How to Add Search to a React App with Fuse.js
 Colby Fayock
Search is a powerful way help people visiting your site find the content that's most important to them. But often it's really challenging to figure out the rules and logic to make that happen. In this article, we'll see how can we can use fuse.js to add search to our apps.
- What is fuse.js?
- Why is search important?
- What are we going to build?
- Step 0: Bootstrapping our app
- Step 1: Installing Fuse.js
- Step 2: Creating a new Fuse search instance
- Step 3: Setting up dynamic search based on user input
What is fuse.js?
Fuse.js is a JavaScript library that provides fuzzy search capabilities for applications and websites. It's nice and easy to use out of the box, but also includes configuration options that allow you to tweak and create powerful solutions.
Why is search important?
Whether you're a content creator or are trying to sell a product with your website, it's important to help your visitors actually find what they're looking for.
If you're building an ecommerce website, you want someone to be able to easily find your Bender vinyl figures rather than having to dig through the entire catalog first.
What are we going to build?
We're going to start off with a basic Create React App example. It's going to include some character info as structured data for one of my favorite shows Futurama that's simply dumped out into an HTML list.
With that list, we're going to use fuse.js to provide client-side search capabilities, allowing us to demonstrate searching for the character we're looking for by their name and other details.
Step 0: Bootstrapping our app
To get started, we're going to need content to work with. I got started by building a list of characters from Futurama as structured json data that I put in a list with a fresh Create React App.
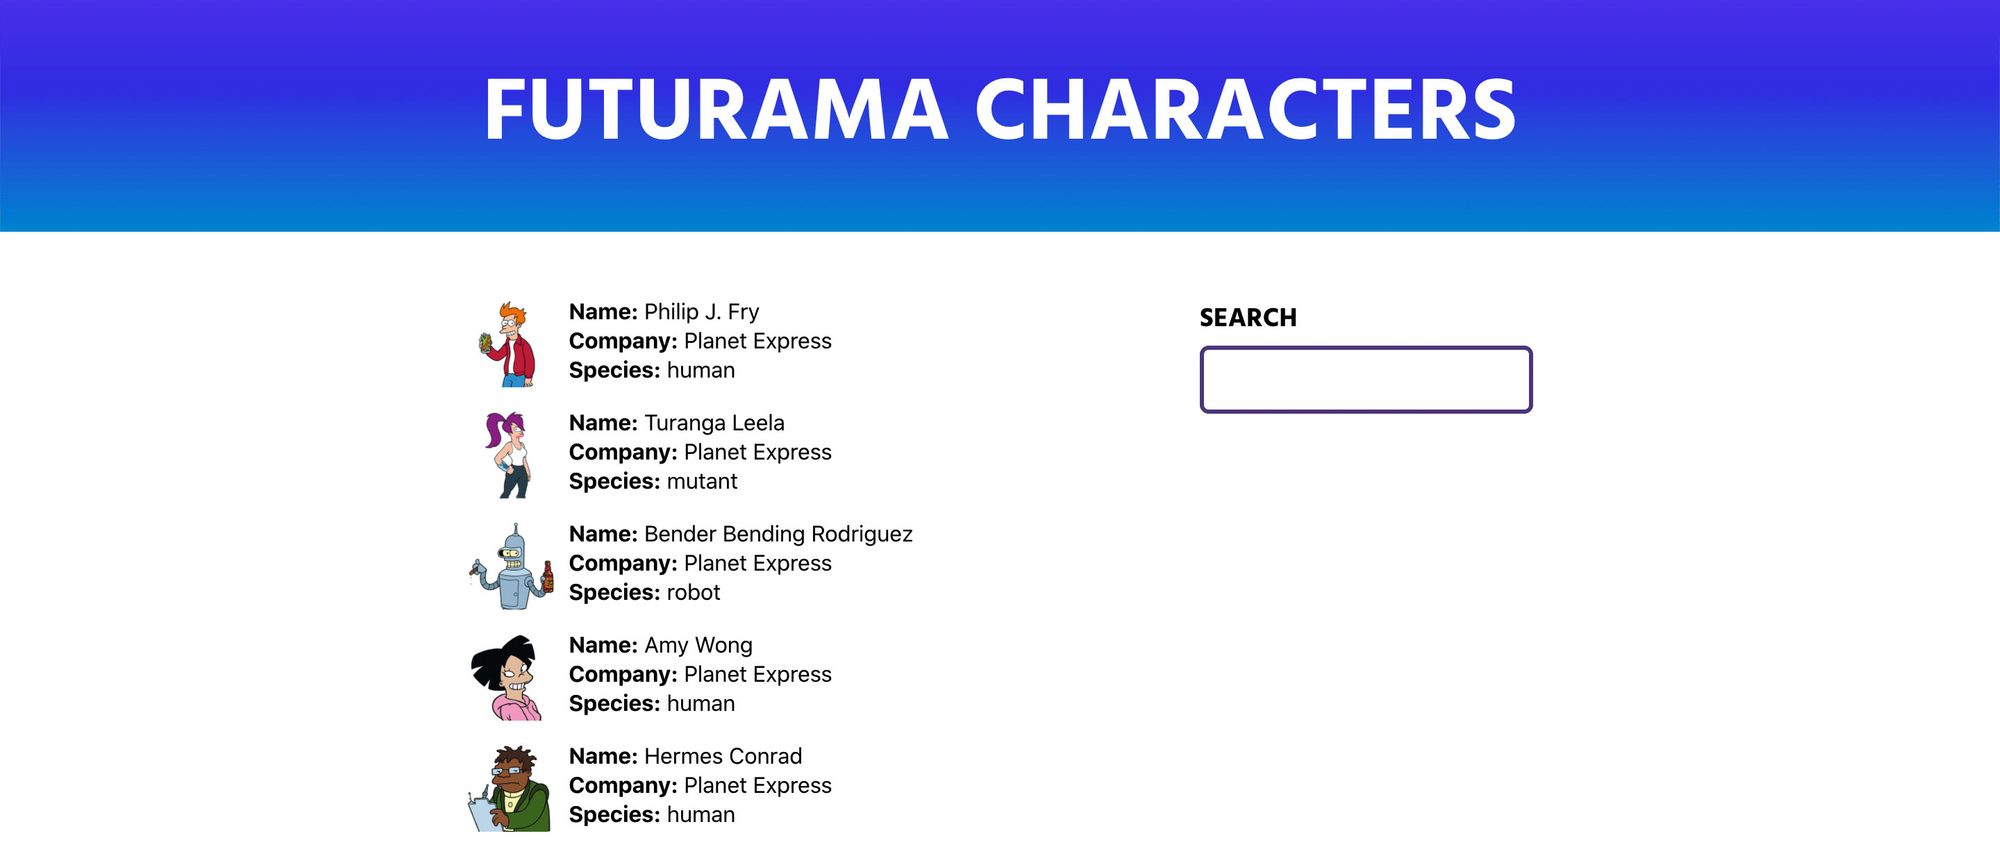 Futurama character search demo
You'll also notice I've already added an input for our search. It's not yet functional but we'll use that to get started.
If you'd like to start off at the same place, I created a branch with my demo repo that you can clone locally to walk through the project with me!
git clone --single-branch --branch start git@github.com:colbyfayock/my-futurama-characters.git
Or follow along with the commit.
Step 1: Installing Fuse.js
First thing we'll want to do is actually add Fuse.js to our app. In your project, run:
yarn add fuse.js
# or
npm install --save fuse.js
This will save the dependency to our project so that we'll be able to use it in our project.
Next we'll want to import the dependency to our app so that we can start building with it. At the top of your file, in our case src/App.js if you're following along with me in a new Create React App project, add:
import Fuse from 'fuse.js';
If you want to test that it's working, you can console.log(Fuse) and see our Fuse class we'll use to create our search capabilities.
 Imported fuse.js class
And with that, we're ready to get started!
Step 2: Creating a new Fuse search instance
To use Fuse.js, we'll want to first create a new instance of it.
At the top of your component, add:
const fuse = new Fuse(characters, {
  keys: [
    'name',
    'company',
    'species'
  ]
});
With this does:
- Creates a new instance of Fuse
- Passes in our
charactersarray of objects - Specifies the 3 keys in our data that we want to search on
Next, to perform the search, we can add:
const results = fuse.search('bender');
And if we console log out the results, we can see:
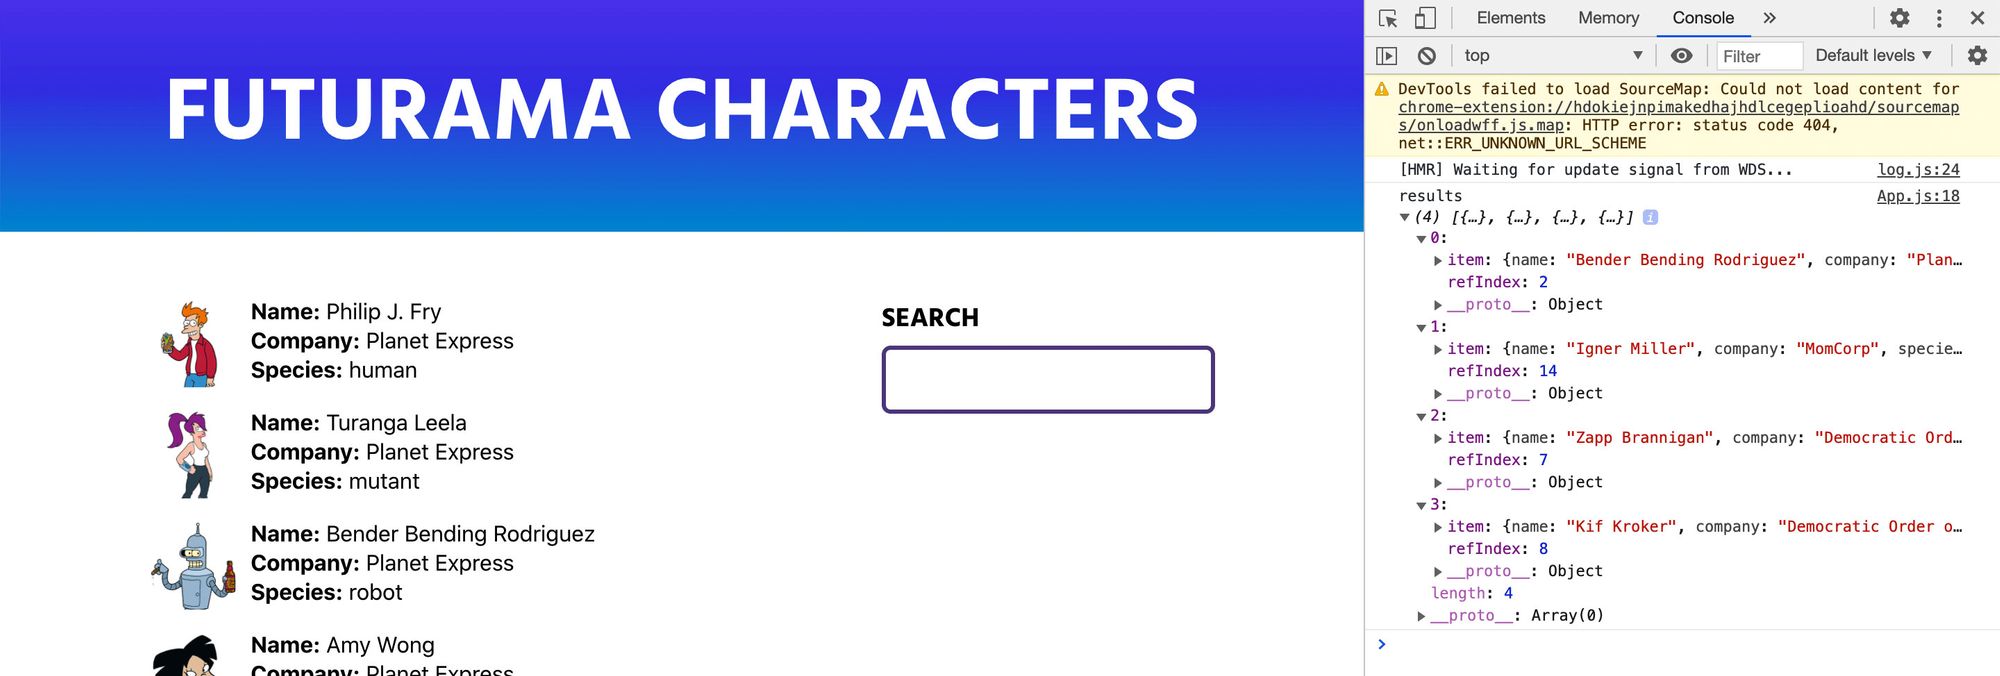 Basic fuse.js search results
You'll notice that we have more results than our friend Bender though. Fuse.js provides a "fuzzy search" meaning it tries to help you in case you're not sure what you're looking for or if you're misspelling your query.
To get an idea of how this works, let's add the includeScore option to our search:
const fuse = new Fuse(characters, {
  keys: [
    'name',
    'company',
    'species'
  ],
  includeScore: true
});
Now we can see the score attribute in our results object.
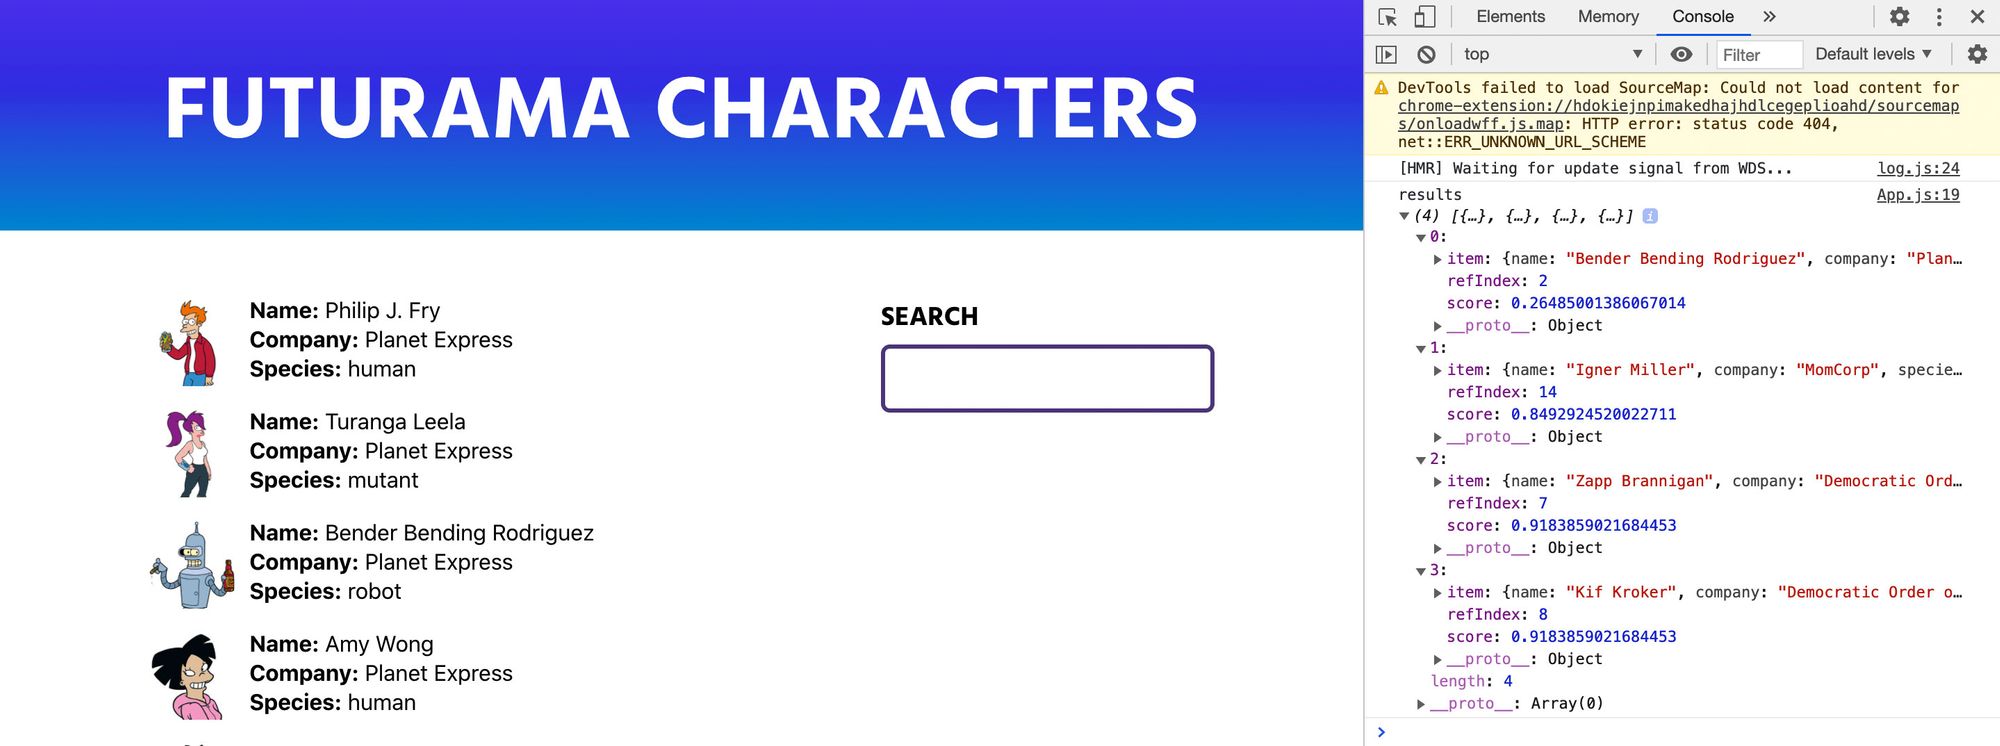 Fuse.js search results with score
You'll notice that our first result has a really low score. With fuse.js, a lower score means it's closer to an exact match.
A score of 0 indicates a perfect match, while a score of 1 indicates a complete mismatch.
It's saying that is incredibly likely that the first result is what we're looking for, but it's not confident in the others.
So with our results, we want to actually connect that to our UI. If you notice our array output is different than what we are mapping through for the HTML list, so let's create a new variable that we can change it to:
const results = fuse.search('bender');
const characterResults = results.map(character => character.item);
What this is doing is creating a new array using the map method that will only include the item property from each array object.
Then if we replace our characters map inside of our list with characterResults.map:
<ul className="characters">
  {characterResults.map(character => {
    const { name, company, species, thumb } = character;
We can now see that our page only shows the results for "bender"!
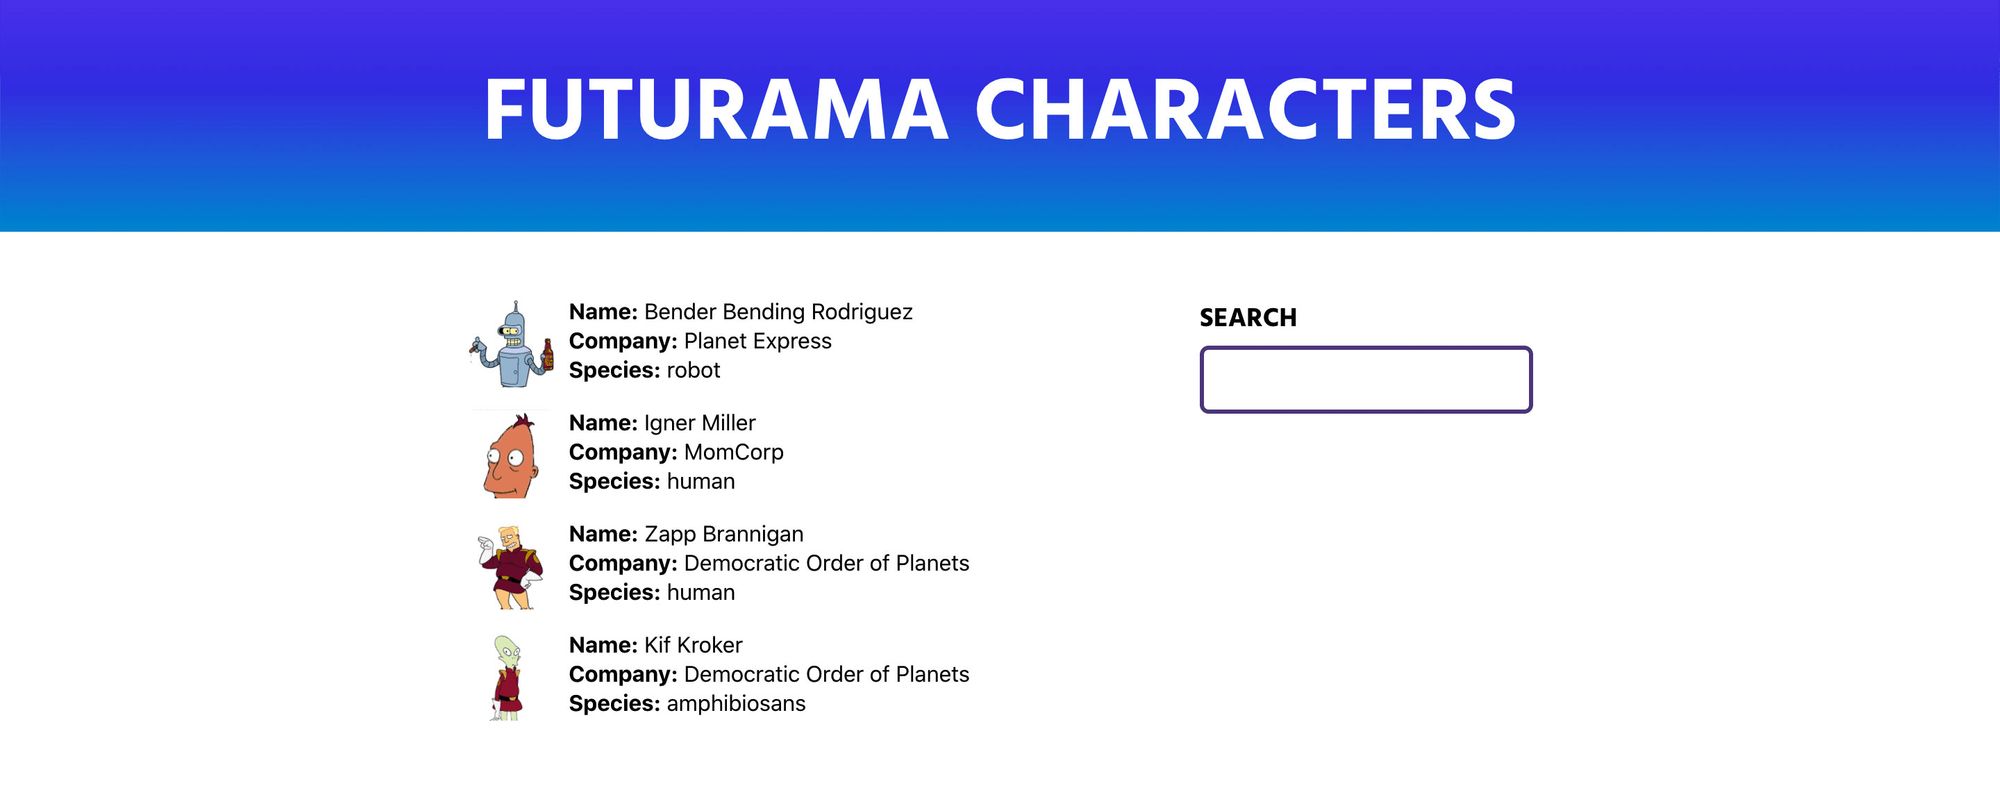 Demo with filtered results
Step 3: Setting up dynamic search based on user input
Now that we have a hard-coded search working, we want someone to actually be able to use the search input to search!
To achieve this, we're going to use the useState hook and listen for changes to the input field, which will dynamically create a search for our data.
First, import the useState hook from React:
import React, { useState } from 'react';
Next, let's use that hook to create a state instance:
const [query, updateQuery] = useState('');
Here, we're creating a new state of query that we can update with updateQuery that defaults to an empty string ('').
With that, let's tell our search input to use that query value as it's value:
<input type="text" value={query} />
At this point, nothing should be different, as we are using a blank query.
Demo with filtered results - nothing changed
Now let's add an event handler to our input that we can use to update our state:
<input type="text" value={query} onChange={onSearch} />
And we'll want to create that function so we can use it:
function onSearch({ currentTarget }) {
  updateQuery(currentTarget.value);
}
This will update our query with the input's value any time it changes.
Now that our query will have what we want to search for, we can update our search instance:
const results = fuse.search(query);
And now if you reload the page, it's blank! ?
 Demo with no results
That's because by default, Fuse sees our empty query and doesn't match it to anything. If we now search for something like slurms, we can see our search dynamically update with results!
 Demo with results for "slurms"
If we wanted to fix this though so that all of our results show when there's no query, we can do so with an if statement or in my example, a ternary, that will show all of the characters if there is no query:
const characterResults = query ? results.map(character => character.item) : characters;
Demo with all results
And with that, we have our basic search!
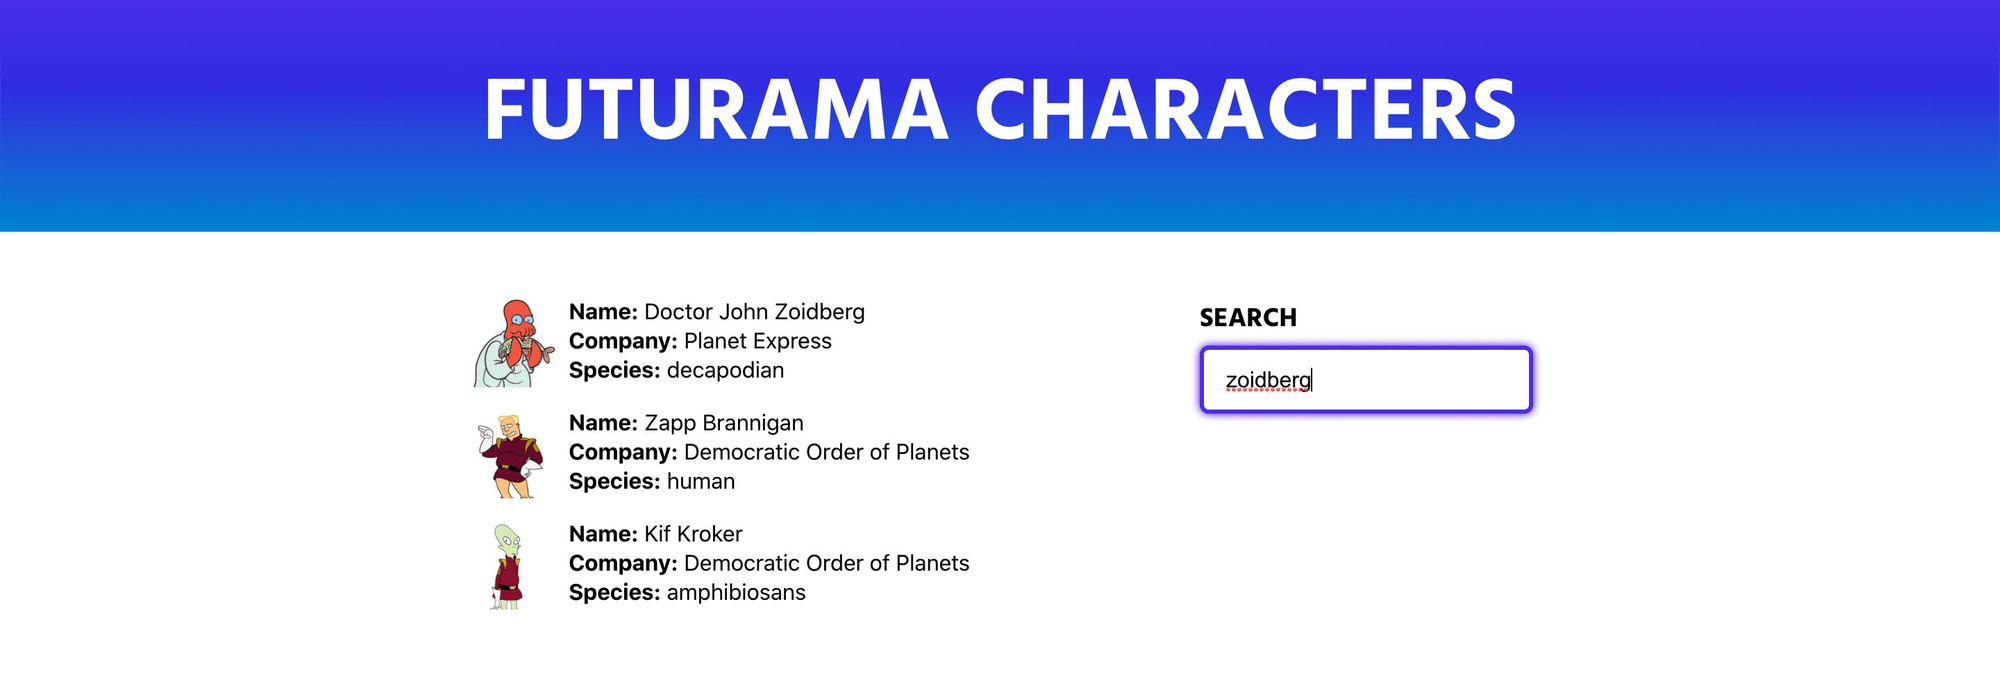 Demo with filtered results for "zoidberg"
What can I do next?
Tuning your search
Fuse.js comes with a lot of options that you can use to tune your search to however you'd like. Want to only show confident results? Use the threshold option! Want case sensitive queries? Use the isCaseSensitive option!
https://fusejs.io/api/options.html
Setting the default query with URL parameters
Sometimes you want someone to be able to link to a particular set of results. To do this, we might want to be able to add a new URL parameter like ?q=bender.
To make this work, you can grab that URL parameter with javascript and use that value to set our query state.
Join the conversation!

Subscribe to my newsletter
Read articles from Colby Fayock directly inside your inbox. Subscribe to the newsletter, and don't miss out.
Written by
Colby Fayock
Colby Fayock
Director of DevX Engineering @ Cloudinary