Accessing alternative S3 Object Stores in OutSystems Developer Cloud Exercise Lab
 Stefan Weber
When you hear S3, you probably think of Amazon Simple Storage Service (S3). It is an object storage service that lets you store any amount of data (objects) and offers extra features like data lifecycle management, encryption, object events, and more.
Over the years, S3 has become a de facto standard not only provided by Amazon Web Services. Multiple storage vendors, such as Dell, have integrated S3 capabilities into their solutions. Additionally, there are hardware-independent software solutions that let you build S3-compatible storage using any hardware or wrap other non-S3 cloud storage services like MinIO. Finally, you will find other cloud providers that offer an S3-compatible service, like IONOS Cloud, Digital Ocean or CloudFlare.
That said, it doesn't have to be an Amazon Web Services hosted S3 object store. You can choose from various options, including storing your objects on-premises.
OutSystems does not have a built-in feature to store objects. The default method is to store objects in a Binary Data field within an entity, which may not be the most efficient way for several reasons. I discuss some of these reasons in my article:
S3 is a great choice, and the existing components on OutSystems Forge make it easy to integrate with your application. Using S3 frees you from relying on a specific storage solution, making data and application migration straightforward. In this exercise lab, we will explore how to use the available Forge components for S3 to connect to both public and private S3 object storage services.
Prerequisites
Before we start with the scenarios make sure that you have installed the following Forge components
AWSSimpleStorage (External Logic connector)
AWS Simple Storage Service Demo (Application)
Scenario 1 - Public S3 Store
When I mention a public S3 store, I mean an S3 service available over the internet, as opposed to a private S3 store that resides in your own data center and is not accessible online.
This one is pretty straightforward. We are using IONOS Cloud here, but you can use any other S3-compatible service of your choice.

Create Access Credentials
To be S3 compatible, a service must provide an Access Key and Secret Access Key for authentication.
Log in to your IONOS Cloud account. If you don't have an IONOS account, you can create a free trial account here. Note that account verification may take up to 24 hours.
In the top menu of the console, click on Storage and select IONOS S3 Object Storage.
Under Key Management, click Generate a key and copy the Access Key and Secret Key values.
Endpoint URL
When using AWS Simple Storage Service, the AWS SDK automatically selects the correct service endpoint URL for you. For a custom S3 store, you need to specify the endpoint URL (ServiceURL) yourself. The IONOS endpoints are available here: https://docs.ionos.com/cloud/storage-and-backup/s3-object-storage/s3-endpoints.
We will use contract-based buckets and use s3.eu-central-3.ionoscloud.com as the endpoint URL.
Try
Open the AWS Simple Storage Service Demo application in your browser.
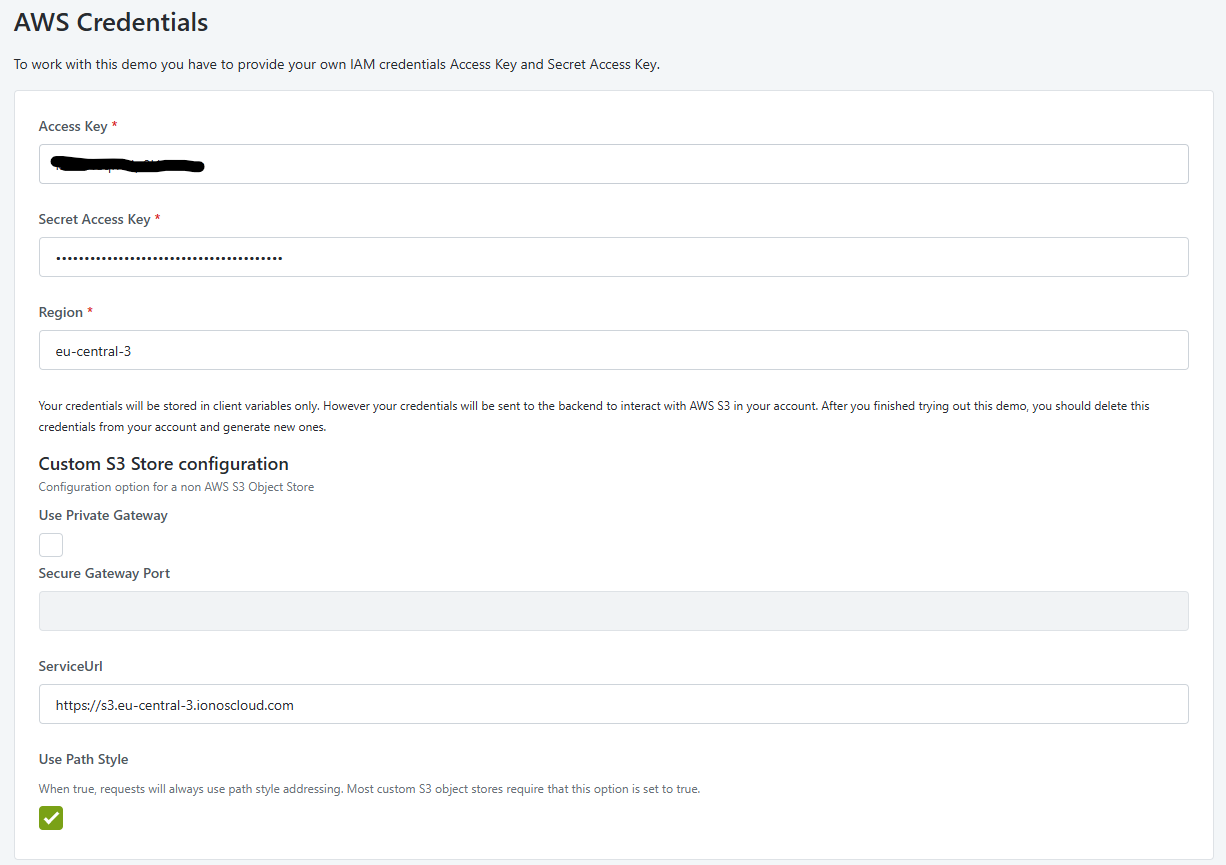
Paste the Access Key and Secret Access Key you retrieved from the IONOS S3 Object Store console.
Enter eu-central-3 for the region (note that the region is not used for custom endpoints).
Enter https://s3.eu-central-3.ionoscloud.com for the Service URL.
Check Use Path Style. Most custom S3 Object Storages require this setting to be true.

Perform the following steps:
Create a new bucket using the Put Bucket operation.
Upload a file to the created bucket using the Put Object operation.
Check the IONOS S3 Object Store console.
Open the AWS Simple Storage Service Demo application in ODC Studio:
Double-click the client action CreateBucketOnClick in the PutBucketForm block.
Click on PutBucket in the flow and check the configuration details of the external logic function.
The minimum configuration elements for working with a public S3 Store are:
AccessKey and SecretAccessKey (configuration).
ForcePathStyle set to true (most likely, but depends on the S3 Store you use).
ServiceURL set to the S3 endpoint of your public S3 Storage service.
Summary
Accessing an alternative public S3 store is quite simple. You just need an endpoint URL and access credentials. The official AWS SDK for S3 also works with third-party S3 alternatives, which reduces effort and makes it easy to switch from one provider to another.
Scenario 2 - Private S3 Store
This scenario is more complex and will take more time to go through, especially if you haven't completed my other exercise lab, OutSystems Developer Cloud Private Gateway on AWS Exercise Lab, which is a prerequisite. Click on the following link to learn how to create a private subnet in an AWS VPC, activate the OutSystems Private Gateway, and install and configure the OutSystems Cloud Connector.
This setup represents a private environment, meaning it is not directly accessible from the internet. Therefore, you need an active OutSystems Private Gateway to access private resources.

For this exercise, we are setting up a private S3 Object Store using MinIO. MinIO is an AGPL-licensed, fully S3-compatible enterprise storage solution.
We begin by launching a new EC2 instance for the MinIO installation in our private subnet.
Launch an EC2 Instance
Switch to the EC2 Dashboard in AWS Console. In the Instances menu click Launch instances.
Name and tags
- Name: odc-minio
Application and OS Images (Amazon Machine Images)
In the Quick Start tab select Amazon Linux
Make sure that Amazon Linux 2023 AMI is selected for Amazon Machine Image (AMI)
Instance type
- Make sure the t2.micro is selected as Instance type
Key pair (login)
- Select or create a new ssh key pair for the instance
Network Settings
Click on Edit to modify the default settings
Select odc-vpc from the VPC dropdown
Select odc-vpc-subnet-private from the Subnet dropdown
Make sure that Auto-assign public IP is set to Disable
Choose Select existing security group in Firewall (security groups)
Select the default security group in Common security groups
Configure Storage
- Increase the the root device storage to 30GB
Leave default values for the rest and submit with Launch Instance.
SSH to EC2 Instance
We will use the aws-cli to connect to EC2 instances via SSH through our created EC2 Instance Connect Endpoint. For more connection options, check the documentation.
In the EC2 Dashboard, go to Instances and copy the Instance ID of the EC2 instance you want to connect to.
Open a terminal and enter the following command:
aws ec2-instance-connect ssh --instance-id <your ec2 instance id> --connection-type eice
Upon successful connection you should now see your Amazon Linux prompt.
Install MinIO
Installing MinIO in standalone mode is quite simple. Start by downloading and installing the MinIO package with:
wget https://dl.min.io/server/minio/release/linux-amd64/archive/minio-20240803043323.0.0-1.x86_64.rpm -O minio.rpm
sudo dnf install minio.rpm
The package installs a systemd service description that starts MinIO under the minio-user user and group. However, it does not create the corresponding user and group for us, so we need to do that next.
sudo groupadd -r minio-user
sudo useradd -M -r -g minio-user minio-user
Next we create a directory where minio can store objects and change the owner
sudo mkdir /mnt/data
sudo chown minio-user:minio-user /mnt/data
The final configuration step before starting the MinIO service is to create an environment configuration file. This file is referenced in the service description. Run the following command:
sudo nano /etc/default/minio
and add the following details
MINIO_ROOT_USER=minio
MINIO_ROOT_USER_PASSWORD=miniopassword
MINIO_VOLUMES="/mnt/data"
MINIO_OPTS="--console-address :9001"
MINIO_ROOT_USER and MINIO_ROOT_USER_PASSWORD set the username and password for the MinIO root account. We will need these credentials later to sign into the web console.
Exit nano with CTRL-X and save the file.
Now we can start the service with
sudo systemctl start minio.service
You can check the status of MinIO with sudo systemctl status minio.service. If MinIO has started successfully, you can enable the service with
sudo systemctl enable minio.service
Launching MinIO Web Interface
MinIO has a user-friendly web UI running on port 9001. However, we cannot directly access the private subnet of our VPC, and thus, the MinIO EC2 instance. Fortunately, we can use our configured EC2 Instance Connect to establish a port tunnel. For this, you will need the following:
Your private EC2 instance PEM key file
The private IP address of your MinIO EC2 instance (found on the Instance Details Page)
The instance ID of your MinIO EC2 instance (found on the Instance Details Page)
Run the following command in a terminal window
ssh -i '<Path to your>\<ec2 private key>.pem' -L 9001:localhost:9001 -N -f ec2-user@<Private Instance IP Address> -o ProxyCommand='aws ec2-instance-connect open-tunnel --instance-id <Instance Id>'
This will create a port tunnel from your local port 9001 to the remote port 9001 running the Web UI of MinIO.
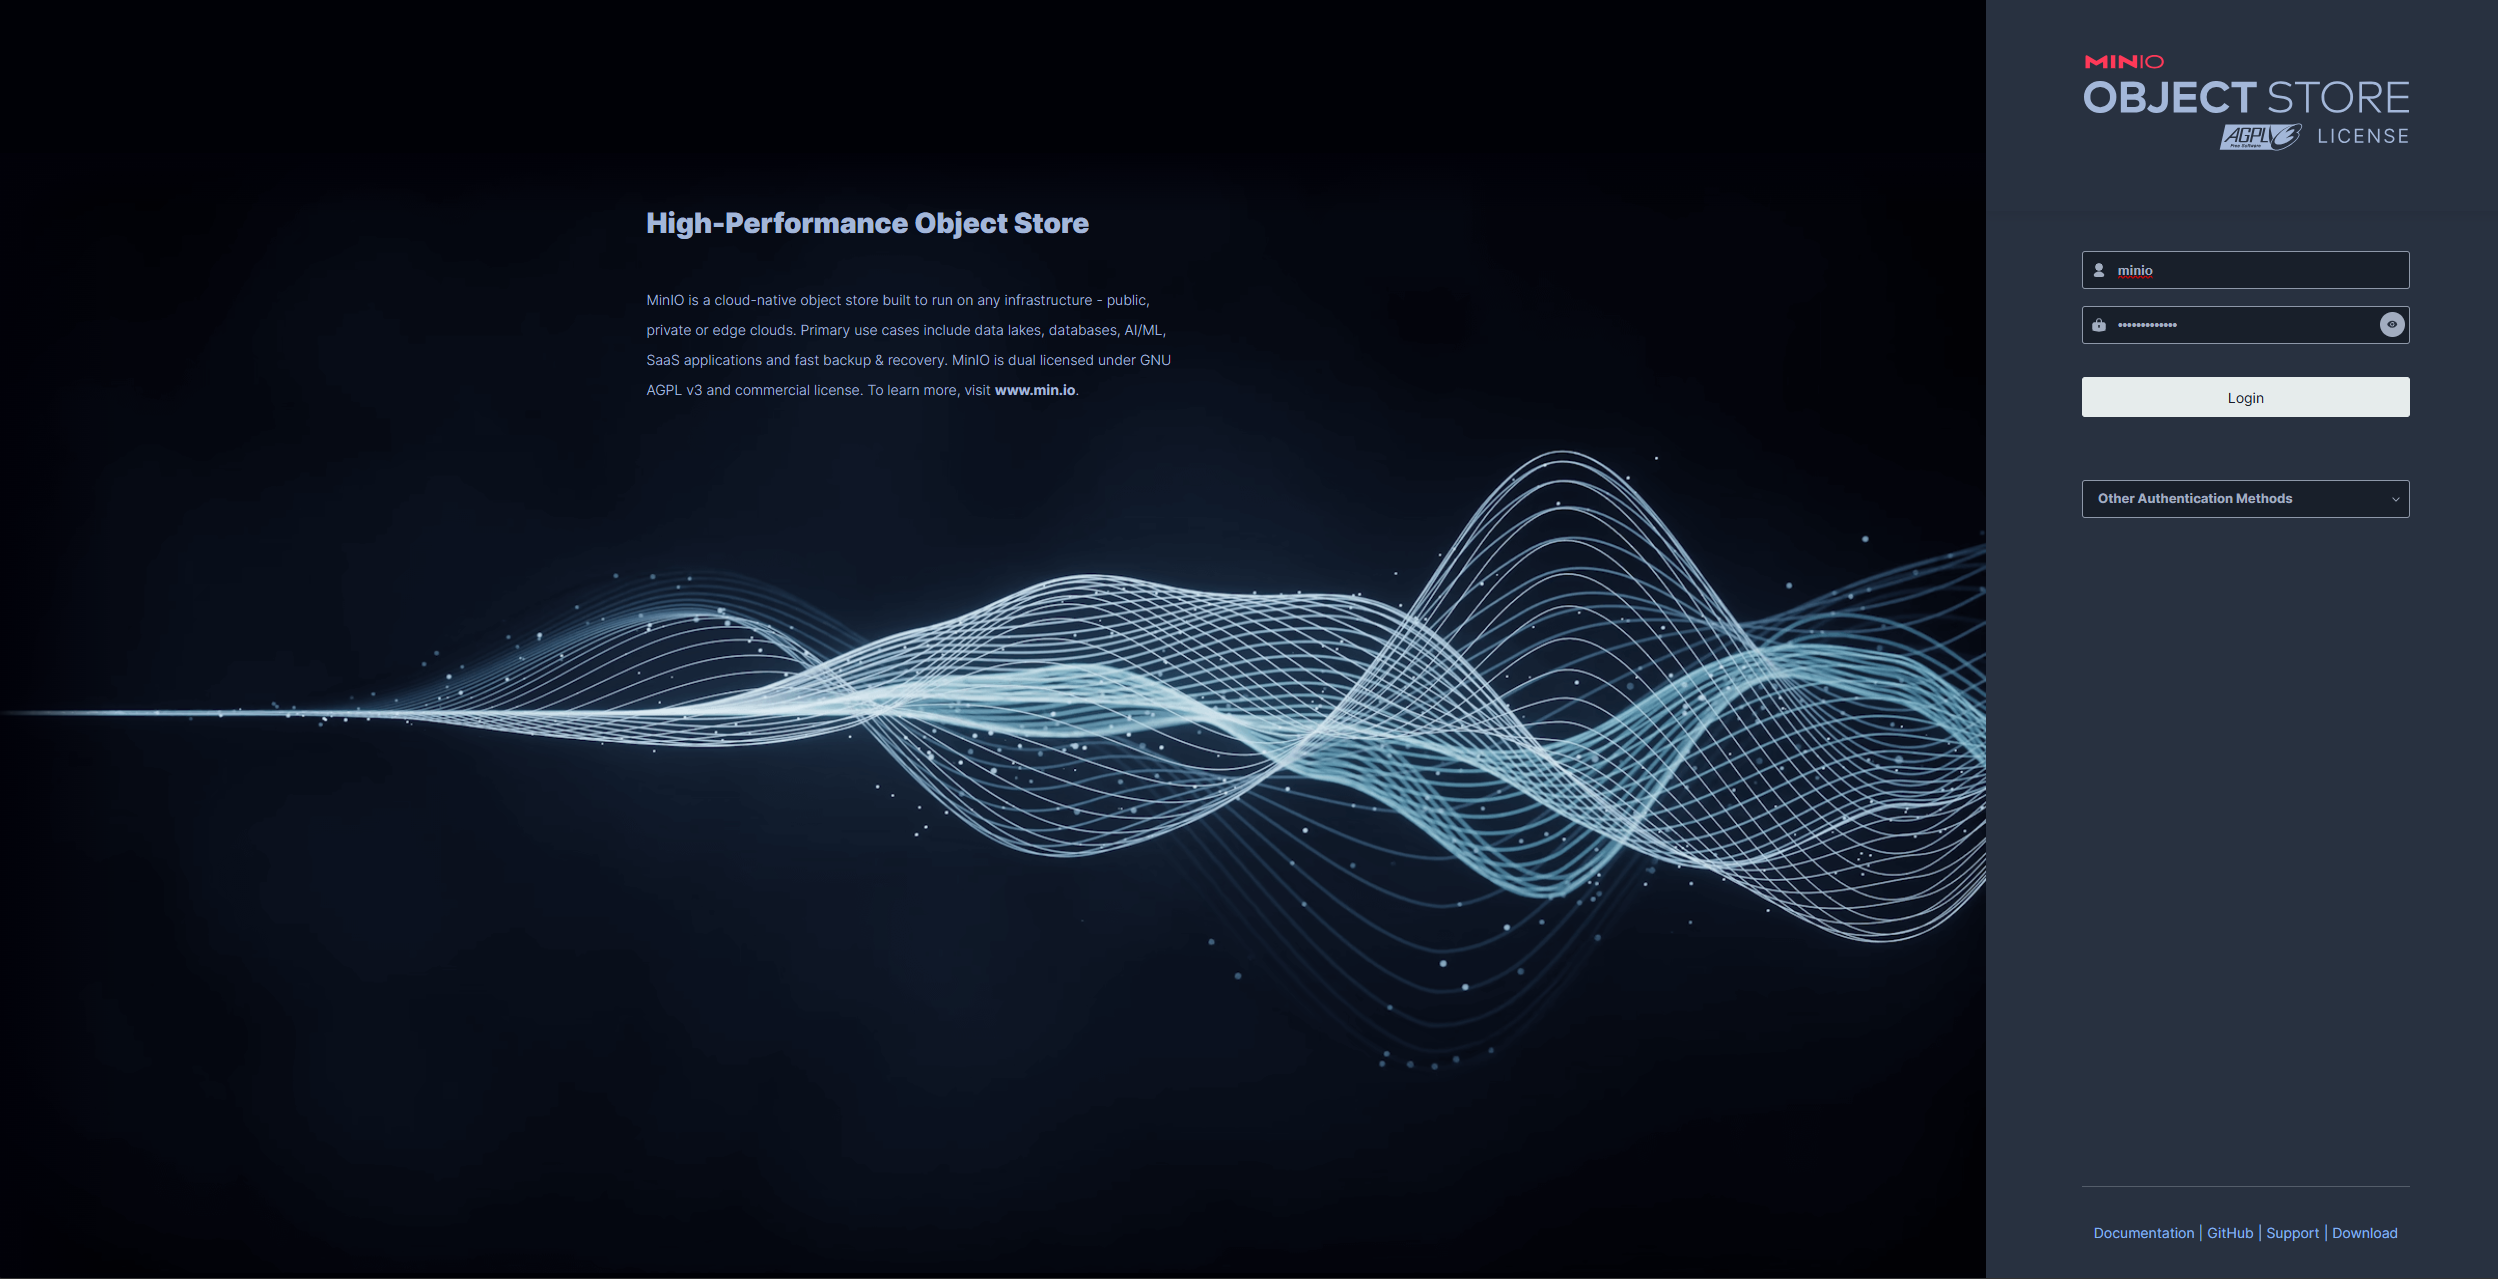
Open a browser tab and navigate to http://localhost:9001.

To quit the ssh tunnel press CTRL+PAUSE.
Create MinIO Credentials
After you successfully signed in to the console, select the Access Keys menu and click on Create access key.
Leave the defaults and submit the form by clicking Create.
Copy both the Access Key and Secret Key. We will need these later to connect to our MinIO environment.
Configure OutSystems Cloud Connector
To use our private MinIO instance from OutSystems application we have to extend our Cloud Connector configuration.
Connect to your OutSystems Cloud Connector EC2 instance using the aws-cli.
Open the Cloud Connector service description file with
sudo nano /etc/systemd/system/odccc.service
Add a tunnel configuration for R:9000:<instance ip address>:9000 to forward requests from port 9000 of the secure gateway to port 9000 of our MinIO instance running the S3-compatible API.
Your configuration file should look like this now
[Unit]
Description=OutSystems Cloud Connector
After=network.target

[Service]
ExecStart=/opt/odccc/outsystemscc --header "token:<token value>" <address> R:9001:<instance ip address of MinIO>:9001
User=odccc
Group=odccc
Restart=on-failure

[Install]
WantedBy=multi-user.target
Note that if you followed the previous tutorial on connecting a private PostgreSQL database via Private Gateway, you can also add an additional port forwarding. In this case, the ExecStart command should look like this:
ExecStart=/opt/odccc/outsystemscc --header "token:<token value>" <address> R:5432:<instance ip address PostgresSQL>:5432 R:9001:<instance ip address of MinIO>:9001
Restart the service with
sudo systemctl daemon-reload
sudo systemctl restart odccc
and check the service status with sudo systemctl status odccc.
With our Private Gateway connection now configured, we can give it a try.
Try
Open the AWS Simple Storage Service Demo application in your browser.
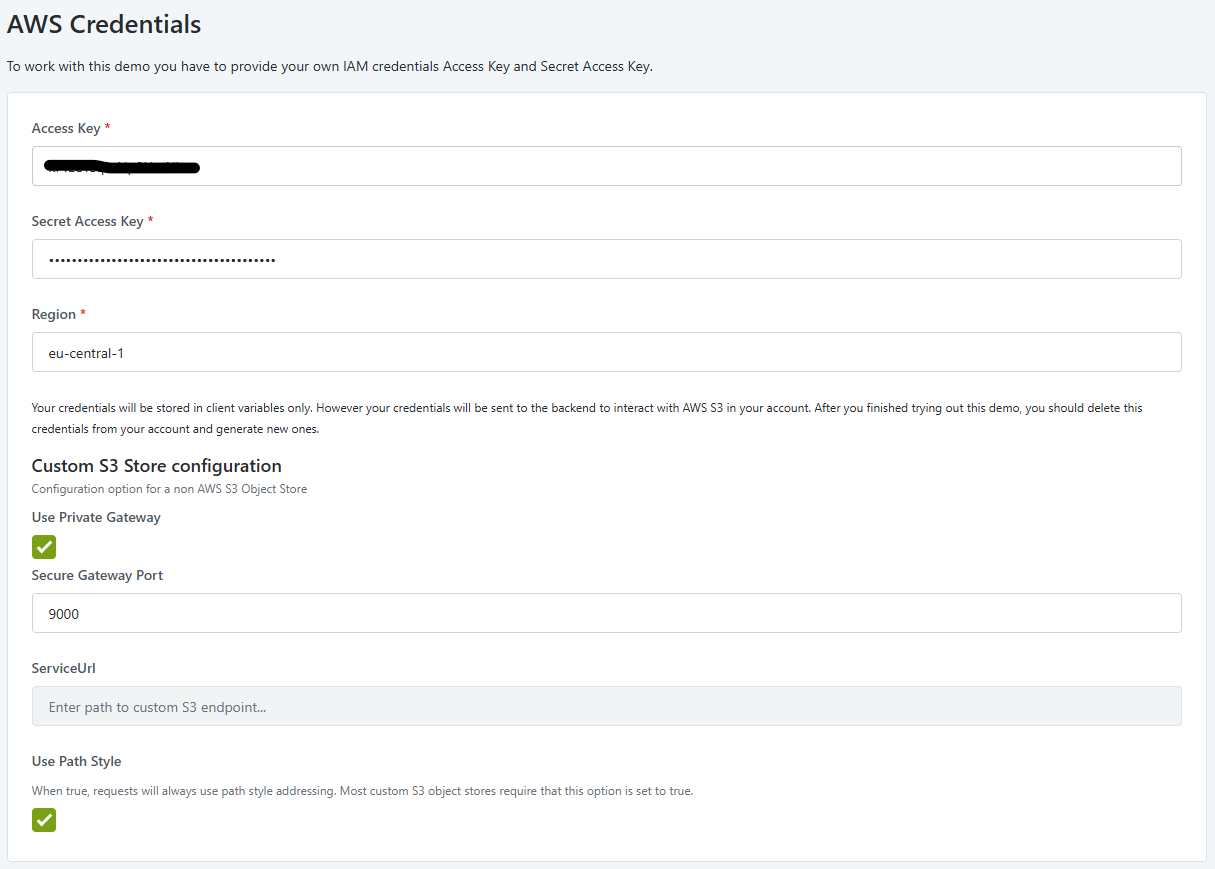
Paste the Access Key and Secret Access Key you retrieved from the MinIO console.
Enter eu-central-1 for the region (note that the region is not used for custom endpoints).
Check Use Private Gateway. This configuration tells the external logic integration to use the OutSystems Cloud Connector for connecting.
Enter 9000 for Secure Gateway Port. (The left part of the port forwarding configuration in ExecStart of odccc service)
Check Use Path Style. Most custom S3 Object Storages require this setting to be true.

Perform the following steps:
Create a new bucket using the Put Bucket operation.
Upload a file to the created bucket using the Put Object operation.
Check the MinIO console.
Open the AWS Simple Storage Service Demo application in ODC Studio:
Double-click the client action CreateBucketOnClick in the PutBucketForm block.
Click on PutBucket in the flow and check the configuration details of the external logic function.
The minimum configuration elements for working with a public S3 Store are:
AccessKey and SecretAccessKey (configuration).
UseSecureGateway set to true.
SecureGatewayPort set to 9000.
ForcePathStyle set to true (most likely, but depends on the S3 Store you use).
Summary
Connecting to a non-public/private S3 Store involves configuring the OutSystems Cloud Connector to link the private S3 resource with your OutSystems Developer Cloud stage. Once set up, the interaction with the store is identical to using a public S3 store.
The End?
You have reached the end of this exercise lab, and I hope you successfully connected with both alternative public and private S3 object stores. If any parts need more details or are unclear, please let me know.
Follow me on LinkedIn to receive notifications whenever I publish something new.
Subscribe to my newsletter
Read articles from Stefan Weber directly inside your inbox. Subscribe to the newsletter, and don't miss out.
Written by

Stefan Weber
Stefan Weber
Throughout my diverse career, I've accumulated a wealth of experience in various capacities, both technically and personally. The constant desire to create innovative software solutions led me to the world of Low-Code and the OutSystems platform. I remain captivated by how closely OutSystems aligns with traditional software development, offering a seamless experience devoid of limitations. While my managerial responsibilities primarily revolve around leading and inspiring my teams, my passion for solution development with OutSystems remains unwavering. My personal focus extends to integrating our solutions with leading technologies such as Amazon Web Services, Microsoft 365, Azure, and more. In 2023, I earned recognition as an OutSystems Most Valuable Professional, one of only 80 worldwide, and concurrently became an AWS Community Builder.