Deploying a Sample HTML Application to AWS EC2 with CodePipeline, CodeDeploy, and GitHub
 SANDESH D MANOCHARYA
Step 1: Create IAM Roles
Create two IAM Roles. One for the service AWS EC2 and another for the service AWS CodeDeploy.
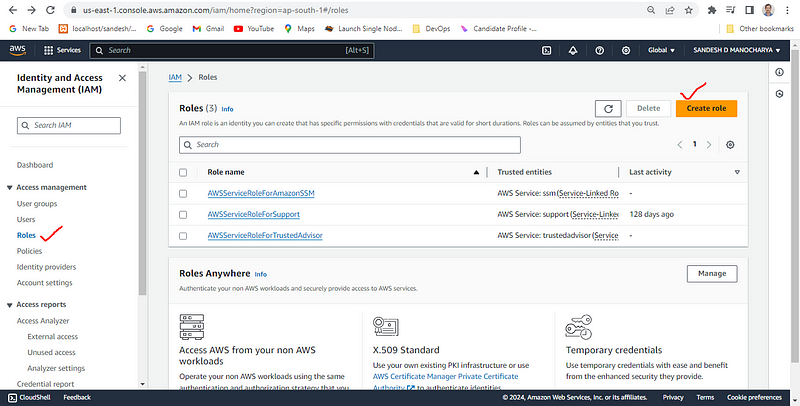
Go to the service “IAM”, select “Roles” in the left panel and click on “Create role” on the right top.
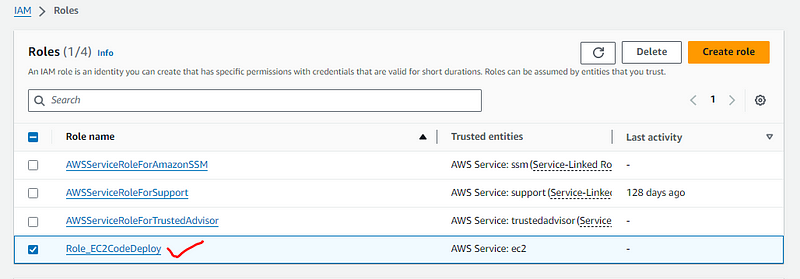
First let us create a role “Role_EC2CodeDeploy” for the service EC2.
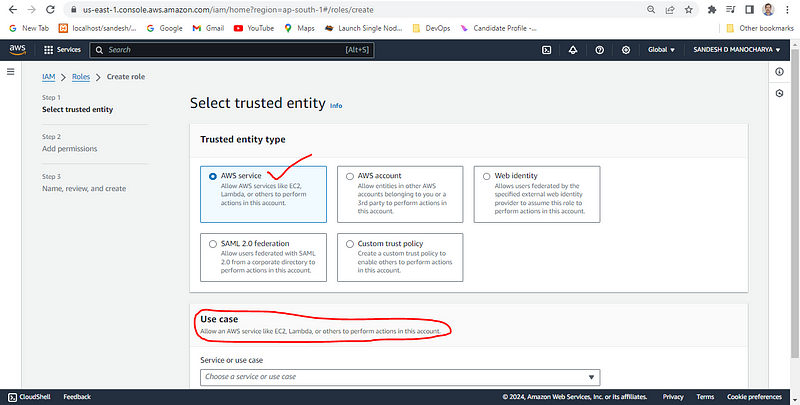
To do so ensure that “AWS service” is selected.
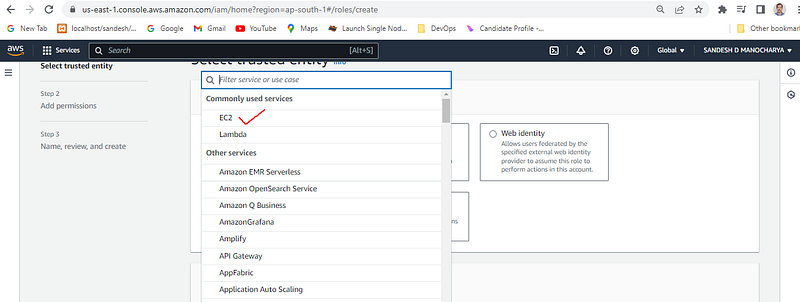
From the dropdown of “Use case”, under “Commonly used services”, select the service or use case “EC2”.
Click “Next” and “Next”
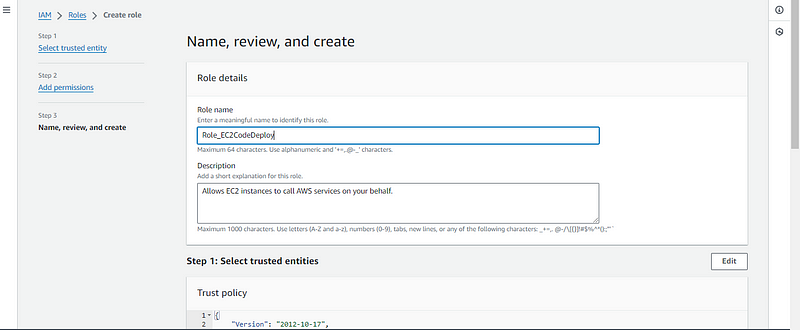
Give a name to the role as “Role_EC2CodeDeploy” and click on “Create role”.
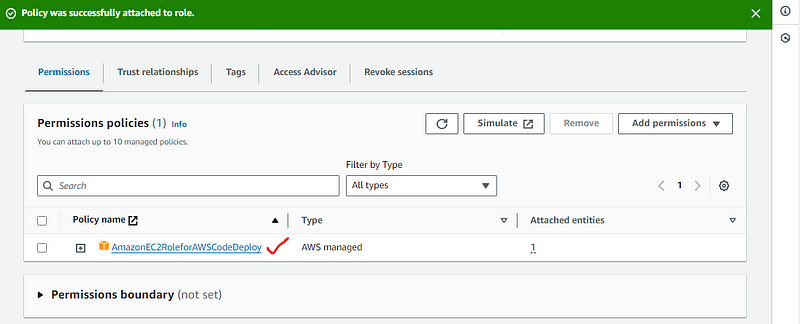
Either during the role creation or after the role creation we need to add permissions by searching CodeDeploy in the search bar and selecting the policy “AmazonEC2RoleforAWSCodeDeploy”.
A new role is created. I am going to use this role on an EC2 machine. This role allows the service AWS EC2 to access another service AWS CodeDeploy.
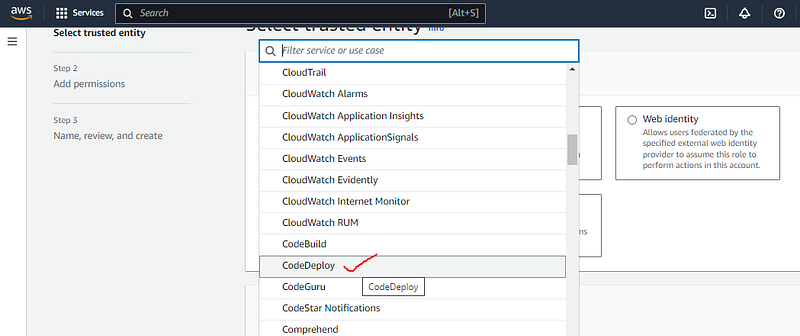
Similarly let us create another role “Role_CodeDeploy” for the service CodeDeploy.
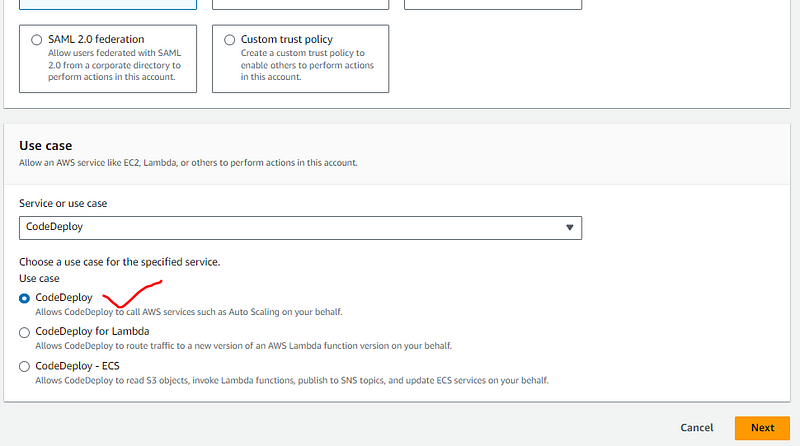
But this time instead of EC2, select the service or use case “CodeDeploy”.
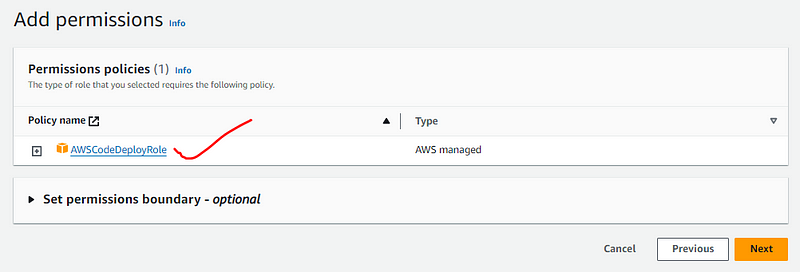
It will take the permission policy “AWSCodeDeployRole” automatically. I am going to use this role on CodeDeploy.
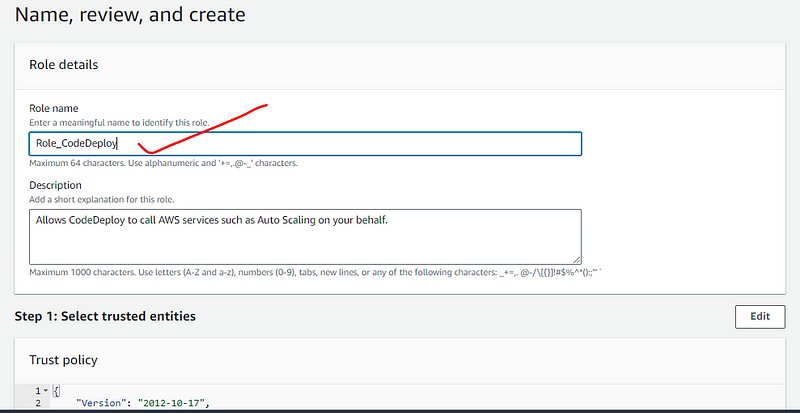
Give a name “Role_CodeDeploy” to the role and click on “Create role”.
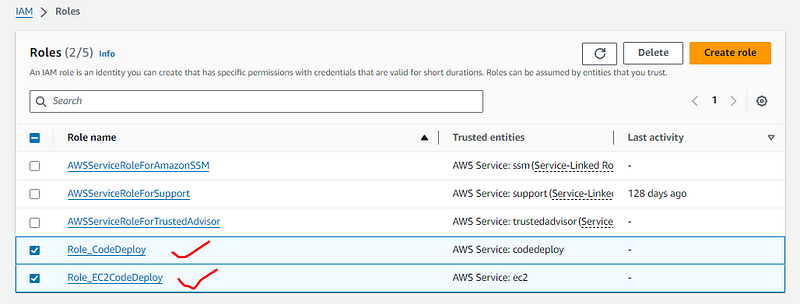
Now both the roles are created.
Step 2: Create EC2 Instance and Attach the Role “Role_EC2CodeDeploy”
We can launch any number of instances based on our requirements. But I will launch only one instance “Demo_AWSCodeDeploy” in this example.
I launched an Amazon Linux 2023 AMI t2.micro EC2 instance.
Make sure that you have added the ports 22 and 80 as inbound rules.
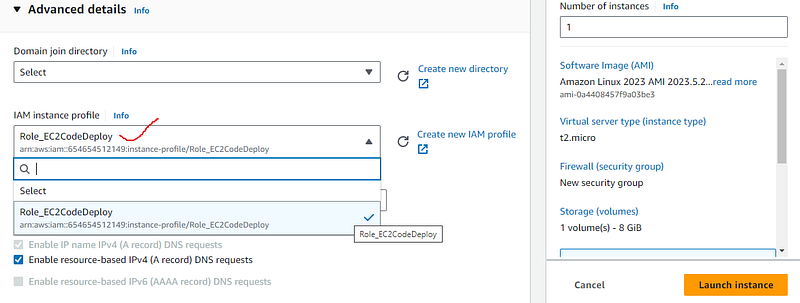
Under “Advanced details”, from the IAM instance profile dropdown, select the role “Role_EC2CodeDeploy” which was created recently for the service EC2.
Under “Advanced details” itself scroll down and in the “User data” section paste the following script to automatically install all the packages or dependencies immediately after launching the EC2 instance.
#!/bin/bash
sudo yum -y update
sudo yum -y install ruby
sudo yum -y install wget
cd /home/ec2-user
wget https://aws-codedeploy-ap-south-1.s3.ap-south-1.amazonaws.com/latest/install
sudo chmod +x ./install
sudo ./install auto
sudo yum install -y python-pip
sudo pip install awscli
Click on “Launch instance”.
The EC2 instance “Demo_AWSCodeDeploy” is launched and running successfully.
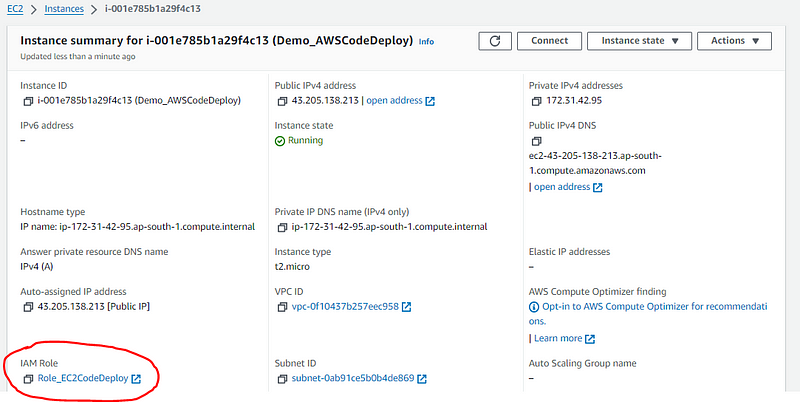
If we click on the instance ID and see the details of the instance then we can see the IAM role “Role_EC2CodeDeploy” attached.
That is all fine. But I want to try each command individually. So I do not use the user data script.
Connect to the instance through Git Bash or any other CLI of your choice.
First let us update the package lists.
sudo yum -y update
Now let us install necessary packages.
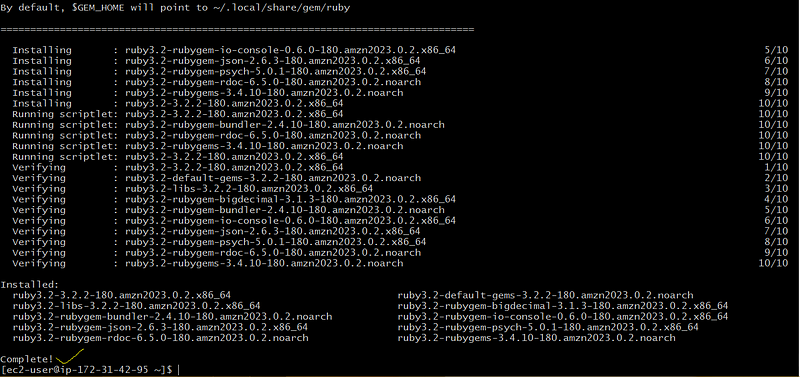
sudo yum -y install ruby
sudo yum -y install wget
Let us create a project directory and navigate to it.
mkdir -p /home/ec2-user/Projects/GitHub_CodeDeploy
cd /home/ec2-user/Projects/GitHub_CodeDeploy
ls -la
Now let us download CodeDeploy agent installer.
wget https://aws-codedeploy-ap-south-1.s3.ap-south-1.amazonaws.com/latest/install
ls -la
Let us make the installer executable.
sudo chmod +x ./install
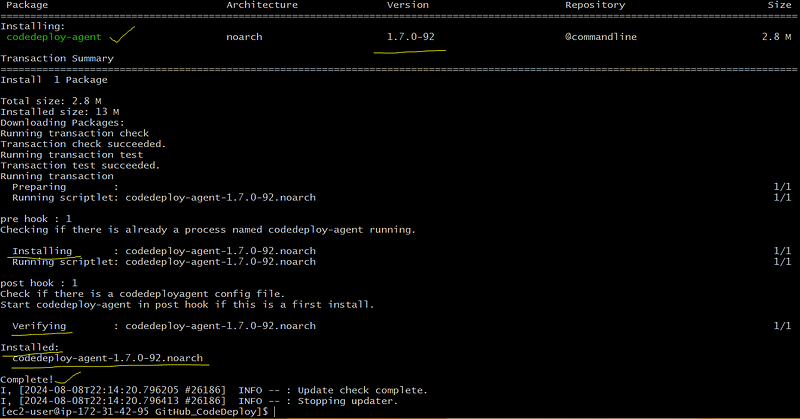
Let us install the CodeDeploy agent in auto mode.
sudo ./install auto
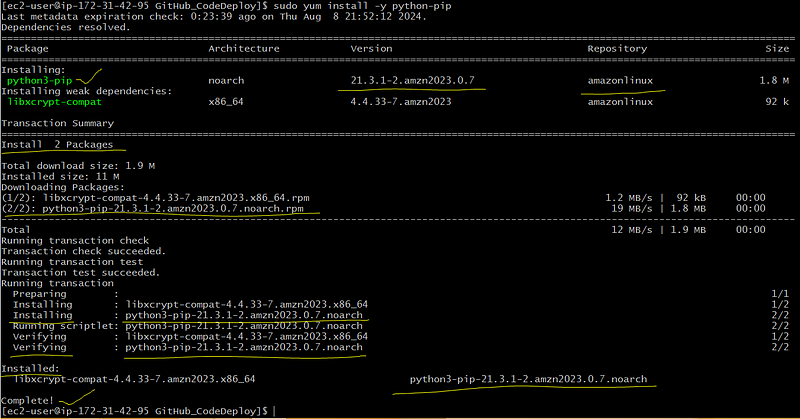
Let us install pip
sudo yum install -y python-pip
Let us install awscli
sudo pip install awscli
Let us confirm the installation of awscli
aws — version
Step 3: Create an Application and Deployment Group under CodeDeploy
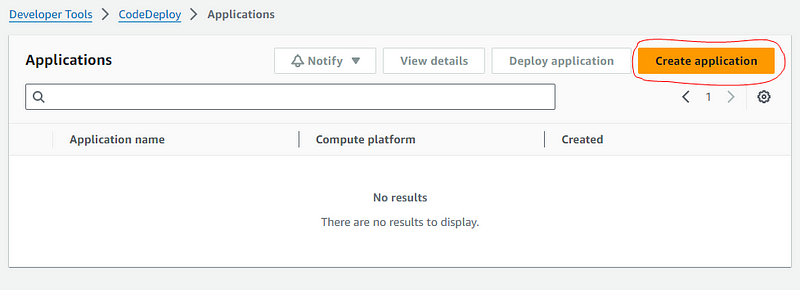
Go to the service “CodeDeploy”, select “Applications” in the left side bar and click on “Create application”.
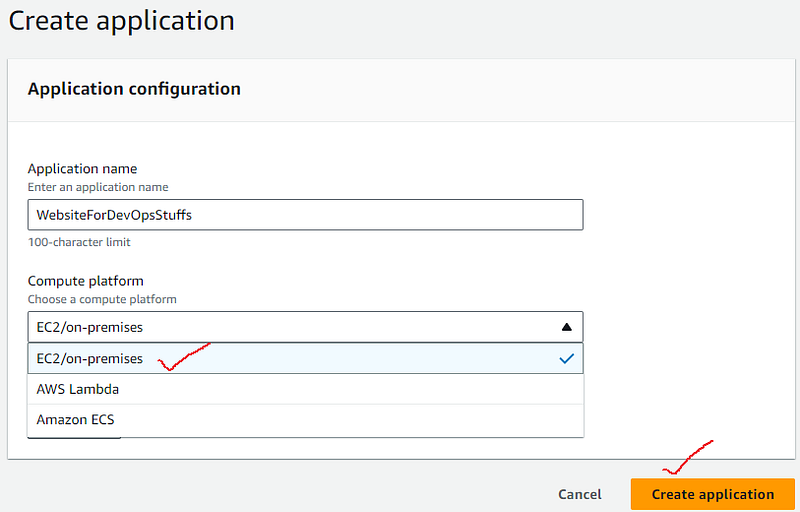
Give a name “WebsiteForDevOpsStuffs” for the application.
Select “EC2” from Compute platform dropdown.
Click on “Create application”.
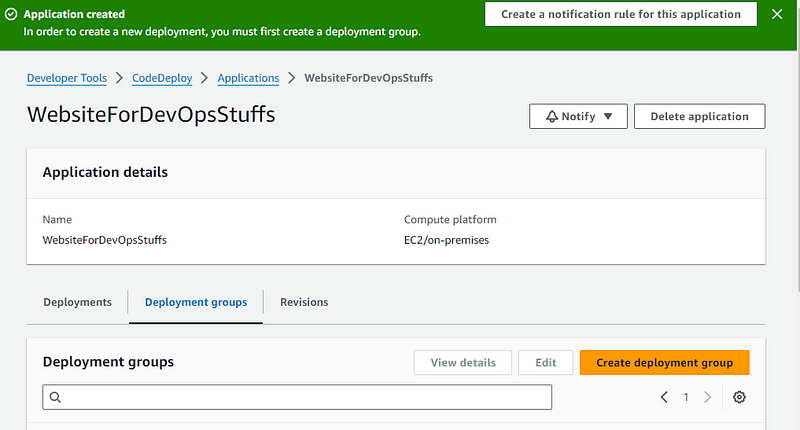
An application “WebsiteForDevOpsStuffs” is created.
Click on “Create deployment group”.
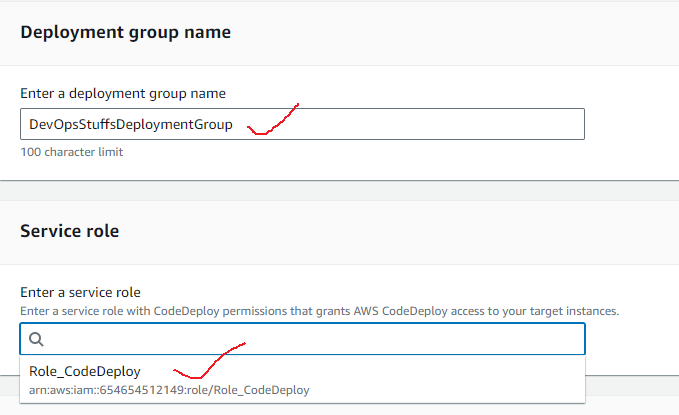
Give the name “DevOpsStuffsDeploymentGroup” to the deployment group.
Attach the role “Role_CodeDeploy” to the service “AmazonCodeDeploy” by selecting “Role_CodeDeploy” from the “Service role” dropdown.
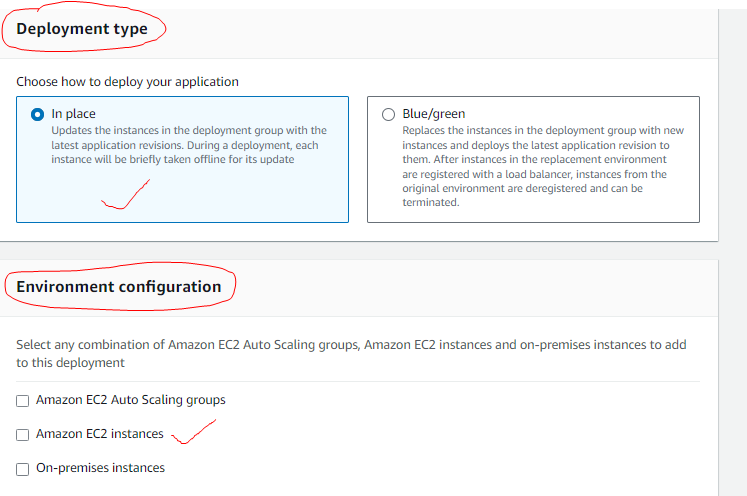
Select “In place” as “Deployment type”.
Select “Amazon EC2 instances” as “Environment configuration”.
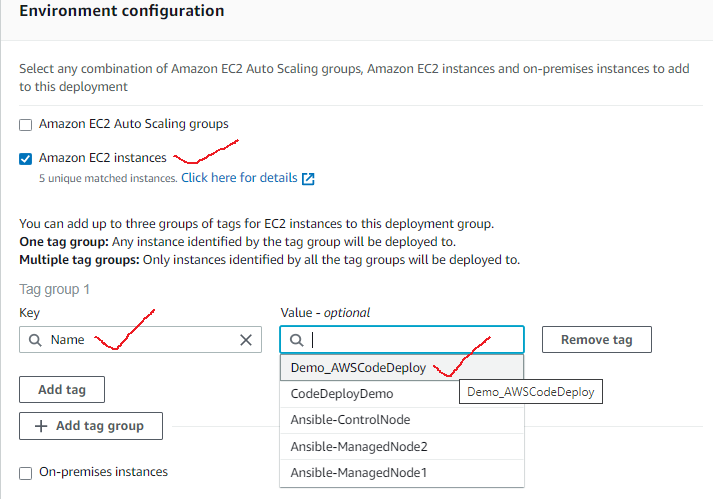
In the Tag group, select “Name” and name of the newly created EC2 instance as value from dropdowns.
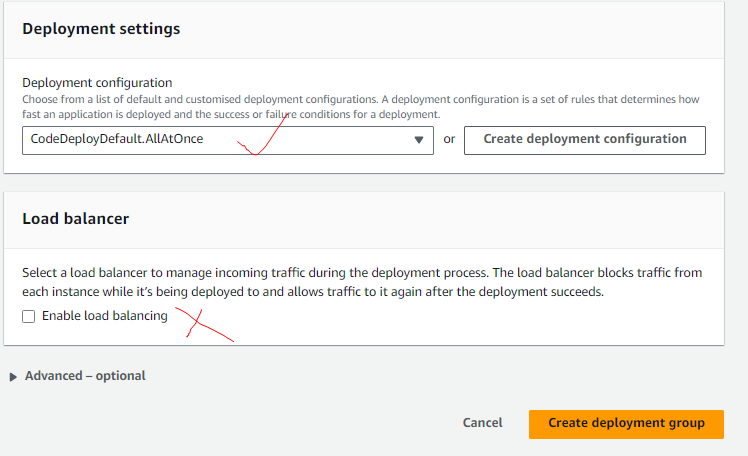
Leave all other settings as their default values.
Disable “Load balancer”.
Click on “Create deployment group”.
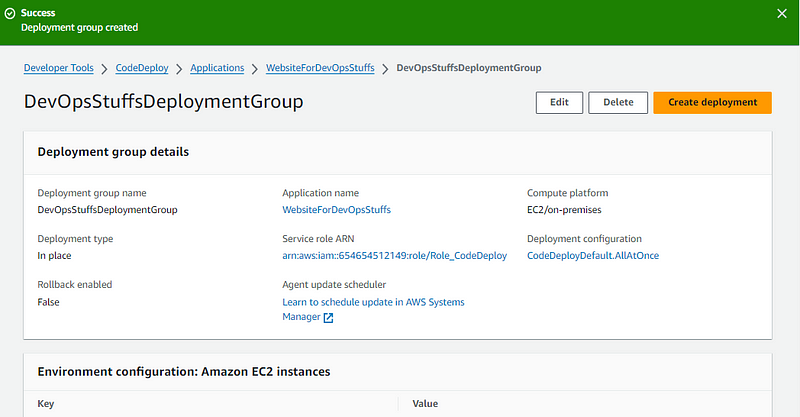
Deployment group “DevOpsStuffsDeploymentGroup” was created successfully.
Step 4: Create a Pipeline and Integrate GitHub with CodePipeline
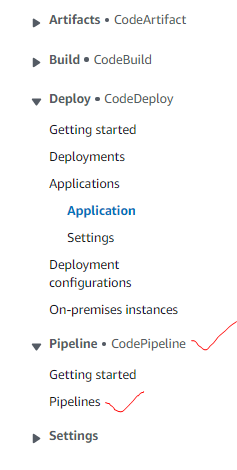
Go to the left panel, expand “CodePipeline” and and click on Pipelines”
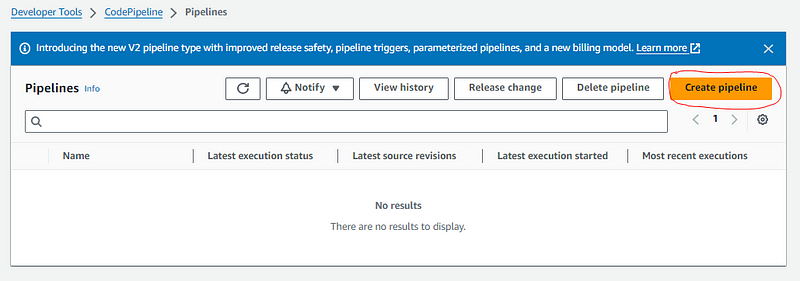
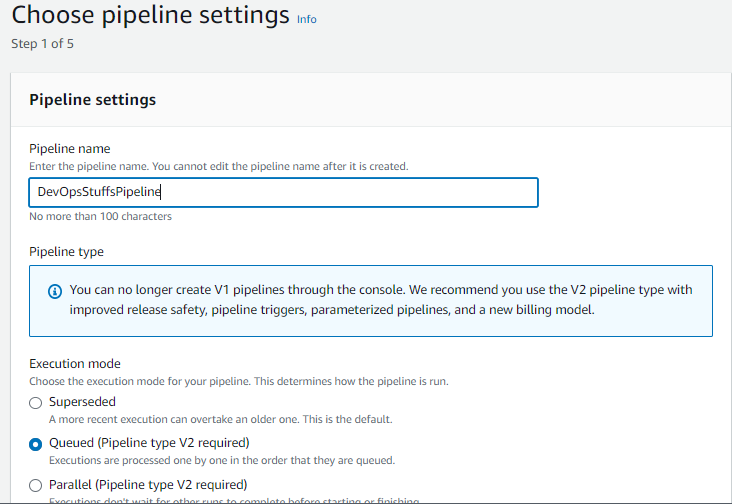
Click on “Create pipeline”, give a name “DevOpsStuffsPipeline” to it, and leave the rest of the things default. By default it stores the artifacts in S3.
Then click “Next”.
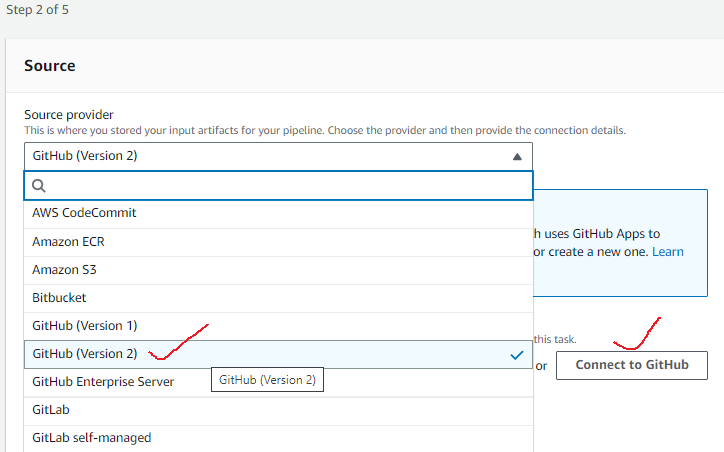
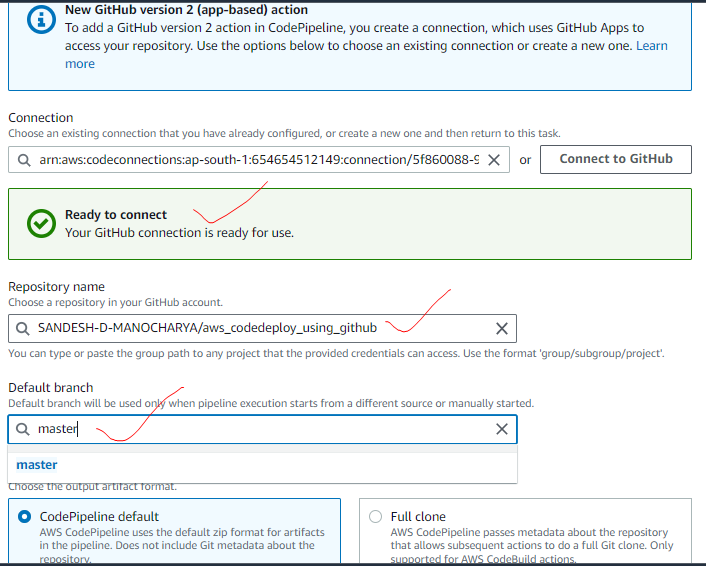
Select GitHub (Version 2) from dropdown, paste the connection link if you already have one or click on “Connect to GitHub” to create one.
Select repository name and branch name from dropdowns.
Select “No filter” for specifying how you want to trigger the pipeline and leave rest as default.
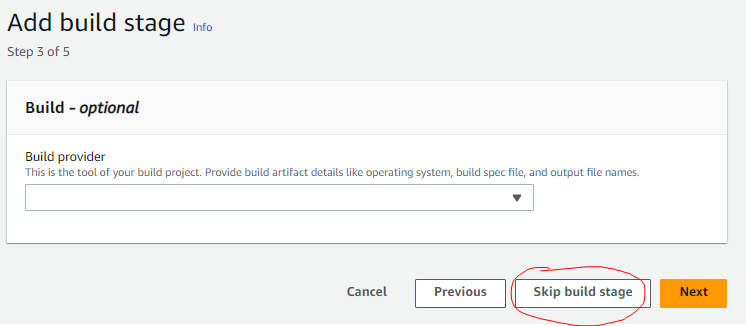
Click on “Skip build stage” since we are not building the code in this project.
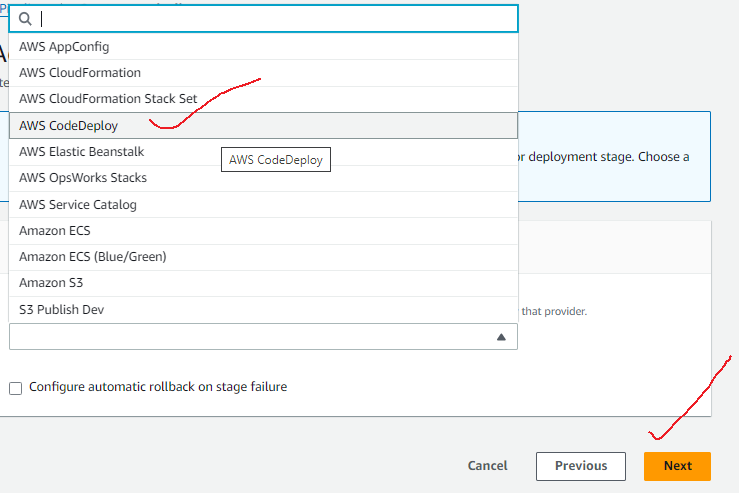
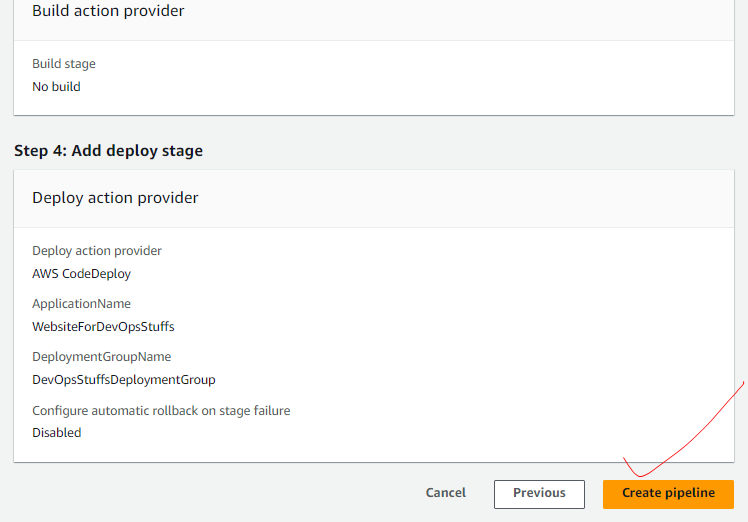
Select “AWS CodeDeploy” from the dropdown for “Deploy Provider”.
Click on “Next”.
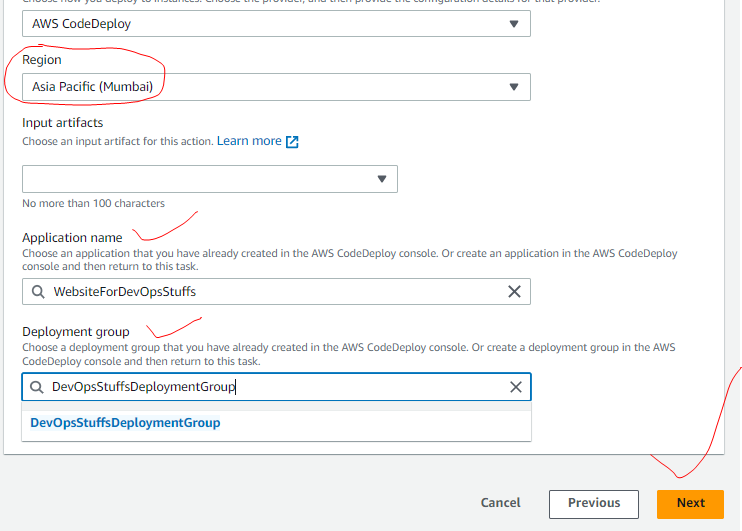
It will automatically take Region, select the application and the deployment group from dropdowns.
Click on “Next”.
Review all the things and click on “Create pipeline”.
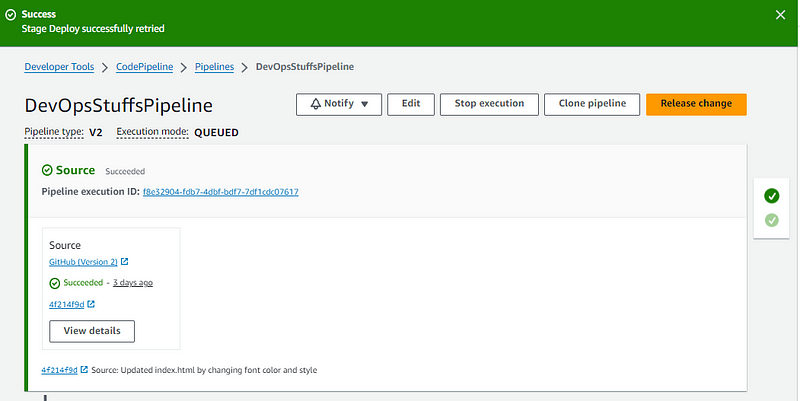
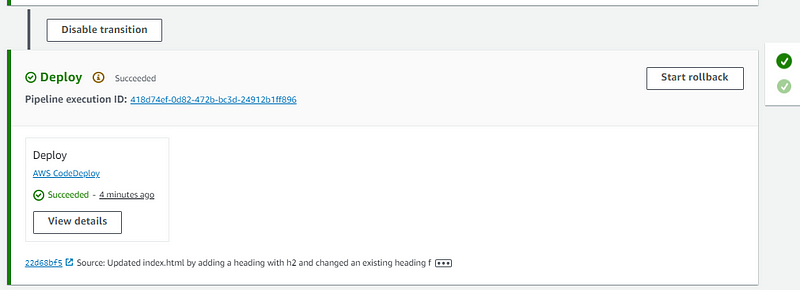
Now deployment will be started using AWS CodeDeploy. If we would have specified the number of EC2 instances as 4 during the time of launch in Step 2 then the application would have been deployed on all 4 EC2 instances now.
First the code will be checked out from GitHub repo.
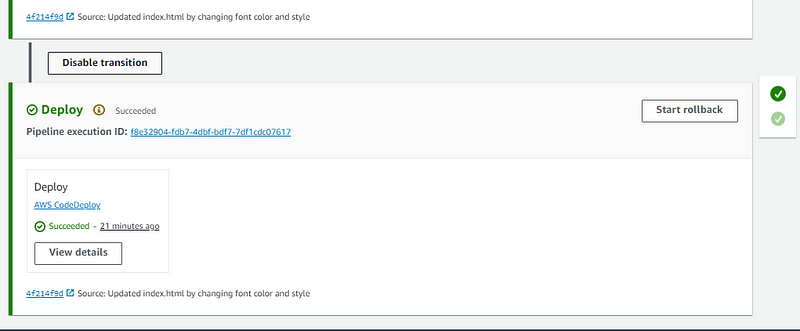
After some time code or application will be deployed on EC2 instance or server.
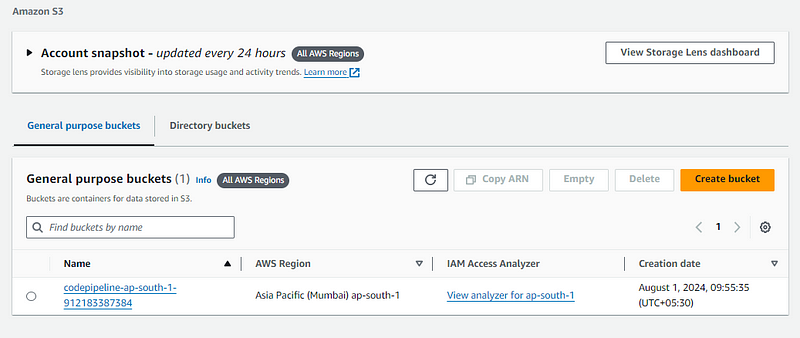
You can click on “View details” to see the summary. As the code will be stored in S3 bucket by default, you can go to the service “AWS S3” and see the bucket.
Step 5: Access the Application
Let us access the application on port 80 as already we have added the inbound rule 80 in the EC2 instance.
Copy the Public DNS of the EC2 instance and paste it in the browser.
There we go!!
Let us go to GitHub repo, make some minor changes in the file index.html by clicking on Edit/Pencil icon and commit the changes as follows.
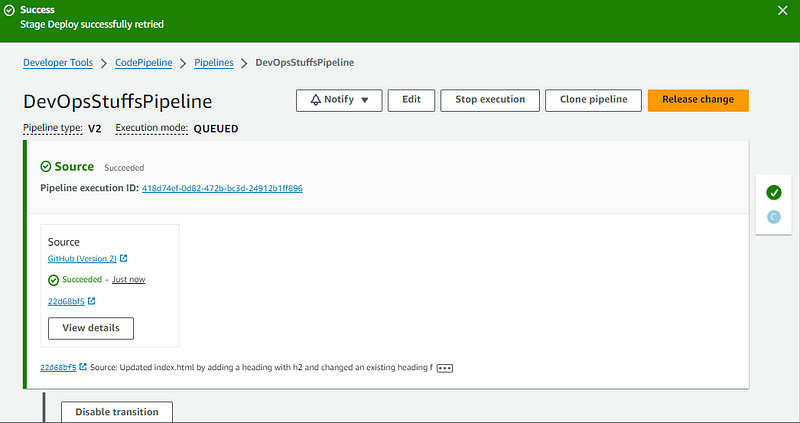
Now go back to Amazon CodePipeline and just refresh the page.
Then go back to the browser and just refresh the page.
There we go!!
The AmazonCodePipeline has automatically identified the code changes in the GitHub repo and triggered the build.
Here is the GitHub repo of the project:
https://github.com/SandyDevOpsStuffs/AWS-Project1.git
Subscribe to my newsletter
Read articles from SANDESH D MANOCHARYA directly inside your inbox. Subscribe to the newsletter, and don't miss out.
Written by

