How to Deploy Frontend Apps on AWS: A Step-by-Step Guide
 Subhrajit Dutta
Table of contents

Deploying your frontend application on AWS can be seamless when done correctly. In this blog, we'll walk through the essential steps to deploy a React frontend on AWS, utilizing services like S3, CloudFront, and more.
Step 1: Create an AWS Account
Before you begin, ensure you have an active AWS account. If you don’t, sign up at AWS and log in. Access to S3 and CloudFront is required, and automatically available if you are the root user.
Step 2: Build Your React Frontend
Start by building your React application. This method is ideal for basic React apps and HTML/CSS/JS apps. It doesn’t apply to frameworks with server-side rendering, like Next.js.
Navigate to your React project directory and run the following commands:
cd /path/to/your/react/project
npm run build
To serve the HTML/CSS/JS files locally, install the serve package:
npm i -g serve
serve -s build
This ensures everything is working correctly before deploying.
Step 3: Understanding CDNs
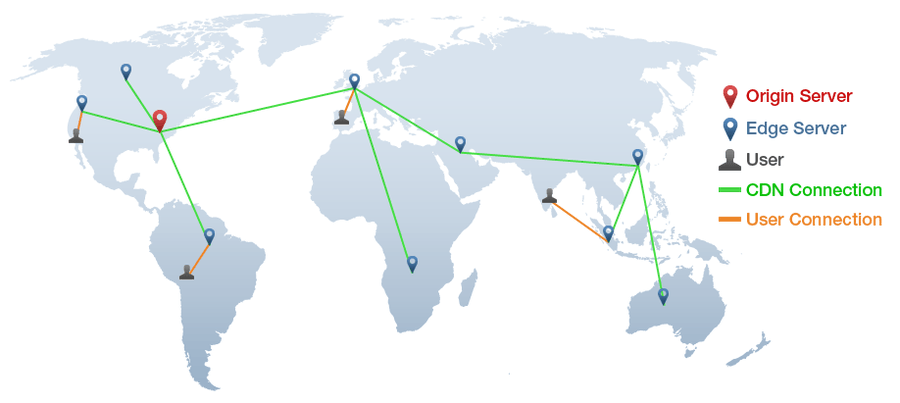
A Content Delivery Network (CDN) optimizes the delivery of your content to users worldwide. AWS CloudFront is a powerful CDN that works perfectly with S3 to serve your frontend efficiently. While you might consider using an EC2 instance, CDNs are better suited for static content like frontend applications due to their speed and reliability.
Step 4: Create an S3 Bucket
Amazon S3 is AWS’s object storage service. You’ll need to create a bucket, which will serve as the storage location for your React application’s files.
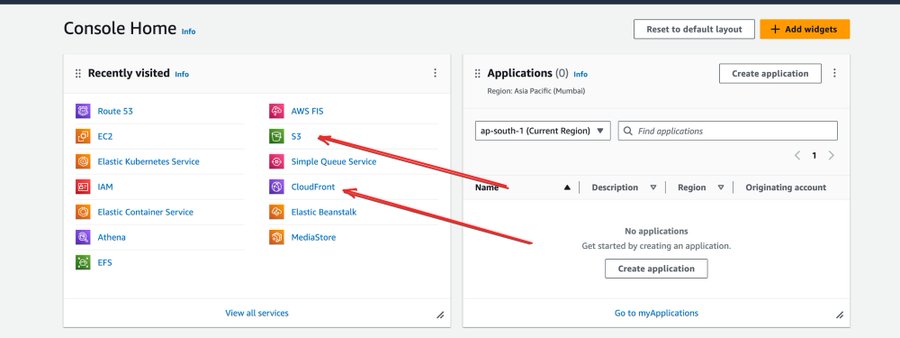
Go to the S3 service in your AWS Console.
Click "Create bucket" and follow the prompts to set it up.

Step 5: Upload Your React Build to S3
Once your S3 bucket is ready, upload the files from the build directory of your React project.
Open your S3 bucket.
Click "Upload" and select the files from your
builddirectory.Ensure the files are uploaded successfully.
Step 6: Accessing Your Website
After uploading your files, resist the urge to directly open your S3 bucket. By default, your S3 bucket is private, and you should keep it that way. Instead, you’ll use CloudFront to serve your content securely.
Step 7: Set Up CloudFront Distribution
To distribute your content via CloudFront:
Go to the CloudFront service in your AWS Console.
Click "Create Distribution" and select your S3 bucket as the origin.
Enable Origin Access Control (OAC) to ensure content is only accessible through CloudFront.
Once configured, CloudFront will provide you with a URL where your site is hosted.
Step 8: Connect a Custom Domain
For a professional touch, connect a custom domain to your CloudFront distribution:
Edit the distribution settings in CloudFront.
Attach your domain name.
Request an SSL certificate through the AWS Certificate Manager to enable HTTPS.
Step 9: Handle Error Pages
A common issue with single-page applications like React is encountering an error page when trying to access routes other than the index. To fix this, configure CloudFront to redirect all requests to index.html:
In CloudFront, go to the "Error Pages" tab.
Create a custom error response for 404 errors, and set it to redirect to
index.html.
Final Thoughts
By following these steps, you now have a fully deployed React application on AWS, hosted on a custom domain with HTTPS. Happy deploying!
If you found this blog post helpful, please consider sharing it with others who might benefit. You can also follow me for more content on Javascript, React, and other web Development topics.
Connect with me on Twitter, LinkedIn, and GitHub.
Thank you for Reading :)
If you like my work, you can support me here:

Subscribe to my newsletter
Read articles from Subhrajit Dutta directly inside your inbox. Subscribe to the newsletter, and don't miss out.
Written by

Subhrajit Dutta
Subhrajit Dutta
Passionate about crafting seamless web applications and optimizing workflows through DevOps practices. Skilled in Javascript, React, and Kubernetes, with a knack for solving complex problems and enhancing tech communities. Always on a mission to learn, innovate, and contribute. Join me on my journey through code and cloud!


