Day 4 #KubeWeek : Mastering Kubernetes Service Discovery: Exposing Workloads and Discovering Services
 Gunjan Bhadade
Introduction
Welcome to Day 4 of the KubeWeek challenge! Today, we'll dive into the world of Kubernetes services and service discovery. We'll learn how to expose Kubernetes workloads to the outside world and how to discover pods and services within a Kubernetes cluster using DNS and other mechanisms. Whether you're new to Kubernetes or need a refresher, this guide will provide you with a solid understanding of these essential concepts. Let's get started! 🚀
What are Kubernetes Services? 🤔
In Kubernetes, a Service is an abstraction that defines a logical set of pods and a policy by which to access them. Services enable communication between various components within the cluster and can also expose applications to the outside world.
Types of Services
ClusterIP (default): Exposes the service on an internal IP in the cluster. This type is only accessible within the cluster.
NodePort: Exposes the service on each node's IP at a static port. This type makes the service accessible from outside the cluster using
<NodeIP>:<NodePort>.LoadBalancer: Exposes the service externally using a cloud provider's load balancer.
ExternalName: Maps a service to a DNS name, redirecting traffic to that DNS name.
Exposing Workloads Using Services 🌍
Example: Exposing an Nginx Deployment
Let's create an Nginx deployment and expose it using different types of services.
1. ClusterIP Service 🏠
ClusterIP exposes the service on an internal IP in the cluster. This type of service is only accessible within the cluster.
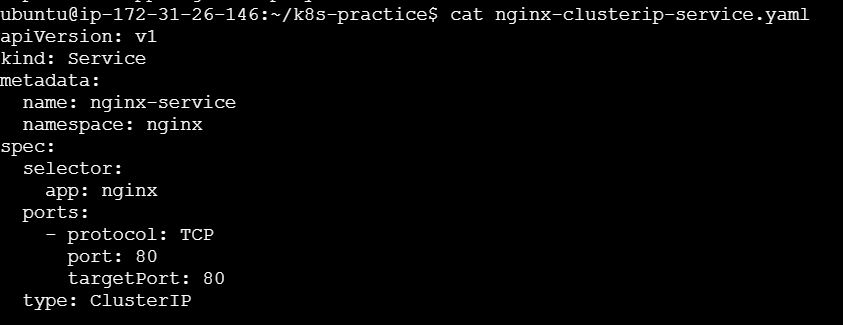
Code Example:
apiVersion: v1
kind: Service
metadata:
  name: nginx-service
  namespace: nginx
spec:
  selector:
    app: nginx
  ports:
    - protocol: TCP
      port: 80
      targetPort: 80
  type: ClusterIP
Explanation:
metadata.name: The name of the service.namespace: The namespace where the service is created.spec.selector: Selects the pods that will receive the traffic.spec.ports: Specifies the port on which the service is exposed and the target port on the pods.
To run this service:
kubectl apply -f clusterip-service.yaml
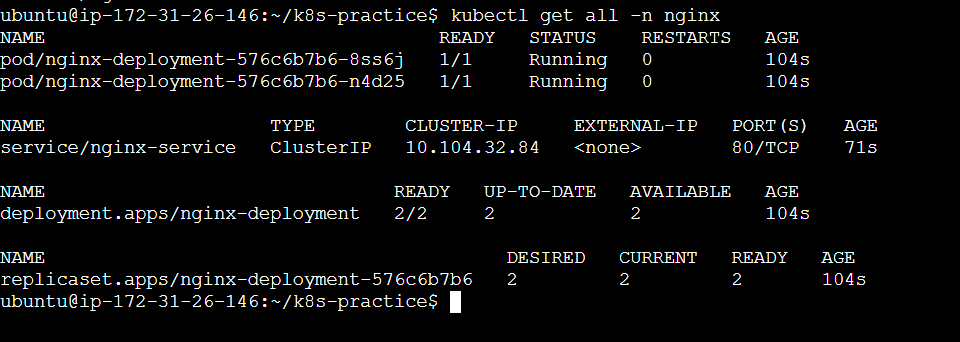

ClusterIP doesn't get expose so you need to do Port forwarding

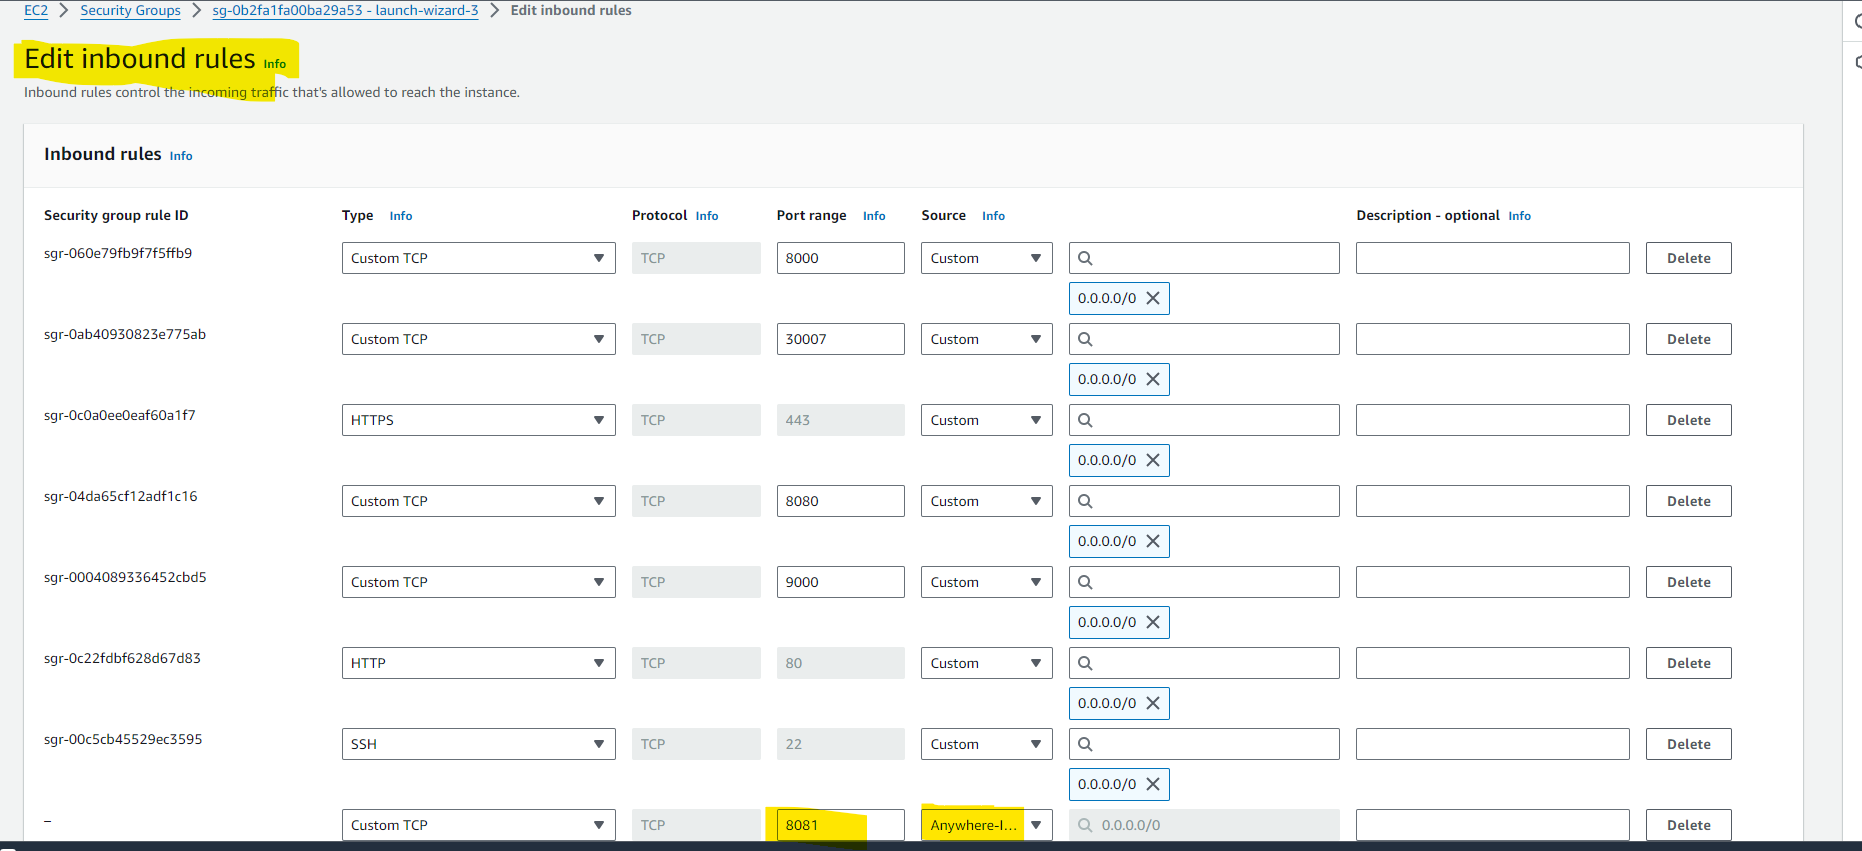

2. NodePort Service 🌐
NodePort exposes the service on each Node’s IP at a static port. This makes the service accessible from outside the cluster.
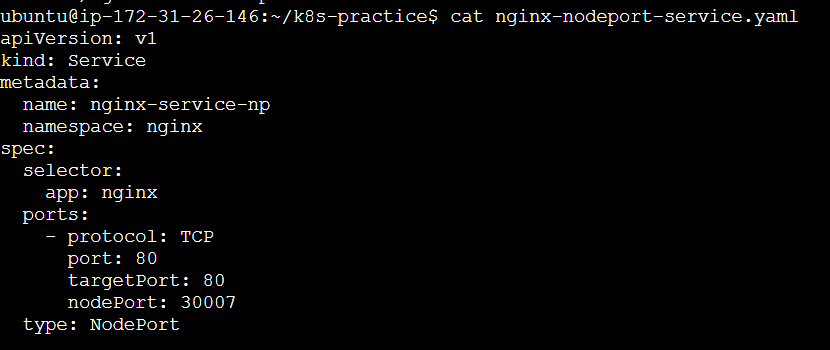
Code Example:
apiVersion: v1
kind: Service
metadata:
  name: nginx-service-np
  namespace: nginx
spec:
  selector:
    app: nginx
  ports:
    - protocol: TCP
      port: 80
      targetPort: 8080
      nodePort: 30007
  type: NodePort
Explanation:
nodePort: The port on each node where the service is exposed.
To run this service:
kubectl apply -f nodeport-service.yaml


3. LoadBalancer Service 📡
LoadBalancer exposes the service externally using a cloud provider’s load balancer.
Code Example:
apiVersion: v1
kind: Service
metadata:
  name: nginx-service-loadbalancer
  namespace: nginx
spec:
  selector:
    app: nginx
  ports:
    - protocol: TCP
      port: 80
      targetPort: 8080
  type: LoadBalancer
Explanation:
- This service type automatically creates an external load balancer and assigns a fixed, external IP to the service.
To run this service:
kubectl apply -f loadbalancer-service.yaml
4. ExternalName Service 🔗
ExternalName maps a service to a DNS name, allowing you to connect to external services using a Kubernetes service.
Code Example:
apiVersion: v1
kind: Service
metadata:
  name: nginx-service-externalname
  namespace: nginx
spec:
  type: ExternalName
  externalName: example.com
Explanation:
externalName: The DNS name of the external service.
Discovering Pods and Services Within a Kubernetes Cluster
Service discovery in Kubernetes is essential for enabling communication between different components within the cluster. Kubernetes provides several mechanisms for service discovery, including DNS and environment variables. Let's explore these methods in detail.
DNS-Based Service Discovery
Kubernetes comes with a built-in DNS service that provides automatic DNS resolution for services and pods. This allows components within the cluster to communicate with each other using DNS names.
Discovering Services Using DNS
When a service is created in Kubernetes, it gets a DNS entry that follows the pattern <service-name>.<namespace>.svc.cluster.local. This allows pods to access services by their DNS names.
Example: Suppose you have a service named nginx-service in the default namespace.
Step-by-Step Guide
Create an Nginx Service:
nginx-service.yaml:
 apiVersion: v1
 kind: Service
 metadata:
   name: nginx-service
   namespace: default
 spec:
   selector:
     app: nginx
   ports:
   - protocol: TCP
     port: 80
     targetPort: 80
Apply the service:
kubectl apply -f nginx-service.yamlDeploy a Pod to Test DNS Resolution:
dns-test-pod.yaml:
 apiVersion: v1
 kind: Pod
 metadata:
   name: dns-test
   namespace: default
 spec:
   containers:
   - name: dns-test
     image: busybox
     command: ["sleep", "3600"]
Apply the pod:
kubectl apply -f dns-test-pod.yamlCheck DNS Resolution:
Get a shell into the
dns-testpod:kubectl exec -it dns-test -- shInside the pod, perform a DNS lookup:
nslookup nginx-service.default.svc.cluster.localOutput:

This shows that the service nginx-service is resolvable via DNS.
Discovering Pods Using DNS
Starting with Kubernetes v1.21, you can enable headless services to directly resolve pod IPs.
Example: Creating a headless service to resolve pod IPs.
Create a Headless Service:
nginx-headless-service.yaml:
 apiVersion: v1
 kind: Service
 metadata:
   name: nginx-headless
   namespace: default
 spec:
   clusterIP: None
   selector:
     app: nginx
   ports:
   - protocol: TCP
     port: 80
     targetPort: 80
Apply the service:
kubectl apply -f nginx-headless-service.yamlCheck DNS Resolution for Pods:
Get a shell into the
dns-testpod:kubectl exec -it dns-test -- shInside the pod, perform a DNS lookup:
nslookup nginx-headless.default.svc.cluster.localThis should list the IP addresses of the pods that match the selector.

Environment Variable-Based Service Discovery
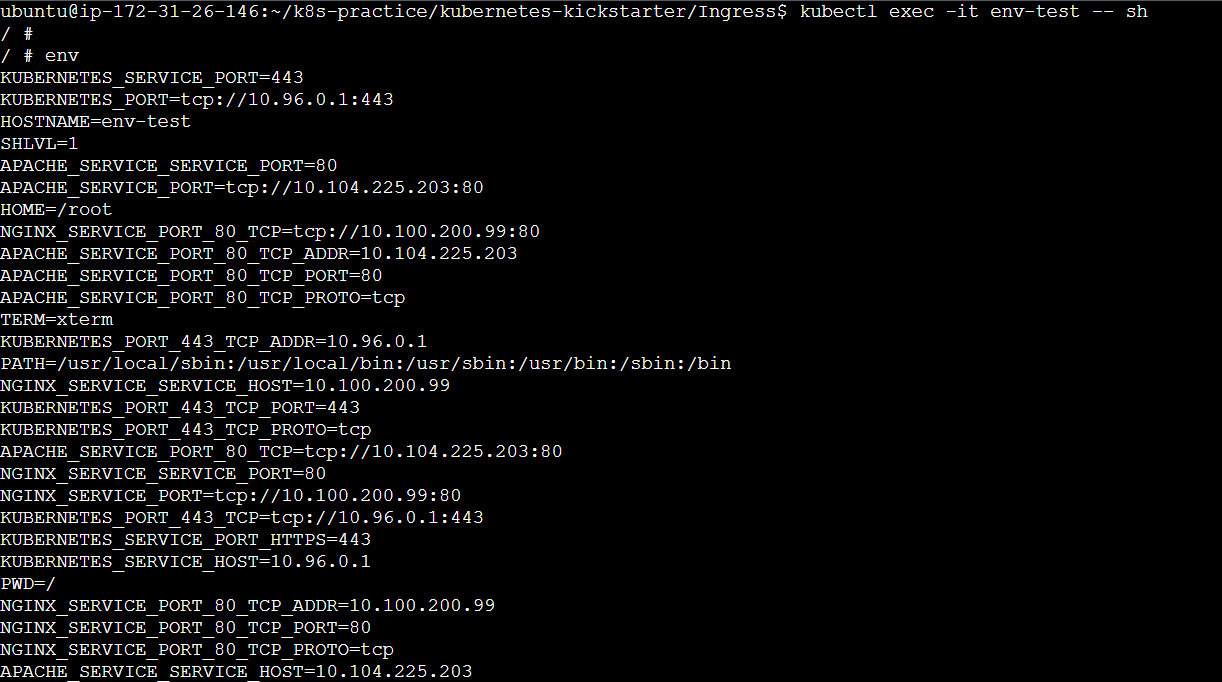
Kubernetes also provides service discovery via environment variables. When a pod is created, environment variables are automatically injected with the service's information.
Discovering Services Using Environment Variables
Deploy a Pod and Inspect Environment Variables:
env-test-pod.yaml:
 apiVersion: v1
 kind: Pod
 metadata:
   name: env-test
   namespace: default
 spec:
   containers:
   - name: env-test
     image: busybox
     command: ["sleep", "3600"]
Apply the pod:
kubectl apply -f env-test-pod.yamlInspect Environment Variables:
Get a shell into the
env-testpod:kubectl exec -it env-test -- shInside the pod, list environment variables:
envLook for variables related to
nginx-service, such as:
Discovering Pods Using Labels and Selectors
Labels and selectors are another powerful way to discover and manage pods within a Kubernetes cluster.
Example: Listing pods with a specific label.
Label a Pod:
Add labels to your pods in the deployment:
 apiVersion: apps/v1
 kind: Deployment
 metadata:
   name: nginx-deployment
   namespace: default
 spec:
   replicas: 2
   selector:
     matchLabels:
       app: nginx
   template:
     metadata:
       labels:
         app: nginx
         tier: frontend
     spec:
       containers:
       - name: nginx
         image: nginx:1.19
         ports:
         - containerPort: 80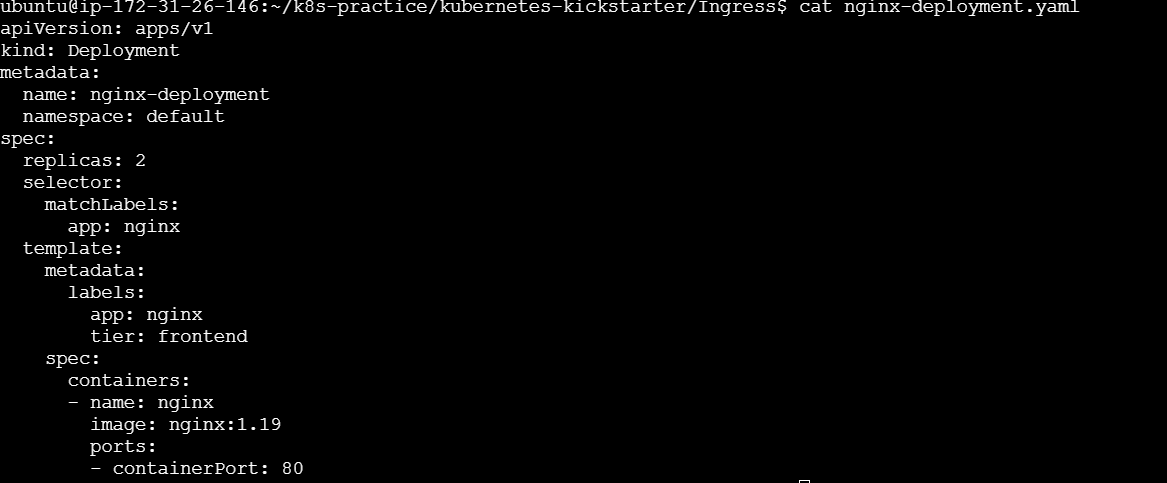
Apply the deployment:
kubectl apply -f nginx-deployment.yamlList Pods by Label:
Use
kubectlto list pods with the labeltier=frontend:kubectl get pods -l tier=frontend

This shows the pods that match the specified label selector.
Conclusion
KubeWeek Day 4 has been a deep dive into Kubernetes services and service discovery, essential components for managing communication within and outside the cluster. We explored various types of services, including ClusterIP, NodePort, and LoadBalancer, and learned how to expose workloads effectively. Additionally, we delved into DNS-based and environment variable-based service discovery, providing a comprehensive understanding of how pods and services can discover and interact with each other seamlessly.
Understanding these concepts empowers you to design robust, scalable, and efficient Kubernetes applications. By mastering service exposure and discovery mechanisms, you ensure reliable communication pathways within your cluster and enable external access to your applications when needed. Keep experimenting, stay curious, and continue your journey through Kubernetes with confidence. 🚀🌟
Did you enjoy this post? Join me for the rest of KubeWeek and continue your Kubernetes journey! 🎉
Subscribe to my newsletter
Read articles from Gunjan Bhadade directly inside your inbox. Subscribe to the newsletter, and don't miss out.
Written by
