Day 5 #KubeWeek : Kubernetes Storage and Security
 Gunjan Bhadade
Introduction
Welcome to an in-depth exploration of Kubernetes storage and security! Today, we will cover essential topics like Persistent Volumes (PV), Persistent Volume Claims (PVC), Storage Classes, StatefulSets, and delve into Kubernetes security mechanisms such as RBAC, Pod Security Policies, Secrets, Network Policies, and TLS. Understanding these concepts is crucial for building robust, scalable, and secure Kubernetes applications. Let's get started! 🚀
Kubernetes Storage
Persistent Volumes (PV)
What is a Persistent Volume?
A Persistent Volume (PV) is a piece of storage in the cluster that has been provisioned by an administrator or dynamically provisioned using Storage Classes. It is a resource in the cluster, similar to a node. PVs have a lifecycle independent of any individual pod that uses the PV. This decoupling allows for greater flexibility and reusability.
Key Features of Persistent Volumes
Lifecycle: PVs exist independently of pods and their lifecycles. They can persist data beyond the life of individual pods.
Provisioning: PVs can be statically created by an administrator or dynamically provisioned using Storage Classes.
Types of Storage: PVs can be backed by different types of storage such as NFS, iSCSI, cloud provider-specific storage (AWS EBS, GCE PD), and more.
Access Modes: PVs support different access modes:
ReadWriteOnce (RWO): The volume can be mounted as read-write by a single node.
ReadOnlyMany (ROX): The volume can be mounted as read-only by many nodes.
ReadWriteMany (RWX): The volume can be mounted as read-write by many nodes.
Creating a Persistent Volume
Example: Creating a Persistent Volume with a hostPath
PersistentVolume.yaml:
apiVersion: v1
kind: PersistentVolume
metadata:
  name: nginx-pv
  labels:
    env: dev
spec:
  storageClassName: standard
  capacity:
    storage: 1Gi
  accessModes:
    - ReadWriteOnce
  hostPath:
    path: "/home/ubuntu/data"

Apply the configuration:
kubectl apply -f PersistentVolume.yaml
In this example, we created a PV named PersistentVolume with a capacity of 1Gi and an access mode of ReadWriteOnce. The hostPath storage type uses the directory "/home/ubuntu/data" on the node where the pod is running.
Verify the Persistent Volume (PV)
After applying your PersistentVolume.yaml file, you can verify the creation and status of your PV with the following command:
kubectl get pv
This command will list all the Persistent Volumes in the cluster. You should see an entry for my-pv. The output will look something like this:

Persistent Volume Claims (PVC)
What is a Persistent Volume Claim?
A Persistent Volume Claim (PVC) is a request for storage by a user. It is similar to a pod in that pods consume node resources, and PVCs consume PV resources. PVCs specify the size and access modes needed for the storage. Once a PVC is created, Kubernetes finds a suitable PV to bind to the PVC.
Key Features of Persistent Volume Claims
Dynamic Provisioning: PVCs can trigger dynamic provisioning of PVs using Storage Classes.
Binding: PVCs are bound to PVs, and the binding is managed by Kubernetes based on the specified criteria.
Access Modes: PVCs request specific access modes that the bound PV must satisfy.
Resizing: PVCs can be resized (if supported by the underlying storage).
Creating a Persistent Volume Claim
Example: Creating a Persistent Volume Claim
PersistentVolumeClaim.yaml:
apiVersion: v1
kind: PersistentVolumeClaim
metadata:
  name: nginx-pv-claim
spec:
  storageClassName: standard
  accessModes:
    - ReadWriteOnce
  resources:
    requests:
      storage: 500Mi

Apply the configuration:
kubectl apply -f PersistentVolumeClaim.yaml
In this example, we created a PVC named PersistentVolumeClaim requesting 1Gi of storage with an access mode of ReadWriteOnce.
Verify the Persistent Volume Claim (PVC)
After applying your PersistentVolumeClaim.yaml file, you can verify the creation and status of your PVC with the following command:
kubectl get pvc
This command will list all the Persistent Volume Claims in the default namespace. You should see an entry for my-pvc. The output will look something like this:

Binding PVC to PV
Kubernetes automatically binds a PVC to a suitable PV based on the requested criteria. If a matching PV is available, the PVC will be bound to it. If not, the PVC will remain unbound until a suitable PV is created or becomes available.
Using PVC in a Pod
To use a PVC in a pod, you need to reference the PVC in the pod's volume specification.
Example: Using a PVC in a Pod
pod.yaml:
apiVersion: v1
kind: Pod
metadata:
  name: nginx-pod
spec:
  volumes:
    - name: nginx-storage
      persistentVolumeClaim:
        claimName: nginx-pv-claim
  containers:
    - name: nginx-container
      image: nginx
      ports:
        - containerPort: 80
      volumeMounts:
        - mountPath: "/usr/share/nginx/html"
          name: nginx-storage
Apply the configuration:
kubectl apply -f pod.yaml
In this example, the pod nginx-pod uses the PVC nginx-pv-claim as a volume, mounted at /usr/share/nginx/html in the container.
Verify the Pod Using the PVC
You can also describe the pod to see more detailed information, including the volume mounts:
kubectl describe pod nginx-pod

Look for the Volumes section to verify that the PVC is being used correctly.
4. Check Logs and Volume Mount
To ensure that the volume is mounted and being used correctly, you can check the logs of the pod. If the pod is running an Nginx server, for example, you can exec into the pod and check the mounted directory:
kubectl exec -it nginx-pod -- /bin/bash
Once inside the pod, navigate to the mounted directory and check its contents:
cd /usr/share/nginx/html
ls -l

Storage Classes in Kubernetes
What is a Storage Class?
A Storage Class defines the characteristics and parameters for storage volumes, such as performance, backup policies, and the provisioner that handles the volume creation. By using Storage Classes, cluster administrators can offer a variety of storage options to users and manage them efficiently.
Components of a Storage Class
Provisioner: Specifies the plugin or driver that handles the creation of volumes. Examples include
kubernetes.io/aws-ebs,kubernetes.io/gce-pd, andkubernetes.io/nfs.Parameters: Key-value pairs that define specific configurations for the provisioner, such as volume type, IOPS, and replication factors.
Reclaim Policy: Determines what happens to the volume when the PVC is deleted. The common options are
Retain,Delete, andRecycle.Binding Mode: Specifies when the PVC is bound to a PV. Options include
Immediate(default) andWaitForFirstConsumer.AllowVolumeExpansion: Indicates whether the volumes created using this storage class can be dynamically resized.
Example: Creating a Storage Class
Let's create a Storage Class for AWS Elastic Block Store (EBS) with General Purpose SSD (gp2) storage.
storageclass.yaml:
apiVersion: storage.k8s.io/v1
kind: StorageClass
metadata:
  name: fast
provisioner: kubernetes.io/aws-ebs
parameters:
  type: gp2
  fsType: ext4
reclaimPolicy: Retain
allowVolumeExpansion: true

Apply the Storage Class:
kubectl apply -f storageclass.yaml
List All Storage Classes
To see all the Storage Classes available in your cluster, use the following command:
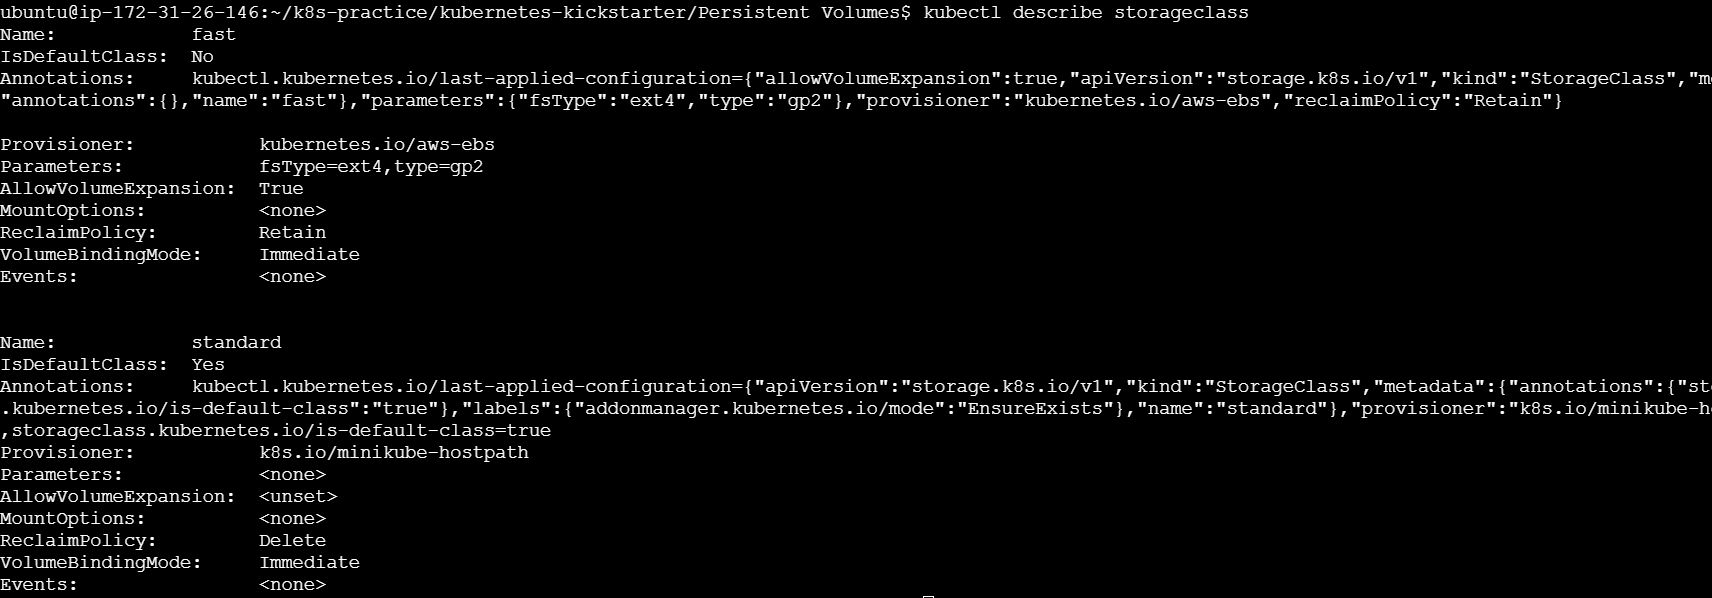
kubectl get storageclass

This will display a list of all Storage Classes along with some basic information such as the provisioner, reclaim policy, and whether they allow volume expansion.
Get Detailed Information About a Specific Storage Class
To get detailed information about a specific Storage Class, use the following command
kubectl describe storageclass
This command provides detailed information, including parameters, reclaim policy, binding mode, and annotations.
StatefulSet
What is a StatefulSet?
A StatefulSet is a Kubernetes workload object used to manage stateful applications. Unlike Deployments, which are suitable for stateless applications, StatefulSets maintain a sticky identity for each of their pods. These pods are created from the same spec but are not interchangeable: each has a persistent identifier that it maintains across any rescheduling.
Key Features of StatefulSets
Stable Network Identity: Each pod in a StatefulSet gets a stable hostname, which helps in maintaining network identity across rescheduling.
Stable Storage: StatefulSets can automatically attach persistent volumes to pods, ensuring that data is not lost when pods are rescheduled.
Ordered Deployment and Scaling: Pods in a StatefulSet are created, deleted, and scaled in a specific order. This is crucial for applications that require startup or shutdown ordering.
Rolling Updates: StatefulSets support rolling updates with predictable ordering, ensuring that only one pod is updated at a time, preserving the application state and stability.
Use Cases for StatefulSets
StatefulSets are ideal for:
Databases (e.g., MySQL, PostgreSQL)
Distributed file systems (e.g., HDFS, GlusterFS)
Stateful applications that require stable network identities and persistent storage
Example: Deploying a StatefulSet
Create a Headless Service
A headless service is required to provide stable network identities for the StatefulSet.
Headless Service YAML (nginx-headless-service.yaml):
apiVersion: v1
kind: Service
metadata:
  name: nginx
  namespace: nginx
spec:
  clusterIP: None
  selector:
    app: nginx
  ports:
  - port: 80
    name: web
Apply the headless service:
kubectl apply -f nginx-headless-service.yaml
Create a StatefulSet
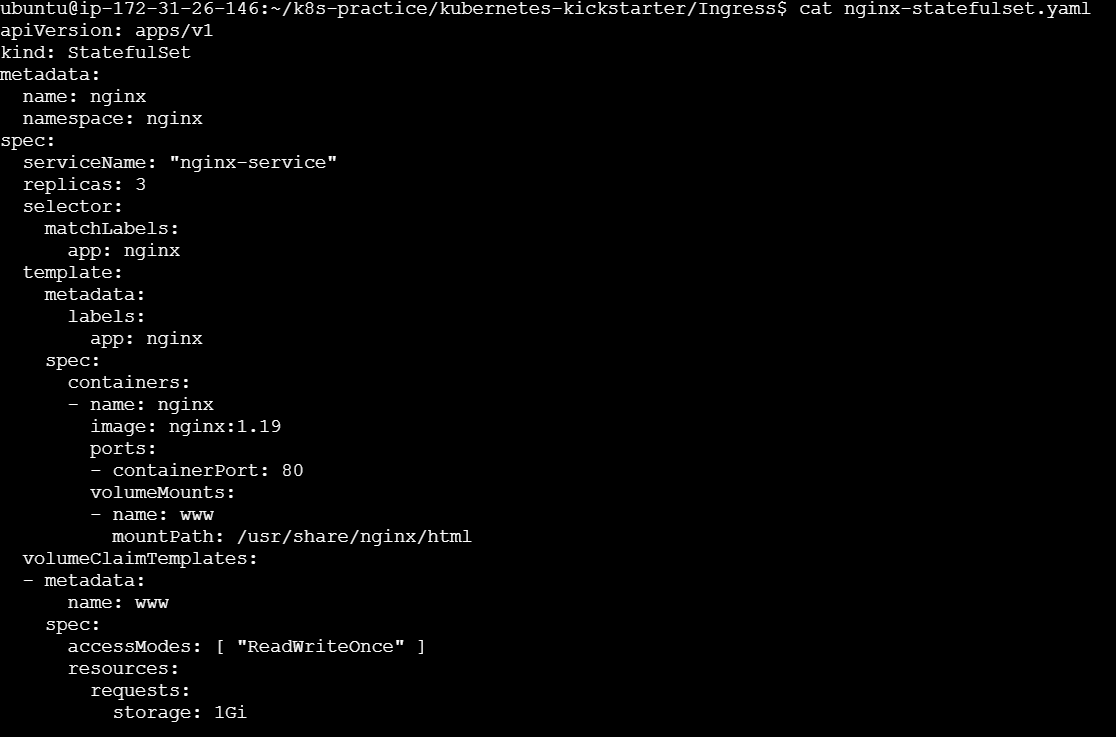
StatefulSet YAML (nginx-statefulset.yaml):
apiVersion: apps/v1
kind: StatefulSet
metadata:
  name: nginx
  namespace: nginx
spec:
  serviceName: "nginx"
  replicas: 3
  selector:
    matchLabels:
      app: nginx
  template:
    metadata:
      labels:
        app: nginx
    spec:
      containers:
      - name: nginx
        image: nginx:1.19
        ports:
        - containerPort: 80
        volumeMounts:
        - name: www
          mountPath: /usr/share/nginx/html
  volumeClaimTemplates:
  - metadata:
      name: www
    spec:
      accessModes: [ "ReadWriteOnce" ]
      resources:
        requests:
          storage: 1Gi
Apply the StatefulSet:
kubectl apply -f nginx-statefulset.yaml
Verify the StatefulSet
After applying the StatefulSet, verify that the pods are running and have stable identities.
kubectl get pods -l app=nginx -n nginx
You should see pods with names like nginx-0, nginx-1, and nginx-2.

What is RBAC?
RBAC is a method of regulating access to resources based on the roles of individual users within an organization. In Kubernetes, RBAC is used to control access to the Kubernetes API. It allows you to define roles that specify which actions can be performed on which resources, and then assign those roles to users or groups.
Core Components of RBAC
RBAC in Kubernetes consists of four main components:
Role: A set of permissions within a namespace.
ClusterRole: A set of permissions that applies cluster-wide.
RoleBinding: Assigns a role to a user or group within a namespace.
ClusterRoleBinding: Assigns a cluster role to a user or group cluster-wide.
Example Setup
We'll create a namespace, deploy Apache, and set up RBAC to manage access to this deployment.
Step 1: Create a Namespace
Namespaces provide a way to divide cluster resources between multiple users.
namespace.yml:
apiVersion: v1
kind: Namespace
metadata:
  name: apache-namespace
Apply the namespace:
kubectl apply -f namespace.yml
Step 2: Create an Apache Deployment
Deploy Apache in the newly created namespace.
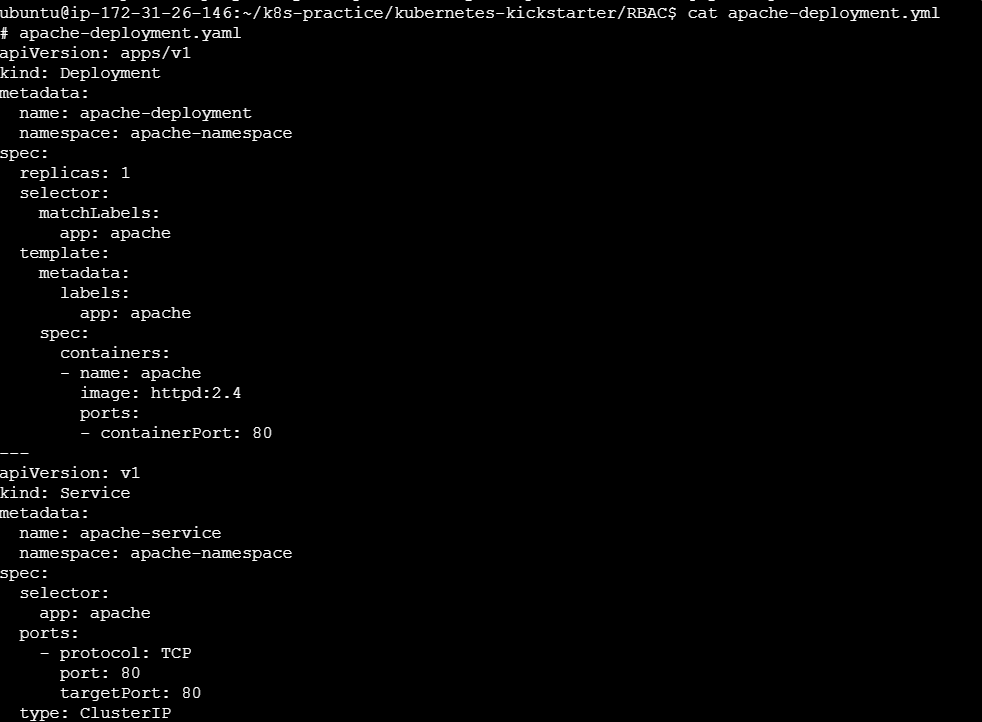
apache-deployment.yml:
apiVersion: apps/v1
kind: Deployment
metadata:
  name: apache-deployment
  namespace: apache-namespace
spec:
  replicas: 1
  selector:
    matchLabels:
      app: apache
  template:
    metadata:
      labels:
        app: apache
    spec:
      containers:
      - name: apache
        image: httpd:2.4
        ports:
        - containerPort: 80
---
apiVersion: v1
kind: Service
metadata:
  name: apache-service
  namespace: apache-namespace
spec:
  selector:
    app: apache
  ports:
    - protocol: TCP
      port: 80
      targetPort: 80
  type: ClusterIP
Apply the deployment:
kubectl apply -f apache-deployment.yml
Step 3: Create a Role
Define the permissions that the service account will have within the namespace.
apache-role.yml:
apiVersion: rbac.authorization.k8s.io/v1
kind: Role
metadata:
  namespace: apache-namespace
  name: apache-manager
rules:
- apiGroups: ["", "apps", "extensions"]
  resources: ["deployments", "services", "pods"]
  verbs: ["get", "list", "watch", "update", "patch", "delete"]

Apply the role:
kubectl apply -f apache-role.yml
Step 4: Create a RoleBinding
Bind the role to the service account.
apache-rolebinding.yml:
apiVersion: rbac.authorization.k8s.io/v1
kind: RoleBinding
metadata:
  name: apache-manager-binding
  namespace: apache-namespace
subjects:
- kind: User
  name: minikube-user # This should be replaced with the actual user name
  apiGroup: rbac.authorization.k8s.io
roleRef:
  kind: Role
  name: apache-manager
  apiGroup: rbac.authorization.k8s.io

Apply the role binding:
kubectl apply -f apache-rolebinding.yml


To check you can use below commands :
kubectl auth whoami
kubectl auth can-i get deployments -n apache-namespace --as=minikube-user
kubectl auth can-i create deployments -n apache-namespace --as=minikube-user

By setting up RBAC, we can precisely control access to resources within our Kubernetes cluster. In this guide, we created a namespace, deployed an Apache application, and configured RBAC to manage access using roles, role bindings, and service accounts. This ensures that only authorized processes can interact with the resources, enhancing the security and manageability of our Kubernetes environment.
Secrets
What Are Secrets?
Secrets are Kubernetes objects used to store sensitive data. They provide a secure way to pass sensitive information to pods. Secrets can be referenced by pods to access the confidential data they need without embedding it in the pod specifications.
Types of Secrets
Opaque: This is the default type used to store arbitrary user-defined data.
kubernetes.io/service-account-token: Automatically created secrets containing tokens for accessing the Kubernetes API.
kubernetes.io/dockercfg: Used for storing Docker credentials.
kubernetes.io/dockerconfigjson: Similar to
dockercfg, but in JSON format.kubernetes.io/tls: Used to store TLS certificates and keys.
apiVersion: apps/v1
kind: Deployment
metadata:
  name: mysql
  namespace: mysql
  labels:
    app: mysql
spec:
  replicas: 1
  selector:
    matchLabels:
      app: mysql
  template:
    metadata:
      labels:
        app: mysql
    spec:
      containers:
      - name: mysql
        image: mysql:8
        ports:
        - containerPort: 3306
        env:
        - name: MYSQL_ROOT_PASSWORD
          valueFrom:
            secretKeyRef:
              name: mysql-secret
              key: password
        - name: MYSQL_DATABASE
          valueFrom:
            configMapKeyRef:
              name: mysql-config
              key: MYSQL_DB
        volumeMounts:
        - name: mysql-persistent-storage
          mountPath: /var/lib/mysql
      volumes:
      - name: mysql-persistent-storage
        persistentVolumeClaim:
          claimName: mysql-pv-claim
kubectl apply -f deployment.yaml

apiVersion: v1
kind: Secret
metadata:
  name: mysql-secret
  namespace: mysql
type: Opaque
data:
  password: Z3VuamFuCg==

Apply the secret :
kubectl apply -f secrets.yaml

Pod Security Policies (PSPs) are an essential part of Kubernetes' security framework. They allow cluster administrators to control the security-related aspects of pod specifications, ensuring that the pods adhere to the desired security standards. PSPs provide a mechanism to enforce security contexts and other constraints on pod creation and updates.
Introduction to Pod Security Policies
A Pod Security Policy is a cluster-level resource that controls security-sensitive aspects of pod specifications. PSPs help to:
Restrict the use of privileged containers.
Enforce capabilities restrictions.
Control the usage of host namespaces and host networking.
Limit the use of hostPath volumes.
Set user and group IDs.
Enforce SELinux, AppArmor, and Seccomp profiles.
Enabling Pod Security Policies
To use Pod Security Policies, the PodSecurityPolicy admission controller must be enabled in your Kubernetes cluster. This is usually enabled by default in many managed Kubernetes services, but for custom setups, you need to ensure it is enabled.
Creating and Applying Pod Security Policies
Example Pod Security Policy
Here is a comprehensive example of a Pod Security Policy that enforces several security constraints:
psp-restricted.yaml:
apiVersion: policy/v1beta1
kind: PodSecurityPolicy
metadata:
  name: restricted
spec:
  privileged: false  # Prevent privileged containers
  allowPrivilegeEscalation: false  # Prevent privilege escalation
  requiredDropCapabilities:  # Drop all capabilities by default
    - ALL
  runAsUser:
    rule: 'MustRunAsNonRoot'  # Enforce non-root user
  seLinux:
    rule: 'RunAsAny'  # Allow any SELinux context
  fsGroup:
    rule: 'MustRunAs'
    ranges:
    - min: 1
      max: 65535
  supplementalGroups:
    rule: 'MustRunAs'
    ranges:
    - min: 1
      max: 65535
  volumes:  # Restrict volume types
    - 'configMap'
    - 'emptyDir'
    - 'projected'
    - 'secret'
    - 'downwardAPI'
    - 'persistentVolumeClaim'
Apply the Pod Security Policy:
kubectl apply -f psp-restricted.yaml
To verify if your Pod Security Policy (PSP) is applied correctly and functioning as intended, you can follow these steps:
Create the PSP: Apply the PSP configuration if you haven't already.
kubectl apply -f psp-restricted.yamlCheck the PSP: Verify that the PSP has been created successfully.
kubectl get podsecuritypoliciesYou should see an output listing the
restrictedPSP:NAME PRIV CAPS SELINUX RUNASUSER FSGROUP SUPGROUP READONLYROOTFS VOLUMES restricted false <none> RunAsAny MustRunAs MustRunAs MustRunAs false
Kubernetes Network Policies 🌐
Network Policies in Kubernetes are crucial for securing your cluster by controlling the traffic flow between Pods. They allow you to define rules for ingress (incoming) and egress (outgoing) traffic at the Pod level, enhancing your cluster's security posture.
Key Concepts 🗝️
Pod Selector: Specifies the group of Pods to which the policy applies.
Policy Types: Defines whether the policy controls ingress, egress, or both types of traffic.
Rules: Defines the traffic allowed or denied based on specific criteria like IP blocks, namespaces, and other Pod selectors.
Creating a Network Policy 🛠️
Let's go through the steps to create a Network Policy with an example.
Example Scenario
You have a web application running in the default namespace, and you want to:
Allow traffic only from Pods within the same namespace.
Deny traffic from outside the namespace.
Step-by-Step Example
1. Define the Network Policy
apiVersion: networking.k8s.io/v1
kind: NetworkPolicy
metadata:
  name: allow-same-namespace
  namespace: default
spec:
  podSelector: {}
  policyTypes:
  - Ingress
  ingress:
  - from:
    - podSelector: {}
Explanation:
podSelector: {}: The policy applies to all Pods in thedefaultnamespace.policyTypes: ["Ingress"]: This policy controls ingress traffic.ingressrule: Allows ingress traffic from any Pod in the same namespace.
2. Apply the Network Policy
Save the above YAML definition to a file, e.g., network-policy.yaml, and apply it:
kubectl apply -f network-policy.yaml
3. Verify the Network Policy
Check the applied Network Policies:
kubectl get networkpolicies -n default
To describe the policy in detail:
kubectl describe networkpolicy allow-same-namespace -n default
More Advanced Network Policies 🌐✨
Example 1: Restricting Egress Traffic
To restrict egress traffic to a specific IP block:
apiVersion: networking.k8s.io/v1
kind: NetworkPolicy
metadata:
  name: restrict-egress
  namespace: default
spec:
  podSelector:
    matchLabels:
      app: myapp
  policyTypes:
  - Egress
  egress:
  - to:
    - ipBlock:
        cidr: 192.168.1.0/24
Explanation:
podSelector: {matchLabels: {app: myapp}}: Applies the policy to Pods with the labelapp=myapp.policyTypes: ["Egress"]: Controls egress traffic.egressrule: Allows egress traffic only to the IP block192.168.1.0/24.
Example 2: Combining Ingress and Egress Rules
To combine ingress and egress rules in one policy:
apiVersion: networking.k8s.io/v1
kind: NetworkPolicy
metadata:
  name: combined-policy
  namespace: default
spec:
  podSelector:
    matchLabels:
      app: myapp
  policyTypes:
  - Ingress
  - Egress
  ingress:
  - from:
    - namespaceSelector:
        matchLabels:
          project: myproject
  egress:
  - to:
    - podSelector:
        matchLabels:
          app: anotherapp
Explanation:
podSelector: {matchLabels: {app: myapp}}: Applies to Pods with the labelapp=myapp.policyTypes: ["Ingress", "Egress"]: Controls both ingress and egress traffic.ingressrule: Allows traffic from any Pod in namespaces labeled withproject=myproject.egressrule: Allows traffic to Pods labeledapp=anotherapp.
Tips for Using Network Policies 🛡️
Start Simple: Begin with simple policies and gradually add complexity.
Label Pods Effectively: Use meaningful labels to easily group and manage Pods with policies.
Test Policies: Use tools like
netcatorcurlwithin Pods to test connectivity and ensure policies work as intended.Monitor and Audit: Regularly review and audit your Network Policies to adapt to changes in your cluster.
Transport Layer Security (TLS) in Kubernetes on Minikube 🔒
Transport Layer Security (TLS) is crucial for securing communication between clients and servers by encrypting the data transmitted over the network. Implementing TLS in Kubernetes ensures that your applications and services can communicate securely.
Setting Up TLS on Minikube
Let's walk through the steps to set up TLS on Minikube, including creating certificates, configuring a Kubernetes Ingress resource with TLS, and deploying a sample application.
Step-by-Step Guide
Step 1: Create TLS Certificates
First, generate a self-signed TLS certificate and key using openssl.
openssl req -x509 -nodes -days 365 -newkey rsa:2048 -keyout tls.key -out tls.crt -subj "/CN=mydomain.com/O=mydomain.com"
Step 2: Create a Kubernetes Secret
Create a secret in Kubernetes to store the TLS certificate and key.
kubectl create secret tls my-tls-secret --cert=tls.crt --key=tls.key
You can verify the secret creation:
kubectl get secrets

Step 3: Deploy a Sample Application
Deploy a simple Nginx application for demonstration purposes.
Create a file named nginx-deployment.yaml with the following content:
apiVersion: apps/v1
kind: Deployment
metadata:
  name: nginx-deployment
spec:
  replicas: 1
  selector:
    matchLabels:
      app: nginx
  template:
    metadata:
      labels:
        app: nginx
    spec:
      containers:
      - name: nginx
        image: nginx:1.19.6
        ports:
        - containerPort: 80
Apply the deployment:
kubectl apply -f nginx-deployment.yaml
Create a service to expose the Nginx deployment:
apiVersion: v1
kind: Service
metadata:
  name: nginx-service
spec:
  selector:
    app: nginx
  ports:
    - protocol: TCP
      port: 80
      targetPort: 80
  type: ClusterIP
Apply the service:
kubectl apply -f nginx-service.yaml
Step 4: Configure Ingress with TLS
Ensure the Ingress addon is enabled in Minikube:
minikube addons enable ingress
Create an Ingress resource to expose the Nginx service over HTTPS.
Create a file named nginx-ingress.yaml with the following content:
apiVersion: networking.k8s.io/v1
kind: Ingress
metadata:
  name: nginx-ingress
  annotations:
    nginx.ingress.kubernetes.io/rewrite-target: /
spec:
  tls:
  - hosts:
    - mydomain.com
    secretName: my-tls-secret
  rules:
  - host: mydomain.com
    http:
      paths:
      - path: /
        pathType: Prefix
        backend:
          service:
            name: nginx-service
            port:
              number: 80
Apply the Ingress resource:
kubectl apply -f nginx-ingress.yaml
Step 5: Update /etc/hosts
To test the setup, add an entry to your /etc/hosts file to map mydomain.com to the Minikube IP address.
Get the Minikube IP address:
minikube ip
Edit your /etc/hosts file to include:
phpCopy code<minikube-ip> mydomain.com
Replace <minikube-ip> with the actual IP address obtained from the previous command.
Step 6: Access the Application
Now, you should be able to access your application securely via HTTPS.
You might see a warning about the certificate not being trusted because it's self-signed. You can proceed by accepting the risk and continue to the site.
For running/checking ingress on local you need to make changes in /etc/hosts by adding the private IP to it

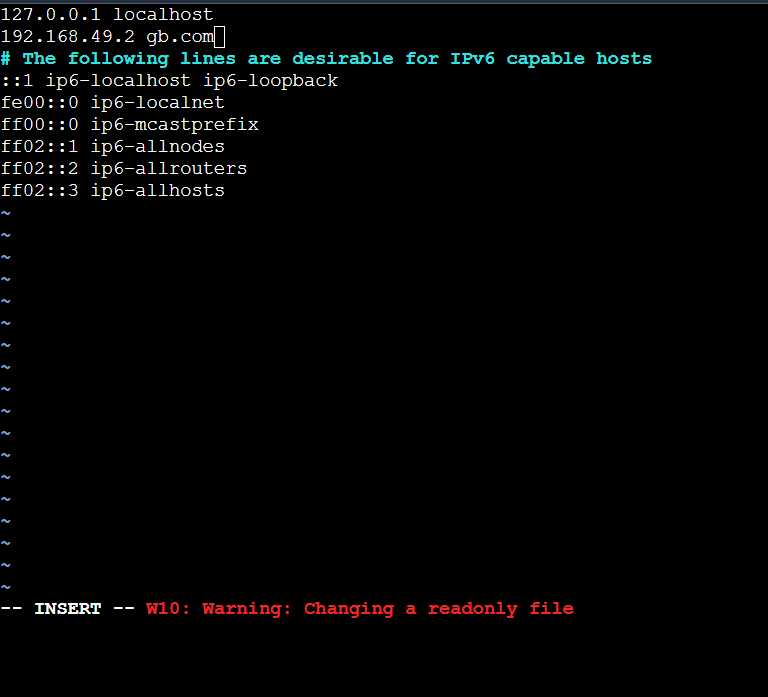
To redirect to url on host use curl command


Conclusion
Understanding and implementing Kubernetes storage and security mechanisms are crucial for maintaining robust, scalable, and secure applications. From managing persistent data with PVs, PVCs, Storage Classes, and StatefulSets, to enforcing security with RBAC, Pod Security Policies, Secrets, Network Policies, and TLS, each component plays a vital role in the Kubernetes ecosystem. Keep exploring and experimenting with these concepts to enhance your Kubernetes expertise. 🌟
Thank you for joining me on this comprehensive guide to Kubernetes storage and security. Let's continue to learn and grow in this Kubernetes journey together! 🚀💬
Did you enjoy this post? Join me for the rest of KubeWeek and continue your Kubernetes journey! 🎉
Subscribe to my newsletter
Read articles from Gunjan Bhadade directly inside your inbox. Subscribe to the newsletter, and don't miss out.
Written by
