Deploying a 3-Tier App on Kubernetes with Custom Domain 🌍: A Detailed Guide 🛠️📘
 Malhar Kauthale
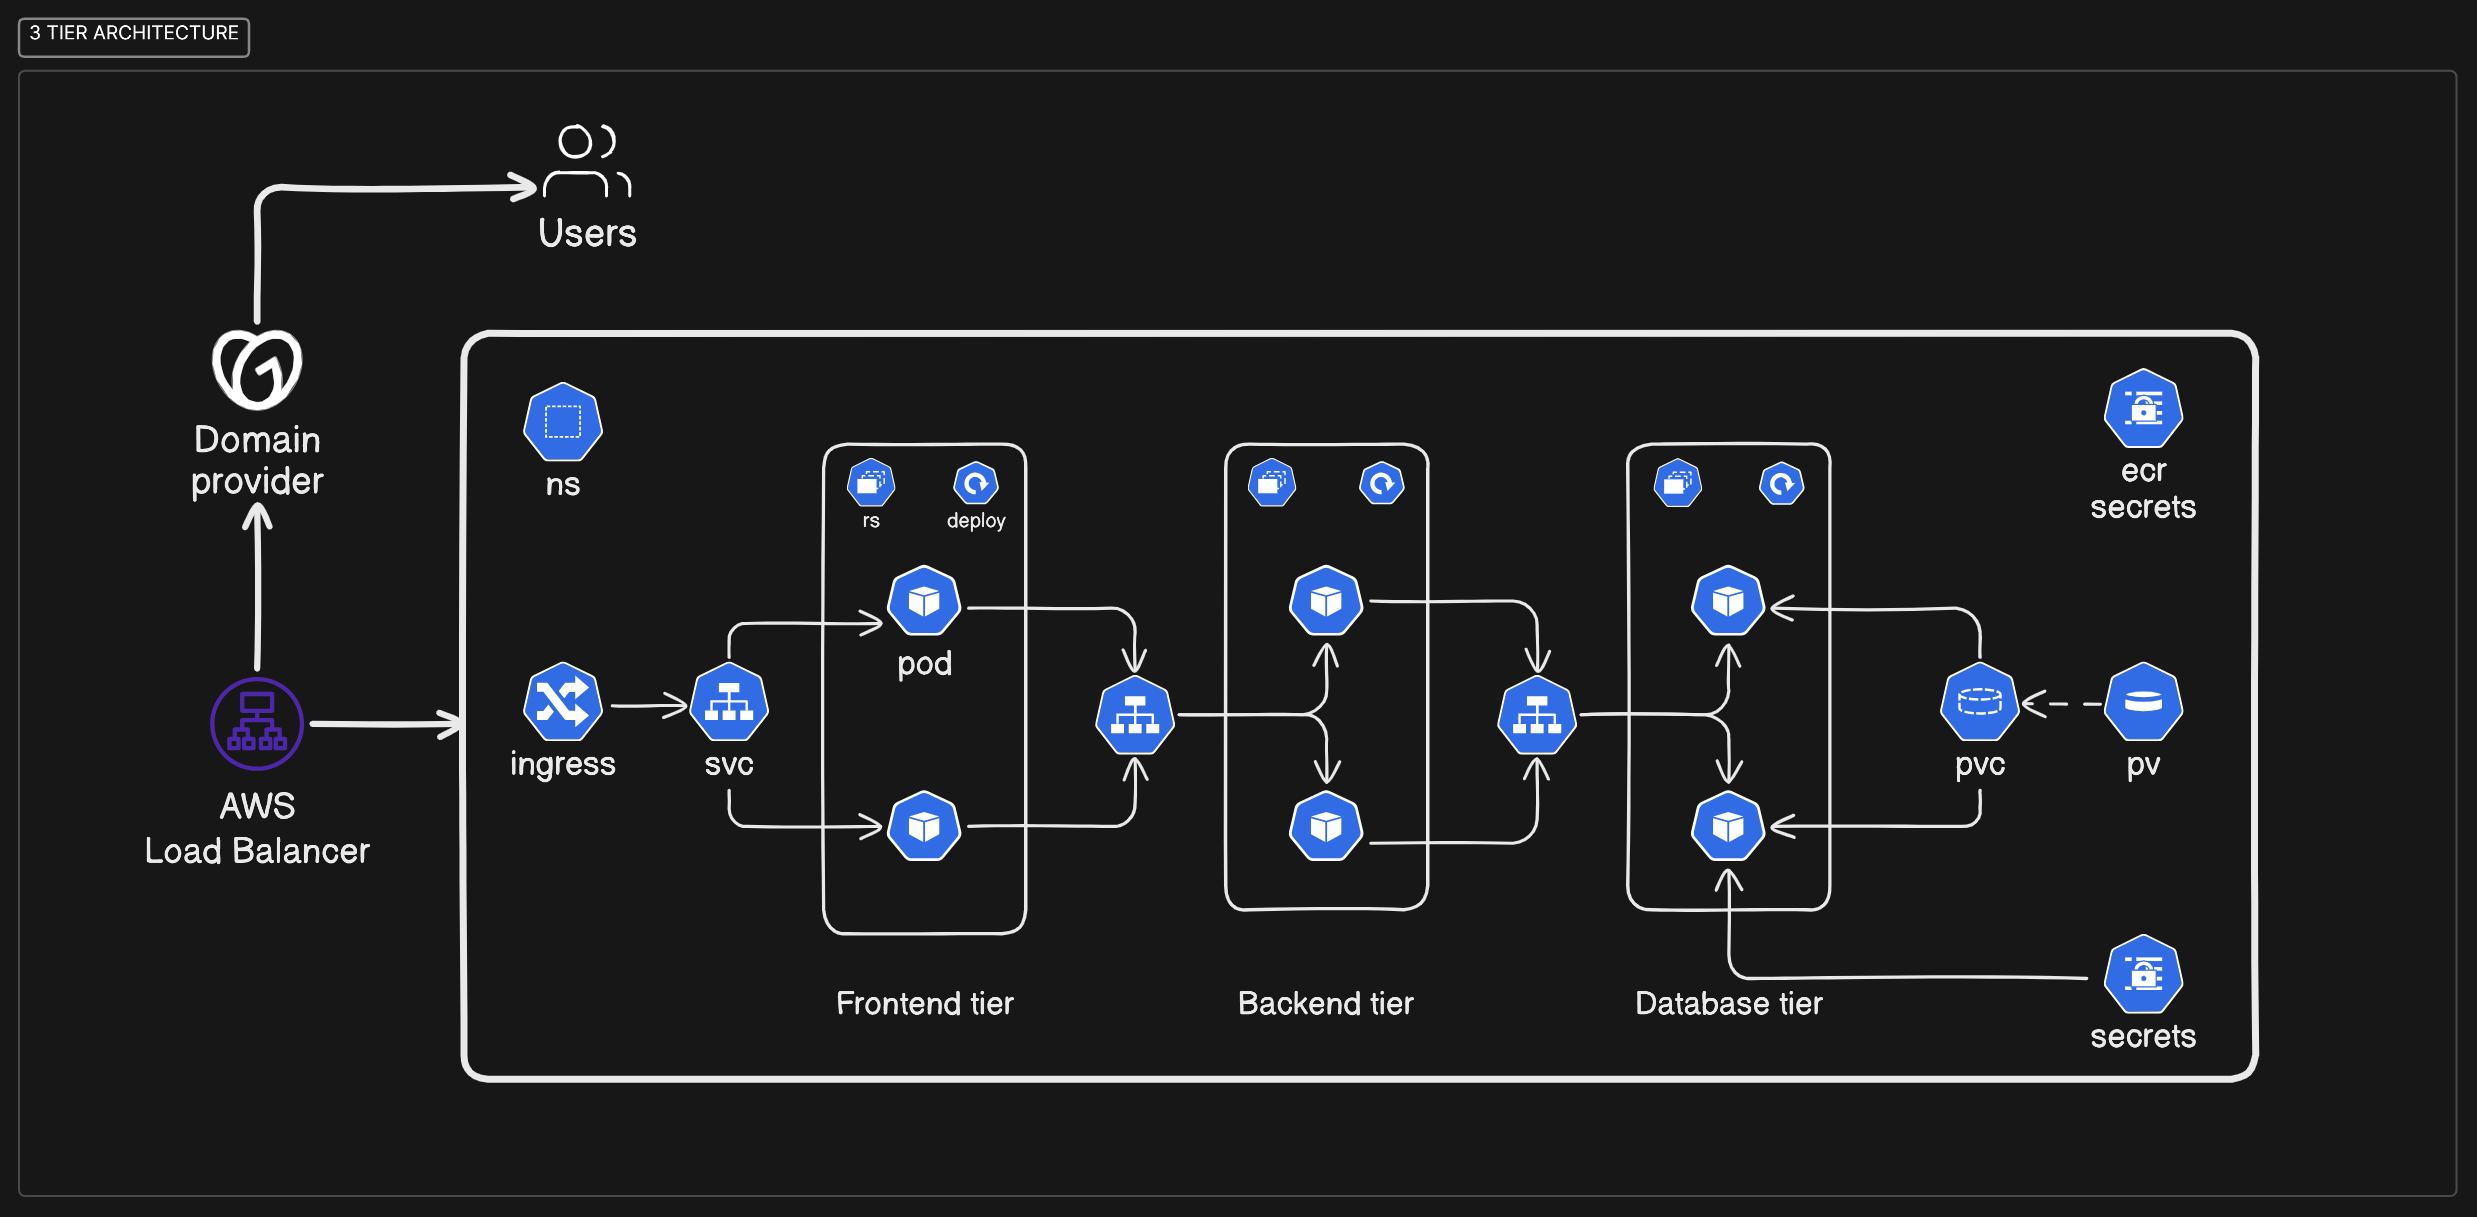
What is a Three-tier application?
A three-tier application splits its functions into three parts: presentation, logic, and data. The presentation layer is the user interface (what you see), the logic layer handles the application's core functions, and the data layer stores all the information. This separation makes it easier to manage, update, and scale each part independently, improving the app's overall performance and reliability.
Step-by-Step guide.
Launch an instance
required instance configuration:
• type : t2.micro
• ami : ubuntu
• allow ssh, http, https traffic
• storage volume 30>=

git clone https://github.com/MalharKt/Three-Tier-App.git
Now build the dockerfile (Frontend and Backend).
Frontend
FROM node:14
WORKDIR /usr/src/app
COPY package*.json ./
RUN npm install
COPY . .
CMD [ "npm", "start" ]
Backend
FROM node:14
WORKDIR /usr/src/app
COPY package*.json ./
RUN npm install
COPY . .
CMD ["node", "index.js"]
Go to aws ecr and create repos for frontend and backend accordingly after that make use of push commands to build, tag and push the images to ecr.
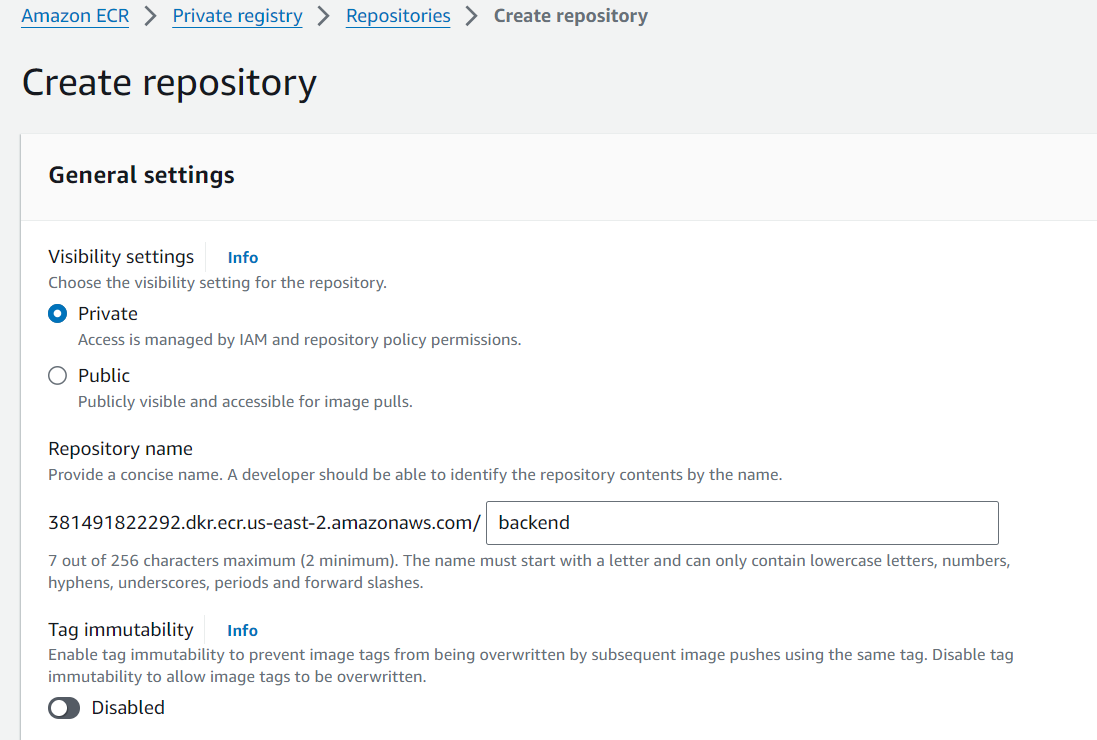
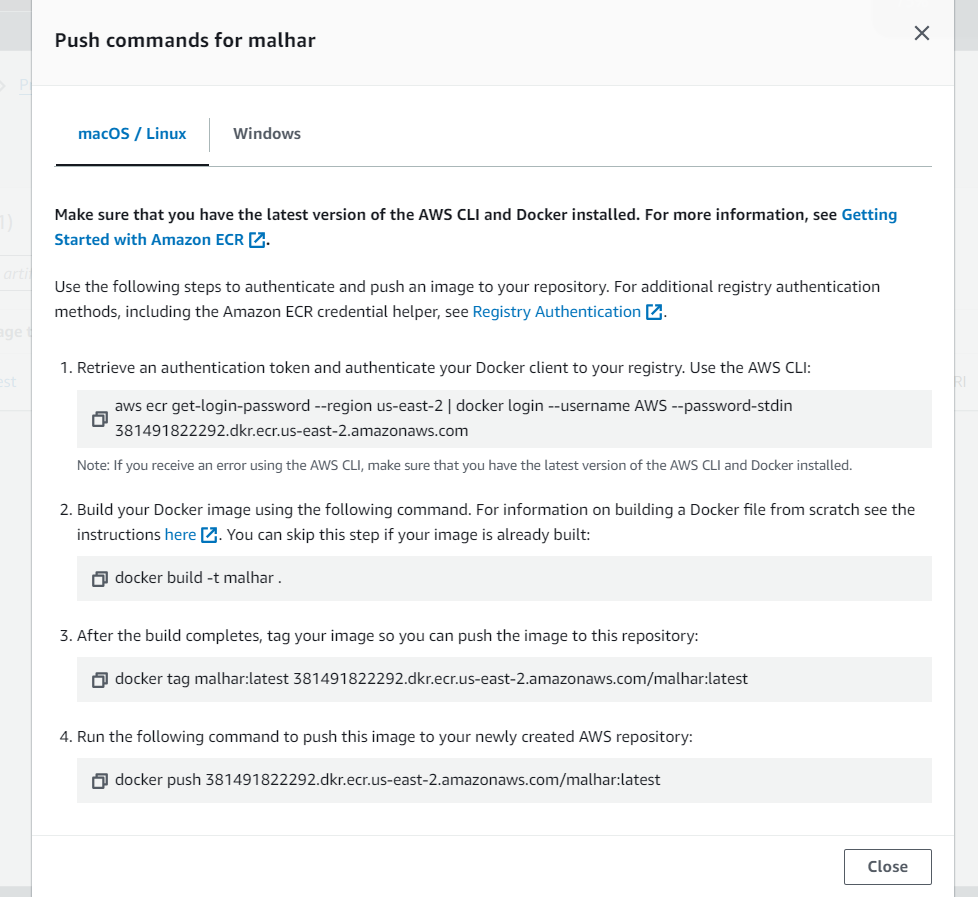
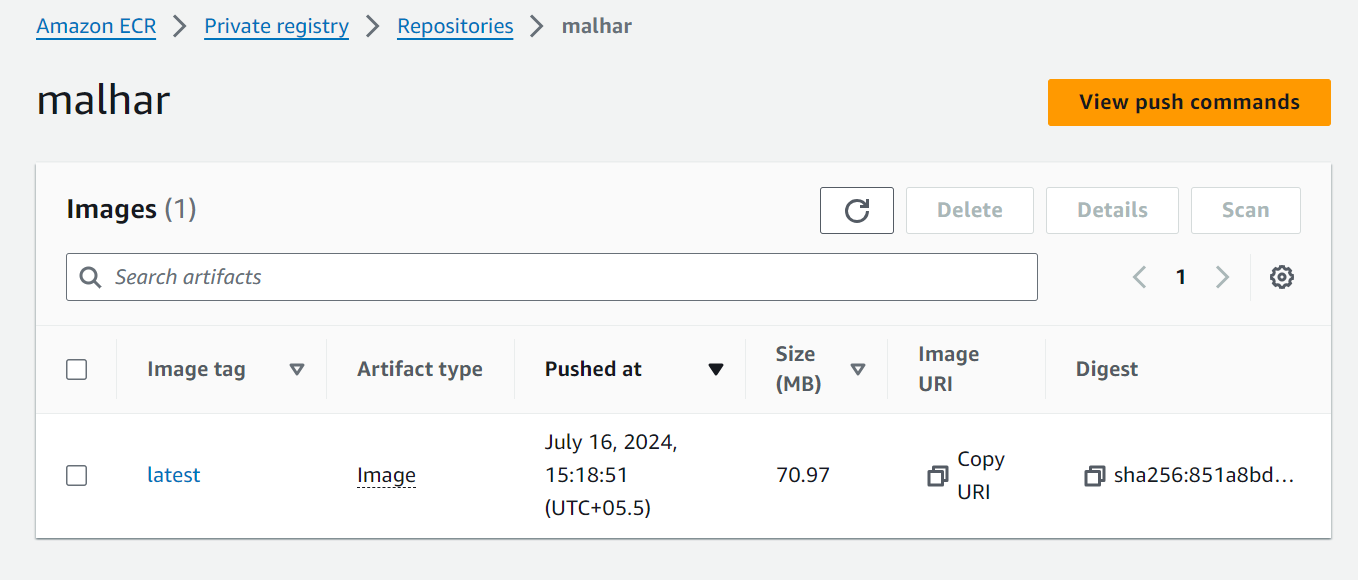
Copy the uri of the image and paste it in the respected deployment (frontend and backend).
Cluster creation guide
make sure you have aws-cli, docker, eksctl, kube-ctl installed
AWS-CLI
curl "https://awscli.amazonaws.com/awscli-exe-linux-x86_64.zip" -o "awscliv2.zip"
sudo apt install unzip
unzip awscliv2.zip
sudo ./aws/install -i /usr/local/aws-cli -b /usr/local/bin --update
aws configure
DOCKER
sudo apt-get update
sudo apt install docker.io
docker ps
sudo chown $USER /var/run/docker.sock
EKS-CTL
curl --silent --location "https://github.com/weaveworks/eksctl/releases/latest/download/eksctl_$(uname -s)_amd64.tar.gz" | tar xz -C /tmp
sudo mv /tmp/eksctl /usr/local/bin
eksctl version
KUBE-CTL
curl -o kubectl https://amazon-eks.s3.us-west-2.amazonaws.com/1.19.6/2021-01-05/bin/linux/amd64/kubectl
chmod +x ./kubectl
sudo mv ./kubectl /usr/local/bin
kubectl version --short --client
To create cluster follow the commands:
eksctl create cluster --name three-tier-cluster --region us-west-2 --node-type t2.medium --nodes-min 2 --nodes-max 2
kubectl get nodes
write your sub domain followed by the path in the env section of frontend deployment file.


also create the service file in the frontend and backend folders and apply the configuration.
after that create the configuration for the mongo database

• check all the pods are running

• check all the deployments are available.

• check all the service are correctly configured.

• Now to check that out frontend is running hit the public ip of instance you see the frontend page
• To ensure the backend and database is configured correctly apply the following command

Our application is internally accessible but to expose it to the internet we need to install the ingress.
(Make sure to replace your cluster name and region)
• Install AWS Load Balancer.
curl -O https://raw.githubusercontent.com/kubernetes-sigs/aws-load-balancer-controller/v2.5.4/docs/install/iam_policy.json
aws iam create-policy --policy-name AWSLoadBalancerControllerIAMPolicy --policy-document file://iam_policy.json
eksctl utils associate-iam-oidc-provider --region=us-west-2 --cluster=three-tier-cluster --approve
eksctl create iamserviceaccount --cluster=three-tier-cluster --namespace=kube-system --name=aws-load-balancer-controller --role-name AmazonEKSLoadBalancerControllerRole --attach-policy-arn=arn:aws:iam::626072240565:policy/AWSLoadBalancerControllerIAMPolicy --approve --region=us-west-2
• Deploy AWS Load Balancer Controller.
sudo snap install helm --classic
helm repo add eks https://aws.github.io/eks-charts
helm repo update eks
helm install aws-load-balancer-controller eks/aws-load-balancer-controller -n kube-system --set clusterName=my-cluster --set serviceAccount.create=false --set serviceAccount.name=aws-load-balancer-controller
kubectl get deployment -n kube-system aws-load-balancer-controller
kubectl apply -f full_stack_lb.yaml
if you see this it means your lb controller is successfully deployed.

• Create the ingress find the value section and replace your subdomain and apply the file.

Finally configure your domain accordingly from your provider.
Check if the app is deployed
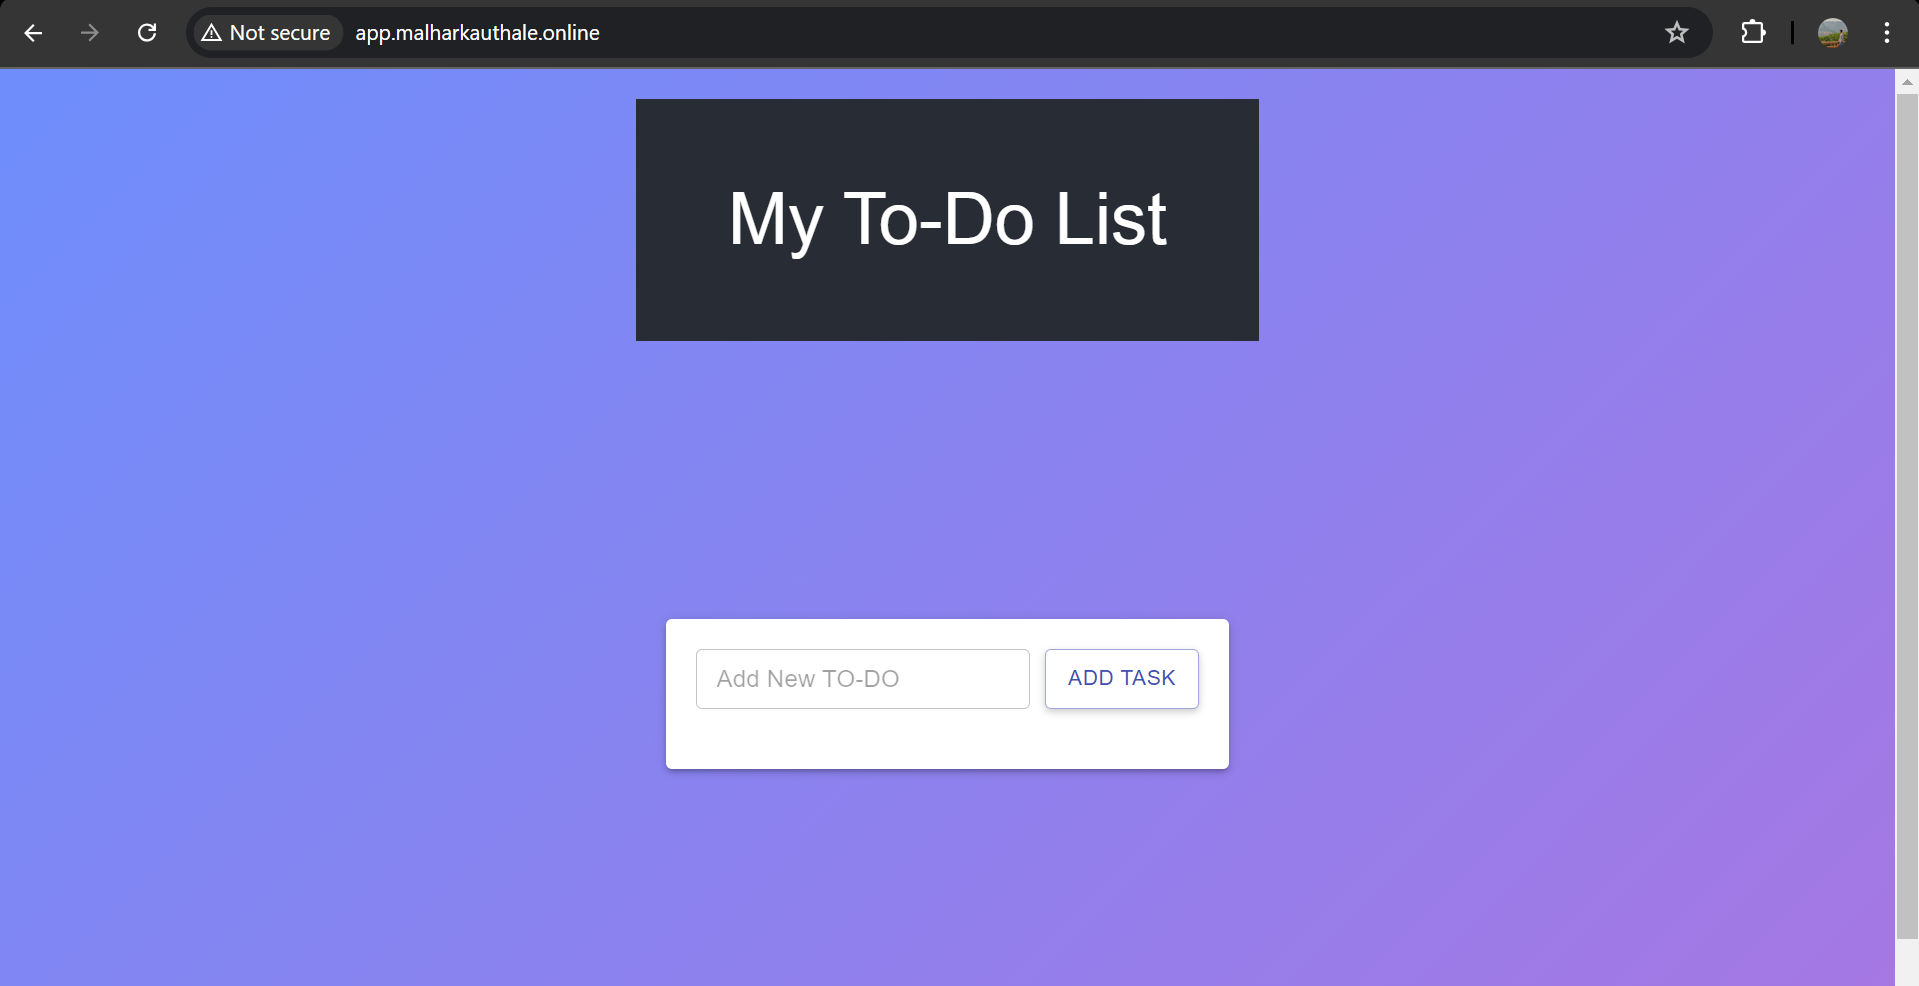
Congrats! 🎉 The app is live and kicking! 🚀
Let's verify if the application is functioning correctly. By adding some tasks in it.
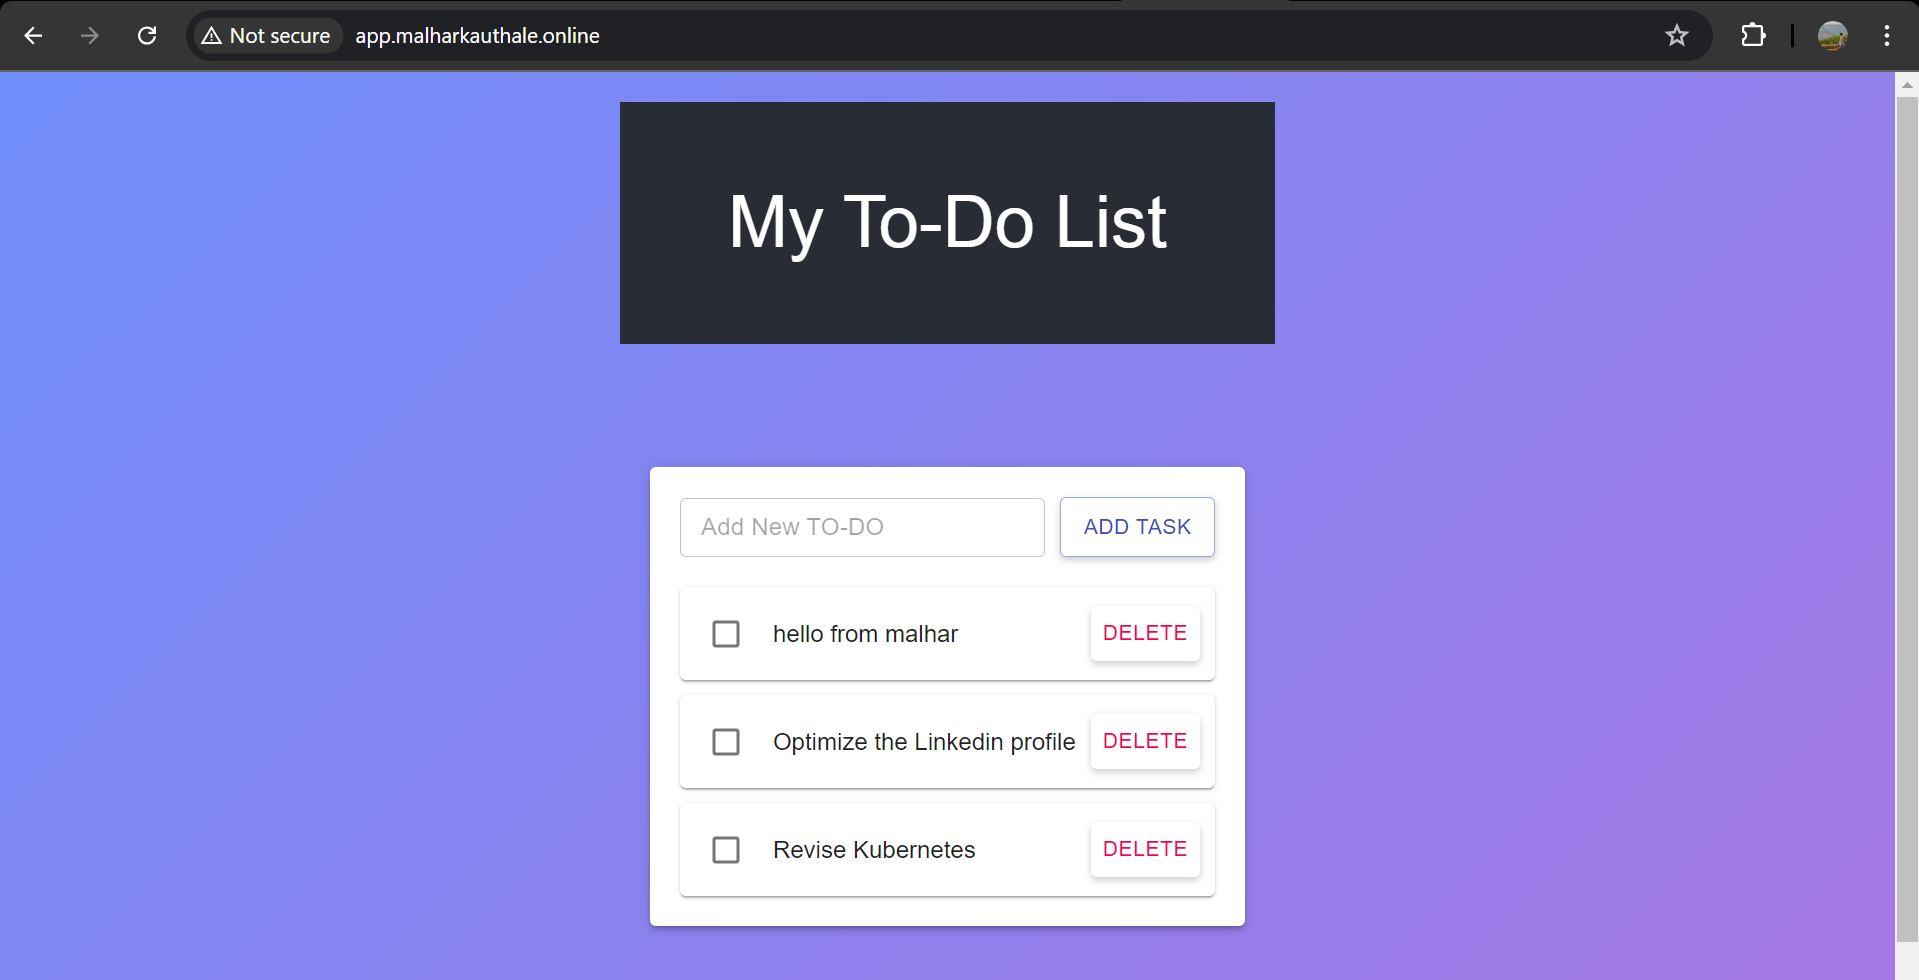
The application is functional, We nailed it! 🥳👏
Happy Learning.. 🚀👨💻👩💻
Subscribe to my newsletter
Read articles from Malhar Kauthale directly inside your inbox. Subscribe to the newsletter, and don't miss out.
Written by

Malhar Kauthale
Malhar Kauthale
Aspiring Cloud DevOps Engineer ♾️ | AWS Enthusiast ☁️ | Python & Shell Scripting 🐍 | Docker 🐳 | Terraform 🛠️ | Kubernetes ☸️ | Web Development 🌐 | Automation & Troubleshooting 🤖🔍 | Always exploring the latest in DevOps tools and practices.