Quickstart Guide to Develop on ZKSync : Develop a Gasless Transaction DApp (Chapter 5)
 Ridho Izzulhaq
In the previous chapter, we discussed paymasters by creating a program that enables NFT minting processes where the gas fees are covered by custom ERC-20 via paymaster. We also developed a DApp for checking the availability of a specified NFT in a user's account. In this chapter, we will delve into gasless transactions on zkSync, starting with sending data between accounts, interacting with smart contracts, and building a frontend that implements these feature.
But first, what exactly is a gasless transaction?
A gasless transaction refers to a transaction where the user does not directly pay the gas fees required for processing the transaction on the blockchain. Instead, these fees are typically covered by a third party, such as a relayer or the dApp itself, allowing users to interact with the blockchain without needing to hold or spend any native cryptocurrency for gas.
What are the benefits and use cases of gasless transactions? There are several benefits and use cases which are of course many more!
Example of Benefits:
Improved User Experience: By eliminating the need for users to manage and pay gas fees, gasless transactions make blockchain interactions smoother and more accessible, especially for non-technical users.
Increased Adoption: Reducing the complexity and cost associated with transactions can encourage broader adoption of decentralized applications (dApps), as users are more likely to engage when the process is simplified.
Onboarding New Users: Gasless transactions can be particularly beneficial for onboarding new users who may not yet own any cryptocurrency. By removing the initial barrier of acquiring tokens to pay for gas, dApps can attract a wider audience.
Example of Use Cases:
Gaming: In blockchain-based games, gasless transactions allow players to enjoy seamless gameplay without interruptions caused by fee management. For example, players can trade in-game assets or mint NFTs without worrying about gas fees.
Social Media dApps: Gasless transactions can be used in decentralized social media platforms, where users can like, share, or post content without needing to pay gas fees, making the experience similar to traditional social media.
Token Airdrops and Promotions: Projects can use gasless transactions to distribute tokens or rewards to users without requiring them to cover transaction costs. This approach is often used in marketing campaigns to drive user engagement.
And many more 👏 🥳
Why zkSync is Ideal for Developing Applications with Gasless Transactions?

Interested in building gasless applications? zkSync is the great platform for developers because of its native support for account abstraction and Paymasters, features that are hard to find on other blockchains. Unlike other platforms where developers have to deal with complex setups to cover gas fees or rely on third-party relayers, zkSync makes this simple. Paymasters can automatically cover fees or let users pay with ERC20 tokens, something that’s much more difficult to implement on Ethereum and other blockchains. Plus, zkSync uses zk-rollups to reduce transaction costs, making it easier and more affordable to offer gasless experiences.
Let's Code Our First Gasless Program!

At this initial part, we will build our Paymaster program and send data from one account to another through the Paymaster. Please use the repository from Alchemy (Thanks to Alchemy for the open repo👏)
Let's break down the Paymaster code by opening the Paymaster contract (contracts/Paymaster.sol). For deployment, ensure that IPaymaster.sol and Transaction.sol are in the same folder. Use the Nethermind plugin in Remix IDE, as explored in the first chapter for the deployment process.
// SPDX-License-Identifier: MIT
pragma solidity 0.8.25;

import "./IPaymaster.sol";

address constant BOOTLOADER = address(0x8001);

contract Paymaster is IPaymaster {
    function validateAndPayForPaymasterTransaction(
        bytes32,
        bytes32,
        Transaction calldata _transaction
    ) external payable returns (bytes4 magic, bytes memory context) {
      require(BOOTLOADER == msg.sender);

      context = "";
      magic = PAYMASTER_VALIDATION_SUCCESS_MAGIC;

      uint requiredEth = _transaction.gasLimit * _transaction.maxFeePerGas;

      (bool success, ) = BOOTLOADER.call{ value: requiredEth }("");
      require(success);
    }

    receive() external payable {}
}
The validateAndPayForPaymasterTransaction function validates the transaction and covers its fees. It checks if the transaction meets the required criteria, such as ensuring that the ERC20 token allowance is sufficient. If the transaction uses an ERC20 token, it first confirms the user's allowance and then transfers the tokens to the Paymaster. Next, it sends the equivalent ETH to the bootloader to cover the transaction fee, allowing the user to avoid direct gas payments.
So, what is bootloader?
In zkSync, the bootloader is a specialized smart contract responsible for managing and validating transactions. It ensures transactions are processed correctly and handles the transfer of ETH to cover gas fees, enabling seamless gasless transactions. More on : https://docs.zksync.io/build/start-coding/quick-start/paymasters-introduction

Fill the Paymaster with funds
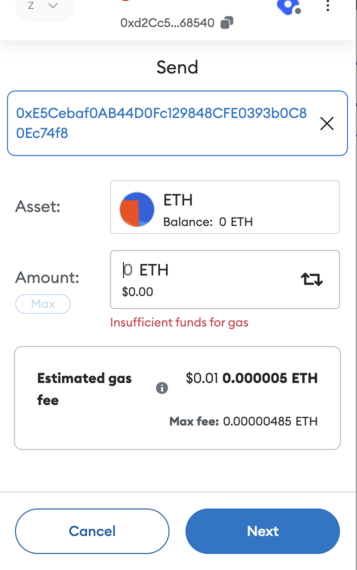
The deployed Paymaster address (Paymaster.sol) will be used to cover users transaction gas fees. Please send funds to the Paymaster address to cover these gas fees.
Interact with Our First Gasless Transaction
In the directory that we cloned, open scripts/gasSponsor.js :
const { Provider, types, Wallet } = require("zksync-ethers");
const { getPaymasterParams } = require("zksync-ethers/build/paymaster-utils");

const provider = Provider.getDefaultProvider(types.Network.Sepolia);

const wallet = new Wallet(
  "your wallet private key", // <-- this private key does not need gas, as it will be sponsored
  provider
);

console.log(wallet.address);

const PAYMASTER = "your deployed paymaster";

(async () => {
  const paymasterParams = getPaymasterParams(PAYMASTER, {
    type: "General",
    innerInput: new Uint8Array(),
  });

  const tx = await wallet.sendTransaction({
    data: "0x1337",
    to: "field with another address",
    customData: {
      paymasterParams,
    },
  });
  console.log(tx);
})();
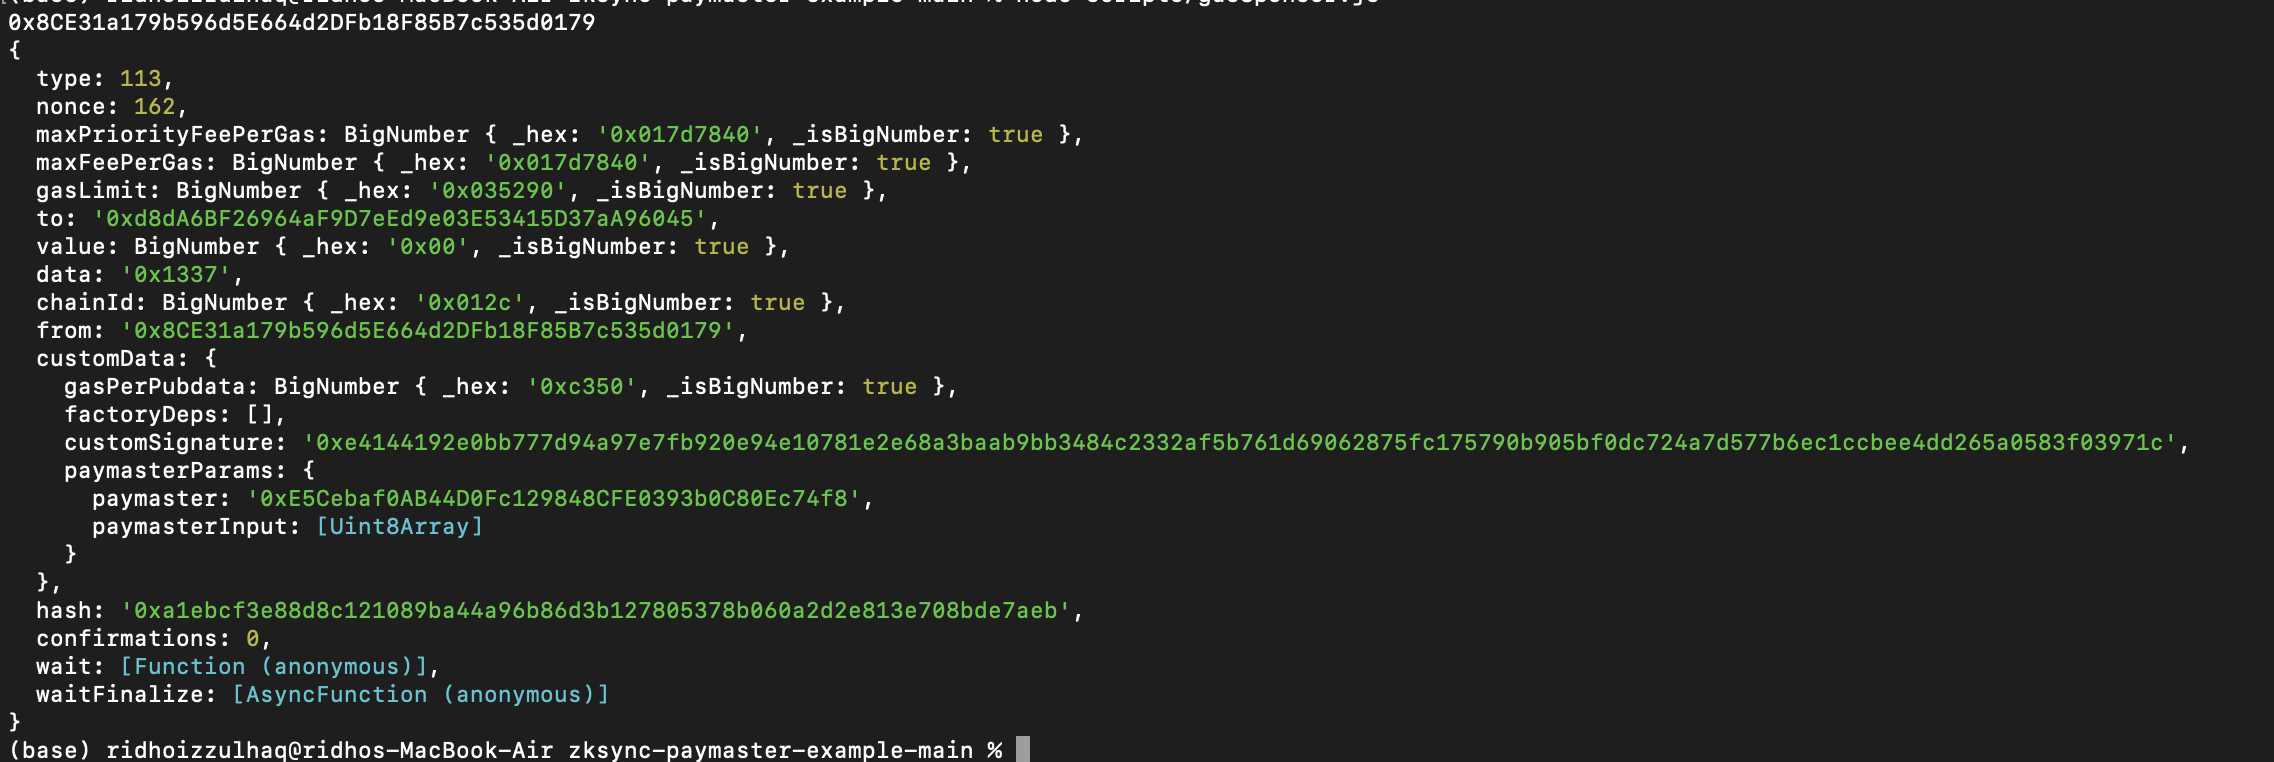
Change the private key with your account private key, account is usage for initiate transaction, const PAYMASTER = "your deployed paymaster"; field with your paymaster. type: "General" is type of Paymaster (prefer for gasless) on ZkSync, and
const tx = await wallet.sendTransaction({ data: "0x1337", to: "field with another address", customData: { paymasterParams,
Sending transaction to: "field with another address" with 0x1337 as data.
output :

Using Gasless on Smart Contract :
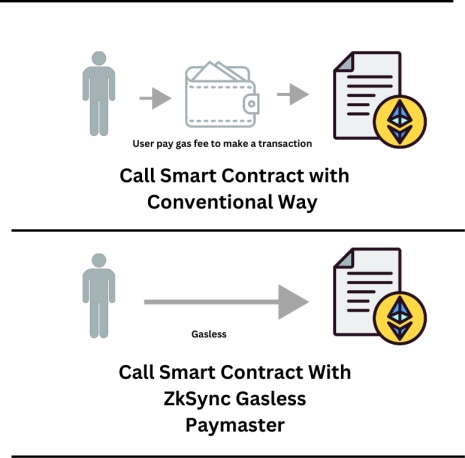
In the previous part, we built a program that allows sending data from one account to another using gasless transactions. To apply this in transactions within a smart contract, follow these steps:
Let's write this smart contract :
// SPDX-License-Identifier: MIT
pragma solidity ^0.8.0;

contract SimpleStore {
    string private message;

    // Function to set the message
    function setMessage(string memory newMessage) public {
        message = newMessage;
    }

    // Function to get the message
    function getMessage() public view returns (string memory) {
        return message;
    }
}
The SimpleStore contract has a message variable to store a message and two functions: setMessage to update the message and getMessage to retrieve the stored message. Same as the previous step, for deployment, please use the Nethermind plugin for remix that we explored in the first chapter.
Script :
In the previous script, we sent data to another address; we can modify that script to interact with a contract, specifically to write data using the setMessage function via Gasless Paymaster,
please import these packages :
const { Provider, types, Wallet } = require("zksync-ethers");
const { getPaymasterParams } = require("zksync-ethers/build/paymaster-utils");
const { ethers } = require("ethers");

const provider = Provider.getDefaultProvider(types.Network.Sepolia);
For the account used, please enter the private key :
const wallet = new Wallet(
  "enter your your private key", //
  provider );
console.log("Wallet Address:", wallet.address);
Inserting ABI and contract address for enabling interaction with a specific smart contract. A contract instance is created using ethers.Contract, allowing direct function calls on the smart contract :
const simpleStoreABI = [
  {
    "inputs": [],
    "name": "getMessage",
    "outputs": [
      {
        "internalType": "string",
        "name": "",
        "type": "string"
      }
    ],
    "stateMutability": "view",
    "type": "function"
  },
  {
    "inputs": [
      {
        "internalType": "string",
        "name": "newMessage",
        "type": "string"
      }
    ],
    "name": "setMessage",
    "outputs": [],
    "stateMutability": "nonpayable",
    "type": "function"
  }
];

const simpleStoreAddress = "0xF30eB8A430d22d69CF6C749a4CEb1Af971CAa2a2"; // <-- The actual contract address
// The ABI and address define the structure and location of the contract, allowing specific function calls on the contract.

const simpleStoreContract = new ethers.Contract(simpleStoreAddress, simpleStoreABI, wallet);
// Creating a contract instance allows us to call functions like setMessage and getMessage directly on the contract.
uses populateTransaction to dynamically prepare transaction data based on the smart contract function call :
const txData = await simpleStoreContract.populateTransaction.setMessage("Hello zkSync!");
Adding custom paymaster parameters to the dynamically generated transaction data ensures that the transaction is correctly structured for gasless execution :
txData.customData = {
    paymasterParams: getPaymasterParams(PAYMASTER, {
        type: "General",
        innerInput: new Uint8Array(),
    }),
};
for waiting for the transaction to be confirmed and then retrieves the updated state of the contract, providing verification that the transaction is successful :
try {
    const tx = await wallet.sendTransaction(txData);
    const receipt = await tx.wait();
    const message = await simpleStoreContract.getMessage();

    console.log("Transaction confirmed in block:", receipt.blockNumber);
    console.log("Current Message:", message);
} catch (error) {
    console.error("Error:", error.message); // <-- Handles and logs any errors that occur during the process
}
Complete Code :
const { Provider, types, Wallet } = require("zksync-ethers");
const { getPaymasterParams } = require("zksync-ethers/build/paymaster-utils");
const { ethers } = require("ethers");

const provider = Provider.getDefaultProvider(types.Network.Sepolia);

const wallet = new Wallet(
  "enter your private key",
  provider
);

console.log("Wallet Address:", wallet.address);

const PAYMASTER = "use your paymaster address"; // Replace with your actual paymaster address

const simpleStoreABI = [
  {
    "inputs": [],
    "name": "getMessage",
    "outputs": [
      {
        "internalType": "string",
        "name": "",
        "type": "string"
      }
    ],
    "stateMutability": "view",
    "type": "function"
  },
  {
    "inputs": [
      {
        "internalType": "string",
        "name": "newMessage",
        "type": "string"
      }
    ],
    "name": "setMessage",
    "outputs": [],
    "stateMutability": "nonpayable",
    "type": "function"
  }
];

const simpleStoreAddress = "contract address";

// Create a contract instance
const simpleStoreContract = new ethers.Contract(simpleStoreAddress, simpleStoreABI, wallet);

(async () => {
  try {
    // Test calling the getMessage function

    // Create transaction data to call setMessage with the new message
    const txData = await simpleStoreContract.populateTransaction.setMessage("Hello zkSync!");

    // Add custom data for paymaster sponsorship
    txData.customData = {
      paymasterParams: getPaymasterParams(PAYMASTER, {
        type: "General",
        innerInput: new Uint8Array(), // Adjust this if your paymaster needs specific parameters
      }),
    };

    // Send the transaction with paymaster integration
    const tx = await wallet.sendTransaction(txData);

    console.log("Transaction Hash:", tx.hash);

    // Wait for the transaction to be confirmed
    const receipt = await tx.wait();
    const message = await simpleStoreContract.getMessage();


    console.log("Transaction confirmed in block:", receipt.blockNumber);
    console.log("Current Message:", message);
  } catch (error) {
    console.error("Error:", error.message);
  }
})();
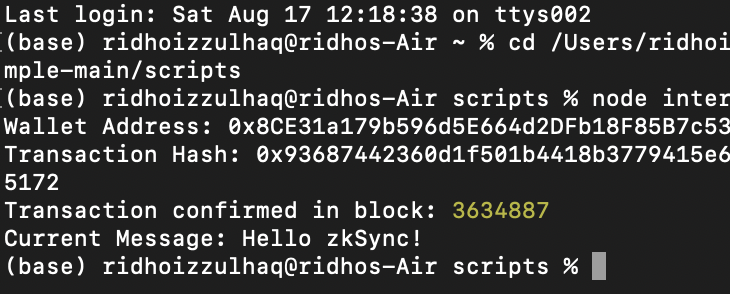
Output :
🤩 Implementing Gasless Transactions in Web App :
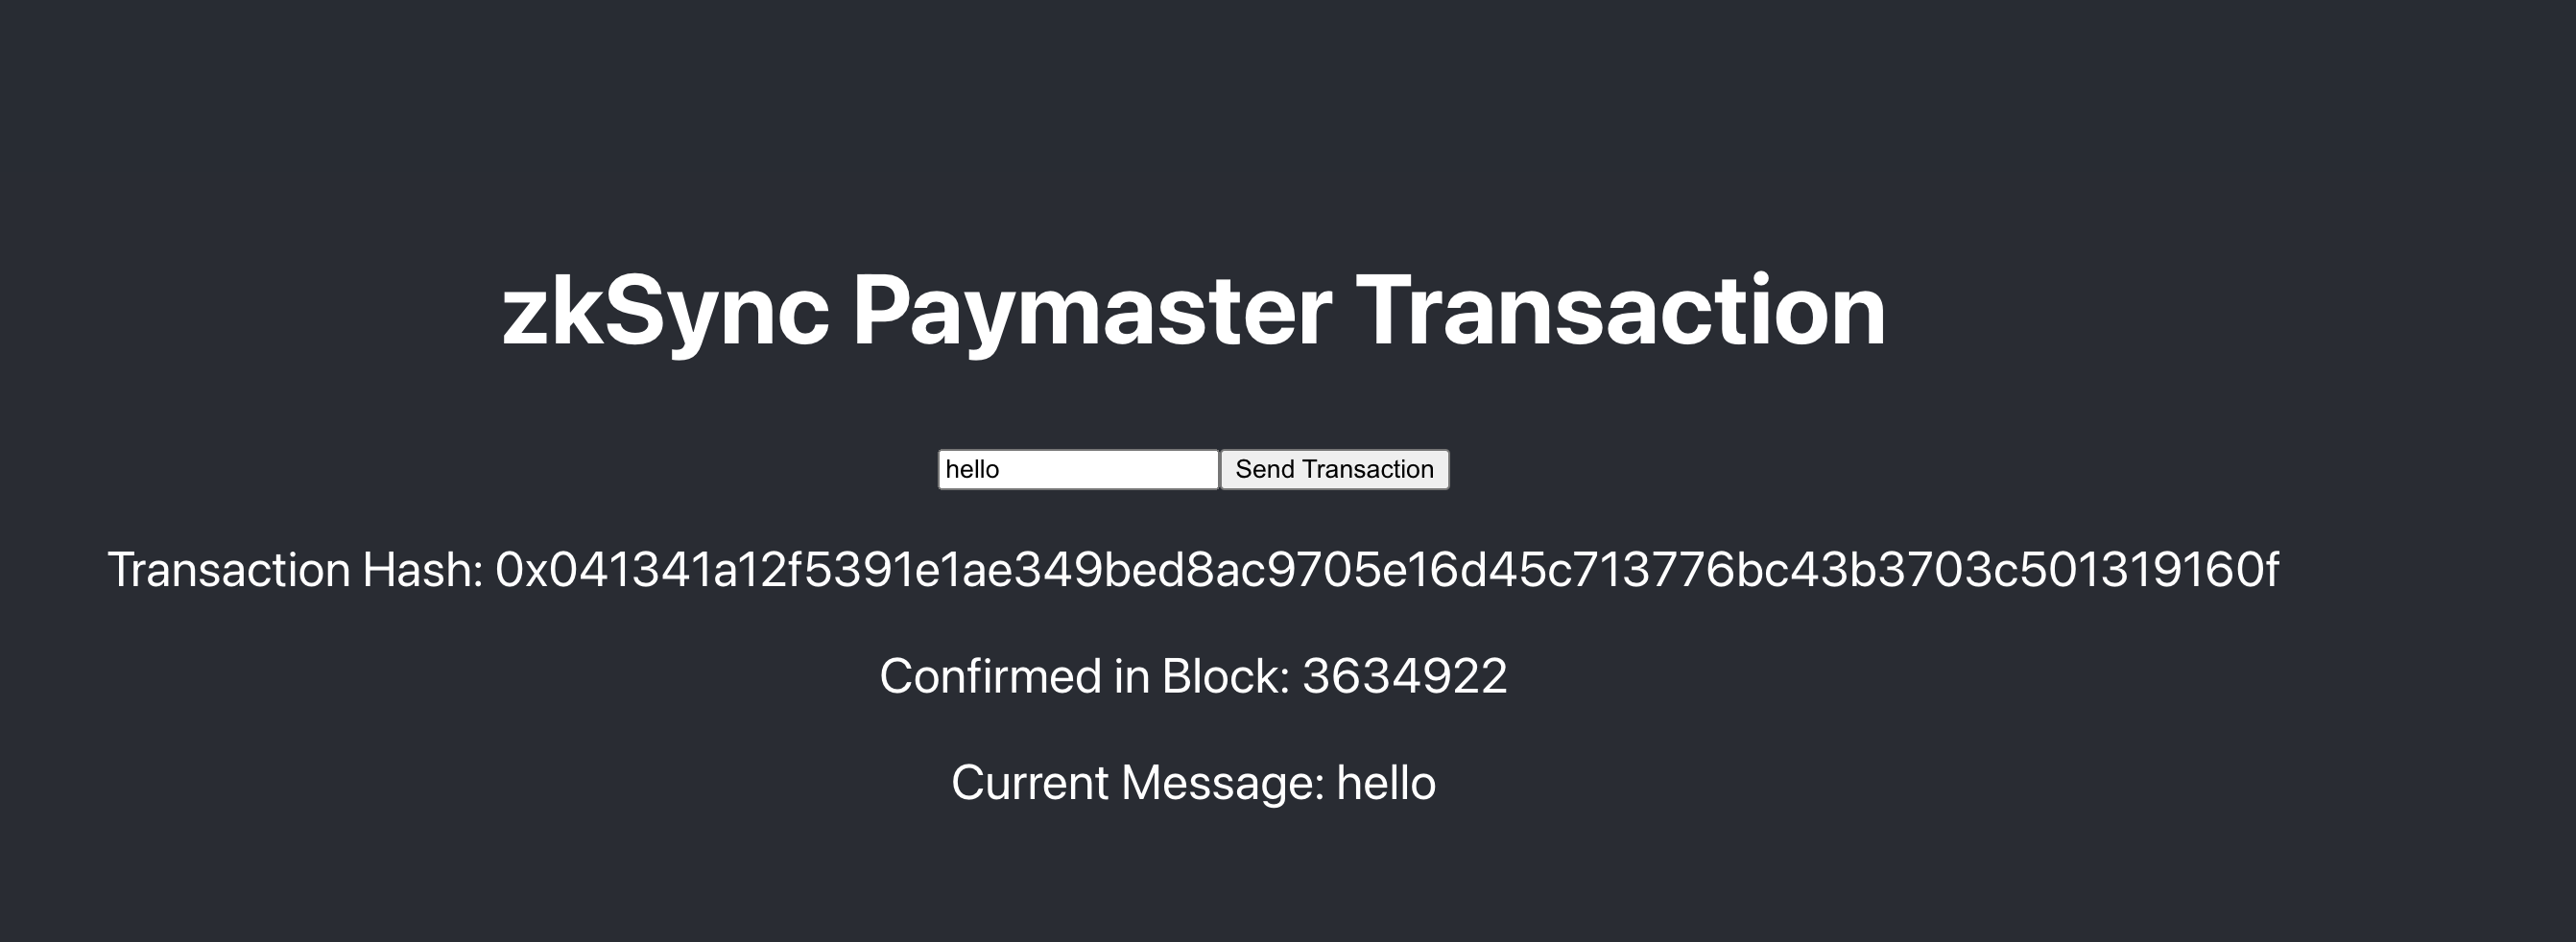
In the previous two parts, we discussed how to implement a paymaster to send data to another account and interact with a smart contract. In this part, we will create a frontend for a simple dApp to interact with the smart contract, but with 'setMessage' function that can be written dynamically via frontend.
Source Code :
https://github.com/ridhoizzulhaq/zkstore
Create new React Project :
npx create-react-app zkstore
install the zksync-ethers library along with its peer dependency:npm install zksync-ethers@5 ethers@5
Create file (src/PaymasterTransaction.js) :
Import Packages :
import React, { useState, useEffect } from 'react';
import { ethers } from 'ethers';
import { Provider, Wallet, types } from 'zksync-ethers';
import { getPaymasterParams } from 'zksync-ethers/build/paymaster-utils';
Imports necessary libraries and modules: React for UI components, ethers for blockchain interaction, and zksync-ethers for zkSync network functionalities, including the getPaymasterParams utility.
Component State Initialization :
const [message, setMessage] = useState('');
const [currentMessage, setCurrentMessage] = useState('');
const [transactionHash, setTransactionHash] = useState('');
const [blockNumber, setBlockNumber] = useState('');
const [provider, setProvider] = useState(null);
const [wallet, setWallet] = useState(null);
Declare various state variables to manage the input message, current message from the contract, transaction hash, block number, provider, and wallet instance.
Defines Specific Paymaster, ABI, Storage Address:
  const PAYMASTER = 'enter with your paymaster address';
  const simpleStoreAddress = 'enter with your storage address';

  const SIMPLE_STORE_ABI = [
    {
      inputs: [],
      name: 'getMessage',
      outputs: [
        {
          internalType: 'string',
          name: '',
          type: 'string',
        },
      ],
      stateMutability: 'view',
      type: 'function',
    },
    {
      inputs: [
        {
          internalType: 'string',
          name: 'newMessage',
          type: 'string',
        },
      ],
      name: 'setMessage',
      outputs: [],
      stateMutability: 'nonpayable',
      type: 'function',
    },
  ];
Defines paymaster address, the smart contract address, and the ABI of the smart contract, which specifies the functions available in the contract.
Initialization of Provider and Wallet
const PRIVATE_KEY = ''; // Replace with your private key

useEffect(() => {
  const initializeProviderAndWallet = () => {
    const newProvider = Provider.getDefaultProvider(types.Network.Sepolia);
    const newWallet = new Wallet(PRIVATE_KEY, newProvider);
    setProvider(newProvider);
    setWallet(newWallet);
  };

  initializeProviderAndWallet();
}, []);
hook initializes the provider and wallet when the component mounts. This connects to the ZKSync network and creates a wallet instance using the provided private key. Flow :
Provider Initialization:
TheProvider.getDefaultProvider(types.Network.Sepolia)connects to the ZKSync network (in this case, the Sepolia testnet). This provider is responsible for communicating with the blockchain.Wallet Initialization:
Thenew Wallet(PRIVATE_KEY, newProvider)creates a wallet instance using the provided private key. This wallet is connected to the provider, allowing it to send transactions and interact with smart contracts on the blockchain.State Updates:
setProvider(newProvider)andsetWallet(newWallet)update the component's state with the newly created provider and wallet, making them available for other functions.
Transaction Sending Function
const sendTransaction = async () => {
  if (!wallet) {
    alert('Wallet is not initialized');
    return;
  }

  try {
    const simpleStoreContract = new ethers.Contract(simpleStoreAddress, SIMPLE_STORE_ABI, wallet);

    // Create transaction data to call setMessage with the new message
    const txData = await simpleStoreContract.populateTransaction.setMessage(message);

    // Add custom data for paymaster sponsorship
    txData.customData = {
      paymasterParams: getPaymasterParams(PAYMASTER, {
        type: 'General',
        innerInput: new Uint8Array(), // Adjust this if your paymaster needs specific parameters
      }),
    };

    // Send the transaction with paymaster integration
    const tx = await wallet.sendTransaction(txData);

    setTransactionHash(tx.hash);

    // Wait for the transaction to be confirmed
    const receipt = await tx.wait();
    setBlockNumber(receipt.blockNumber);

    // Fetch the updated message
    const updatedMessage = await simpleStoreContract.getMessage();
    setCurrentMessage(updatedMessage);
  } catch (error) {
    console.error('Error:', error.message);
  }
};
Responsible for sending a transaction to the blockchain that interacts with a smart contract. It uses a paymaster to sponsor the gas fees, making the transaction gasless for the user. Here are the steps performed :
Wallet Check:
It first checks if the wallet has been initialized. If not, it alerts the user and stops the process.Contract Interaction:
Theethers.Contractinstance is created using the contract address (simpleStoreAddress), the contract's ABI (SIMPLE_STORE_ABI), and the wallet. This instance allows the function to interact with the smart contract.Transaction Data Creation:
simpleStoreContract.populateTransaction.setMessage(message)prepares the data needed for the transaction to call thesetMessagefunction on the smart contract with the user's input (message).Paymaster Integration:
Custom data for the paymaster is added to the transaction. This includes thepaymasterParams, which may require specific parameters depending on the paymaster's requirements. In this example, a general type with an emptyUint8Arrayis used.Transaction Sending:
The transaction is sent usingwallet.sendTransaction(txData). The wallet signs and broadcasts the transaction to the blockchain.Transaction Confirmation and Fetch Updated Data:
The function waits for the transaction to be confirmed usingtx.wait(), after which it updates the component's state with the transaction hash and block number. Finally, it callssimpleStoreContract.getMessage()to fetch the updated message from the smart contract, updating the state with the new message.
Breakdown for the Frontend Integration :
return (
  <div>
    <h1>zkSync Paymaster Transaction</h1>
    <div>
      <input
        type="text"
        placeholder="Enter your message"
        value={message}
        onChange={(e) => setMessage(e.target.value)}
      />
      <button onClick={sendTransaction}>Send Transaction</button>
    </div>
    {transactionHash && (
      <div>
        <p>Transaction Hash: {transactionHash}</p>
        <p>Confirmed in Block: {blockNumber}</p>
        <p>Current Message: {currentMessage}</p>
      </div>
    )}
  </div>
);
The JSX code defines the UI elements:
A text input field to enter the message (
setMessage).A button to trigger the
sendTransactionfunction.Displays transaction details like the transaction hash, block number, and the current message retrieved from the smart contract after the transaction is confirmed.
Complete Code :
import React, { useState, useEffect } from 'react';
import { ethers } from 'ethers';
import { Provider, Wallet, types } from 'zksync-ethers';
import { getPaymasterParams } from 'zksync-ethers/build/paymaster-utils';

const PaymasterTransaction = () => {
  const [message, setMessage] = useState('');
  const [currentMessage, setCurrentMessage] = useState('');
  const [transactionHash, setTransactionHash] = useState('');
  const [blockNumber, setBlockNumber] = useState('');
  const [provider, setProvider] = useState(null);
  const [wallet, setWallet] = useState(null);

  const PAYMASTER = ''; // Replace with your paymaster address
  const simpleStoreAddress = ''; //replace with your storage contract address

  const SIMPLE_STORE_ABI = [
    {
      inputs: [],
      name: 'getMessage',
      outputs: [
        {
          internalType: 'string',
          name: '',
          type: 'string',
        },
      ],
      stateMutability: 'view',
      type: 'function',
    },
    {
      inputs: [
        {
          internalType: 'string',
          name: 'newMessage',
          type: 'string',
        },
      ],
      name: 'setMessage',
      outputs: [],
      stateMutability: 'nonpayable',
      type: 'function',
    },
  ];

  // Hardcoded private key for testing
  const PRIVATE_KEY = ''; // Replace with your private key

  useEffect(() => {
    const initializeProviderAndWallet = () => {
      const newProvider = Provider.getDefaultProvider(types.Network.Sepolia);
      const newWallet = new Wallet(PRIVATE_KEY, newProvider);
      setProvider(newProvider);
      setWallet(newWallet);
    };

    initializeProviderAndWallet();
  }, []);

  const sendTransaction = async () => {
    if (!wallet) {
      alert('Wallet is not initialized');
      return;
    }

    try {
      const simpleStoreContract = new ethers.Contract(simpleStoreAddress, SIMPLE_STORE_ABI, wallet);

      // Create transaction data to call setMessage with the new message
      const txData = await simpleStoreContract.populateTransaction.setMessage(message);

      // Add custom data for paymaster sponsorship
      txData.customData = {
        paymasterParams: getPaymasterParams(PAYMASTER, {
          type: 'General',
          innerInput: new Uint8Array(), // Adjust this if your paymaster needs specific parameters
        }),
      };

      // Send the transaction with paymaster integration
      const tx = await wallet.sendTransaction(txData);

      setTransactionHash(tx.hash);

      // Wait for the transaction to be confirmed
      const receipt = await tx.wait();
      setBlockNumber(receipt.blockNumber);

      // Fetch the updated message
      const updatedMessage = await simpleStoreContract.getMessage();
      setCurrentMessage(updatedMessage);
    } catch (error) {
      console.error('Error:', error.message);
    }
  };

  return (
    <div>
      <h1>zkSync Paymaster Transaction</h1>
      <div>
        <input
          type="text"
          placeholder="Enter your message"
          value={message}
          onChange={(e) => setMessage(e.target.value)}
        />
        <button onClick={sendTransaction}>Send Transaction</button>
      </div>
      {transactionHash && (
        <div>
          <p>Transaction Hash: {transactionHash}</p>
          <p>Confirmed in Block: {blockNumber}</p>
          <p>Current Message: {currentMessage}</p>
        </div>
      )}
    </div>
  );
};

export default PaymasterTransaction;
Modify App.js :
to run PaymasterTransaction.js inside the application
// src/App.js

import React from 'react';

import './App.css';

import PaymasterTransaction from './PaymasterTransaction';


function App() { return ( <div className="App"> <header className="App-header"> <PaymasterTransaction /> </header> </div> );}
export default App;
Output (Video Demo)
What needs to be improved in the upcoming chapters?
We'll be implementing gasless transactions for more real-world applications and integrating user wallets like MetaMask. Stay tuned for the upcoming chapters!
Closing
Thank you for your support and interest in this series of articles, which is part of a grant program available at Wave Hacks on Akindo.
Structure :
Subscribe to my newsletter
Read articles from Ridho Izzulhaq directly inside your inbox. Subscribe to the newsletter, and don't miss out.
Written by
