How to Set Up dbt Locally and Integrate It with Snowflake
 Vipin
Vipin
Introduction
In today’s data-driven world, the ability to efficiently manage and transform data is crucial. This is where dbt (Data Build Tool) comes in—a powerful tool that enables data teams to transform raw data into clean, documented datasets. In this guide, we'll walk through how to set up dbt on your local machine and integrate it with Snowflake, a leading cloud-based data warehouse.
By the end of this tutorial, you'll have a local dbt setup that connects seamlessly with Snowflake, allowing you to manage your analytics workflows efficiently.
Prerequisites
Before we dive in, make sure you have the following tools installed:
Python: Required to run dbt.
Visual Studi code. Install Python and dbt extension in VS code.
A Snowflake Account: Ensure you have a Snowflake account with sufficient permissions to create roles, warehouses, databases, etc. Refer https://vipinmp.hashnode.dev/snowflake-a-beginners-guide
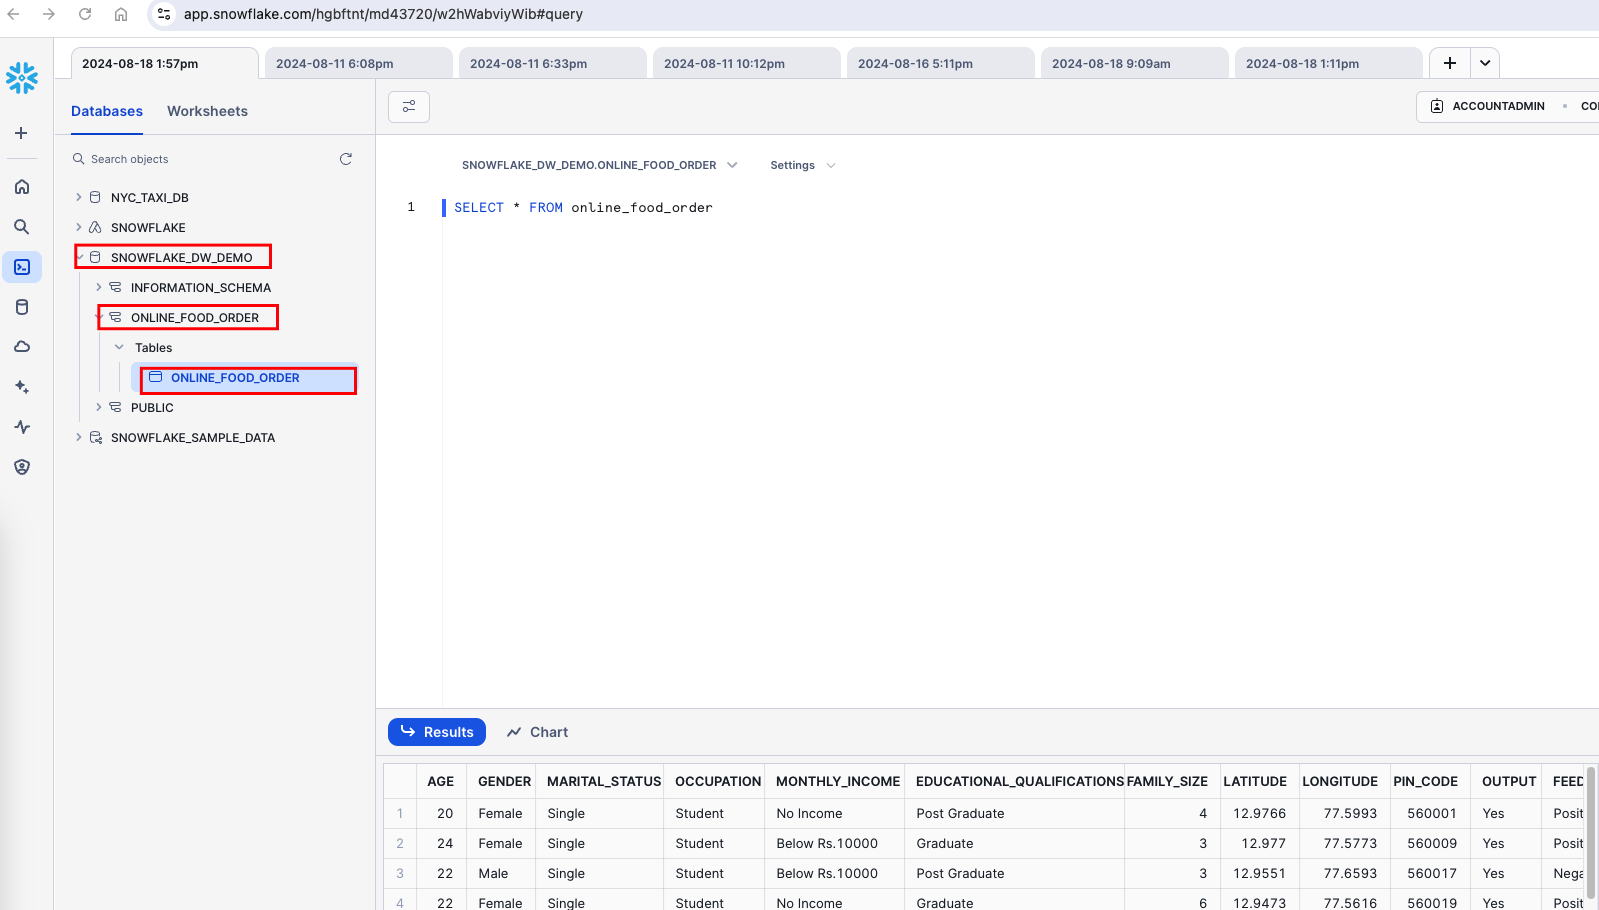
Load Snowflake with a sample dataset. Refer https://vipinmp.hashnode.dev/snowflake-mini-project-online-food-order-data-analysis . Upon successful data load, you will find below table structure in snowflake.
Setting Up the Environment
Confirm pip3 and python3 are correctly installed.
python3 --version
pip3 --versionInstall Python virtual environment
pip3 install virtualenvCreate a folder where you what to setup dbt project.
Create virtual environment and activate it
virtualenv my_dbt_venvsource my_dbt_venv/bin/activate
Install dbt: Use pip to install dbt along with the Snowflake adapter:
pip install dbt-core dbt-snowflakeCreate .dbt folder in the home directory.
Create a New dbt Project: Run the following command to initialize a new dbt project:
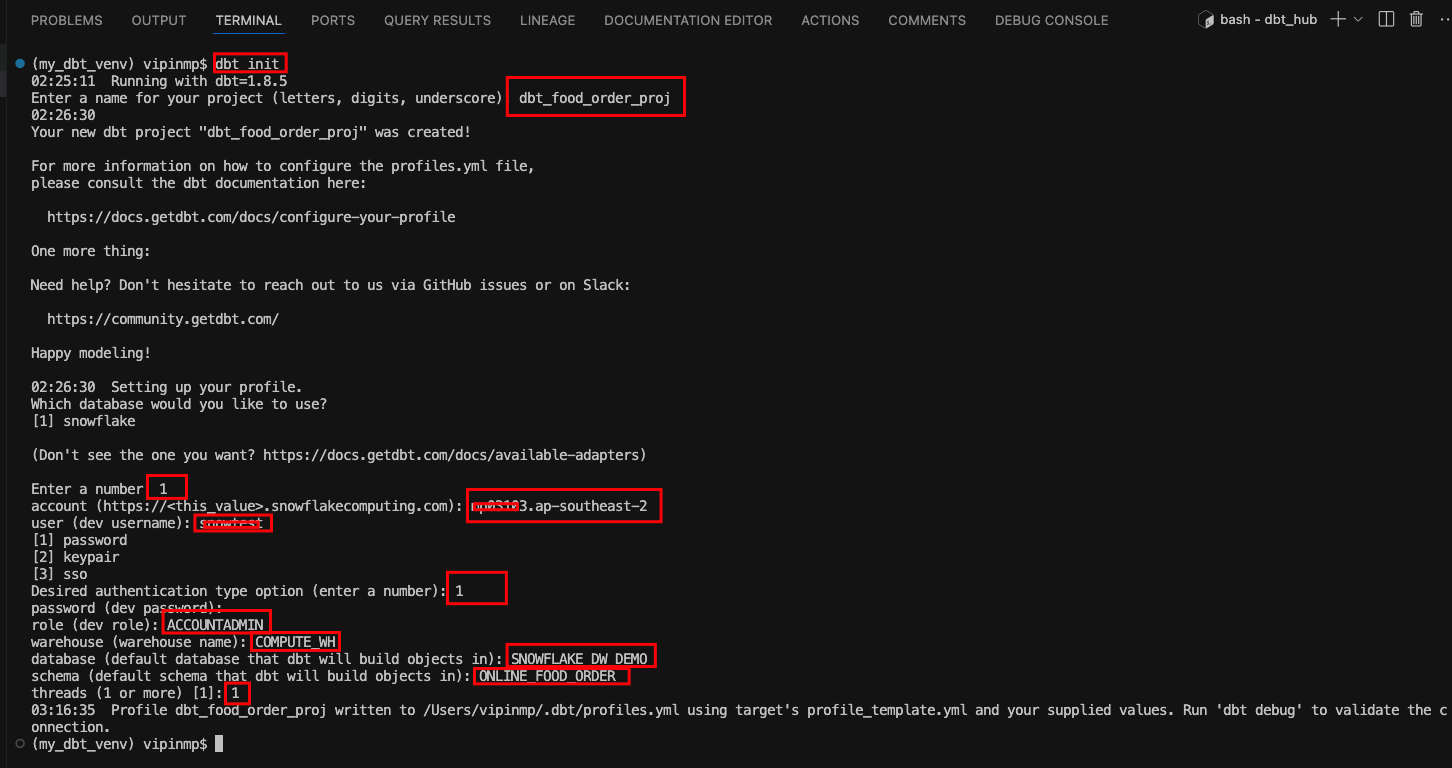
Open the newly created project in VSCODE.
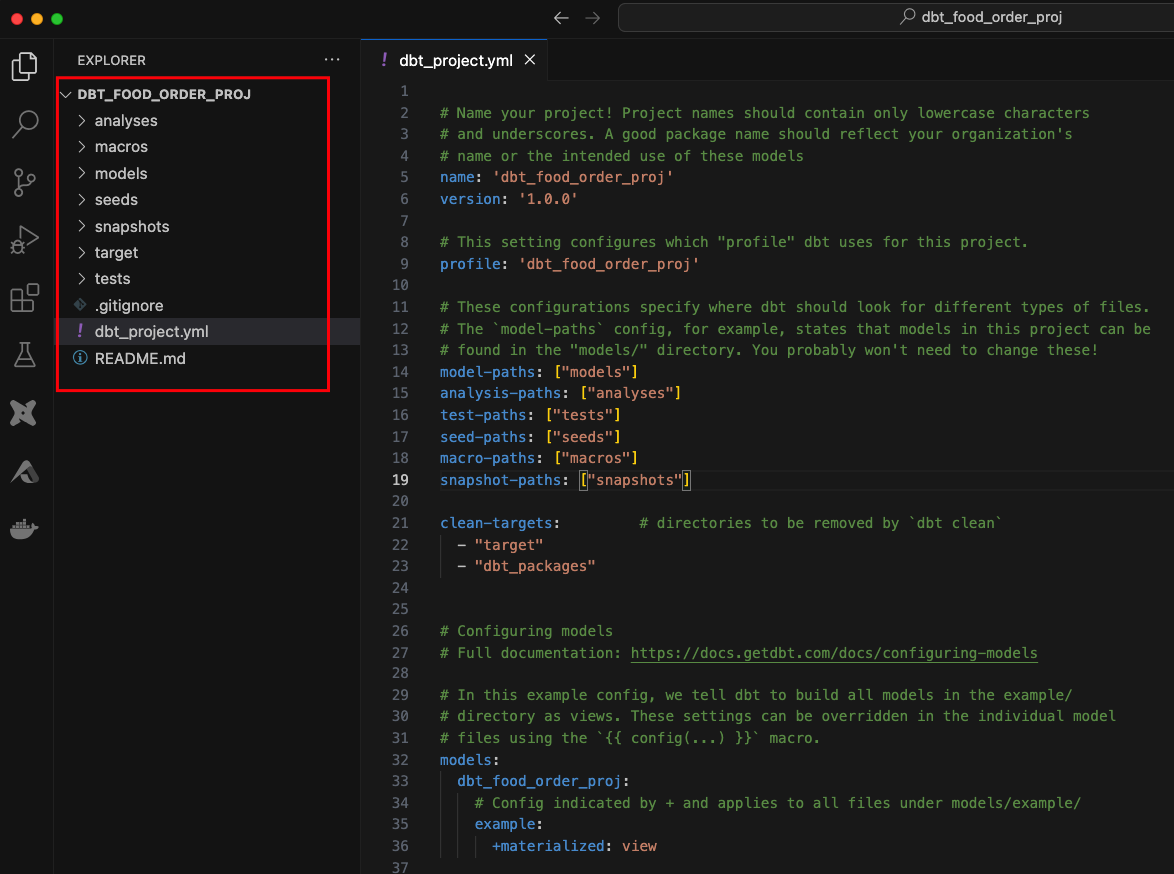
Ensure .dbt/profiles.yml updated with configuration value.
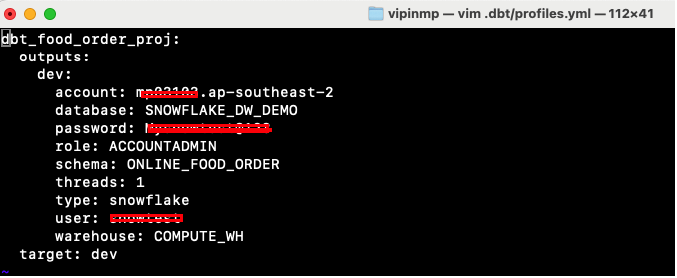
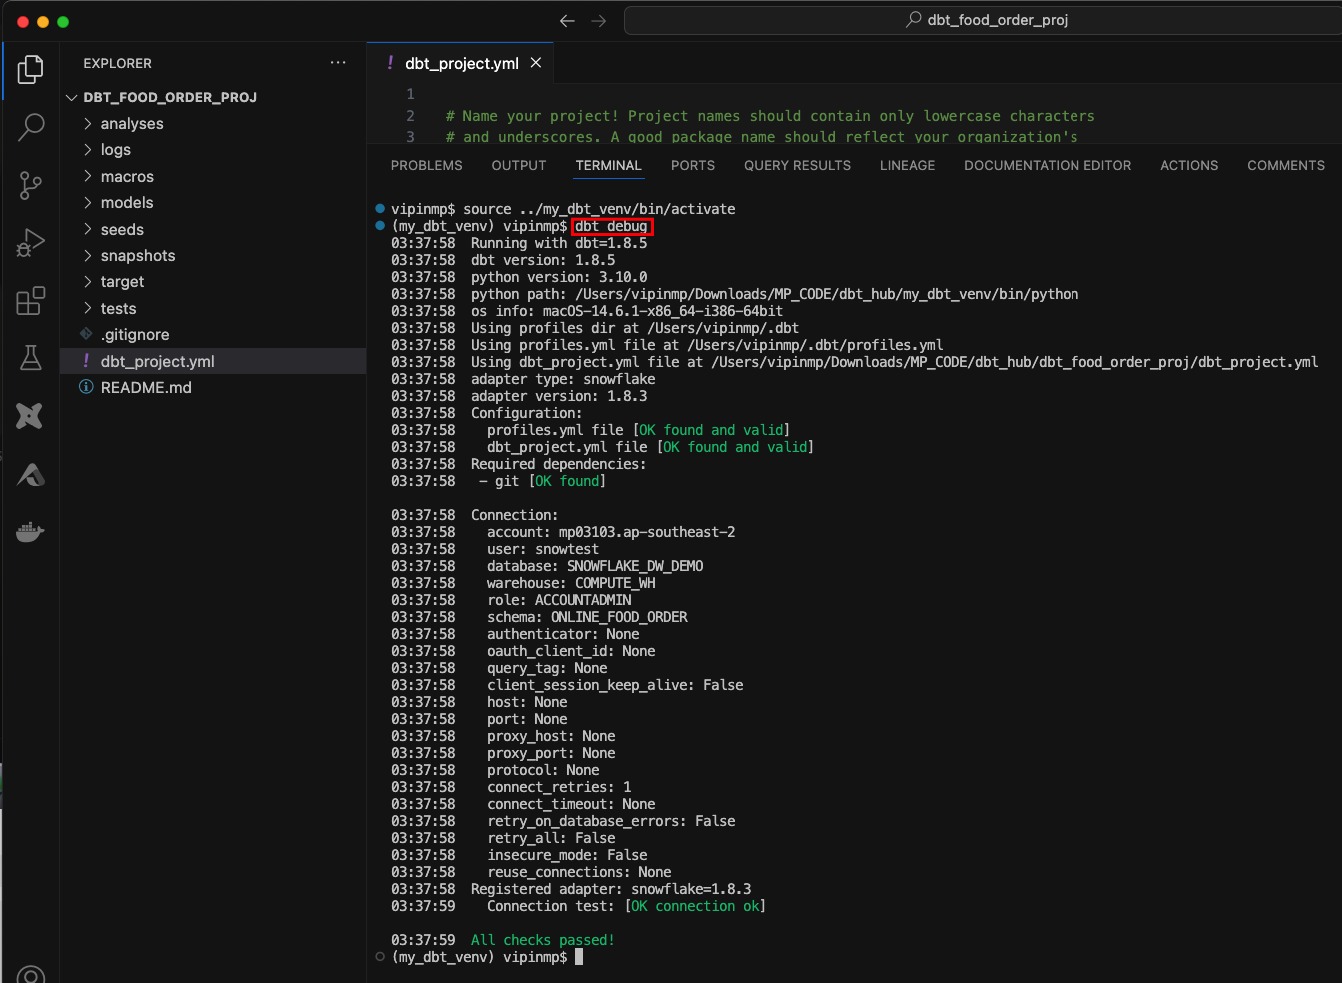
Activate the virtual environment and test the connection using
dbt debugcommand.
Running Your First dbt Model
Creating a Simple Model
Create a SQL Model: Inside the
models/directory, create a new file namedexample_model.sql: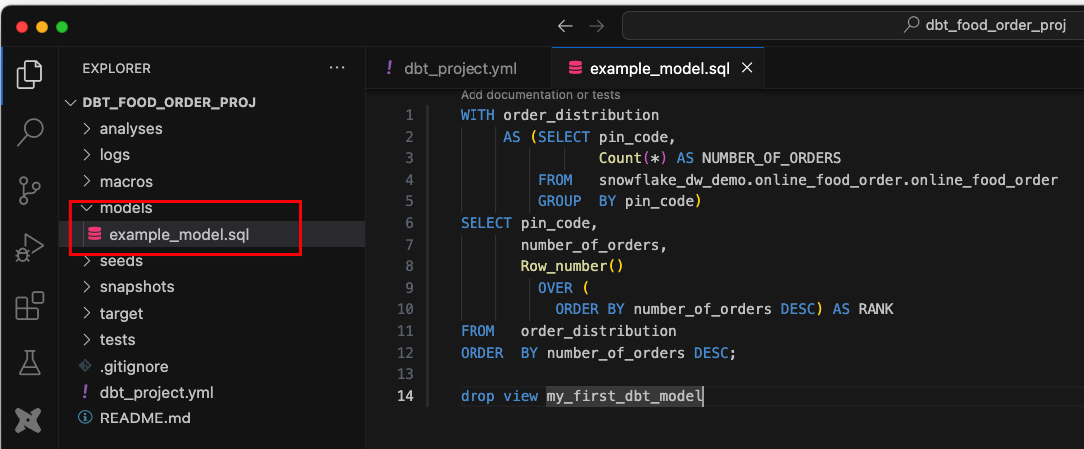
  WITH order_distribution
       AS (SELECT pin_code,
                  Count(*) AS NUMBER_OF_ORDERS
           FROM   snowflake_dw_demo.online_food_order.online_food_order
           GROUP  BY pin_code)
  SELECT pin_code,
         number_of_orders,
         Row_number()
           OVER (
             ORDER BY number_of_orders DESC) AS RANK
  FROM   order_distribution
  ORDER  BY number_of_orders DESC
This SQL query calculates Distribution of Orders by Pin Code.
Running dbt Commands
Run the Model: Execute the following command to run your dbt model:
dbt run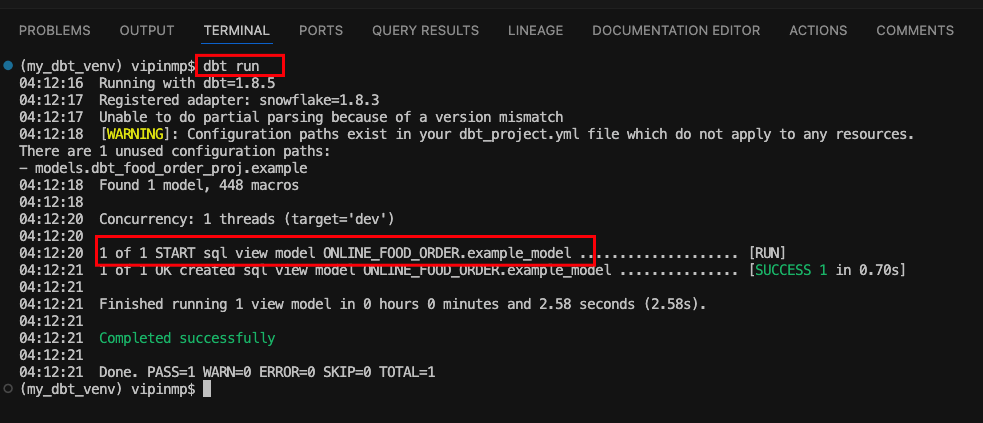
This command compiles the SQL file and runs it against your Snowflake database. Observe that a new view is created with the same name of the model.
Verify the object in snowflake.
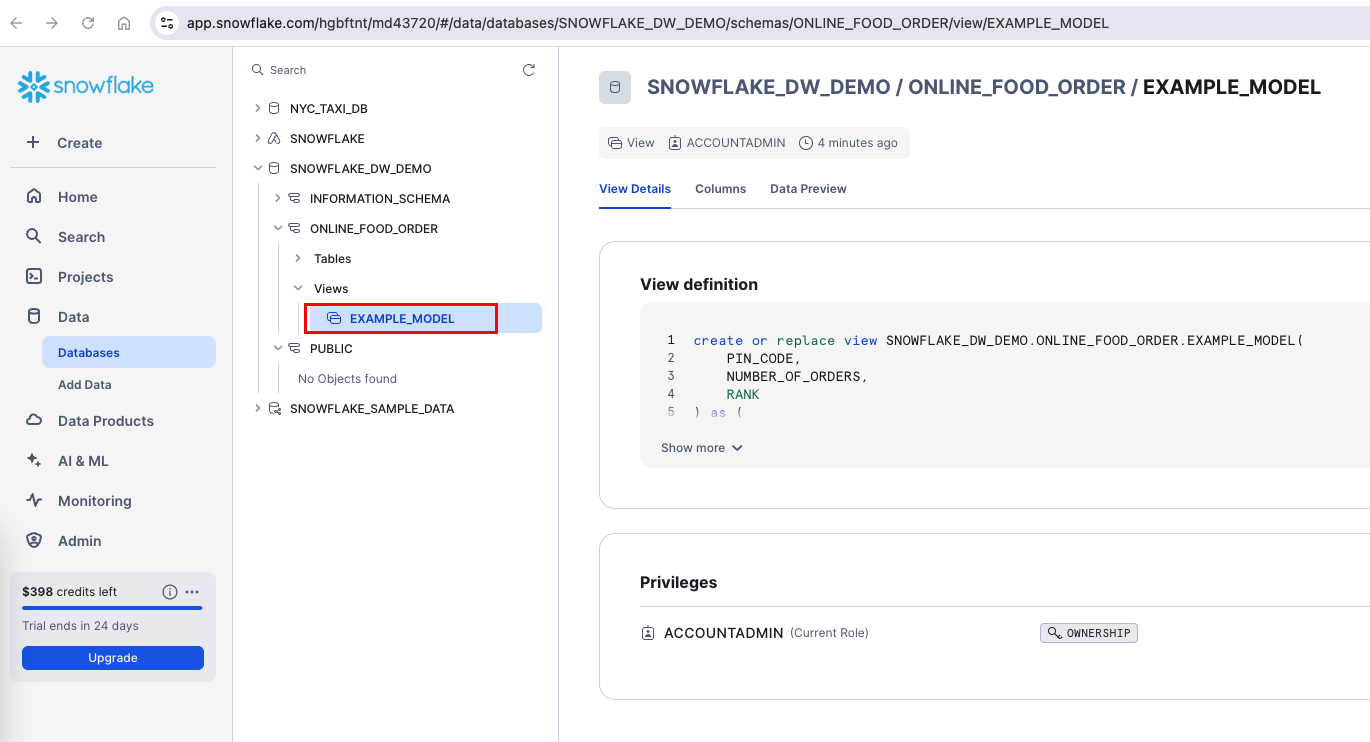
Note: The default materialization for dbt model is view. This can be configured for the table as well with
{{ config(materialized='table') }}option.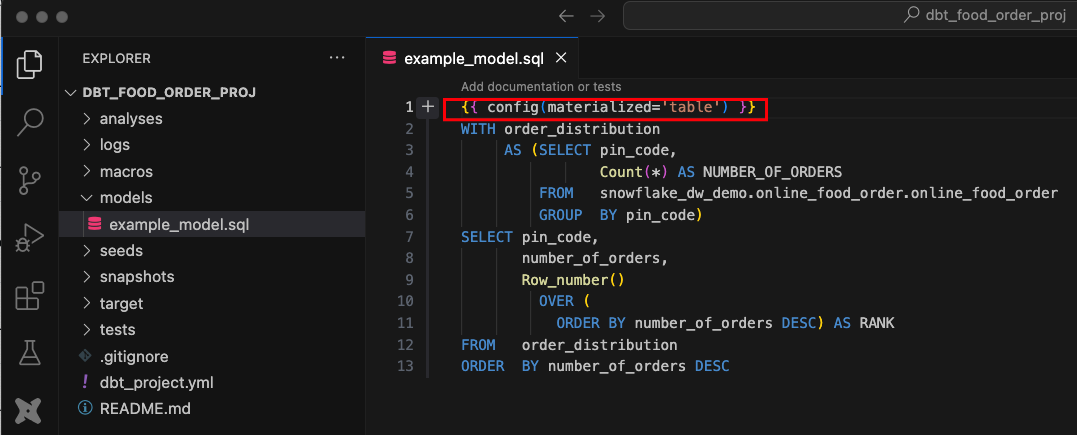
Troubleshooting Common Issues
Connection Errors
Invalid Credentials: Ensure that your Snowflake username and password are correct and that the account field is correctly formatted.
Permission Denied: Make sure the Snowflake user has the necessary permissions to access the warehouse and database.
Model Run Errors
SQL Errors: If you encounter SQL errors, check your model’s SQL syntax and the structure of the source tables.
Data Quality Issues: Ensure that the source data adheres to the expected schema and data types.
Conclusion
In this tutorial, we walked through setting up dbt locally and integrating it with Snowflake. We covered the initial setup, configuring the profiles.yml file, creating and running dbt models, and troubleshooting common issues. With this setup, you can now efficiently manage and transform your data in Snowflake using dbt.
Next Steps
Explore more advanced dbt features, such as macros, snapshots, and incremental models.
Consider integrating dbt with other data platforms or using it in a CI/CD pipeline.
Resources and Further Reading
Subscribe to my newsletter
Read articles from Vipin directly inside your inbox. Subscribe to the newsletter, and don't miss out.
Written by

Vipin
Vipin
Highly skilled Data Test Automation professional with over 10 years of experience in data quality assurance and software testing. Proven ability to design, execute, and automate testing across the entire SDLC (Software Development Life Cycle) utilizing Agile and Waterfall methodologies. Expertise in End-to-End DWBI project testing and experience working in GCP, AWS, and Azure cloud environments. Proficient in SQL and Python scripting for data test automation.