Deploying a Java Web Application in AWS
 Ruchi Lamichhane
The project involves the development and deployment of a Java application using a continuous delivery pipeline. The key components of the pipeline include:
Version Control: Git
Build Automation: Maven
Testing Framework: JUnit
CI/CD Tool: Jenkins
Cloud Platform: AWS
The main objectives of this project were to:
Establish a reliable and scalable development environment for Java.
Automate the build and deployment processes to ensure consistency and efficiency using Maven.
Implement comprehensive testing to maintain code quality.
By the end of this blog, you'll have a solid understanding of how to leverage CI/CD to automate repetitive tasks, ensure code quality, and deliver software more reliably. Join us on this journey to mastering CI/CD for Java applications!
Step1: Jenkins Server Setup in Linux VM
Go to AWS cloud and create EC2 instance like below
Go to resources then instances
launch instance
Name the instance
select os image :ubuntu
use instance type :t2.medium
create key pair and save it in a folder
launch the instance
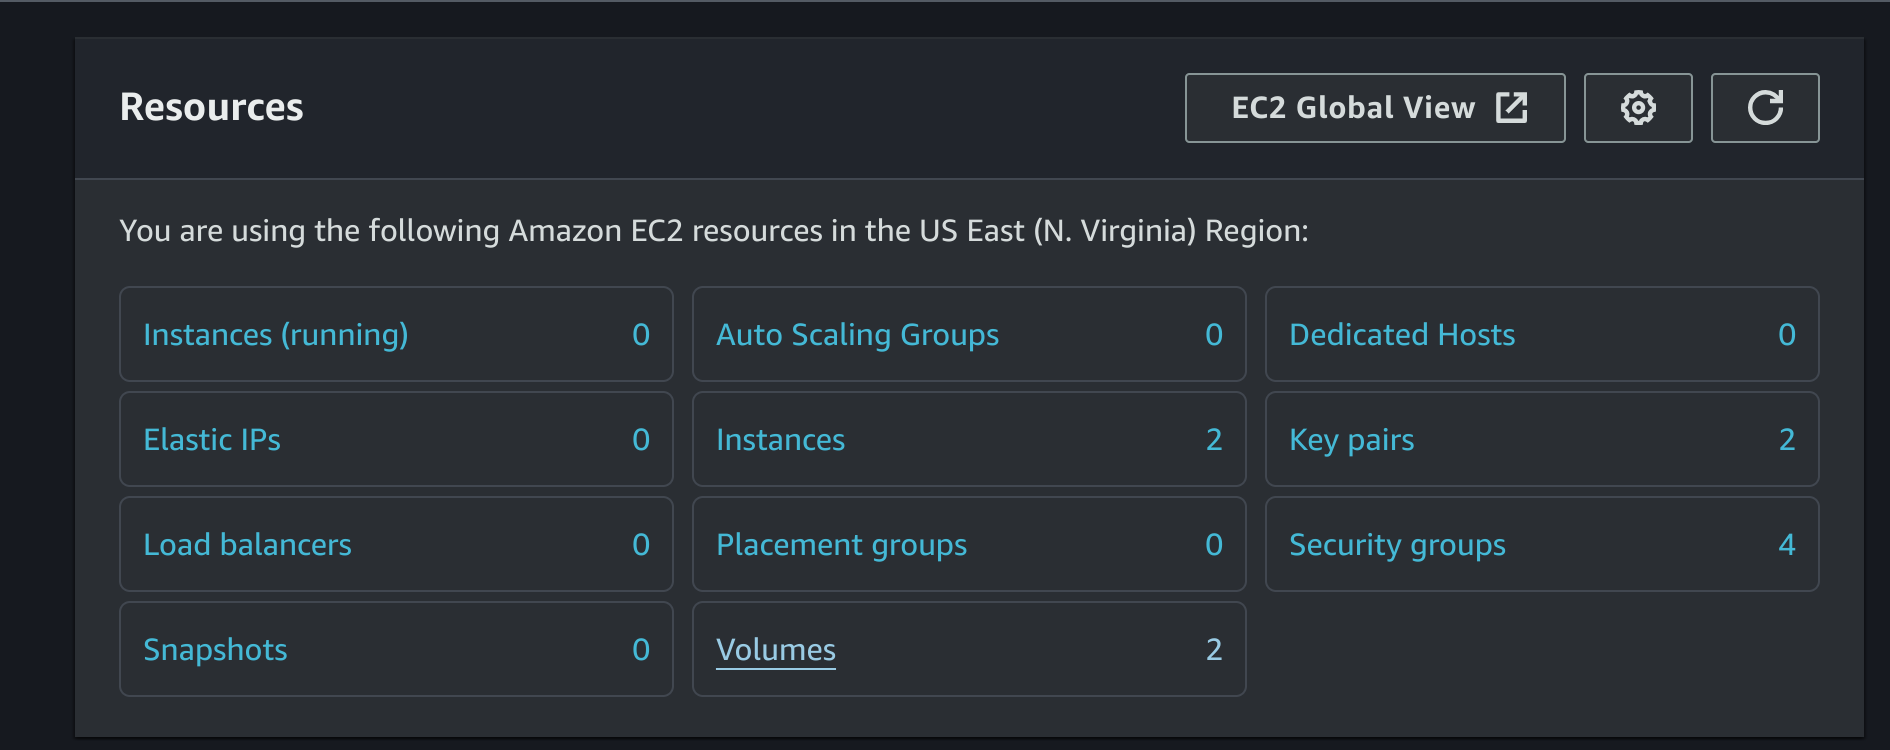

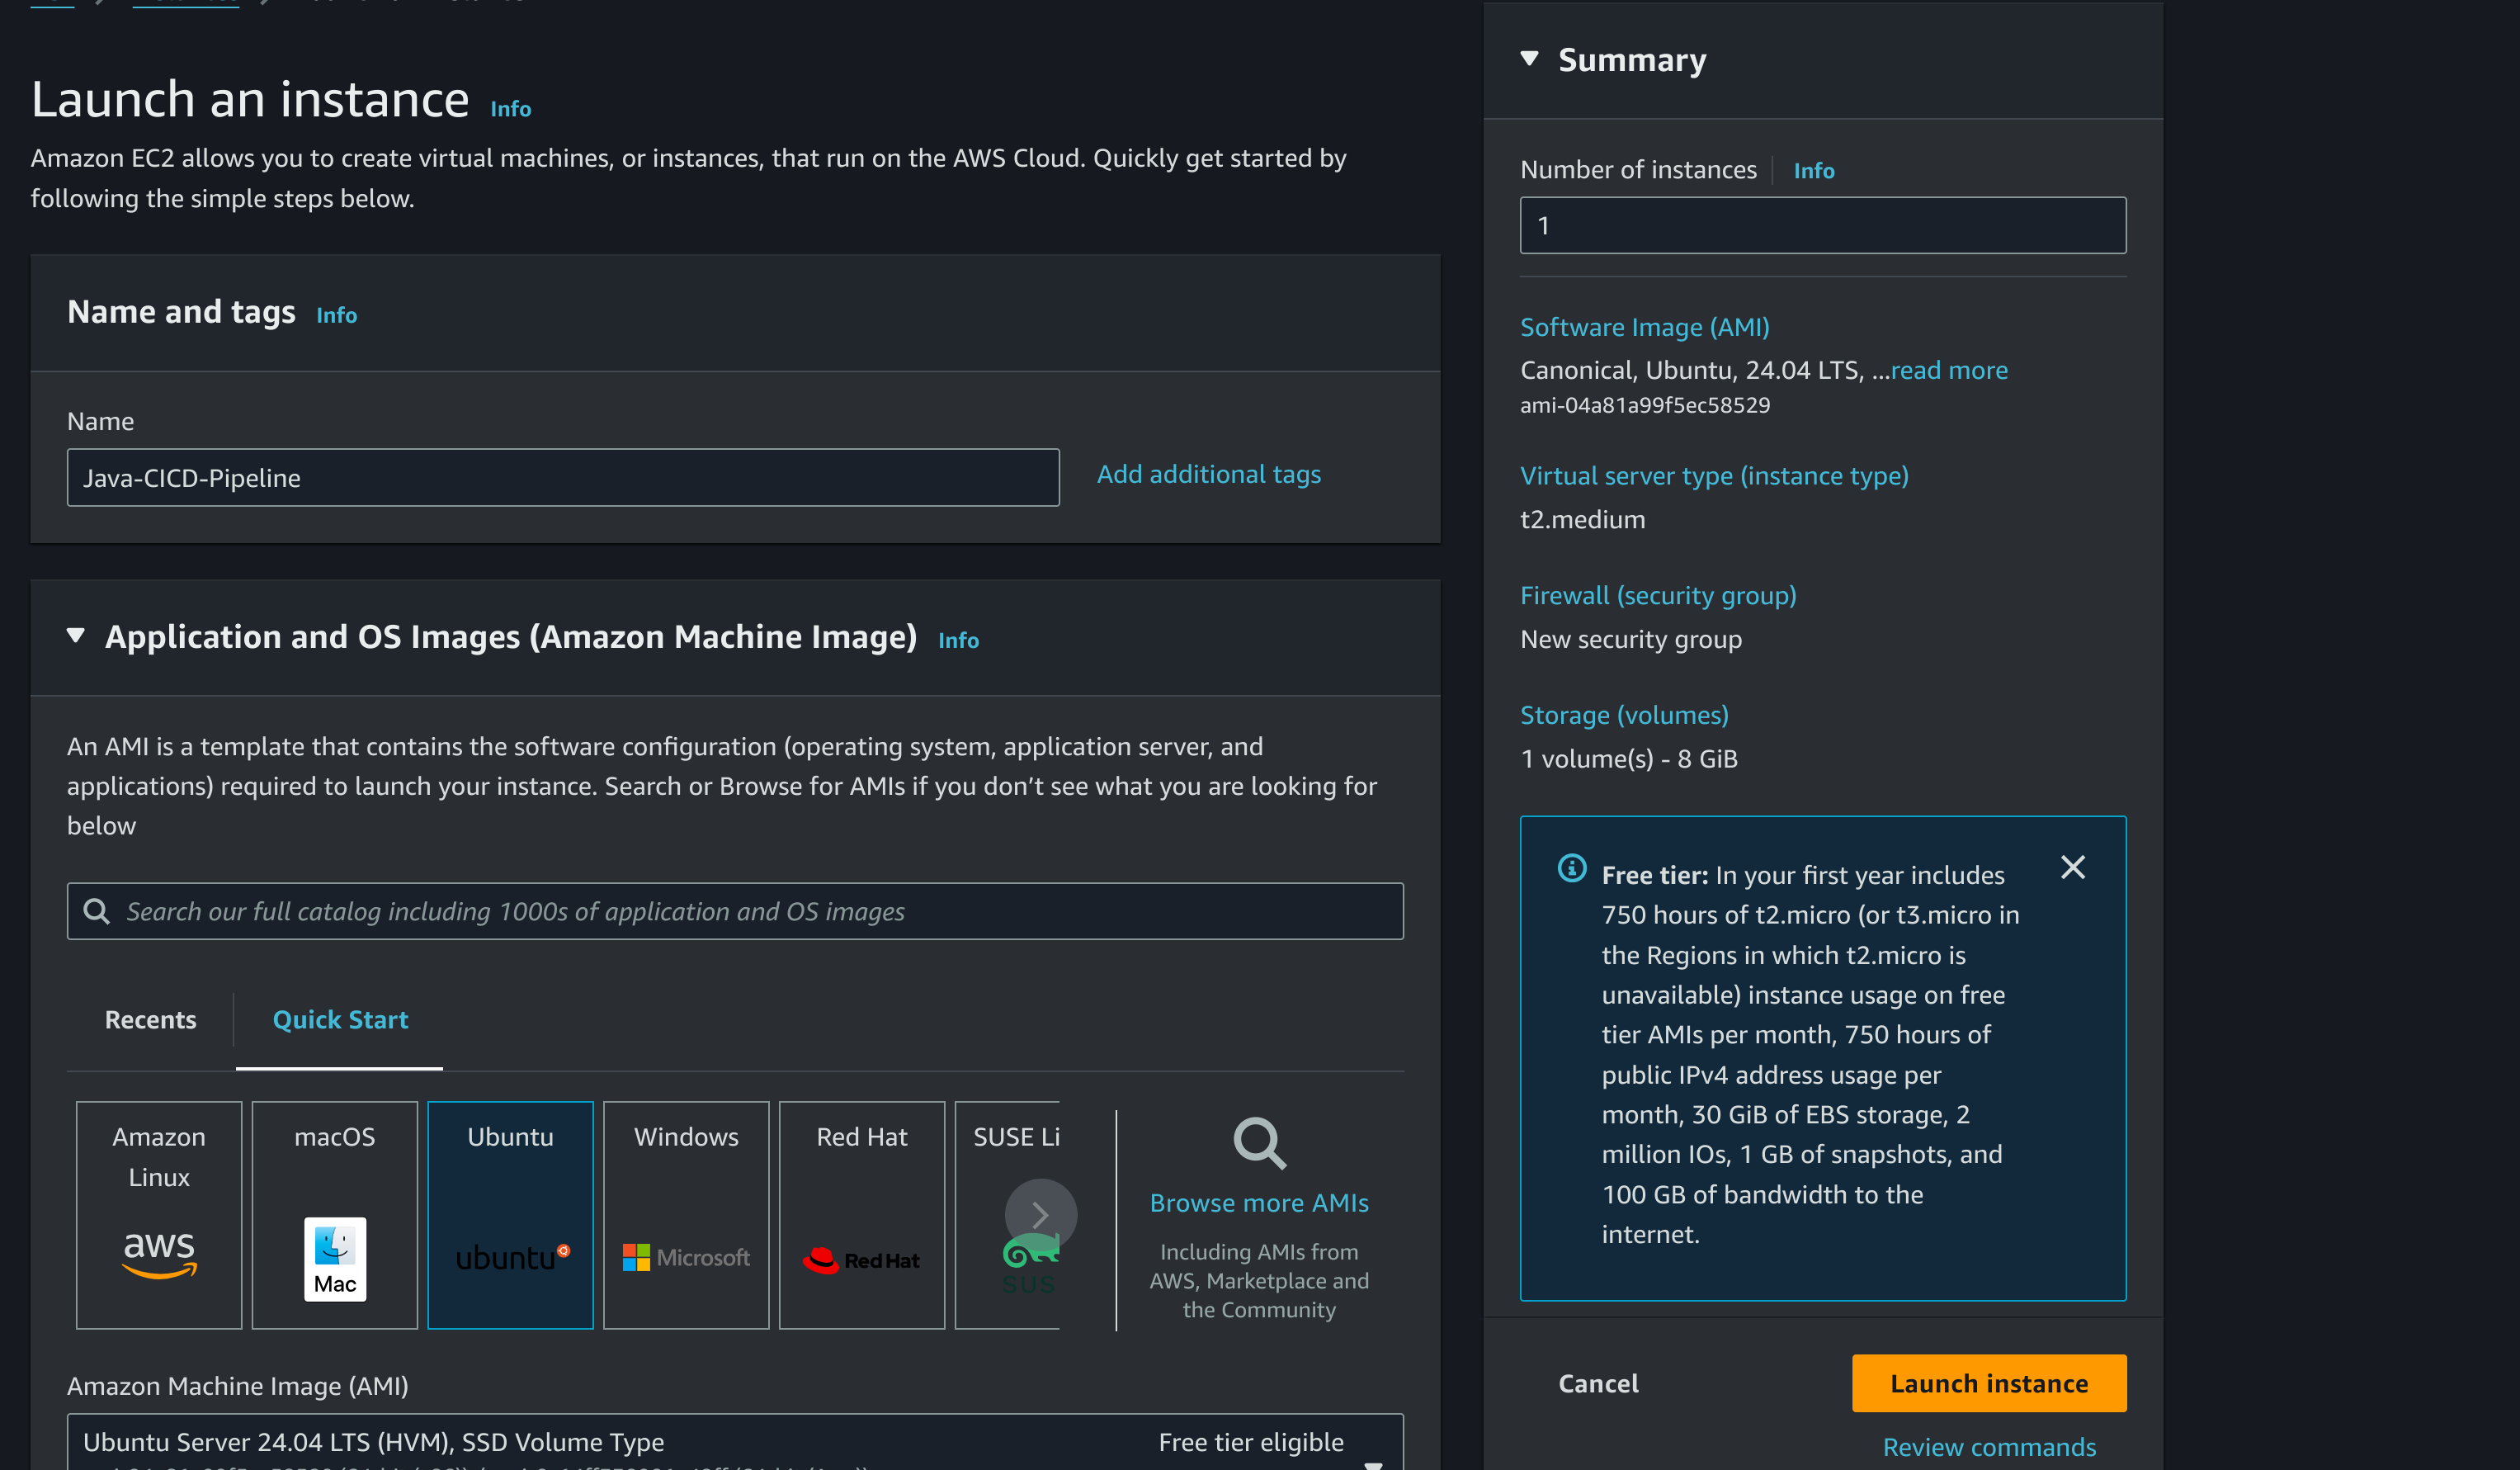
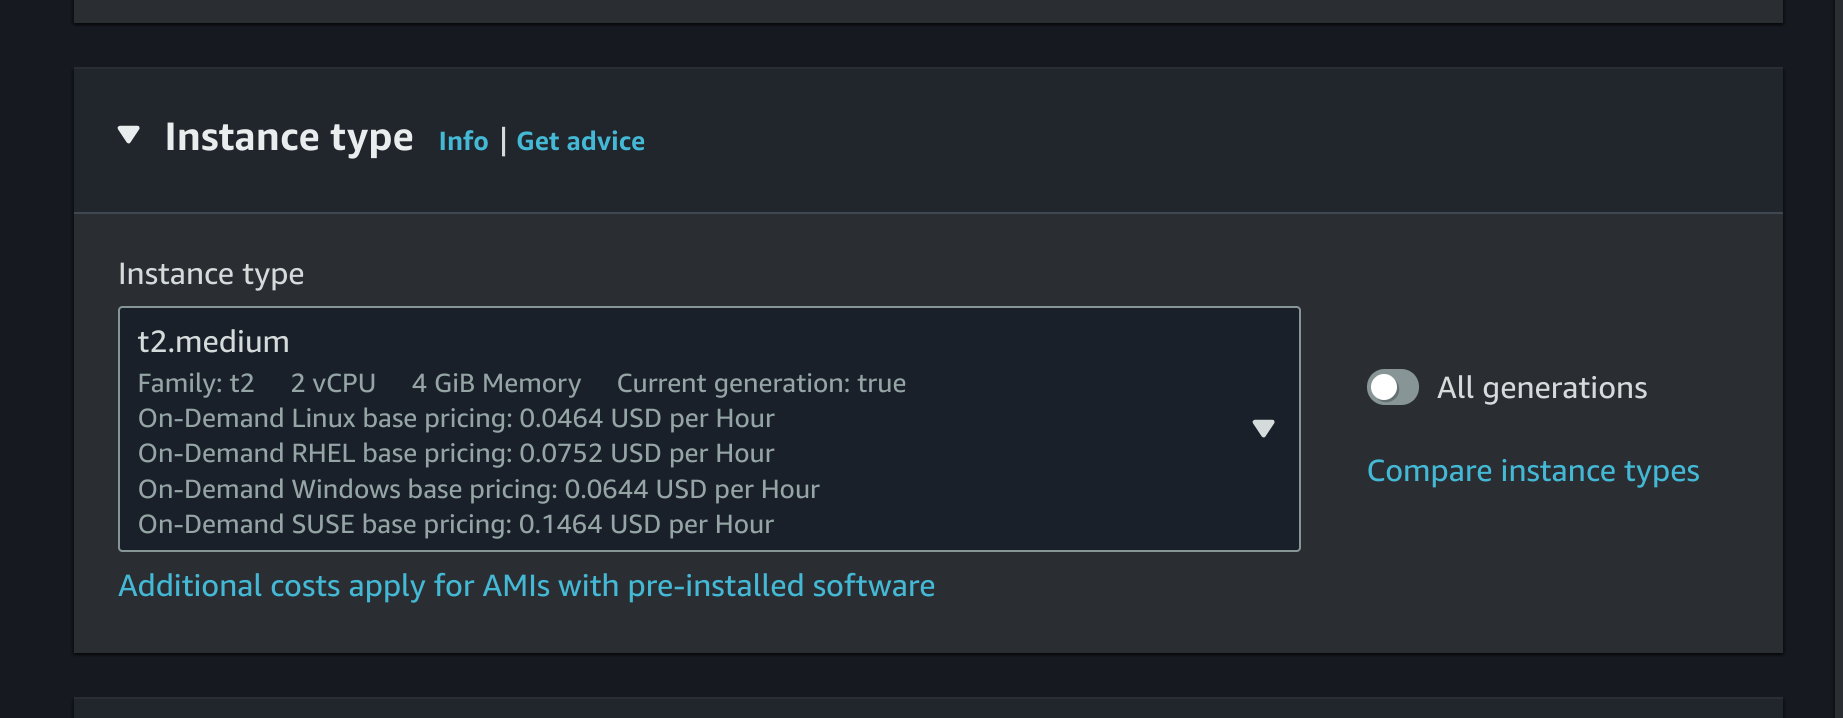
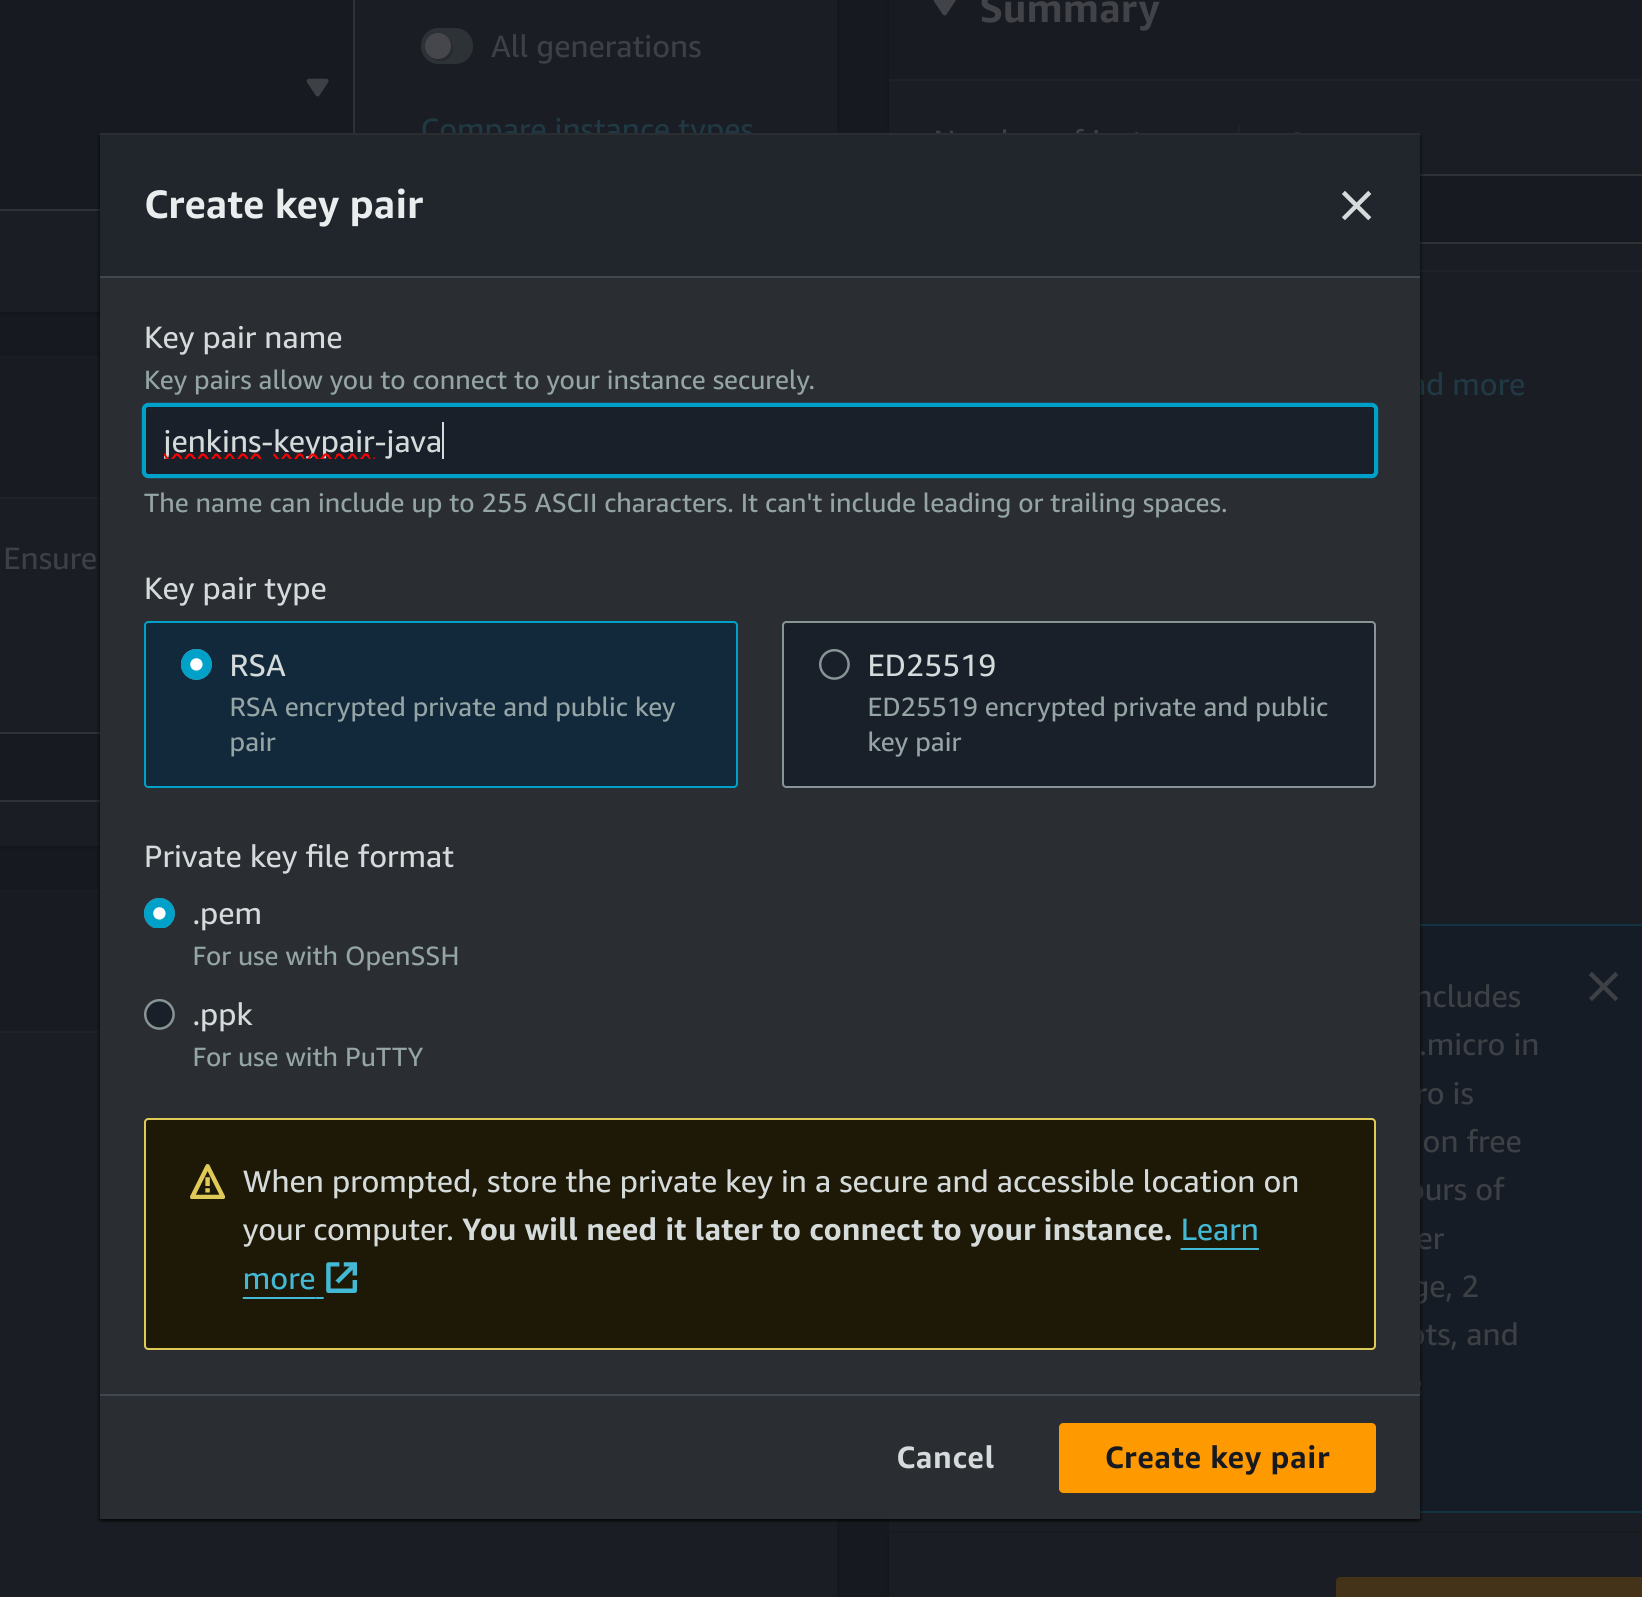

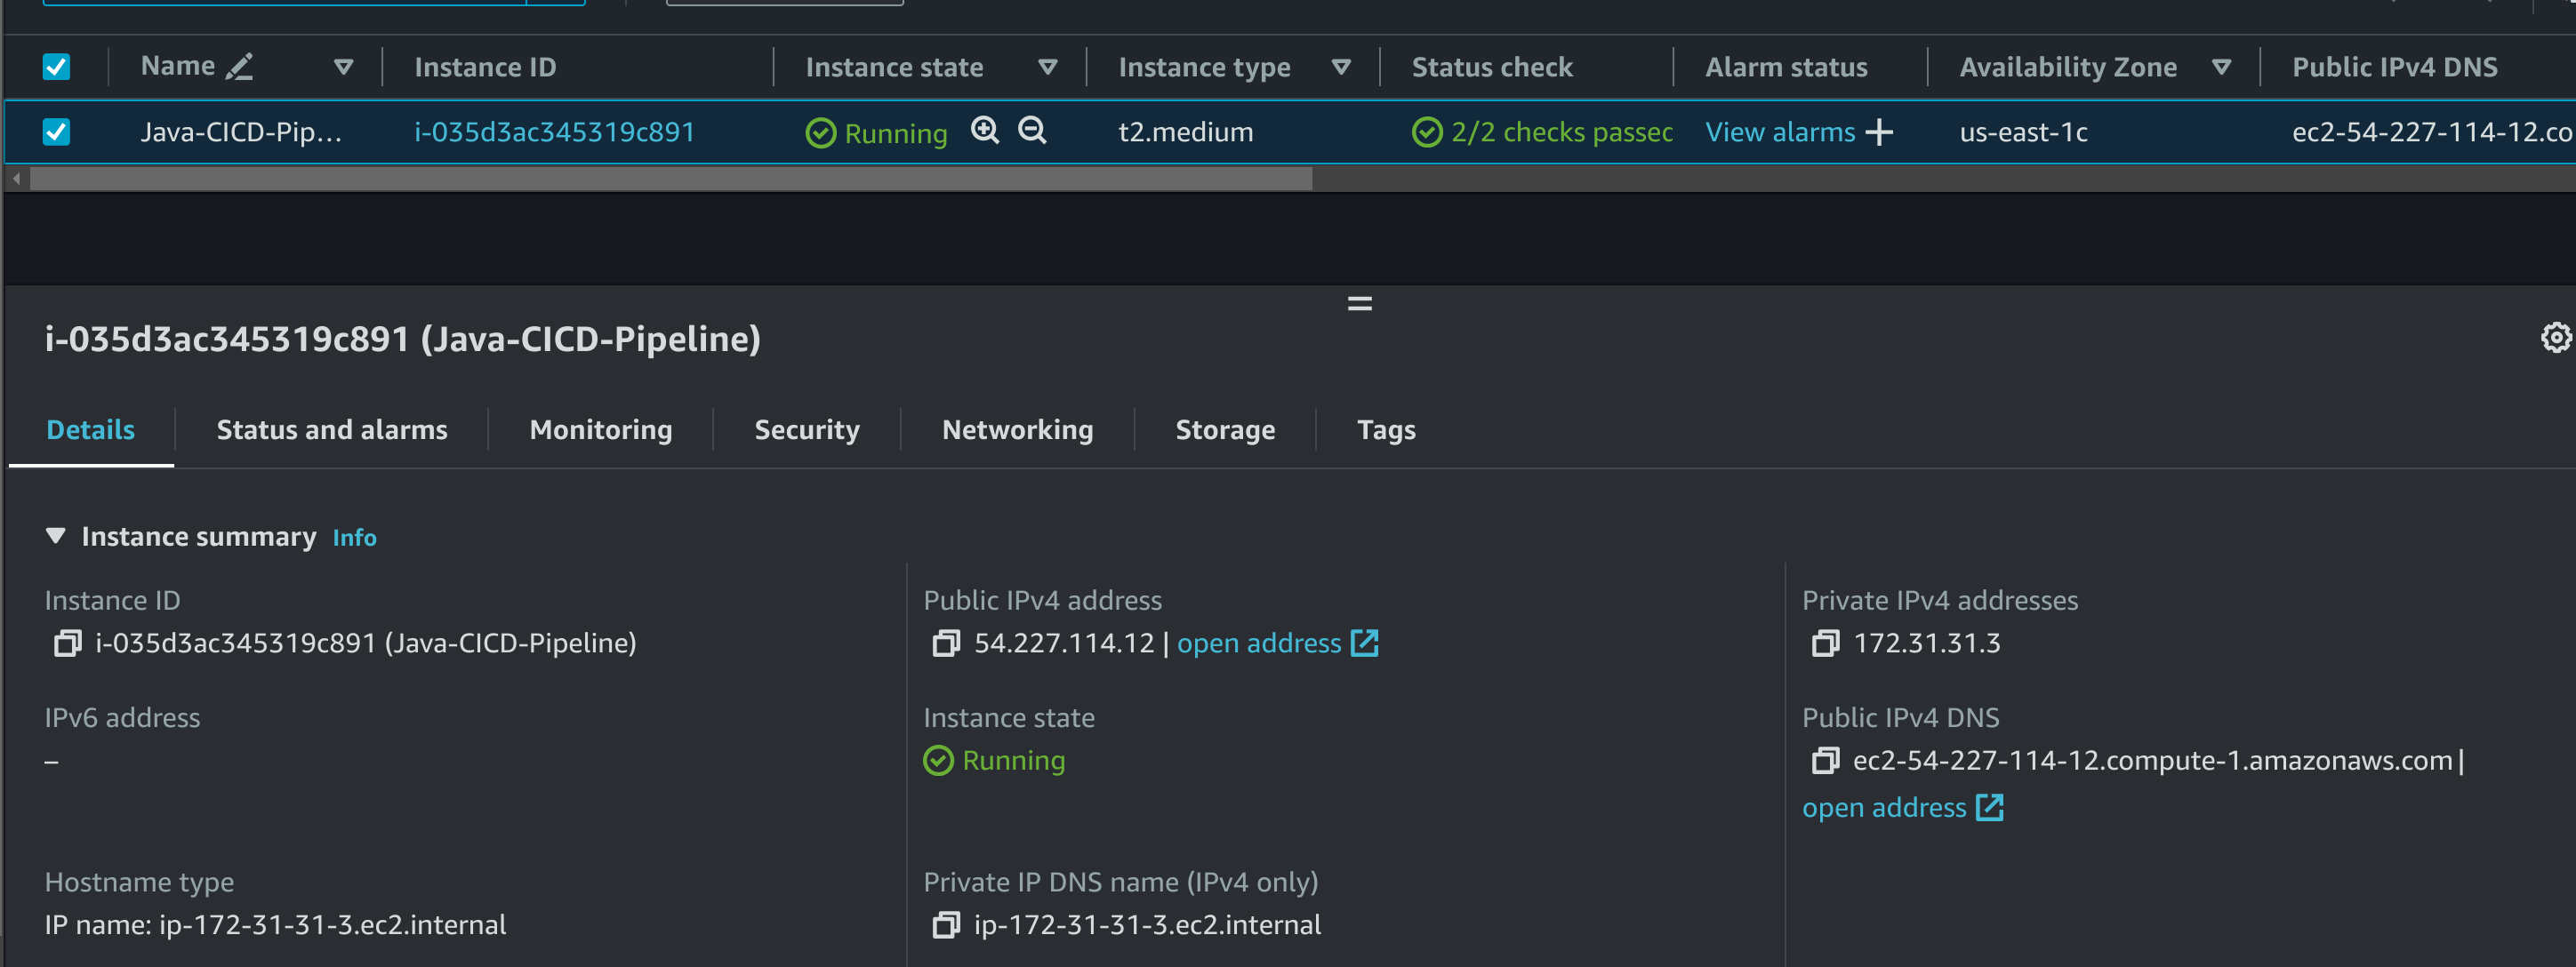
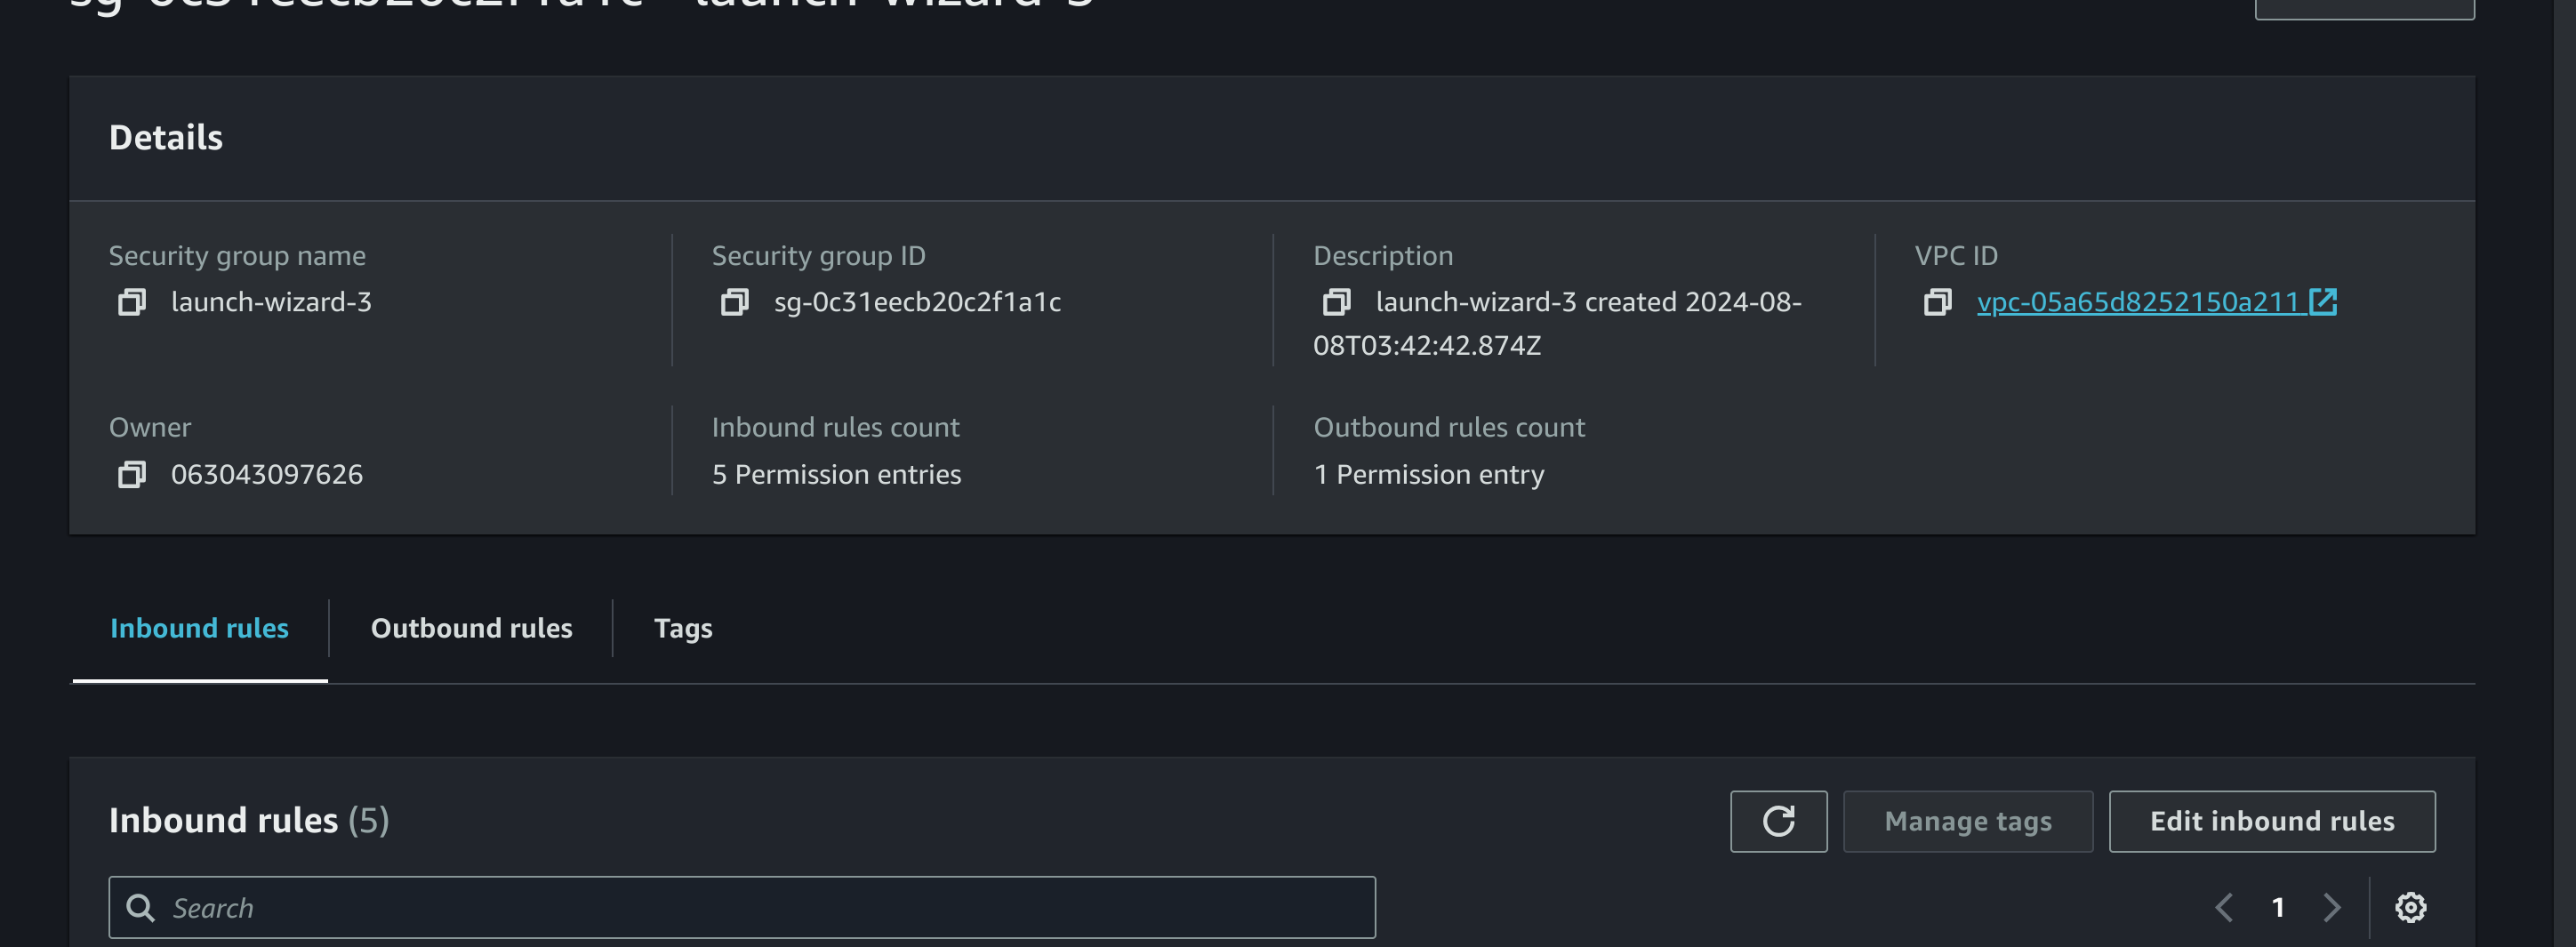
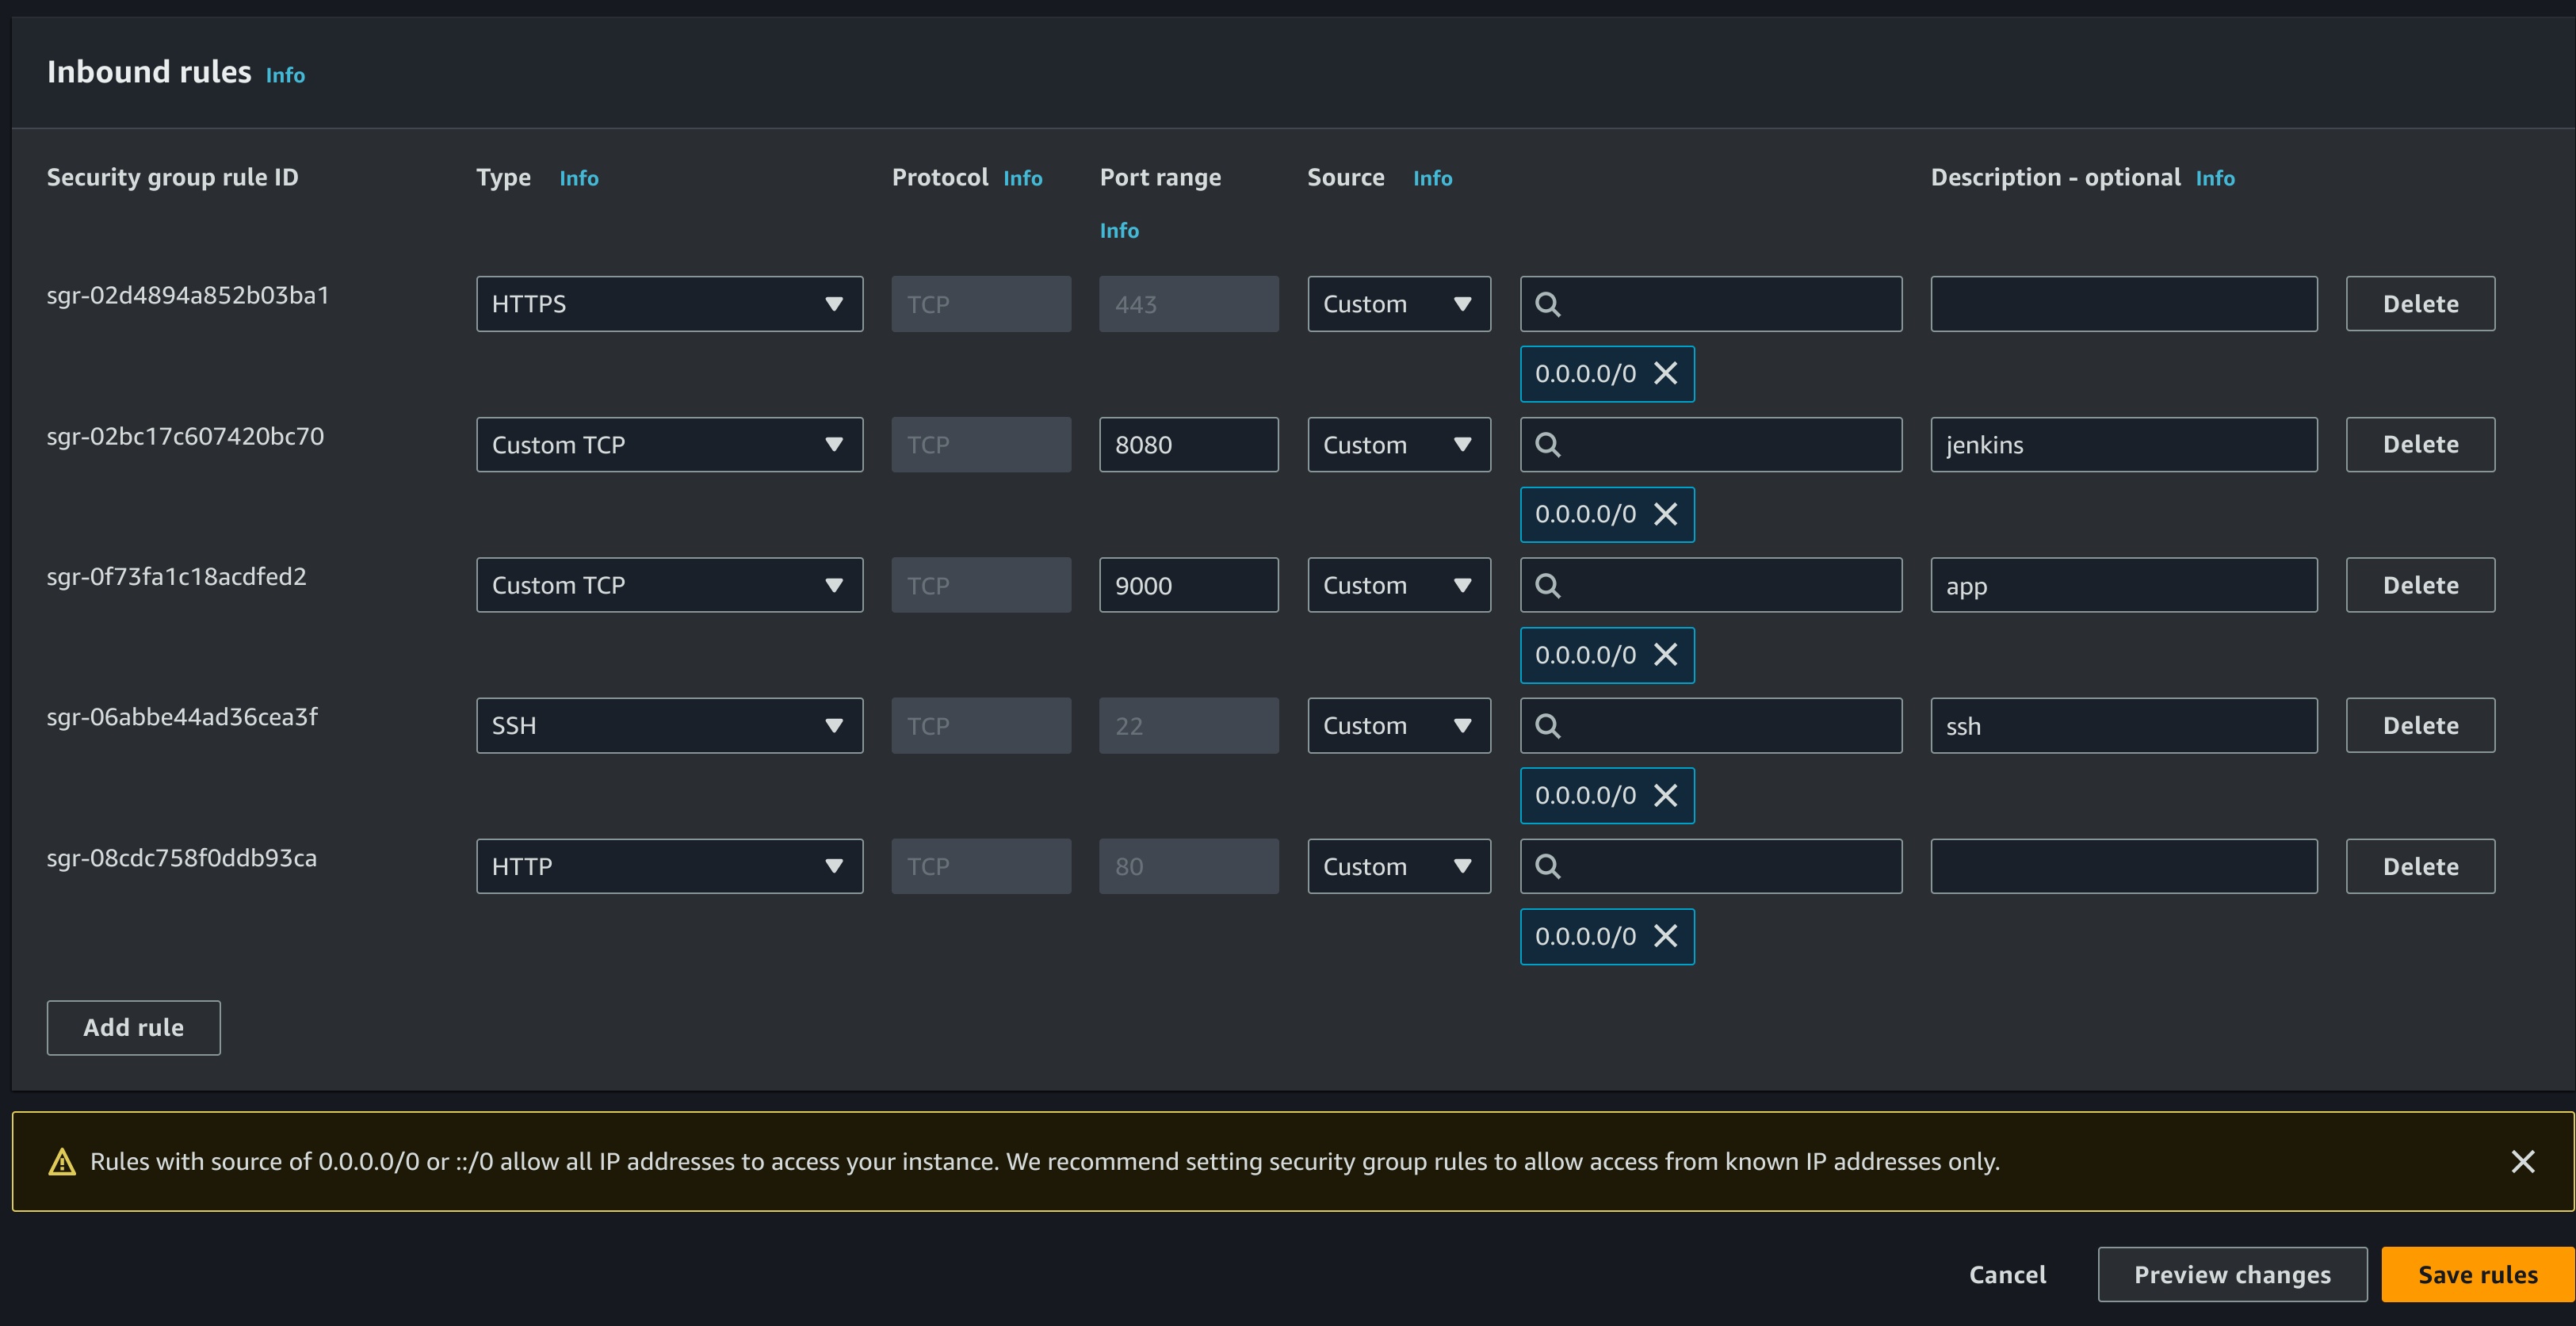
Now, enable 8080 Port Number in Security Group Inbound Rules
Go to security , the go to security groups
Go to edit inbound rules
Set type for https ,HTTP ,ssh and custom tc as shown.


- Connect using SSH : Go to the folder in which key pair is ,give permission 400 to the pem key file then use command ssh -i "jenkins-keypair-java.pem" ubuntu@ec2-54-227-114-12.compute-1.amazonaws.com
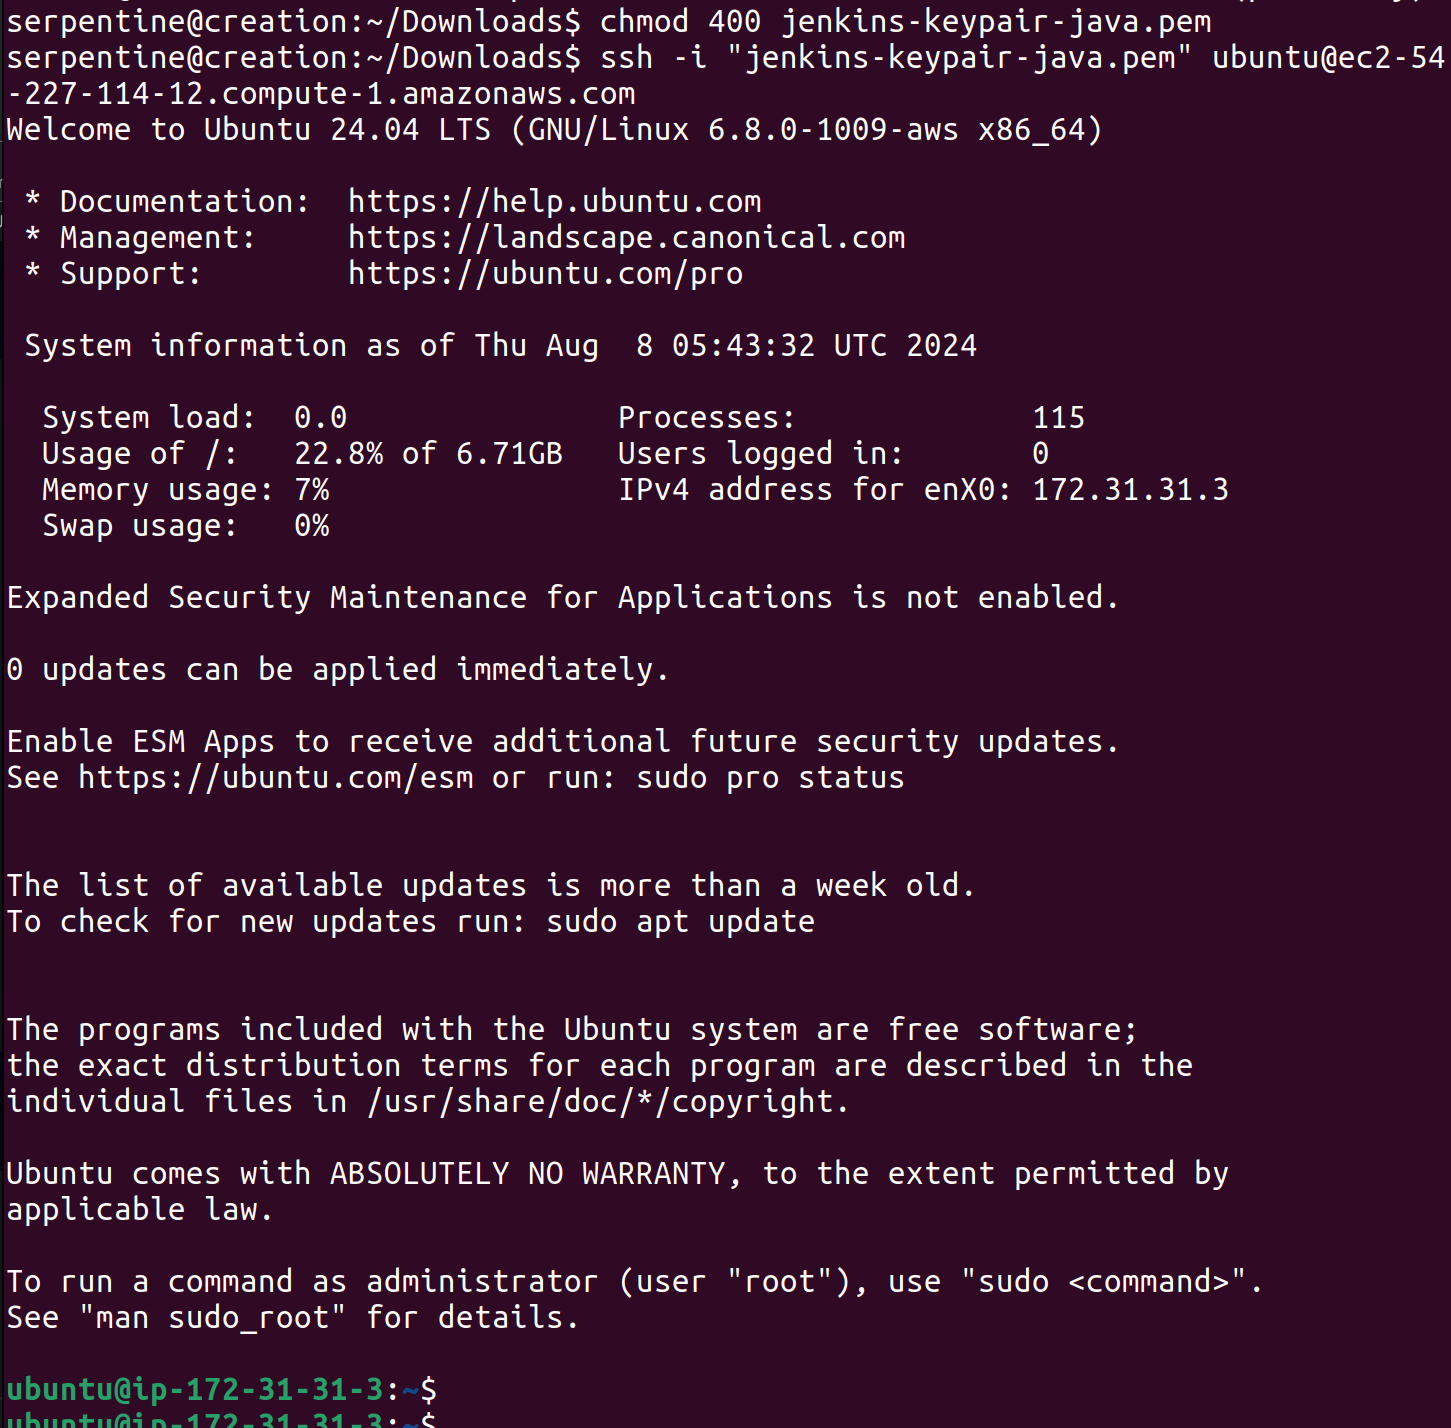
Now in VM
- Install Java
sudo apt update
sudo apt install fontconfig openjdk-17-jre
java -version
- Install Jenkins
sudo wget -O /usr/share/keyrings/jenkins-keyring.asc \
  https://pkg.jenkins.io/debian-stable/jenkins.io-2023.key
echo deb [signed-by=/usr/share/keyrings/jenkins-keyring.asc] \
  https://pkg.jenkins.io/debian-stable binary/ | sudo tee \
  /etc/apt/sources.list.d/jenkins.list > /dev/null
sudo apt-get update
sudo apt-get install jenkins
- Start Jenkins
sudo systemctl enable jenkins
sudo systemctl start jenkins
- Verify Jenkins
sudo systemctl status jenkins
- Access jenkins server in browser using VM public ip
http://public-ip:8080/
- Copy jenkins admin pwd
sudo cat /var/lib/jenkins/secrets/initialAdminPassword

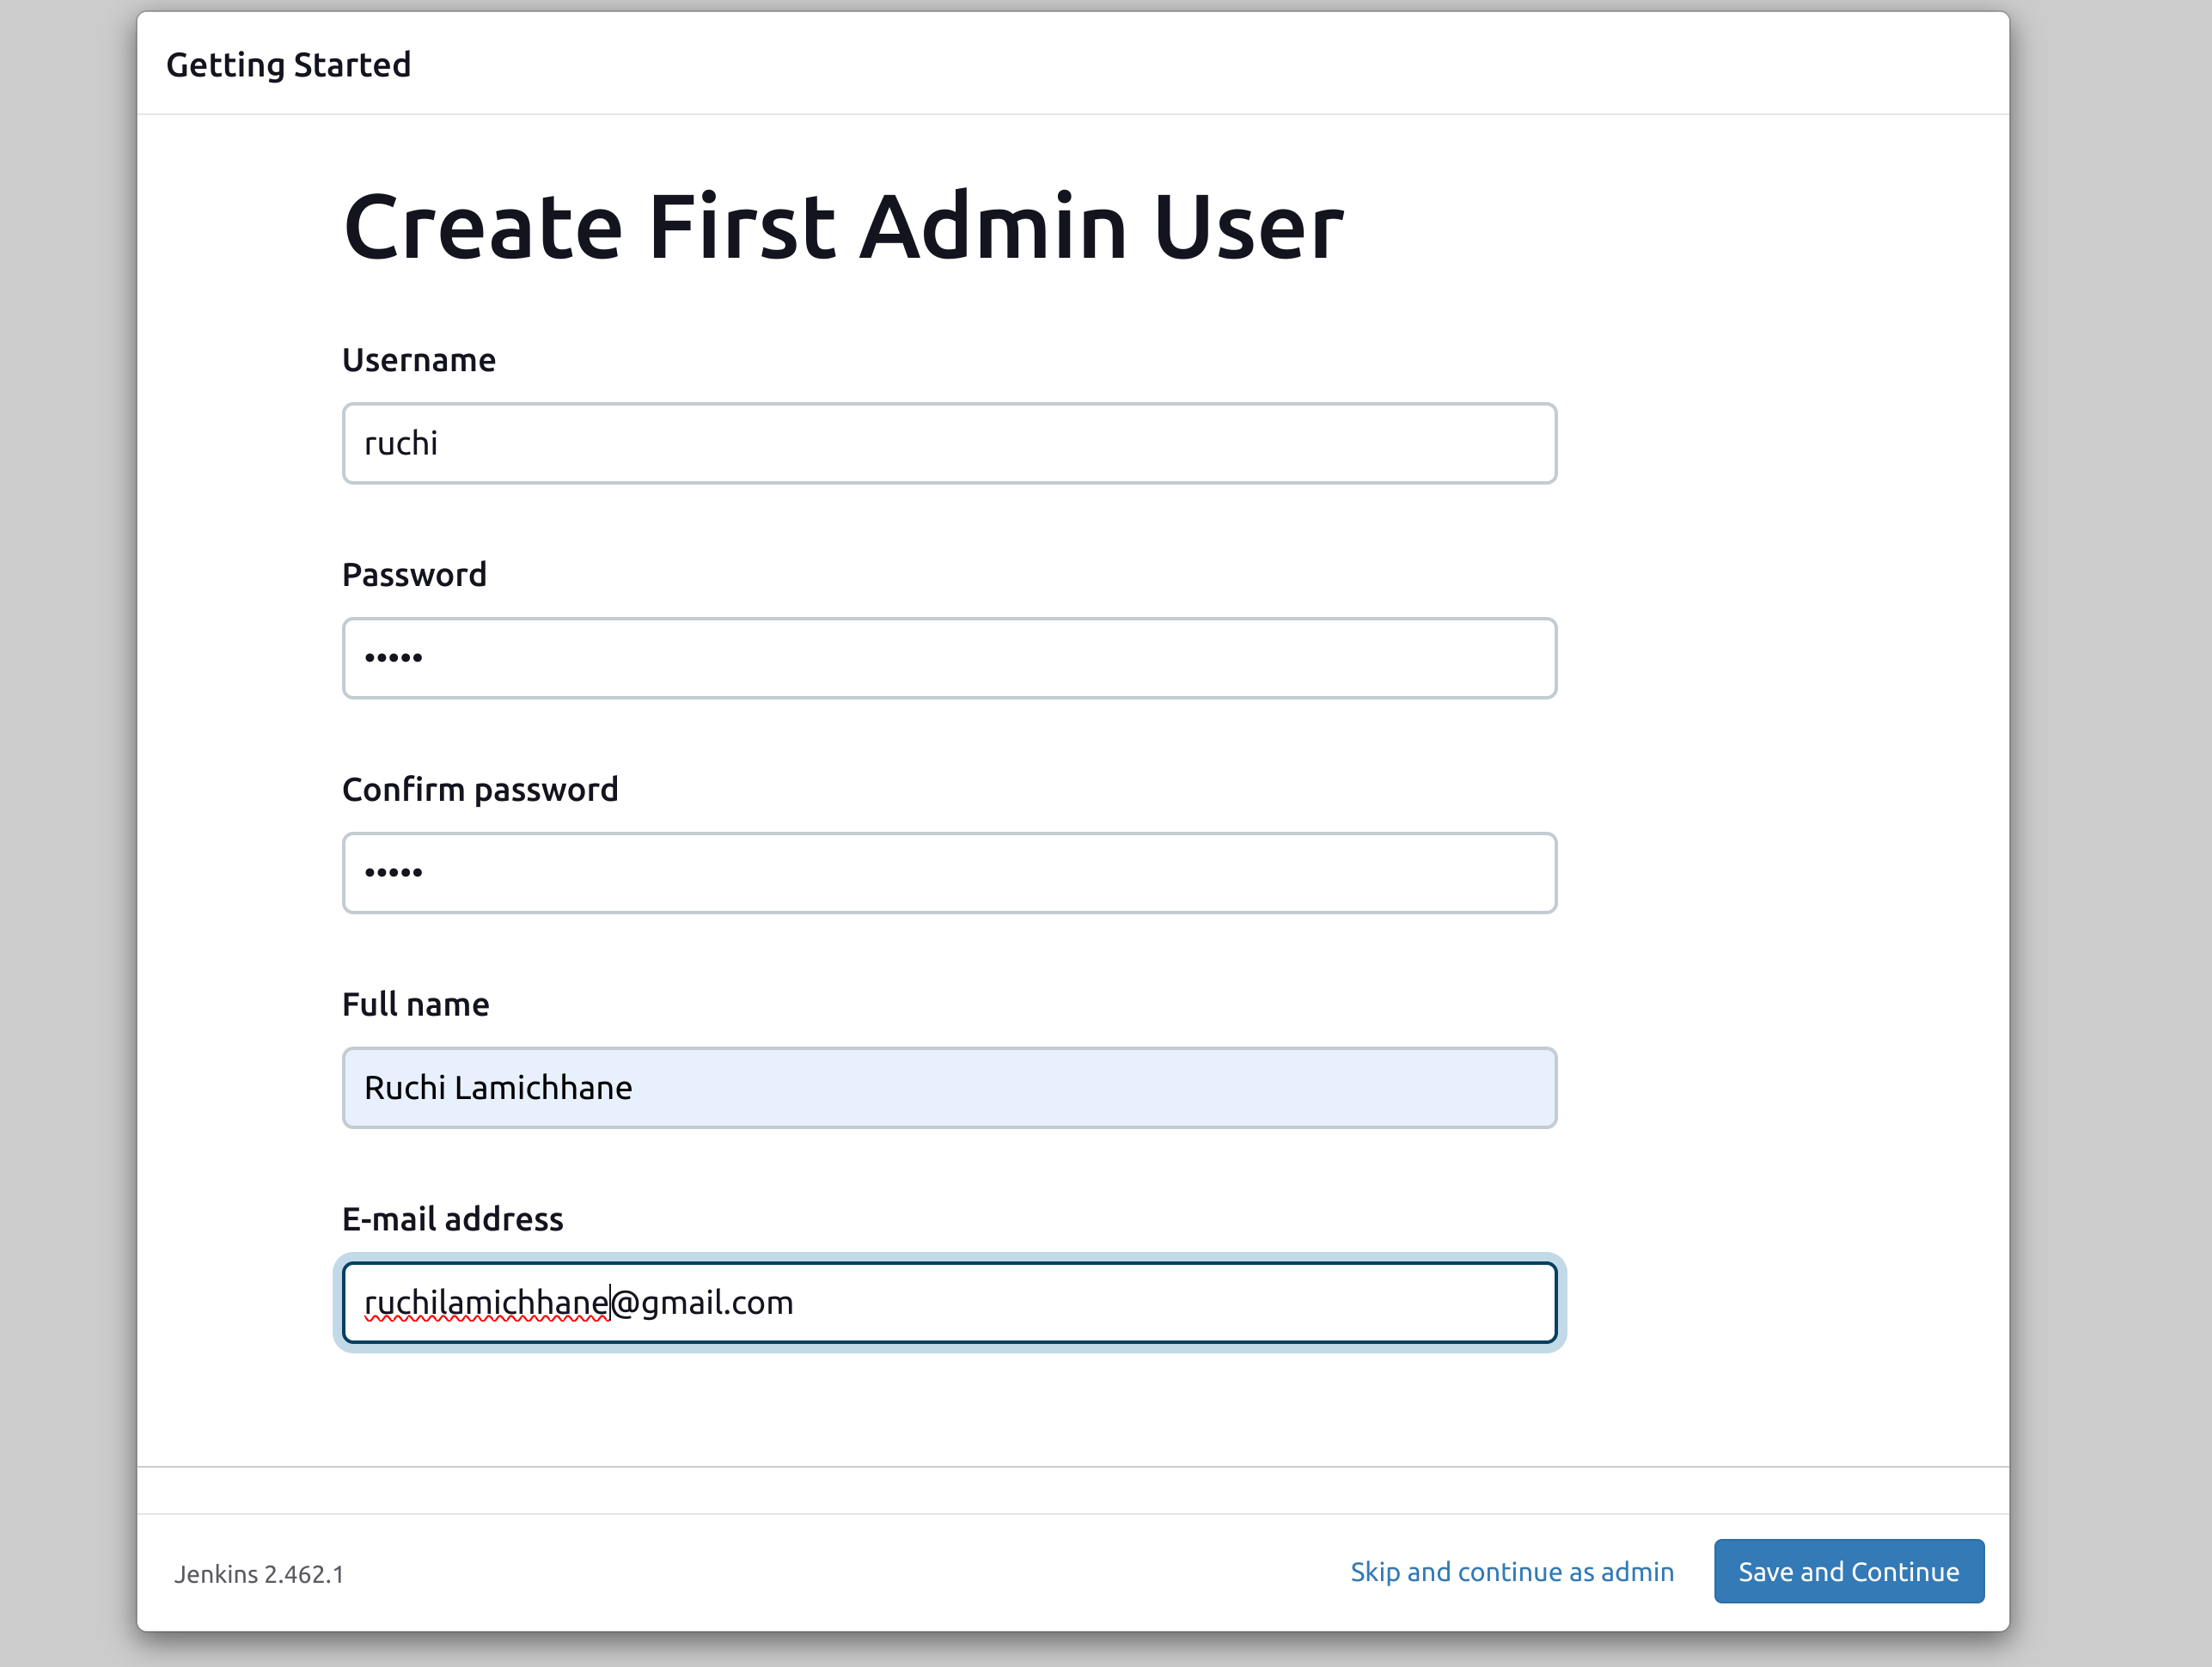
Create an Admin Account & Install Required Plugins in Jenkins.
Create pipeline. Pipelines are created in two ways. They are:
Declarative pipeline- simplified way
Scripted Pipeline - Groovy
Declarative Pipeline: Structured and simplified way to define pipelines in Jenkins. Uses predefined syntax with specific keywords. Great for standardizing pipeline definitions and simpler requirements. Offers less flexibility compared to Scripted Pipeline.
Scripted Pipeline: Allows writing pipelines as Groovy scripts. Provides more flexibility and control with Groovy scripting. Suitable for complex scenarios and advanced control flow. Can be verbose and complex compared to Declarative Pipeline.
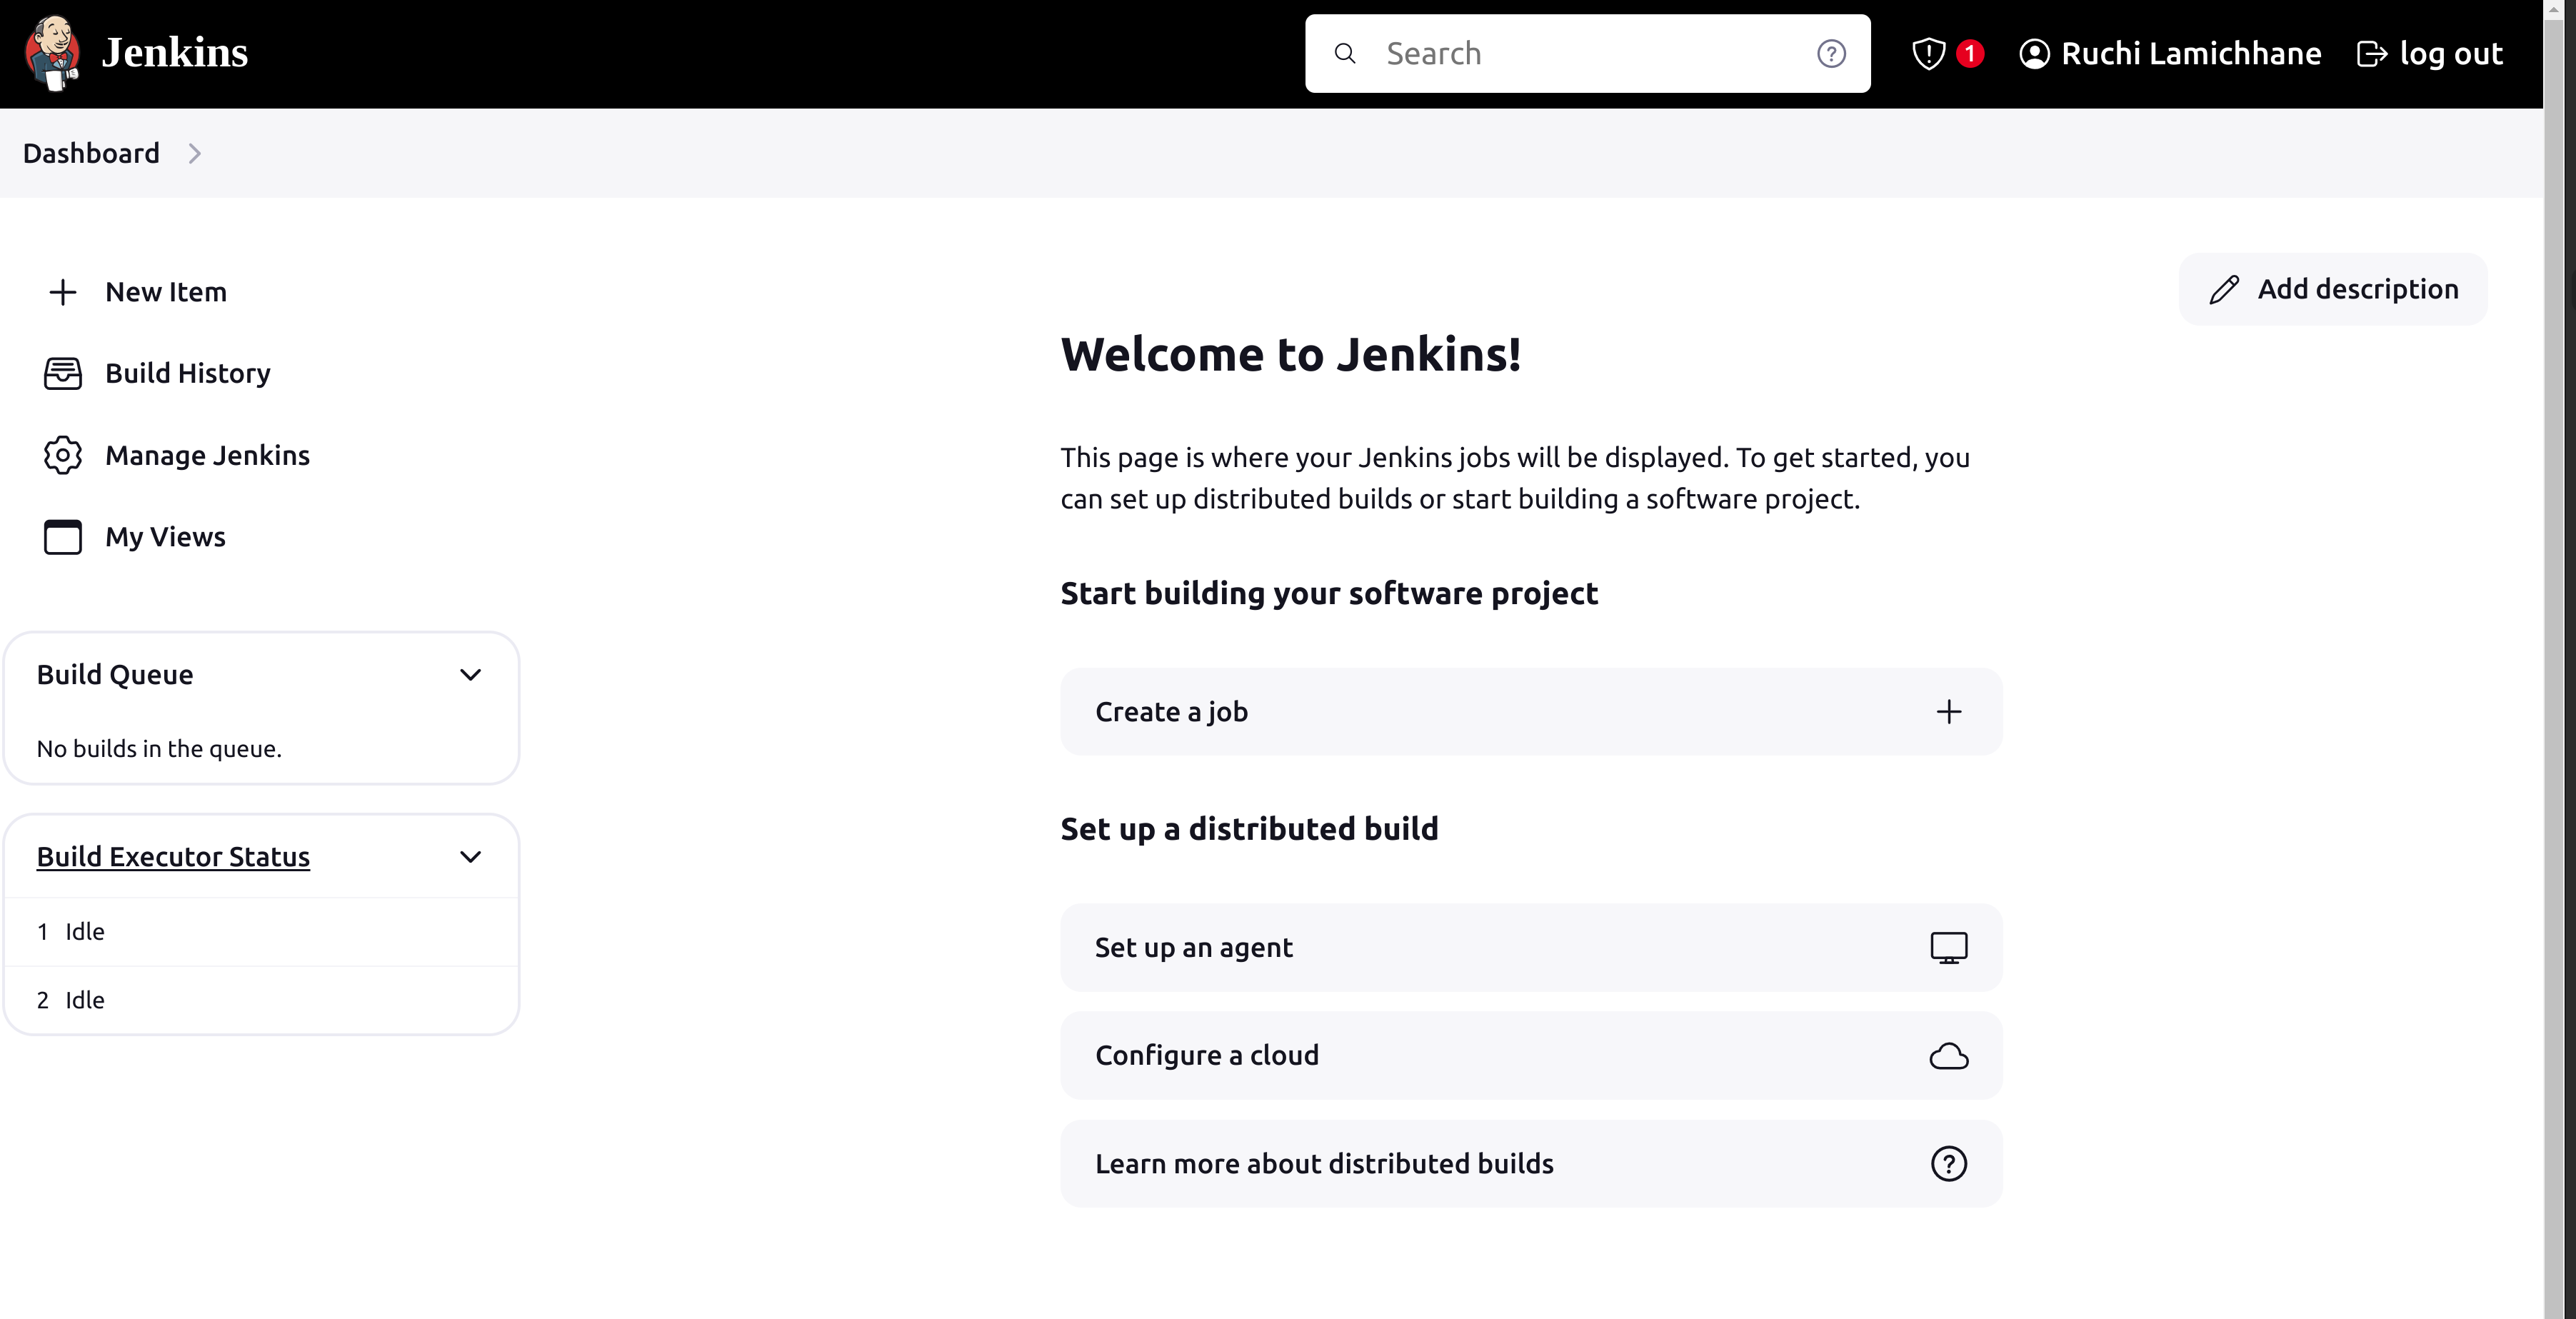
Go to manage jenkins >> plugins >> available plugins
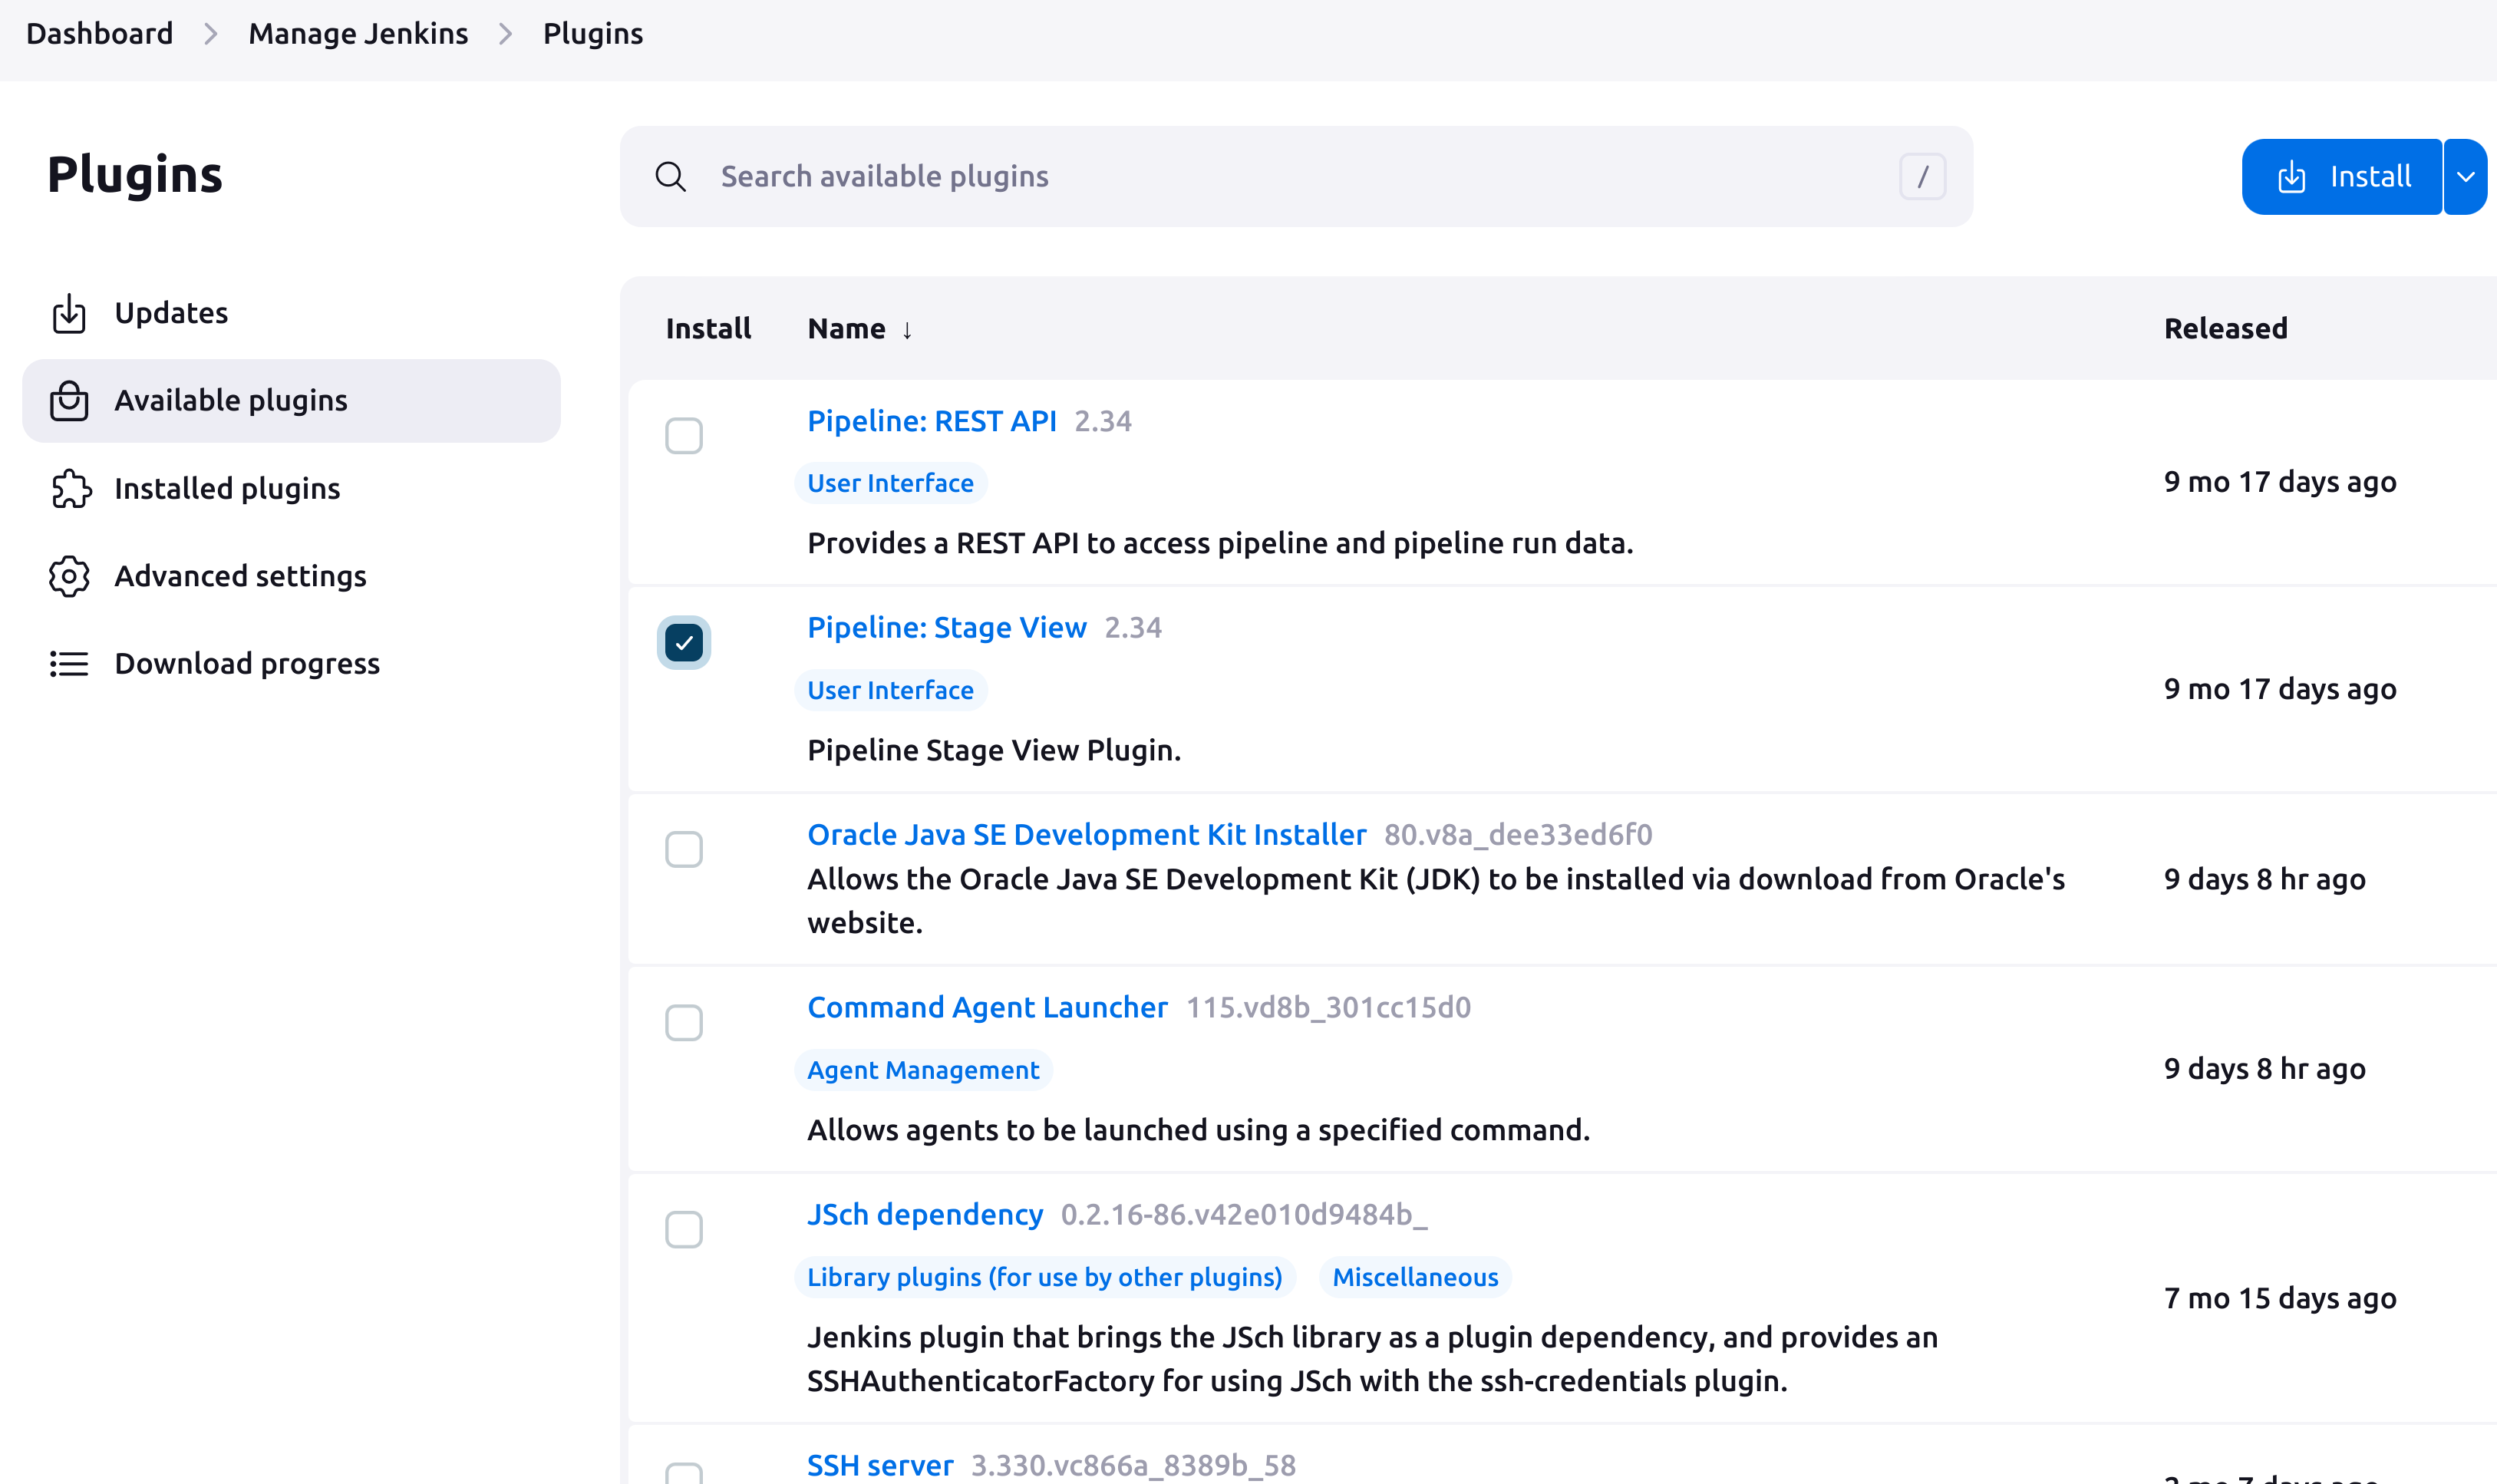
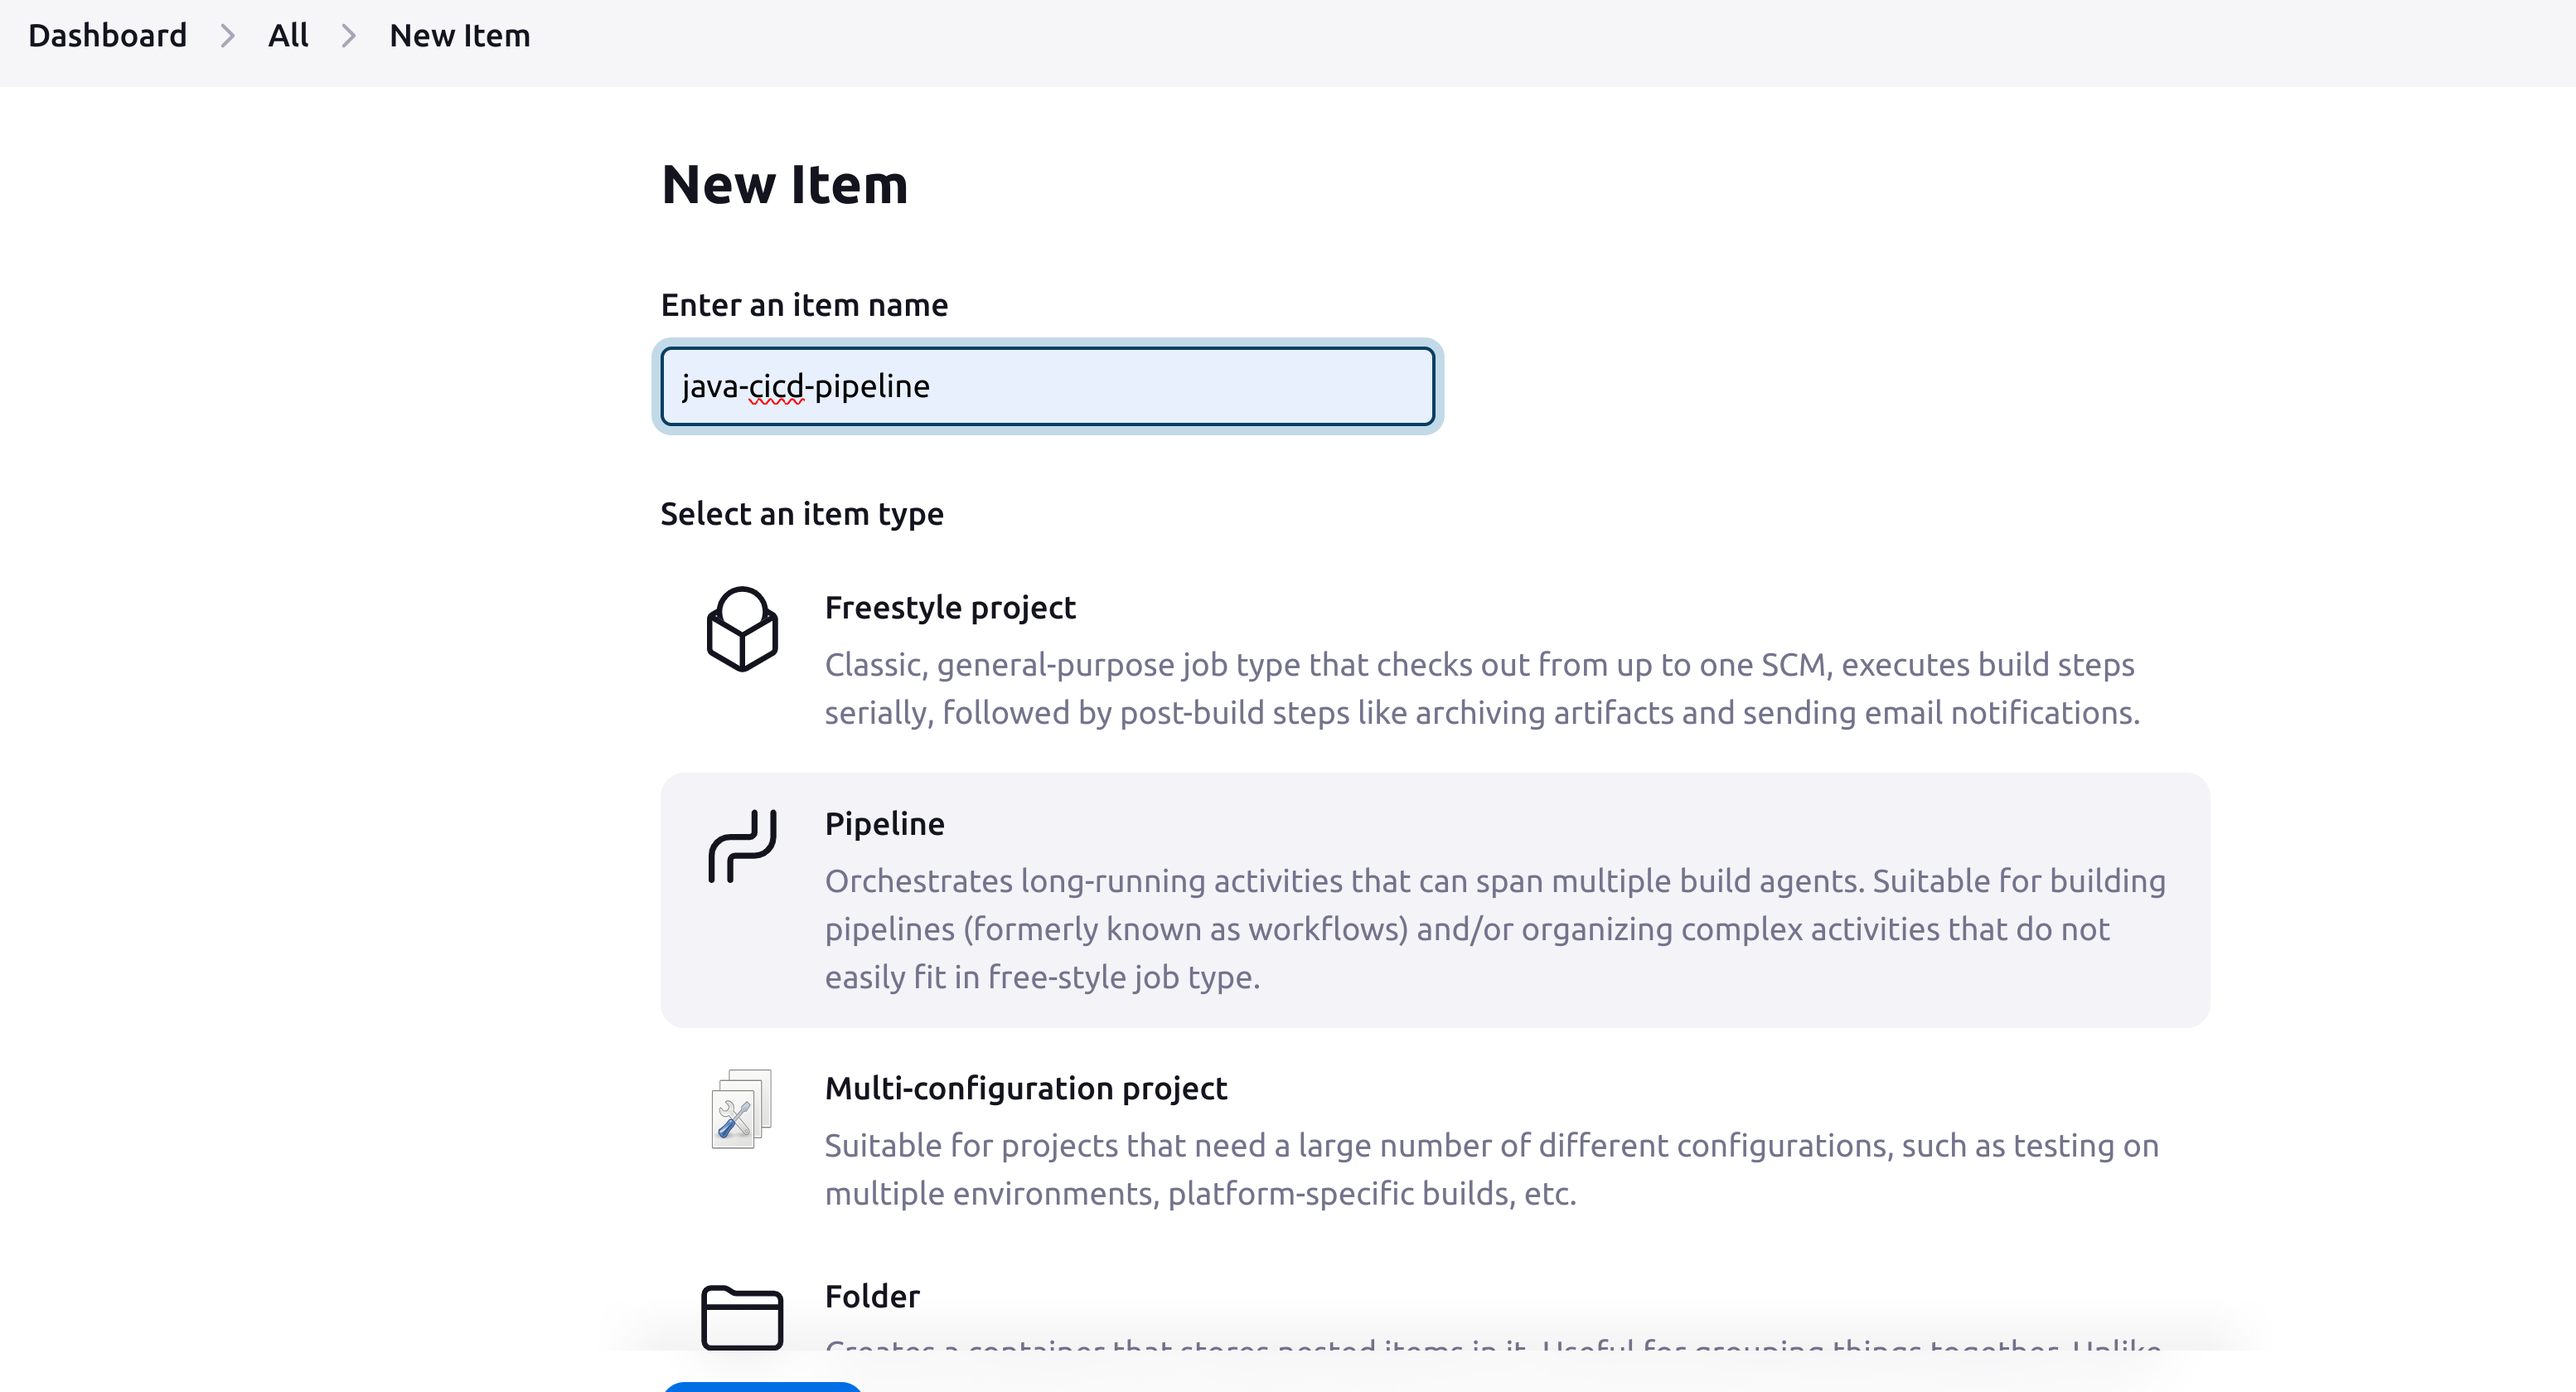
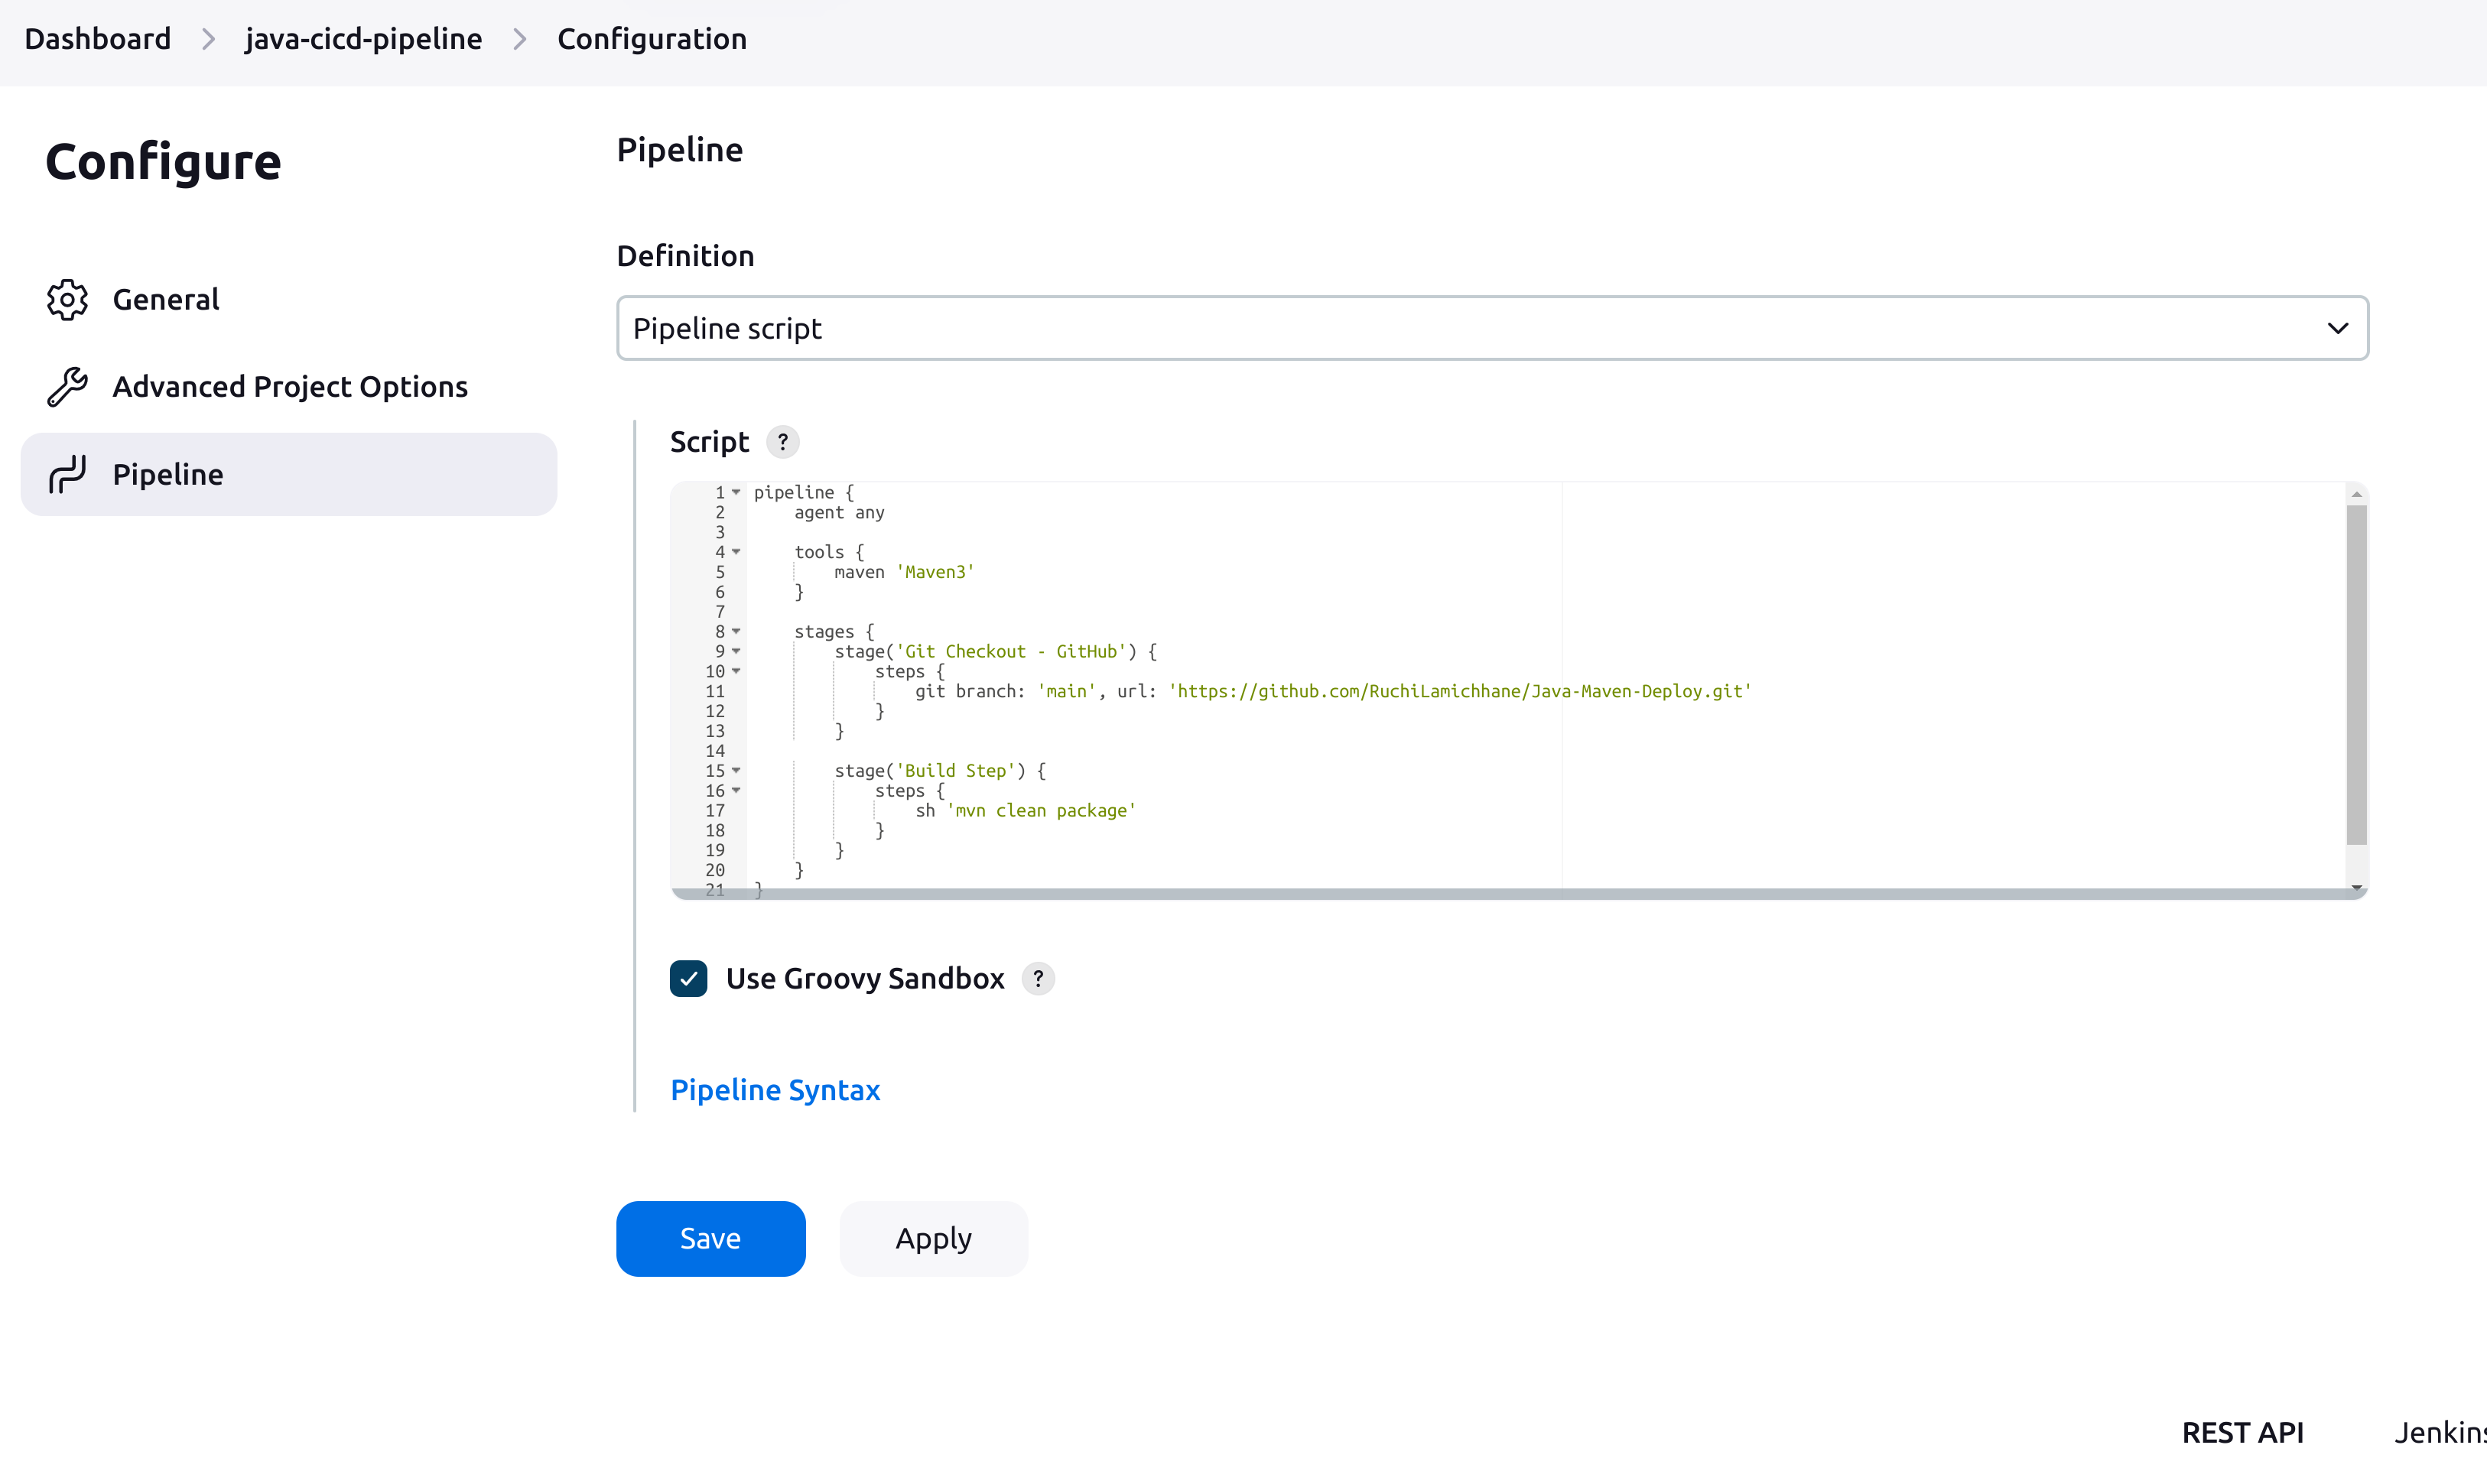
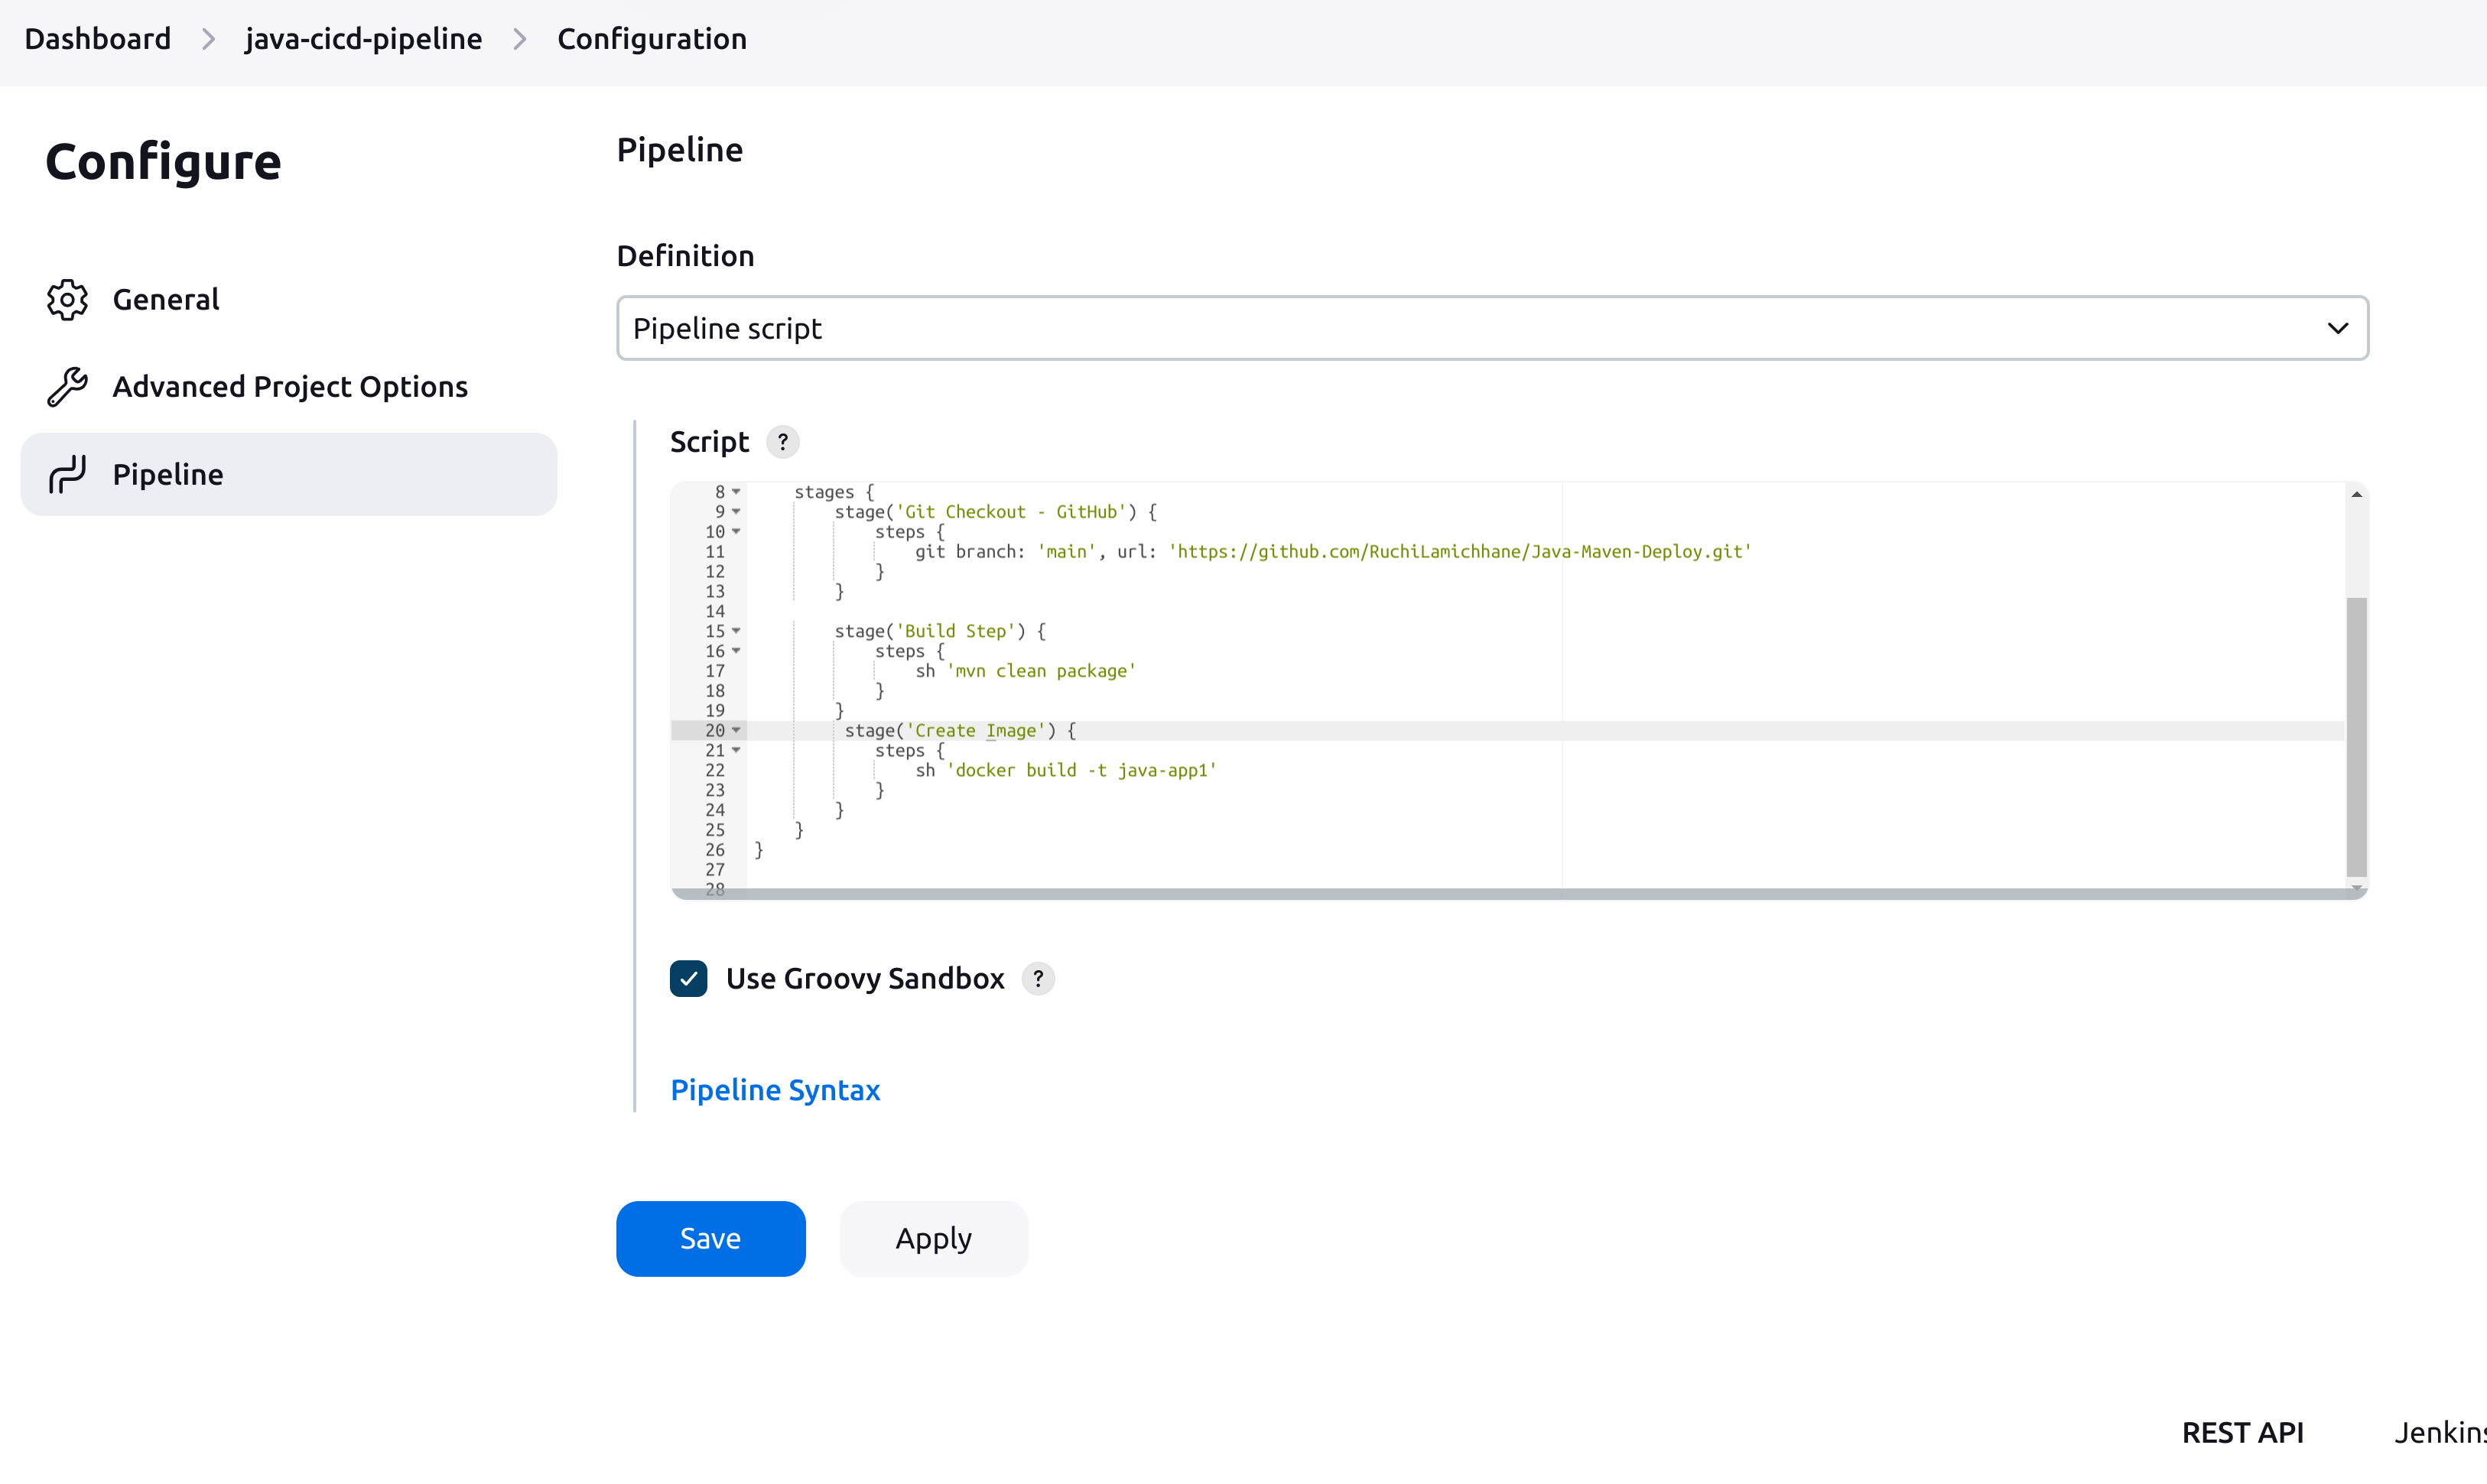
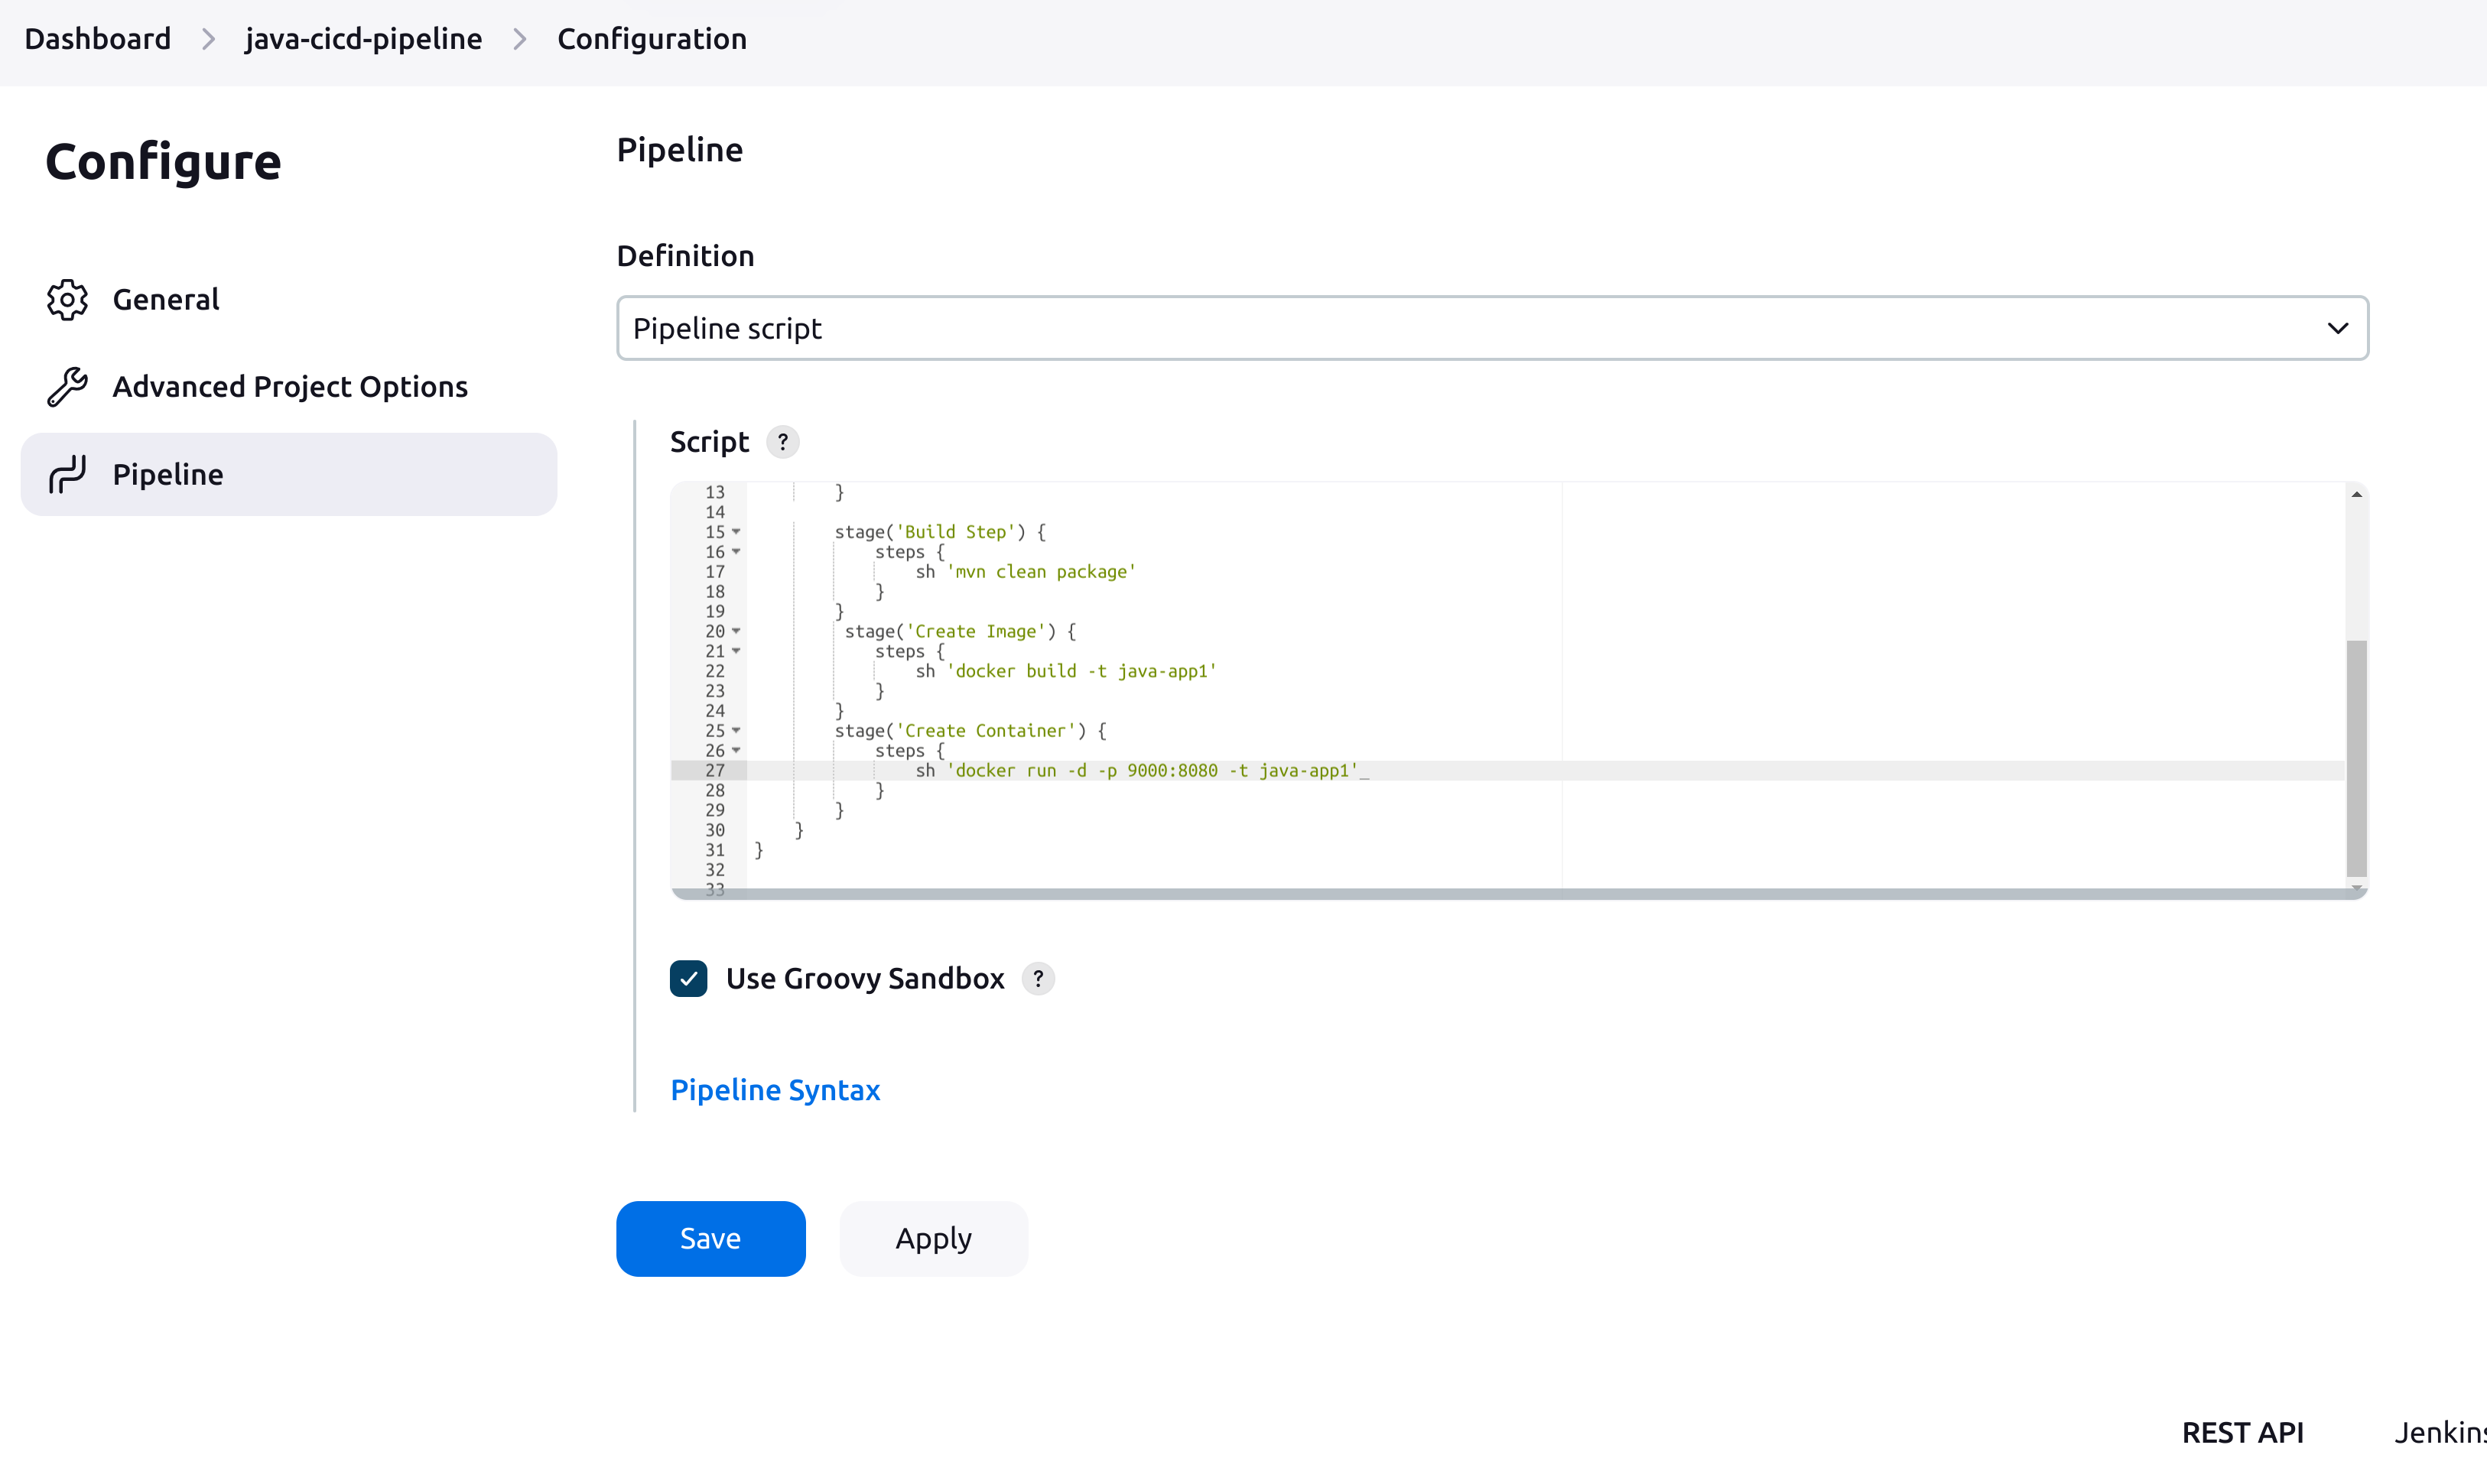
we will be using declarative pipeline
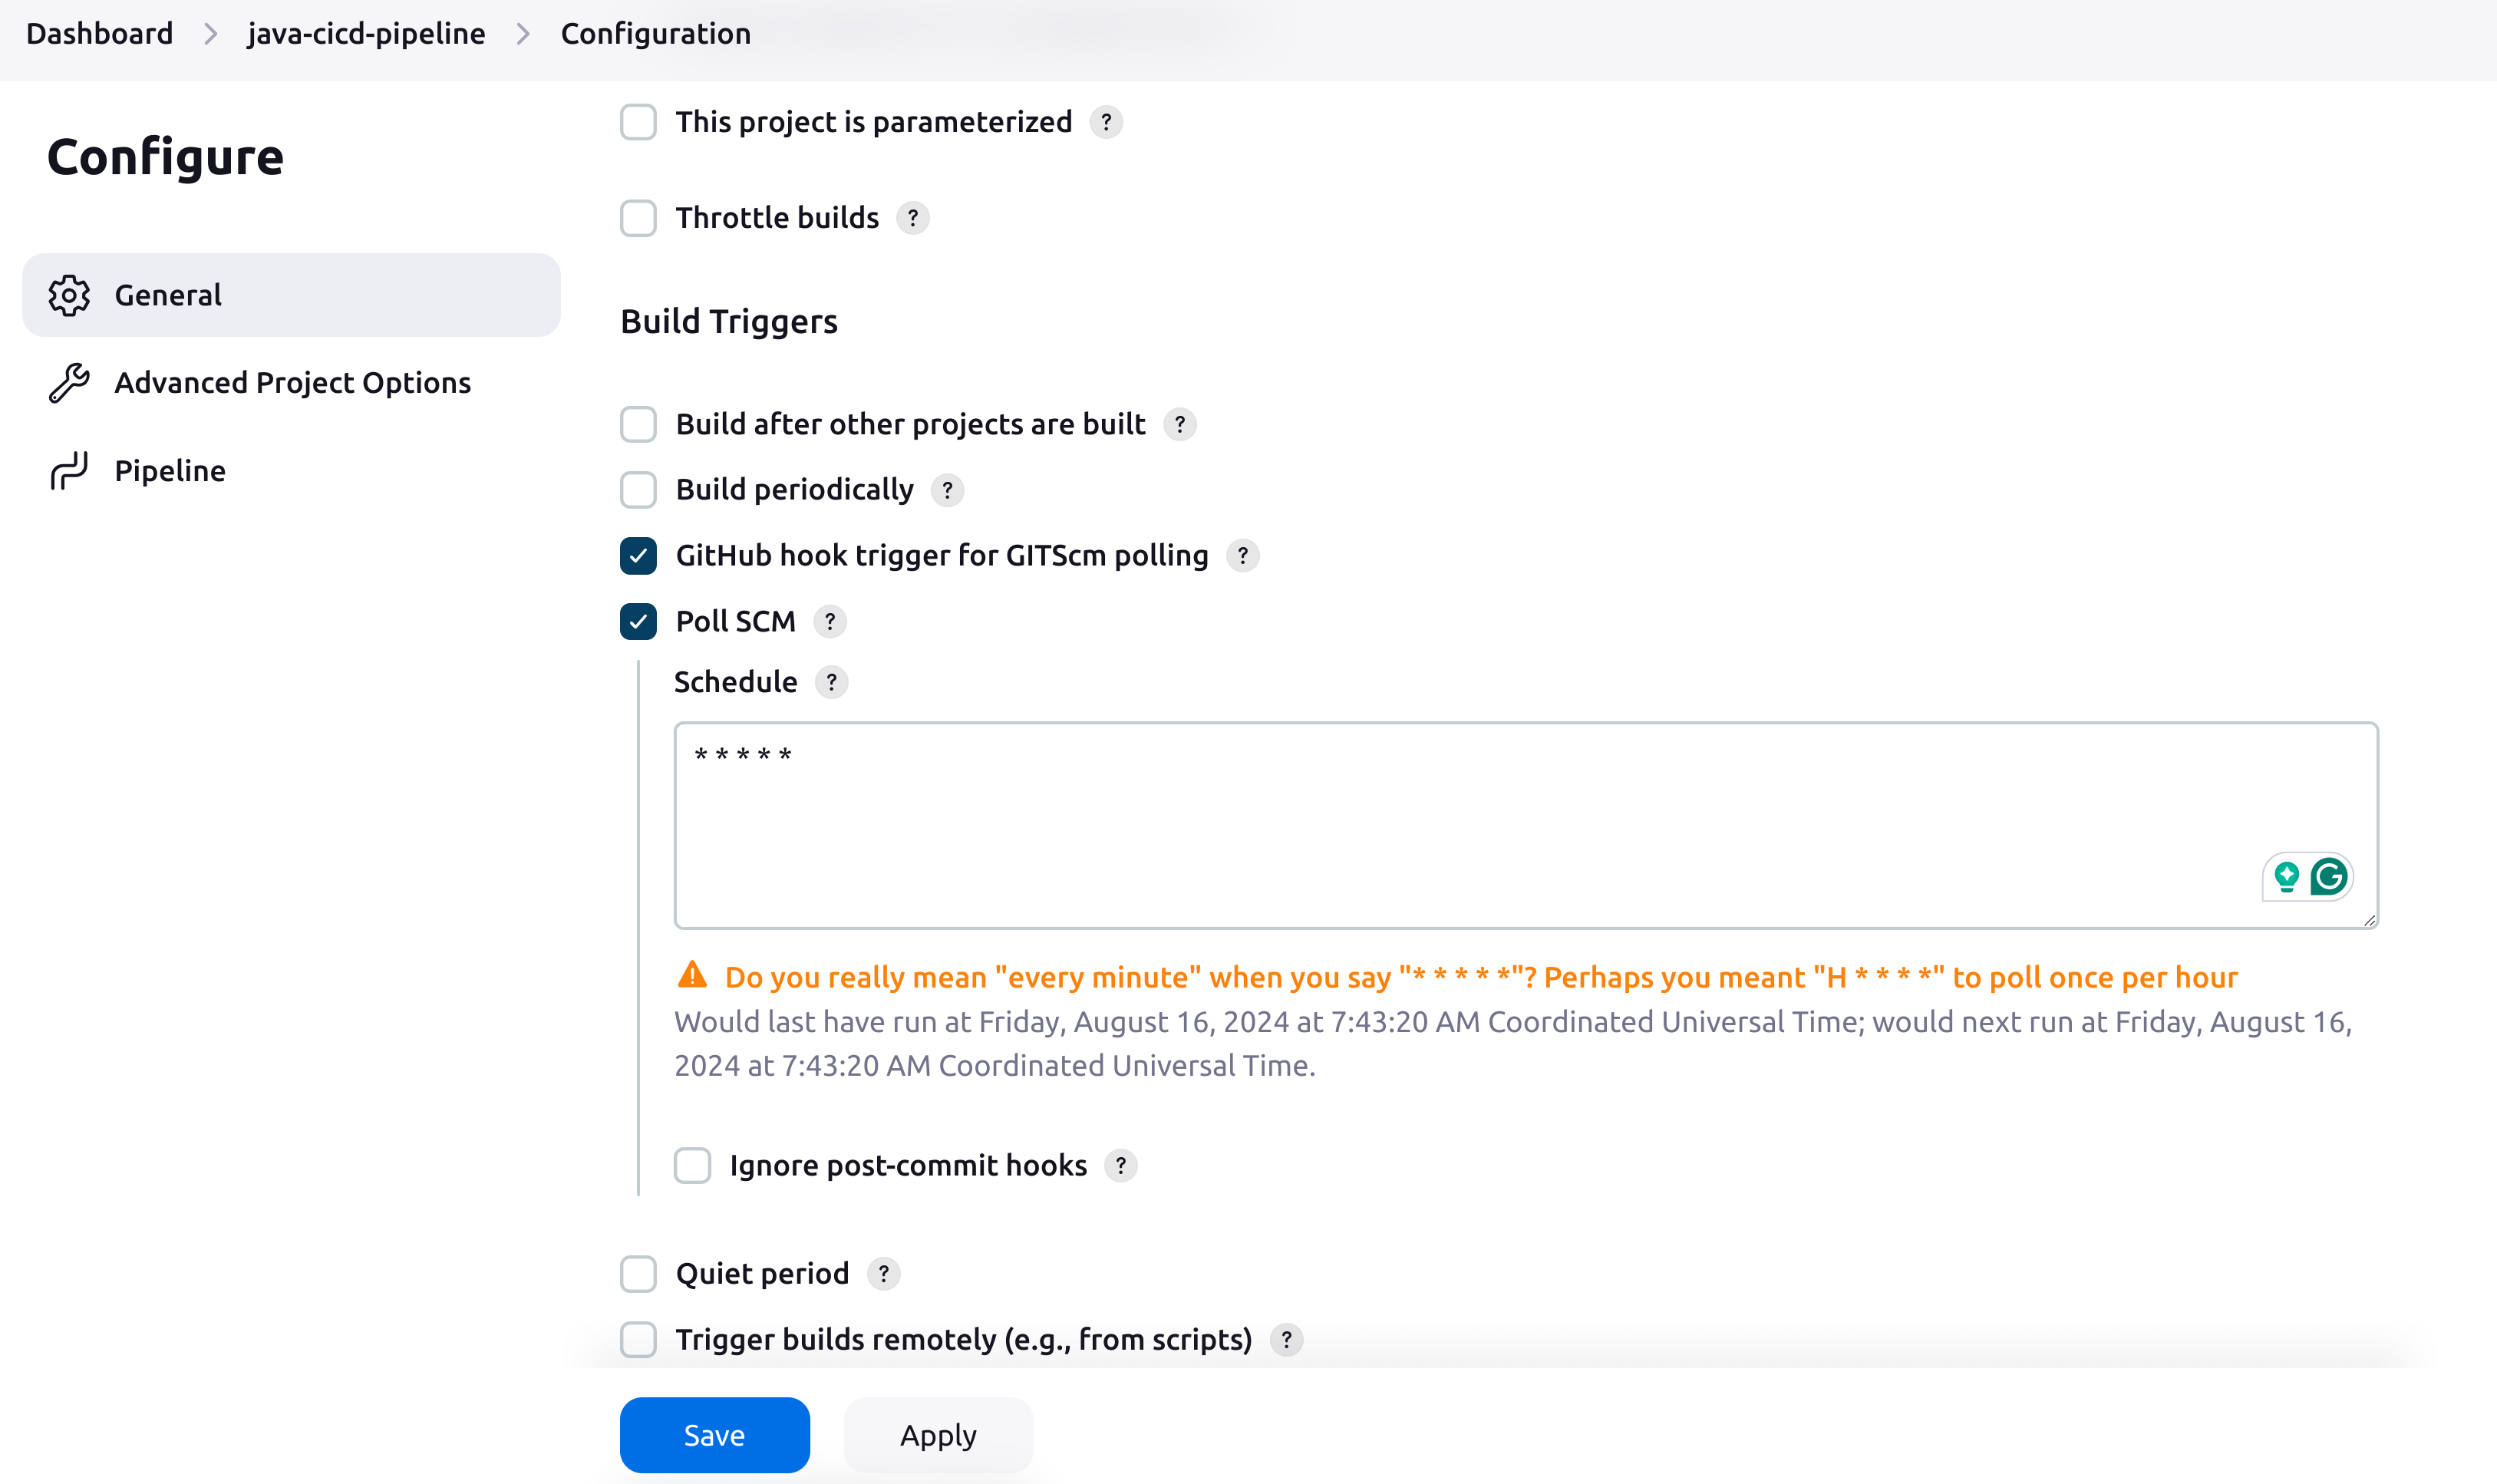
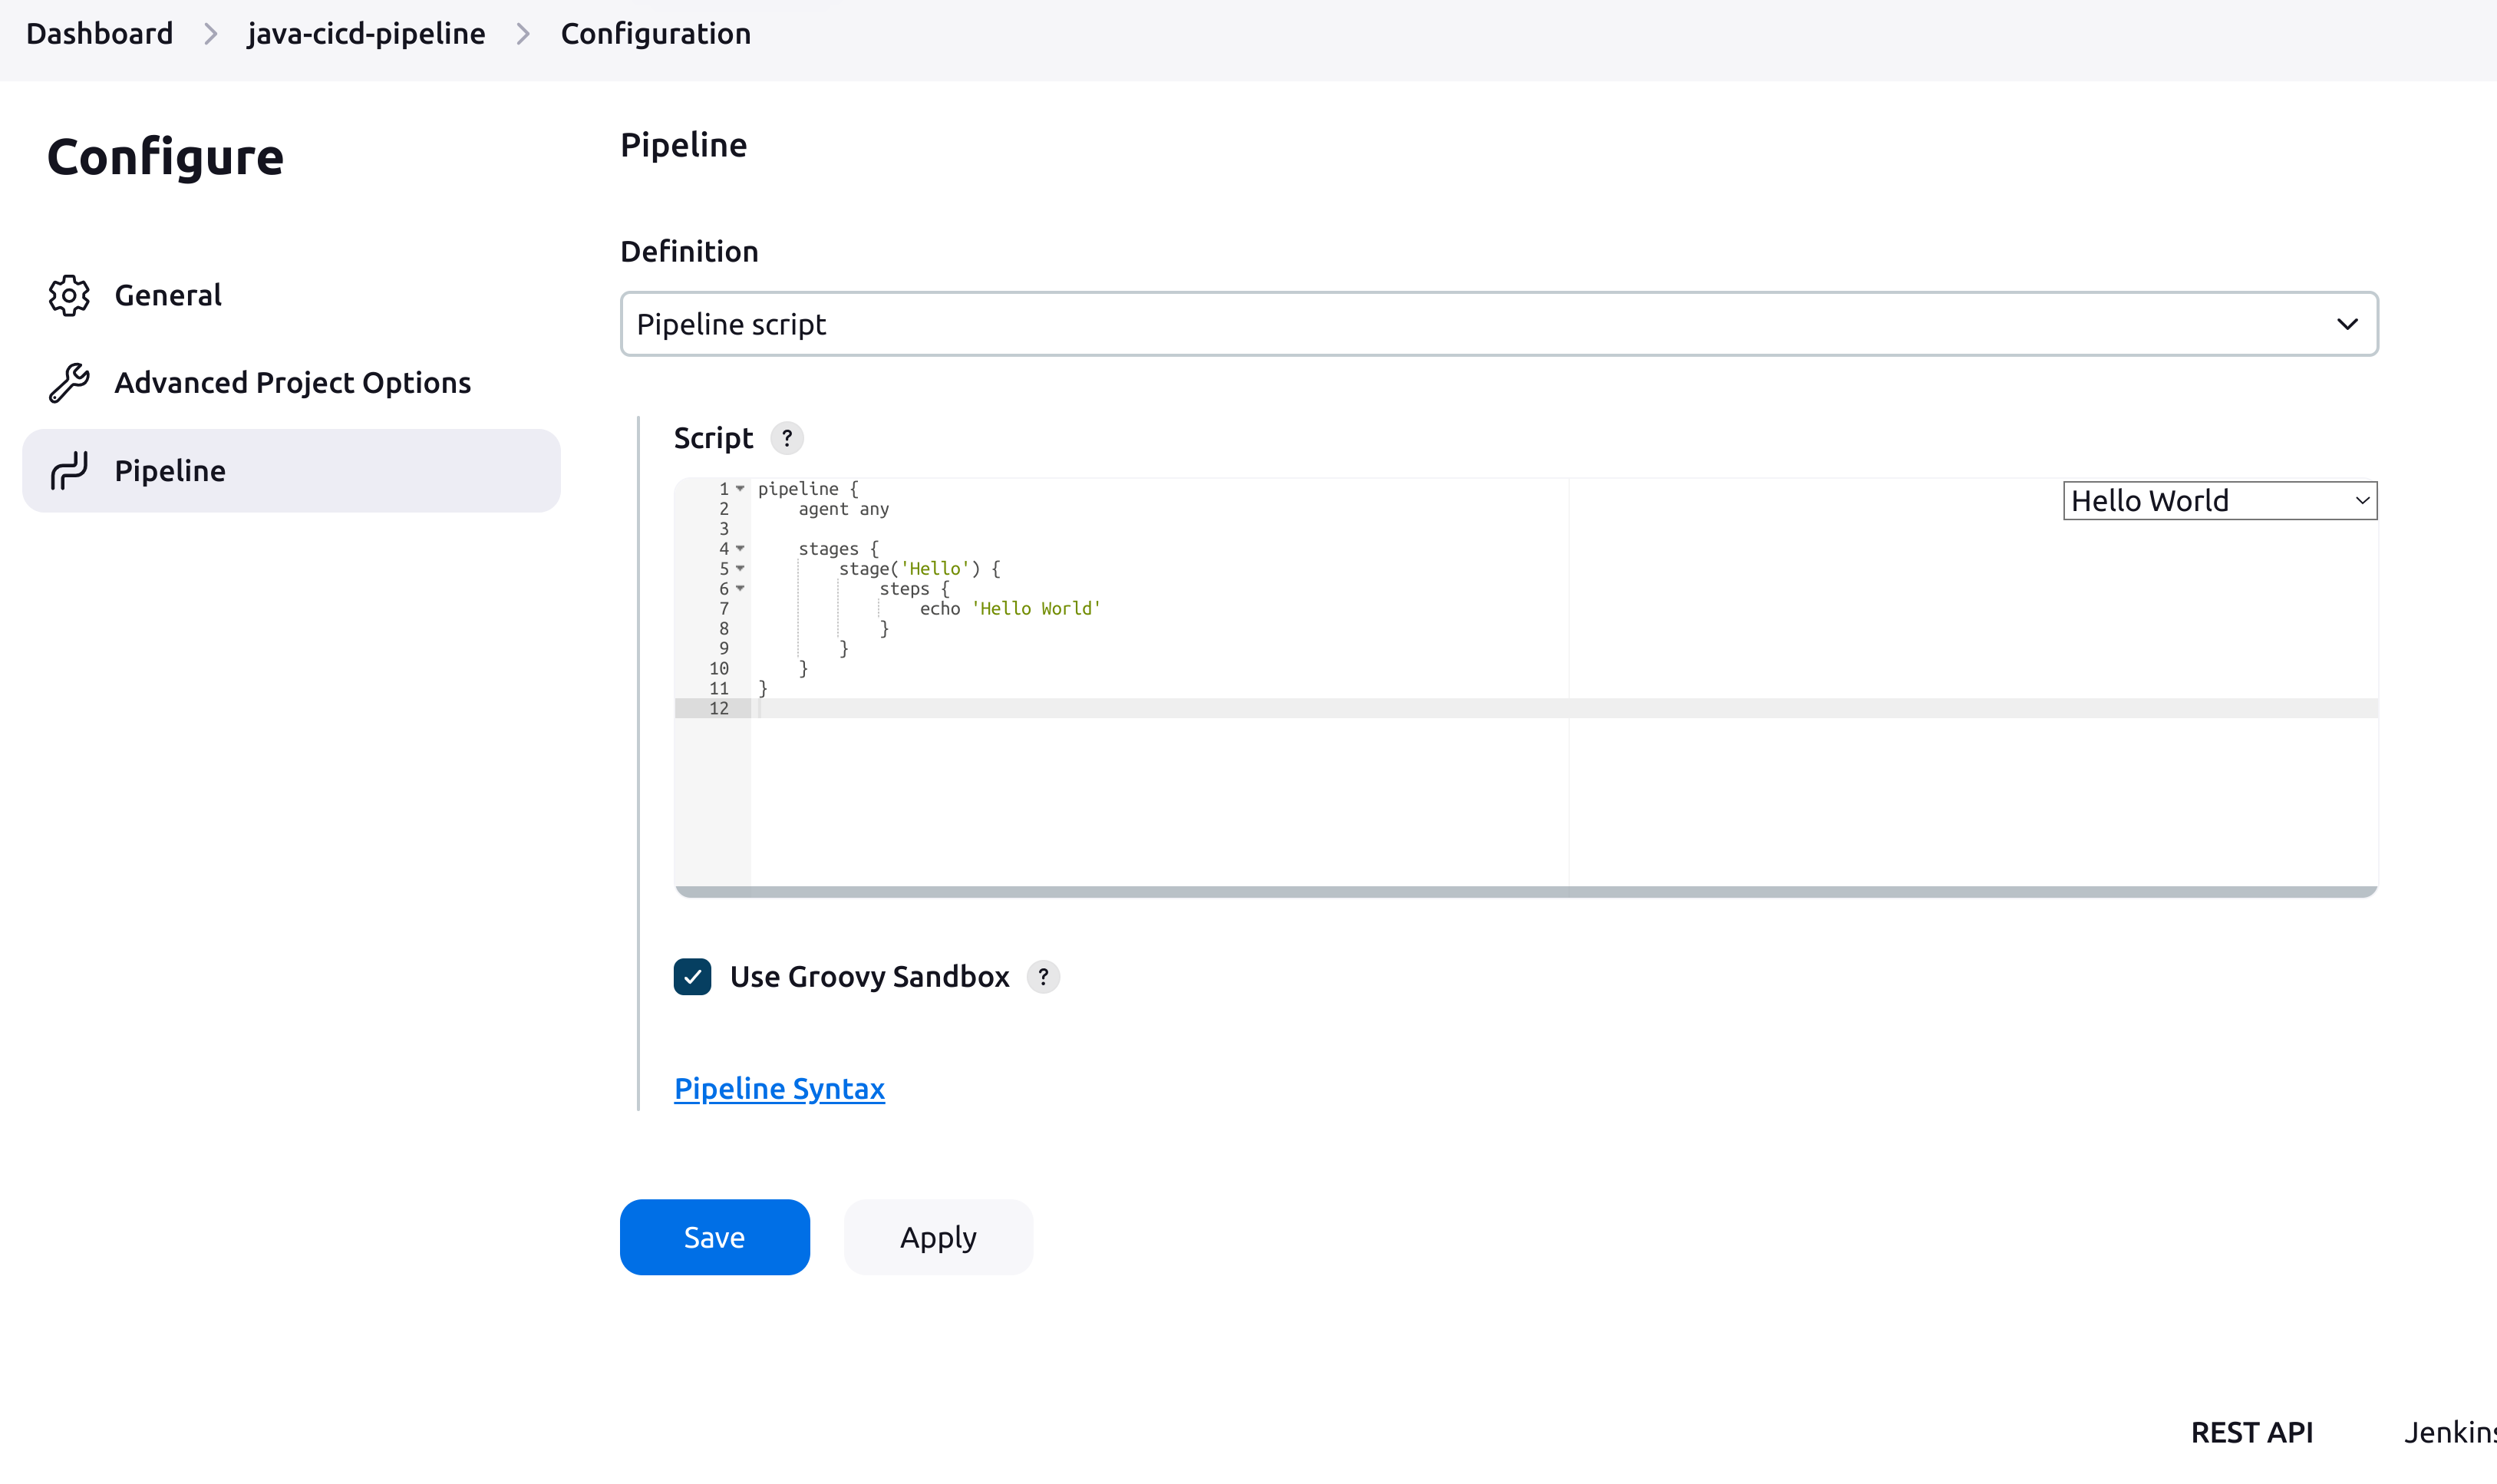
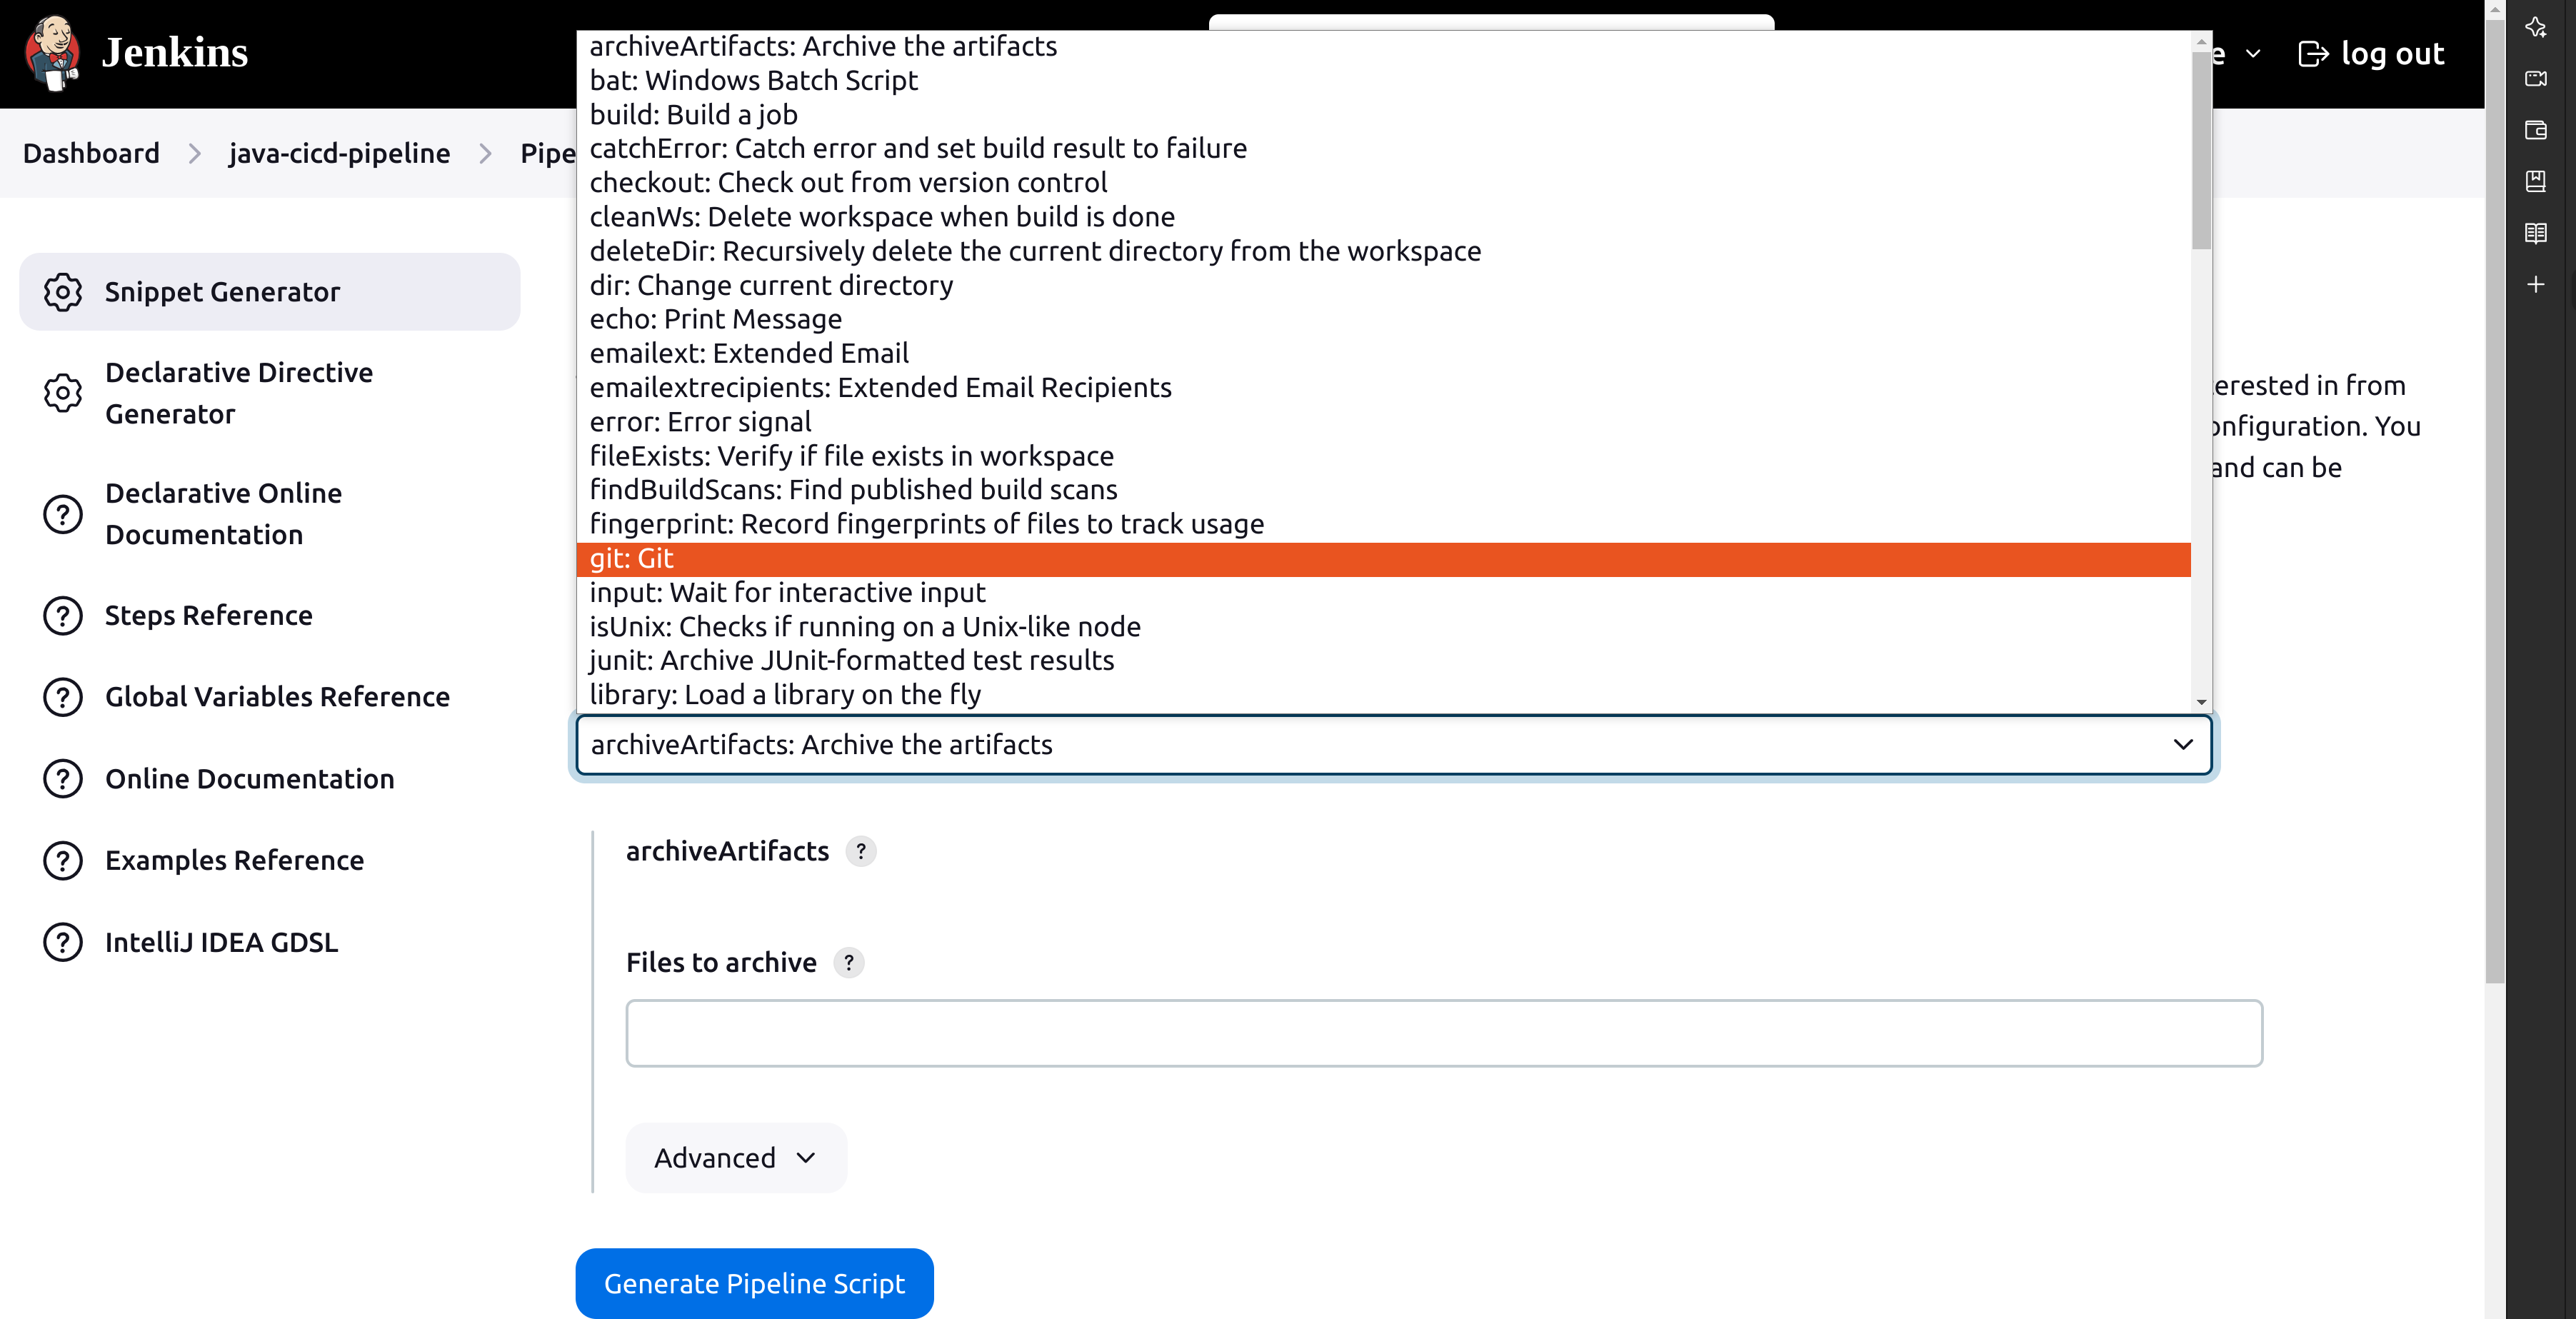
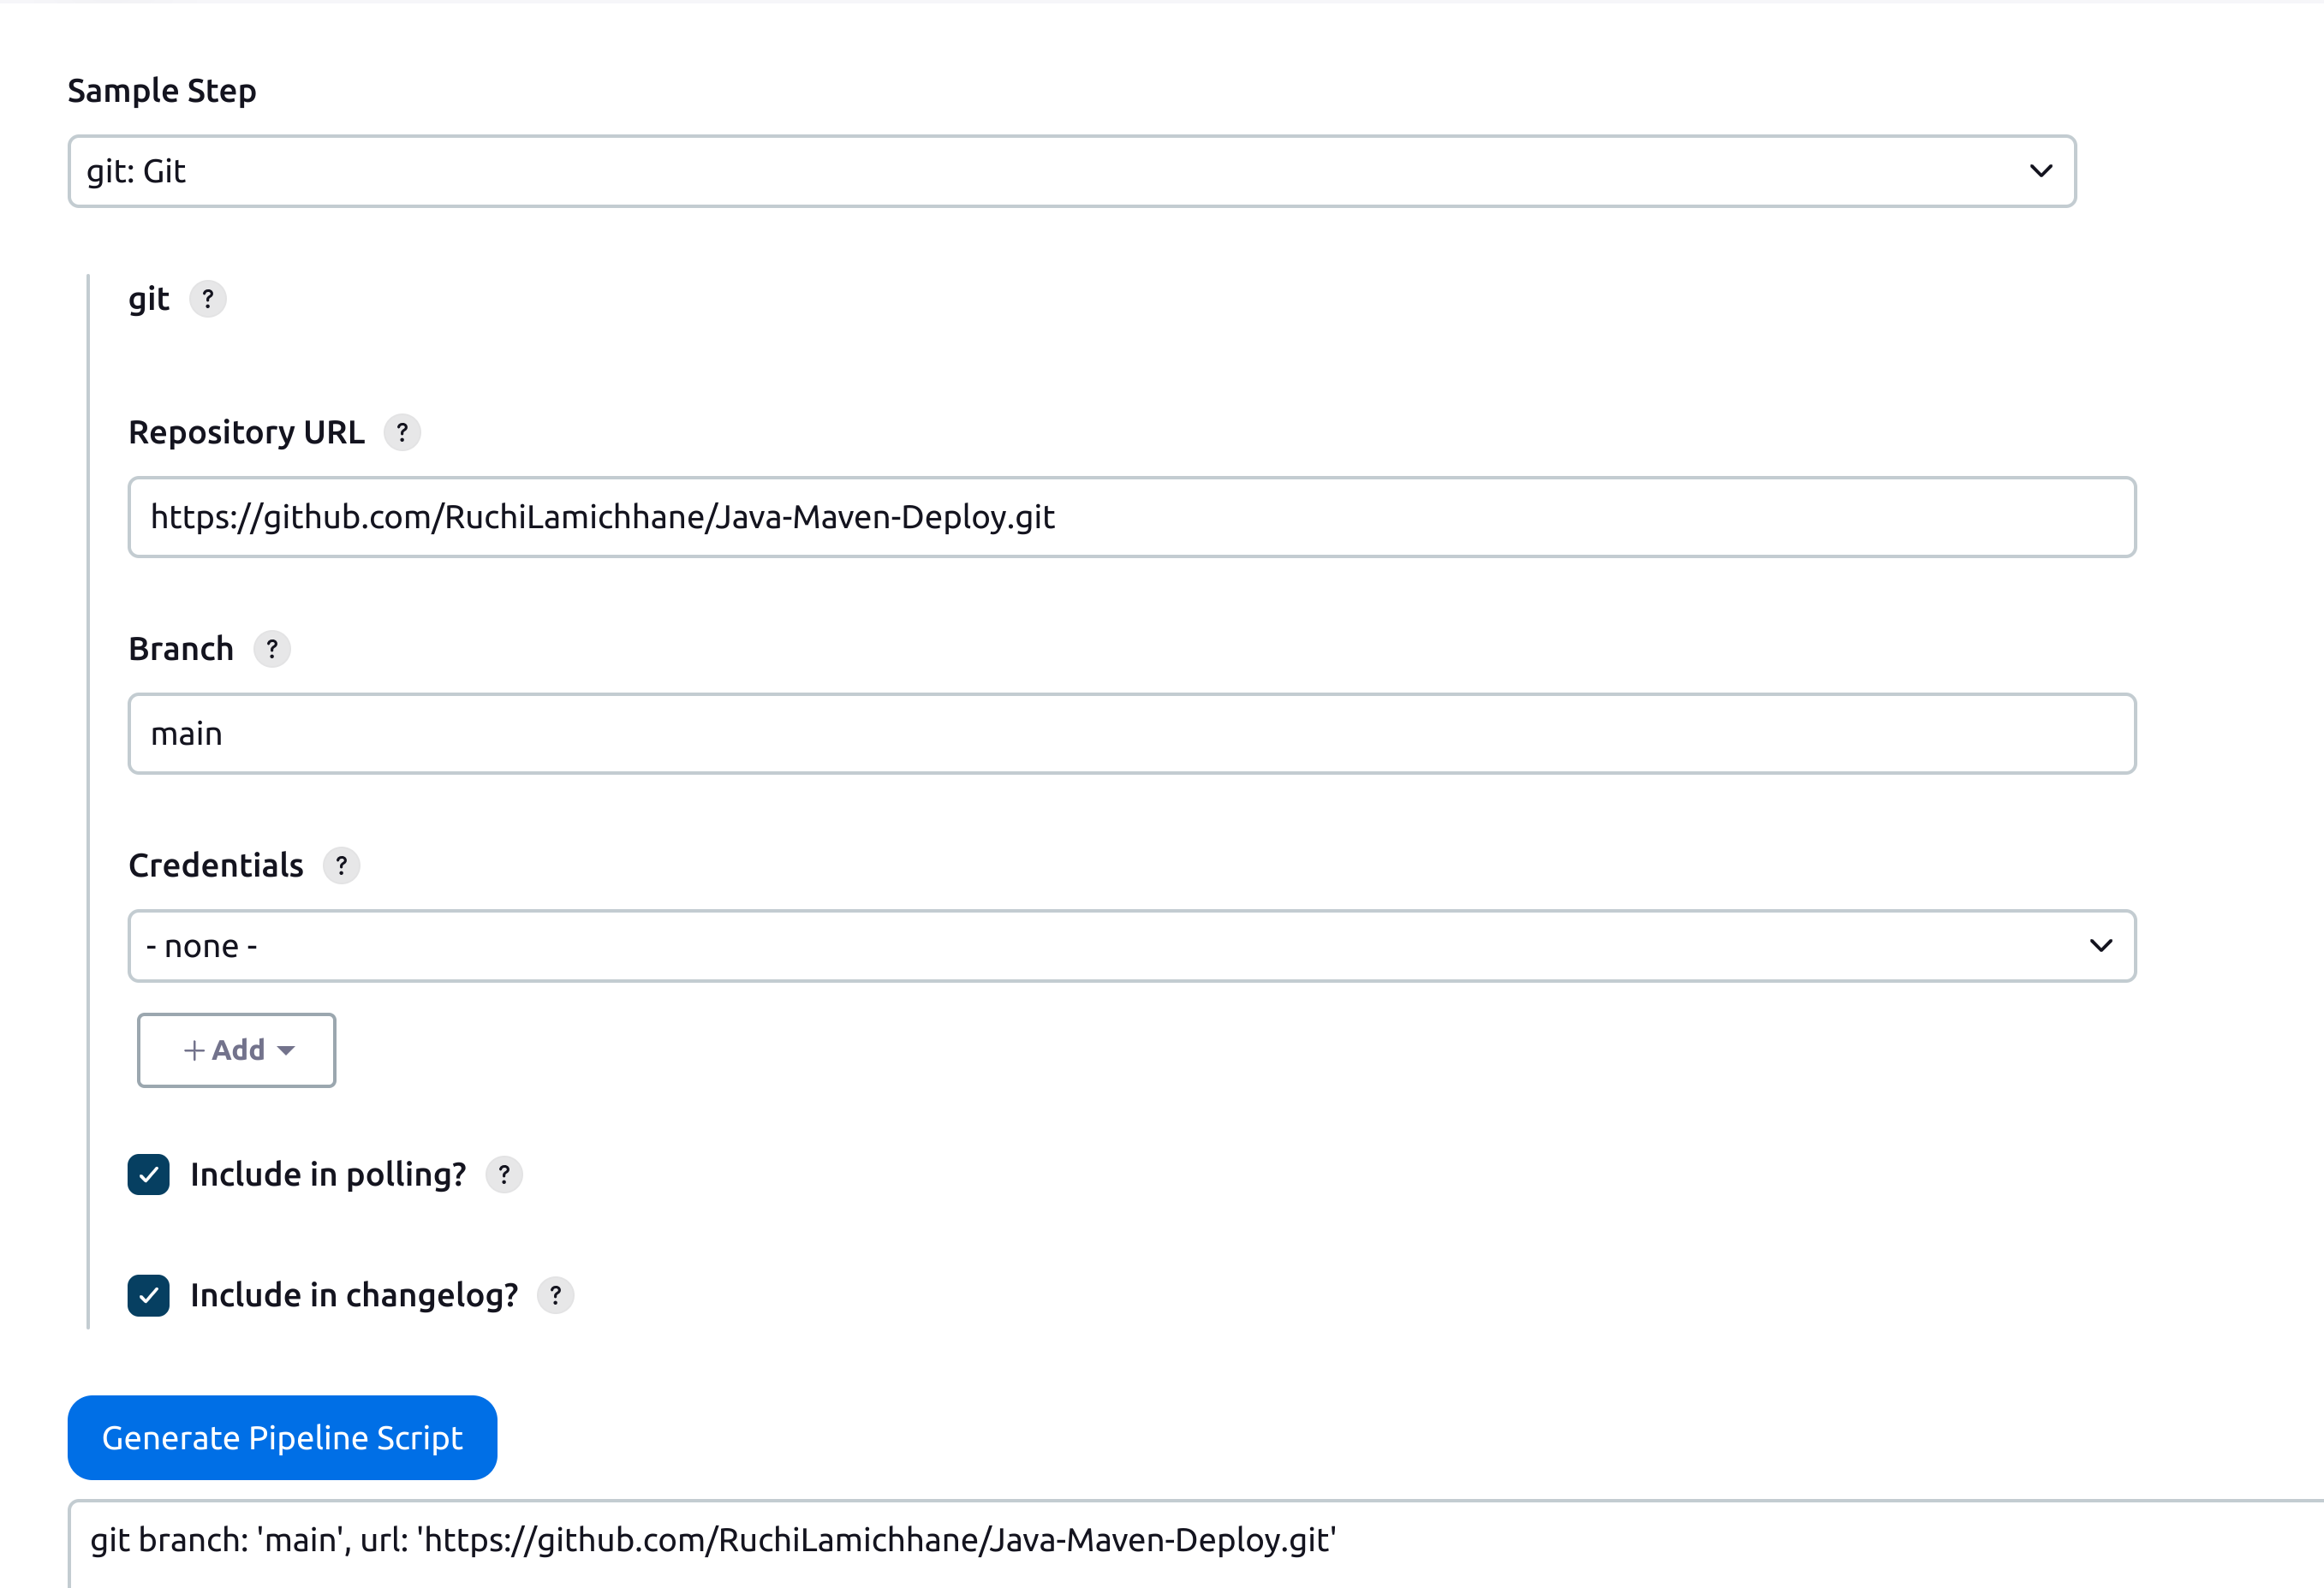
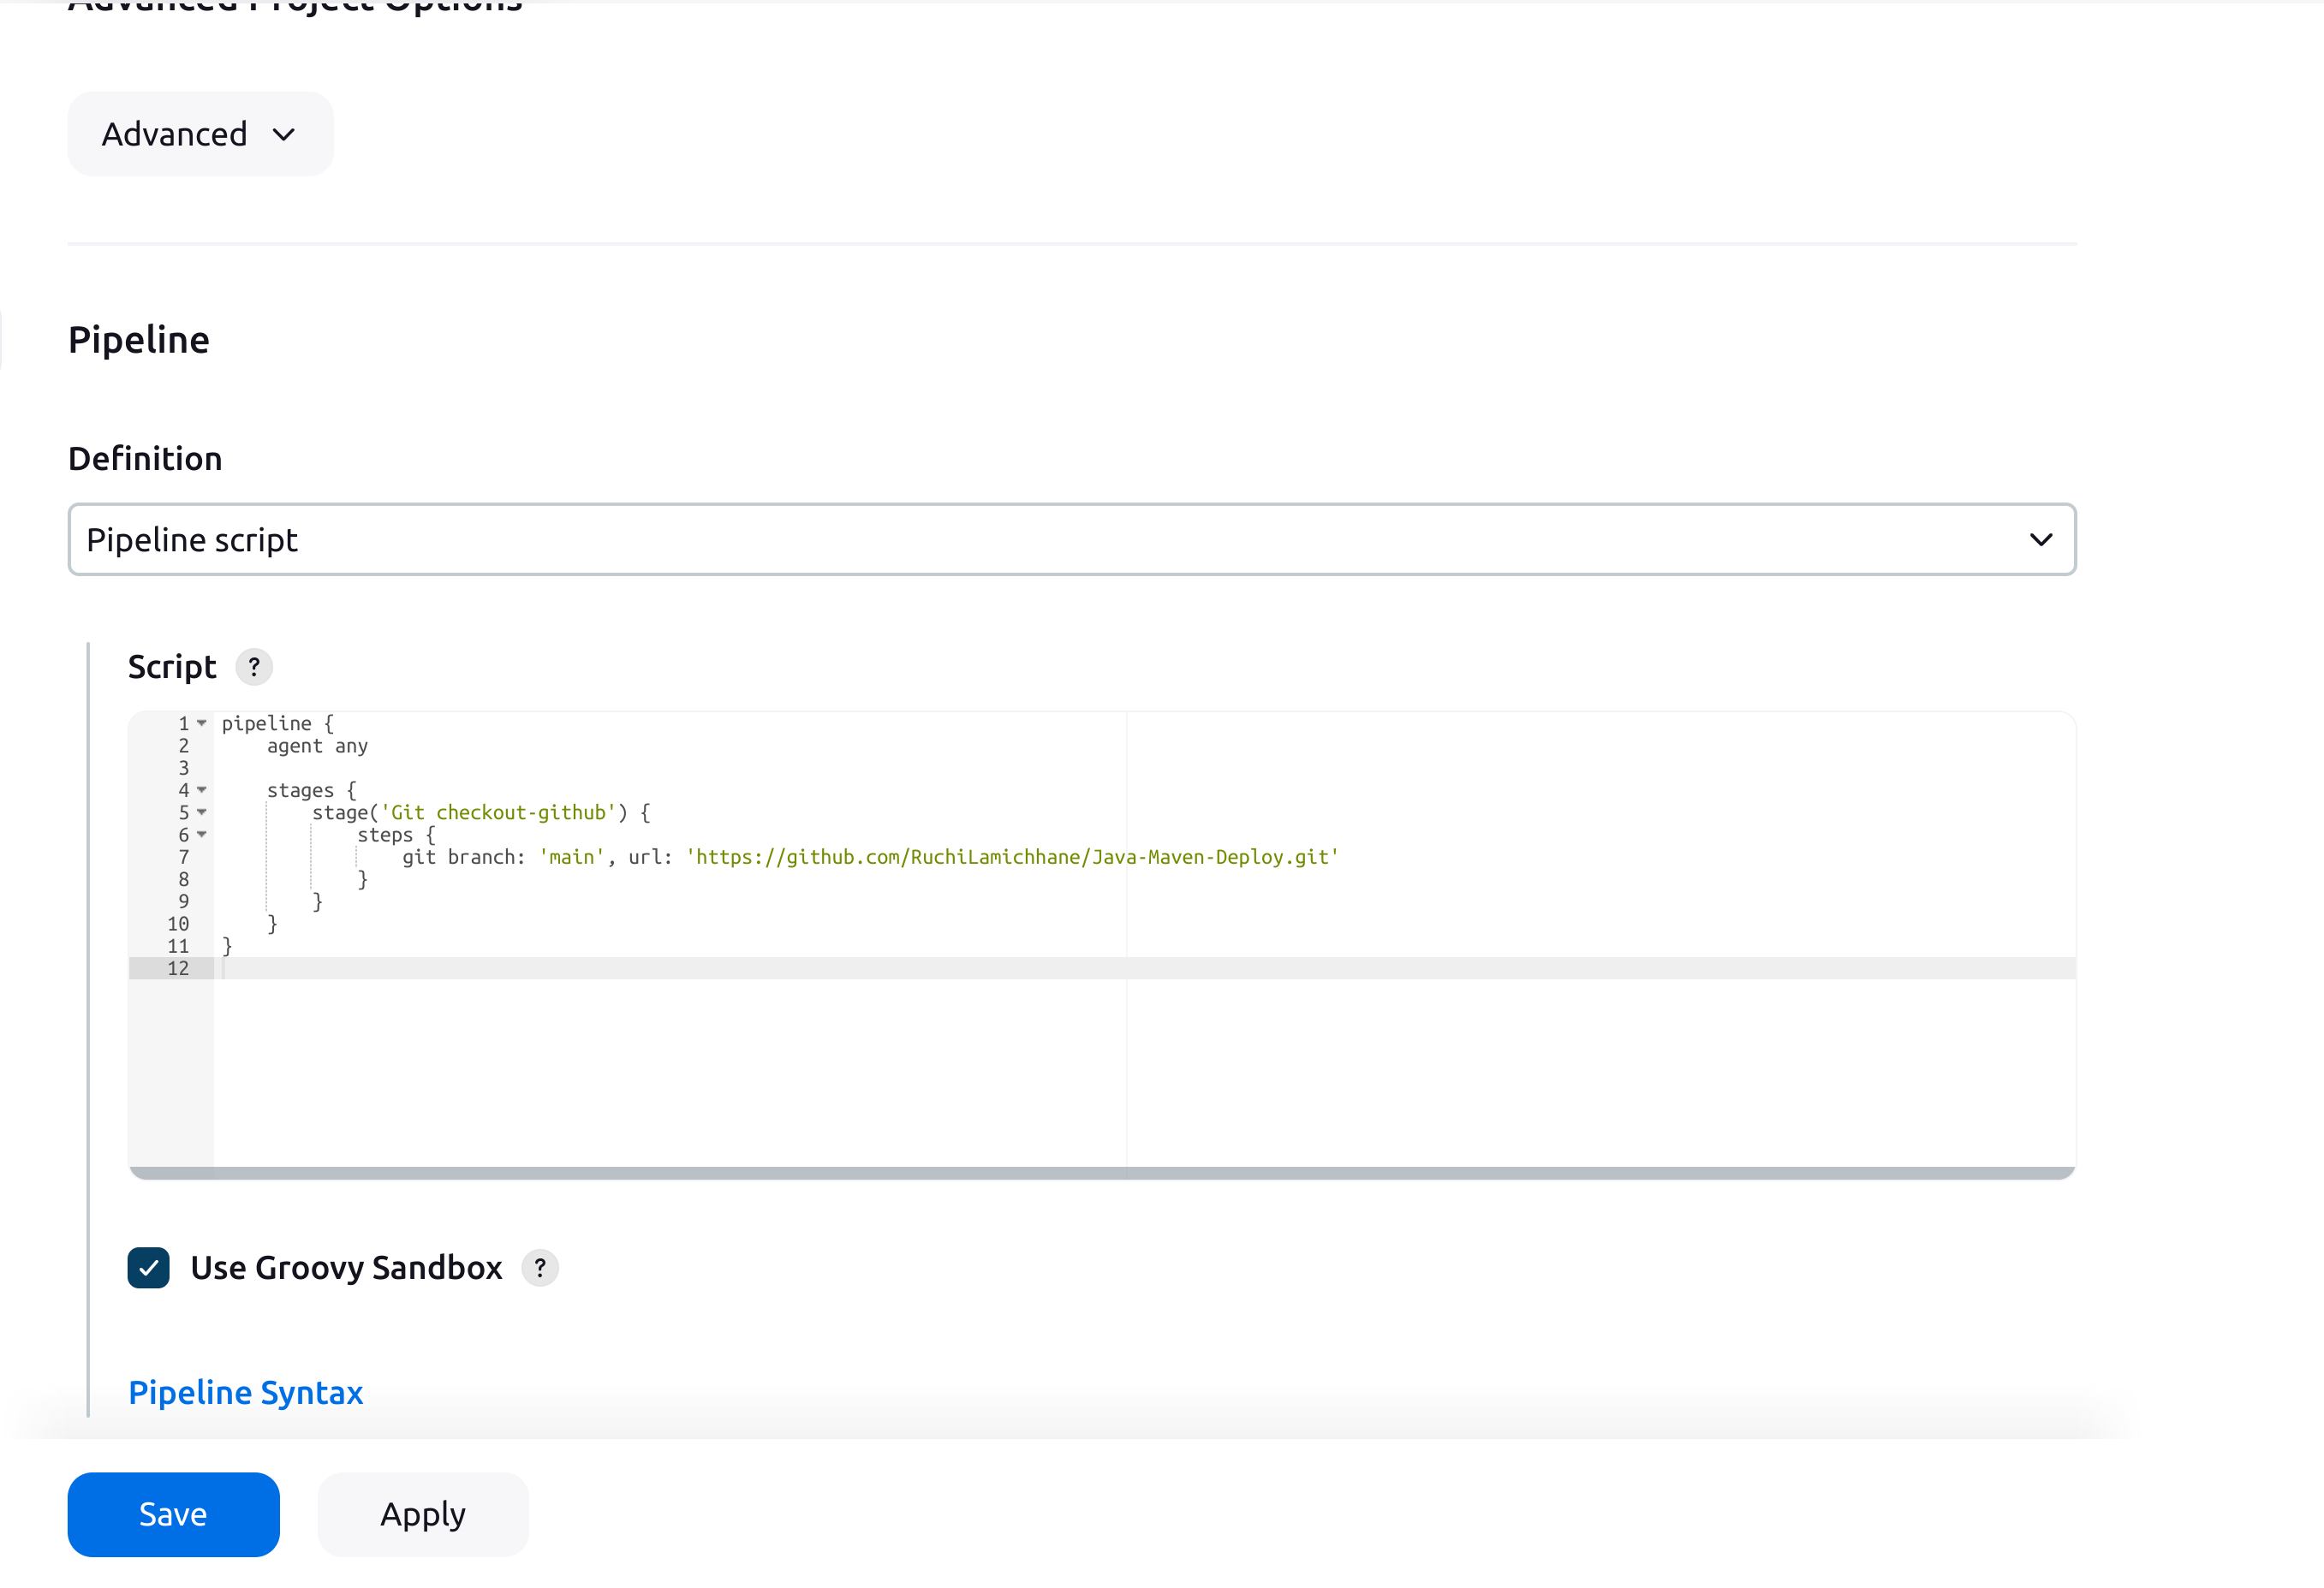
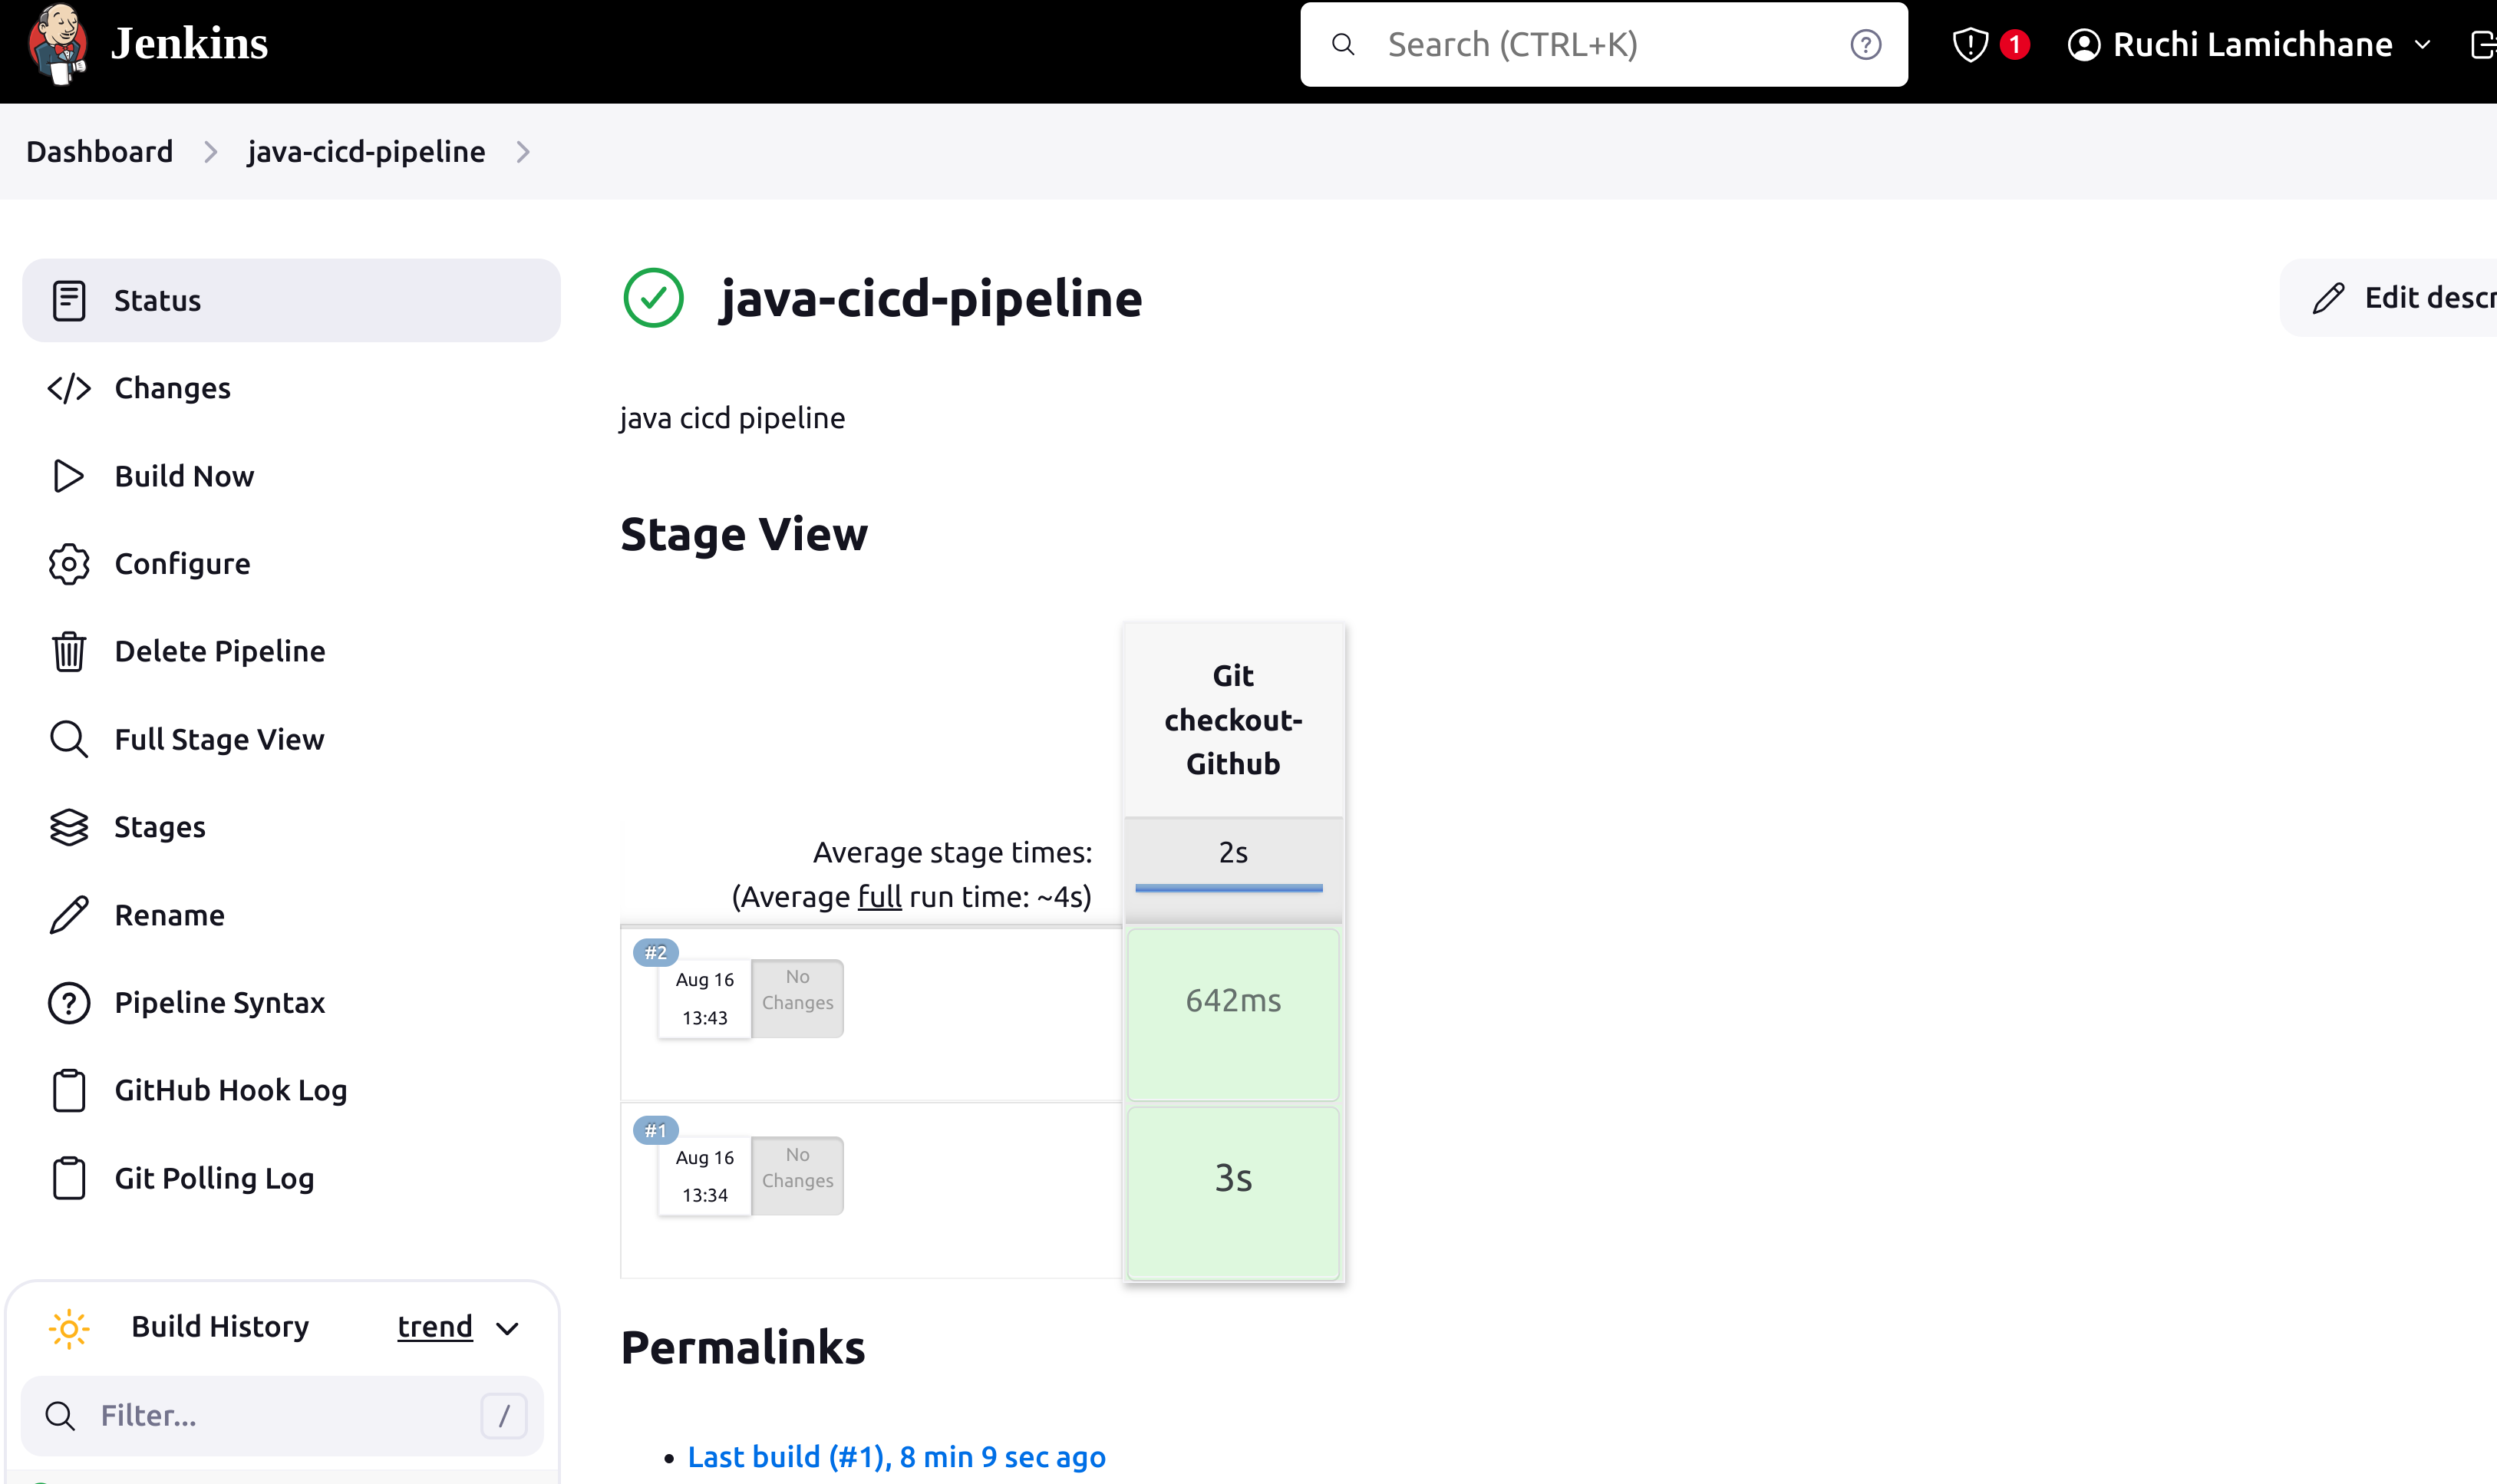
install git plugins if you get this error:
Failed to connect to repository : Error performing git command: ls-remote -h https://github.com/RuchiLamichhane/Java-Maven-Deploy.git HEAD
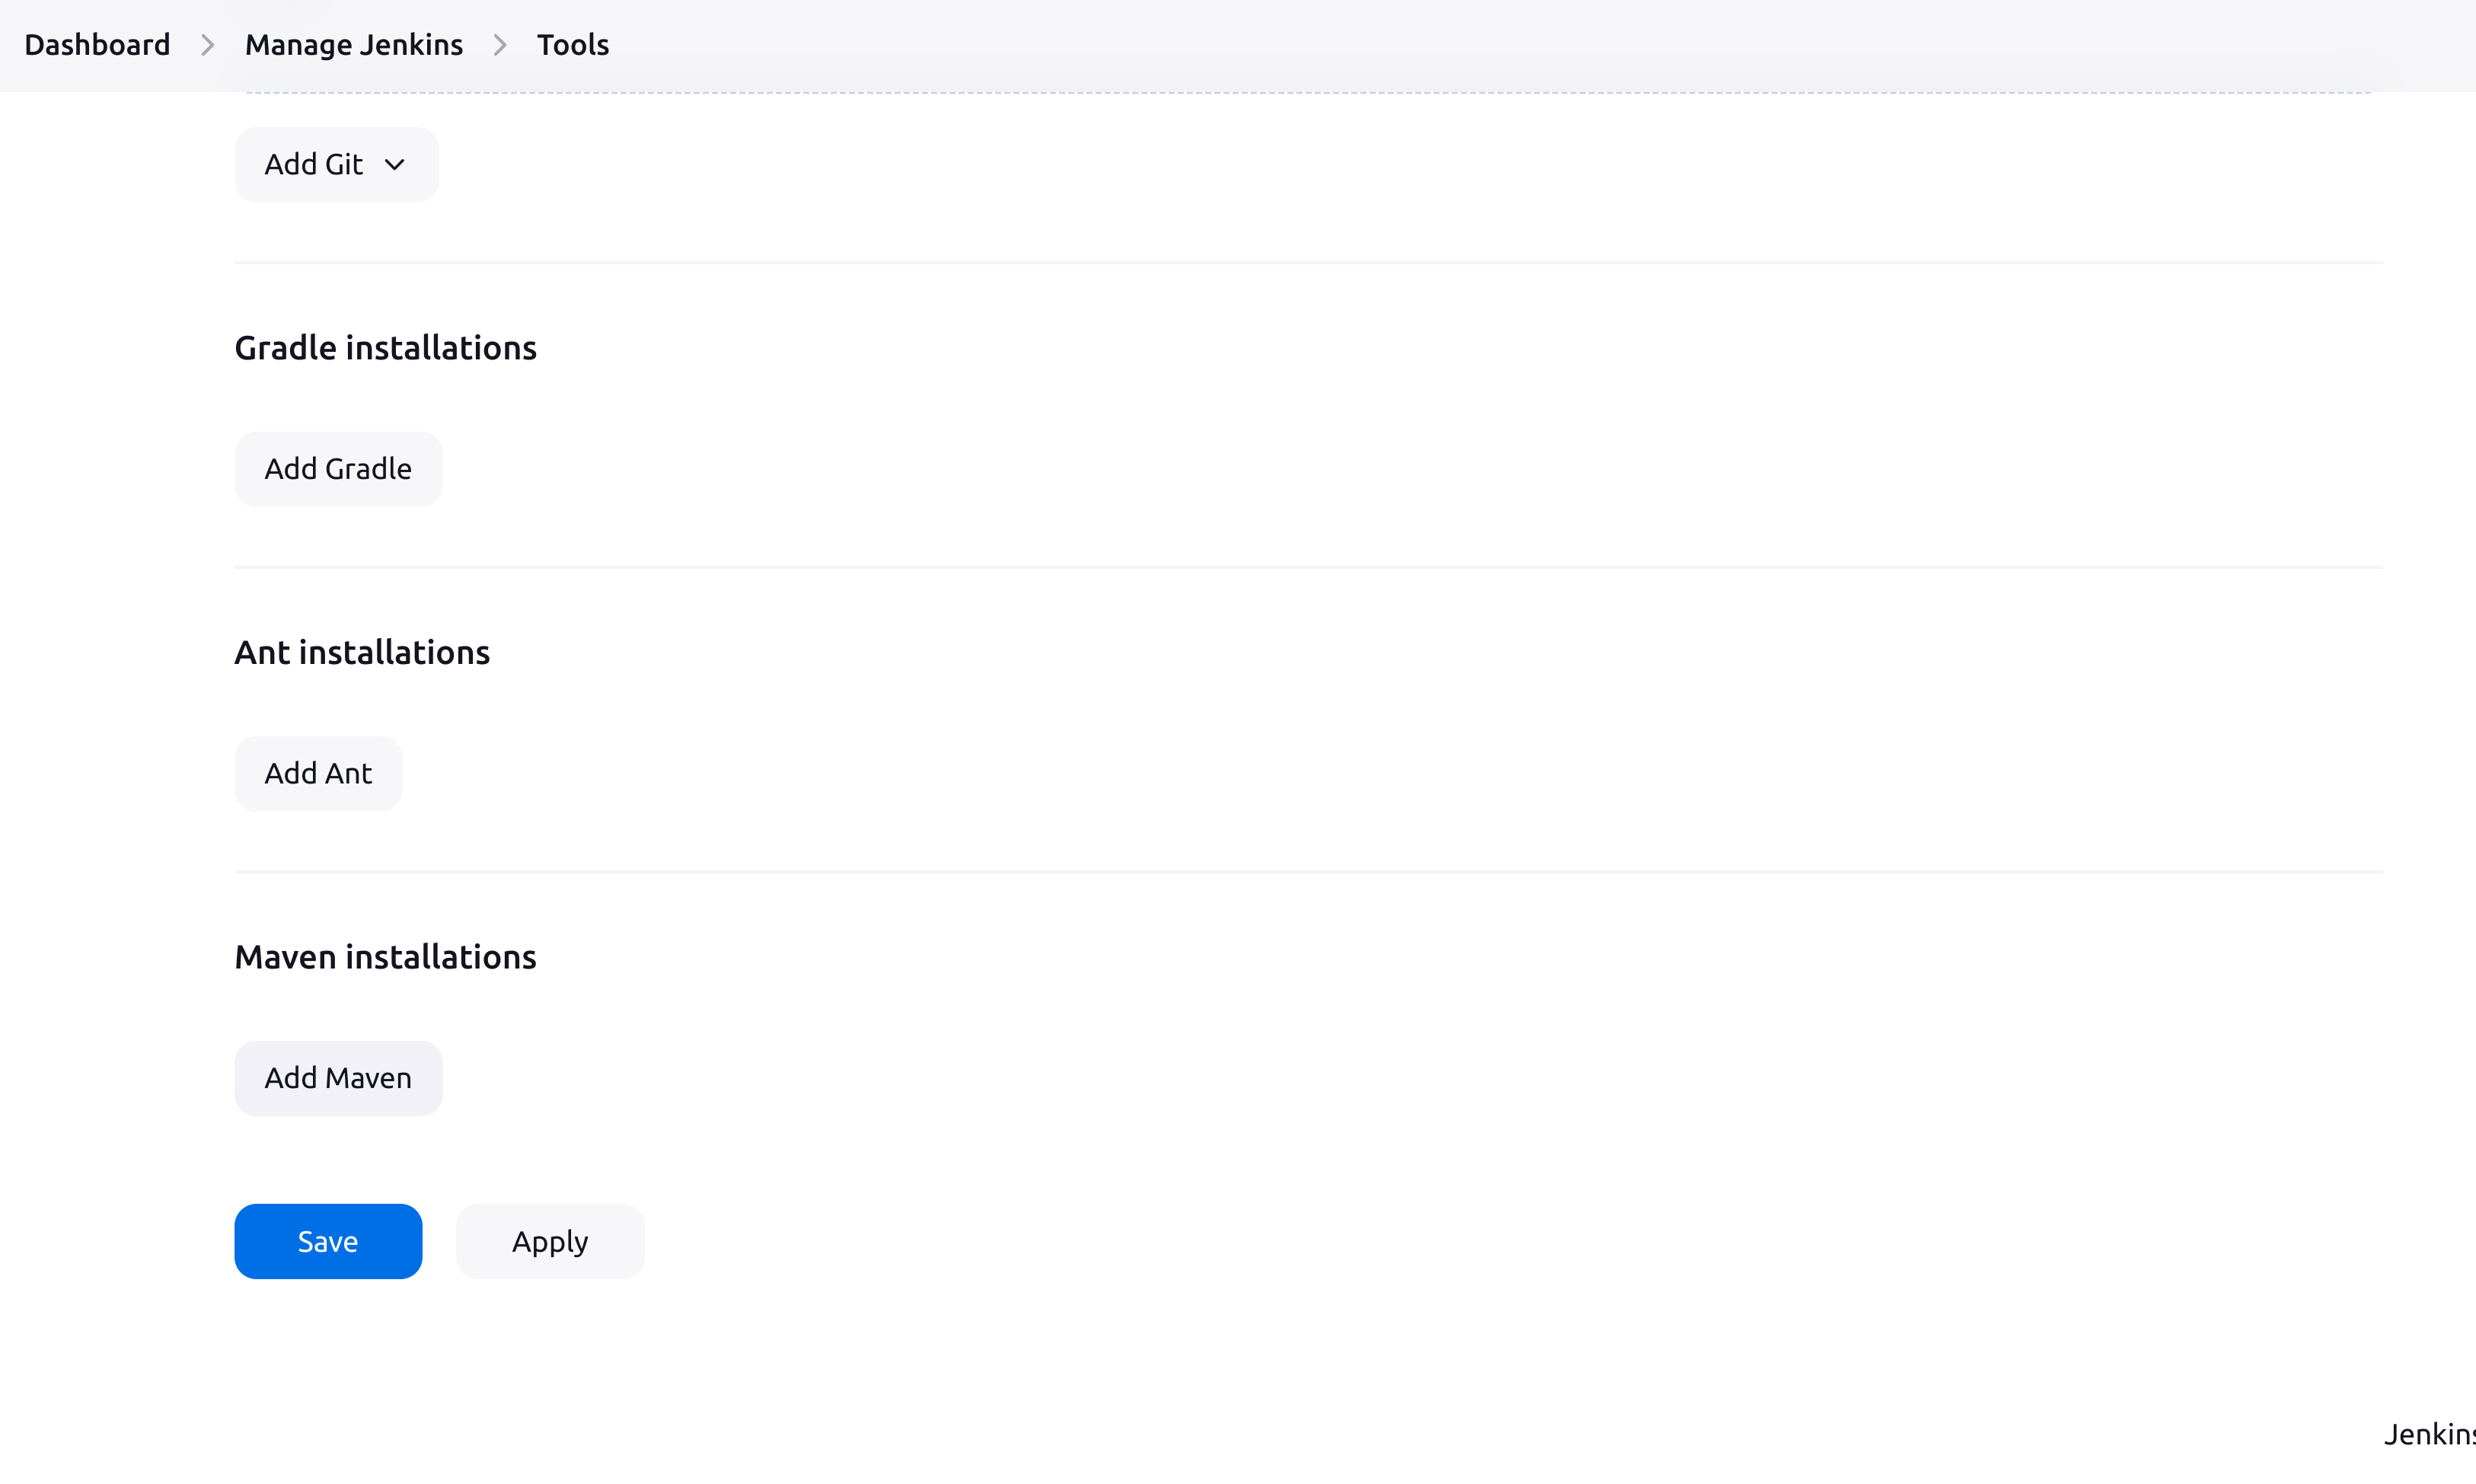
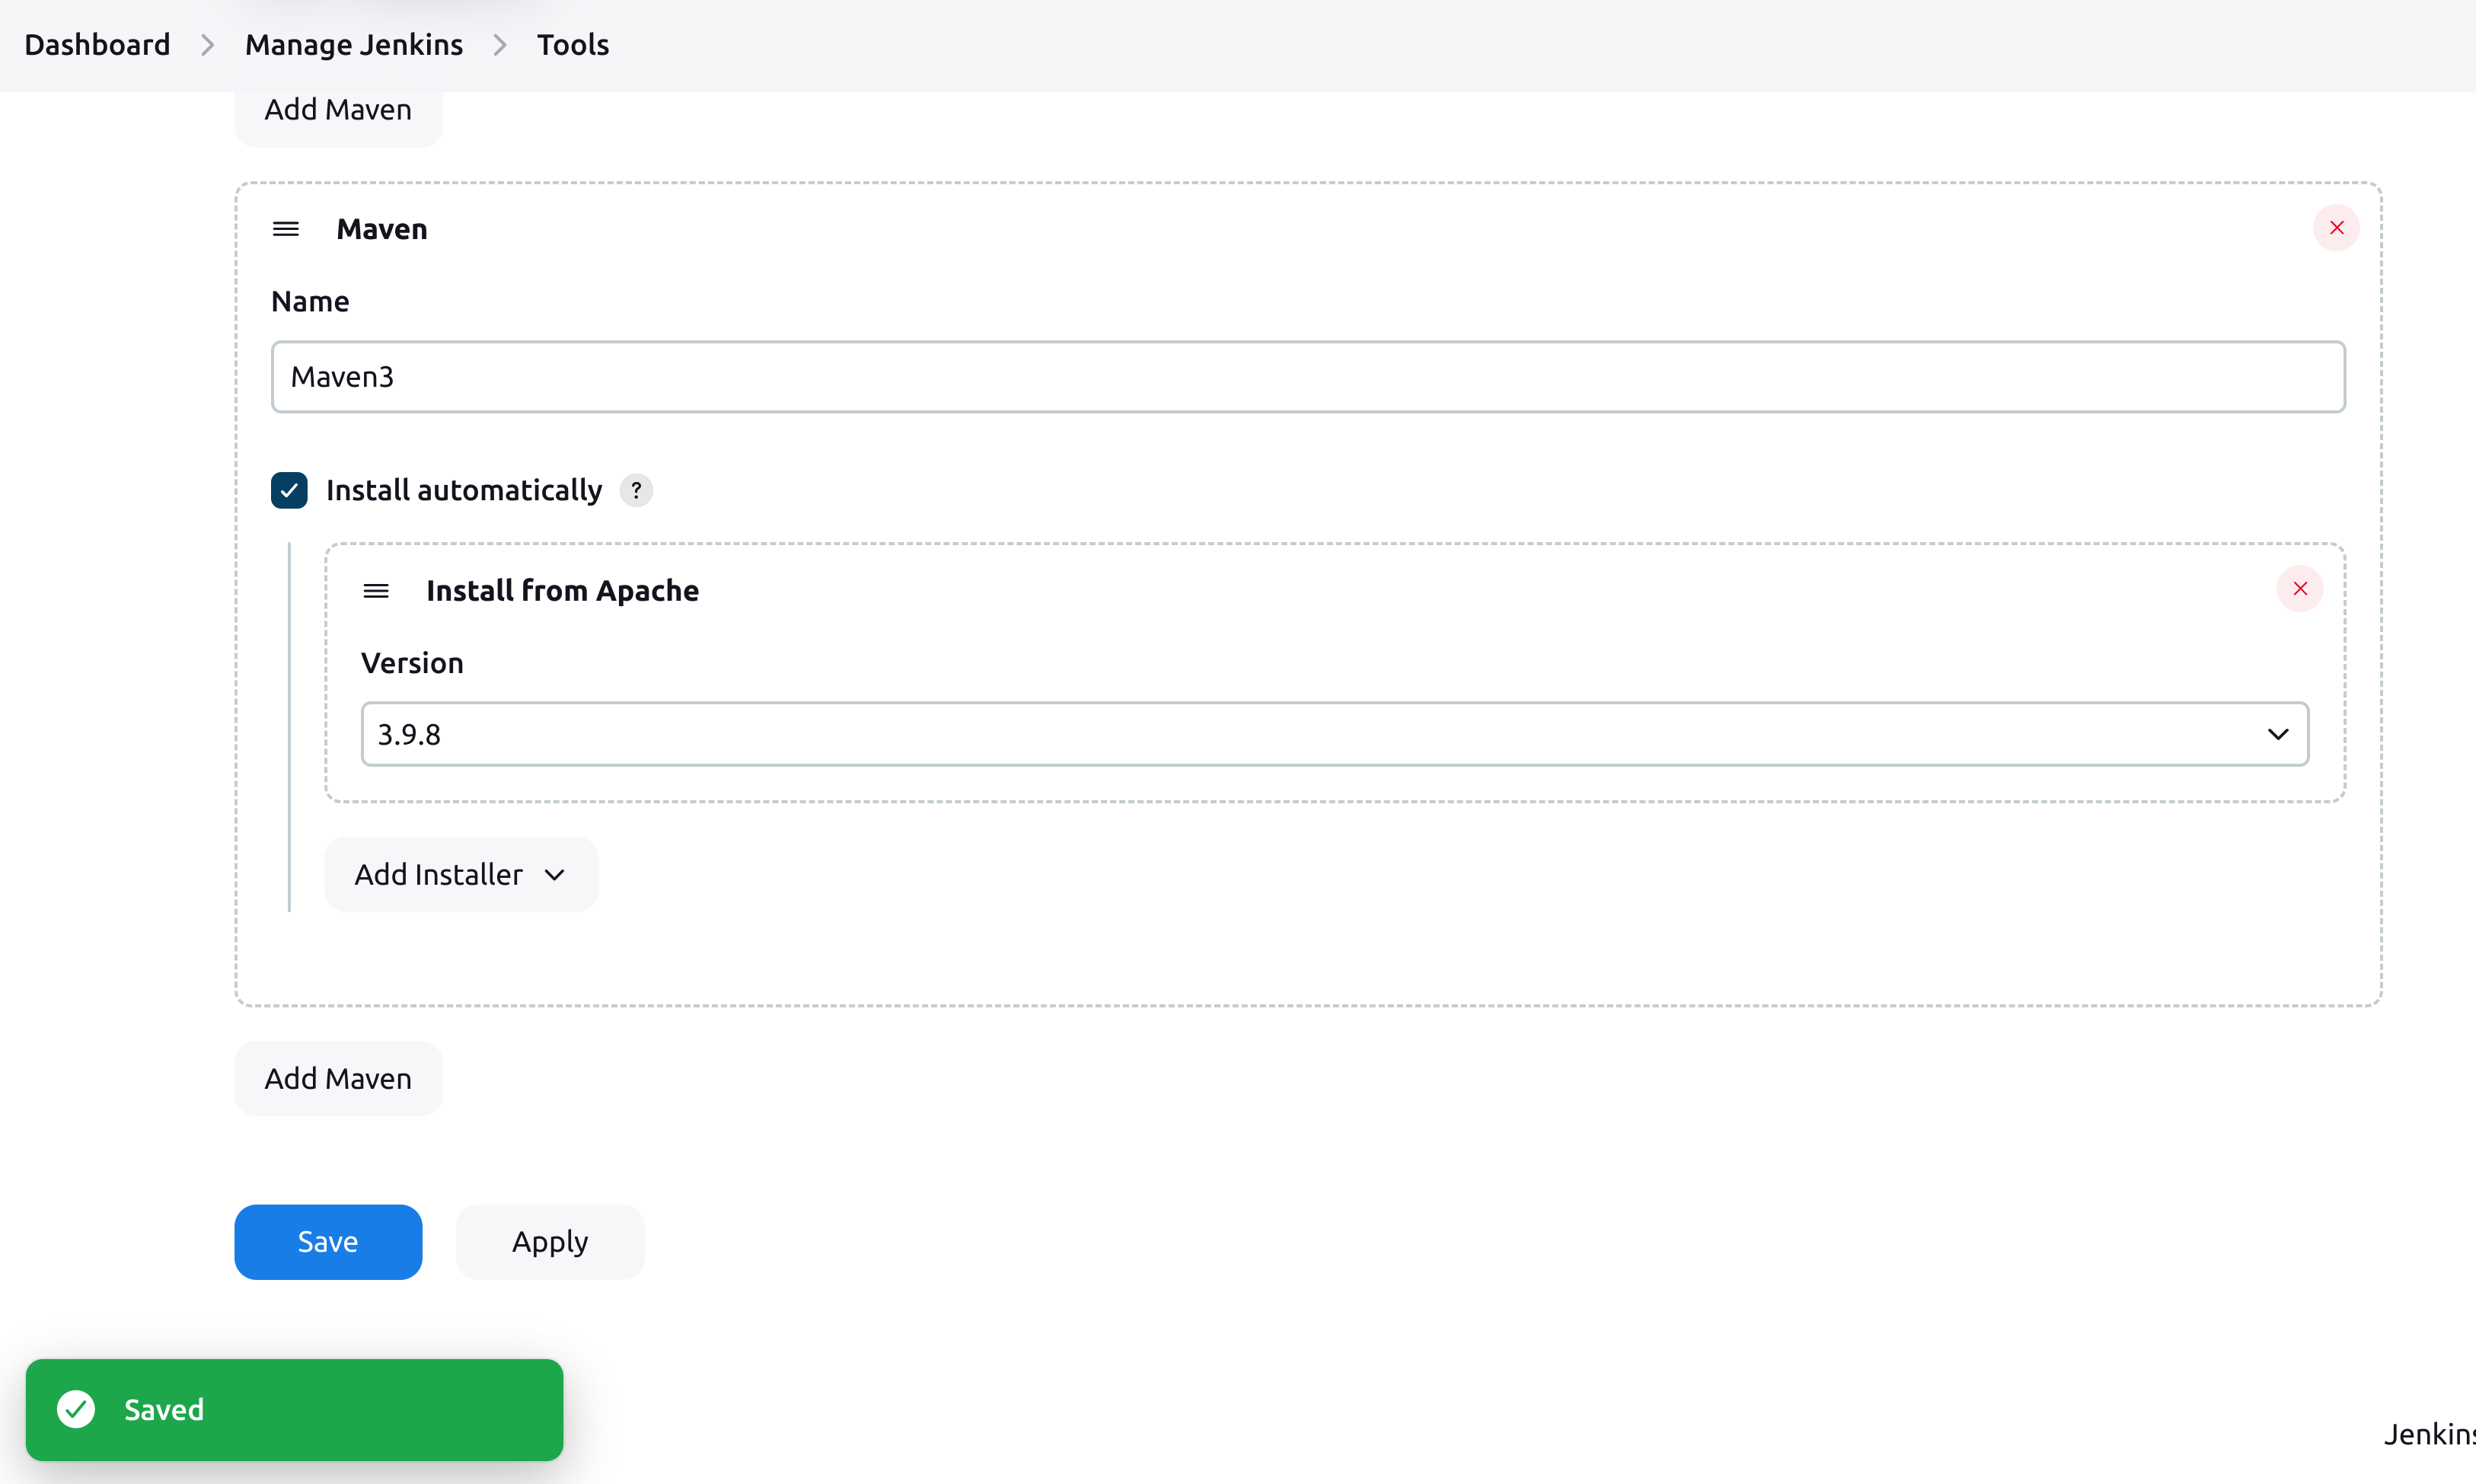
Step-2 : Configure Maven as Global Tool in Jenkins
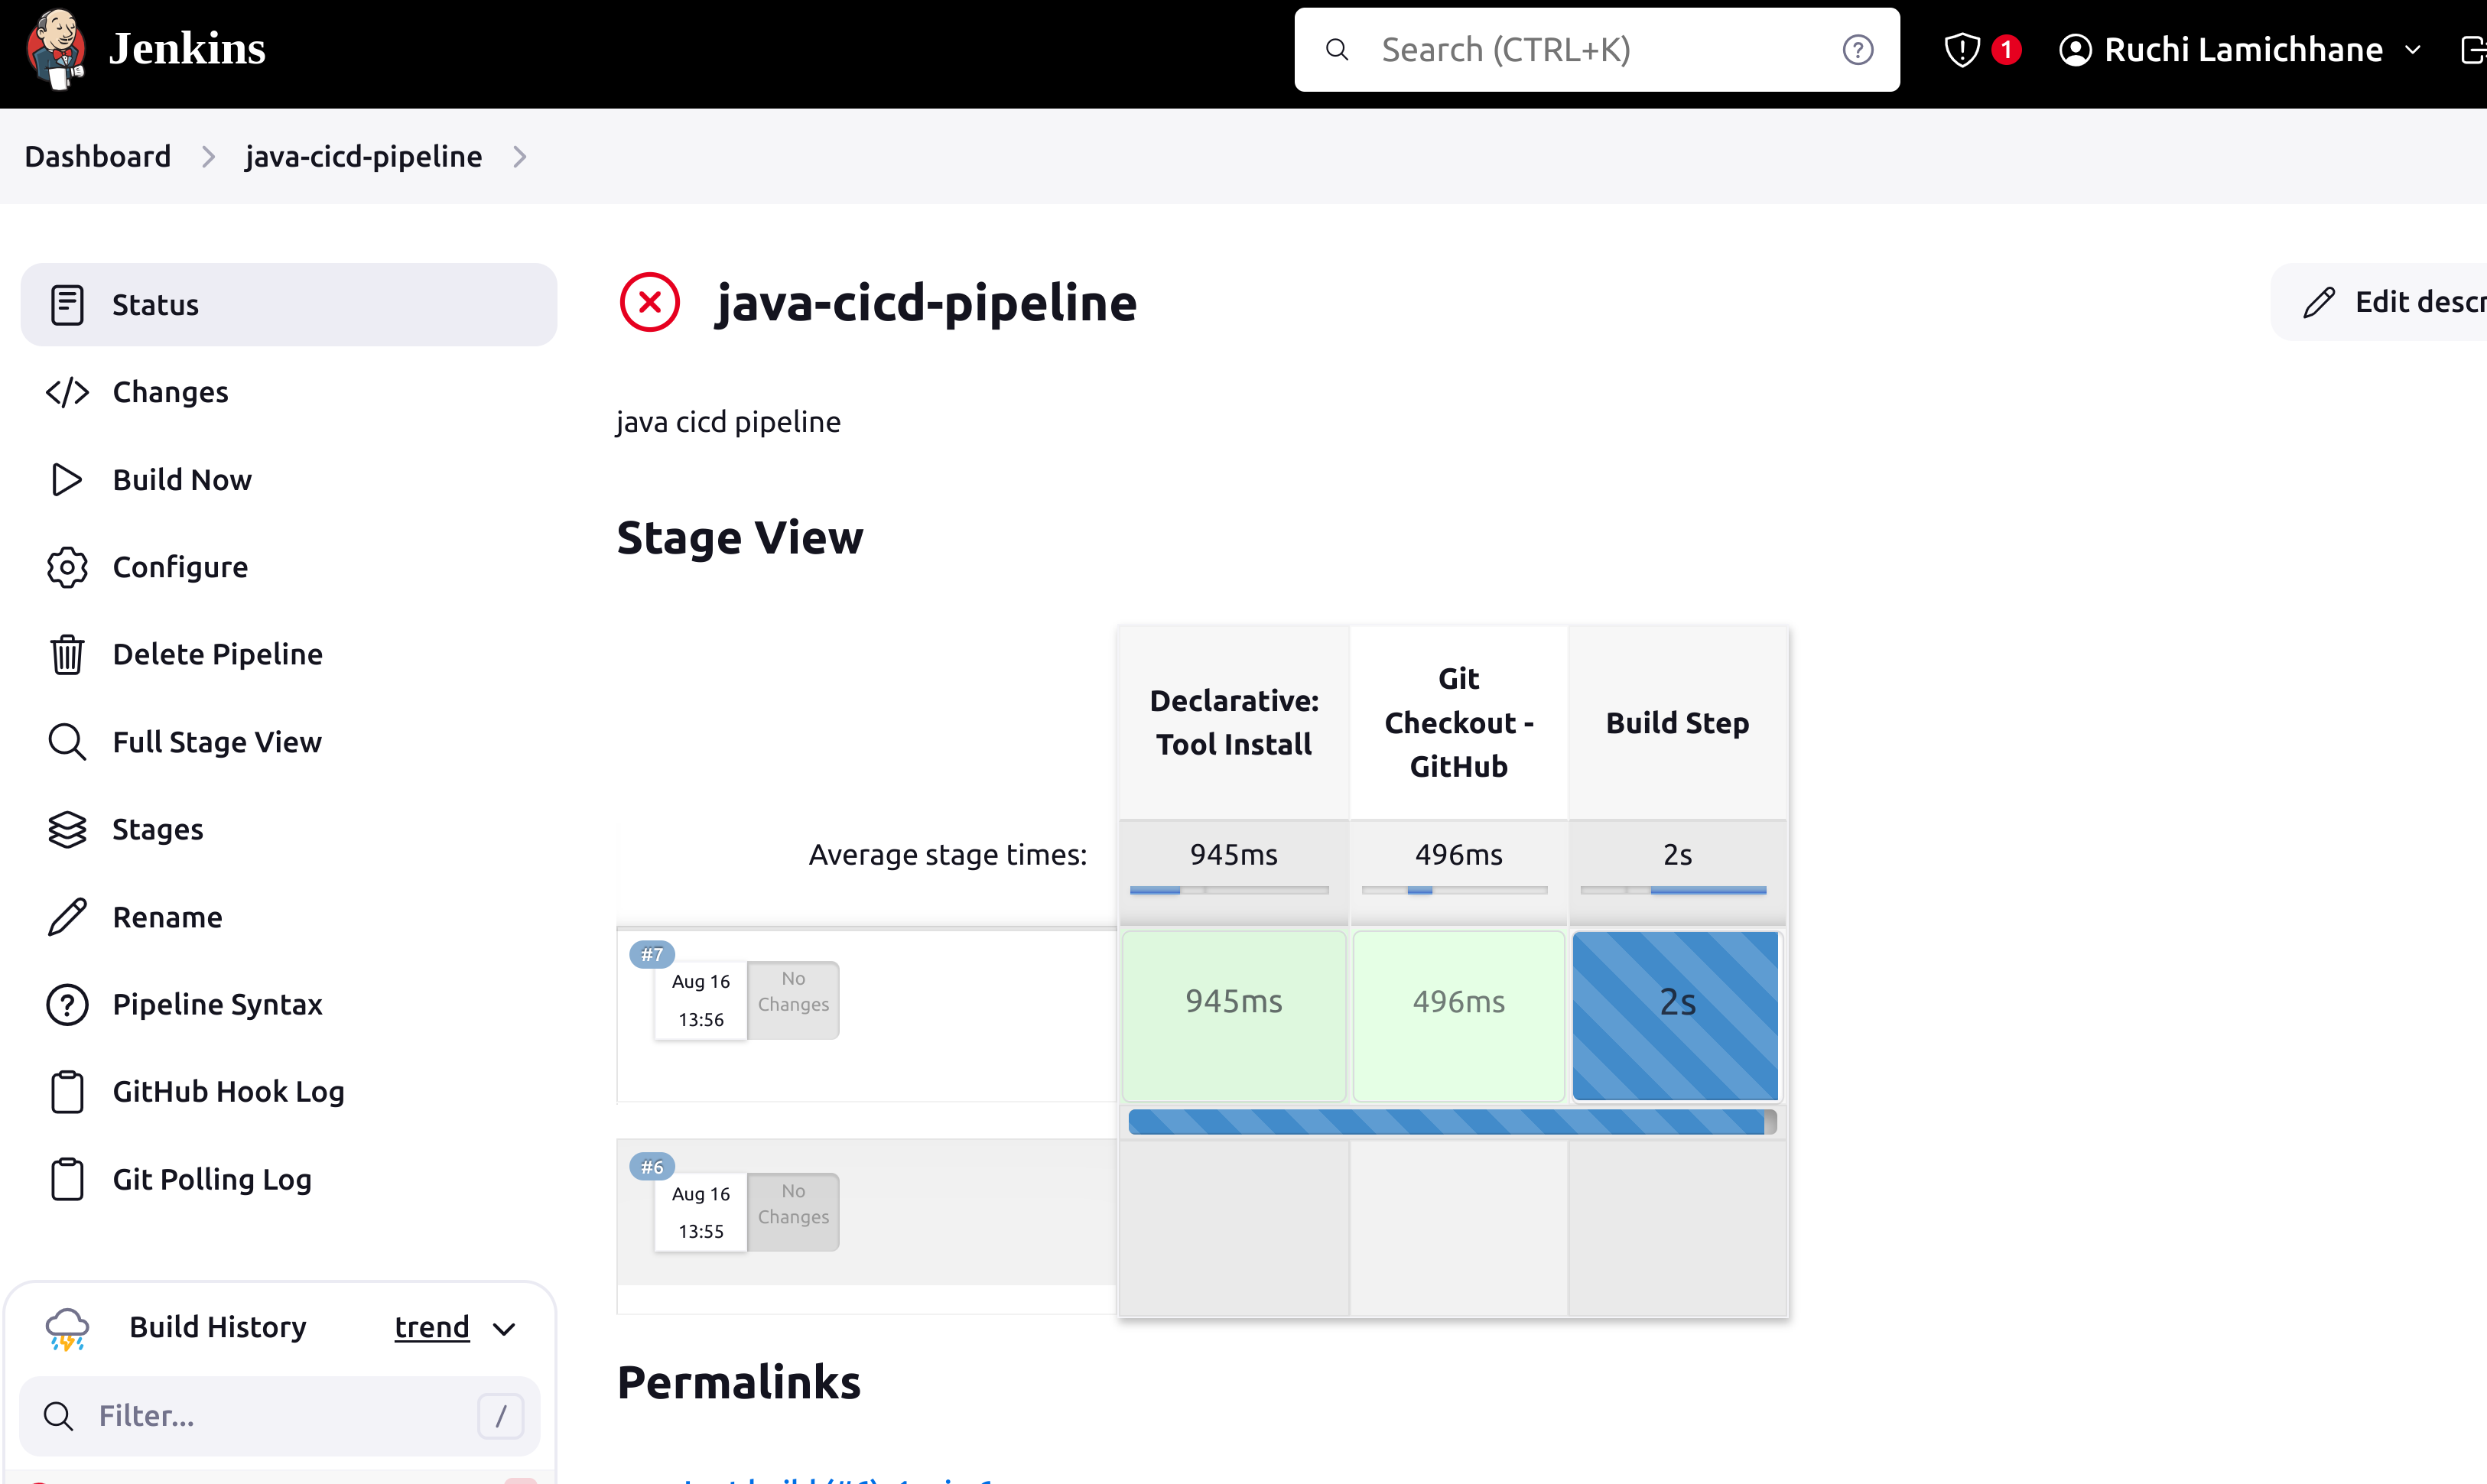
Manage Jenkins -> Tools -> Maven Installation -> Add maven
Step- 3 : Setup Docker in Jenkins
curl -fsSL get.docker.com | /bin/bash
sudo usermod -aG docker jenkins
sudo usermod -aG docker ubuntu
sudo systemctl restart jenkins
sudo docker version
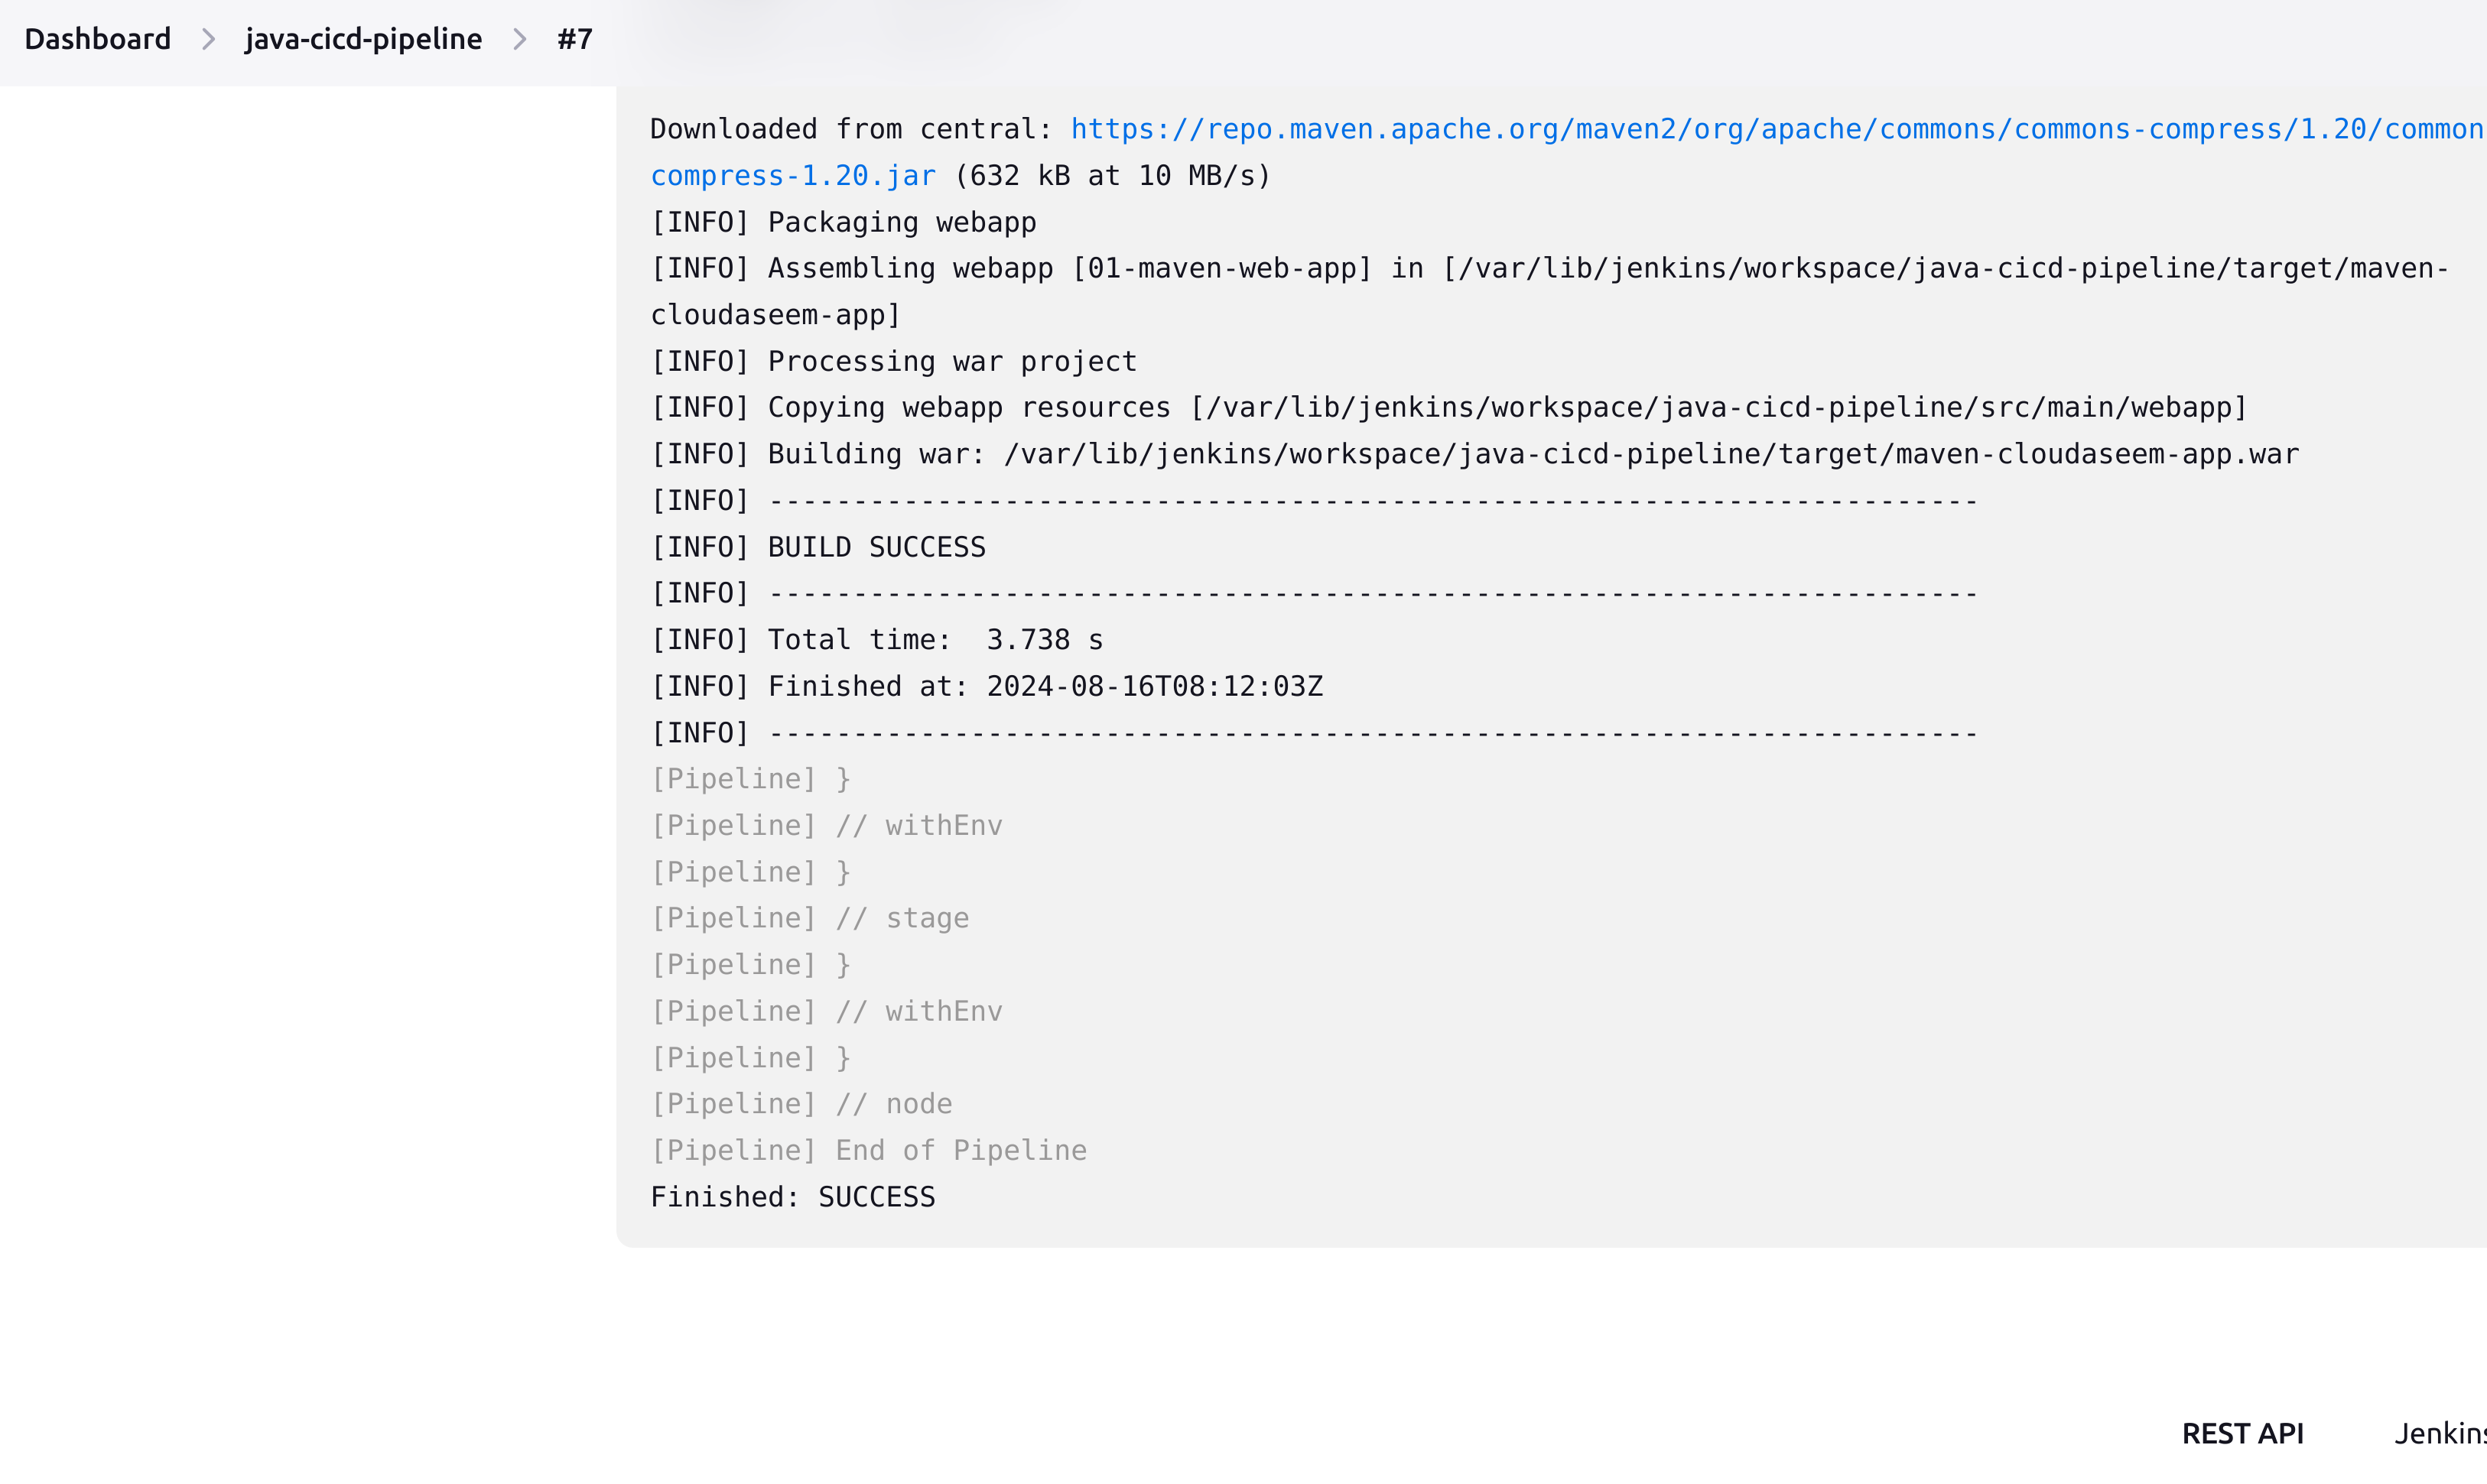
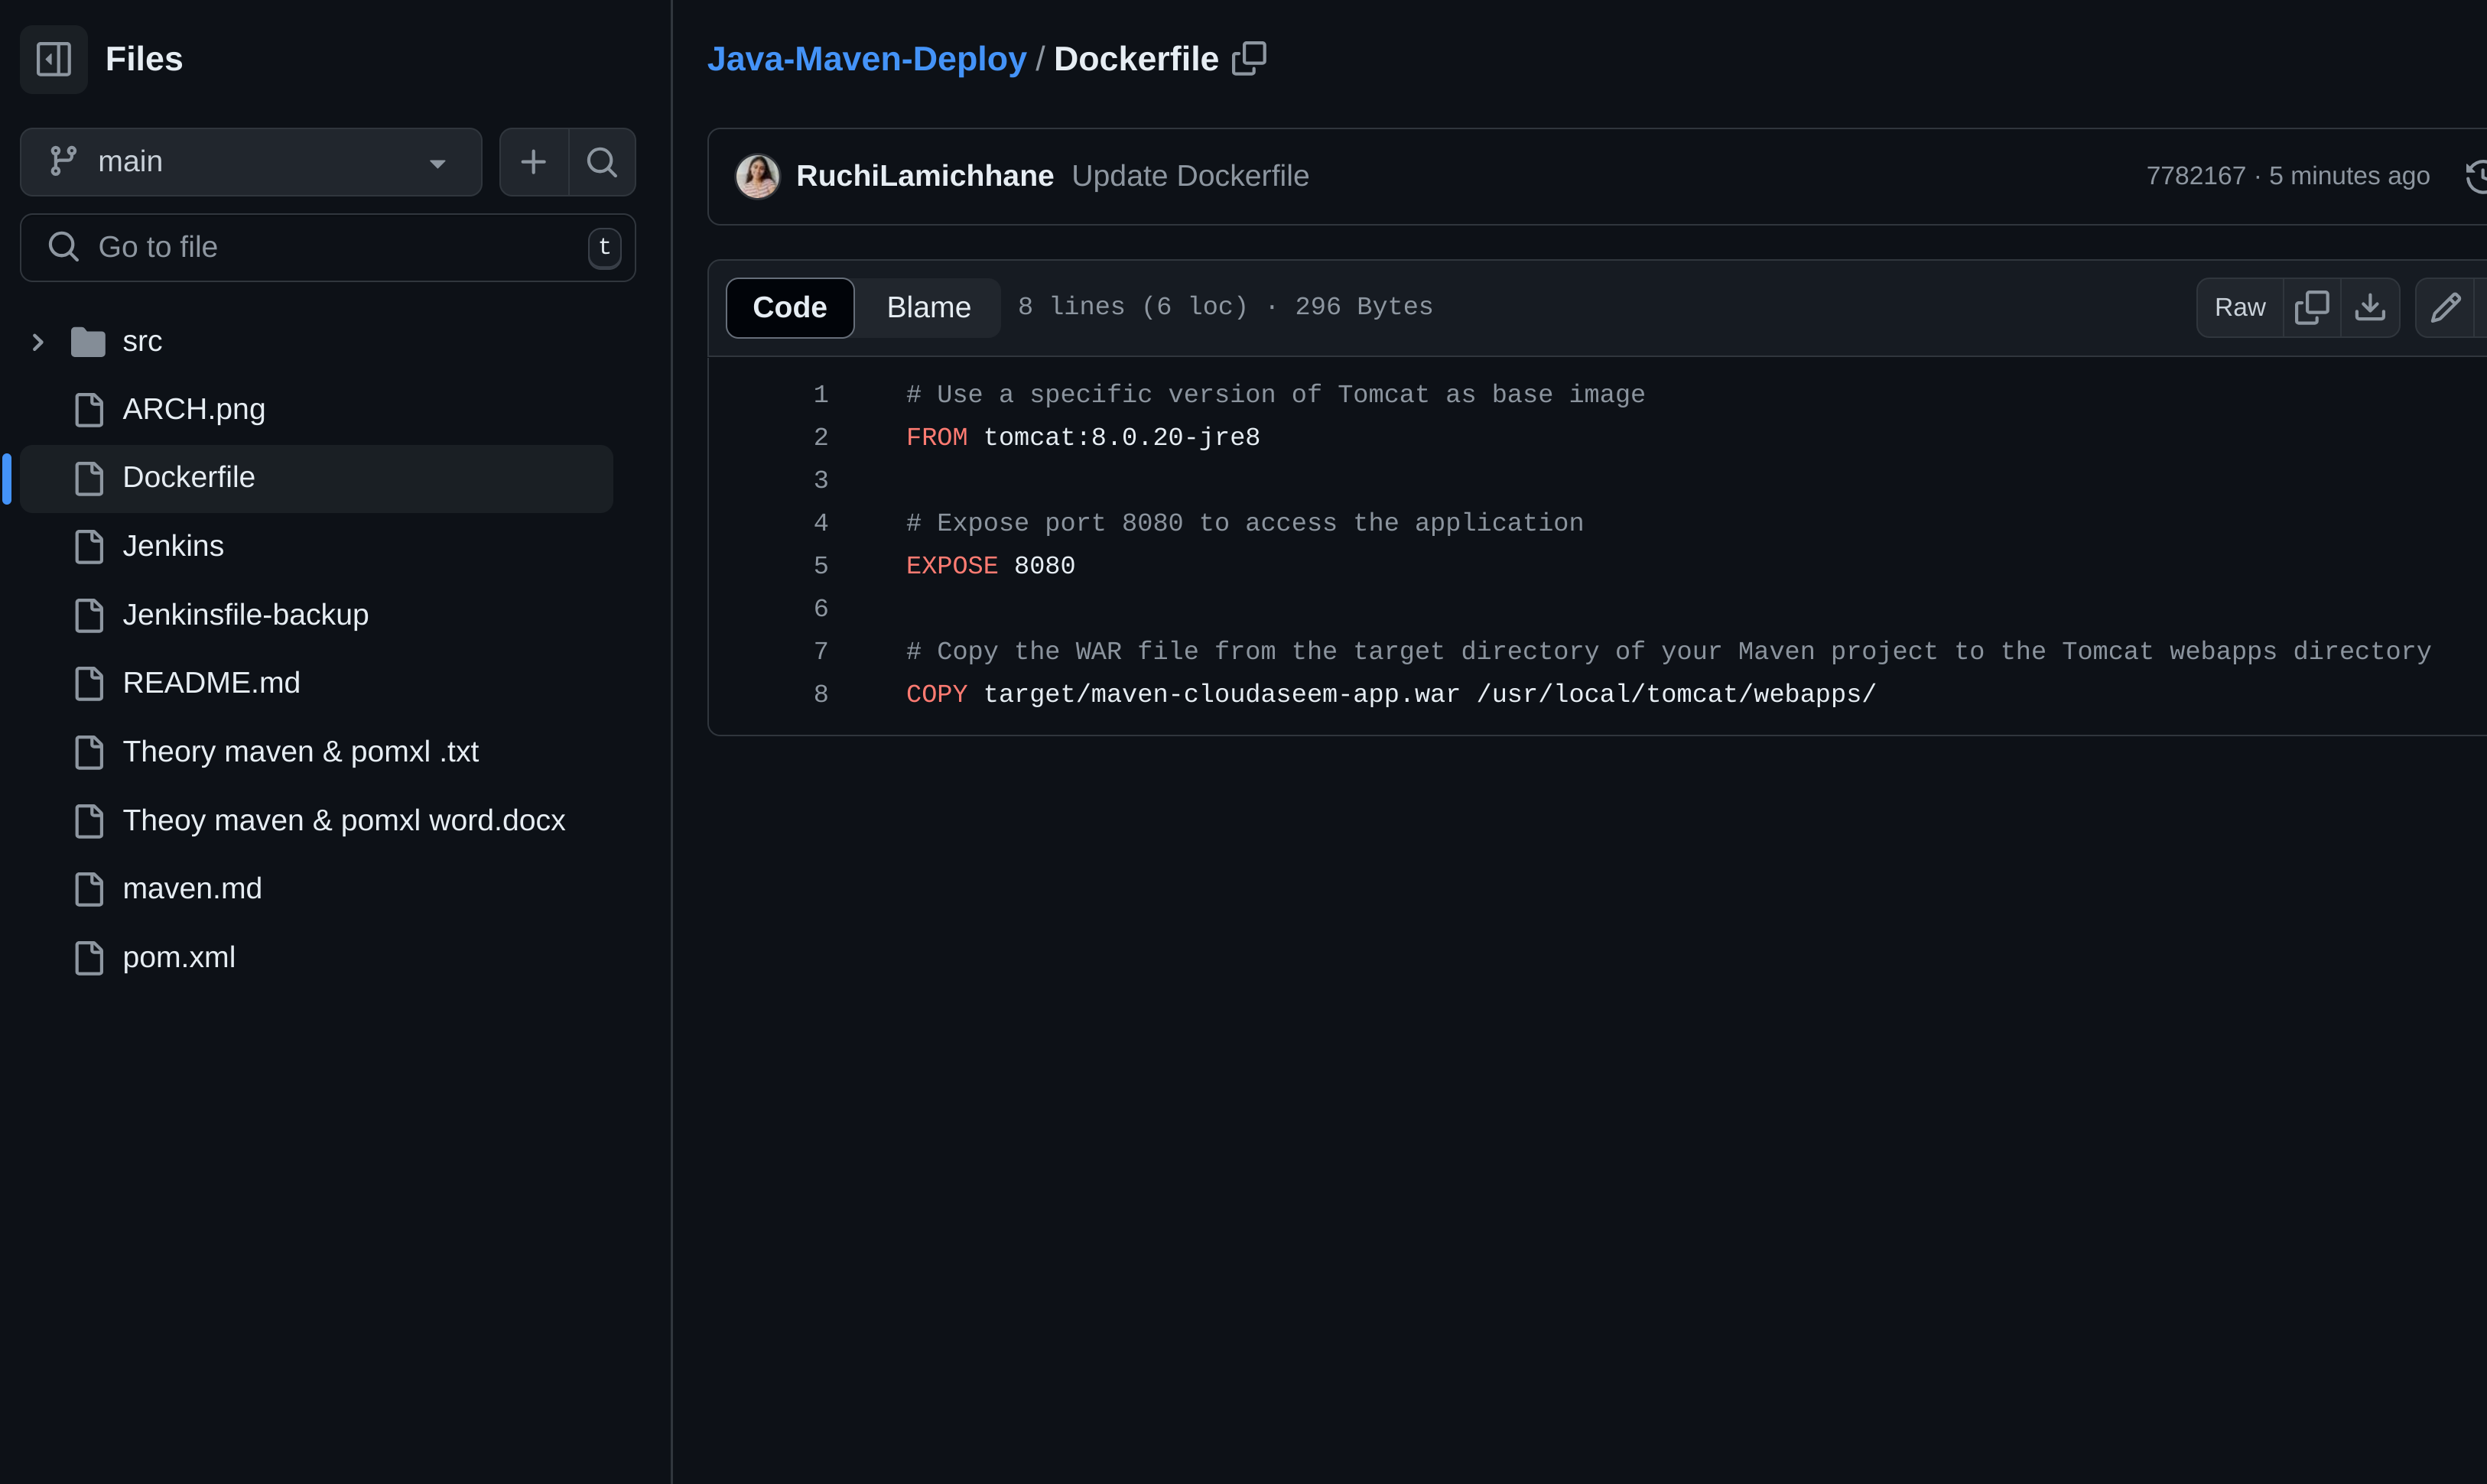
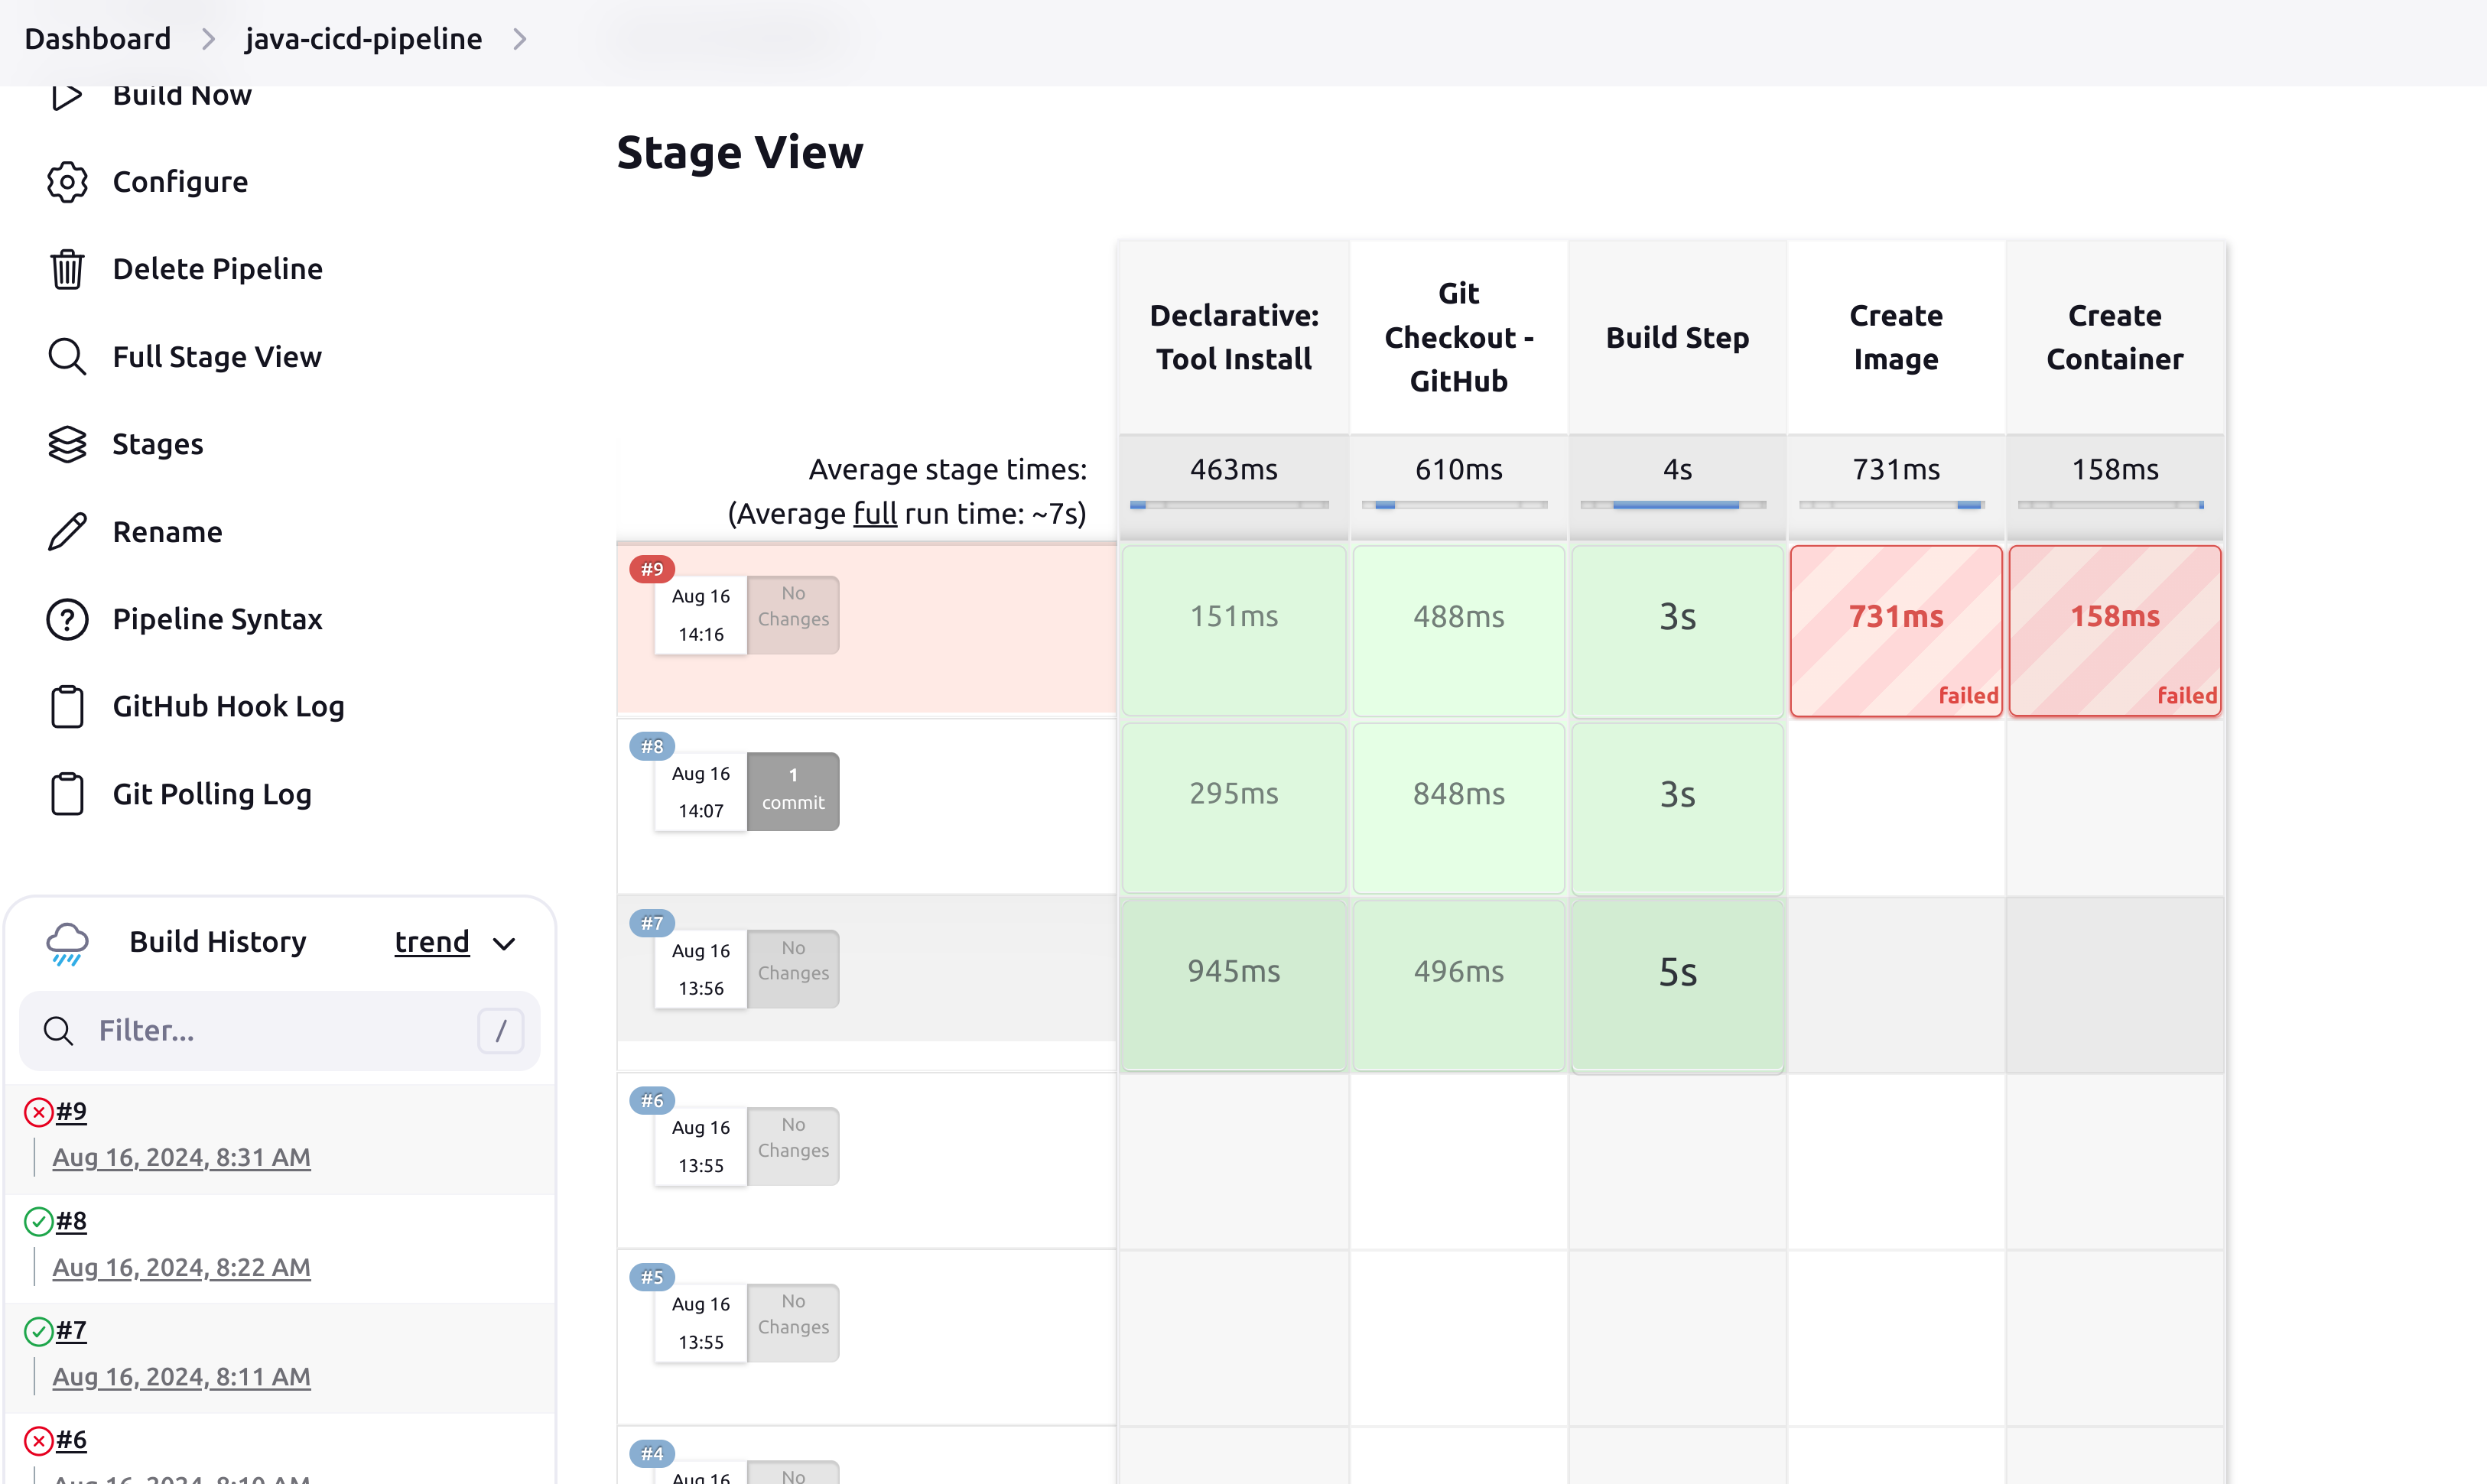
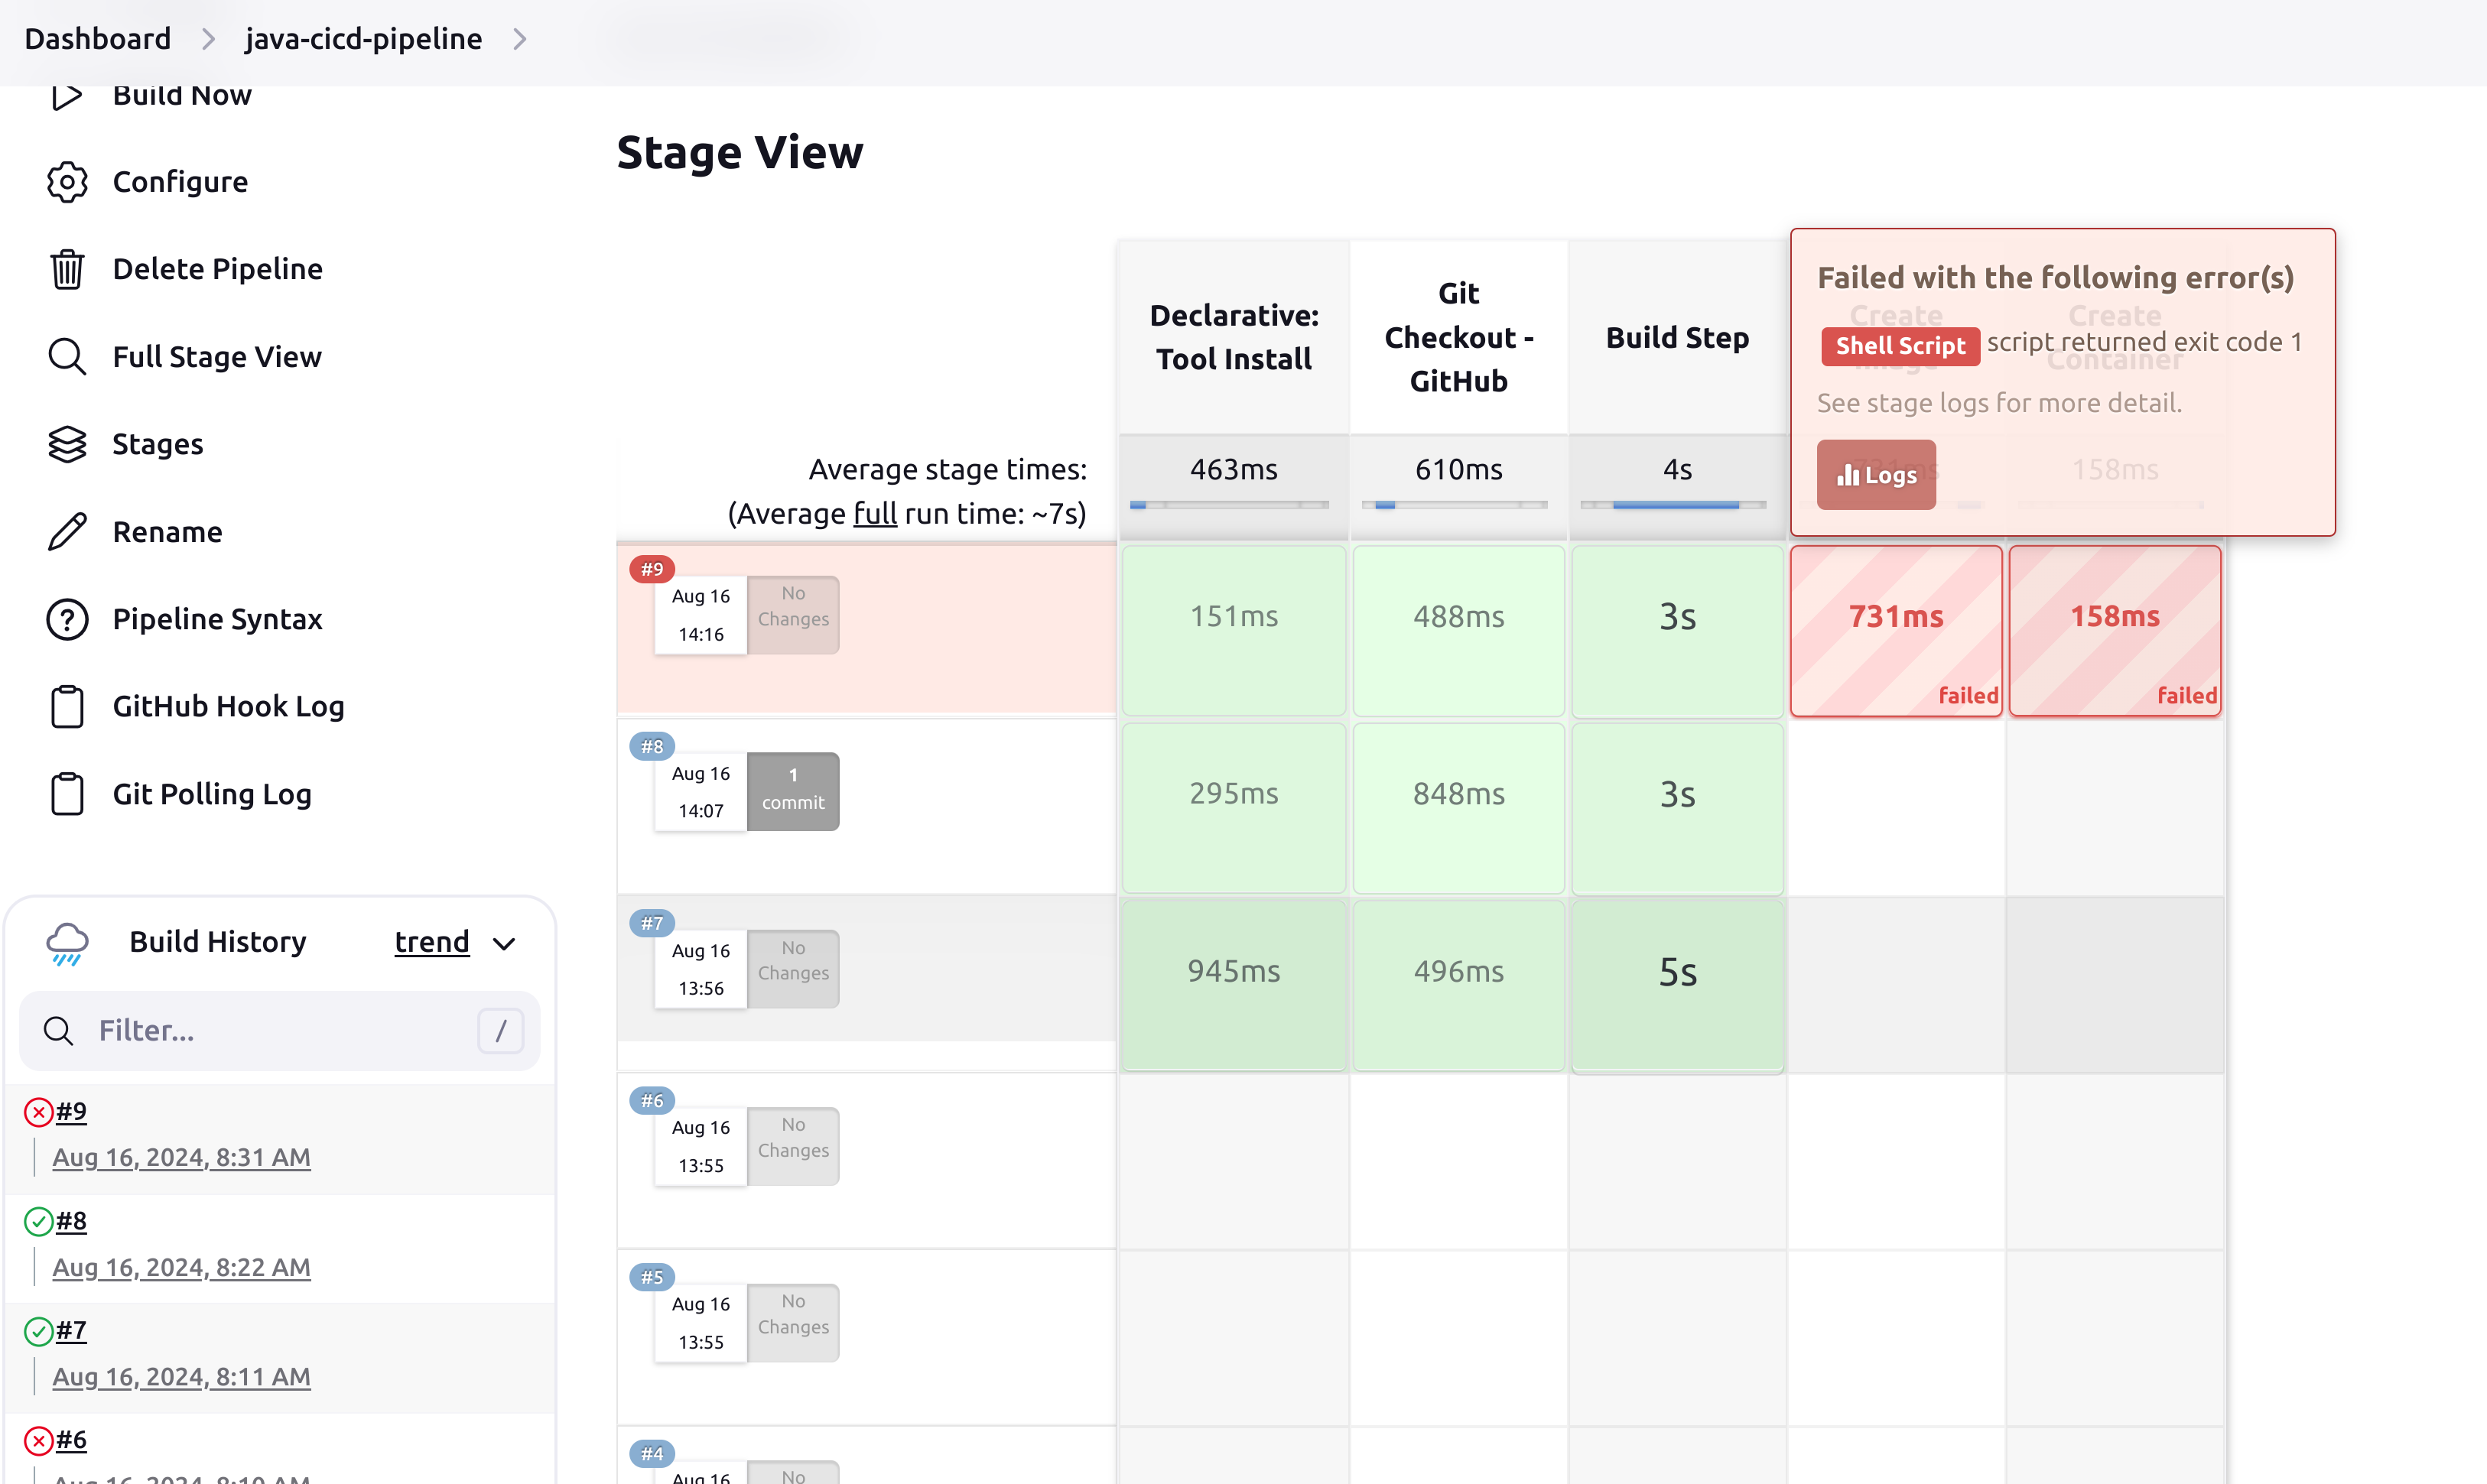
Check console output to find the building war location and create dockerfile
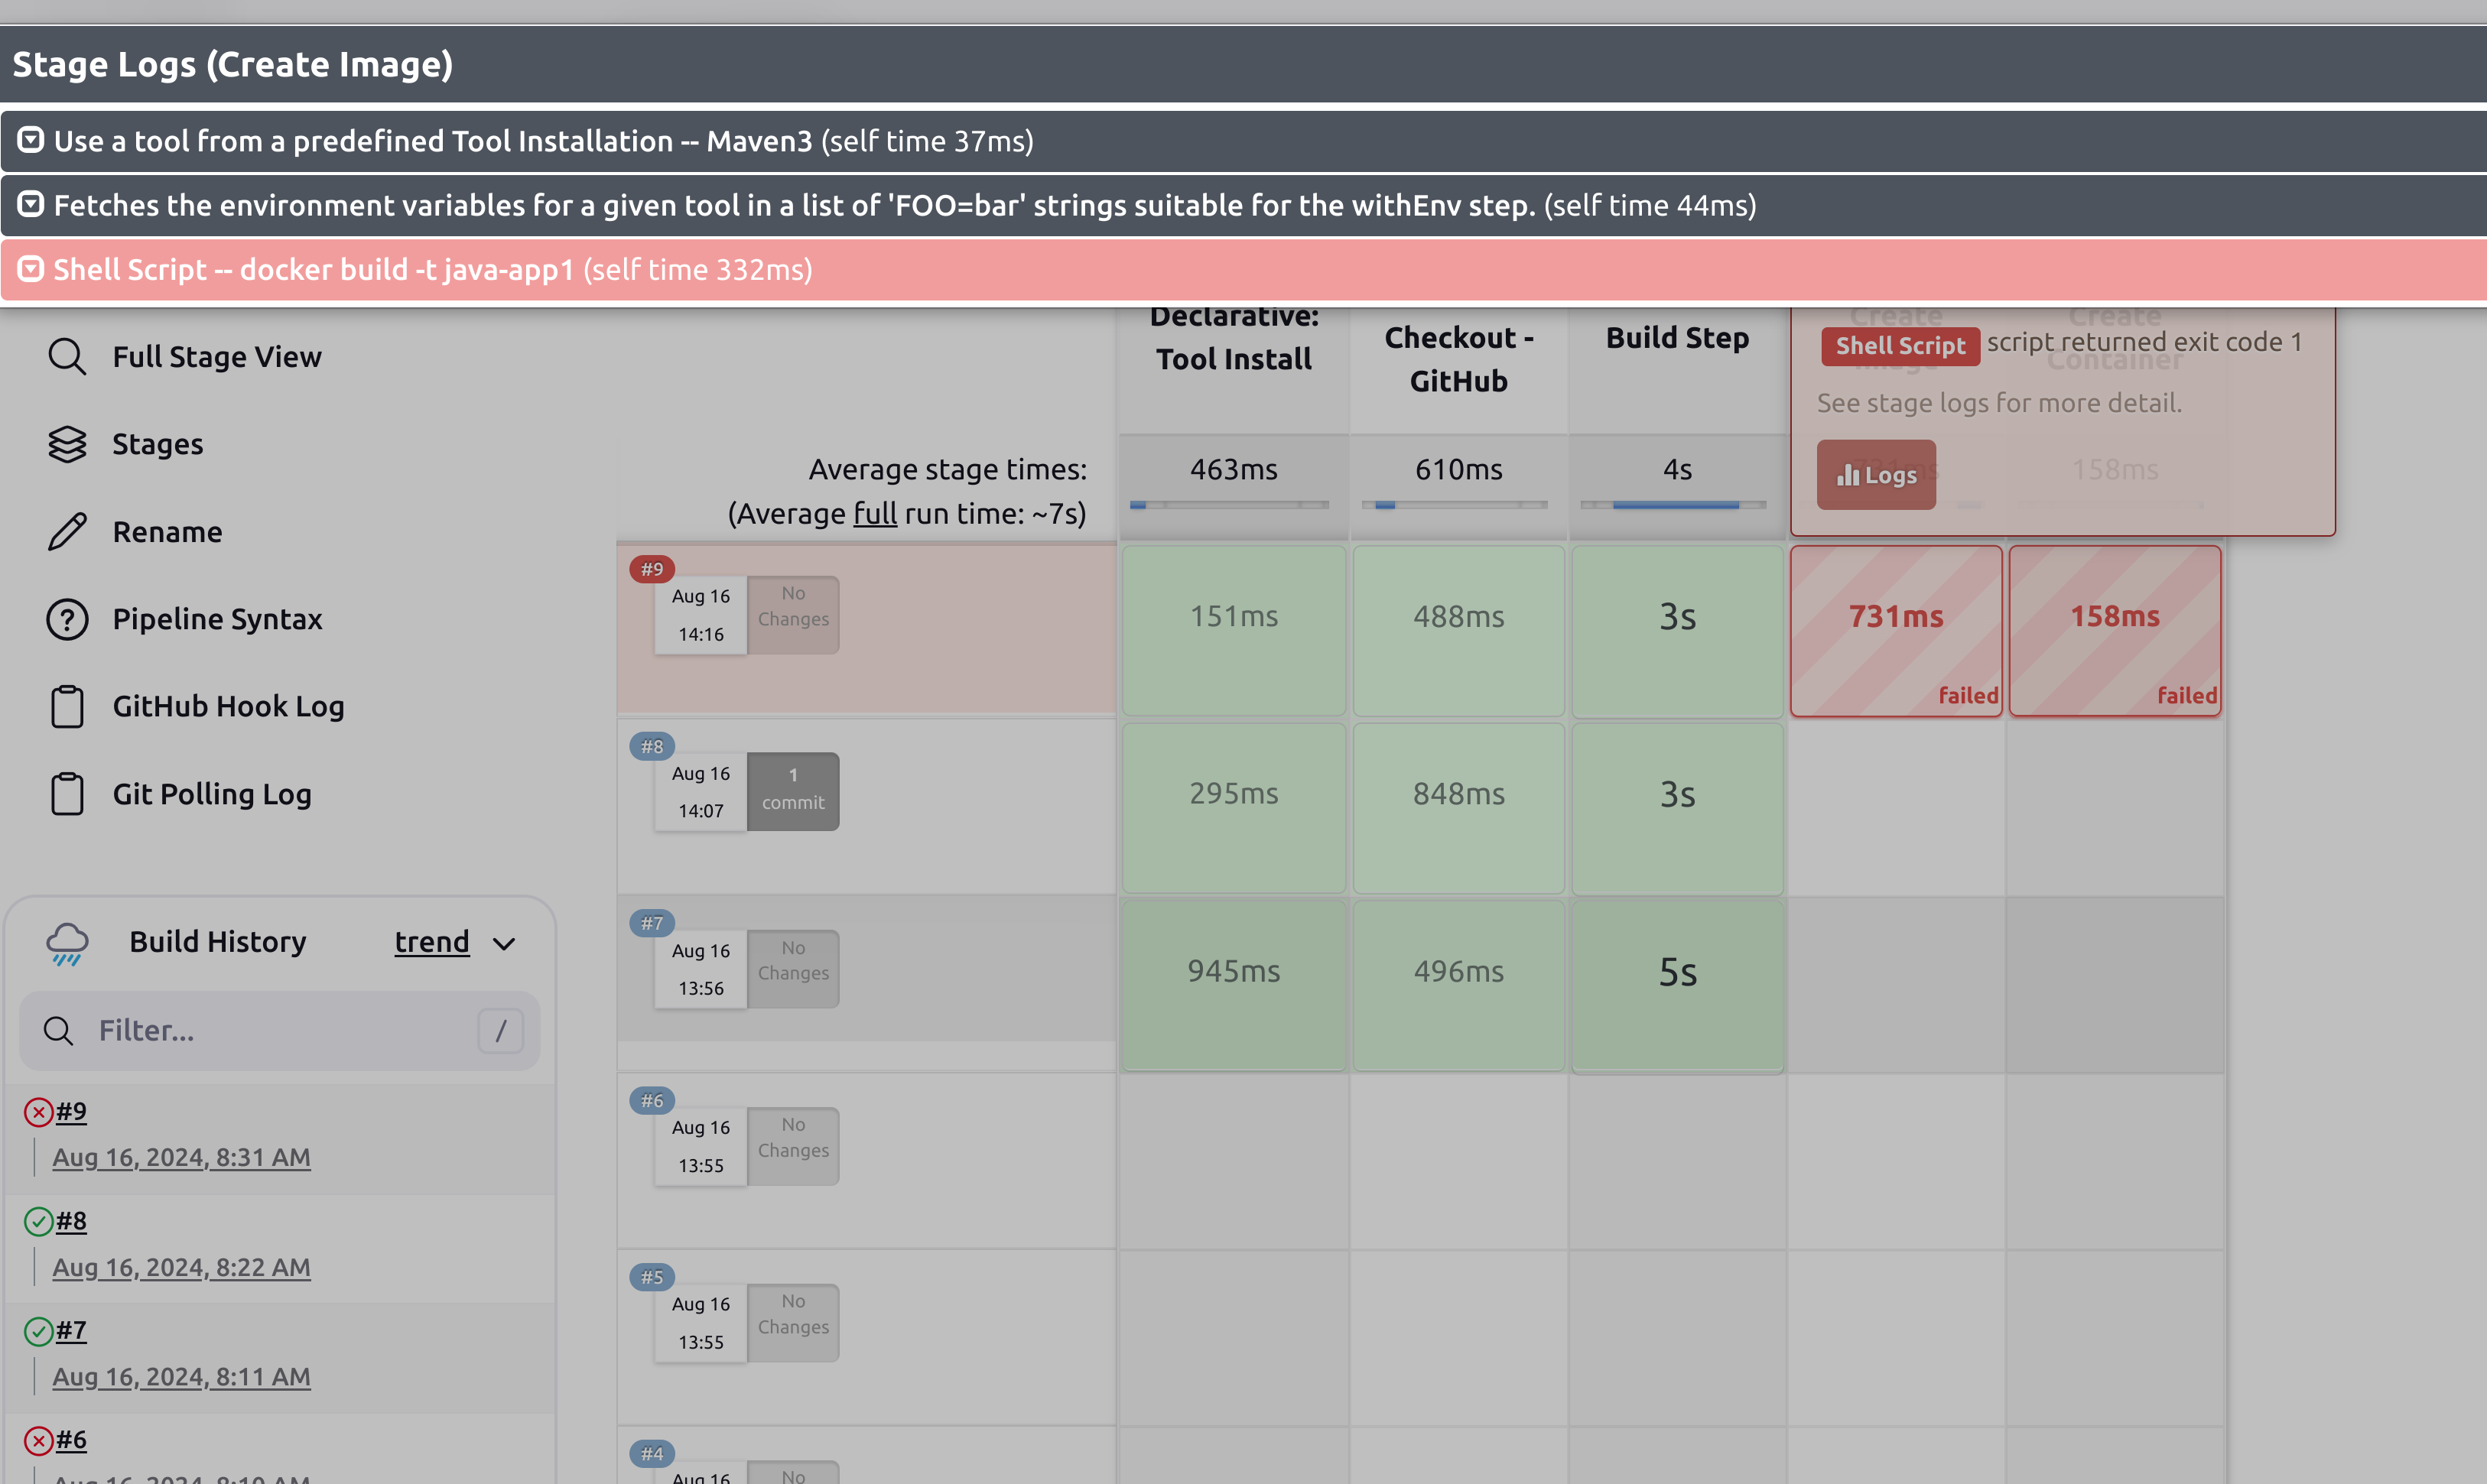
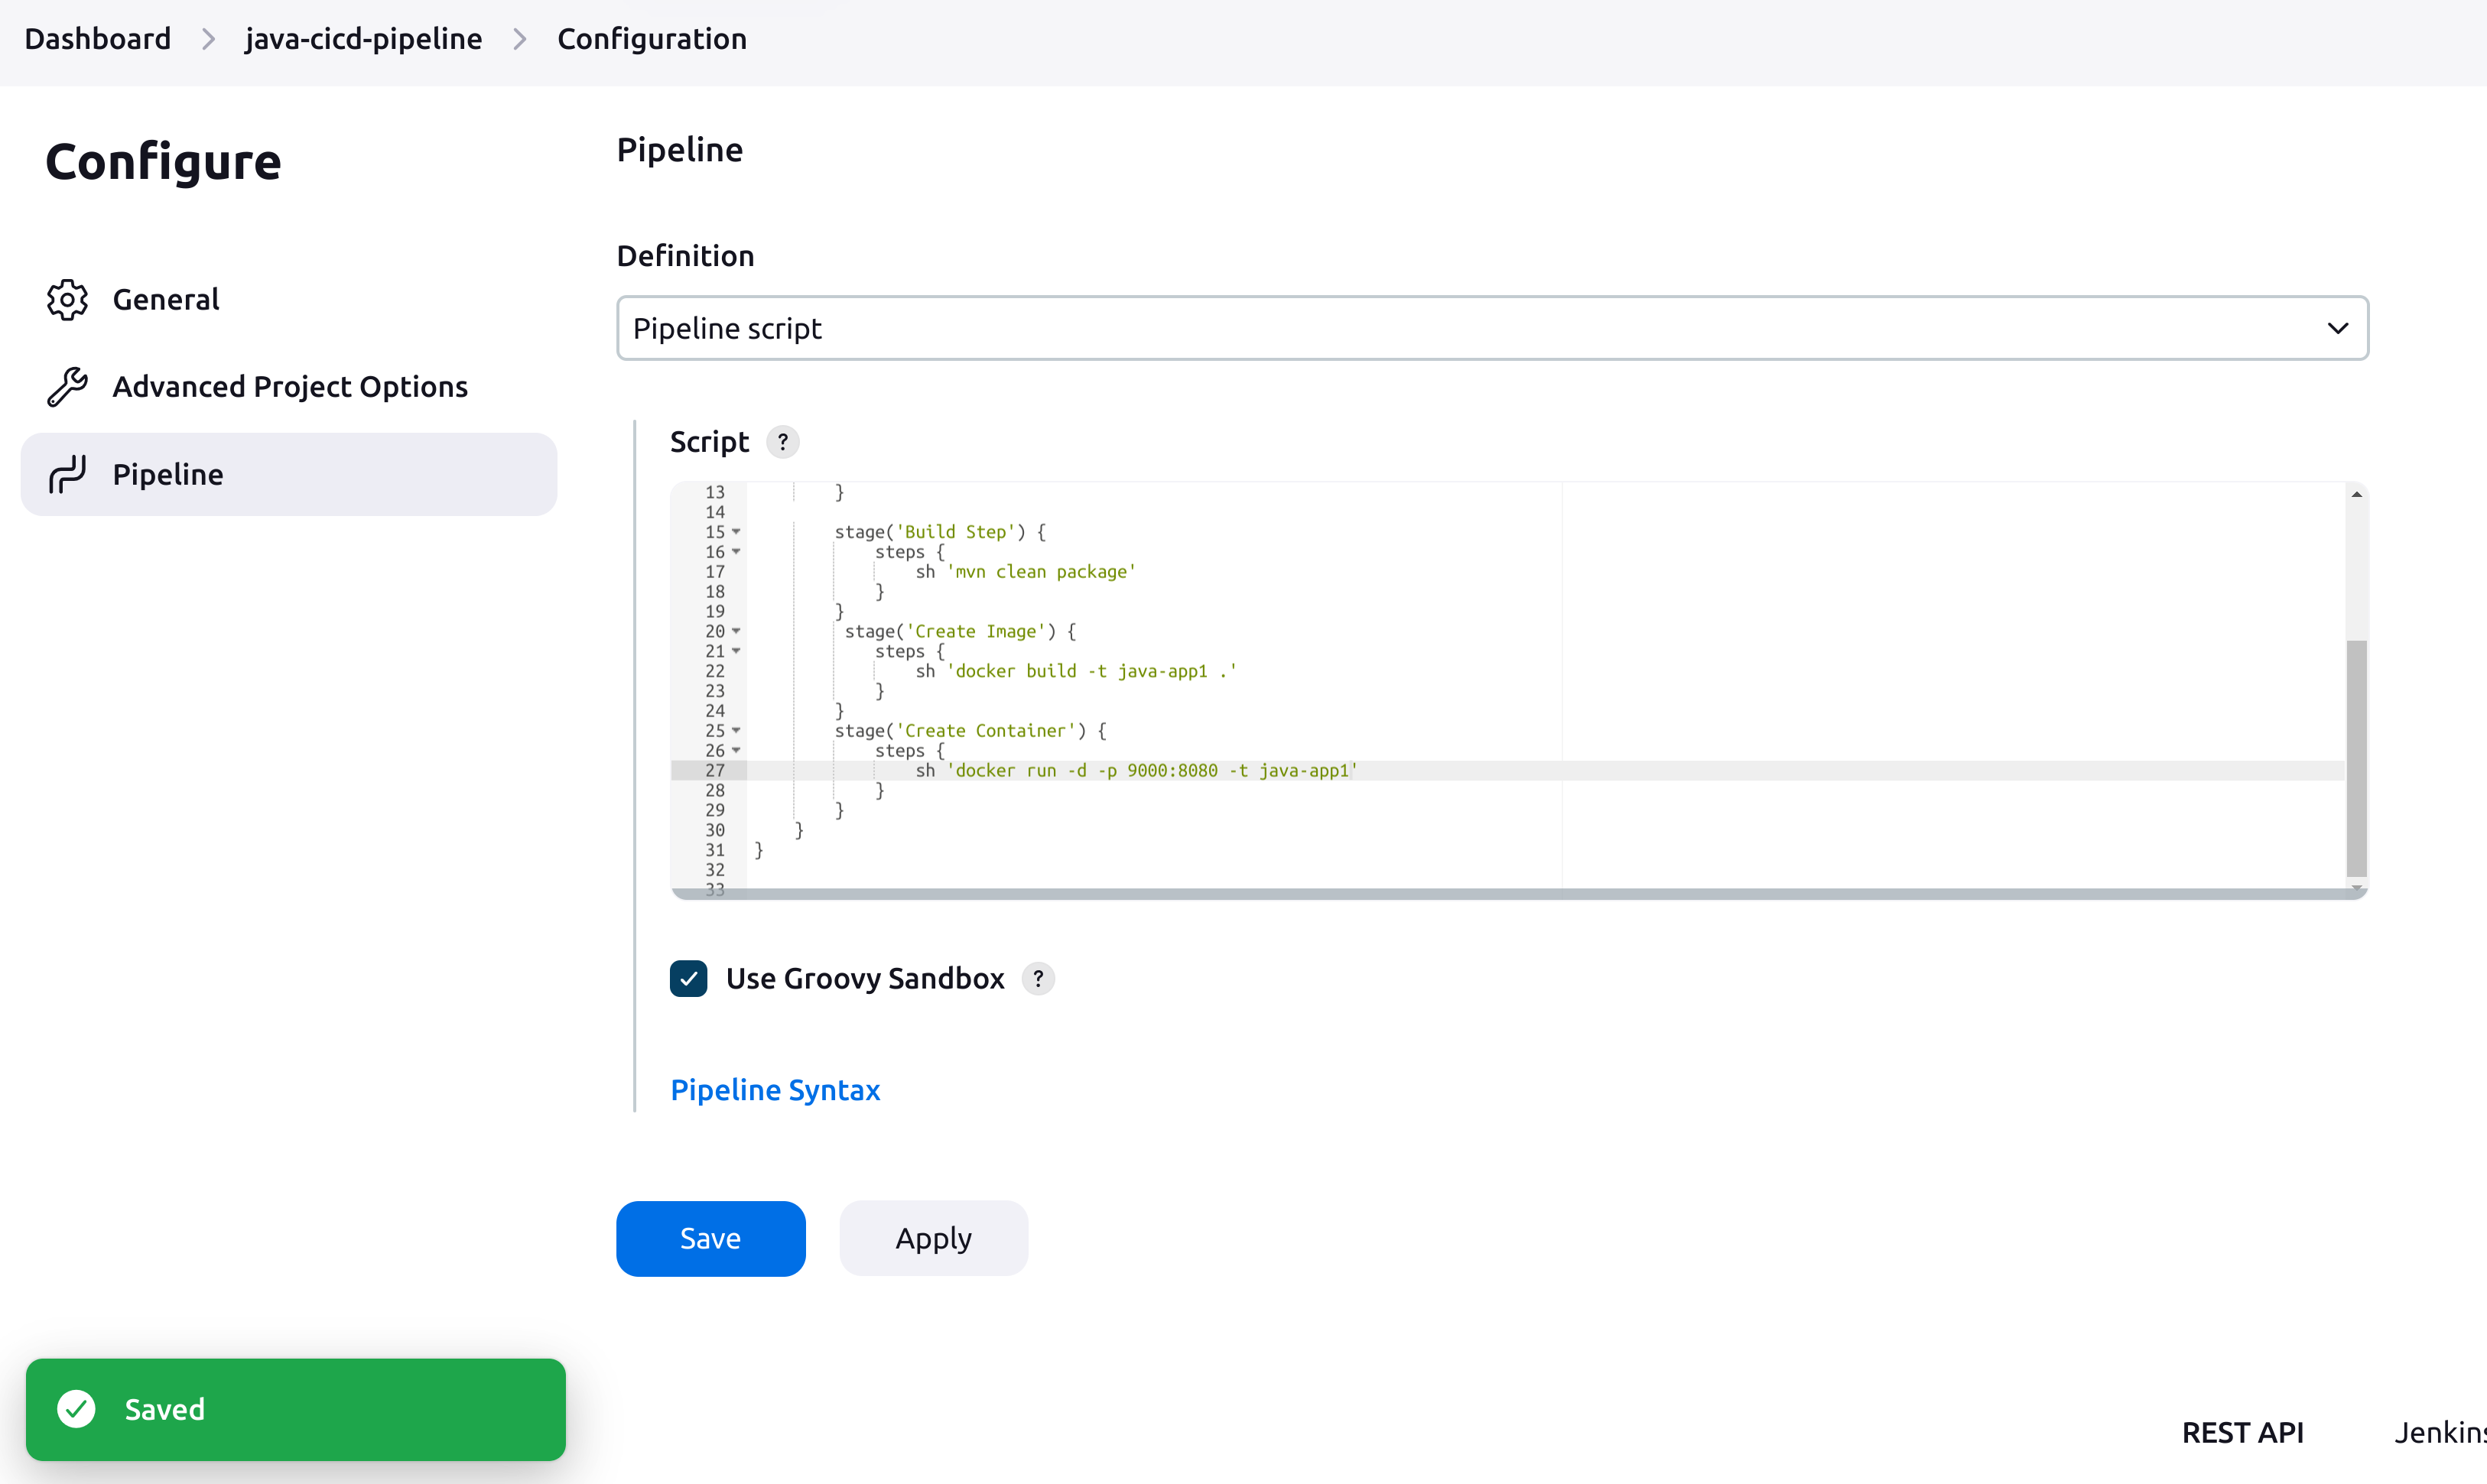
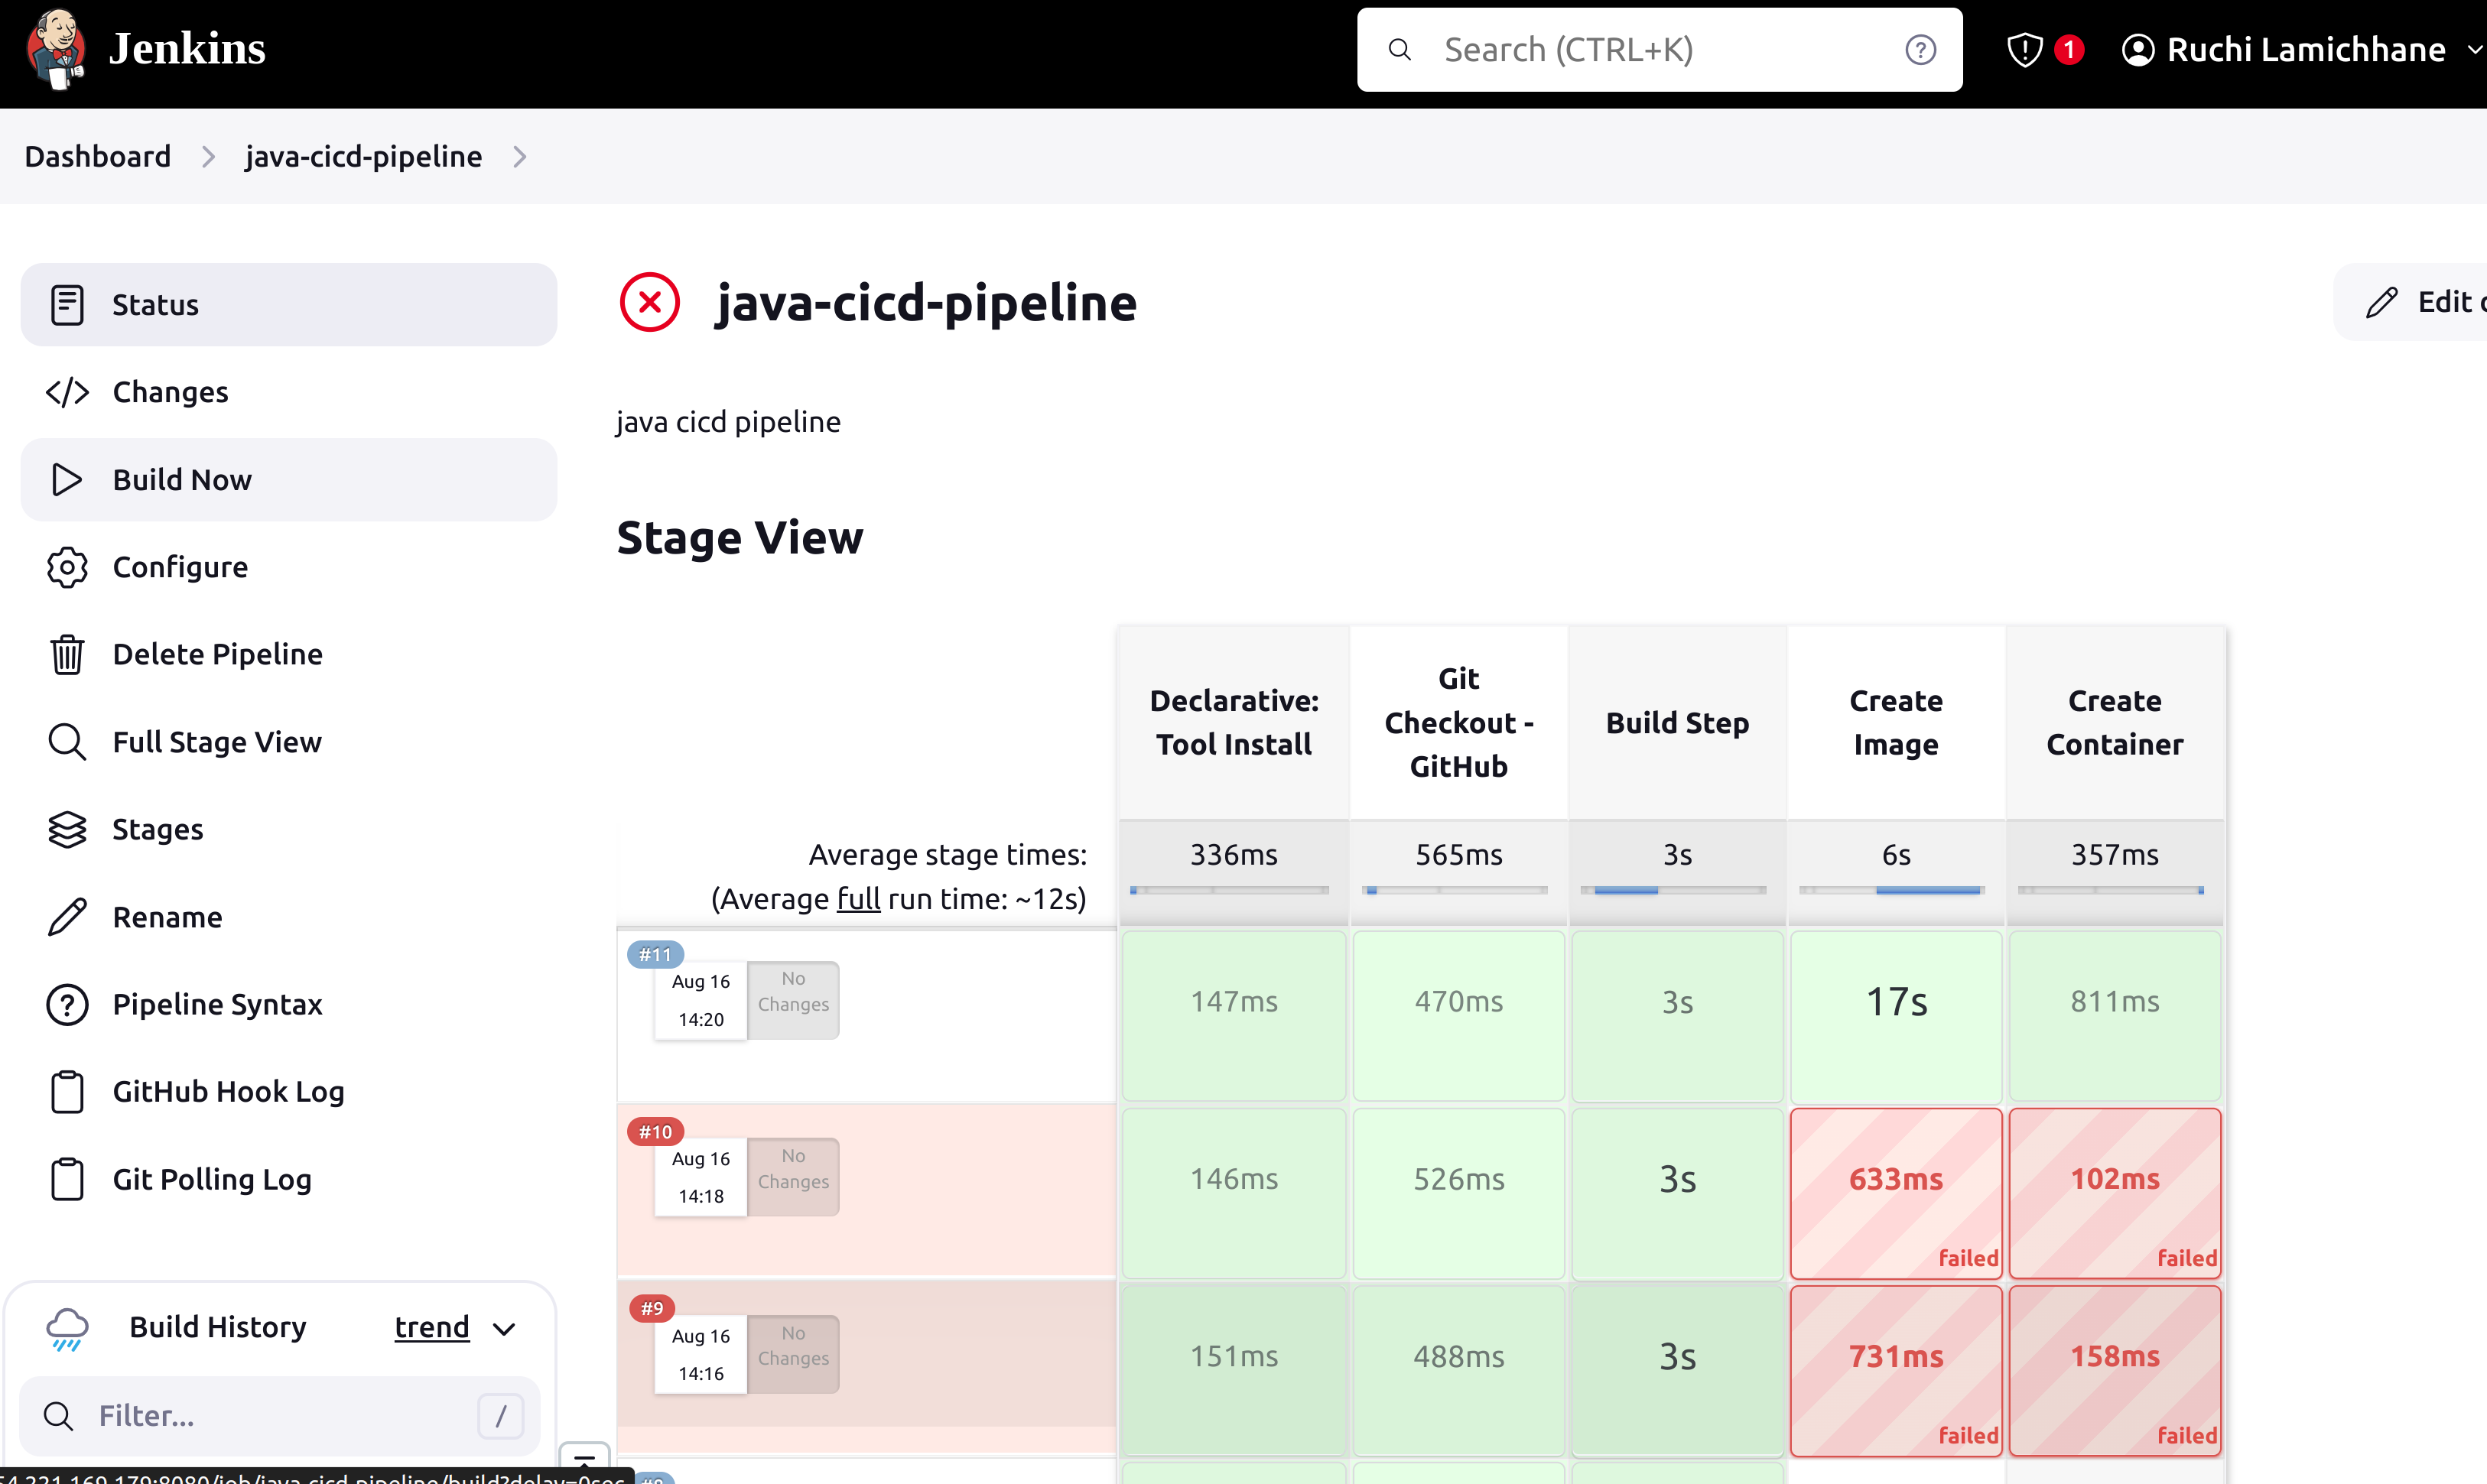
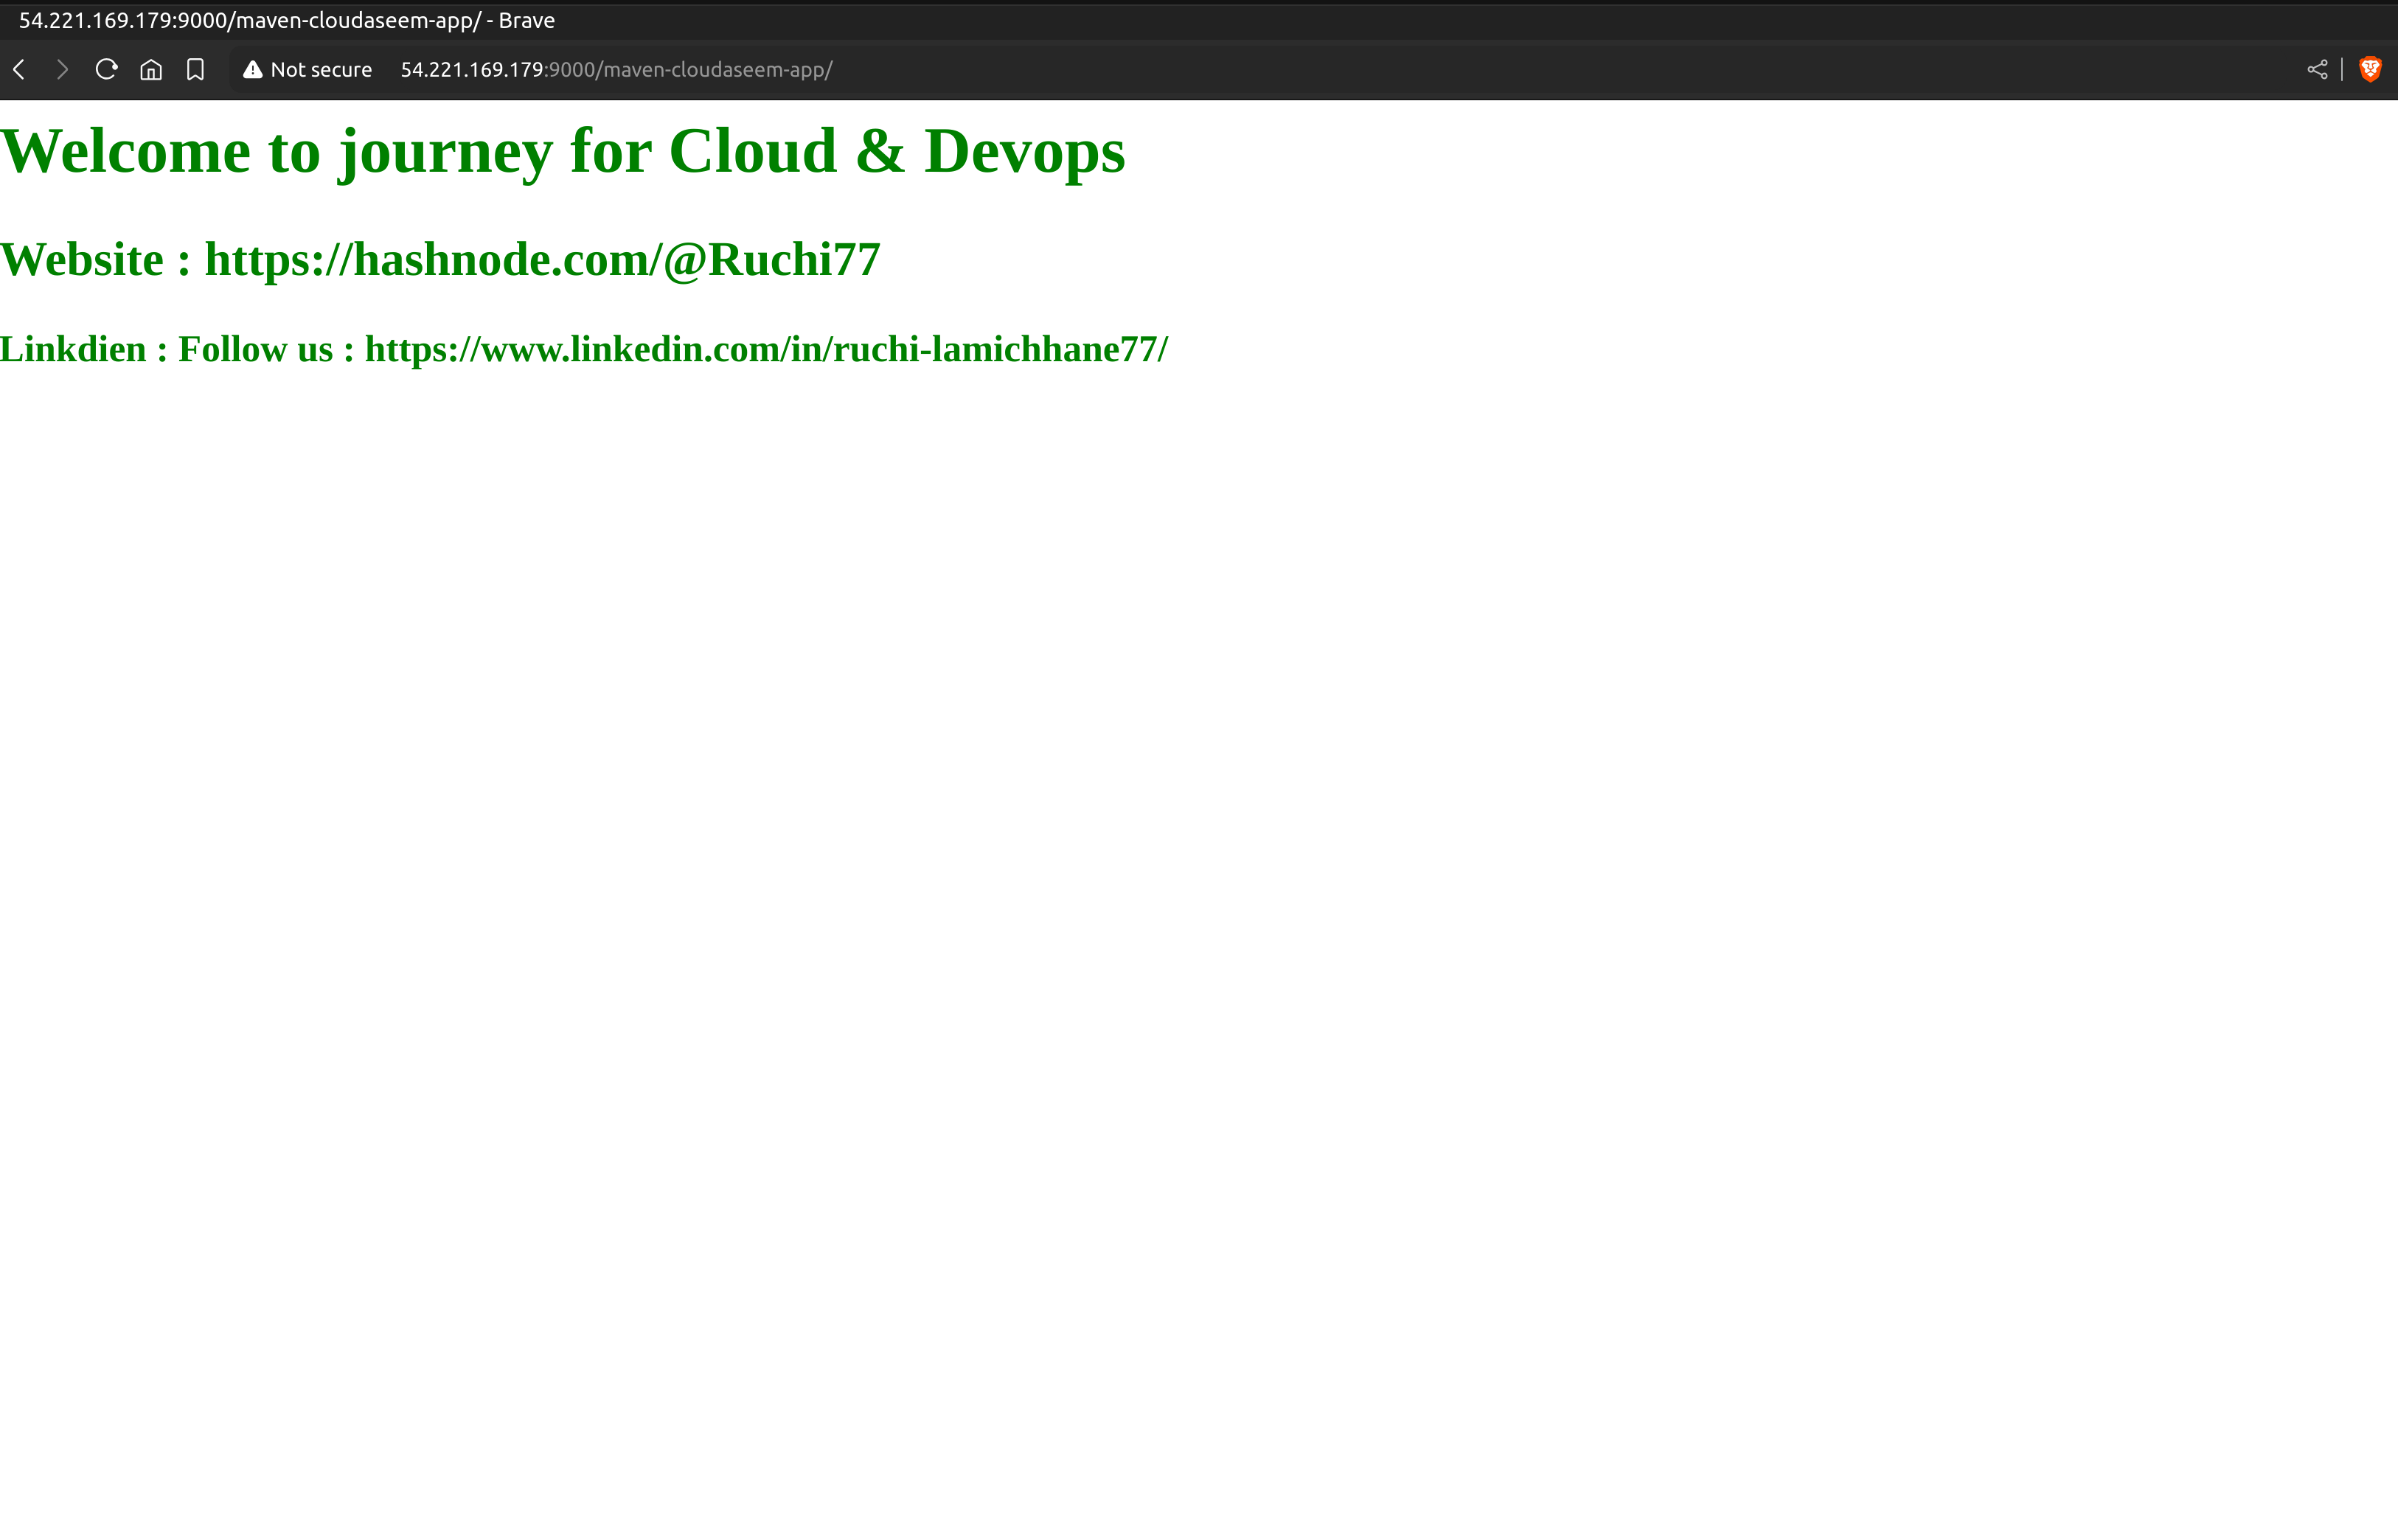
now go to https:publicipadress/9000/app-name
Subscribe to my newsletter
Read articles from Ruchi Lamichhane directly inside your inbox. Subscribe to the newsletter, and don't miss out.
Written by

Ruchi Lamichhane
Ruchi Lamichhane
I am a tech ethusiast with passion for technology, embracing the world of continuous integration, automation, and collaboration to make a meaningful impact in the dynamic realm of DevOps.