How to set up a Kubernetes Self-Hosted GitHub Runners.
 divine kenechukwu
In this article, i will be documenting the step by step processes which i used to set up a Kubernetes Self-Hosted Github Runners using a forked HNG boilerplate repo.
Prerequisites
GKE Cluster
Helm
Github Account
Why Self-Hosted Runner?
Self-hosted runners are ideal for use-cases where you need to run workflows in a highly customizable environment with more granular control over hardware requirements, security, operating system, and software tools than GitHub-hosted runners provides.
Self-hosted runners can be physical, virtual, in a container, on-premises, or in a cloud. In this guide, we’ll deploy it as a container in the Kubernetes cluster in the Google Cloud.
Deploy Kubernetes Cluster (optional)
Here i will be showing how i created a GKE cluster on Google cloud using gcloud.
1. Enable the GKE API
gcloud services enable container.googleapis.com
2. Set Default Region and Zone
Replace us-central1 with your desired region and us-central1-a with your desired zone:
gcloud config set compute/region us-central1
gcloud config set compute/zone us-central1-a
Create a GKE Cluster
gcloud container clusters create my-cluster --num-nodes=2
Replace
my-clusterwith your desired cluster name.The
--num-nodes=2flag specifies the number of initial nodes.
4. Get Cluster Credentials
gcloud container clusters get-credentials my-cluster
This command downloads the necessary configuration files to authenticate with your cluster.
Using Your GKE Cluster
1. Verify Cluster Status
kubectl get nodes
This command lists the nodes in your cluster. You should see two nodes in the Ready state.
Install cert-manager on a Kubernetes cluster
By default, actions-runner-controller uses cert-manager for certificate management of admission webhook, so we have to make sure cert-manager is installed on Kubernetes before we install actions-runner-controller.
To Install Cert-manager:
Add the Jetstack Helm repository (which hosts the
cert-managerchart):helm repo add jetstack https://charts.jetstack.io helm repo updateInstall cert-manager:
helm install cert-manager jetstack/cert-manager --namespace cert-manager --create-namespace --set installCRDs=true- The
--set installCRDs=trueflag is used to install the necessary CRDs forcert-manager.
- The
Verify the installation:
  kubectl get pods --namespace cert-manager
  kubectl --namespace cert-manager get all
You should see several pods running, such as
cert-manager,cert-manager-cainjector, andcert-manager-webhook
Setting Up Authentication for Hosted Runners
We will be Using a PAT (personal access token) to set up the Authentication for the hosted runners and i will be showing you how to do that in a few steps below.
To authenticate an action-runner-controller with the GitHub API, we can use a PAT with the action-runner-controller registers a self-hosted runner.
- Go to account > Settings > Developers settings > Personal access token. Click on “Generate new token”. Under scopes, select “Full control of private repositories”.
.png)
- Click on the “Generate token” button.
.png)
- Copy the generated token and run the below commands to create a Kubernetes secret, which will be used by action-runner-controller deployment.
Namespace Creation:
Create a dedicated namespace for the runner controller.
kubectl create namespace actions-runner-system
Create secret:
- You need to create the
controller-managersecret with the appropriate GitHub token value. Here’s how you can do it:
kubectl create secret generic github-token \
  --from-literal=github_token=YOUR_GITHUB_TOKEN \
  -n actions-runner-system
NB: Change the YOUR_GITHUB_TOKEN to the actual github token.
Let's install the GitHub Actions Runner Controller on your Kubernetes cluster.
helm repo add actions-runner-controller https://actions-runner-controller.github.io/actions-runner-controller
helm repo update
helm upgrade --install --namespace actions-runner-system --create-namespace --wait actions-runner-controller actions-runner-controller/actions-runner-controller --set syncPeriod=1m
Verify that the action-runner-controller installed properly using below command:
kubectl --namespace actions-runner-system get all
Service Account and Permissions:
The Helm chart should have set up the necessary service account and permissions. You can verify this:
kubectl get serviceaccounts -n actions-runner-system
kubectl get clusterroles | grep actions-runner-controller
kubectl get clusterrolebindings | grep actions-runner-controller
Create a Repository Runner
Runner Deployment: Create a file named runner-deployment.yaml with the following content:
apiVersion: actions.summerwind.dev/v1alpha1
kind: RunnerDeployment
metadata:
  name: hng-stage-7-runner
  namespace: actions-runner-system
spec:
  replicas: 2
  template:
    spec:
      repository: divine2142/hng-stage-7
      labels:
        - self-hosted
        - linux
        - x64
      env:
        - name: GITHUB_TOKEN
          valueFrom:
            secretKeyRef:
              name: github-token
              key: github_token
---
apiVersion: actions.summerwind.dev/v1alpha1
kind: HorizontalRunnerAutoscaler
metadata:
  name: hng-stage-7-runner-autoscaler
  namespace: actions-runner-system
spec:
  scaleTargetRef:
    name: hng-stage-7-runner
  minReplicas: 2
  maxReplicas: 5
  metrics:
    - type: TotalNumberOfQueuedAndInProgressWorkflowRuns
      repositoryNames:
        - divine2142/hng-stage-7
Before executing this file to create the runners, create the github-token secret with the appropriate GitHub token value. Here’s how you can do it:
kubectl create secret generic github-token \
  --from-literal=github_token=YOUR_GITHUB_TOKEN \
  -n actions-runner-system
NB: Change the YOUR_GITHUB_TOKEN to the actual github token.
Verify the secret:
kubectl get secret github-token -n actions-runner-system -o yaml
Apply this configuration:
kubectl apply -f runner-deployment.yaml
Verify Runners:
Check if the runners are correctly registered:
kubectl get runners -n actions-runner-system
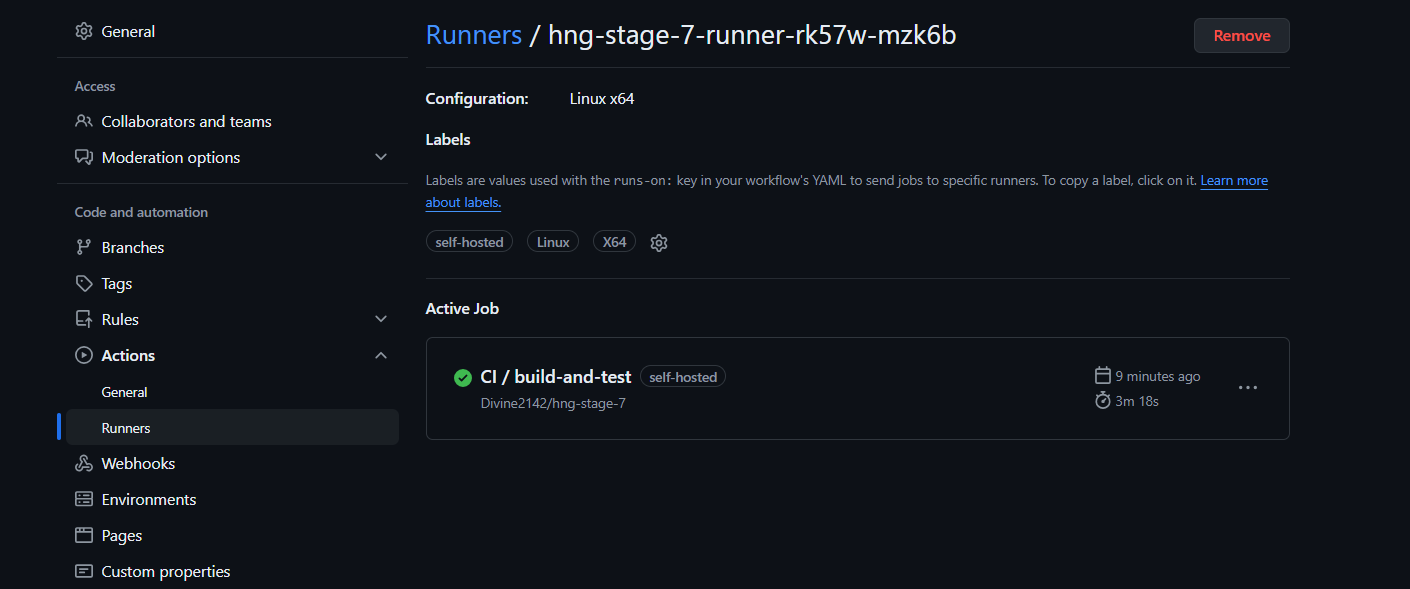
Also, verify in your GitHub repository settings under Actions > Runners.

To Make sure the Runners are working properly, Simple changes to the forked boilerplate repo cloned by simply making a change in the runs-on line, changing it to self-hosted as seen in the yaml file below.
Also changes was made to the Yaml file to make sure the ci runs on push request.
name: CI

on:
  push:
    branches:
      - '**'
    paths-ignore:
      - "**README.md**"
  pull_request:
    types: [opened, synchronize, reopened]
    paths-ignore:
      - "README.md"

jobs:
  build-and-test:
    runs-on: self-hosted

    services:
      postgres:
        image: postgres:latest
        env:
          POSTGRES_USER: "username"
          POSTGRES_PASSWORD: "password"
          POSTGRES_DB: "test"
        ports:
          - 5432:5432

    steps:
      - name: Checkout code
        uses: actions/checkout@v4

      - name: Set up Python
        uses: actions/setup-python@v4
        with:
          python-version: "3.10"

      - name: Cache dependencies
        uses: actions/cache@v3
        with:
          path: ~/.cache/pip
          key: ${{ runner.os }}-pip-${{ hashFiles('**/requirements.txt') }}
          restore-keys: |
            ${{ runner.os }}-pip-

      - name: Install dependencies
        run: |
          pip install -r requirements.txt

      - name: Copy env file
        run: cp .env.sample .env

      - name: Run app
        run: |
          python3 main.py & pid=$!
          sleep 10
          if ps -p $pid > /dev/null; then
            echo "main.py started successfully"
            kill $pid
          else
            echo "main.py failed to start"
            exit 1
          fi

      - name: Run migrations
        run: |
          alembic revision --autogenerate
          alembic upgrade head

      - name: Run tests
        run: |
          PYTHONPATH=. pytest
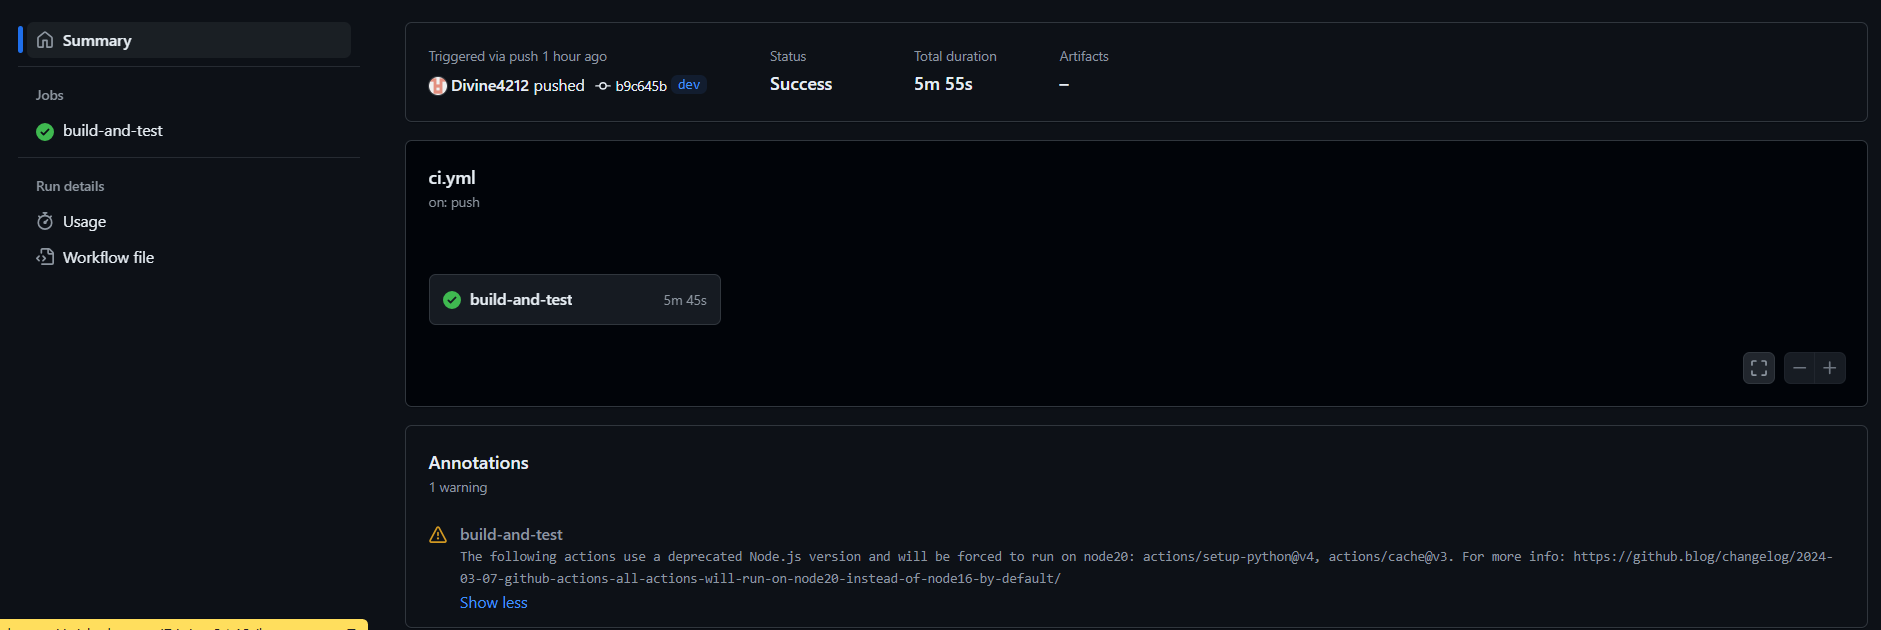
Once a push commit is made, the runners should trigger the ci workflow and a build should begin. check screenshots for reference.


Conclusion
If all steps are followed correctly, the setup should work as intended. Ensure to test thoroughly.
Subscribe to my newsletter
Read articles from divine kenechukwu directly inside your inbox. Subscribe to the newsletter, and don't miss out.
Written by
