Cloudflare: Custom Domain Setup and DNS Management Explained
 Anant Vaid
Introduction
Quick Recap
Welcome to part two of our series Building a Secure Static Website on Amazon S3. In this article, we will guide you through hosting your static website using a custom domain. If you haven't read the first part, we recommend doing so for better context.
Overview of Cloudflare
Cloudflare is a web infrastructure and website security company that provides content delivery network (CDN) services, DDoS mitigation, Internet security, and distributed domain name server (DNS) services. Cloudflare also acts as an intermediary (reverse proxy) between a website's visitor and the hosting provider, enhancing security and performance.
Let's dive into these aspects in the following sections.
Importance of custom domain setup and DNS management
In the last blog, we ended with a public URL for our static website from S3. However, this URL is hard to remember and looks a bit unprofessional, doesn't it? Let's learn why having a custom domain is important.
Custom domain setup and DNS management are crucial for several reasons:
Branding and Professionalism: Using a custom domain enhances your brand's credibility and professionalism. It makes your website appear more legitimate and trustworthy to visitors.
Control and Flexibility: Managing your own DNS settings allows you to have full control over your domain's configuration. This includes setting up subdomains, email services, and other domain-related services.
Performance Optimization: Proper DNS management can improve website performance by reducing latency and ensuring faster load times. Services like Cloudflare can cache content closer to users, enhancing the overall user experience.
Security: Custom domain setup and DNS management allow you to implement security measures such as DNSSEC, which protects against DNS spoofing and other attacks. Additionally, services like Cloudflare offer DDoS protection and other security features.
Reliability and Uptime: Effective DNS management ensures that your website remains accessible and minimizes downtime. Using a reliable DNS provider can help distribute traffic and handle large volumes of requests efficiently.
SEO Benefits: A custom domain can improve your website's search engine ranking. Search engines often favor websites with custom domains over those using generic or subdomains.
Email Services: Setting up a custom domain allows you to create professional email addresses that match your domain, further enhancing your brand's image.
Overall, custom domain setup and DNS management are essential for maintaining a professional online presence, ensuring website performance, and protecting against security threats.
Custom Domain Setup
Namecheap
Let's create a custom domain from a well-known registrar, Namecheap. Namecheap is a well-known domain registrar and web hosting company that provides a variety of services including domain name registration, web hosting, SSL certificates, and more. Founded in 2000, Namecheap has grown to become one of the most popular and trusted domain registrars in the industry.
Benefits of using Namecheap:
Affordable Pricing: Namecheap is known for its competitive pricing, making it an attractive option for individuals and businesses looking to register domains and host websites.
User-Friendly Interface: The platform is designed to be user-friendly, making it easy for users to manage their domains and hosting services.
Customer Support: Namecheap offers 24/7 customer support through live chat and a comprehensive knowledge base.
Security Features: With services like WHOIS privacy protection and SSL certificates, Namecheap ensures that your website and personal information are secure.
Defining custom domains
Create an account in Namecheap by filling up the signup form provided. Once the sign up is complete, login to the account to see the dashboard.
Next, type the domain you want in the search box. Namecheap will check if the domain is available and show the prices for all possible domain names.

Choose the domain name that fits your needs and proceed with the payment using a credit or debit card.
In our case, we will choose the domain - techtalkswithanant.online. Once purchased, the domain name should be shown on the Dashboard.
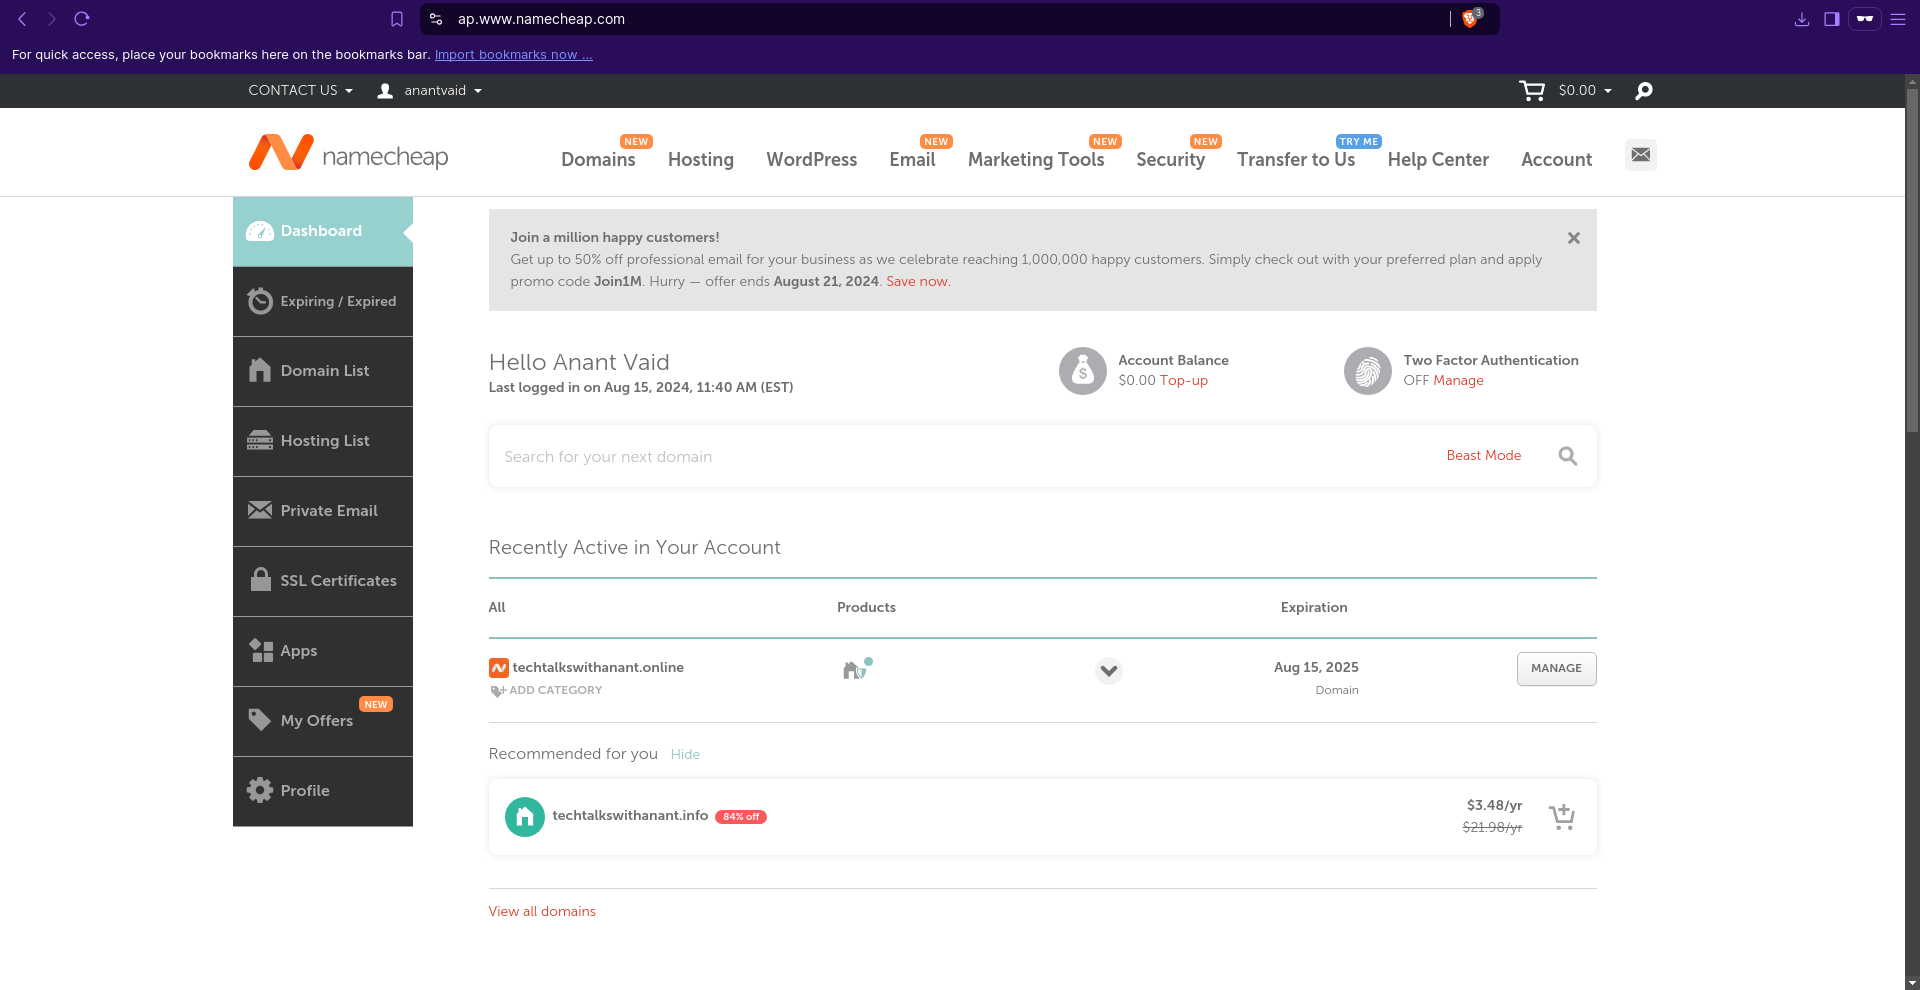
We will get back to managing the domain shortly. In the meantime, let's set up our Cloudflare account.
Getting Started with Cloudflare
Creating a Cloudflare account
To create a Cloudflare account, follow these steps:
Visit Cloudflare's Website: Go to the Cloudflare website at cloudflare.com.
Sign Up: Click on the "Sign Up" button, usually located at the top right corner of the homepage.
Enter Your Email and Password: Provide a valid email address and create a strong password. Make sure to use a unique password for security purposes.
Agree to Terms and Conditions: Read and agree to Cloudflare's terms of service and privacy policy.
Complete the CAPTCHA: Verify that you are not a robot by completing the CAPTCHA challenge.
Submit: Click on the "Create Account" to complete the registration process.
Verify Your Email: Check your email inbox for a verification email from Cloudflare. Click on the verification link to activate your account.
Once your account is verified, you can log in to Cloudflare and start adding your websites and managing your DNS settings. The dashboard should look like this:
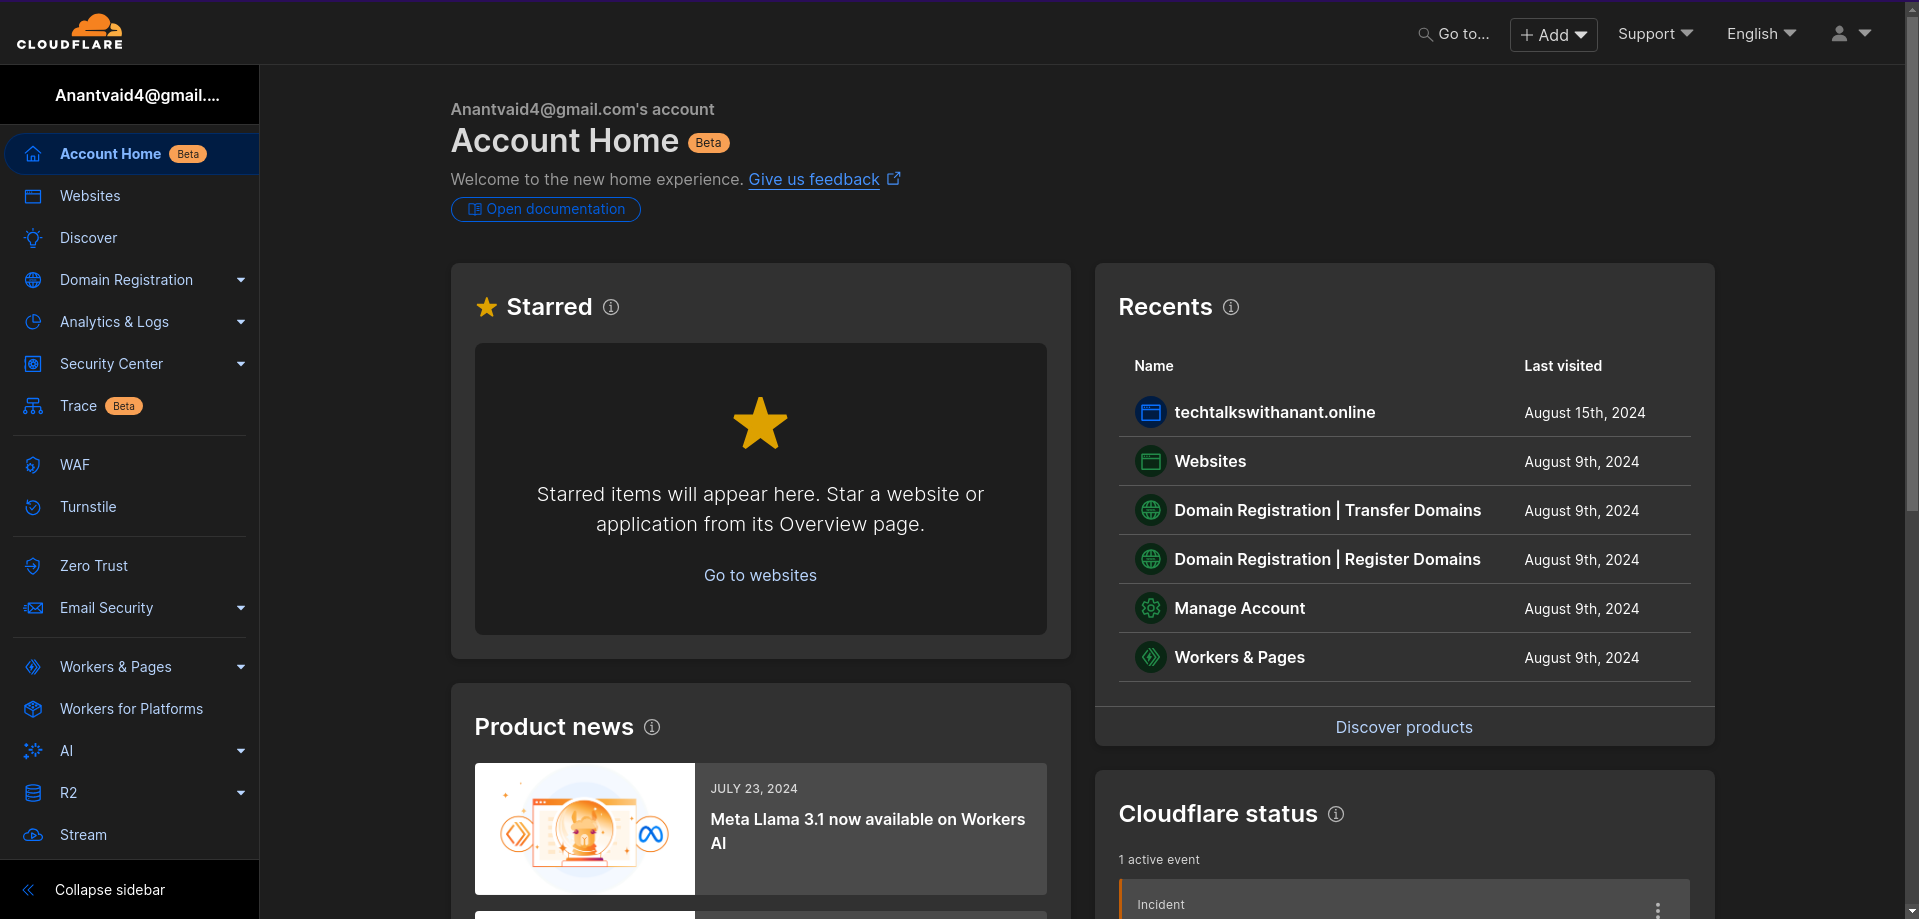
Adding custom domains to Cloudflare
Once you are in your dashboard, click on the "Websites" tab on the left-side panel. This is where we host all our DNS records for the different custom domains we want to manage.
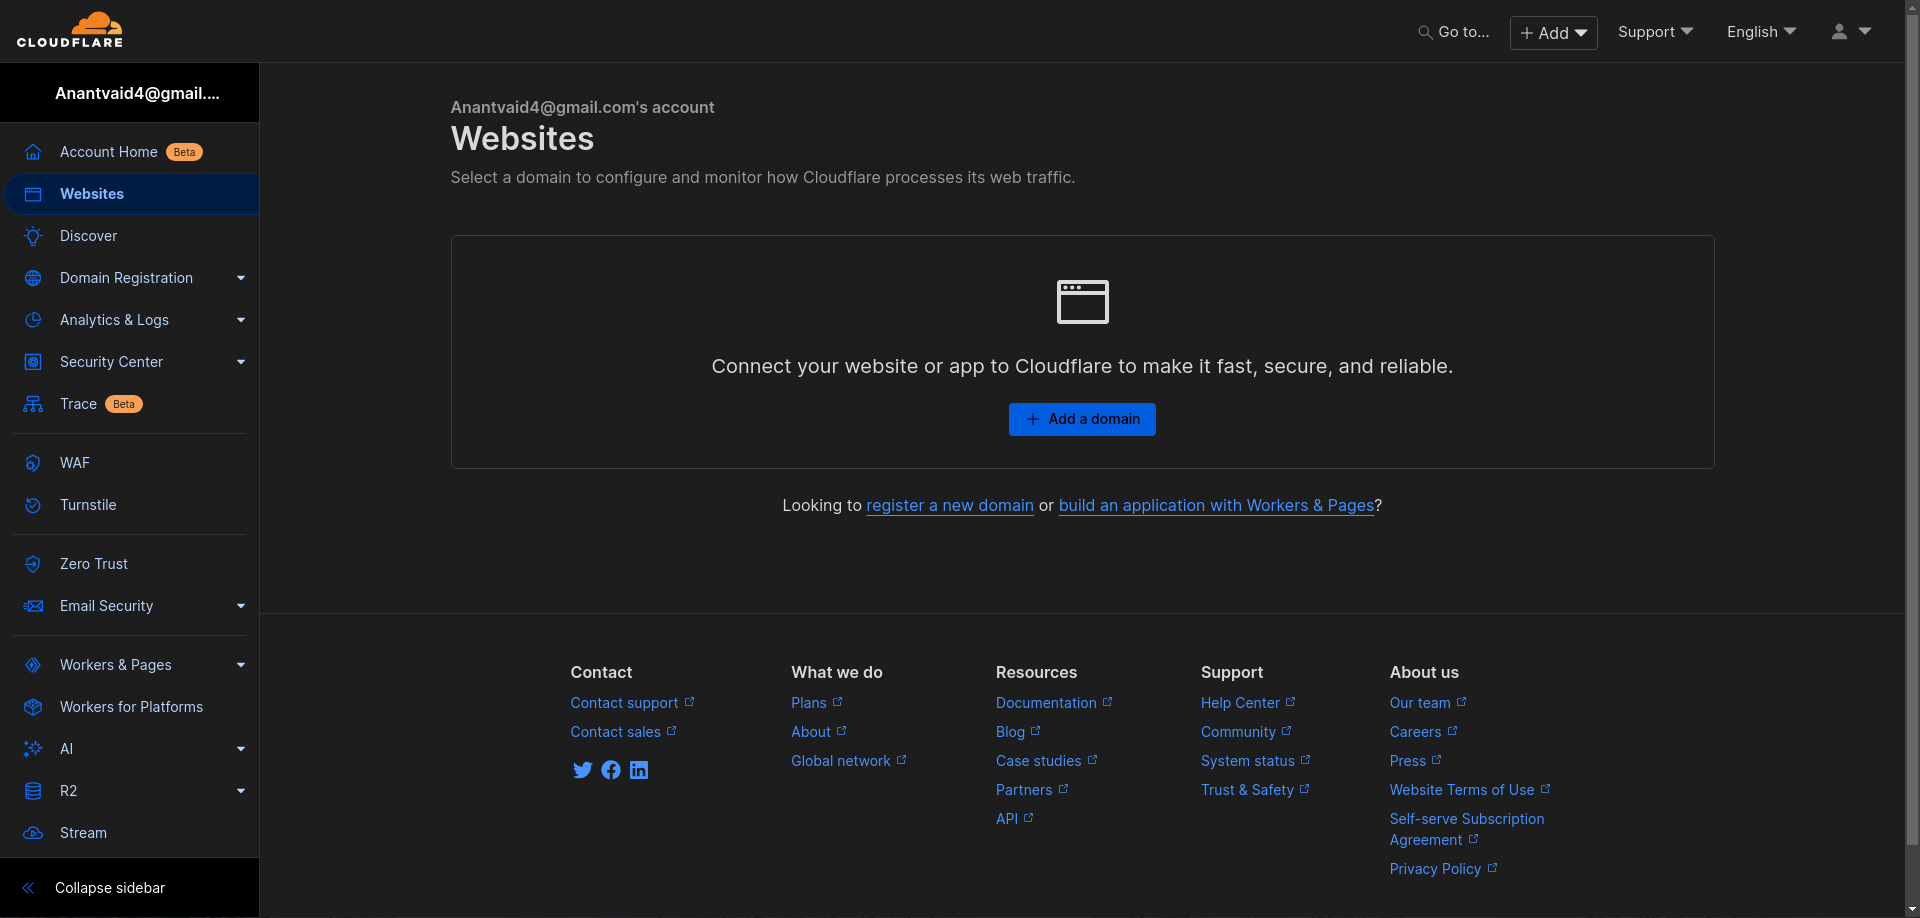
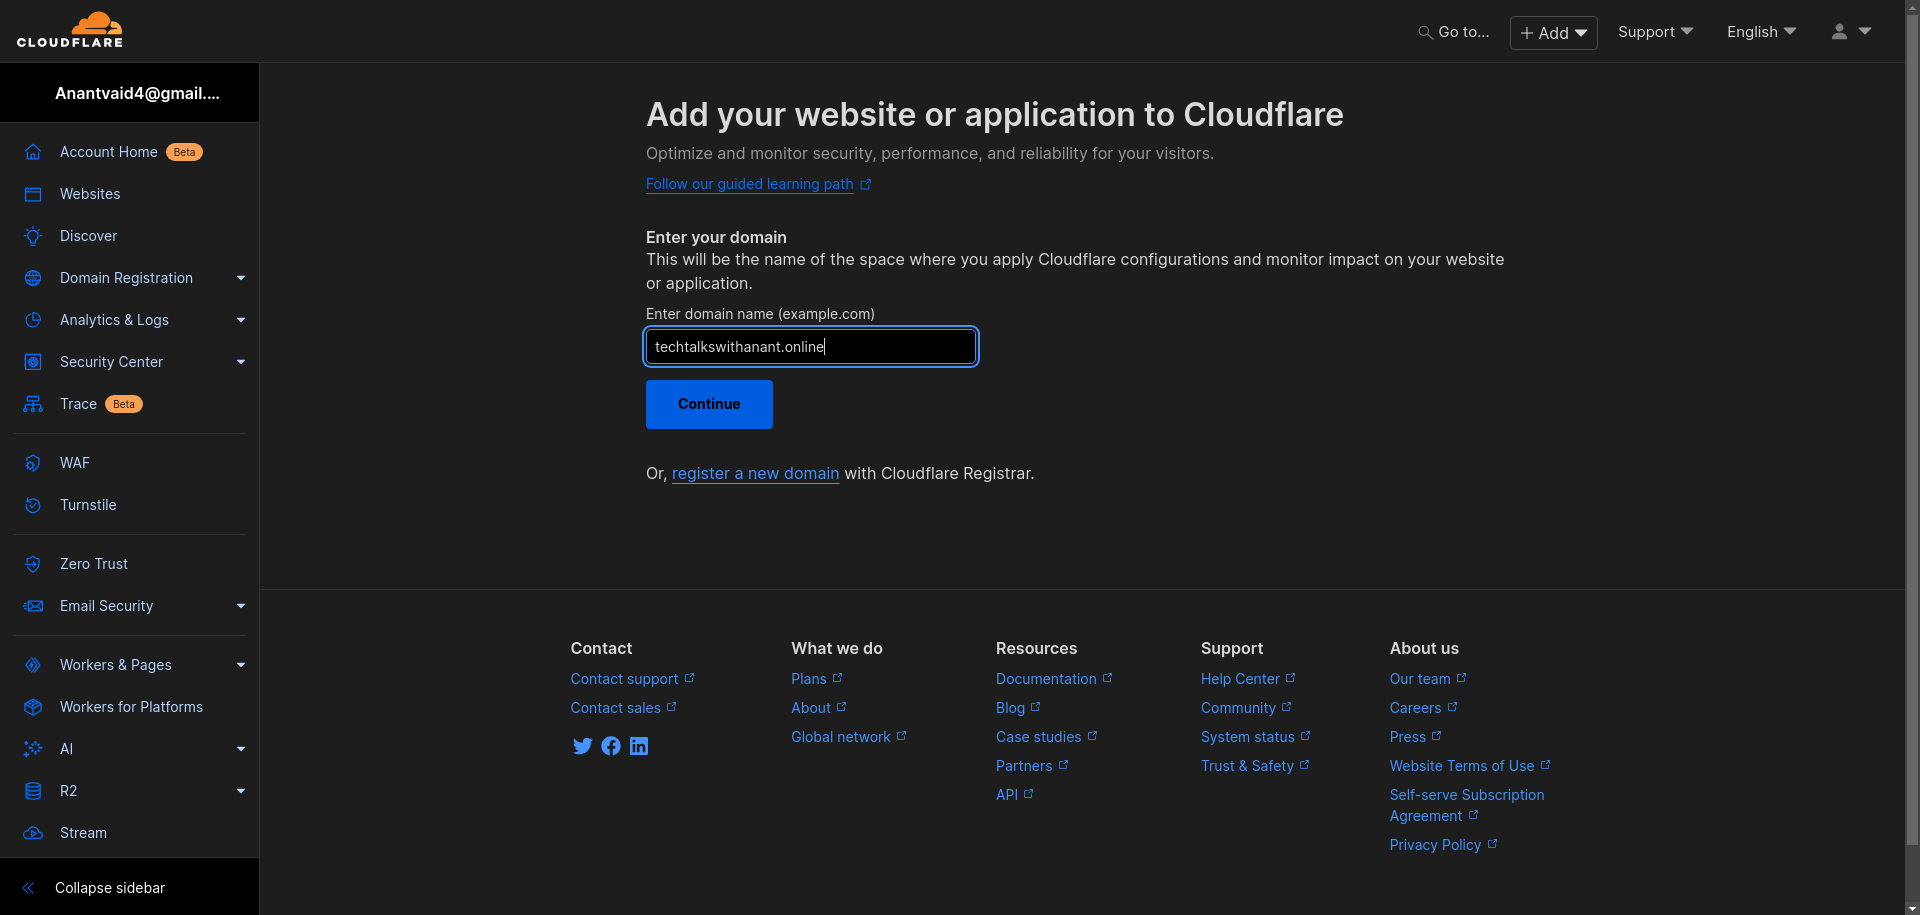
Next, click on "Add a domain" button. Then, enter the domain name without any spaces in between and press Continue.
Choose the Plan based on your needs. Each plan (Free/Pro/Business/Enterprise) is designed to offer a balance of security, performance, and support, allowing users to choose the one that best fits their requirements.
We will proceed with the Free Plan as it provides basic protection, including essential security features like DDoS protection and a shared SSL certificate. Additionally, it offers performance enhancements with basic CDN services to improve website load times. We also have access to Cloudflare's DNS services in the Free Plan.
After selecting the Plan, press "Continue".
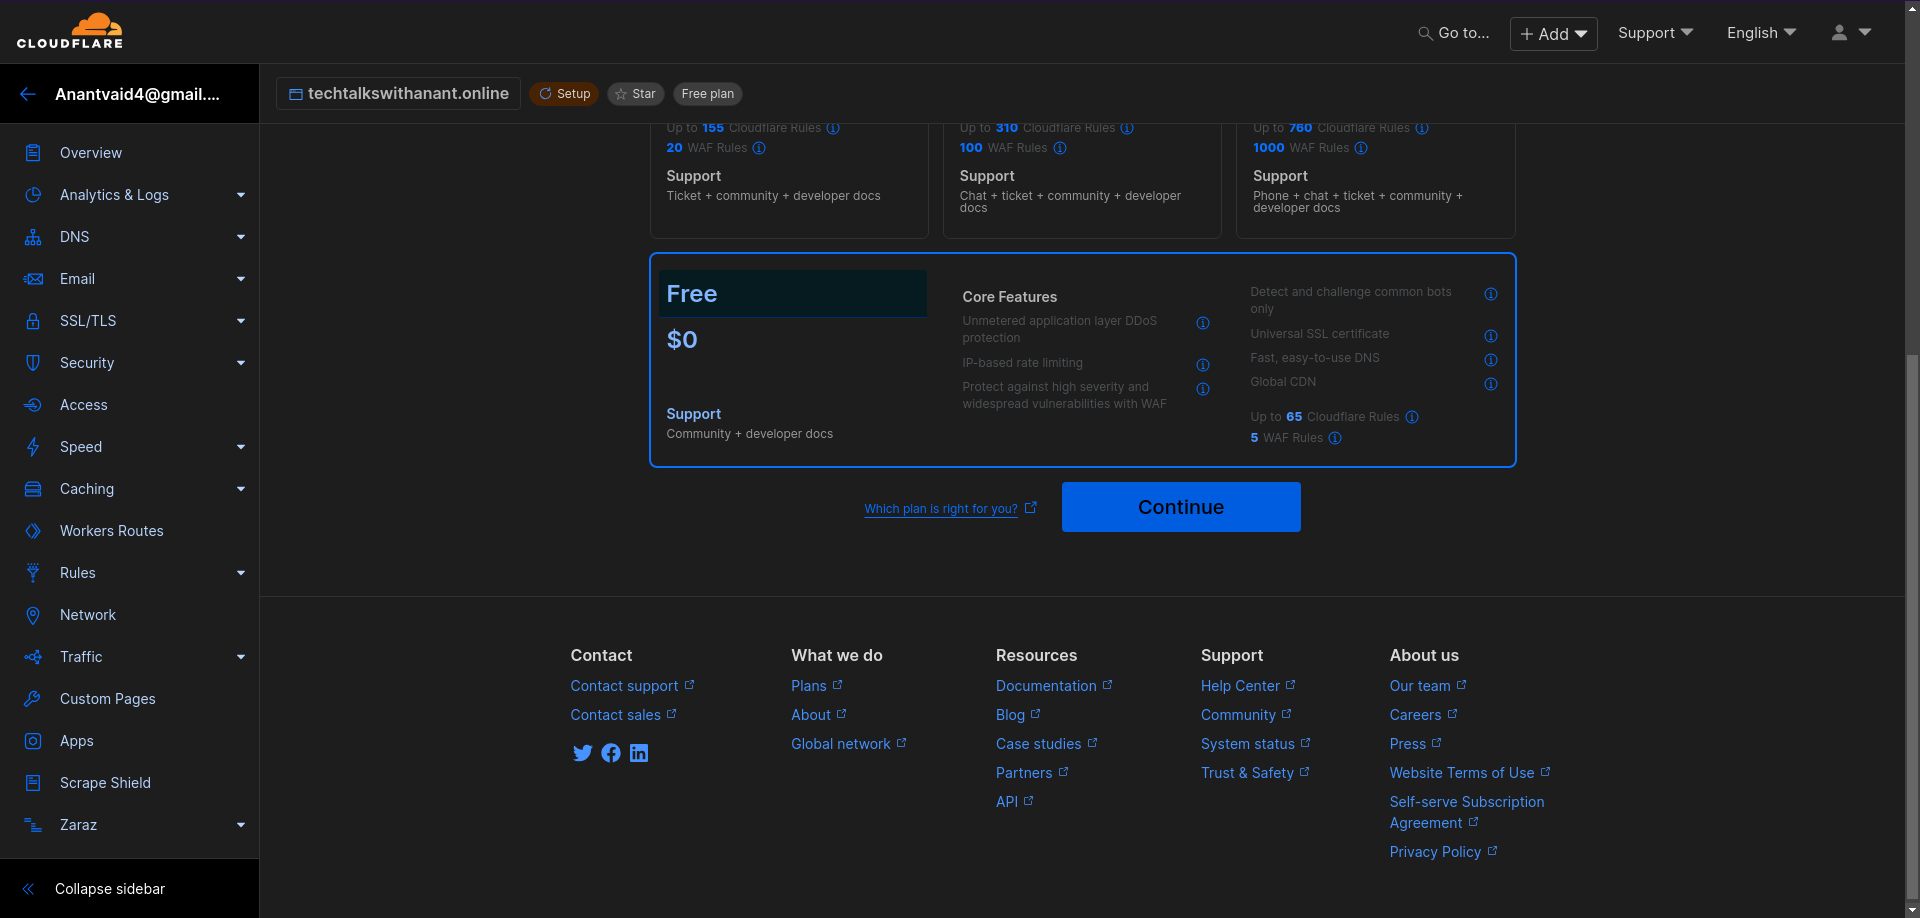
Once the domain is added to Cloudflare, it will notify you that the domain is not yet active in Cloudflare. This is because the domain is still managed by Namecheap's nameservers by default. We need to point the domain to Cloudflare's nameservers.
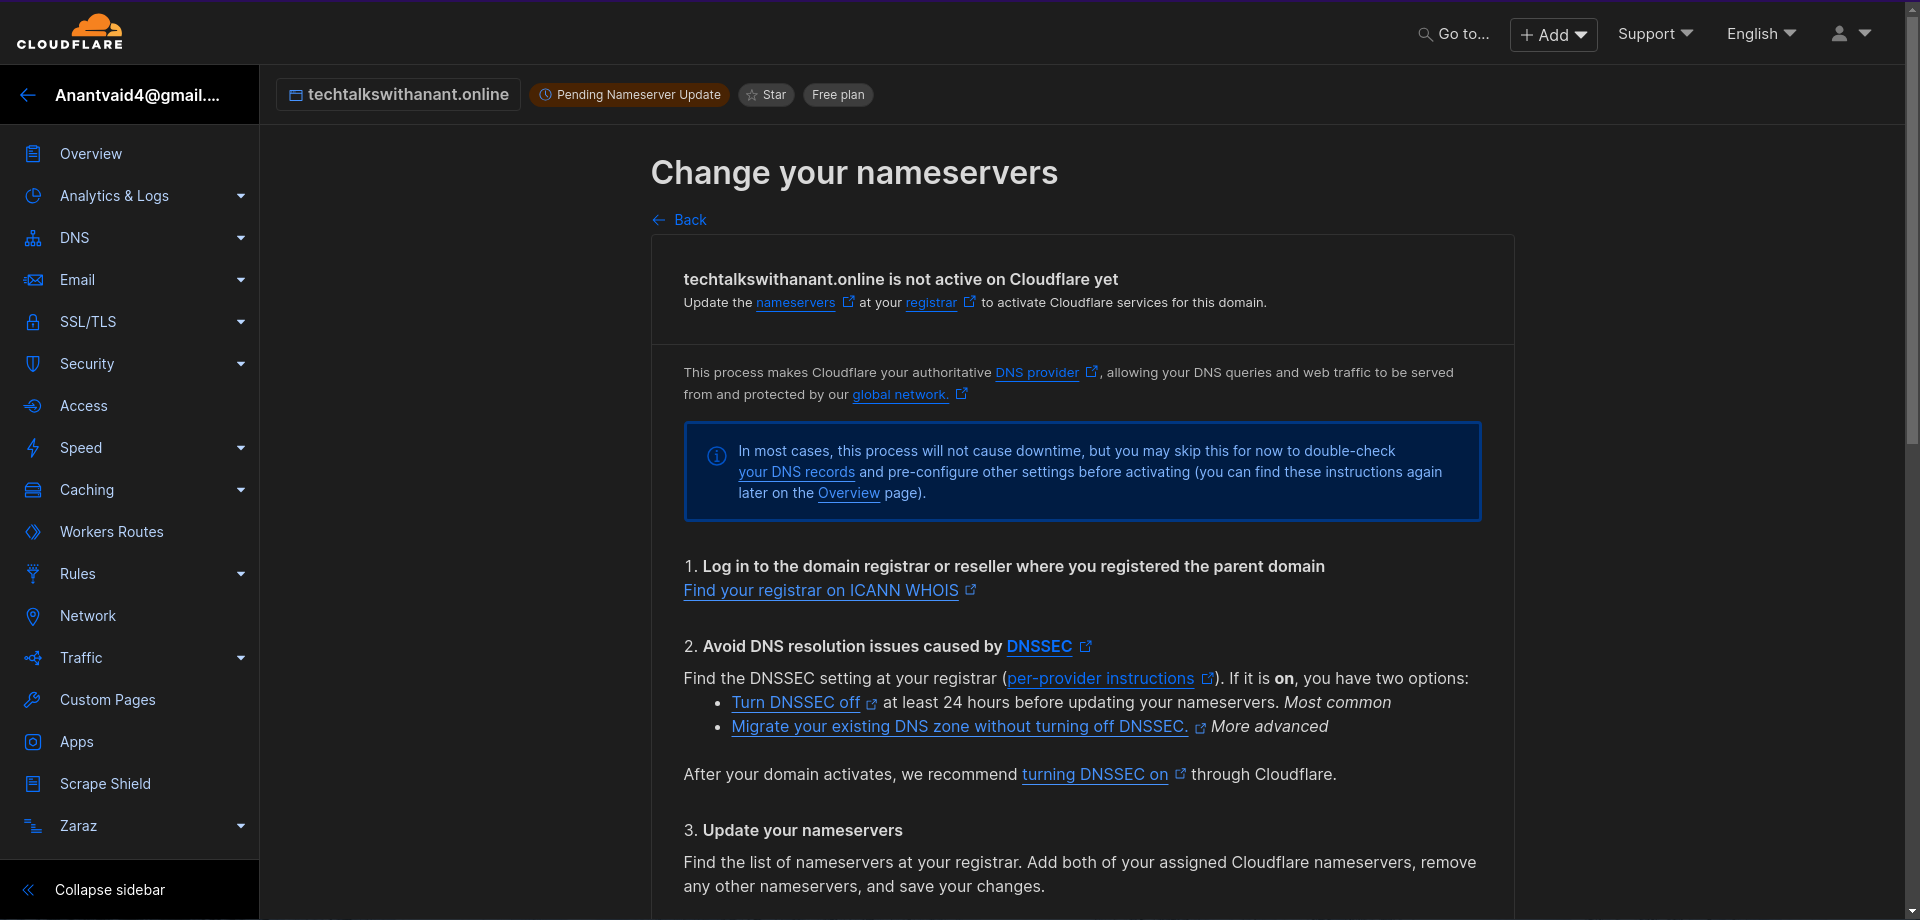
Since Cloudflare's instructions to activate the domain are clear, let's proceed and complete the process.
Changing domain registrar's nameservers to Cloudflare
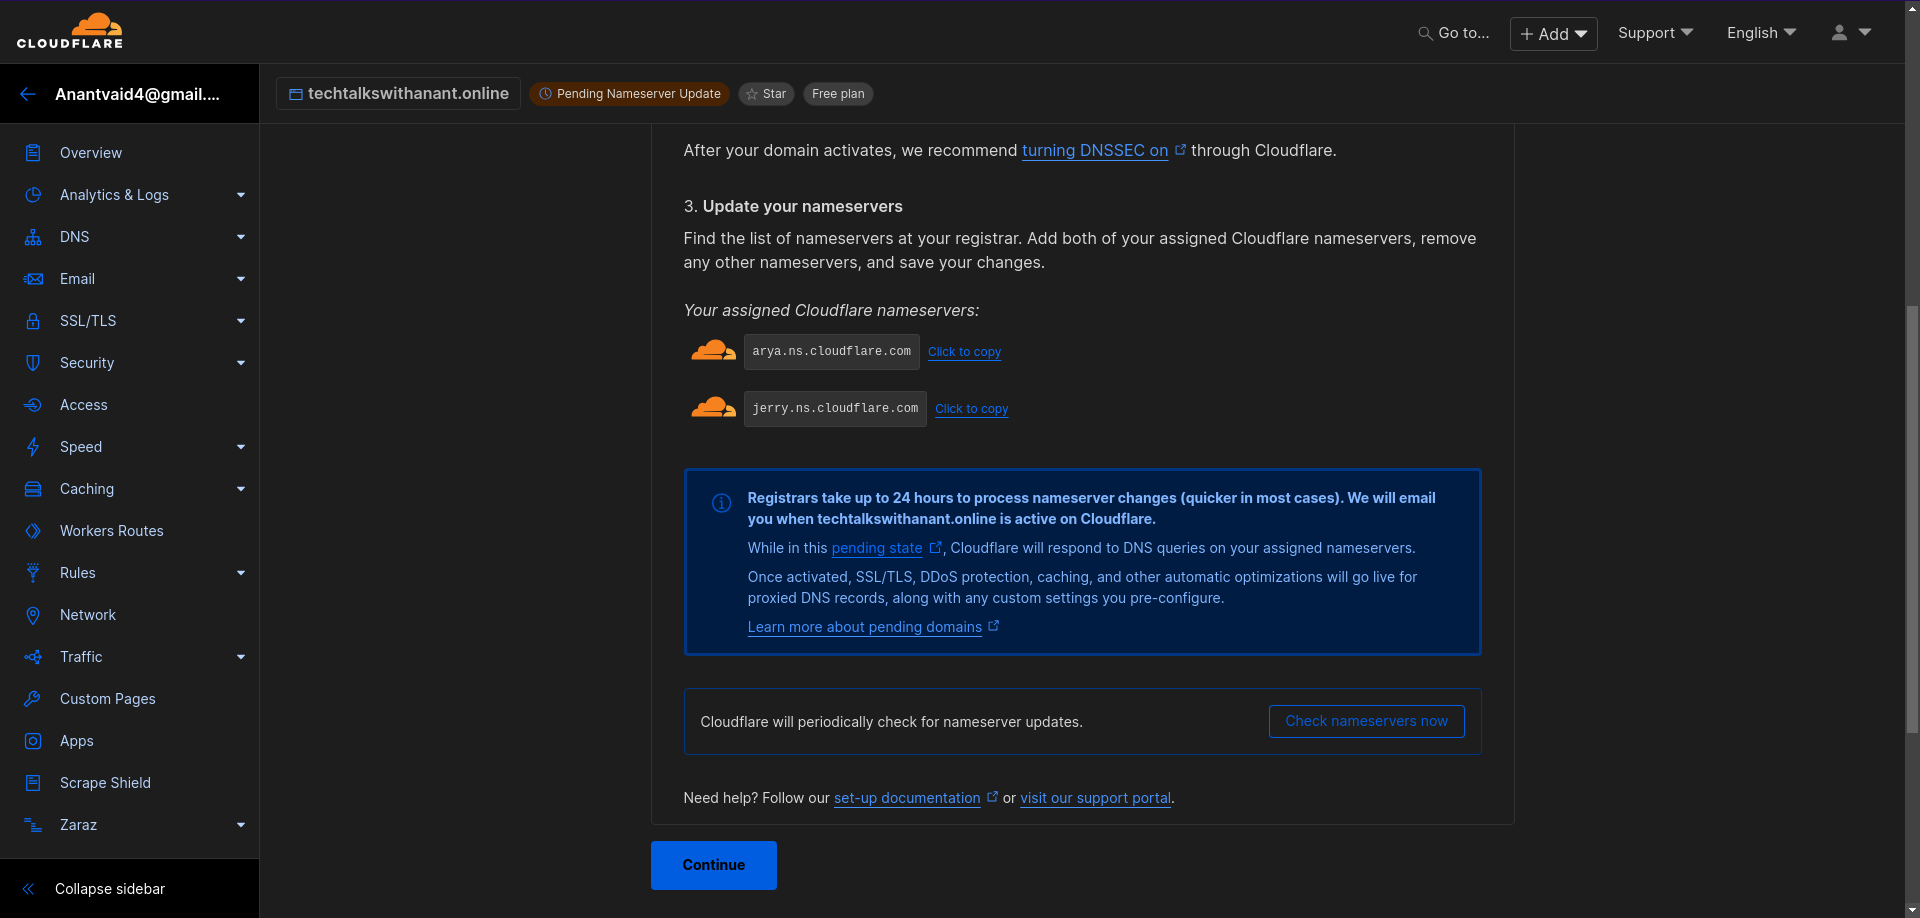
As shown above, Cloudflare asks the user to update the domain's nameservers to arya.ns.cloudflare.com and jerry.ns.cloudflare.com in the domain registrar console. So, let's navigate to the Namecheap domain management console and update the nameservers.
Go to the Domain List section in the left-hand panel of the NameCheap page. Then select the Custom DNS option for the Nameservers and enter the copied Cloudflare nameservers. After this, click the tick button at the top to save the nameservers.
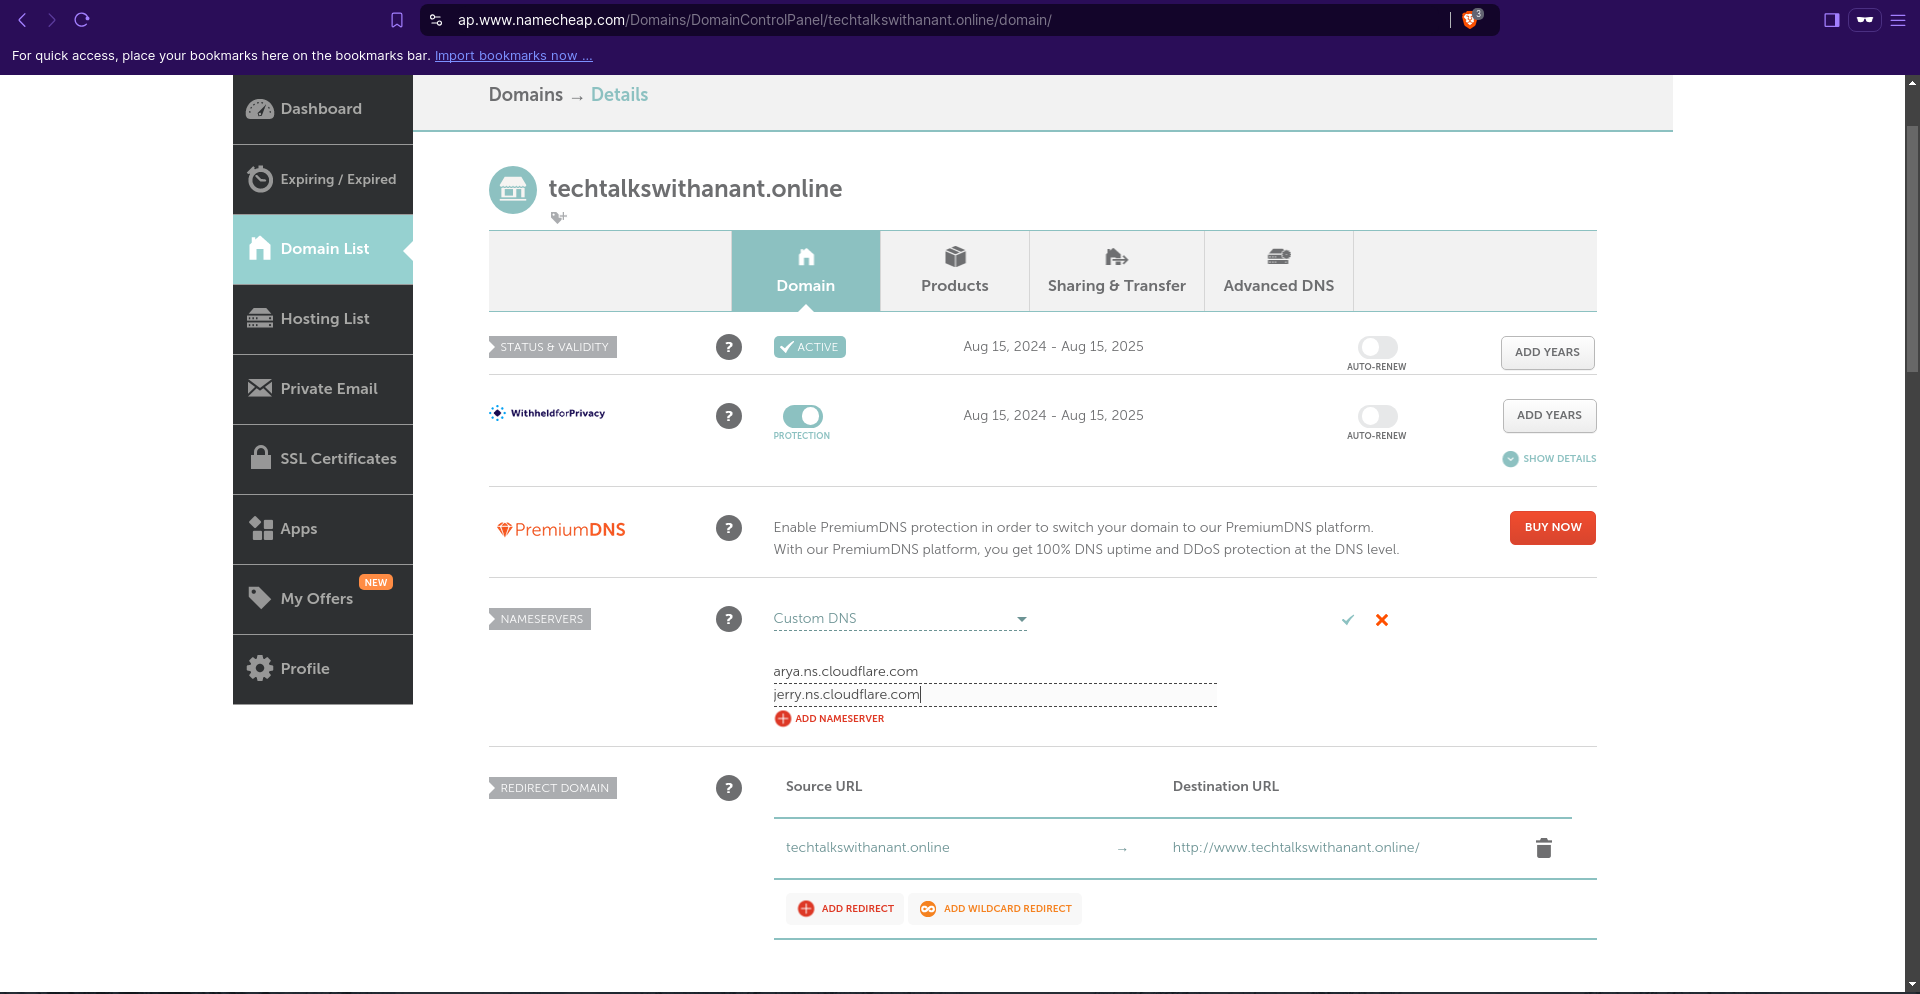
Ensure that the DNSSEC option is disabled in the Advanced DNS tab during the nameserver update and propagation to avoid resolution conflicts between Cloudflare and Namecheap. You can enable this option through Cloudflare after the domain becomes active.
DNSSEC is used to ensure the authenticity and integrity of DNS data, giving users and applications confidence that the DNS responses they receive are accurate and not tampered with.
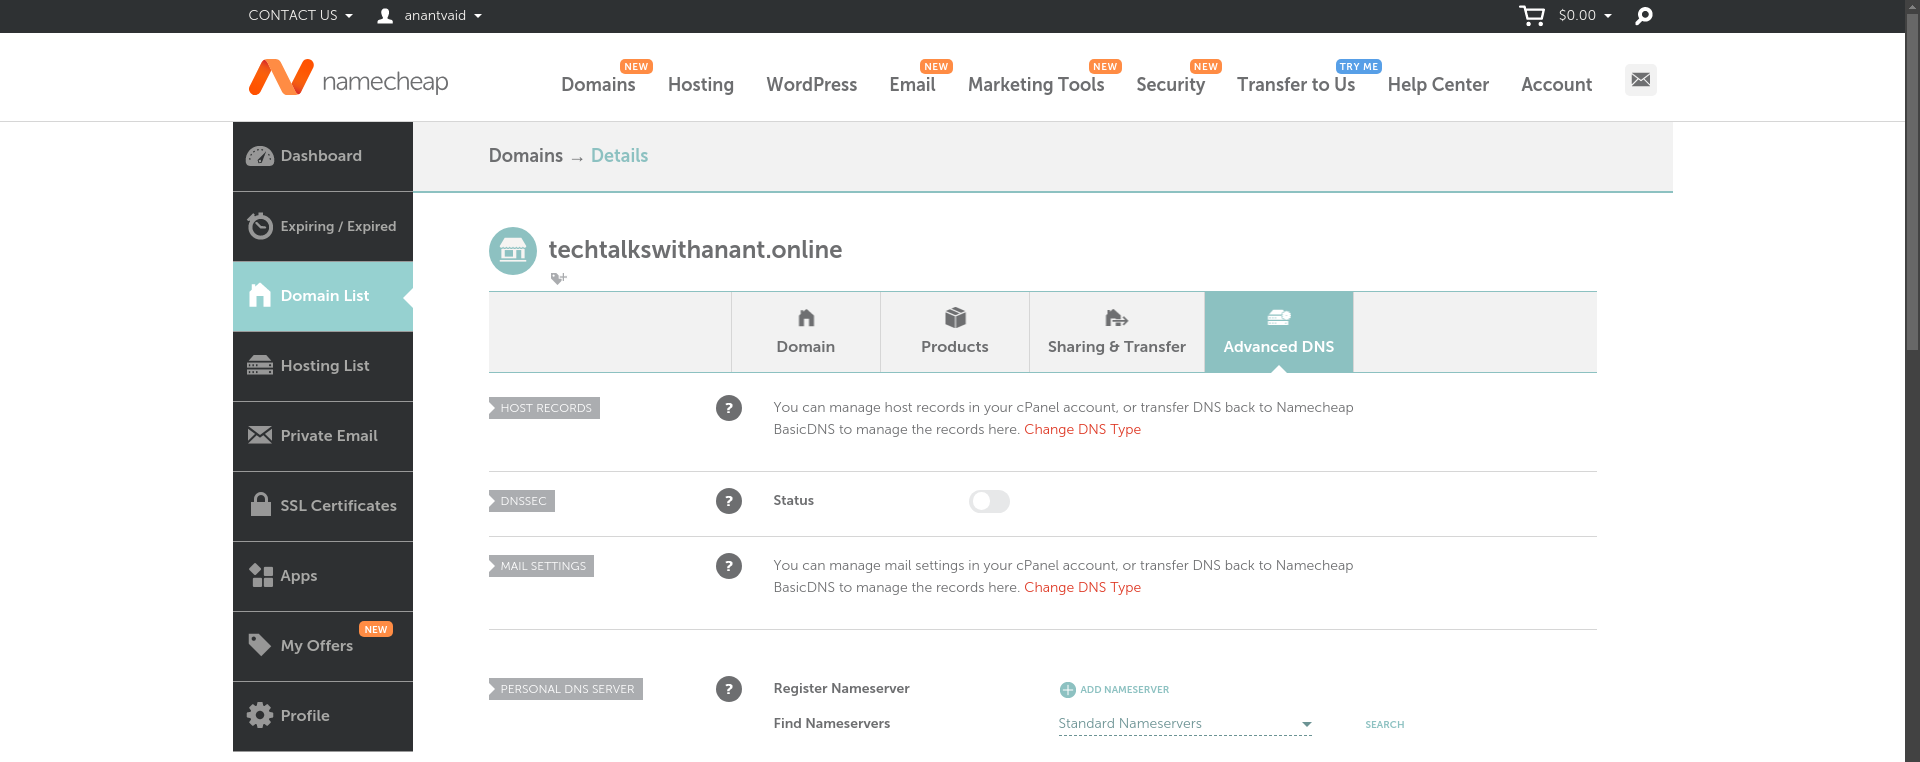
Note: The nameserver update usually takes around 30 minutes to 2 hours to propagate. Cloudflare will keep checking for the nameserver updates periodically, and once the propagation is complete, the domain will be active on Cloudflare.
Verifying domain activation
Once the nameserver updates are propagated, Cloudflare is ready to serve the domain.
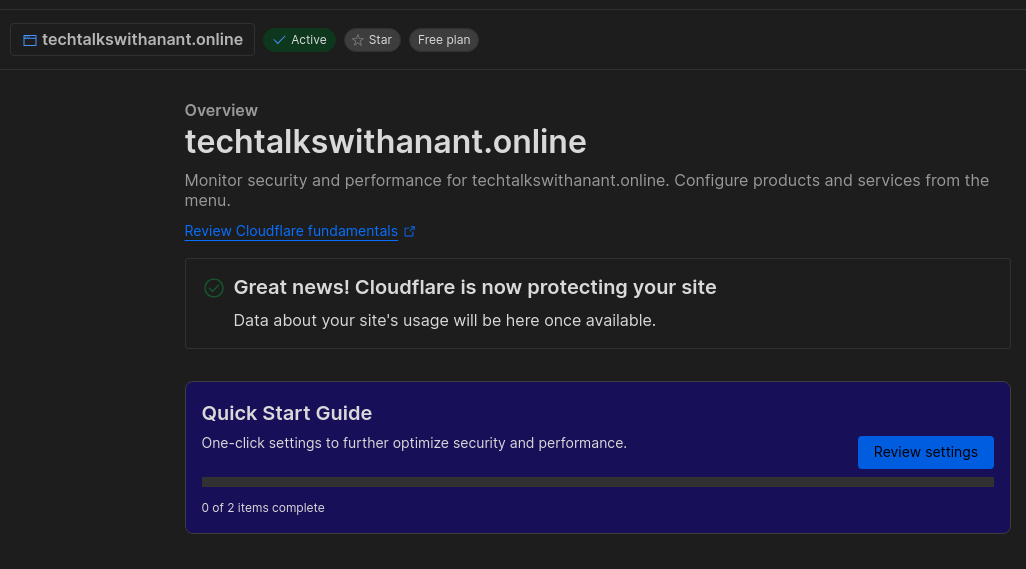
Click on the "Review settings" option and complete the setup.

Make sure to turn on the "Automatic HTTPS Rewrites" and "Always use HTTPS" options to ensure security when accessing our domain.
These options ensure that the site is always redirected to use HTTPS protocol, which in turn secures our site by encrypting the data during transit.
DNS Management in Cloudflare
Introduction to DNS (Domain Name System)
The Domain Name System (DNS) is a fundamental technology that translates human-readable domain names (like www.example.com) into IP addresses (like 192.0.2.1) that computers use to identify each other on the network. Essentially, DNS acts as the "phonebook" of the internet, enabling users to access websites and services without needing to remember complex numerical addresses. By routing requests to the correct servers, DNS plays a crucial role in making the internet user-friendly and accessible.
Adding and Modifying DNS records
Once the set up of the domain is complete, the management console shows all the imported and current DNS zone records of our domain. Since we do not have an A record of the domain (IP address to point to), we can delete the A record imported from Namecheap by clicking the edit button and then pressing the Delete button below. Next, let's add a CNAME record for the domain (alias domain to point to - S3 Bucket static website URL).
Go to the S3 Bucket and copy the S3 static website hosting URL.

Back in the Cloudflare domain management console, click on Add Record button and select the type as CNAME, fill in the name as domain, in this case, techtalkswithanant.online. The target should be the S3 URL without https://. Select the Proxy status as Proxied.

What is Proxied? In the context of Cloudflare, "Proxied" refers to the status of a DNS record that is routed through Cloudflare's network. When a DNS record is proxied, Cloudflare acts as an intermediary between the end user and the origin server. This means Cloudflare never exposes the final endpoint of the domain, maintaining anonymity. It maps to a Cloudflare IP and forwards the requests to the S3 Bucket URL. Cloudflare also caches the content at data centers around the world, acting as a CDN as well.
Since we do not have an IP address (A record) to map our root domain to, Cloudflare uses a technique called CNAME flattening. With CNAME flattening, Cloudflare finds the IP address that a CNAME points to. This process could involve a single lookup or multiple (if your CNAME points to another CNAME). Cloudflare then returns the final IP address instead of a CNAME record, helping DNS queries resolve up to 30% faster.
Verify the Domain name update
Type in the domain name in the browser of your choice - techtalkswithanant.online.
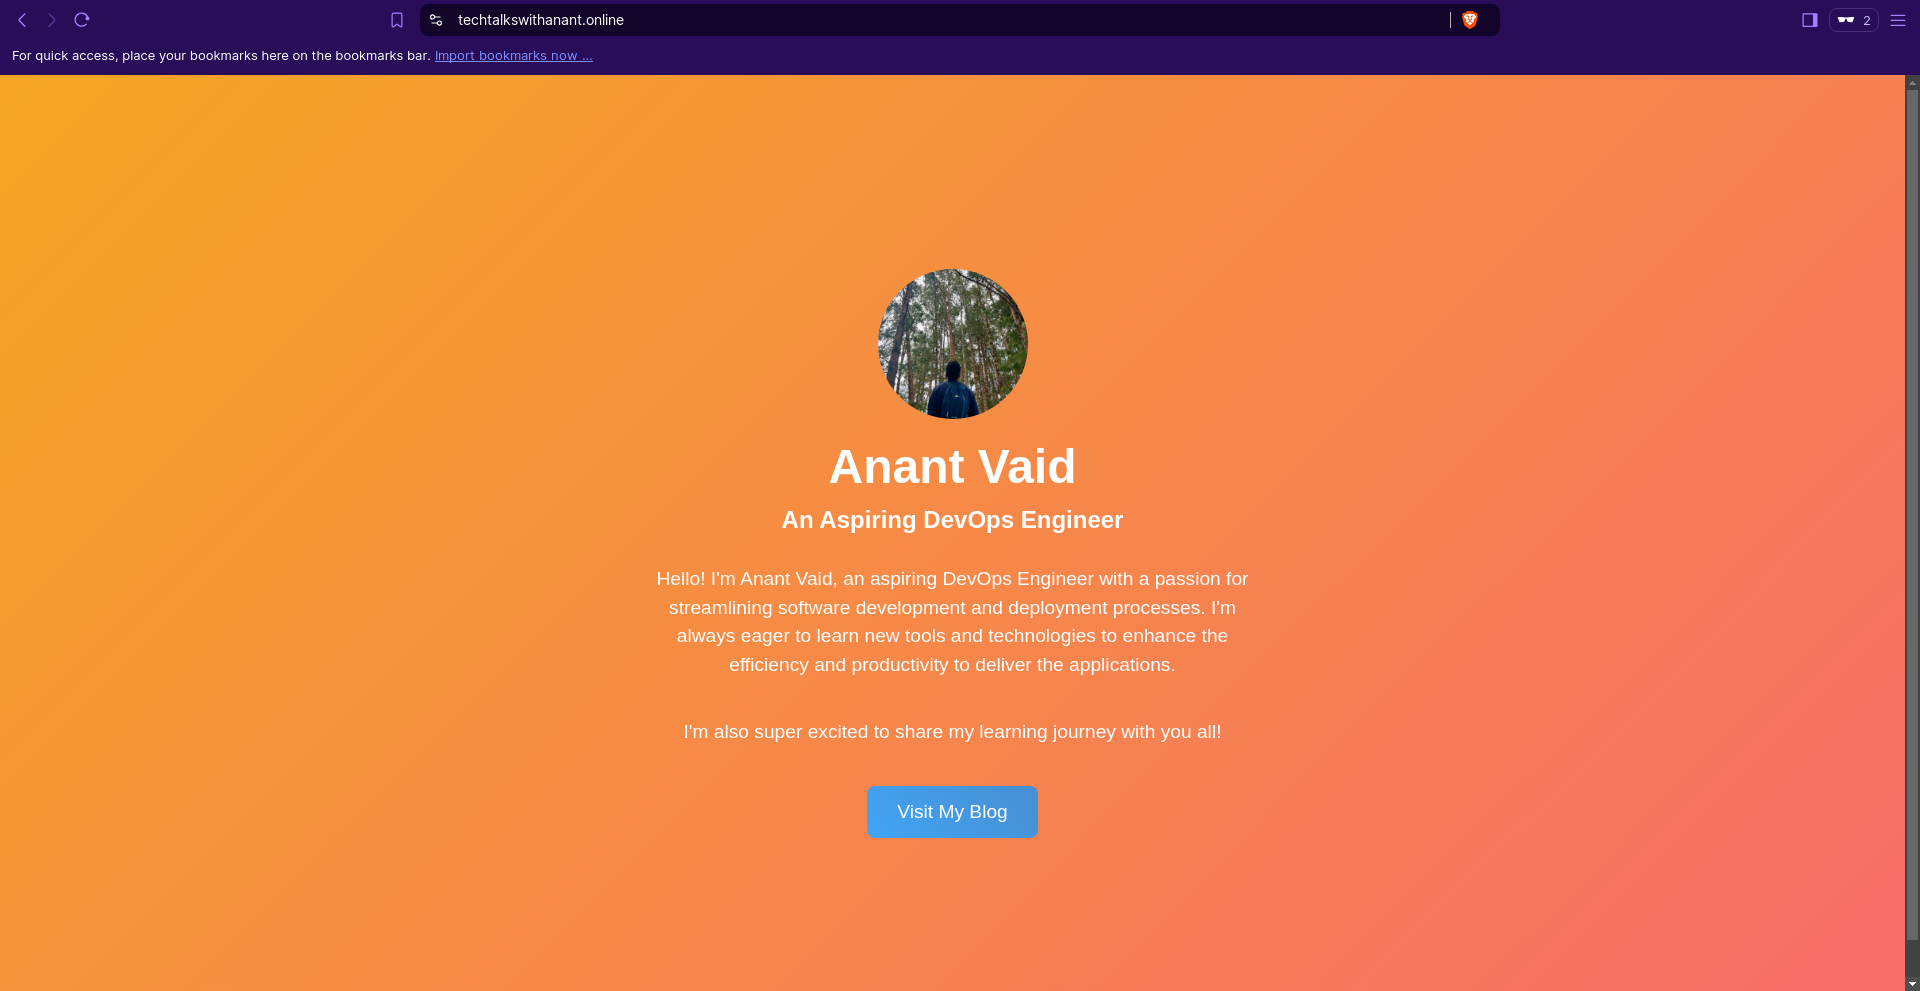
Hurray! We have successfully set up a custom domain and configured DNS settings using Cloudflare, making the domain secure with HTTPS enabled for both performance and security.
Using Cloudflare's DNS analytics
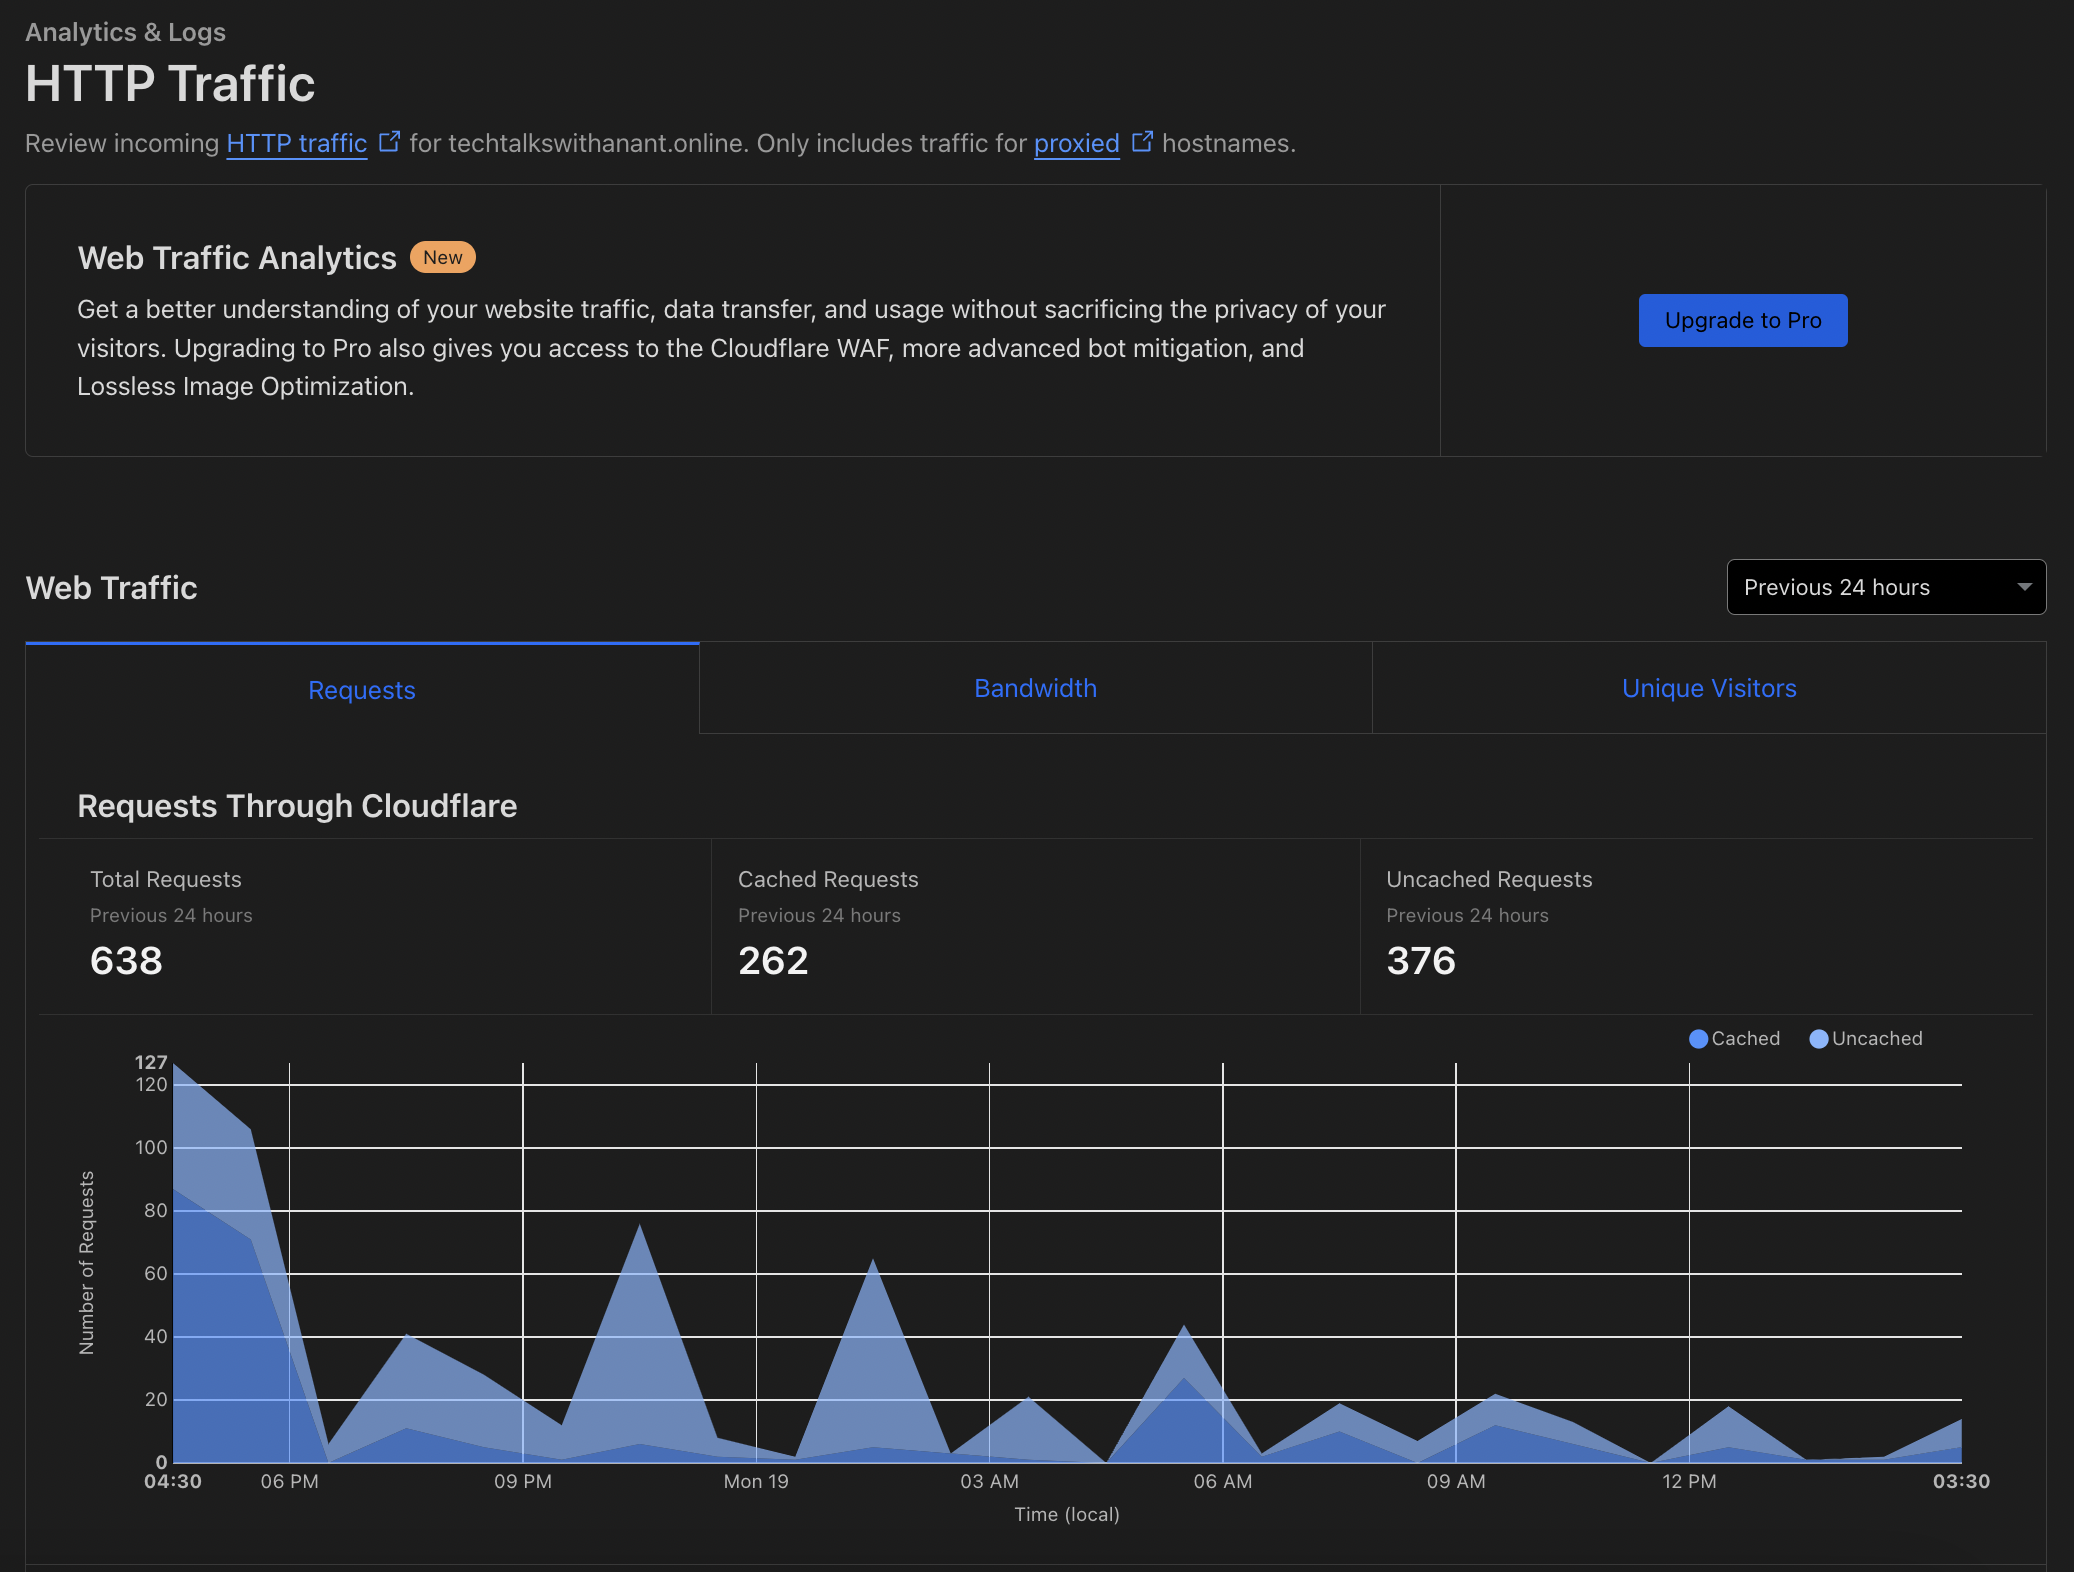
Cloudflare's DNS analytics provide valuable insights into the performance and security of your domain's DNS traffic. These analytics help you understand how your DNS is being used, identify potential issues, and optimize your DNS configuration for better performance and security.
Advanced DNS Features
Introduction to DNSSEC (Domain Name System Security Extensions)
DNSSEC (Domain Name System Security Extensions) is a suite of extensions to DNS (Domain Name System) that adds an additional layer of security to the DNS lookup and exchange processes. It is designed to protect against certain types of attacks, such as DNS spoofing and cache poisoning, by ensuring that the responses to DNS queries are authentic and have not been tampered with.
Enabling and configuring DNSSEC
We can enable DNSSEC in our Cloudflare account by navigating to DNS > Settings and clicking on Enable DNSSEC.

Once we click on Enable DNSSEC, it provides us with a DS record that needs to be added to the registrar, once that is added, Cloudflare verifies, the DNSSEC is automatically enabled.
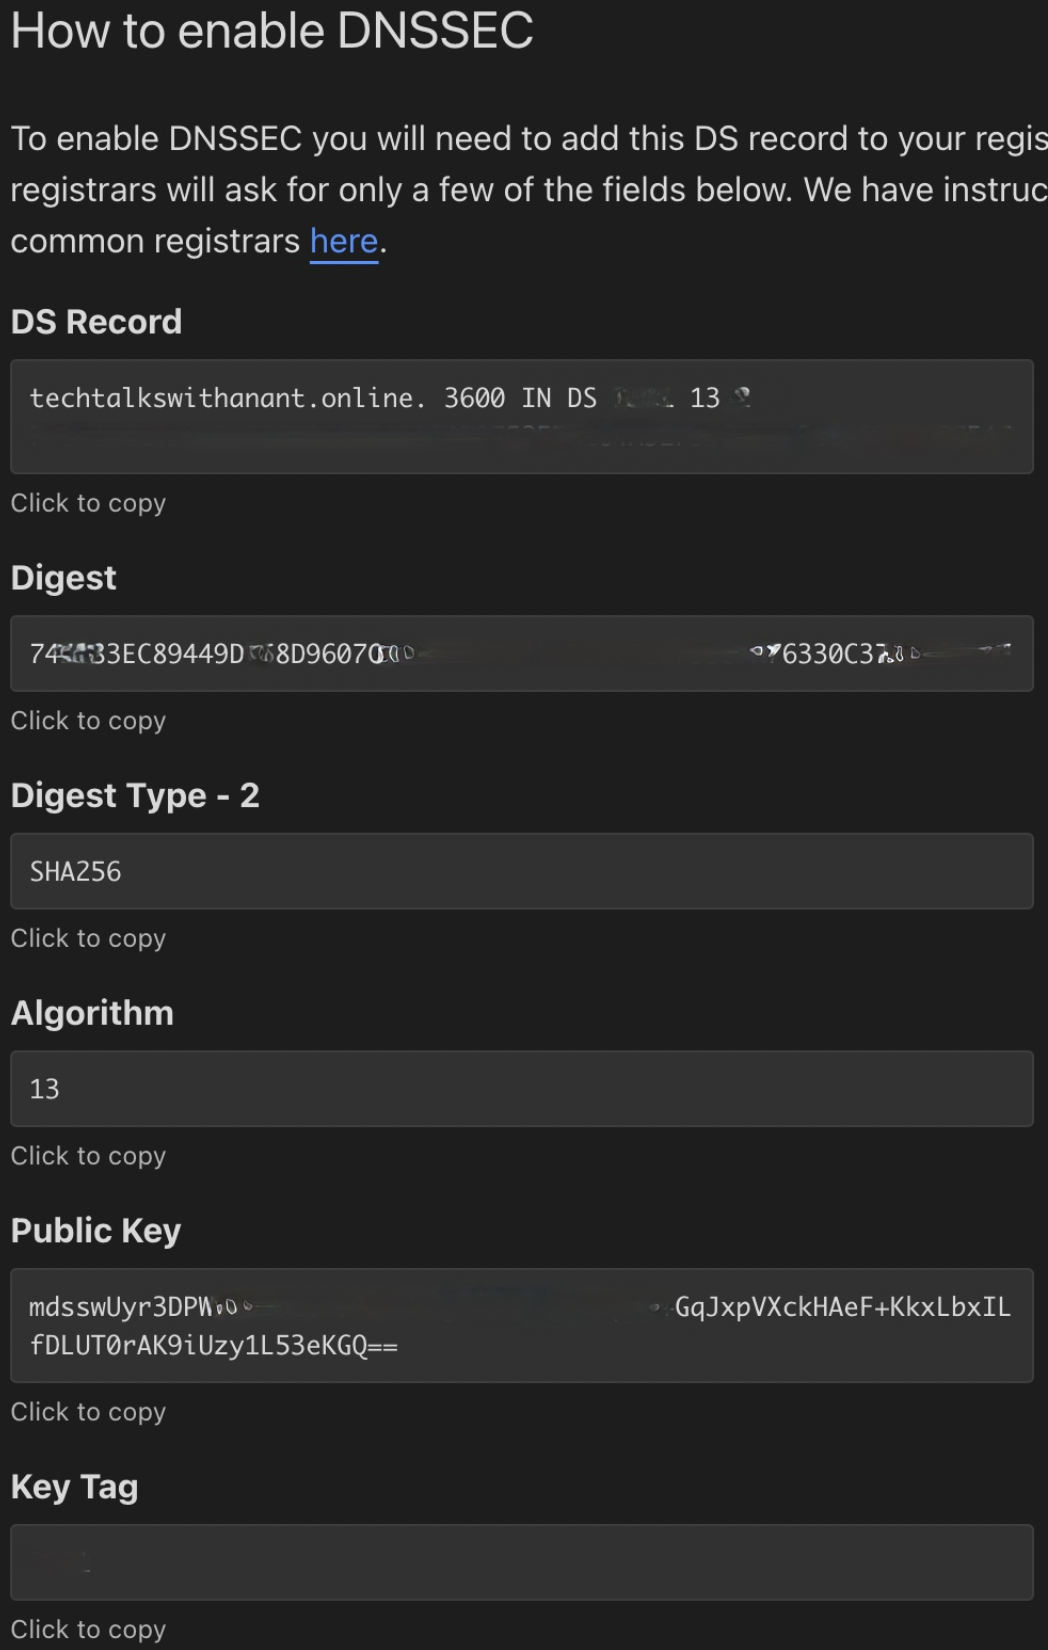
Behind the scenes, to implement DNSSEC, domain owners need to:
Sign Their Zone: Generate a pair of cryptographic keys (ZSK and KSK) and use them to sign their DNS zone.
Publish DNSSEC Records: Publish the DNSSEC-related records (such as DS, RRSIG, DNSKEY) in their DNS zone.
Update Parent Zone: Provide the DS (Delegation Signer) record to the parent zone (e.g., the TLD registry) to establish the chain of trust.
Thus, enabling DNSSEC strengthens your domain's security, ensuring that your users can trust the integrity and authenticity of your online presence.
Conclusion
Summary of key points
In this article, we continued building a secure static website on Amazon S3 by setting it up with a custom domain. We walked through the process of registering a domain with Namecheap, configuring DNS settings using Cloudflare, and using Cloudflare’s features for better performance and security. Topics covered include the importance of custom domains for branding and SEO, DNS management, enabling HTTPS, CNAME flattening, and advanced security with DNSSEC.
By the end, we created a professionally branded, secure website that loads faster and has strong protection against online threats.
Additional Resources
For more detailed information on Cloudflare's features, visit their official documentation.
Subscribe to my newsletter
Read articles from Anant Vaid directly inside your inbox. Subscribe to the newsletter, and don't miss out.
Written by

Anant Vaid
Anant Vaid
An Aspiring DevOps Engineer passionate about automation, CI/CD, and cloud technologies. On a journey to simplify and optimize development workflows.