Days with DevOps | Project 01
 Paminda Kalpa Wickramasinghe
Nginx (pronounced "engine-x") is a open source web server software that is widely used to serve web content, reverse proxy, and load balance. Also it is widely used in production environments and is a popular choice among web developers and administrators. So the main goal of this blog post is to set up and configure an Nginx Web Server on an AWS EC2 instance to host a website.
Requirements :
Before get into the project, ensure you have access to the following:
An AWS account with permissions to create and manage EC2 instances (free tier would be better).
Basic knowledge of Linux commands and SSH protocol.
Familiarity with AWS services like EC2, Security Groups, and IAM roles.
Step 1 : Launch an AWS Instance
First logging in to your created AWS Management Console.Select EC2 Dashboard by searching "EC2" from the service menu.The EC2 dashboard will provide about EC2 instance, security groups, SSH key pairs and other resources.
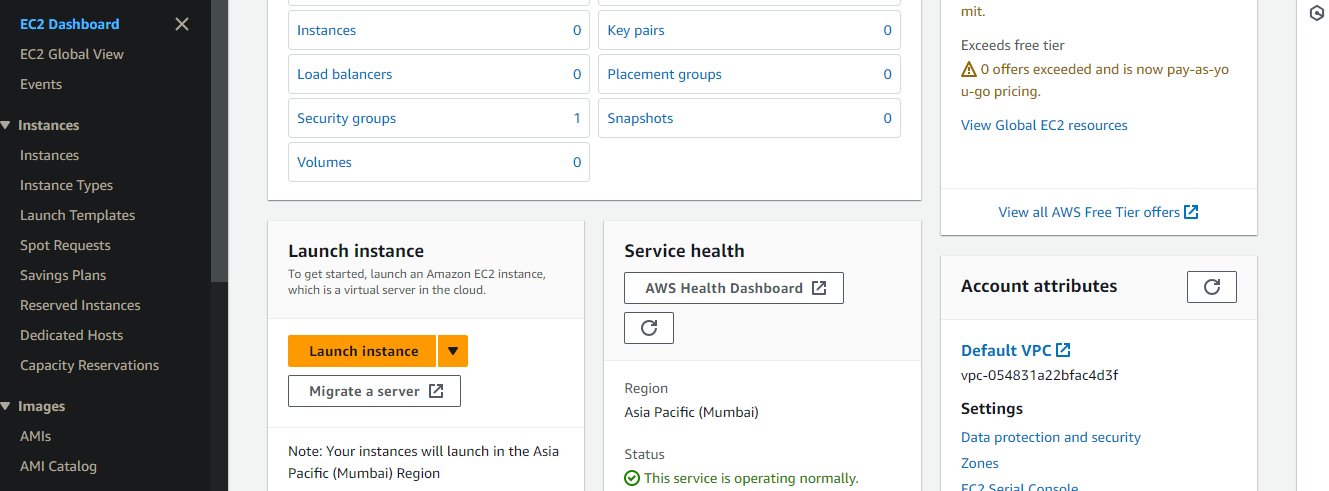
Click on “Launch Instance” to begin creating a new EC2 instance. This process involves selecting the appropriate configurations for your server.
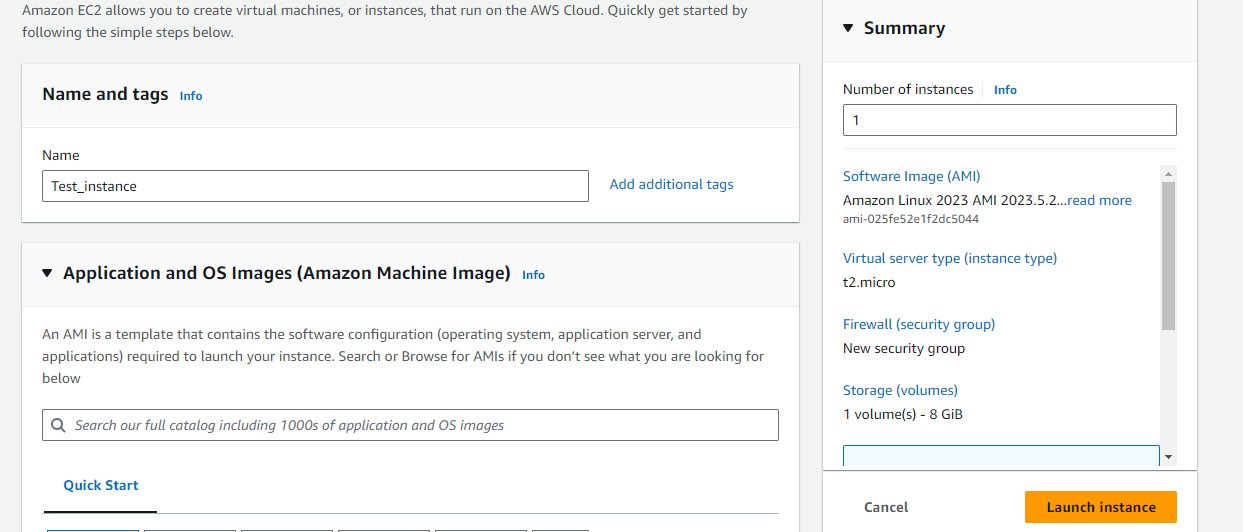
Amazon Machine Image (AMI): Choose Linux based image as your base image.I recommend selecting "Amazon Linux 2". This operating system is specifically optimized for running on AWS and provides a stable, secure, and high-performance execution environment
Instance Type: Select an appropriate instance type based on your needs. For this tutorial, the “t2.micro” instance type is sufficient.
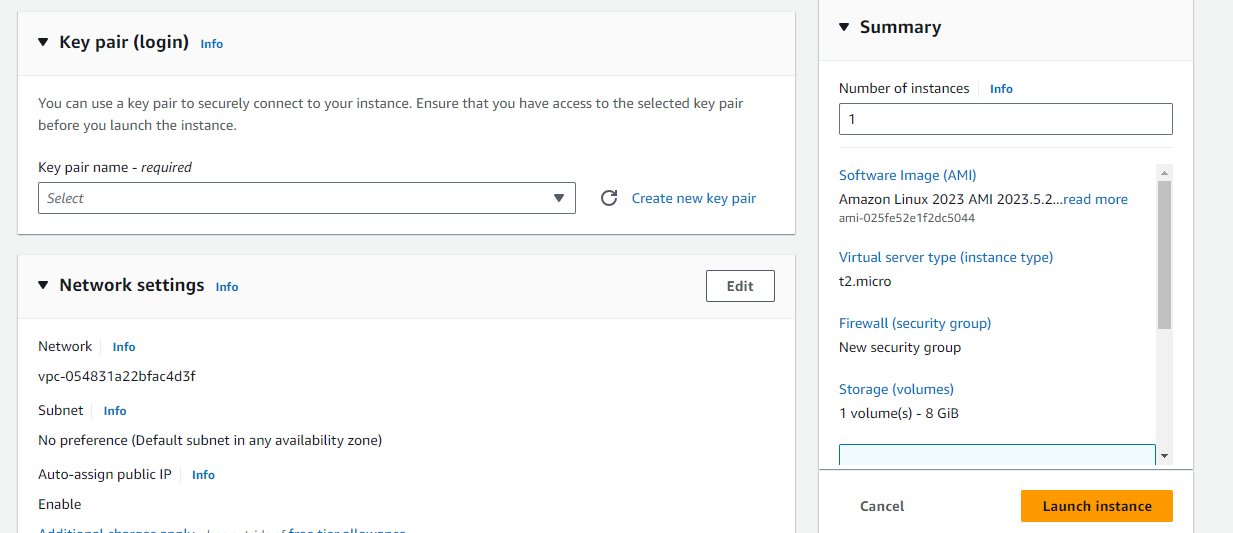
Key Pair: Choose create a new one or an existing key pair. This key pair will be used for SSH access to your instance. Ensure you download the key pair file (.pem) and keep it secure.
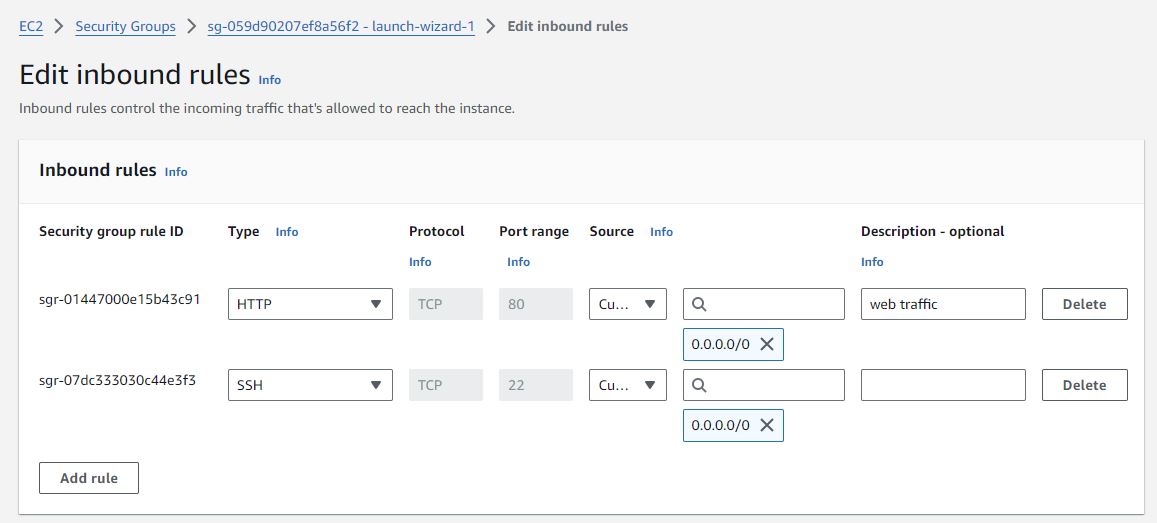
Security Group: Configure the security group to allow SSH (port 22) and HTTP (port 80) traffic. This ensures that you can connect to the instance and that the web server is accessible from the internet.
Finally review the configurations and click “Launch Instance” Your EC2 instance will be created and available in a few moments.
Step 2 : Connect to Instance using SSH
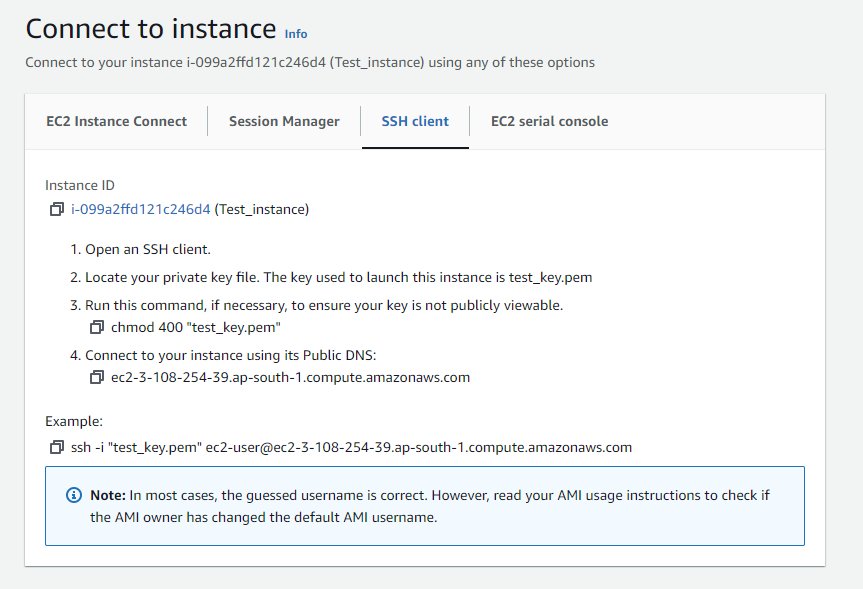
Once the instance is running, SSH into it using your terminal or SSH client. First use the following command on terminal to enable permission to private key file.
chmod 400 "<keyname.pem>"
Then use following command, replacing <key-pair-file> with the path to your key pair file, <username> with your instance username and <instance-public-IP> with your instance's public IP address or public DNS:
ssh -i "<key-pair-file>" <username>@<instance-public-IP or DNS>
In my instance I used public IP,
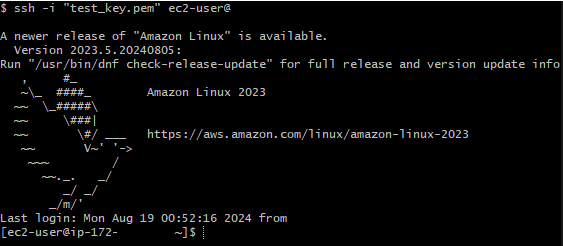
ssh -i "test_key.pem" ec2-user@<xxx.xxx.xxx.xxx>
Step 3 : Update All Packages
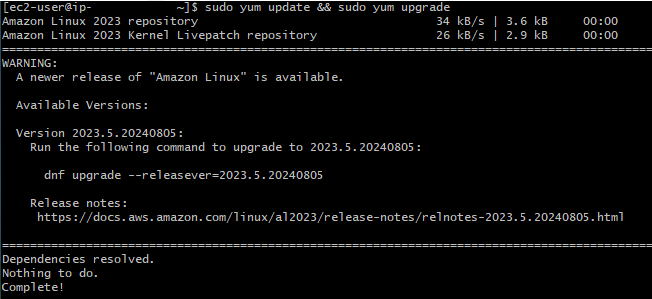
After logging in, it’s important to update all installed packages to ensure your instance is running the latest software versions. Run the following commands:
sudo yum update && sudo yum upgrade
This command updates the package index and ensures that you have access to the latest versions of the software available in the repository.
Step 4 : Install and Enable Nginx Web Server
Next to install Nginx on instance, run the following command:
sudo yum install nginx

you can check weather the Nginx web server installed with command:
sudo yum list install nginx

After installation, enable and start the Nginx web server with command:
sudo systemctl enable nginx


Step 5 : Verify the Nginx Web Server works using Public IP
To verify that your Nginx web server is running, open your web browser and enter your instance’s public IP address. If Nginx is installed and running correctly, you should see the default Nginx welcome page.
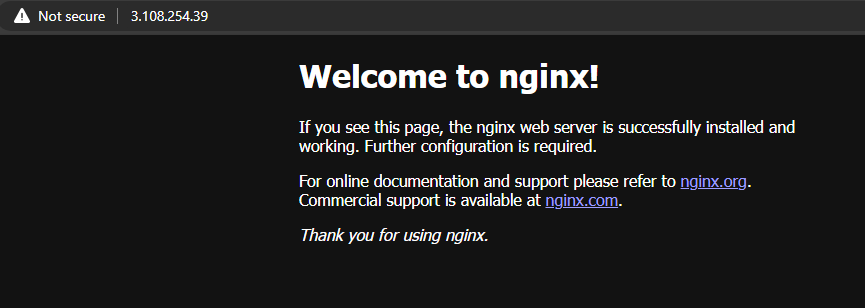
So you have successfully installed Nginx on your EC2 instance. I will now show you how to create a sample HTML file for your website using nano.
So you need to navigate to the document root directory of default Nginx page.
Once you run the following command:
sudo nano /usr/share/nginx/html/index.html
It will open the nano text editor as following
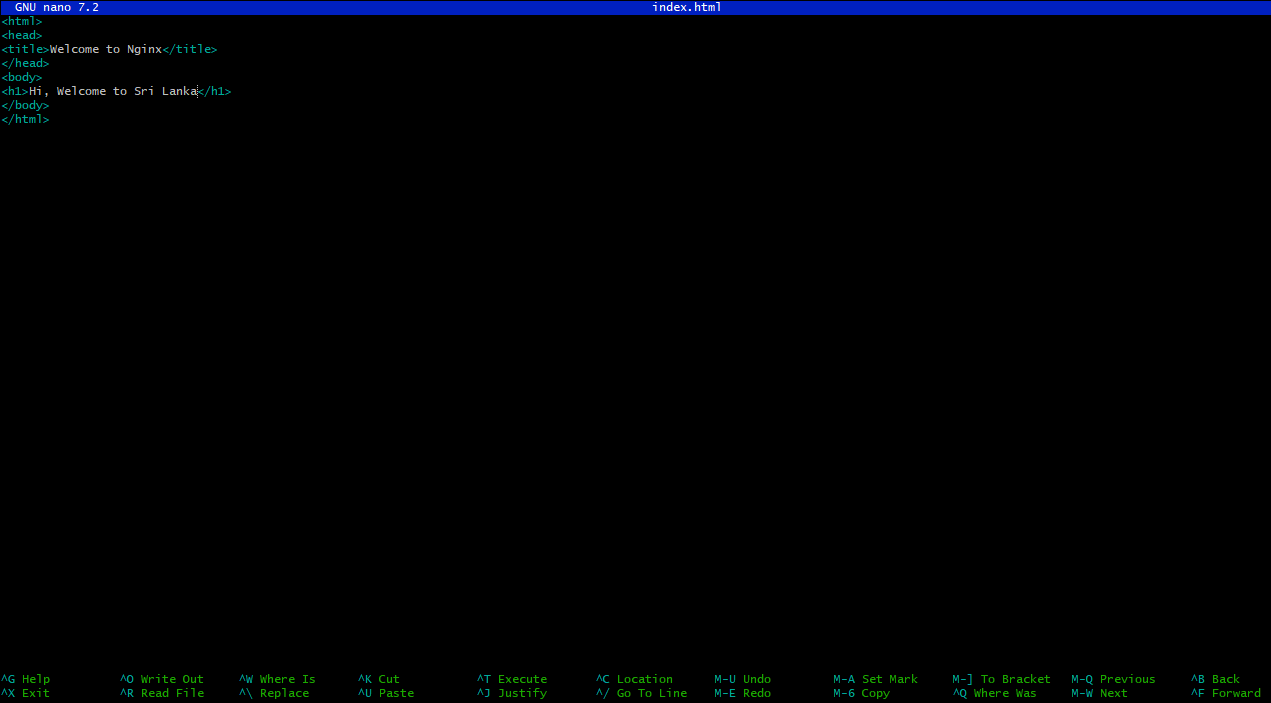
Add your custom HTML content, save the file and exit the editor. Refresh your browser to view your custom webpage!
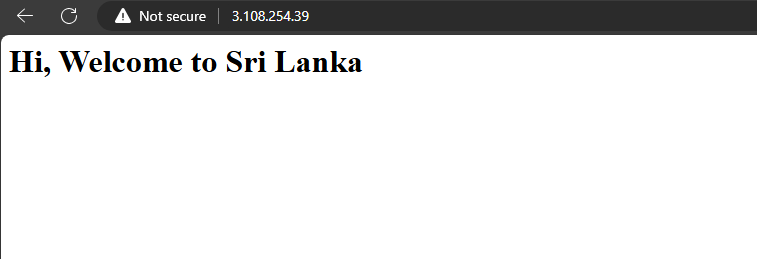
So this is it ! Hoping the above steps great guide to deploying Nginx and sample files on AWS instance. Also, I think this guide will help to deploy other web servers like Apache Web server.
Thank you for reading my blog post! Your positive feedback inspires me to explore more about technology and innovation.
Make sure to follow me on LinkedIn and pamindatechtalk blog where I will be posting similar content in the future! 🙋♂️
Subscribe to my newsletter
Read articles from Paminda Kalpa Wickramasinghe directly inside your inbox. Subscribe to the newsletter, and don't miss out.
Written by

Paminda Kalpa Wickramasinghe
Paminda Kalpa Wickramasinghe
Hi folks ✌, I’m Paminda Kalpa Wickramasinghe from the beautiful city Galle, a charming coastal city in southern Sri Lanka 🌊. I hold a Bachelor’s degree in Information Technology from the University of Colombo School of Computing. With experience as an IT support professional in server management, backup solutions, and LAN administration, I'm passionate about transitioning to in demand fields like DevOps, Cloud Computing, Platform Engineering, Site Reliability Engineering and emerging technologies.