Figma to SwiftUI
 Vishwas Gopinath
The gap between design and code has been a persistent challenge in mobile app development. Translating Figma designs into functional SwiftUI code is a time-consuming process that can take developers days or even weeks to complete. This time spent writing code not only increases project costs but also takes a developer away from critical tasks such as improving app functionality, optimizing performance, and adding new features.
Now, with AI technology becoming more advanced, it's time to leverage it as part of the solution to this challenge. At Builder.io, we've done just that with Visual Copilot.
In this blog post, we will explore how converting a Figma design to SwiftUI code using our AI tool can save hours of manual work, streamline the workflow for iOS developers, and aid in building mobile applications with ease. Whether you're working on a startup pitch or a large-scale project, Visual Copilot can significantly reduce your development effort and help you write SwiftUI code more efficiently.
What is Figma?
Figma is a collaborative interface design tool with an emphasis on real-time collaboration. It's known for its user-friendly interface and strong design capabilities, making it a favourite among designers. Figma components and design files form the basis for creating pixel-perfect designs and prototypes which are crucial for a seamless handoff to development teams.
One of Figma's powerful features is its dev mode, which allows developers to inspect designs and extract valuable information for implementation. Many teams use Figma to create UI kits and design systems for their projects. Figma's extensibility through plugins further enhances its capabilities, allowing users to customize their workflow.
What is SwiftUI?
SwiftUI is Apple's modern declarative framework for building user interfaces across all Apple platforms. Introduced in 2019, it provides an intuitive way to design and develop applications for iOS, macOS, watchOS, and tvOS.
Its powerful layout system, live previews, and seamless integration with Apple's ecosystem make it an increasingly popular choice for creating responsive and visually appealing applications with less code compared to traditional imperative UI frameworks. SwiftUI allows developers to create scalable and efficient apps with features like custom navigation bars and adaptive layouts.
Visual Copilot: AI-powered Figma to SwiftUI Plugin
At Builder.io, we’ve created Visual Copilot — an AI-powered Figma to code toolchain that leverages AI to accurately convert Figma designs to clean code.
One-click conversion
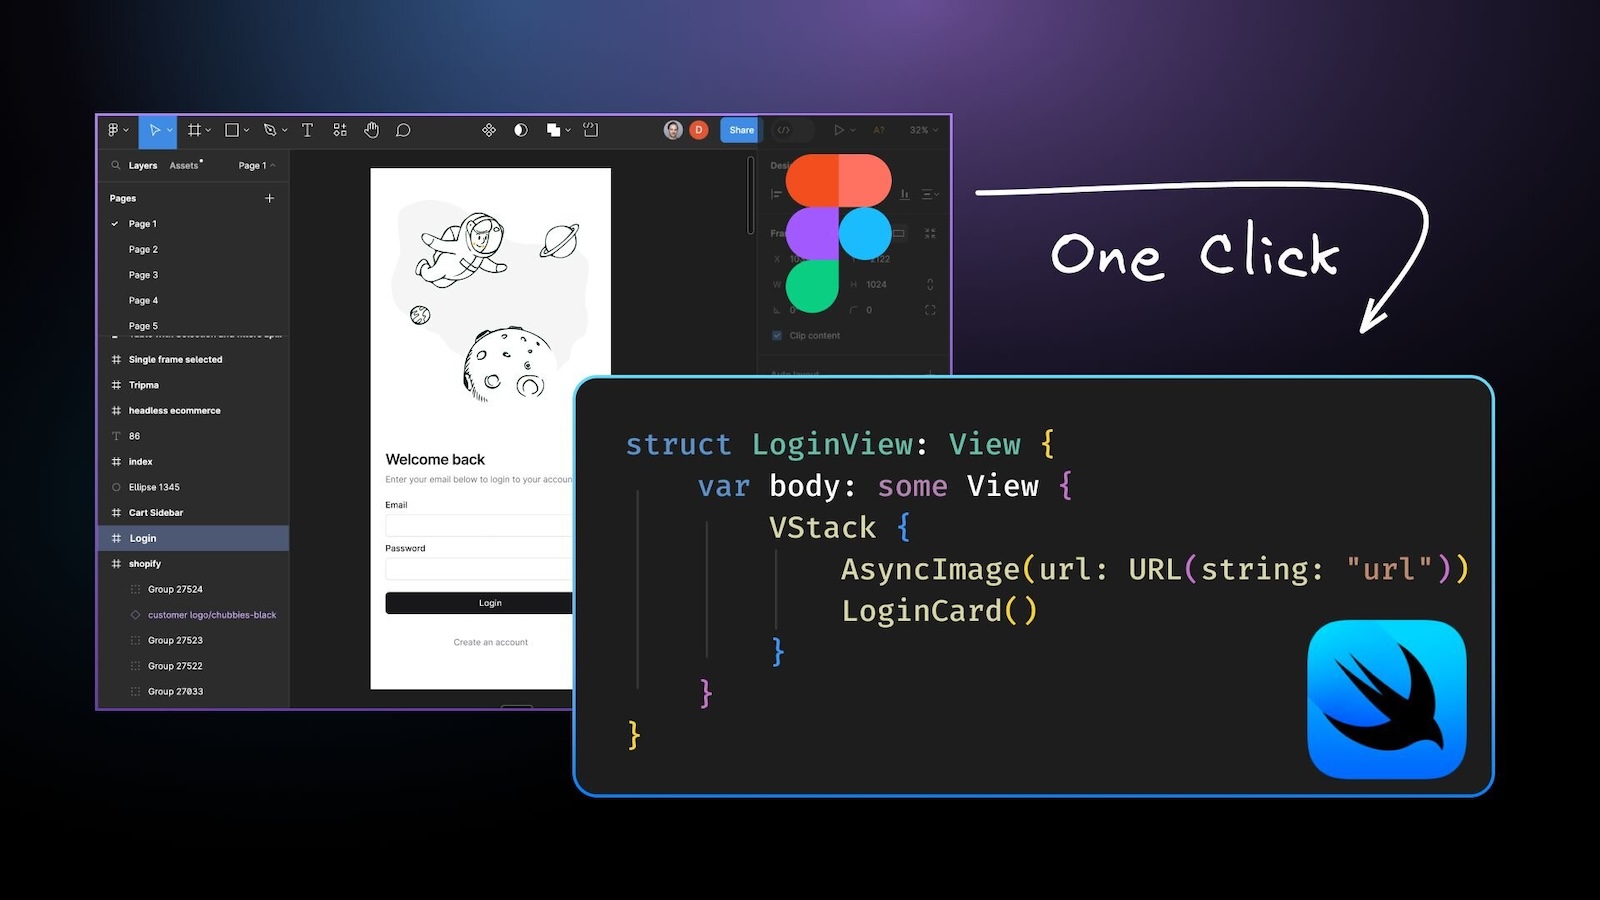
Transform Figma designs into high-quality SwiftUI components with a single click.
Easy integration
Getting started is as easy as copying the code generated directly from Visual Copilot into the project's source code - no integration is required.
Customizable code
Iterate with custom prompts and structure the code to your preferences post-generation. This feature allows users to fine-tune the output to match their specific project needs.
Extensive framework and library support
Beyond SwiftUI, Visual Copilot supports React, Vue, Svelte, Angular, Qwik, Solid, and HTML. It integrates with various styling libraries like CSS, Tailwind, Emotion, Styled Components, and Styled JSX.
How Visual Copilot uses AI to output clean SwiftUI code
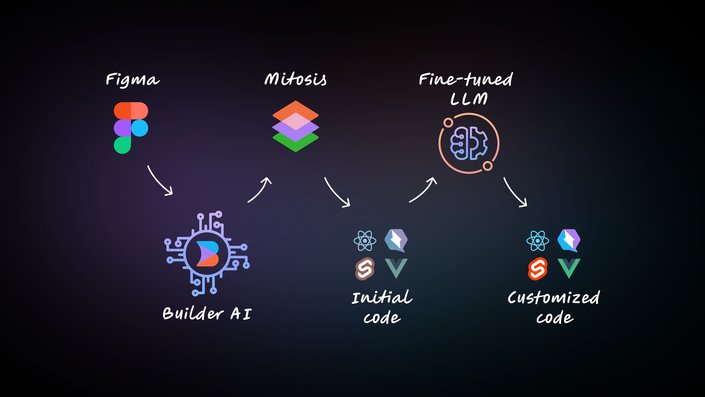
The heart of Visual Copilot lies in its AI models and a specialized compiler. The initial model, trained with over 2 million data points, transforms flat design structures (even without auto layout) into code hierarchies. Our open-source compiler, Mitosis, takes this structured hierarchy and compiles it into code.
In the final pass, a finely tuned Large Language Model (LLM) refines the code to match your specific framework and styling preferences. This multi-stage process ensures that the generated code is high-quality and tailored to meet the requirements of your project. Developers can easily view code output and make any necessary adjustments.
Convert Figma design to SwiftUI code
Getting started with Visual Copilot is straightforward.
- Launch the Visual Copilot Figma plugin.
- Select a layer in your Figma file and preview the selected layer.
- Hit the “Generate code” button.
- Copy the generated code into your Xcode project.
- Refine the code for specific iOS functionalities and custom requirements.
Figma best practices for using Visual Copilot
When using Visual Copilot Figma plugin, following these best practices can significantly improve the accuracy and efficiency of the conversion process:
- Use auto layout: Implement Figma's auto layout feature to organize elements into responsive hierarchies. This is the single most impactful action for ensuring a smooth import.
- Define images explicitly: For complex designs, use Figma's export feature to help the AI model recognize elements as an image or an icon.
- Group background layers: Combine layers that form background elements to simplify the structure and enhance export quality.
- Minimize overlaps and intersections: Align boxes only with related components and avoid unnecessary overlapping to prevent undesired results.
- Avoid translucent effects: Stick to fully opaque colors, as transparency can be challenging for AI to interpret accurately.
- Size text boxes correctly: Keep text bounding boxes snug to their content to avoid issues with extra whitespace or unexpected line breaks.
- Consider design sizes: Create designs that closely match real-world dimensions for practical and accurate results. Address any large-scale designs within the plugin or communicate with developers for optimal outcomes.
Conclusion
With Visual Copilot, you can quickly move from design to a working prototype. The tool helps bridge the gap between designers and developers, ensuring that everyone is on the same page throughout the development process.
Introducing Visual Copilot: convert Figma designs to high quality code in a single click.
Subscribe to my newsletter
Read articles from Vishwas Gopinath directly inside your inbox. Subscribe to the newsletter, and don't miss out.
Written by

