Deploying a MERN Stack Application on Kubernetes Using Kubeadm: A Step-by-Step Guide with Key Learnings
 Atif Kundlik
Introduction
In the world of container orchestration, Kubernetes has become the go-to solution for managing complex applications. However, setting up a Kubernetes cluster from scratch can be a daunting task. This is where Kubeadm comes in—it simplifies the process by providing a straightforward way to bootstrap a Kubernetes cluster. In this article, I'll walk you through my experience of deploying a MERN stack application on Kubernetes using Kubeadm, sharing the challenges I faced and the key learnings along the way.
Setting Up the Kubernetes Cluster with Kubeadm
Prerequisites
Before diving into the setup, ensure you have the following:
Two EC2 Instances: I used t2.large instances with 30 GB of memory each.
Basic Knowledge: Familiarity with Kubernetes, Docker, and Linux will be beneficial.
Kubeadm: A Brief Overview
Kubeadm is a tool that helps you set up a basic Kubernetes cluster quickly and easily. It automates the installation and configuration of the necessary components, making the process much more manageable. Here's how Kubeadm works:
Initialization: Sets up the control plane on one of your computers (the master node).
Joining Nodes: Allows you to add other computers (worker nodes) to the cluster.
Running Kubernetes: Once set up, your Kubernetes cluster is ready to manage containerized applications.
Initial Setup
To get started, I cloned the project repository and verified the contents:
git clone https://github.com/DevMadhup/wanderlust.git
ls
Next, I created a script1.sh file on both the master and worker nodes to disable swap, load necessary kernel modules, and install the CRIO runtime. Here's what the script looked like:
#!/bin/bash
# disable swap
sudo swapoff -a

# Create the .conf file to load the modules at bootup
cat <<EOF | sudo tee /etc/modules-load.d/k8s.conf
overlay
br_netfilter
EOF

sudo modprobe overlay
sudo modprobe br_netfilter

# sysctl params required by setup, params persist across reboots
cat <<EOF | sudo tee /etc/sysctl.d/k8s.conf
net.bridge.bridge-nf-call-iptables  = 1
net.bridge.bridge-nf-call-ip6tables = 1
net.ipv4.ip_forward                 = 1
EOF

# Apply sysctl params without reboot
sudo sysctl --system

# Install CRIO Runtime
sudo apt-get update -y
sudo apt-get install -y software-properties-common curl apt-transport-https ca-certificates gpg

sudo curl -fsSL https://pkgs.k8s.io/addons:/cri-o:/prerelease:/main/deb/Release.key | sudo gpg --dearmor -o /etc/apt/keyrings/cri-o-apt-keyring.gpg
echo "deb [signed-by=/etc/apt/keyrings/cri-o-apt-keyring.gpg] https://pkgs.k8s.io/addons:/cri-o:/prerelease:/main/deb/ /" | sudo tee /etc/apt/sources.list.d/cri-o.list

sudo apt-get update -y
sudo apt-get install -y cri-o

sudo systemctl daemon-reload
sudo systemctl enable crio --now
sudo systemctl start crio.service

echo "CRI runtime installed successfully"

# Add Kubernetes APT repository and install required packages
curl -fsSL https://pkgs.k8s.io/core:/stable:/v1.29/deb/Release.key | sudo gpg --dearmor -o /etc/apt/keyrings/kubernetes-apt-keyring.gpg
echo 'deb [signed-by=/etc/apt/keyrings/kubernetes-apt-keyring.gpg] https://pkgs.k8s.io/core:/stable:/v1.29/deb/ /' | sudo tee /etc/apt/sources.list.d/kubernetes.list

sudo apt-get update -y
sudo apt-get install -y kubelet="1.29.0-*" kubectl="1.29.0-*" kubeadm="1.29.0-*"
sudo apt-get update -y
sudo apt-get install -y jq

sudo systemctl enable --now kubelet
sudo systemctl start kubelet
Configuring the Master Node
Create Script2.sh
With the initial setup complete, I focused on the master node. I created a script2.sh file to initialize the Kubernetes control plane:
sudo kubeadm config images pull
sudo kubeadm init

mkdir -p "$HOME"/.kube
sudo cp -i /etc/kubernetes/admin.conf "$HOME"/.kube/config
sudo chown "$(id -u)":"$(id -g)" "$HOME"/.kube/config

# Network Plugin = calico
kubectl apply -f https://raw.githubusercontent.com/projectcalico/calico/v3.26.0/manifests/calico.yaml

kubeadm token create --print-join-command
After running the script, I received the join command to add worker nodes to the cluster.
Challenges: The initial join command didn't work because port 6443 was not open on the master node. I resolved this by configuring the security group in EC2 to allow traffic on port 6443.
Adding Worker Nodes
Once the master node was configured, I ran the join command on the worker node:
kubeadm join <master-node-ip>:6443 --token <token> --discovery-token-ca-cert-hash <hash> --v=5
I then verified the connection using:
kubectl get nodes

Challenges: I encountered connectivity issues between the master and worker nodes, which were resolved by ensuring that the correct ports were open and that the nodes could communicate with each other over the network.
Working with the Repository
I switched to the appropriate branch for the deployment:
cd wanderlust/
git branch
git checkout devops
In the backend directory, I updated the environment variables to include the frontend URL, which was the IP address of my worker node. This ensured that the application would work correctly.

Namespace and Context Configuration
I created a dedicated namespace for the application and set the context:
kubectl create namespace wanderlust
kubectl config set-context --current --namespace wanderlust

Enabling DNS Resolution in the Kubernetes Cluster
To ensure DNS resolution within the cluster, I checked the CoreDNS pods:
kubectl get pods -n kube-system -o wide | grep -i core

I edited the CoreDNS deployment to ensure the pods ran on both the master and worker nodes:
kubectl edit deploy coredns -n kube-system -o yaml
I also increased the replica count for the CoreDNS pods from 2 to 4 to improve reliability.
Setting Up Docker and Building Images
I installed Docker on both nodes:
sudo apt install docker.io -y
sudo chmod 777 /var/run/docker.sock
I then built Docker images for the frontend and backend services and pushed them to Docker Hub:
bashCopy code# Build frontend and backend images
docker build -t <your-dockerhub-username>/frontend:latest .
docker build -t <your-dockerhub-username>/backend:latest .

# Push images to Docker Hub
docker push <your-dockerhub-username>/frontend:latest
docker push <your-dockerhub-username>/backend:latest

Deploying on Kubernetes
With the images ready, I deployed the application on Kubernetes. First, I created a namespace:
kubectl create namespace wanderlust
Next, I set up Persistent Volumes (PV) and Persistent Volume Claims (PVC) for MongoDB:
kubectl apply -f persistentVolume.yaml
kubectl apply -f persistentVolumeClaim.yaml
I then deployed MongoDB, Redis, and the frontend and backend services:
# Deploy MongoDB and Redis
kubectl apply -f mongodb.yaml
kubectl apply -f redis.yaml

# Deploy frontend and backend
kubectl apply -f frontend.yaml
kubectl apply -f backend.yaml
Challenges: Both the frontend and backend pods initially showed InvalidImageName errors. After reviewing the YAML files, I realized that I had incorrectly named the images. I corrected the names and reapplied the configurations.
Verifying the Deployment
Finally, I verified that all services were running:
kubectl get pods

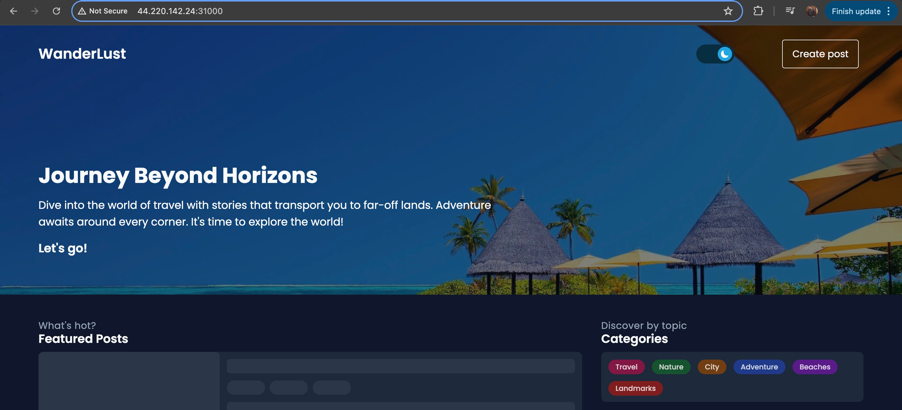
All pods for MongoDB, Redis, frontend, and backend services were in the Running state, and I was able to access the website.

Key Learnings and Challenges
Networking and Connectivity
One of the major challenges I faced was ensuring proper communication between the master and worker nodes. Opening the correct ports and understanding Kubernetes networking were crucial to overcoming these issues.
YAML Configuration and Image Handling
Correctly naming and configuring images in the YAML files is essential. Even small mistakes can lead to significant issues during deployment.
Real-Time Troubleshooting
Throughout the deployment, real-time troubleshooting and using Kubernetes commands effectively were critical. Each issue provided an opportunity to learn more about Kubernetes and its components.
Conclusion
Deploying a MERN stack application on Kubernetes using Kubeadm was a challenging but rewarding experience. From setting up the cluster to troubleshooting deployment issues, I gained valuable insights into Kubernetes' inner workings. I hope this guide helps others navigate the complexities of deploying applications on Kubernetes.
If you're interested in exploring the project further or want to see more of my work, feel free to check out my GitHub account AtifinCloud.
Subscribe to my newsletter
Read articles from Atif Kundlik directly inside your inbox. Subscribe to the newsletter, and don't miss out.
Written by

Atif Kundlik
Atif Kundlik
Aspiring Cloud & DevOps Engineer with a Master's in Information Technology from UTS Sydney. Passionate about IT support, cybersecurity, and leveraging cloud solutions to drive innovation.