How to Upgrade a Multi-Node Kubernetes Cluster: Day 34 of 40DaysOfKubernetes
 Shivam Gautam
Introduction
Upgrading your Kubernetes cluster is essential for ensuring security, stability, and access to the latest features. New releases bring critical fixes, performance improvements, and compatibility with evolving tools, helping to keep your infrastructure efficient and secure. Regular upgrades prevent potential vulnerabilities and performance issues, ensuring your workloads run smoothly in a fast-changing cloud environment.
Let's dive into this with an example.
Kubernetes Versioning
Kubernetes follows semantic versioning for its release cycle, and each version is represented by three numbers in the format X.Y.Z, where:
X: Major Release
Y: Minor Release
Z: Patch Release
Major Release
Example: 1.0.0, 2.0.0
The first number (X) is the major version. Major releases introduce breaking changes, meaning components from the previous major release may not be compatible with the new version. For example, certain APIs or features might be deprecated or removed altogether.
Minor Release
Example: 1.29.0, 1.30.0
The second number (Y) is the minor version. A minor release introduces new features, improvements, and deprecations, but it maintains backward compatibility. Minor releases are scheduled more frequently, about every 3-4 months.
Patch Release
Example: 1.29.2, 1.29.3
The third number (Z) is the patch version. Patch releases focus on bug fixes, security updates, and minor improvements. These do not introduce new features but ensure the platform remains stable and secure. Patch releases are fully backward compatible and typically issued as needed to address specific problems.
Upgrade Strategies
All-at-Once Upgrade
This method upgrades the entire Kubernetes cluster at once. While it’s the fastest, it can result in downtime and is generally not suitable for production environments.
How it works:
Shut down all workloads and control plane components.
Upgrade Kubernetes binaries across the cluster.
Restart the cluster.
Risks:
Complete downtime during the upgrade.
Can disrupt critical services.
Rolling Update
The rolling update strategy upgrades cluster nodes one at a time or in small batches, ensuring minimal downtime. Some nodes remain operational while others are upgraded.
How it works:
Upgrade the control plane (API server, etcd).
Upgrade worker nodes individually:
Cordon the node (prevent new pods from being scheduled on it).
Drain the node (evict existing pods).
Upgrade the Kubernetes binaries.
Uncordon the node (allow scheduling again).
Repeat the process for each node.
Blue-Green Deployment
In this strategy, you have two environments—blue (current) and green (upgraded). Once the upgrade is complete and validated, traffic is switched from the blue environment to the green.
How it works:
Set up a separate green environment with the new version.
Deploy updated workloads.
Validate the green environment.
Switch traffic from blue to green using load balancers or DNS.
Decommission the blue environment once the green is stable.
Advantages:
Zero downtime.
Easy rollback if issues arise.
Disadvantages:
- Requires double the resources during the upgrade process.
Note: Rolling updates are the most commonly used strategy in production environments. Let’s proceed with a demo of the rolling update process.
Rolling Update Demo
Prerequisite: Set up a 1.29.6 version cluster or any version of your choice on any clouds vm, and we will update that cluster to 1.30.2 . You can check my blog for step-by-step setup of kubernetes cluster using kubeadm.

Upgrade Master Node
Determine the version to upgrade to
 sudo apt update
 sudo apt-cache madison kubeadm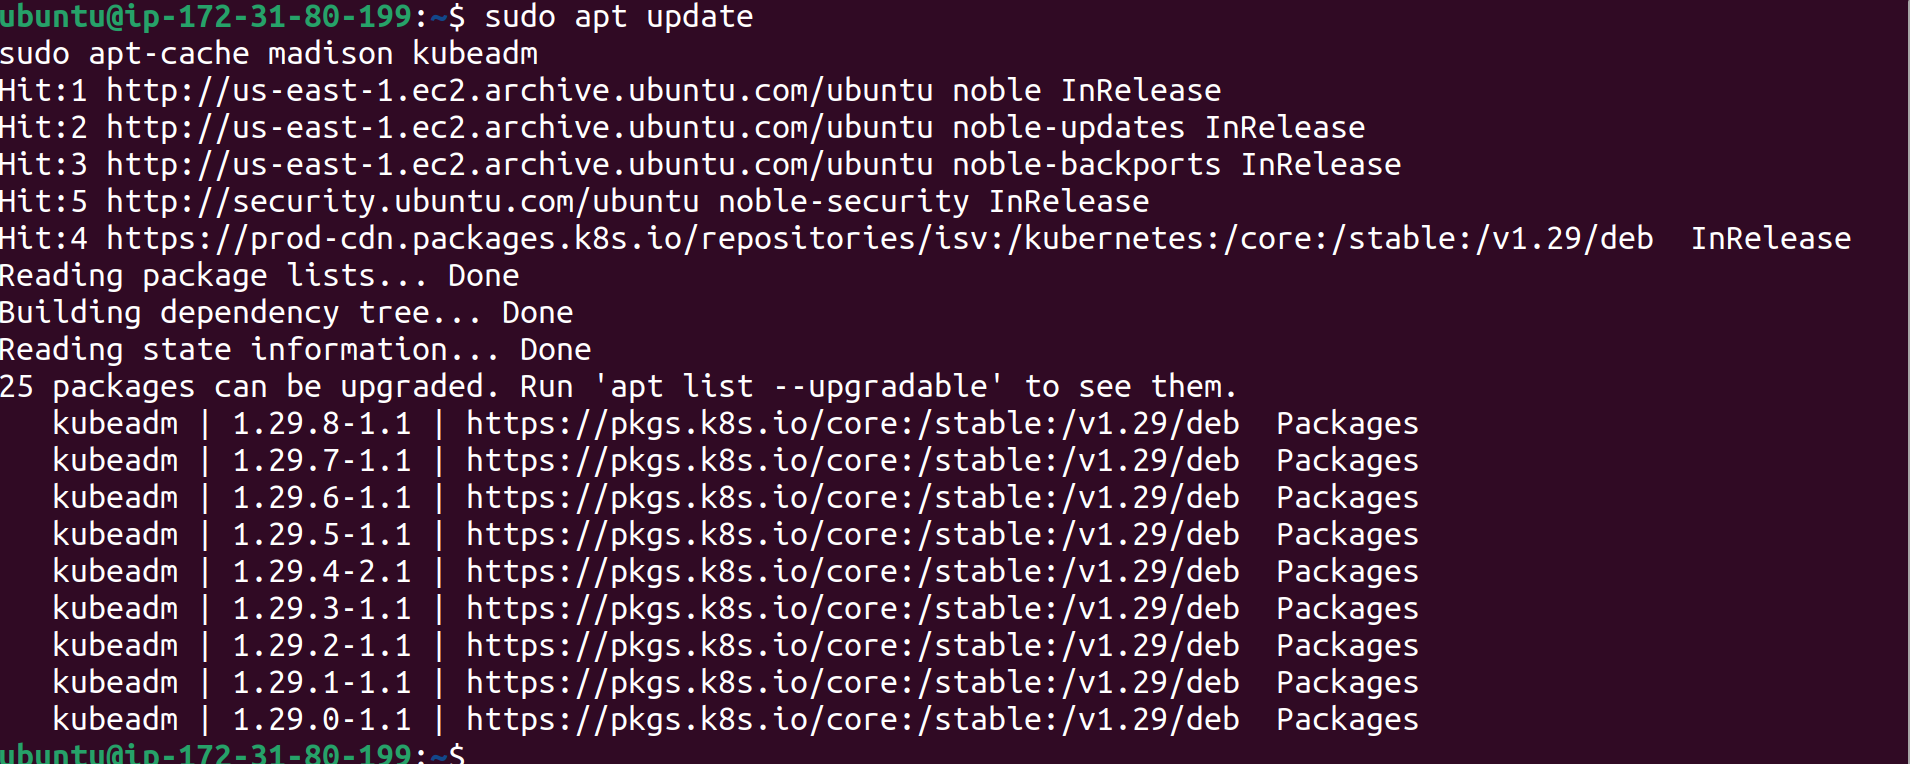
The output may only show 1.29.x series upgrades. To upgrade to 1.30.x, we need to modify the Kubernetes package repositories.
Changing Kubernetes package repositories
sudo nano /etc/apt/sources.list.d/kubernetes.list
Replace
1.29with1.30.Check available versions again

We will update to version
1.30.4-1.1.Upgrade kubeadm
 sudo apt-mark unhold kubeadm && \
 sudo apt-get update && sudo apt-get install -y kubeadm='1.30.x-*' && \
 sudo apt-mark hold kubeadm
Put the version value , you want to upgrade, in our case value is
1.30.4-1.1Check Kubeadm version
kubeadm version
Verify the upgrade plan
sudo kubeadm upgrade plan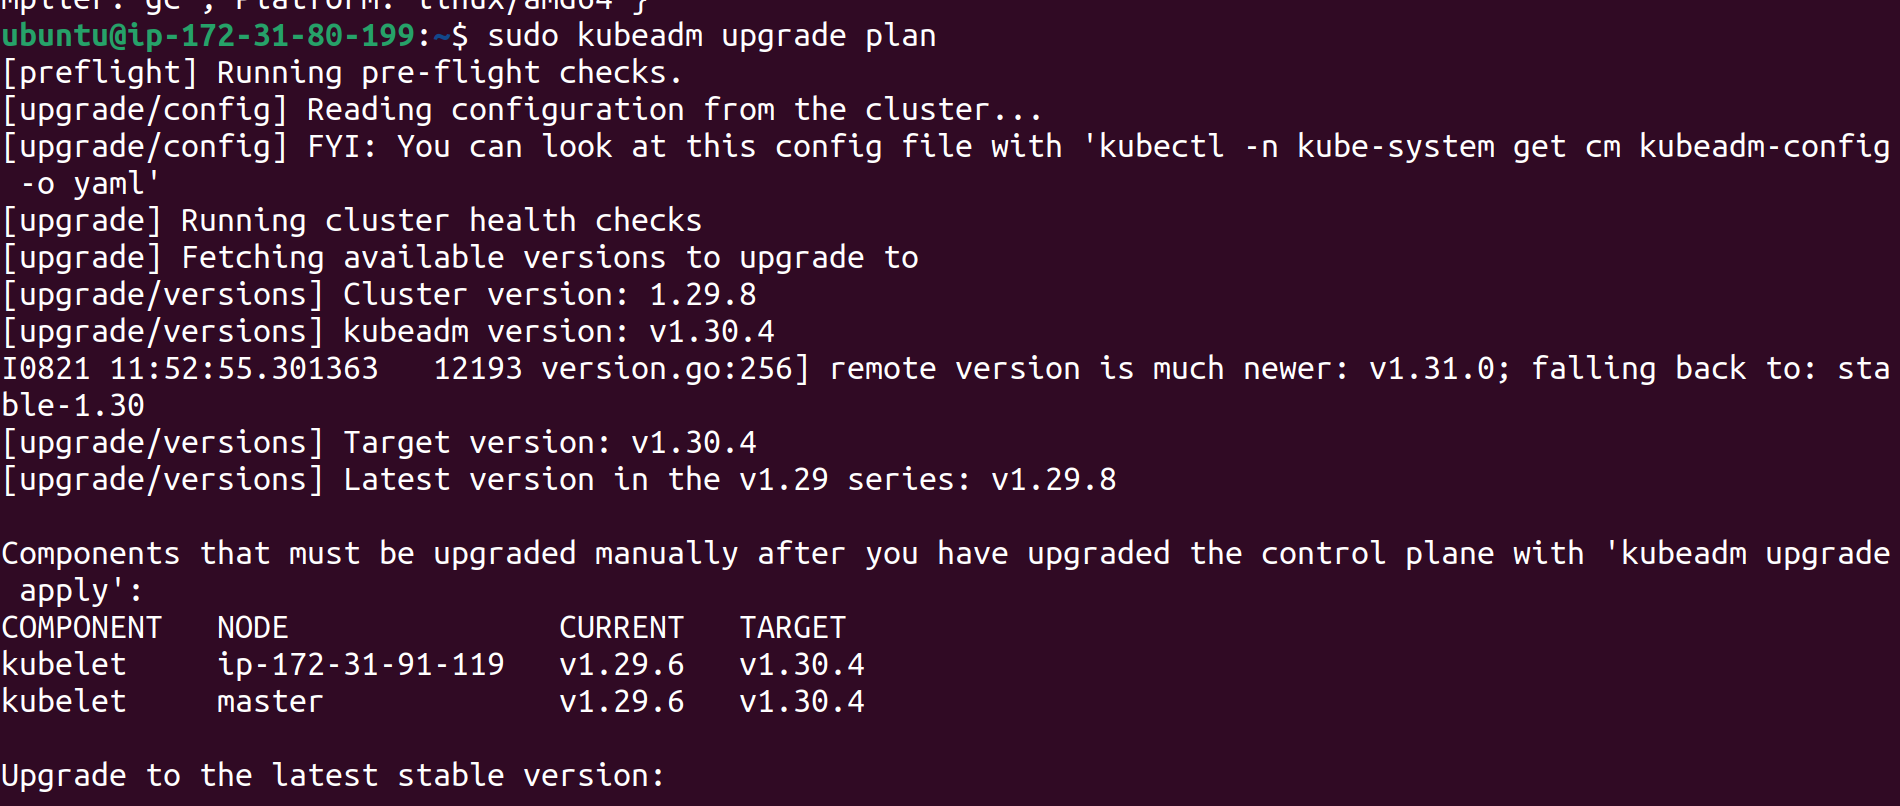
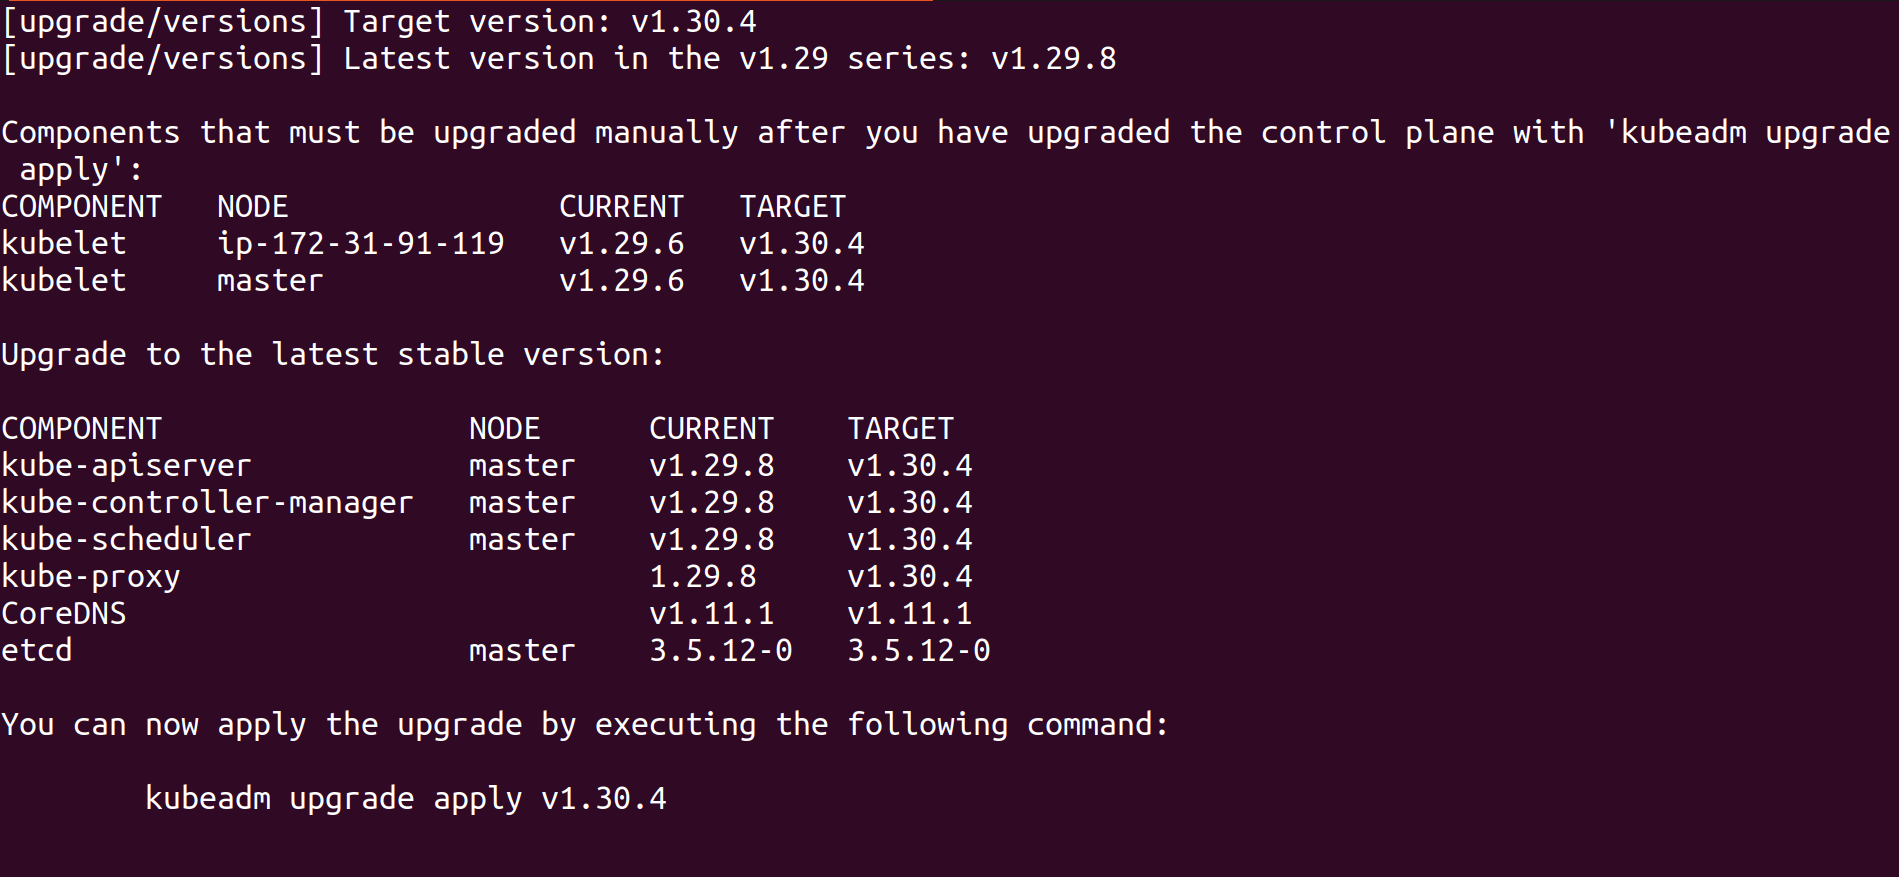
This command checks that our cluster can be upgraded, and fetches the versions you can upgrade to. It also shows a table with the component config version states.
Apply the upgrade
kubeadm upgrade apply v1.30.4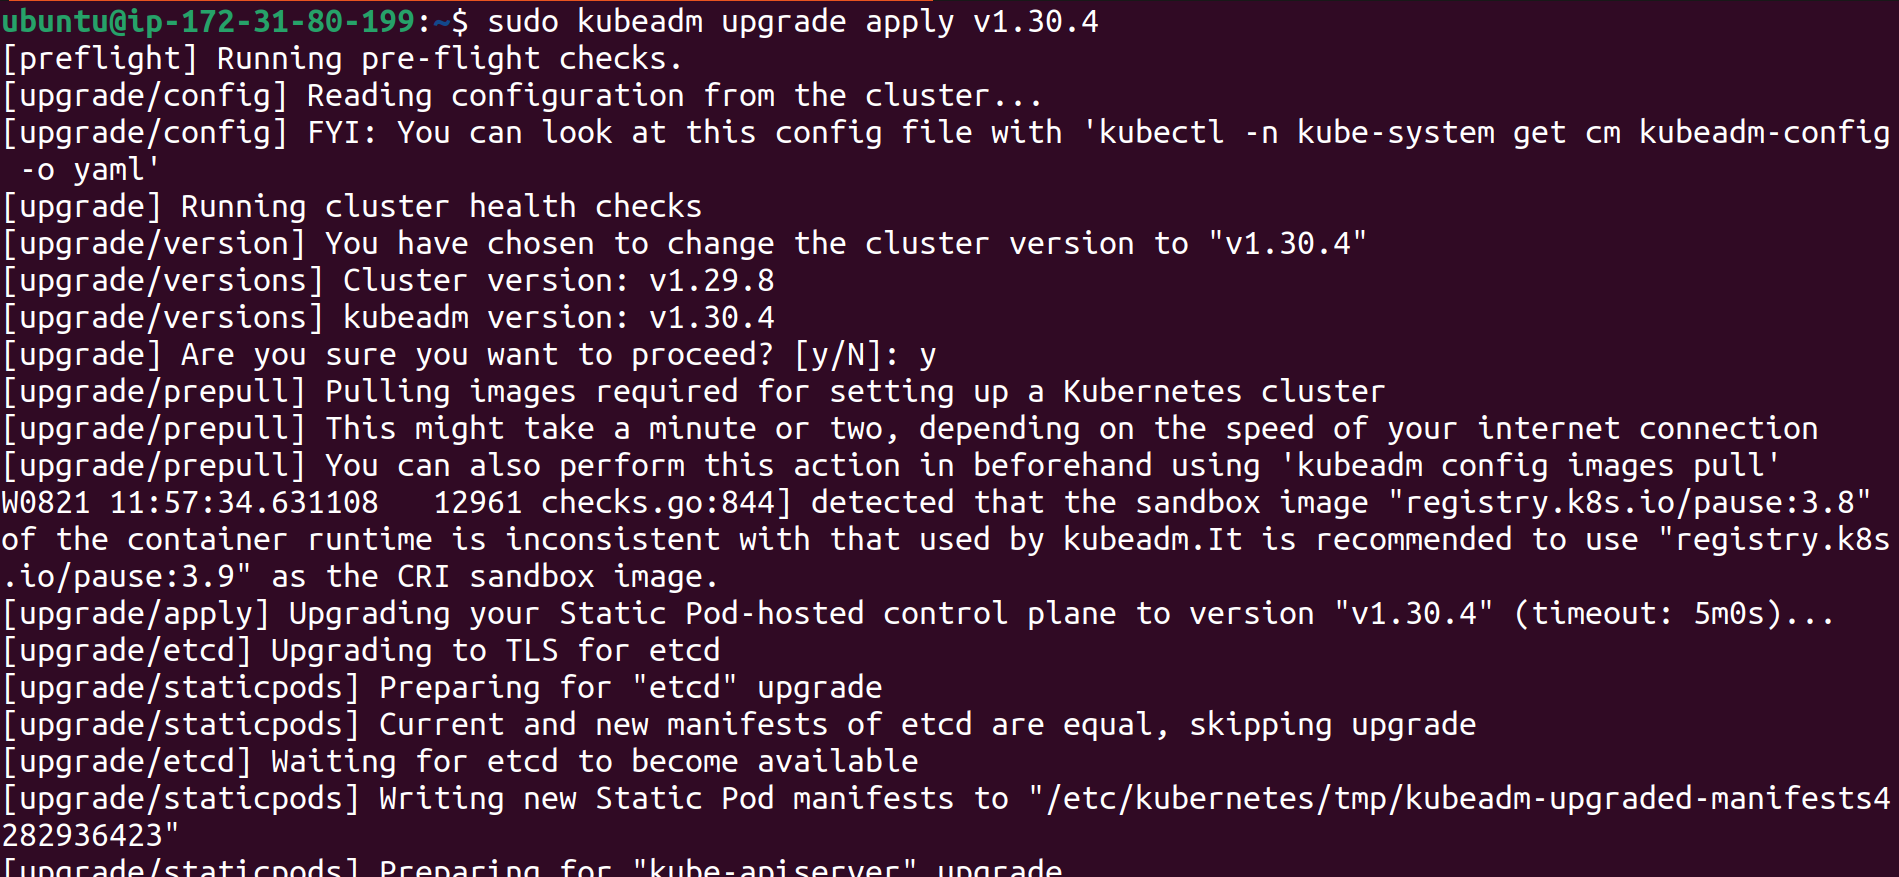
Upgrade the CNI Plugin (e.g., Calico)
We are using an updated Calico (CNI) plugin, so there is no need to worry.
Checking the nodes version

It is still showing 1.29 version but it is a kubectl version not cluster version , for checking the control-plane component version we can check api-server.yaml file.
cat /etc/kube-apiserver.yamlDrain the node
kubectl drain master --ignore-daemonsets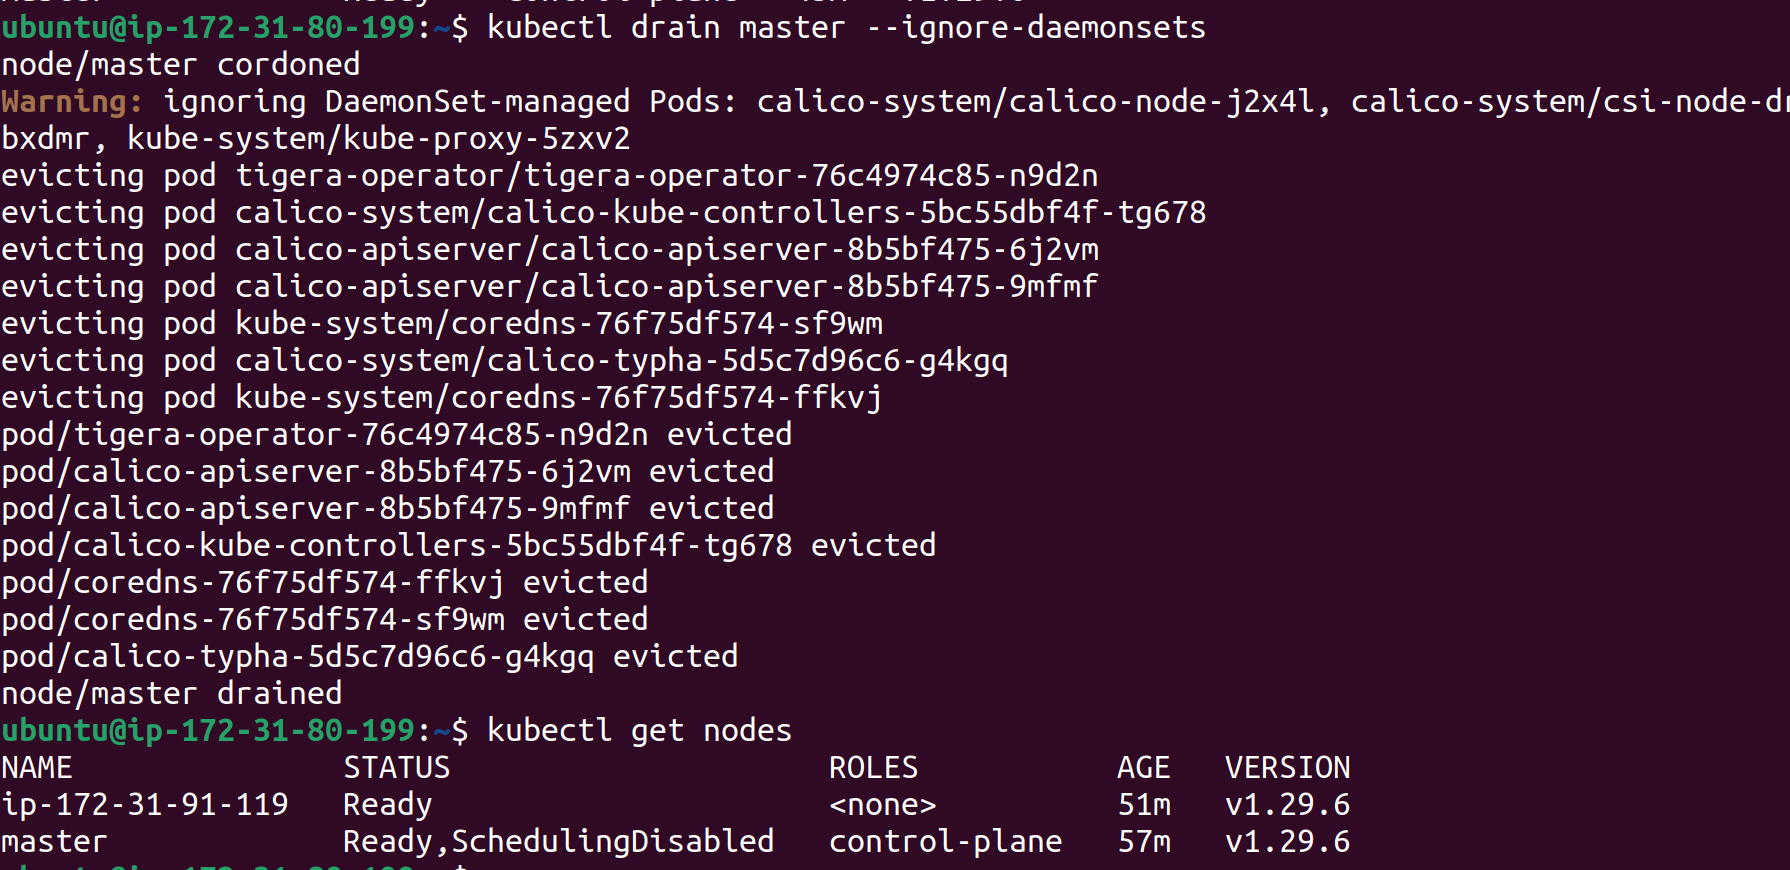
We can see that on master node Scheduling is Disabled
Upgrade kubelet and kubectl
sudo apt-mark unhold kubelet kubectl && \
sudo apt-get update && sudo apt-get install -y kubelet='1.30.x-*' kubectl='1.30.x-*' && \
sudo apt-mark hold kubelet kubectl
use the version
1.30.4-1.1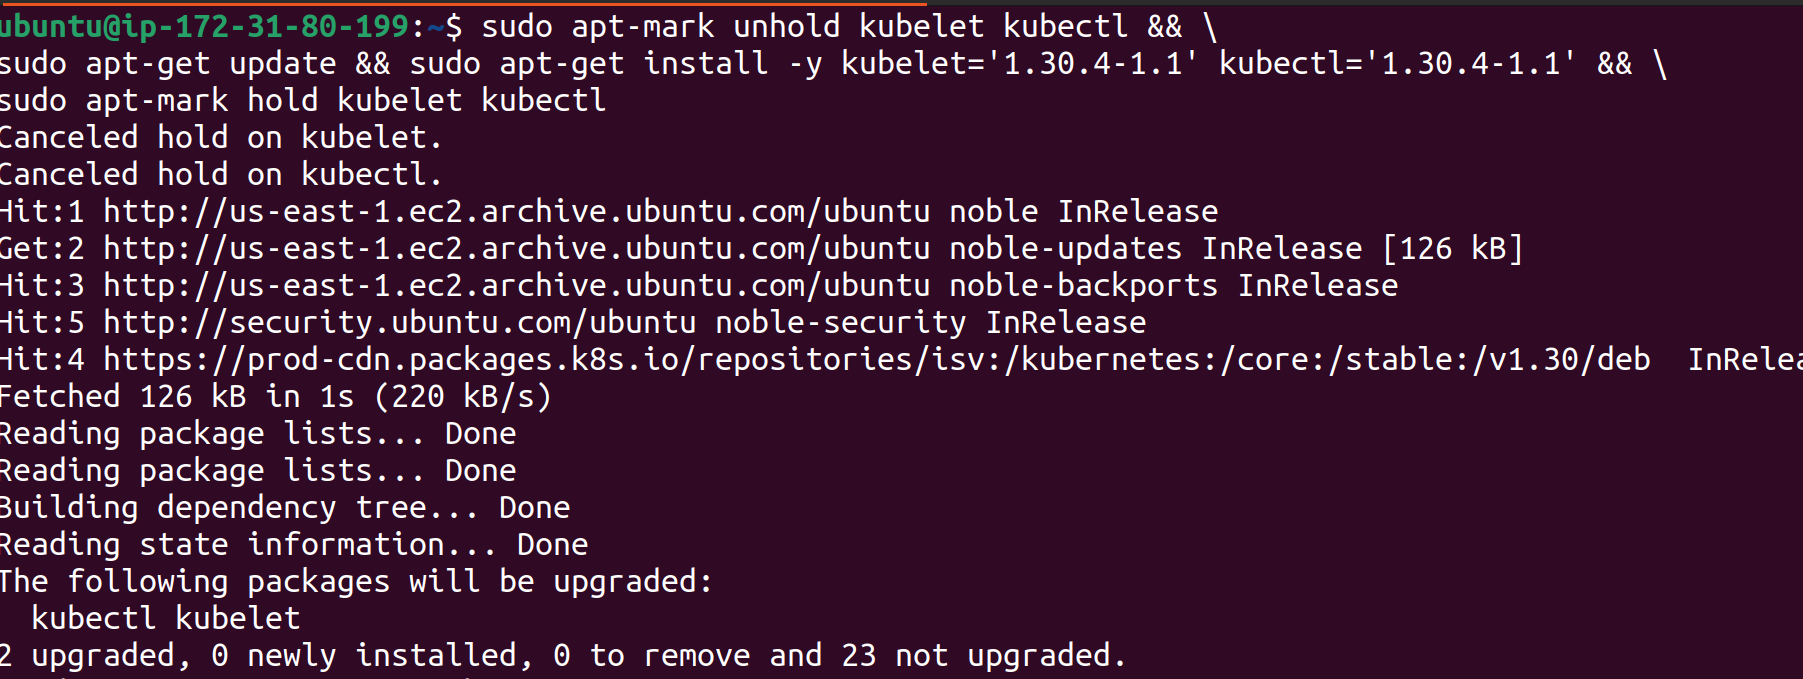
Restart the kubelet
sudo systemctl daemon-reload
sudo systemctl restart kubelet
Uncordon the node
kubectl uncordon masterNow , Finally run the
kubectl get nodescommand and see our master node is upgraded
Upgrade Worker Nodes
ssh into your worker node

Changing Kubernetes package repositories
sudo nano /etc/apt/sources.list.d/kubernetes.list
Change 1.29 to 1.30
Upgrade kubeadm
 sudo apt-mark unhold kubeadm && \
 sudo apt-get update && sudo apt-get install -y kubeadm='1.30.x-*' && \
 sudo apt-mark hold kubeadm
Put the version value , you want to upgrade, in our case value is
1.30.4-1.1upgrades the local kubelet configuration
sudo kubeadm upgrade nodeDrain the node
kubectl drain <node-to-drain> --ignore-daemonsetsPut the worker node name

Upgrade kubelet and kubectl
 sudo apt-mark unhold kubelet kubectl && \
 sudo apt-get update && sudo apt-get install -y kubelet='1.30.x-*' kubectl='1.30.x-*' && \
 sudo apt-mark hold kubelet kubectl
Restart the kubelet
 sudo systemctl daemon-reload
 sudo systemctl restart kubelet
Uncordon the node
kubectl uncordon <node-to-uncordon>Put the worker node name

Conclusion
Congratulations! we have successfully upgraded both the master and worker nodes from version 1.29.6 to 1.30.4 using a rolling update strategy. This process helps minimize downtime and ensures our cluster remains secure and up-to-date with the latest features.
Thank you for reading my blog! Please try this hands-on tutorial yourself to gain a better understanding.
Resources I used
https://v1-30.docs.kubernetes.io/docs/tasks/administer-cluster/kubeadm/kubeadm-upgrade/
Subscribe to my newsletter
Read articles from Shivam Gautam directly inside your inbox. Subscribe to the newsletter, and don't miss out.
Written by

Shivam Gautam
Shivam Gautam
DevOps & AWS Learner | Sharing my insights and progress 📚💡|| 2X AWS Certified || AWS CLoud Club Captain'24