Deploy Your PHP Application with Docker for Free: A Complete Guide
 Oluwadamilola Soji-Oderinde
Introduction
Deploying PHP applications can be frustrating due to hosting platform limitations or cost. However, you can deploy your PHP applications for free on Render using Docker.
Docker is a platform designed to help developers build, share, and run containerized applications. It simplifies the deployment process, ensures consistency across environments, and provides scalability.
Want to know more about Docker? Check out my blog post.
This guide will walk you through deploying a PHP application with Docker on Render.
What You Will Need
Basic understanding of PHP and Docker.
A PHP Application. We’ll use a simple PHP app for this guide, available on GitHub.
Docker installed on your machine. Download Docker from the official website.
Accounts on Docker Hub and Render. If you don’t have any, sign up for a free account on Docker Hub here and on Render here.
Step 1: Setting Up Your PHP Application
We’ll use a simple PHP app that displays a name according to the parameter value (e.g., example.com?name=myname). This example has just an index.php file, but you can deploy larger applications using similar steps.
Step 2: Creating a Dockerfile
A Dockerfile is a configuration file with instructions to build a Docker image. Create a file named Dockerfile in the same directory as your application. For a simple PHP app, your Dockerfile will look like this:
# Use the official PHP 8.2.20 image with Apache as the base image
FROM php:8.2.20-apache

# Set the working directory
WORKDIR /var/www/html

# Copy the application files
COPY . .

# Expose the port
EXPOSE 80

# Start the Apache server
CMD ["apache2-foreground"]
For applications with dependencies, adjust the Dockerfile as follows:
# Use the official PHP 8.2.20 image with Apache as the base image
FROM php:8.2.20-apache

# Set the working directory
WORKDIR /var/www/html

# Install Composer
COPY --from=composer:latest /usr/bin/composer /usr/bin/composer

# Copy the application files
COPY . .

# Install PHP dependencies
RUN composer install

# Expose the port
EXPOSE 80

# Start the Apache server
CMD ["apache2-foreground"]
Step 3: Building the Docker Image
Before building your Docker image, make sure your terminal is open and navigated to the folder containing your PHP application. This directory should include your Dockerfile and all necessary application files.
Use the .dockerignore file to exclude unnecessary files from the Docker image (e.g., vendor folder).
Build your Docker image using the Dockerfile by running the following command:
docker build -t your_docker_username/project_name .
For this example, it will be:
docker build -t sojijr/simplephpapp .
Step 4: Pushing Docker Image to Registry
Ensure you are logged in to Docker Hub by running the following command:
docker login
Enter your Docker Hub username and password when prompted. Then push the image to Docker Hub with the following command:
docker push your_docker_username/project_name
For this example:
docker push sojijr/simplephpapp
The image is now stored in your Docker repository and can be accessed and used by any deployment service.
Step 5: Publishing On Render
Log In: Create an account on Render or log in if you already have one.
Create a Web Service:
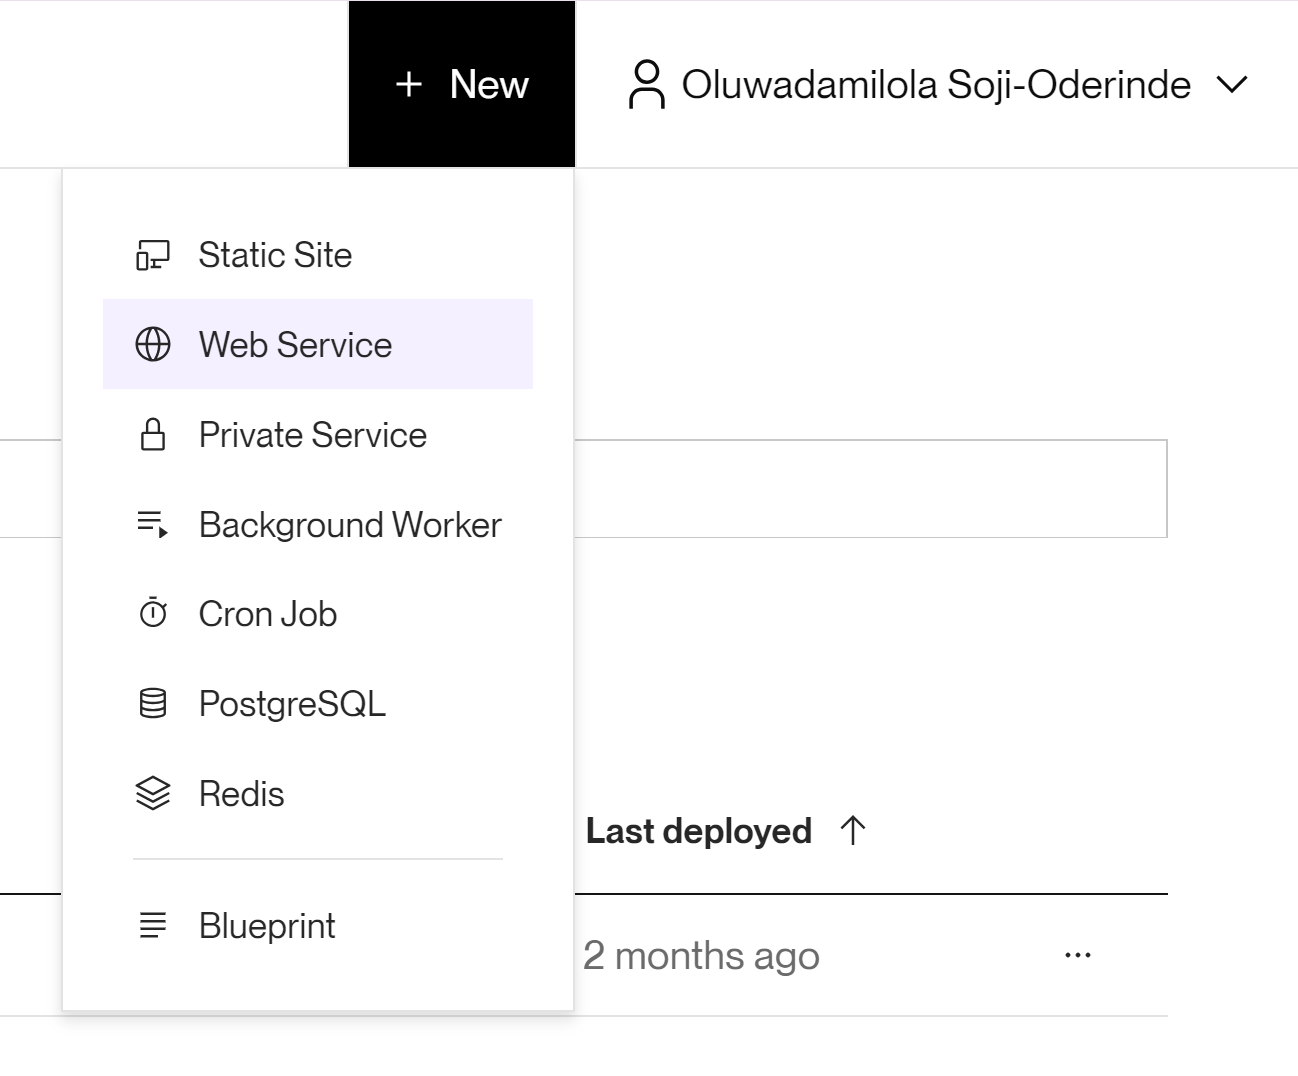
In your Render dashboard, click on the “+ New” button at the top right.
Select “Web Service” from the dropdown menu.

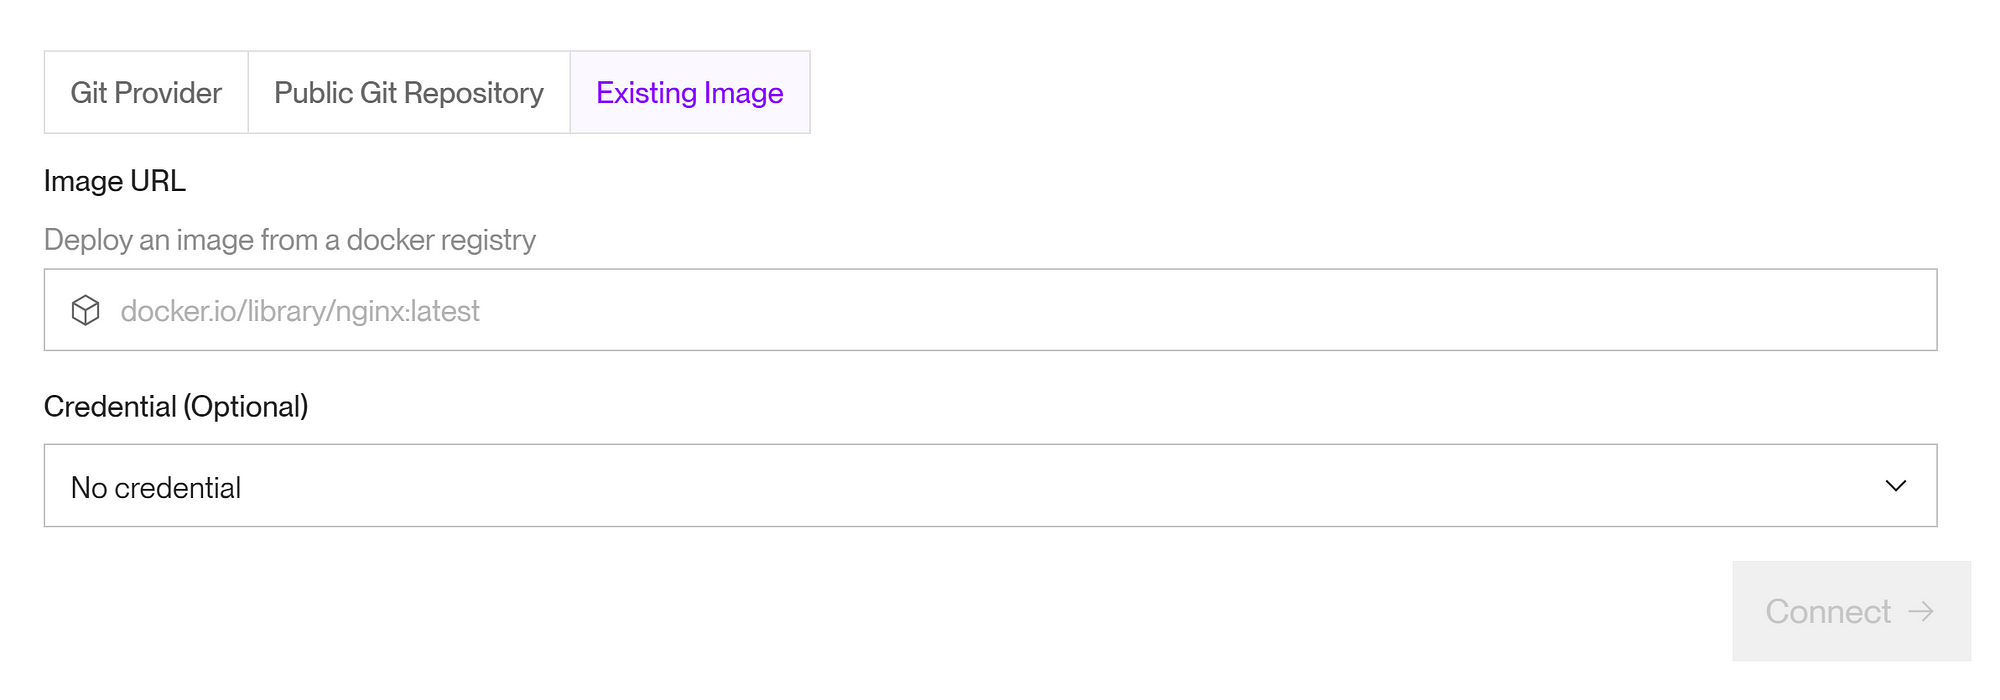
3. Select Deployment Method: Choose “Existing Image” as the method for deploying a web service.

4. Set Up Your Service:
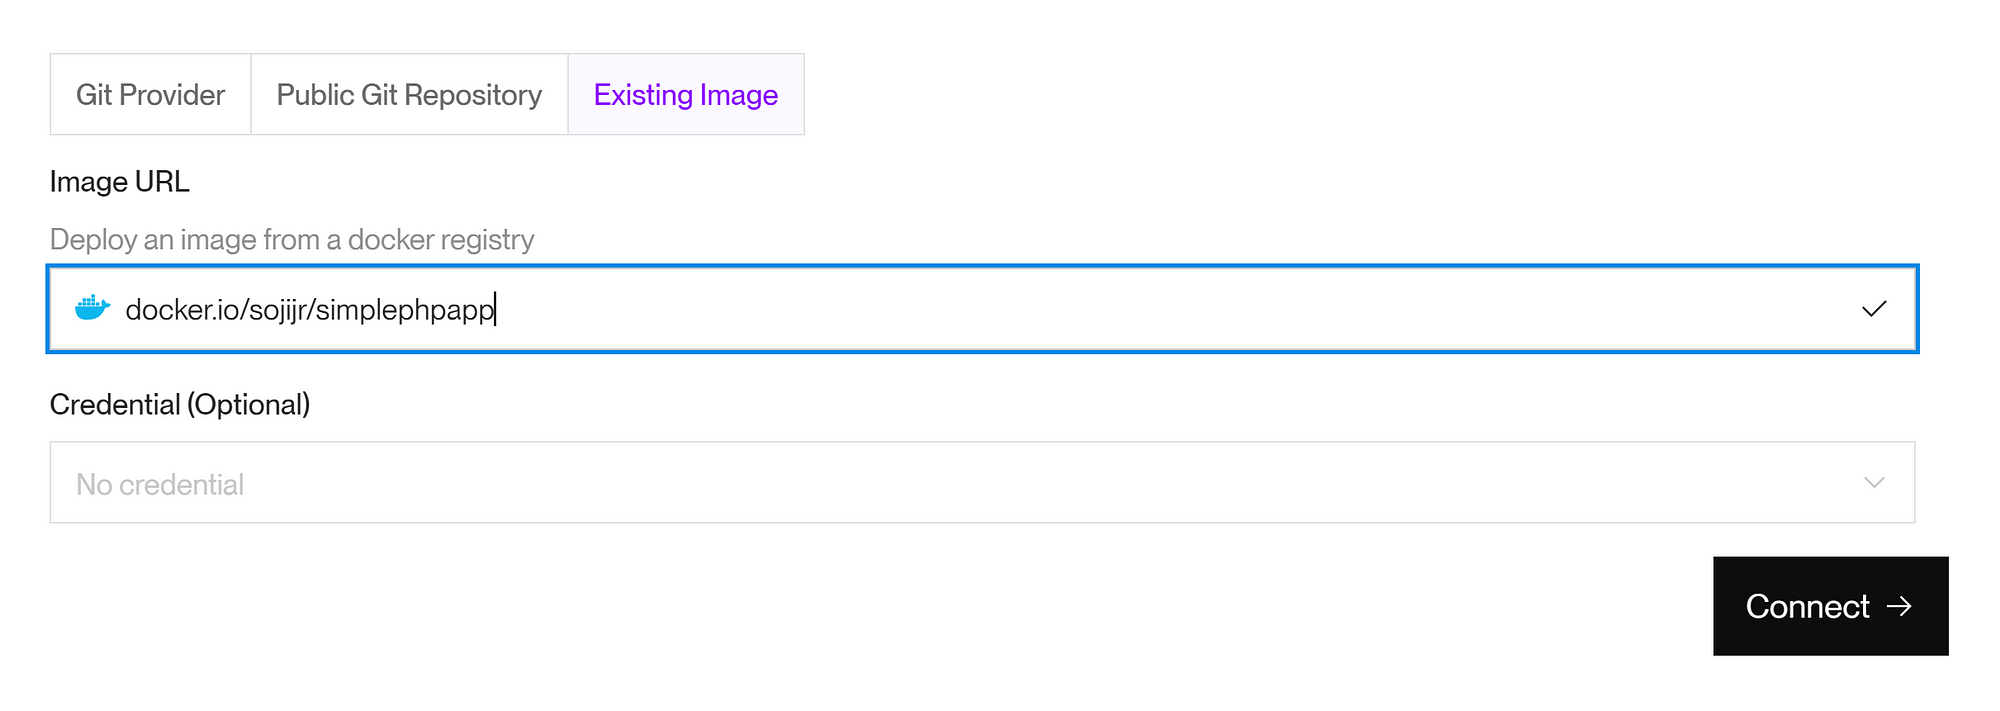
Input the Docker repository URL in the Image URL field, then click “Connect”.
If you’re using a private image, provide the necessary credentials for Render to access it.
For this example, it will be:

5. Service Name: Give your service a name of your choice.

6. Select a Service Plan: Pick the free plan ‘For hobby projects’.

7. Add Environment Variables (Optional): If your application requires environment variables, add them by filling in the key and value. Click the “Add Environment Variable” button to add more.

8. Deploy Your Web Service: After configuring your service, scroll down and click the “Deploy Web Service” button.

9. Monitor Deployment: Render will take you to a status page where you can monitor the deployment. Once it’s finished, Render will give you a .onrender.com URL where your web service is accessible.

Step 6: Test Your Web Service
Visit the provided URL to check if your web service is working as expected. You can also use this URL to set up a custom domain on Render if you choose to do so.
Conclusion
Well done! You’ve successfully deployed your PHP application with Docker on Render. By following these steps, you can take full advantage of Docker’s benefits to streamline your deployment process. Feel free to experiment with more complex configurations and services as needed.
Subscribe to my newsletter
Read articles from Oluwadamilola Soji-Oderinde directly inside your inbox. Subscribe to the newsletter, and don't miss out.
Written by

Oluwadamilola Soji-Oderinde
Oluwadamilola Soji-Oderinde
As a Software Engineering student with over two years of experience in the tech space, I specialize in backend engineering and have hands-on experience as a Software Engineer. I also actively contribute to open-source projects.