Deploying a Highly Available Web App on AWS Using Terraform
 vijayaraghavan vashudevan
🦅 In this article, will explain in detail on DRY principle and Learn how to use input and local variables in Terraform for more flexible and reusable configurations🦅
⚽ Synopsis:
🍀 Understand the DRY concept and learn how to use local and input variables in Terraform
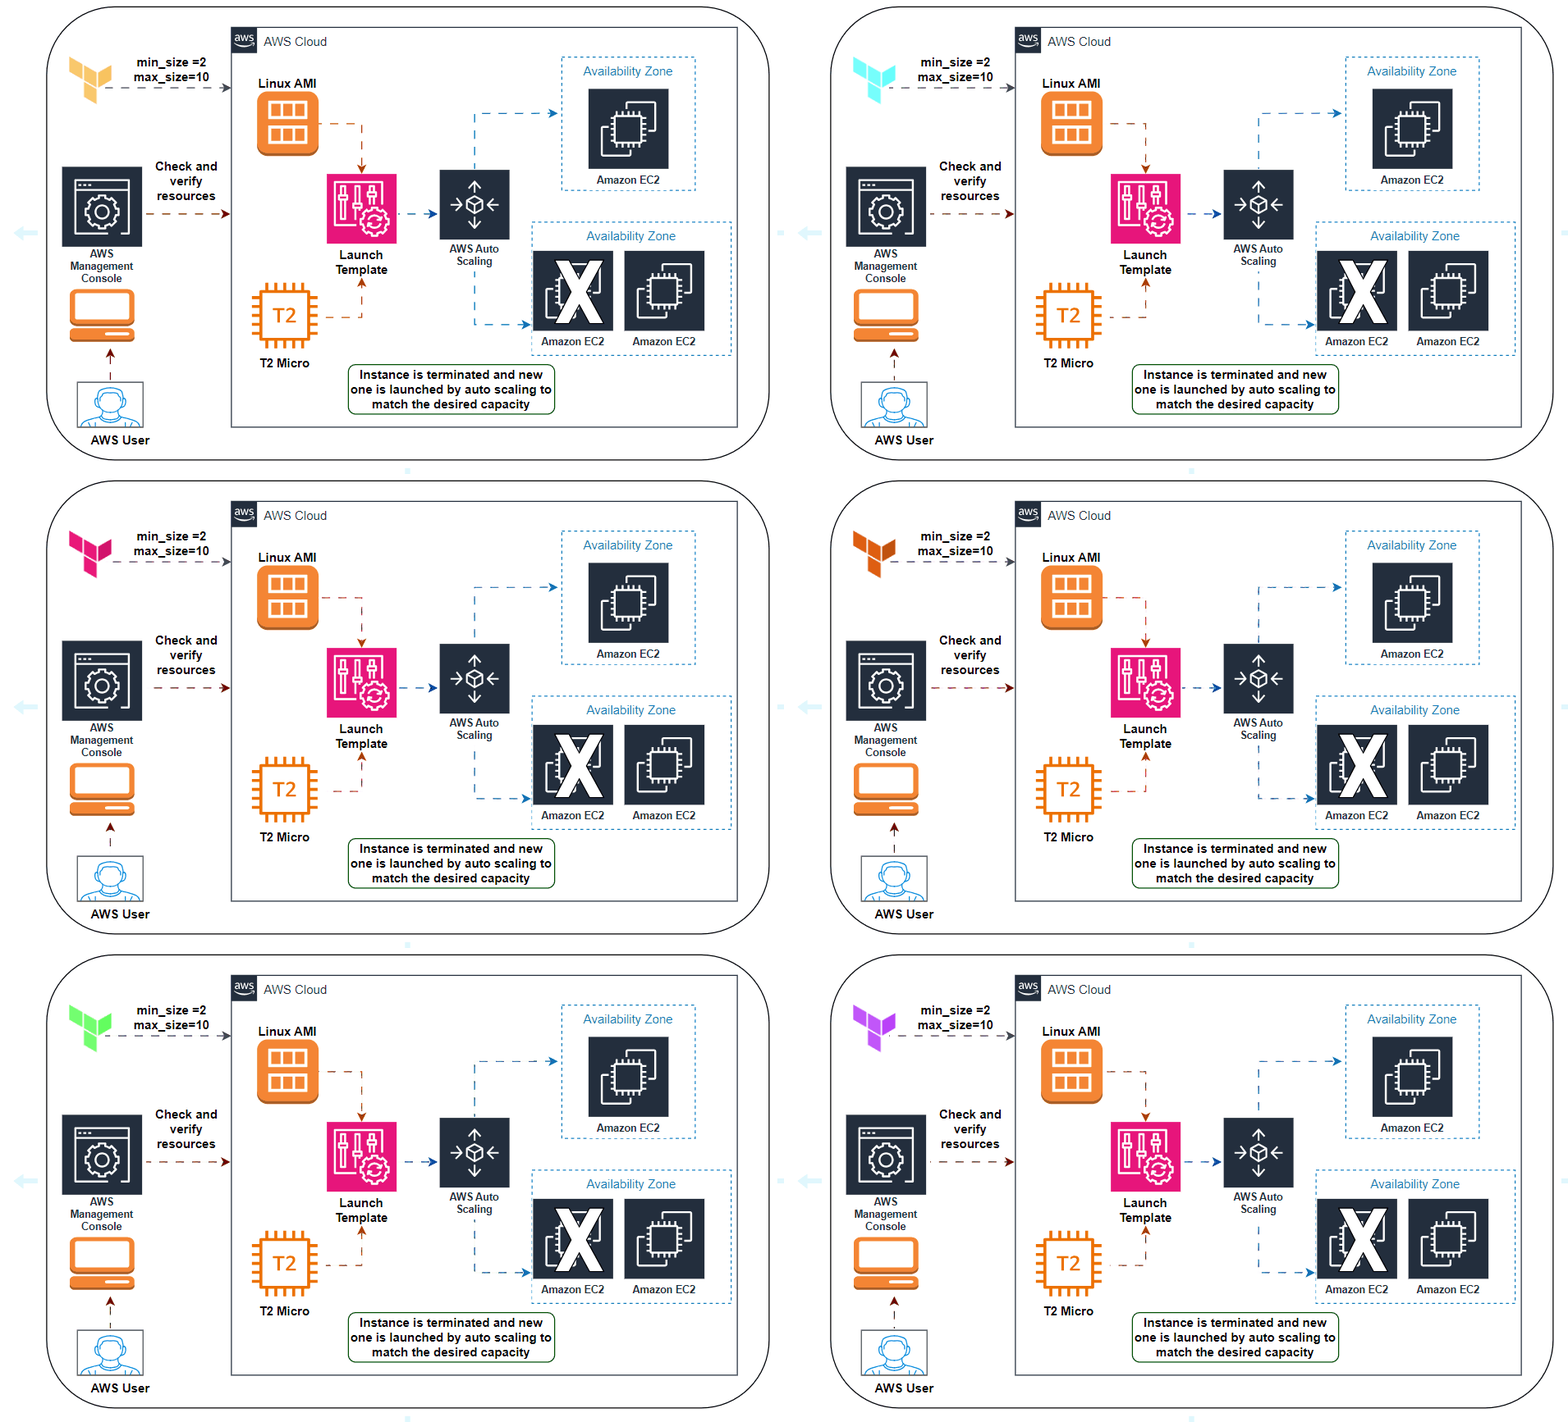
⚽Flow Diagram:

⚽Don’t Repeat Yourself (DRY) principle:
🍀 We might use the web server code that has port 8080 duplicated in both the security group and the User Data configuration.
//security group
 resource "aws_security_group" "instance" {
 name = "terraform-example-instance"
 ingress {
    from_port = 8080
    to_port  = 8080
    protocol   = "tcp"
    cidr_blocks = ["0.0.0.0/0"]
  }
 }
//user data configuration
 resource "aws_instance" "example" {
  ami = "ami-0fb653ca2d3203ac1"
  instance_type  = "t2.micro"
  vpc_security_group_ids = [aws_security_group.instance.id]
  user_data = <<-EOF
          #!/bin/bash
           echo "Hello, World" > index.html
          nohup busybox httpd -f -p 8080 &
          EOF
  user_data_replace_on_change = true
  tags = {
    Name = "terraform-example"
  }
 }
🍀This violates the Don’t Repeat Yourself (DRY) principle: every piece of knowledge must have a single, unambiguous, authoritative representation within a system. If you have the port number in two places, it’s easy to update it in one place but forget to make the same change in the other place.
⚽Input Variables:
🍀To allow you to make your code more DRY and more configurable, Terraform allows you to define input variables.
 variable "NAME" {
 [CONFIG ...]
 }
🍀Here is an example of an input variable that checks to verify that the value you pass is of different data types
//value you pass is the number
variable "number_example" {
  description = "An example of a number variable in Terraform"
  type   = number
  default = 42
}
//value you pass is the list
variable "list_numeric_example" {
  description = "An example of a numeric list in Terraform"
  type  = list(number)
  default  = [1,2,3]
}
//complicated structural type using object type constrain
variable "object_example" {
  description = "An example of a structural type in Terraform"
  type   = object({
    name = string
    age  = number
    tags = list(string)
    enabled = bool
  })
  default = {
    name = "value1"
    age = 42
    tags = ["a", "b", "c"]
    enabled = true
  }
 }
🍀Coming back to the web server example, what you need is a variable that stores the port number:
 variable "server_port" {
  description = "The port the server will use for HTTP requests"
  type  = number
  default  = 8080
}
🍀To use the value from an input variable in your Terraform code, you can use a new type of expression called a variable reference
🍀 With this, the security group code and user data configuration code will look like below
//security group
 resource "aws_security_group" "instance" {
 name = "terraform-example-instance"
 ingress {
    from_port =  var.server_port
    to_port  =  var.server_port
    protocol   = "tcp"
    cidr_blocks = ["0.0.0.0/0"]
  }
 }
//user data configuration
 resource "aws_instance" "example" {
  ami = "ami-0fb653ca2d3203ac1"
  instance_type  = "t2.micro"
  vpc_security_group_ids = [aws_security_group.instance.id]
  user_data = <<-EOF
          #!/bin/bash
           echo "Hello, World" > index.html
          nohup busybox httpd -f -p  ${var.server_port}  &
          EOF
  user_data_replace_on_change = true
  tags = {
    Name = "terraform-example"
  }
 }
🍀In addition to input variables, Terraform also allows you to define output variables by using the following syntax
//output variable syntax
 output "<NAME>" {
  value = <VALUE>
 [CONFIG ...]
 }
🍀The NAME is the name of the output variable, and VALUE can be any Terraform expression that you would like to output. The CONFIG can contain the description.
output "public_ip" {
  value  = aws_instance.example.public_ip
  description = "The public IP address of the web server"
}
⚽Deploying a Cluster of Web Servers:
🍀Running a single server is a good start, but in the real world, a single server is a single point of failure. If that server crashes, or if it becomes overloaded from too much traffic, users will be unable to access your site. The solution is to run a cluster of servers, routing around servers that go down and adjusting the size of the cluster up or down based on traffic.
🍀Managing such a cluster manually is a lot of work. Fortunately, you can let AWS take care of it for you by using an Auto Scaling Group (ASG).An ASG takes care of a lot of tasks for you completely automatically, including launching a cluster of EC2 Instances, monitoring the health of each Instance, replacing failed Instances, and adjusting the size of the cluster in response to load.
🍀The first step in creating an ASG is to create a launch configuration, which specifies how to configure each EC2 Instance in the ASG.
//launch template
resource "aws_launch_template" "terraform" {
  image_id  = "ami-0fb653ca2d3203ac1"
  instance_type = "t2.micro"
  security_groups = [aws_security_group.instance.id]
  user_data = <<-EOF
              #!/bin/bash
              echo "Hello, World" > index.html
             nohup busybox httpd -f -p ${var.server_port} &
             EOF
 }
🍀Now you can create the ASG itself using the aws_autoscaling_group resource:
//autoscaling group
 resource "aws_autoscaling_group" "example" {
  launch_configuration = aws_launch_configuration.example.name
  min_size = 2
  max_size = 10
 tag {
    key  = "Name"
    value = "terraform-asg-example"
    propagate_at_launch = true
  }
 }
🍀This ASG will run between 2 and 10 EC2 Instances (defaulting to 2 for the initial launch), each tagged with the name terraform-asg-example. Note that the ASG uses a reference to fill in the launch configuration name. This leads to a problem: launch configurations are immutable, so if you change any parameter of your launch configuration, Terraform will try to replace it. Normally, when replacing a resource, Terraform would delete the old resource first and then create its replacement, but because your ASG now has a reference to the old resource, Terraform won’t be able to delete it.
🍀To solve this problem, you can use a lifecycle setting. Every Terraform resource supports several lifecycle settings that configure how that resource is created, updated, and/or deleted. A particularly useful lifecycle setting is create_before_destroy. If you set create_before_destroy to true, Terraform will invert the order in which it replaces resources, creating the replacement resource first (including updating any references that were pointing at the old resource to point to the replacement) and then deleting the old resource.
 //Required when using a launch configuration with an auto-scaling group.
 lifecycle {
    create_before_destroy = true
  }
🍀 Now, the aws_launch_template will looks like follow
//launch template
resource "aws_launch_template" "terraform" {
  image_id  = "ami-0fb653ca2d3203ac1"
  instance_type = "t2.micro"
  security_groups = [aws_security_group.instance.id]
  user_data = <<-EOF
              #!/bin/bash
              echo "Hello, World" > index.html
             nohup busybox httpd -f -p ${var.server_port} &
             EOF
//Required when using a launch configuration with an auto-scaling group.
  lifecycle {
    create_before_destroy = true
  }
 }
🍀A data source represents a piece of read-only information that is fetched from the provider (in this case, AWS) every time you run Terraform. Adding a data source to your Terraform configurations does not create anything new; it’s just a way to query the provider’s APIs for data and to make that data available to the rest of your Terraform code. Each Terraform provider exposes a variety of data sources. For example, the AWS Provider includes data sources to look up VPC data, subnet data, AMI IDs, IP address ranges, the current user’s identity
data "aws_subnets" "default" {
 filter {
    name  = "vpc-id"
    values = [data.aws_vpc.default.id]
  }
 }
 resource "aws_autoscaling_group" "example" {
  launch_configuration = aws_launch_configuration.example.name
  vpc_zone_identifier  = data.aws_subnets.default.ids
  min_size = 2
  max_size = 10
 tag {
    key   = "Name"
    value = "terraform-asg-example"
    propagate_at_launch = true
  }
 }
⚽Demo of AWS Auto Scaling:
🍀Launch template in EC2

🍀Click on Auto Scaling Groups under Auto Scaling in the left navigation panel

🍀Go to Instances in the left navigation panel, you can see that two instances have been launched successfully

🍀For testing the auto-scaling policy, go to the EC2 instance list and select one of your instances, and stop the particular instance.Once your instance is stopped (after 1-2 minutes) you can see that your stopped instance will be terminated automatically, and a new instance will be launched to fulfill the policy condition

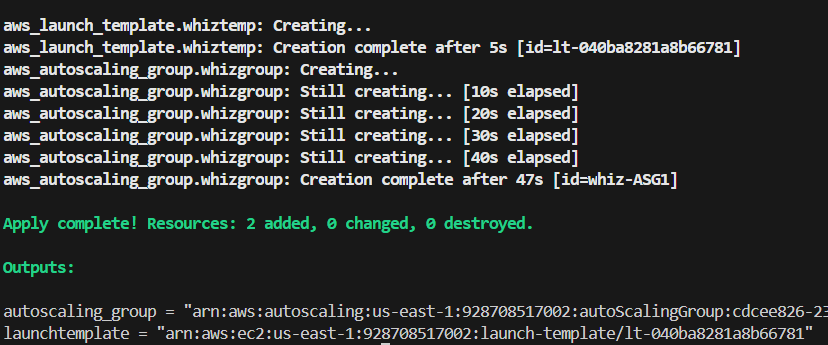
🤩 Terraform output:

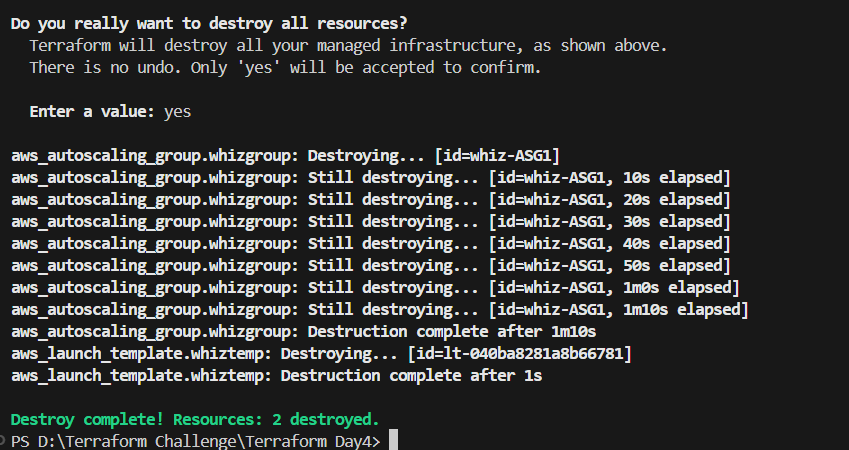
⭐ You can destroy the resource created using the following command

🕵🏻I also want to express that your feedback is always welcome. As I strive to provide accurate information and insights, I acknowledge that there’s always room for improvement. If you notice any mistakes or have suggestions for enhancement, I sincerely invite you to share them with me.
🤩 Thanks for being patient and following me. Keep supporting 🙏
Clap👏 if you liked the blog.
For more exercises — please follow me below ✅!
https://vjraghavanv.hashnode.dev/
#aws #terraform #cloudcomputing #IaC #DevOps #tools #operations #30daytfchallenge #HUG #hashicorp #HUGYDE #IaC #developers #awsugmdu #awsugncr #automatewithraghavan
Subscribe to my newsletter
Read articles from vijayaraghavan vashudevan directly inside your inbox. Subscribe to the newsletter, and don't miss out.
Written by

vijayaraghavan vashudevan
vijayaraghavan vashudevan
I'm Vijay, a seasoned professional with over 13 years of expertise. Currently, I work as a Quality Automation Specialist at NatWest Group. In addition to my employment, I am an "AWS Community Builder" in the Serverless Category and have served as a volunteer in AWS UG NCR Delhi and AWS UG MDU, a Pynt Ambassador (Pynt is an API Security Testing tool), and a Browserstack Champion. Actively share my knowledge and thoughts on a variety of topics, including AWS, DevOps, and testing, via blog posts on platforms such as dev.to and Medium. I always like participating in intriguing discussions and actively contributing to the community as a speaker at various events. This amazing experience provides me joy and fulfillment! 🙂