Azure VM Scale Sets and App Service: A GitHub Integration Guide
 Pratik Lahamge
Here’s the updated article with your GitHub link and website included:
Azure Virtual Machin Scale set
Azure Virtual Machine Scale Sets (VMSS) are a service in Azure that allows you to deploy and manage a set of identical VMs, automatically scaling them up or down based on demand. This helps you maintain availability and reliability for your applications.

Overview of Azure Virtual Machine Scale Sets
Key Features:
Automatic Scaling: VMSS automatically adjusts the number of VMs in the scale set based on demand.
Load Balancing: Integrated with Azure Load Balancer to distribute traffic across VM instances.
High Availability: Ensures that VMs are distributed across availability zones or fault domains to increase reliability.
Centralized Management: Manage and update multiple VMs from a single place.
Custom Images: Deploy VMs from custom images or Azure Marketplace images.
Integration with Autoscale : Automatically adjusts the number of VMs based on predefined metrics or schedules.
Step-by-Step Guide to Create and Manage an Azure Virtual Machine Scale Set
1. Create a Virtual Machine Scale Set
Sign in to the Azure Portal:
- Go to Azure Portal.
Create a Resource:
- Click on "Create a resource" in the upper left-hand corner.
Search for VM Scale Set:
- In the search bar, type "Virtual Machine Scale Set" and select it from the list.
Create VM Scale Set:
- Click "Create" to start the process of creating a new VM Scale Set.
Configure Basic Settings:
Subscription: Select your Azure subscription.
Resource Group: Create a new resource group or select an existing one.
Name: Enter a unique name for your VM Scale Set.
Region: Choose the region closest to your target audience.
Image: Select the image for the VMs. You can choose from a predefined image or use a custom image.
Size: Choose the size for your VMs based on your requirements.
Configure Scaling Options:
Instance Count: Specify the initial number of VM instances.
Scaling Mode: Choose between "Manual" or "Auto-scaling". With auto-scaling, you can define rules for scaling up or down based on metrics like CPU usage.
Configure Networking:
Virtual Network: Choose an existing virtual network or create a new one.
Subnet: Select or create a subnet within the virtual network.
Load Balancer: Optionally, configure an Azure Load Balancer to distribute traffic.
Configure Additional Settings:
Availability Zones: Specify if you want to deploy VMs across availability zones for higher availability.
OS Disk: Choose the OS disk type and size.
Review and Create:
- Review your configuration and click "Create". Wait for the deployment to complete.
2. Manage a Virtual Machine Scale Set
Access Scale Set:
- Go to the Azure Portal and navigate to your VM Scale Set under "Virtual Machine Scale Sets".
Monitor Performance:
Check the "Metrics" tab to monitor the performance of your VMs.
Configure alerts for critical metrics like CPU usage or memory.
Update Scale Set:
- To update the VM Scale Set, go to the "Scaling" tab and modify scaling rules or instance counts as needed.
Scale Manually:
- You can scale the VM Scale Set manually by adjusting the instance count in the "Instances" tab.
Manage Updates:
- Use the "Updates" tab to manage updates and roll out new versions of your application or VM image.
Perform Maintenance:
- Use the "Maintenance" tab to configure maintenance schedules and perform required updates or patches.
3. Set Up Autoscale
Configure Autoscale Rules:
Go to the "Scaling" tab in your VM Scale Set.
Click on "Add a rule" to create a new autoscale rule.
Define the conditions for scaling up or down based on metrics like CPU usage or memory.
Set Scaling Limits:
- Define the minimum and maximum number of VM instances to ensure your scale set remains within desired limits.
Apply and Monitor:
- Apply your autoscale rules and monitor their effectiveness through the "Metrics" tab.
Conclusion
Azure Virtual Machine Scale Sets offer a scalable and manageable solution for deploying and maintaining a large number of VMs. By automating scaling and integrating with other Azure services, VMSS helps ensure your applications remain responsive and available.
For further information and advanced configurations, you can refer to the Azure Virtual Machine Scale Sets documentation.
Feel free to ask if you have any specific questions or need additional details!

Deploying a Static Web App Using Azure App Services
Introduction
Azure App Services provides a robust platform for hosting web applications, APIs, and mobile backends. In this guide, we'll walk through the process of deploying a static web app using Azure App Services.
Prerequisites
Azure Account: You need an Azure account. If you don't have one, sign up for a free trial here.
Git: Ensure Git is installed on your machine for version control.
Code Editor: Use a code editor like Visual Studio Code for your project.
Static Web App: Have a static web app ready for deployment. For this guide, we'll use a simple HTML/CSS/JavaScript project.
Deployment Details
Azure Subscription and Resource Details:
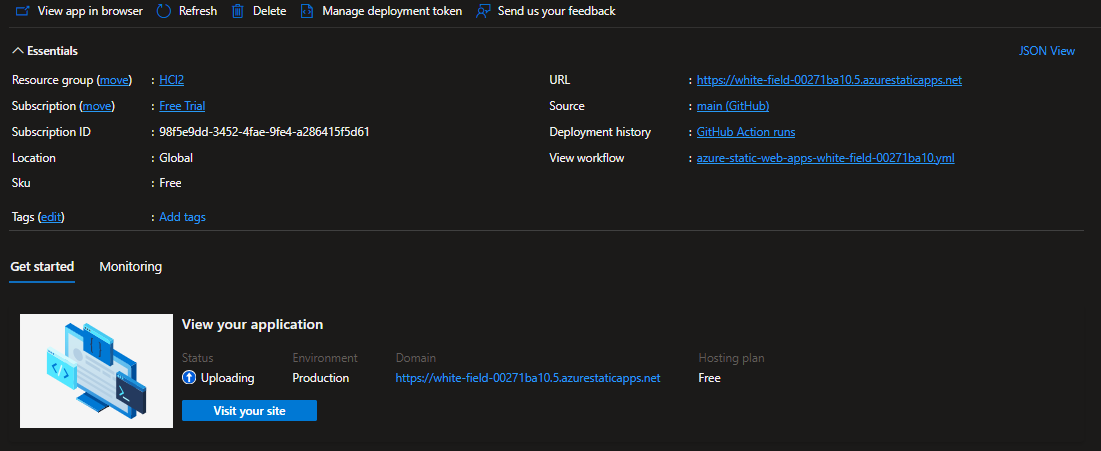
Resource Group: HCl2
Subscription: Free Trial
Subscription ID: 98f5e9dd-3452-4fae-9fe4-a286415f5d61
Location: Global
Workflow File:
azure-static-web-apps-white-field-00271ba10.yml
Step-by-Step Deployment Process
1. Set Up Azure App Services

2. Prepare Your Static Web App
-
Open your terminal or command prompt.
Navigate to your project directory.
Run
git initto initialize a new Git repository.Add and commit your files:
  bashCopy codegit add .
  git commit -m "Initial commit"
3. Deploy Your Static Web App
Get Deployment Credentials:
Go to your App Service in the Azure Portal.
Under "Deployment Center" on the left sidebar, select "GitHub" or "Local Git" depending on your choice.
Configure Deployment:
If using GitHub:
Authenticate with GitHub and select the repository and branch to deploy.
Azure will handle the deployment and set up a GitHub Action for continuous deployment.
If using Local Git:
- Follow the instructions to configure your local Git repository with Azure’s Git remote URL.
Push Your Code:
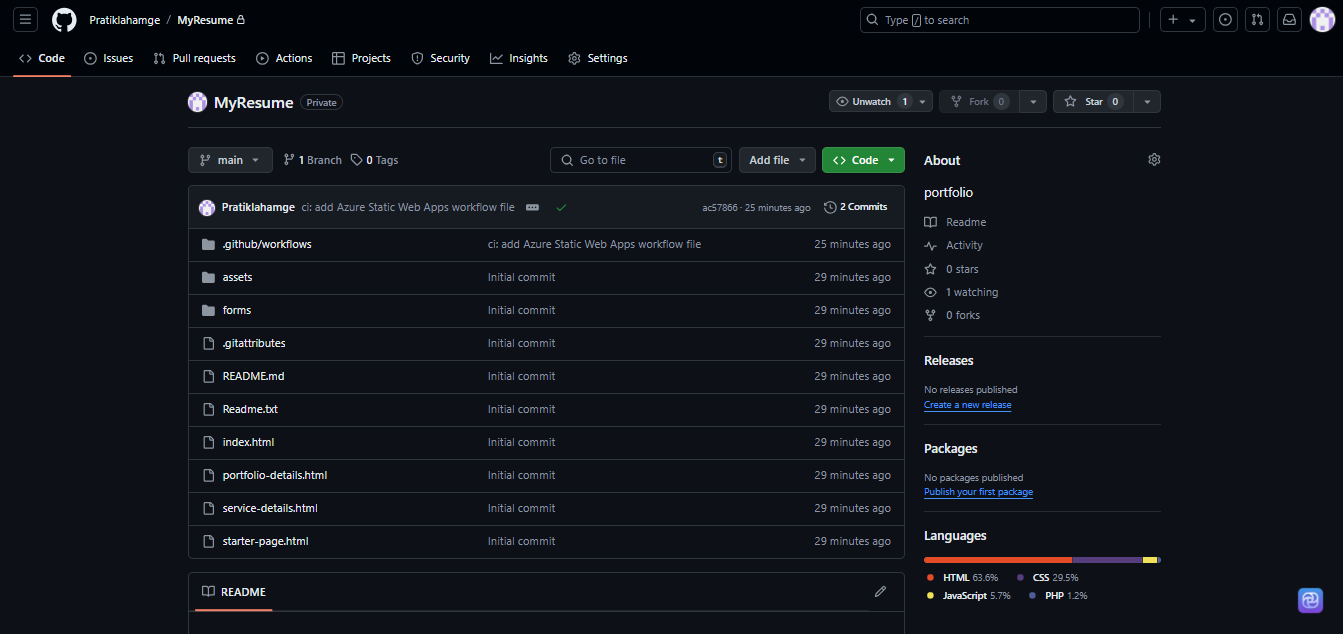
- If using GitHub, simply push your changes to the GitHub repository. For example, you can use the repository https://github.com/Pratiklahamge/MyResume.

If using Local Git:
  bashCopy codegit remote add azure <deployment-url>
  git push azure master
Verify Deployment:
After deployment, go to the URL of your App Service (e.g.,
https://<app-name>.azurewebsites.net).Verify that your static web app is up and running. For instance, you can check out https://white-field-00271ba10.5.azurestaticapps.net/ to see your deployed site.
4. Configure Custom Domain (Optional)
Add a Custom Domain:
In the Azure Portal, navigate to your App Service.
Under "Custom domains" in the left sidebar, click "Add custom domain".
Follow the instructions to configure your custom domain.
Update DNS Records:
- Update your DNS records with your domain provider to point to your Azure App Service.
out put -

Conclusion
Deploying a static web app using Azure App Services is a straightforward process. With Azure’s powerful platform, you can easily deploy, manage, and scale your static sites. This guide provides a step-by-step approach to help you get started with your deployment.
For further reading and more advanced configurations, you can refer to the Azure App Services documentation.
Feel free to reach out if you have any questions or need further assistance!
Subscribe to my newsletter
Read articles from Pratik Lahamge directly inside your inbox. Subscribe to the newsletter, and don't miss out.
Written by

Pratik Lahamge
Pratik Lahamge
"Hi, I'm Pratik Lahamge, an IT professional at HCL Tech with over 3 years of experience in application support and DevOps support. I specialize in streamlining operations, enhancing system reliability, and automating workflows to drive efficient IT processes. My skill set includes cloud technologies (AWS, Azure), CI/CD pipelines, containerization (Docker, Kubernetes), infrastructure as code, and monitoring tools like Grafana, ticketing tools, job monitoring, and deployment."