Building a Two-Tier Web Application with Docker Compose
 ishu raj
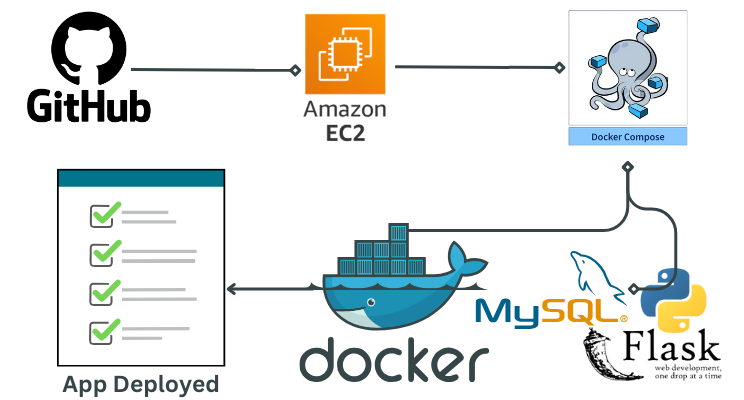
Docker Compose simplifies managing multi-container applications by defining all services, networks, and volumes in a single YAML configuration file. In this article, we’ll explore a practical two-tier web application project that leverages Docker Compose to orchestrate a MySQL database and a Flask web application.
Introduction to the Project
This project demonstrates the use of Docker Compose to set up a two-tier architecture:
MySQL Database (Backend) – Stores the application's data.
Flask Web Application (Frontend) – Serves a Python-based web application, using the MySQL database as its data source.
By running both services in isolated Docker containers, you can develop, test, and deploy the application consistently across different environments.
The Docker Compose Configuration
The docker-compose.yml file describes the services and defines how they interact. Let's dive into the core components.
version: '3.9'
services:
  mysql:
    container_name: mysql
    image: mysql:5.7
    platform: linux/x86_64
    ports:
      - "3306:3306"
    environment:
      MYSQL_ROOT_PASSWORD: root
      MYSQL_DATABASE: devops
      MYSQL_USER: admin
      MYSQL_PASSWORD: admin
    volumes:
      - mysql-data:/var/lib/mysql
    networks:
      - twotier
    healthcheck:
      test: ["CMD", "mysqladmin", "ping", "-h", "localhost", "-u", "root", "-p$MYSQL_ROOT_PASSWORD"]
      interval: 10s
      retries: 5
      start_period: 30s

  flask-app:
    build:
      context: .
    ports:
      - "5001:5000"
    environment:
      MYSQL_HOST: mysql
      MYSQL_USER: root
      MYSQL_PASSWORD: root
      MYSQL_DB: devops
    depends_on:
      mysql:
        condition: service_healthy
    networks:
      - twotier

volumes:
  mysql-data:
networks:
  twotier:
    driver: bridge
Breaking Down the Components
1. MySQL Service
The mysql service runs MySQL version 5.7 within a container:
Data Persistence: The
mysql-datavolume is mapped to/var/lib/mysqlinside the container, ensuring that database data remains intact even if the container is destroyed and recreated.Ports and Environment Variables: MySQL listens on port
3306and is configured using environment variables. The databasedevopsis automatically created, along with the useradminand the corresponding password.Health Check: Docker ensures that MySQL is healthy by continuously pinging the database using
mysqladmin ping. If MySQL doesn't respond within the defined intervals and retries, Docker marks the service as unhealthy.
2. Flask Web Application Service
The flask-app service is built from a local Dockerfile and configured to connect to the mysql service:
Ports: Port
5000inside the container is exposed as5001on the host machine, enabling external access to the Flask application.Environment Variables: These provide the necessary database connection details to the Flask application, such as the MySQL host (
mysql), database name (devops), and login credentials.Service Dependencies: The
depends_ondirective ensures that the Flask app only starts once MySQL is healthy and ready to accept connections.
Networking and Volumes
Custom Network: Both containers are part of a user-defined network called
twotier. This facilitates container-to-container communication, meaning the Flask application can access the MySQL database by simply referring to it by its service name (mysql).Named Volumes: The
mysql-datavolume stores the database’s data outside of the container, ensuring that no data is lost even if the MySQL container is stopped or removed.
How It All Comes Together
By defining the entire application stack in the docker-compose.yml file, developers can easily spin up the environment with a single command:
docker-compose up
Docker Compose automatically pulls the necessary images, builds the Flask application, and creates the network and volume. The two services are then launched in parallel, with the Flask app waiting until the MySQL database is healthy and ready to accept connections. This automated process reduces the complexity of managing multi-container environments.
Benefits of Using Docker Compose for This Project
Simplicity in Setup: You don’t need to manually configure and start each component. Docker Compose handles this for you, saving time and minimizing human errors.
Consistency Across Environments: Whether you’re running this application in development, staging, or production, Docker Compose ensures that the environment remains consistent. This means fewer surprises when moving your app to different stages of deployment.
Isolation: Each service runs in its own container, preventing conflicts between dependencies or software versions.
Scalability: If the application needs to scale, you can easily spin up multiple instances of the
flask-appservice while connecting to the same MySQL container.
Future Improvements
This setup can be expanded further:
Automated Database Initialization: You could uncomment the volume mapping that mounts an SQL script to the
docker-entrypoint-initdb.ddirectory. This would automatically initialize the database with tables and data.Environment-Specific Configurations: Docker Compose allows the use of multiple configuration files for different environments (e.g.,
docker-compose.dev.ymlfor development anddocker-compose.prod.ymlfor production). This enables fine-tuning the services for each stage of the application lifecycle.Load Balancing and Scaling: In a larger deployment, you might add a load balancer in front of the Flask containers and scale them horizontally.
Conclusion
This project illustrates the power of Docker Compose in managing complex application stacks. By isolating each component in its own container and orchestrating them through a simple YAML file, developers can maintain a consistent, scalable, and reliable environment for their web applications. Whether you're deploying a small project or a large distributed system, Docker Compose provides the tools necessary to streamline and simplify your workflow.
Subscribe to my newsletter
Read articles from ishu raj directly inside your inbox. Subscribe to the newsletter, and don't miss out.
Written by
