Gitlab, Gitlab CI/CD with SDLC features....
 Shesh Dhar
Recently, I have learned Gitlab with CICD, it help us to create the custom CI/CD pipeline with Linux hosted runners.
Gitlab is a open source product/tool which is web-based Git Repository that provides free open and private repositories. It is complete DevOps platform that supports the entire software development lifecycle, enabling teams to collaborate more effectively. It has the feature of entire SDLC from project planning and source code management to CI/CD.
Difference between GitHub and Gitlab:-
Philosophy: GitHub focuses more on code collaboration, while GitLab offers a full DevOps lifecycle.
Open Source: GitLab’s community edition is open source, whereas GitHub is not.
CI/CD: GitLab has built-in CI/CD, while GitHub integrates CI/CD through GitHub Actions.
Steps to clone the Gitlab project with command line..
Go to the system where need to clone the Gitlab, run the "ssh-keygen"- this will generate the two keys one is public and another is private key.
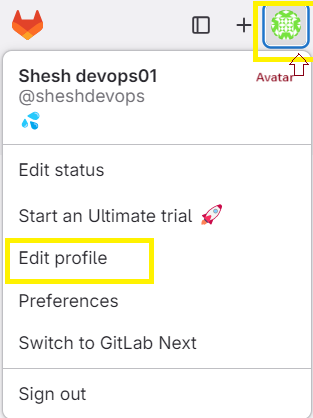
Open the generated public key and copy the content of public key and go to Gitlab.com then click on Avatar* option>>Edit Profile>>SSH Keys>>Add new and paste the generated public key here.

Now go to to system where you need to clone the GitLab project and create a directory and go inside the directory and clone the project as per below instructions.
git clone git@gitlab.com:gitlabgrp/gitlab-project1.git(You can get this from project>>code>>clone with SSH in gitlab)
Copying of the project from GitHub to Gitlab:-
Go to Project>>New Project>>Import project>>Repository by URL>>Enter copied repository>>create project.
Addition of GitLab CICD pipeline file with projects.
Go to project and click + icon to add file>>new file>>File Name should be- .gitlab-ci.yml, now write the pipeline for the project and click to commit changes.
Working of Gitlab Pipeline:-
Gitlab pipeline script. File name .gitlab-ci.yml
stages:
- Build
- Test
- Push
- Deploy
Build_job:
stage: Build
script:
- echo "This is build stage"
Test_job:
stage: Test
script:
- echo "This is Test stage"
Push_job:
stage: Push
script:
- echo "This is Push stage"
Deploy_job:
stage: Deploy
script:
- echo "This is Deploy stage"
And after creation of pipeline, you need to commit the changes.
Gitlab-Runner:-
GitLab runner is a build instance which is used to run the jobs over multiple machines and send the results to GitLab and which can be placed on separate users, servers, and local machine. Gitlab runner can automatically scale the number of runner based on the load.
Configuration of Gitlab runner ...
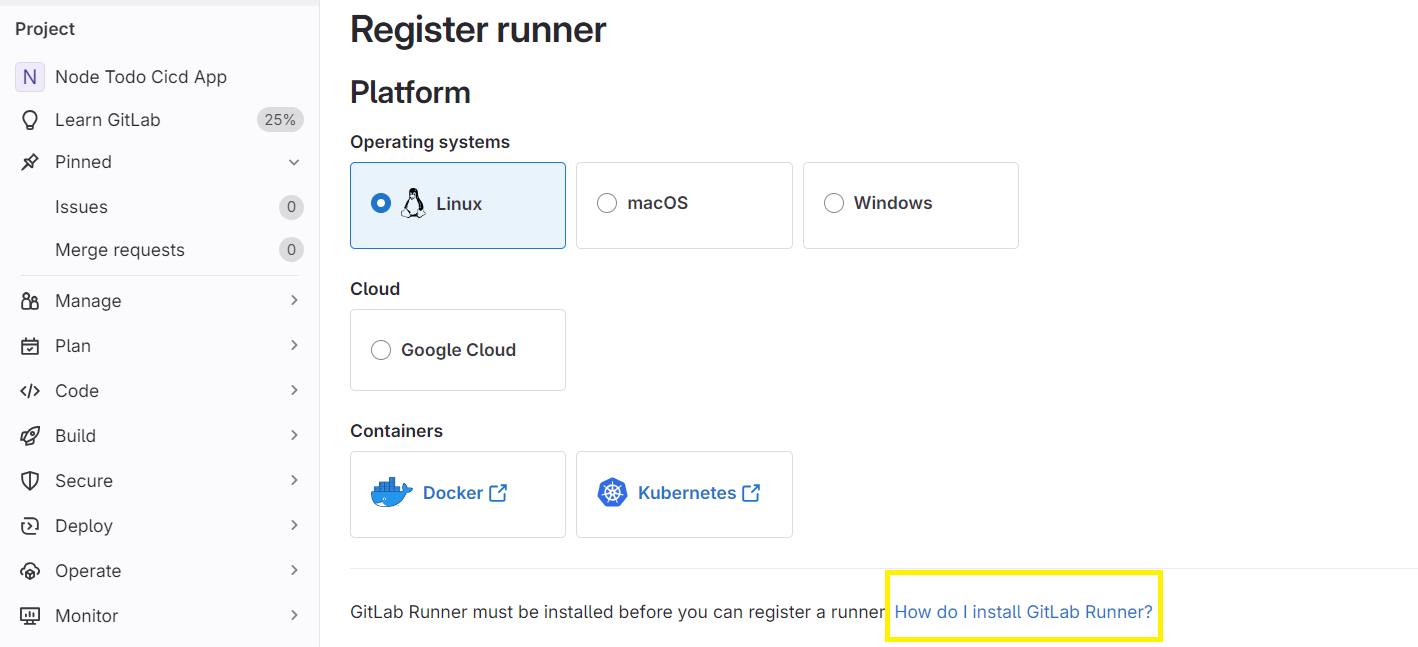
Go to project>>settings>>CI/CD>>Runner>>New Project Runner>>Enter Tag Name like-'dev'>>create runner>>select OS>>Linux>>click on "How do I install Gitlab Runner?"

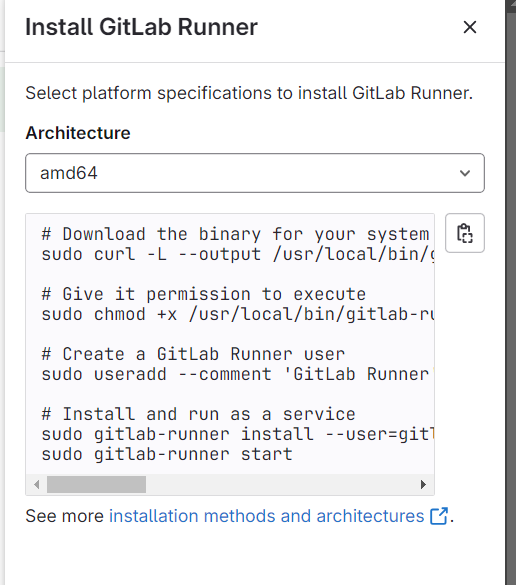
Now click on "How do I install Gitlab Runner" and will get the below details.

Select the Architecture like 'amd64' and run the given command one by one..
Download the binary for your system
sudo curl -L --output /usr/local/bin/gitlab-runner https://gitlab-runner-downloads.s3.amazonaws.com/latest/binaries/gitlab-runner-linux-amd64
Give it permission to execute
sudo chmod +x /usr/local/bin/gitlab-runner
Create a GitLab Runner user
sudo useradd --comment 'GitLab Runner' --create-home gitlab-runner --shell /bin/bash
Install and run as a service
sudo gitlab-runner install --user=gitlab-runner --working-directory=/home/gitlab-runner sudo gitlab-runner start
Now run the below mentioned command on that linux system..
gitlab-runner register --url https://gitlab.com --token glrt-x5JWro2dyxXAskELBEmZ
this token is stored in the config.toml and cannot be accessed again from the UI.
And your runner will be configured with Gitlab.
Gitlab Artifacts:-
Gitlab artifacts are files generated by jobs that are stored and can be used by subsequent jobs in the pipeline. They can be used to pass data between jobs, debug builds, or deploy applications.
It store the output of a job such as binaries, logs or test results.
Artifacts are stored in Gitlab and can be downloaded for inspection or used by later jobs.
Artifacts can be set to expire after a certain time periods.
Addition of Variables in Gitlab:-
Go to project>> Settings>> CI/CD>> Variable>> Expand>> Add variable>> check- masked>> Protected>> Description-This is docker-hub username>> key-DOCKERHUB_USER\>> value-Here enter the dockerhub username>> create.
Go to project>> Settings>> CI/CD>> Variable>> Expand>> Add variable>> check- masked>> Protected>> Description-This is docker-hub username>> key-DOCKERHUB_PASSWORD\>> value-Here enter the dockerhub password/key>> create.
A Gitlab project with CI/CD pipeline step by step.
Node Todo CICD App.
Add the project in Project list.
Go to added project and select setting and then configure the dockerhub credentials in Variable section and add Gitlab-Runner in CI/CD section.
Now create the file .gitlab-ci.yml for Gitlab pipeline and write the Gitlab CI.
stages:
   - Build
   - Test
   - Push to Dockerhub
   - Deploy
build_job:
   stage: Build
   script:
     - docker build -t node-app-gitlab2:lts .
     - mkdir -p sdlogs
   tags:  #This is for Gitlab-runner, where tag name is dev
      - dev
   artifacts:  #This is artifacts
       paths:
       - sdlogs/
       expire_in: 1 week

Test_Job:
    stage: Test
    script:
      - echo "Test the Image.."
    tags:
      - dev
Push_Job:
    stage: Push to Dockerhub
    script:
      - docker login -u $DOCKERHUB_USER -p $DOCKERHUB_PASSWORD
      - docker tag node-app-gitlab2:lts $DOCKERHUB_USER/node-app-gitlab2:lts
      - docker push $DOCKERHUB_USER/node-app-gitlab2:lts
    tags:
      - dev
Deploy_jobs:
    stage: Deploy
    script:
        - docker compose up -d
        - echo "Apps deployed successfully"
    tags:
      - dev
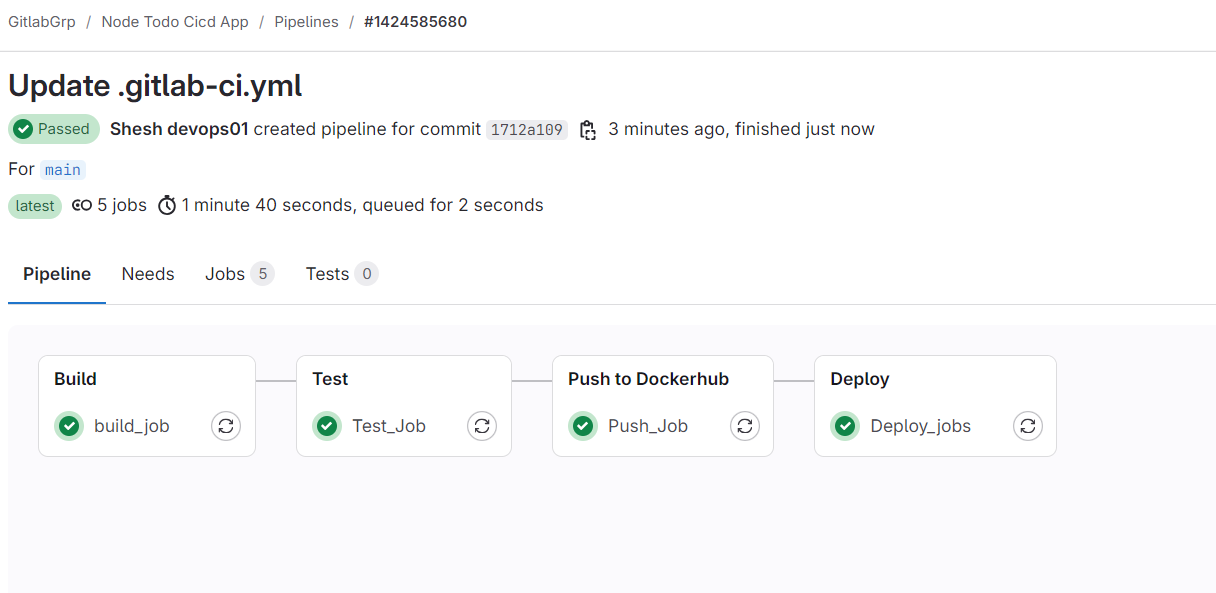
Now commit the changes in GitLab CI configuration file and pipeline will be trigged automatically.

Now you can check the deployed Apps with IP address of the server and port No. 8020.

"/"
Subscribe to my newsletter
Read articles from Shesh Dhar directly inside your inbox. Subscribe to the newsletter, and don't miss out.
Written by
