Day 41 : Setting up an Application Load Balancer with AWS EC2
 Sahil Kaushal
What is Load Balancing?
Load Balancing is a technique used to distribute incoming network traffic across multiple servers. This ensures no single server becomes overwhelmed, which helps improve the availability and reliability of your applications. Load balancers can also perform health checks on servers to ensure traffic is only directed to healthy instances.
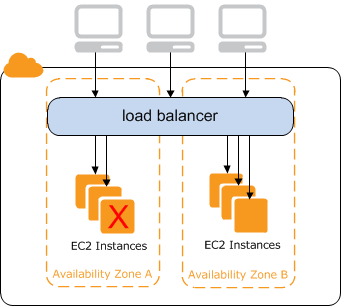
Elastic Load Balancing (ELB) in AWS
Elastic Load Balancing (ELB) is a managed load balancing service provided by AWS. It automatically distributes incoming application traffic across multiple targets, such as Amazon EC2 instances, containers, and IP addresses, in one or more Availability Zones. ELB helps you achieve greater levels of fault tolerance in your applications by seamlessly providing the required amount of load balancing capacity needed to distribute application traffic.
Key Features of ELB:
Automatic Scaling: ELB scales your load balancer capacity automatically in response to incoming traffic changes.
Health Checks: ELB monitors the health of its registered targets and routes traffic only to healthy targets.
High Availability: By distributing traffic across multiple targets in different Availability Zones, ELB ensures high availability and fault tolerance.
SSL Termination: ELB can offload the work of encryption and decryption, allowing your compute resources to focus on their main tasks.
Integration with AWS Services: ELB integrates seamlessly with other AWS services like EC2, ECS, and EKS.
Types of Elastic Load Balancers:
Application Load Balancer (ALB):
Best suited for HTTP and HTTPS traffic.
Provides advanced routing features, such as host-based and path-based routing.
Supports WebSocket and HTTP/2.
Network Load Balancer (NLB):
Designed for ultra-high performance and static IP addresses.
Best suited for TCP, UDP, and TLS traffic.
Capable of handling millions of requests per second while maintaining ultra-low latencies.
Gateway Load Balancer (GWLB):
Integrates with third-party virtual appliances.
Simplifies the deployment, scaling, and management of third-party network appliances.
Classic Load Balancer (CLB):
The original ELB, supporting both HTTP/HTTPS and TCP traffic.
Suitable for applications built within the EC2-Classic network.
How to Use ELB:
You can create, access, and manage your load balancers using various interfaces:
AWS Management Console: A web interface for managing ELB.
AWS CLI: Command-line interface for managing ELB.
AWS SDKs: Language-specific APIs for integrating ELB into your applications.
Query API: Low-level API actions for direct access to ELB.
Benefits of Using ELB:
Improved Availability: Distributes traffic across multiple targets, ensuring no single point of failure.
Scalability: Automatically adjusts capacity to handle varying levels of traffic.
Security: Supports SSL/TLS termination and integrates with AWS Certificate Manager.
Cost-Effective: Pay only for what you use, with no upfront costs.
Elastic Load Balancing is a powerful tool in AWS that helps you build scalable, highly available, and fault-tolerant applications.
Task 1:
launch 2 EC2 instances with an Ubuntu AMI and use User Data to install the Apache Web Server.
Modify the index.html file to include any text so that when your Apache server is hosted, it will display that text also do it for 2nd instance..
Copy the public IP address of your EC2 instances.
Open a web browser and paste the public IP address into the address bar.
It should be like that.


Task 2:
Create an Application Load Balancer (ALB) in EC2 using the AWS Management Console.
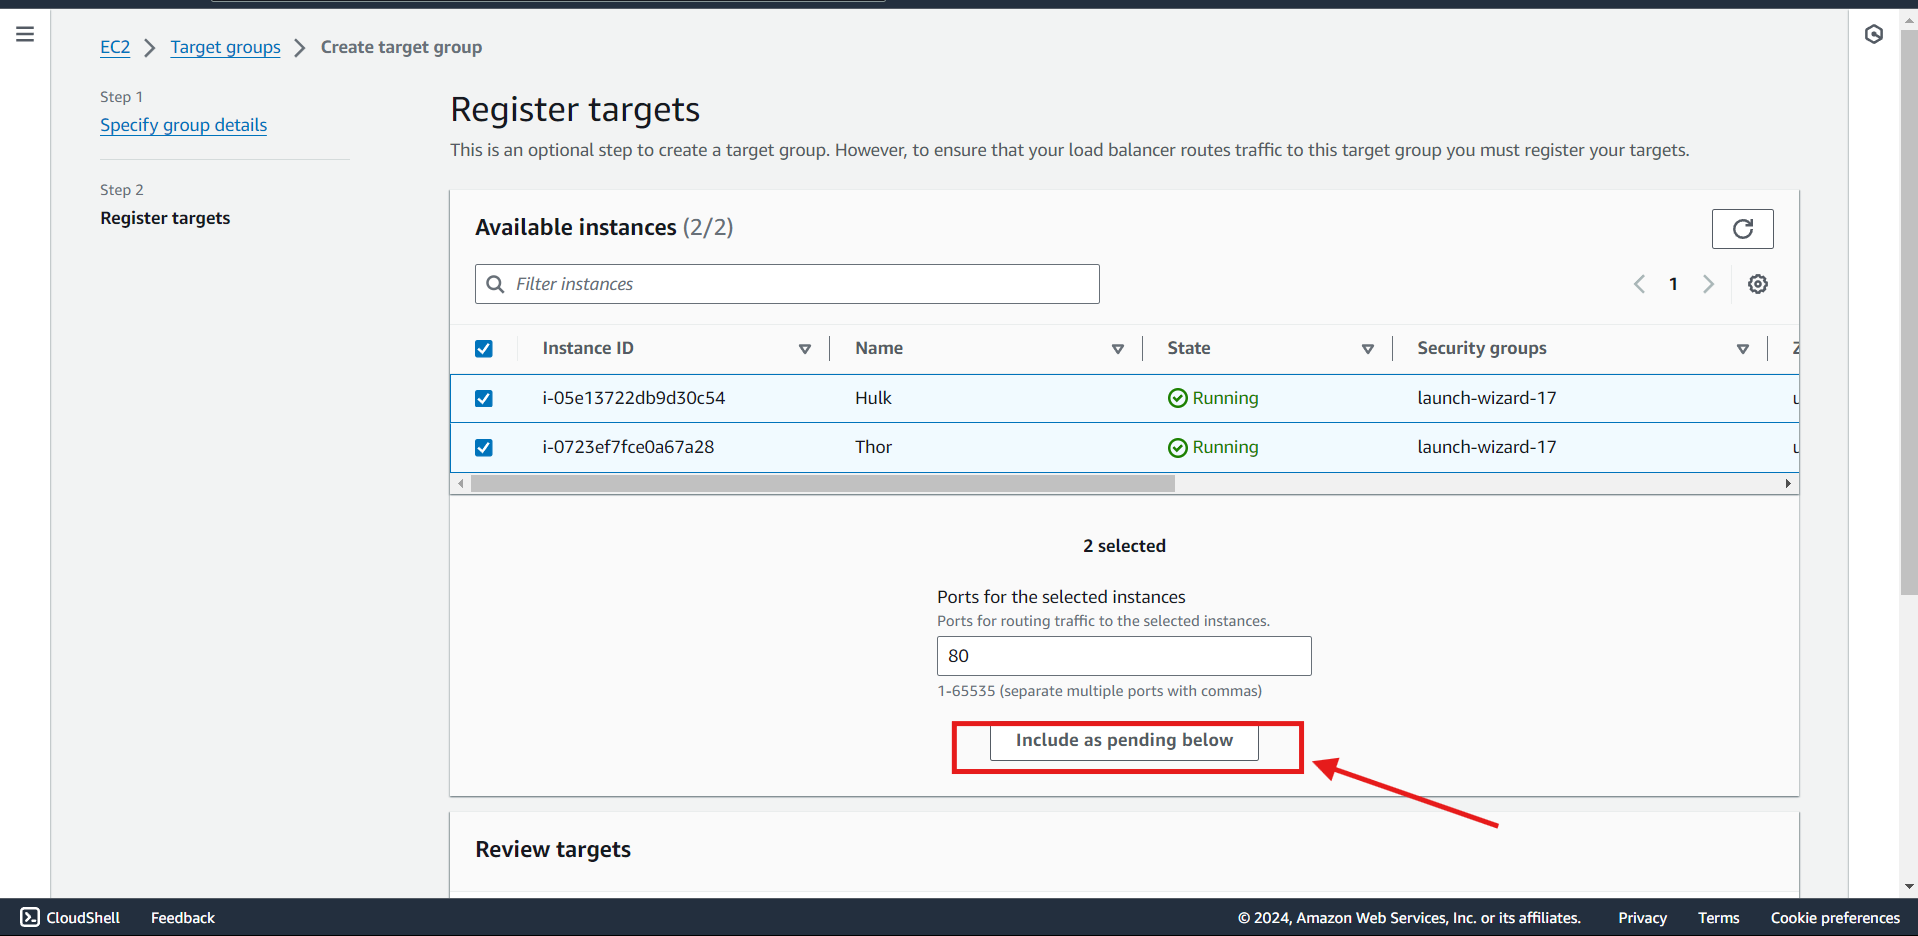
Add EC2 instances which you launch in task-1 to the ALB as target groups.
Verify that the ALB is working properly by checking the health status of the target instances and testing the load balancing capabilities.
Solution:
First create Target groups.
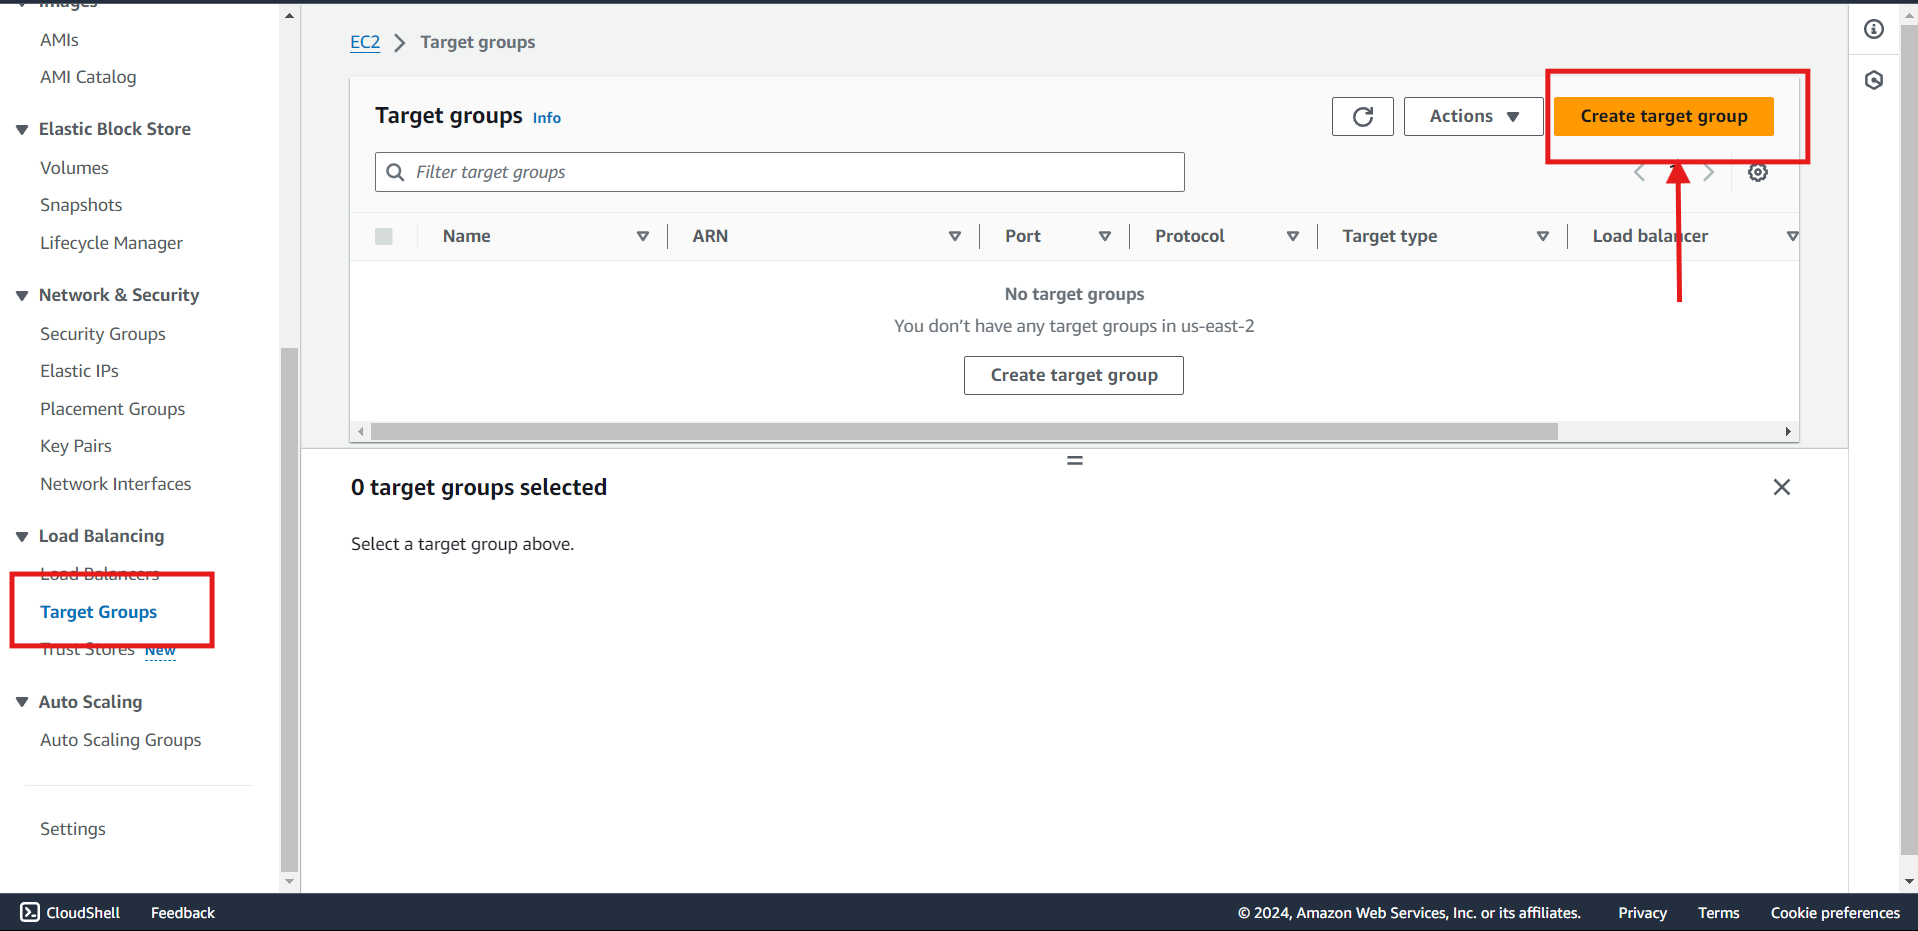
Under Specify group details, Add Target group name, Click Next.


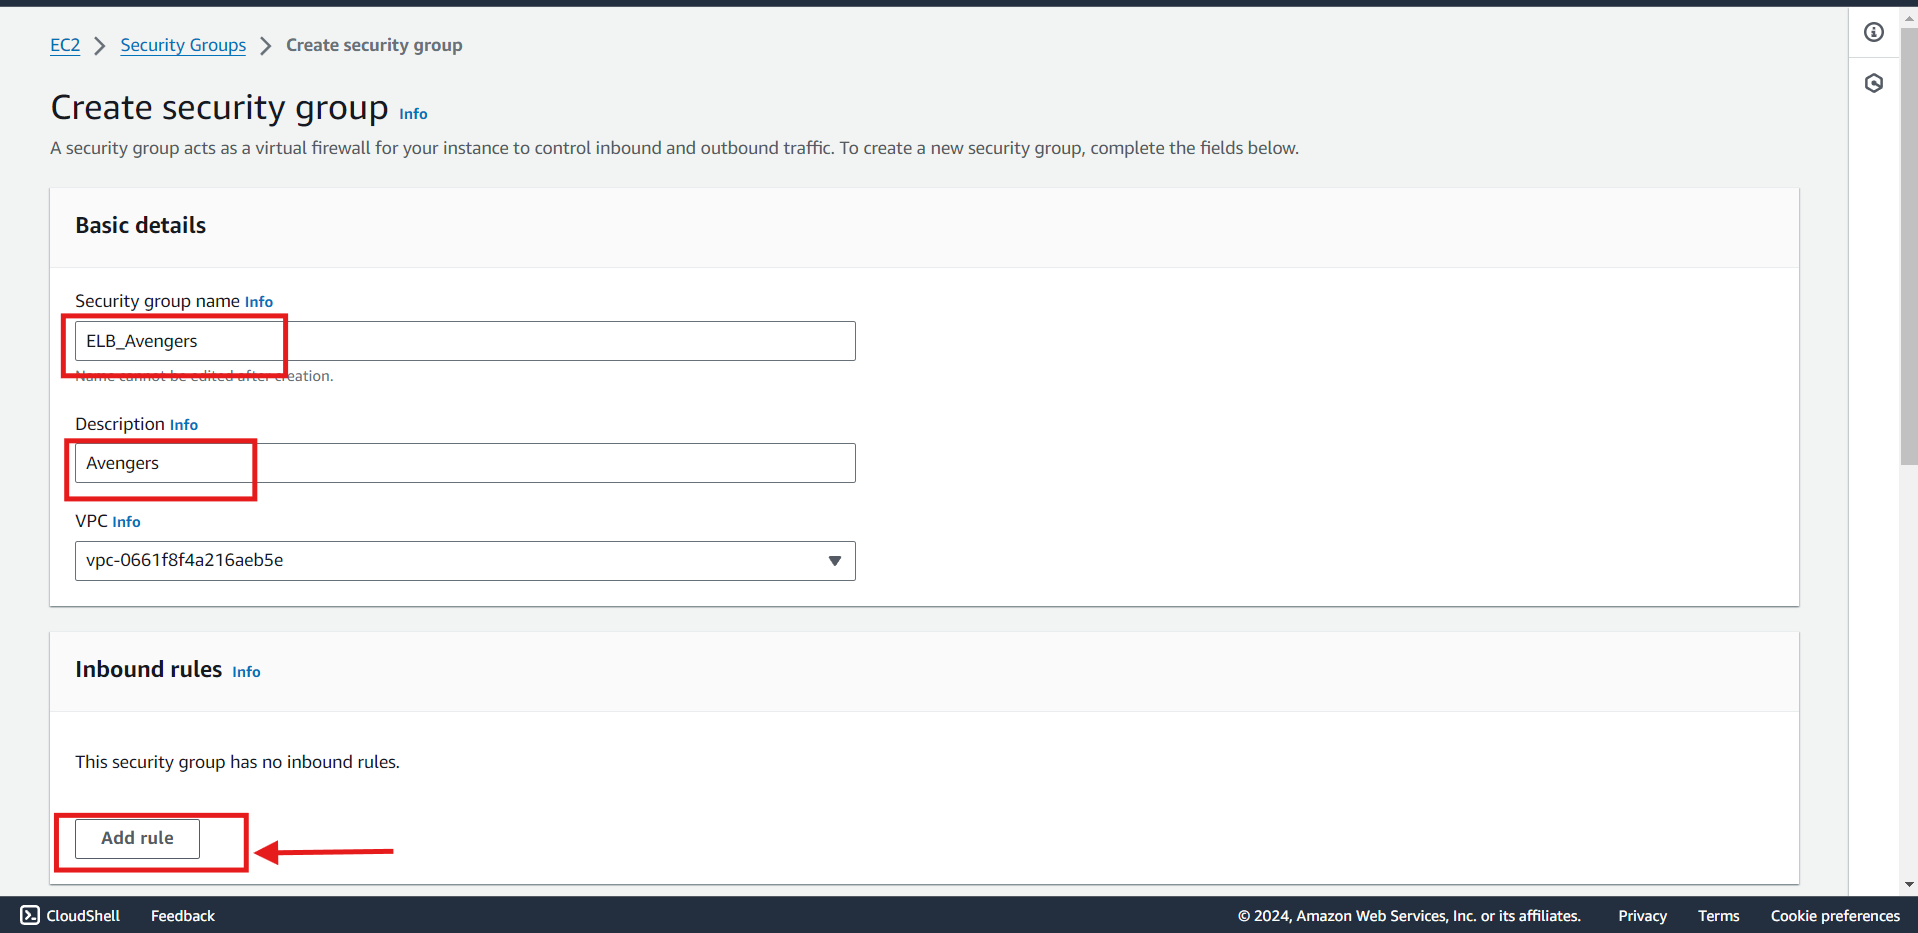
Create a new Security Groups.
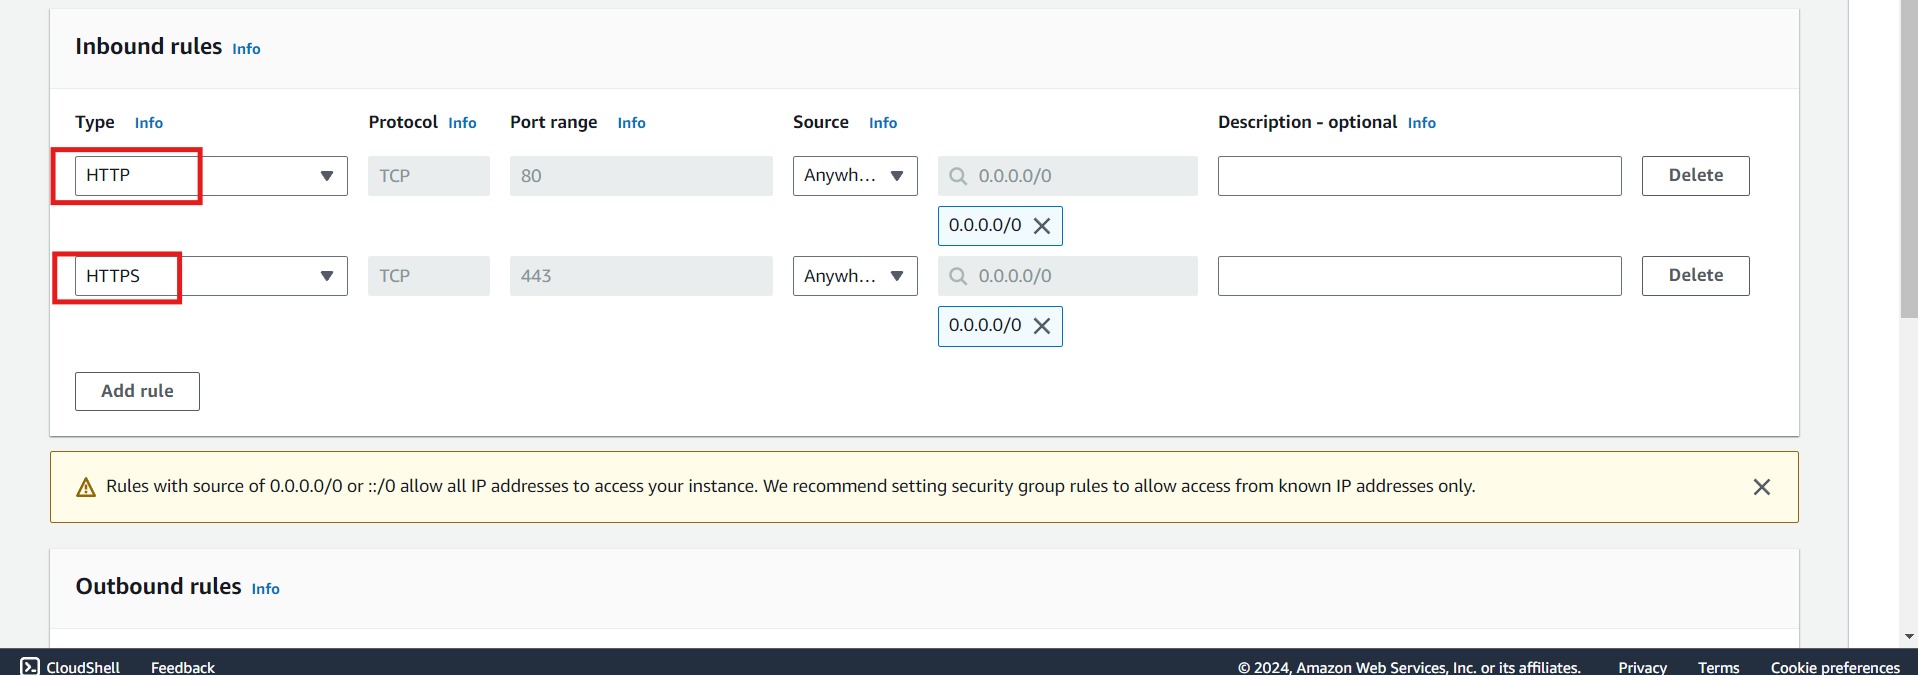

Crate a Load Balancer.
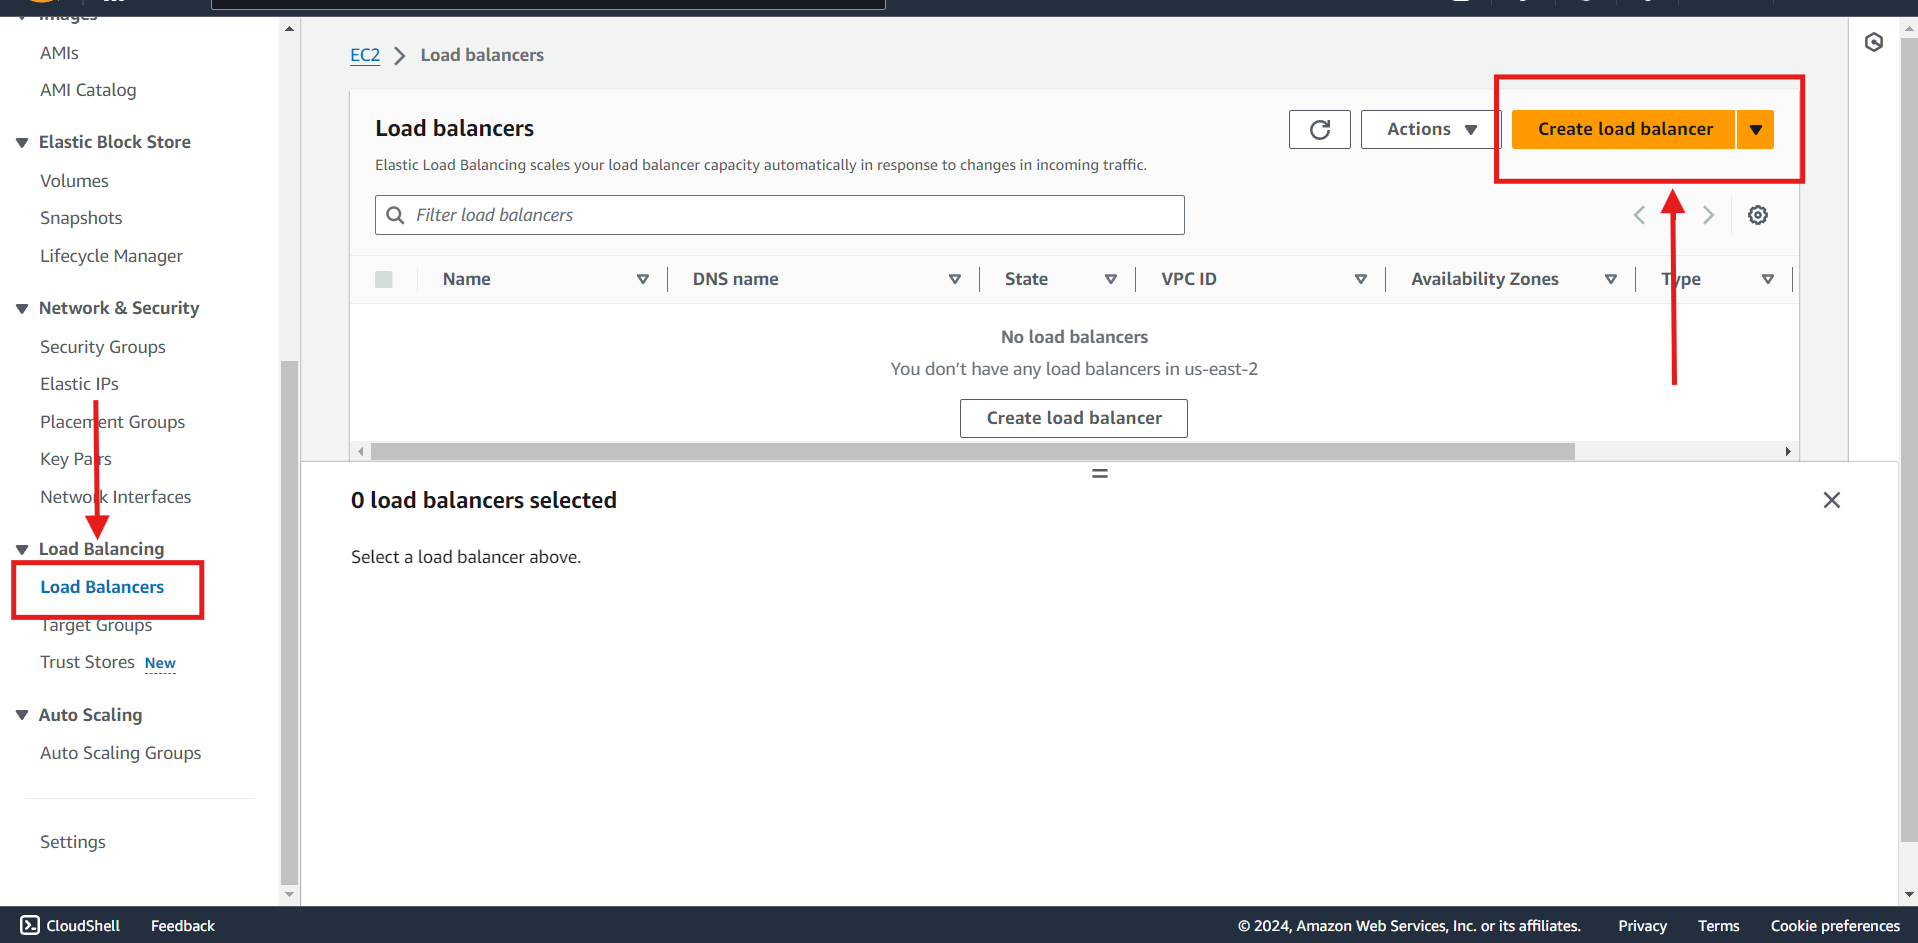
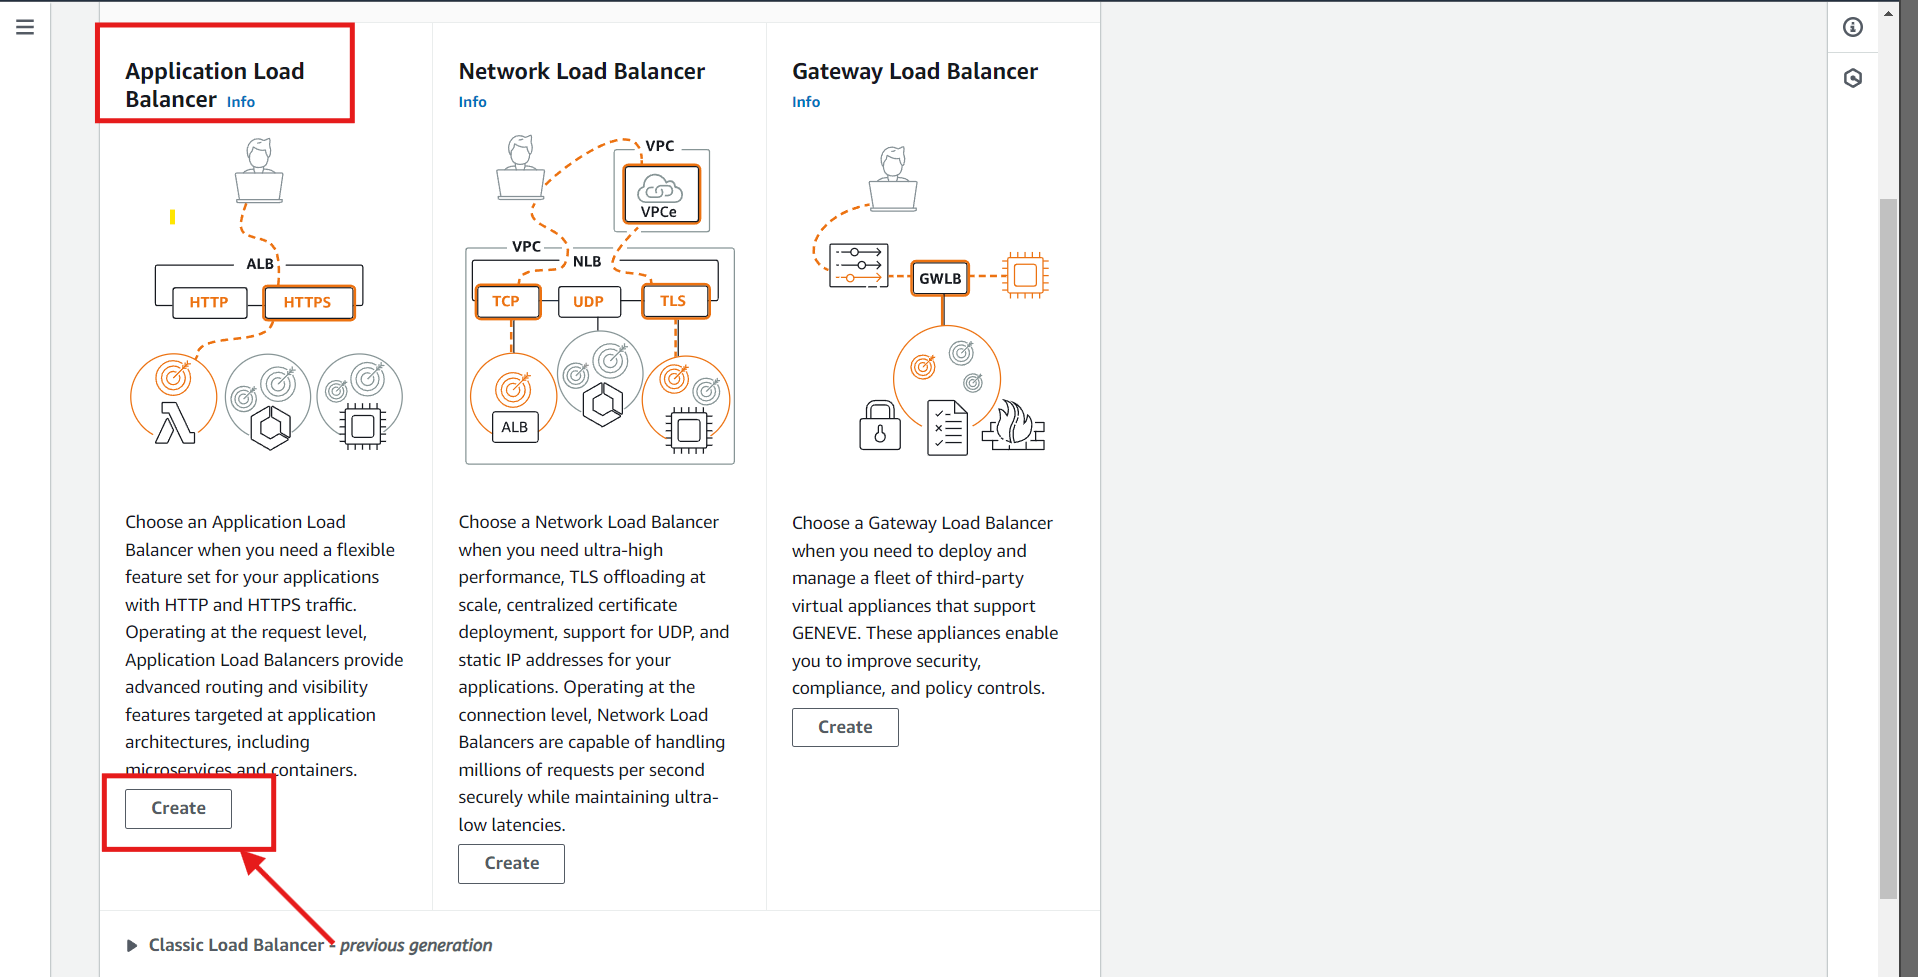
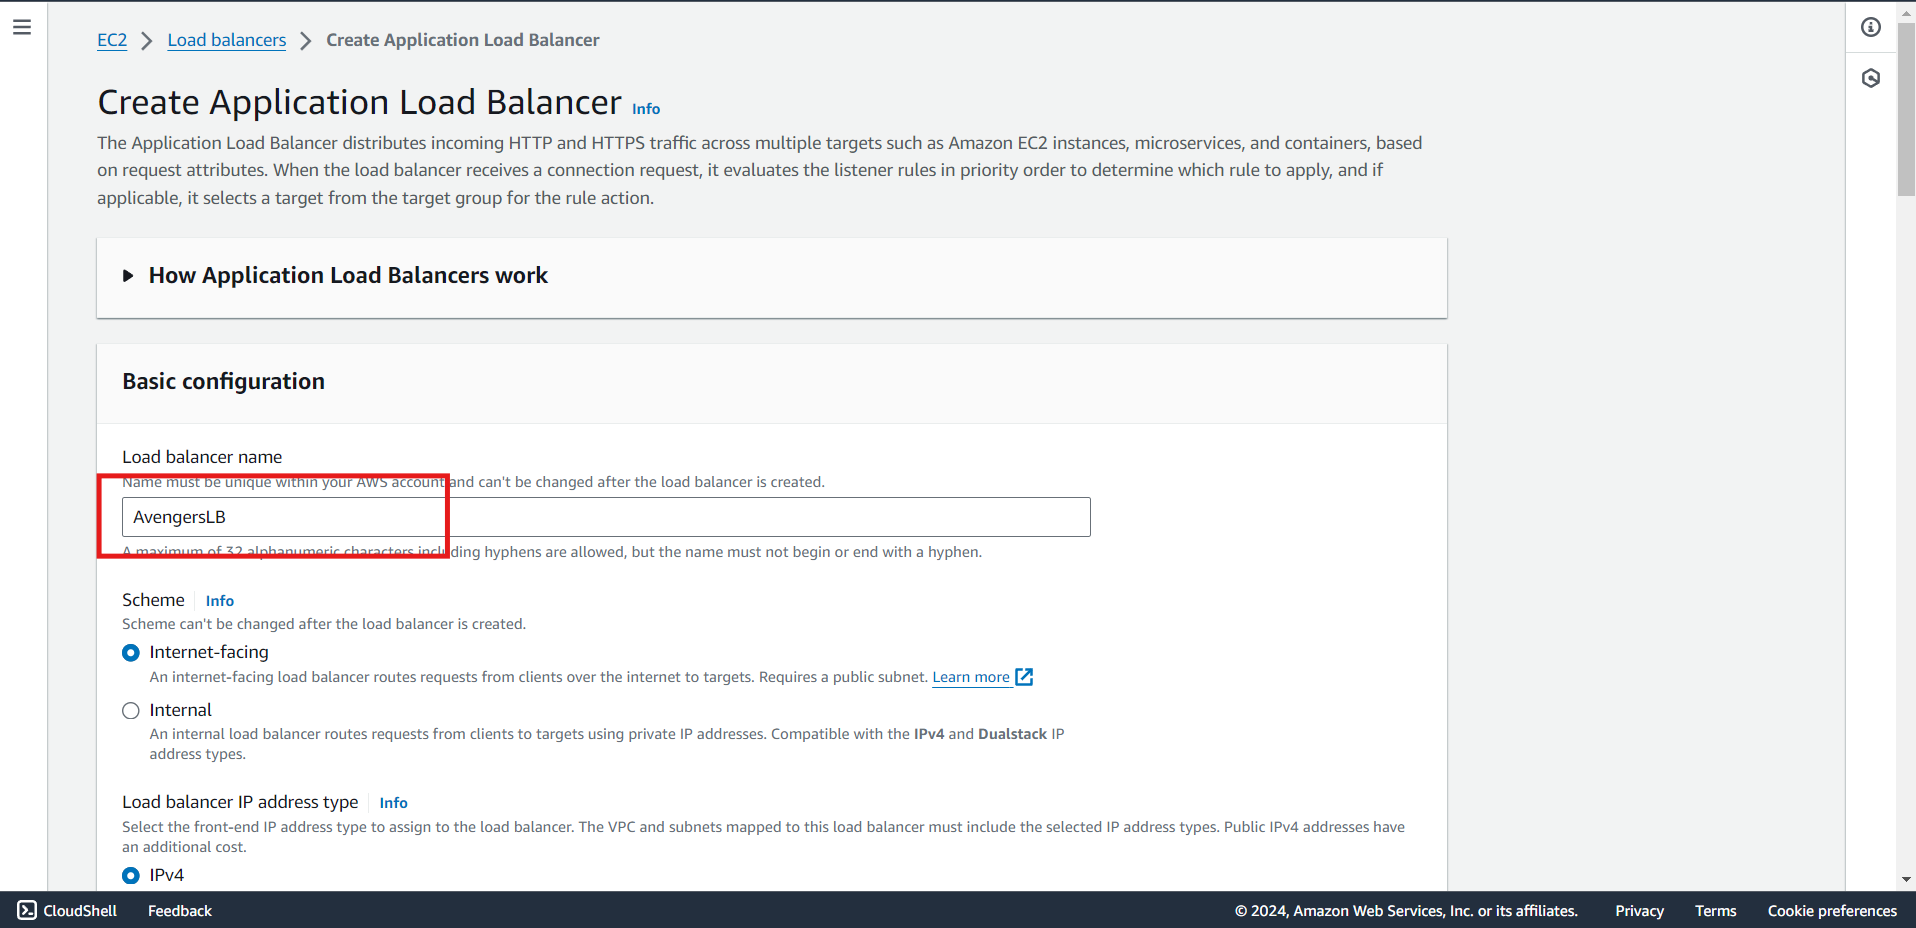
Select at least two Availability Zones.
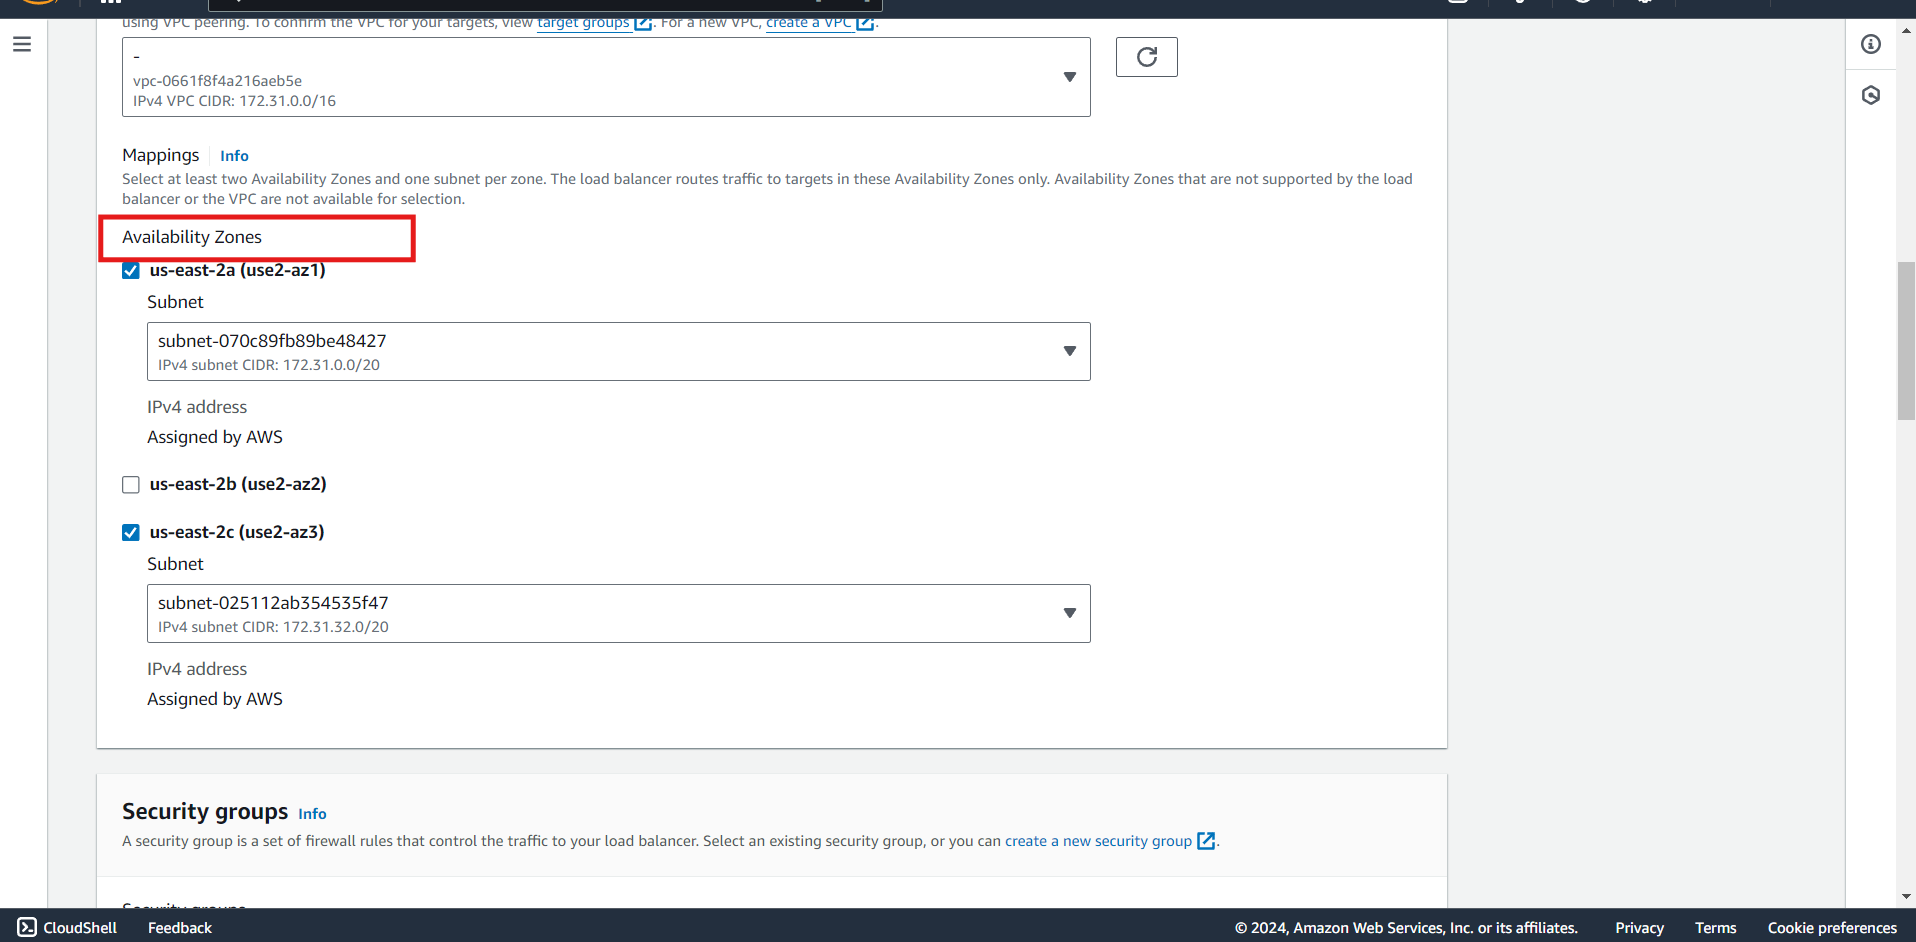
Make sure to add the security groups created earlier.

Add target group created earlier.
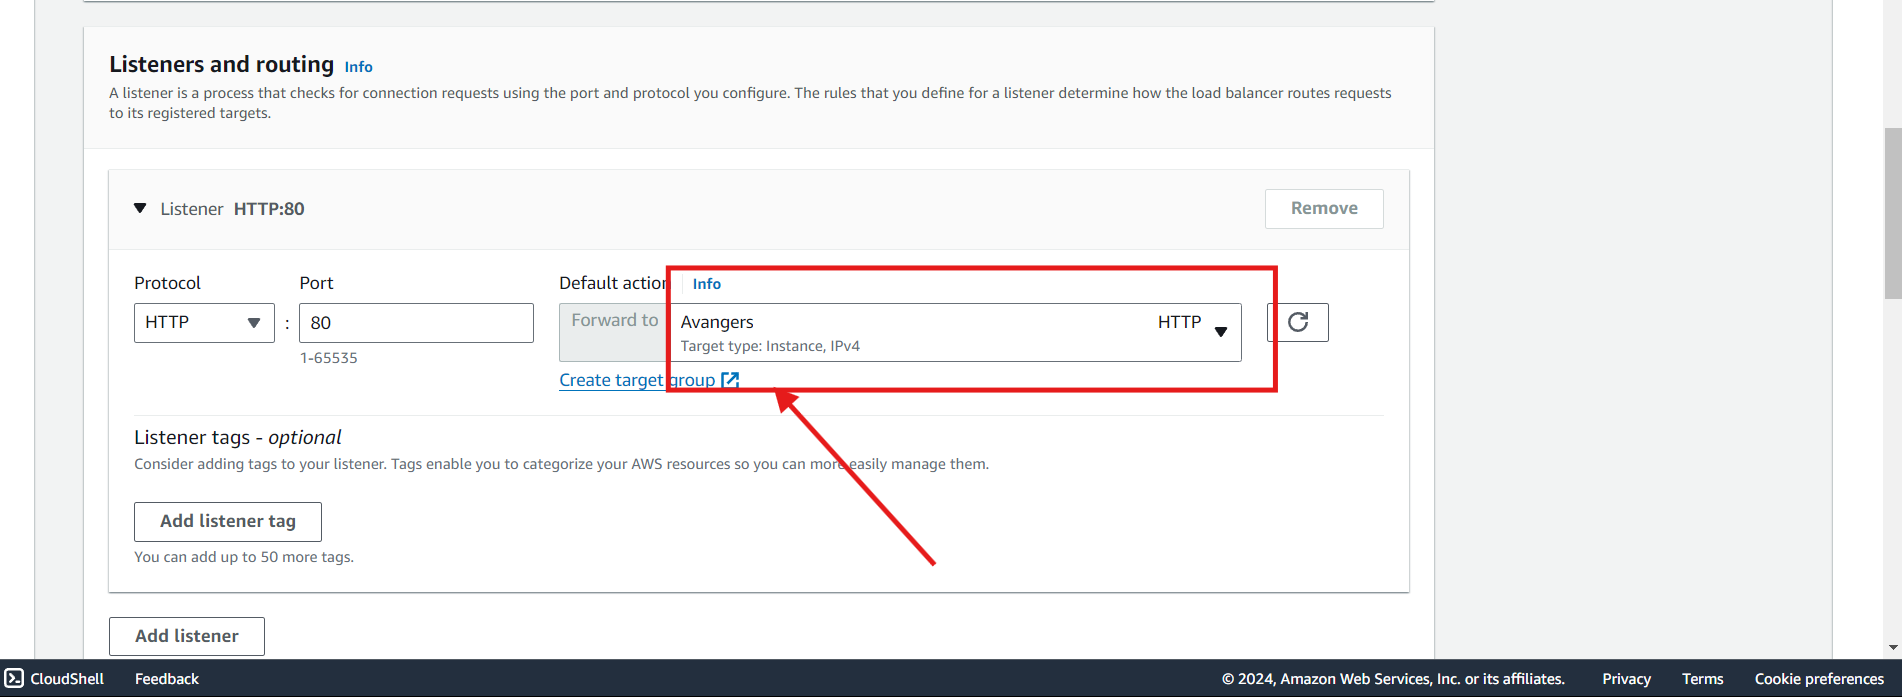

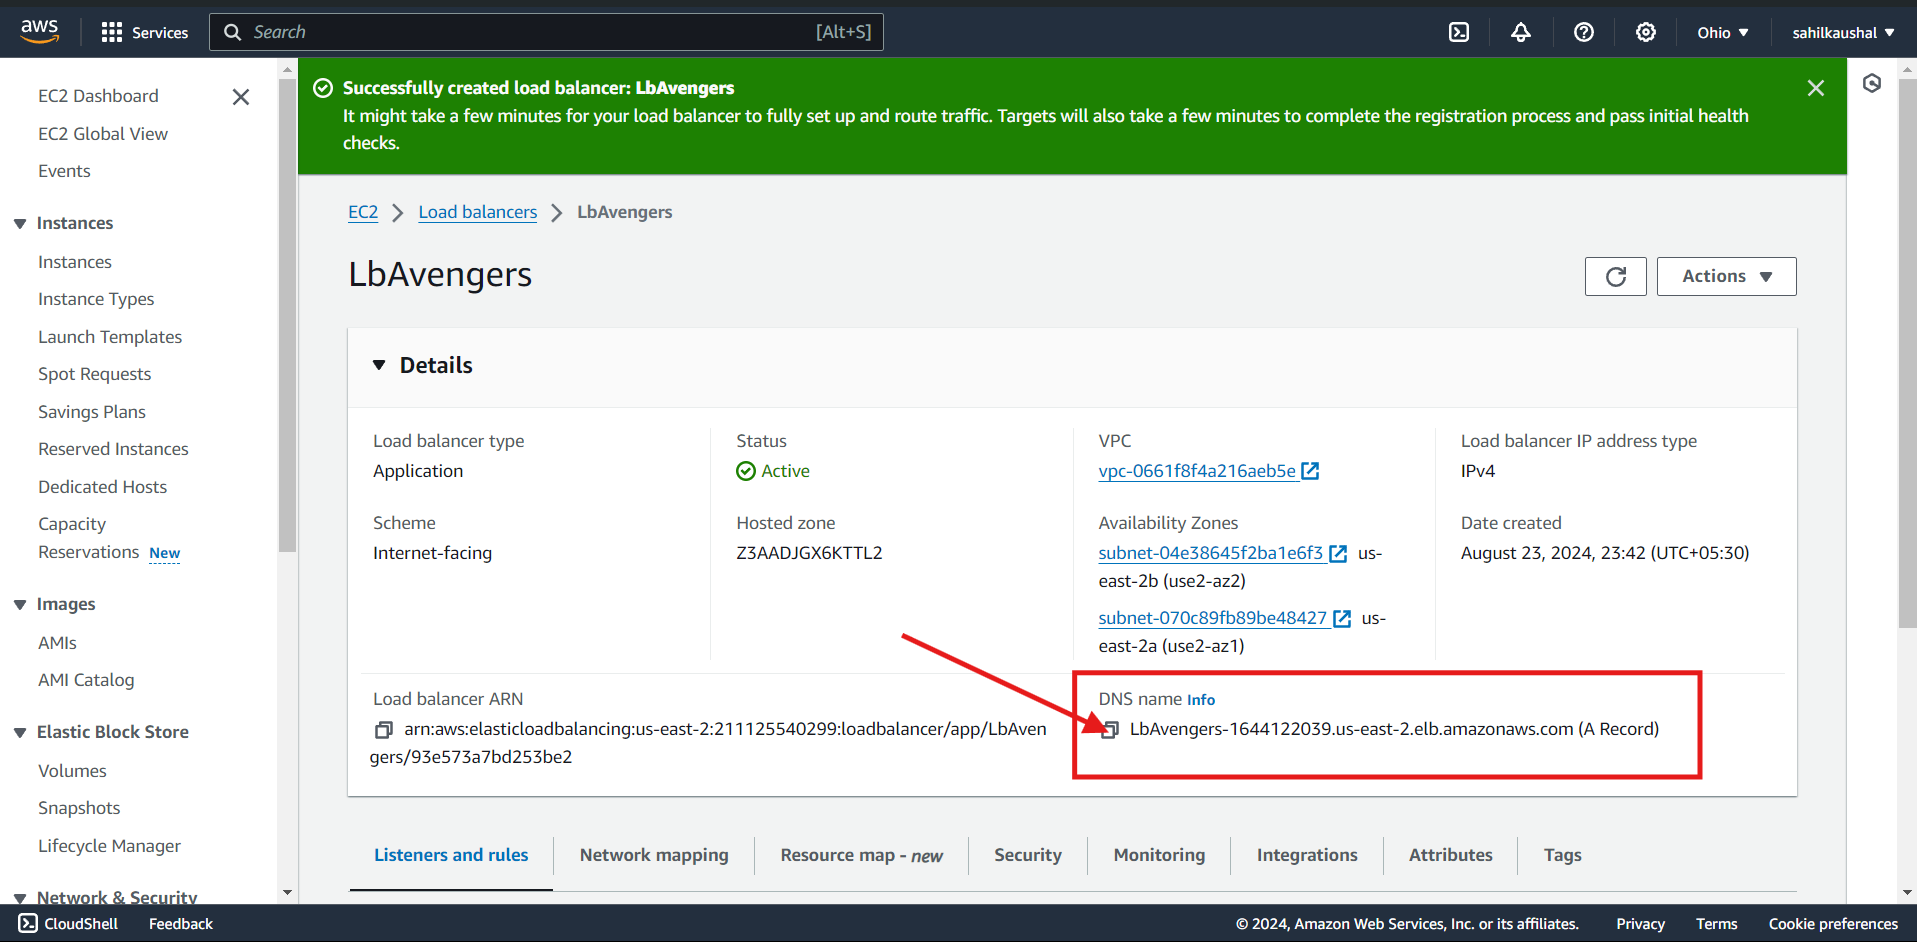
Load Balancer should be working fine.


Thank you for reading😉.
Subscribe to my newsletter
Read articles from Sahil Kaushal directly inside your inbox. Subscribe to the newsletter, and don't miss out.
Written by
