🥳Day 44: Deploying a Three-Tier Application on Kubernetes
 Ritesh Dolare
Hey there! 👋
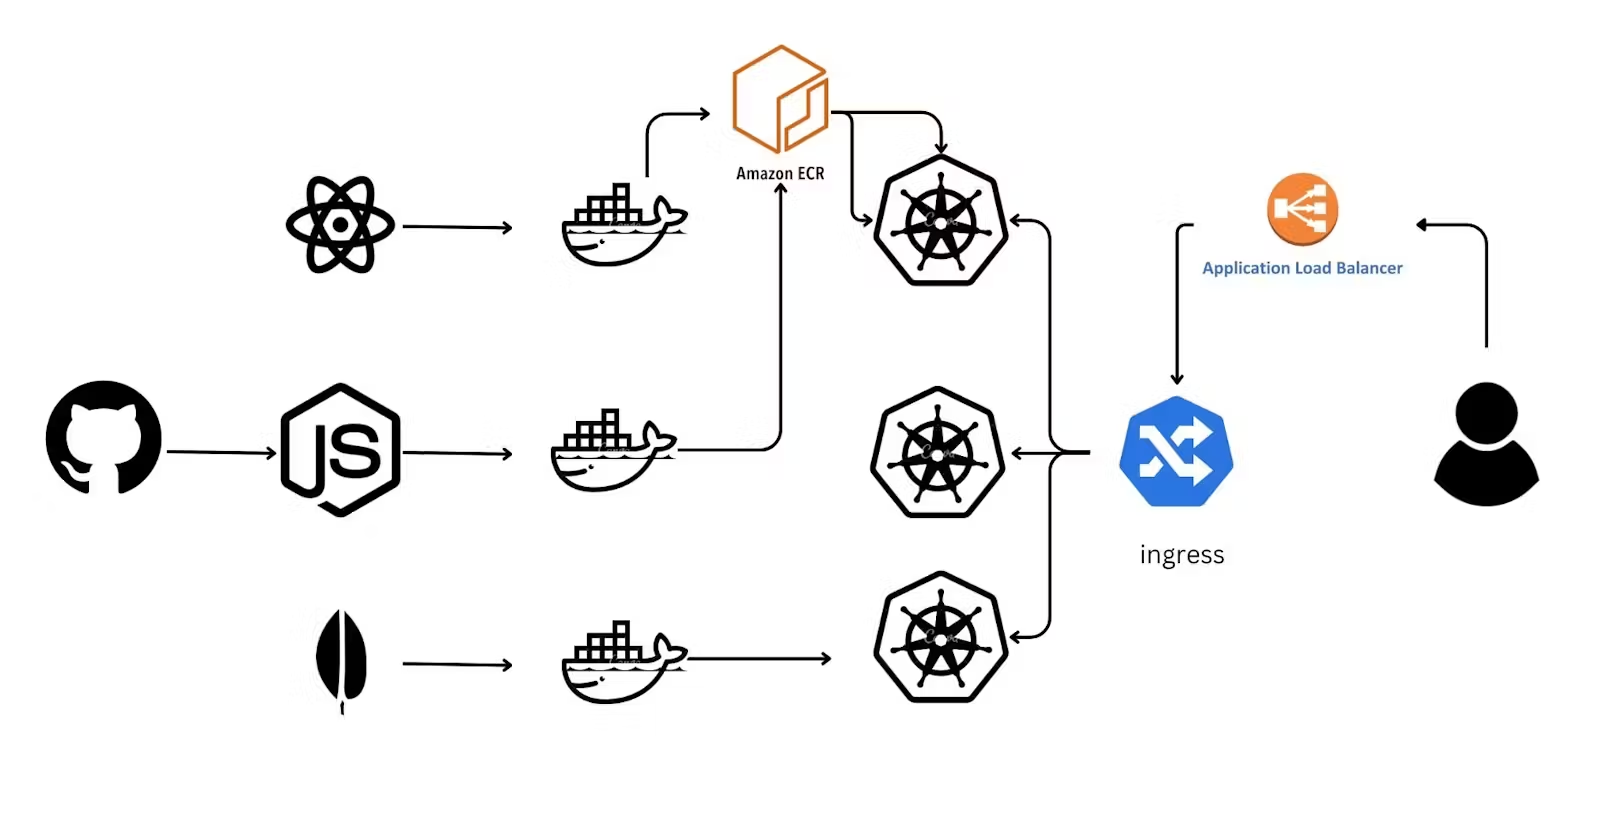
Today, we are diving into how to deploy a three-tier application on Amazon EKS (Elastic Kubernetes Service). We'll learn how to set up the frontend, backend, and database components, and get them running smoothly in the cloud using Kubernetes. 🚀
🤔What is a Three-Tier Application?
First, let’s understand what we mean by a "three-tier application." Imagine your favorite online store, where you browse products, add them to your cart, and make purchases. This store typically has three main parts:
Frontend (React.js): This is the part you see and interact with—the website interface, where you click buttons, view images, and enter information.
Backend (Node.js): Behind the scenes, this part processes your requests, like fetching product details or processing your payment. It’s the brain of the operation, handling all the logic.
Database (MongoDB): This is where all the data lives—information about products, user accounts, orders, etc. The backend communicates with the database to store and retrieve data as needed.
Together, these three components make up a "three-tier application." Each part plays a crucial role, and today, we learned how to deploy them on Kubernetes, a powerful platform for managing containerized applications.
✅STEP 1 : Setting up EC2 for Application Deployment
Sign in to the AWS Management Console
In the AWS Management Console, navigate to the "Services" dropdown and select "EC2".
In the EC2 Dashboard, click on the "Instances" in the left navigation pane.
Click the "Launch Instances" button.
View Instances:
Once the instance is launched, you can view it on the Instances page. It may take a few minutes for the instance to be in the running state.

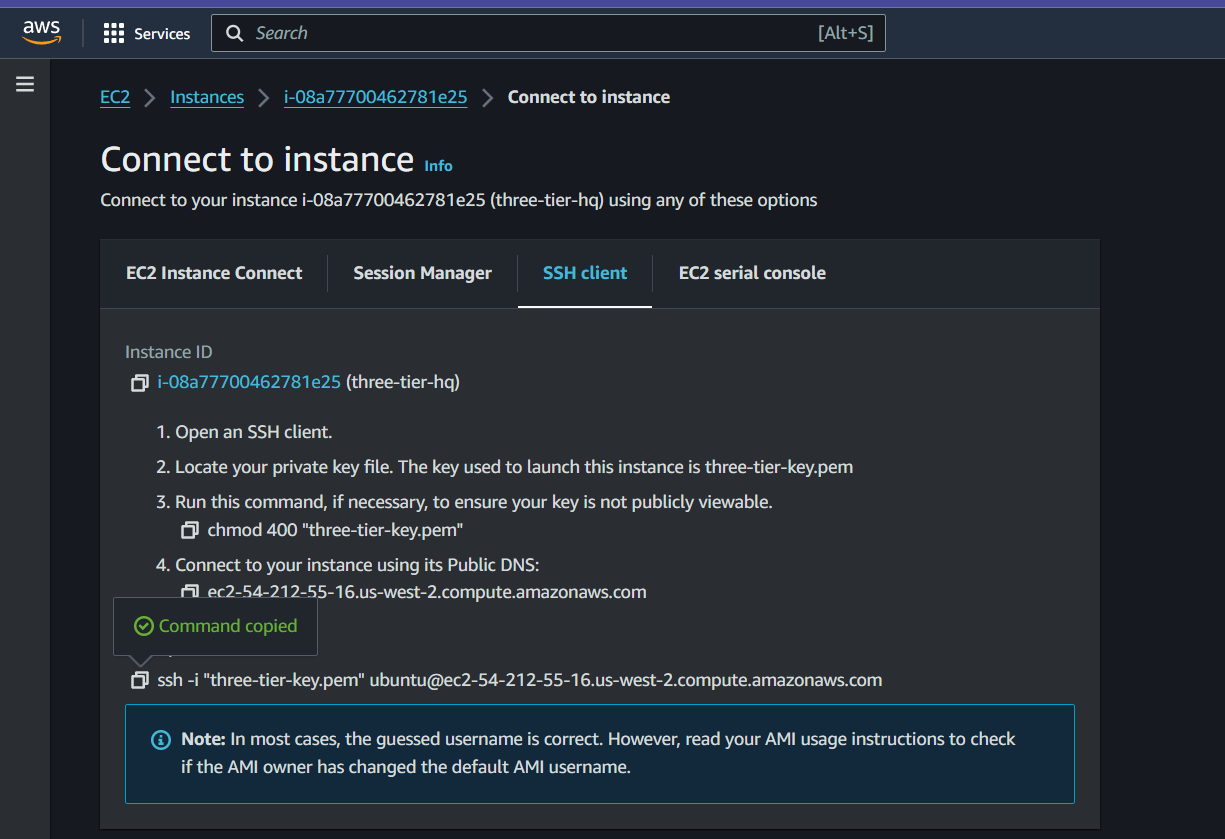
Connect using SSH:
Open a terminal on your local machine.
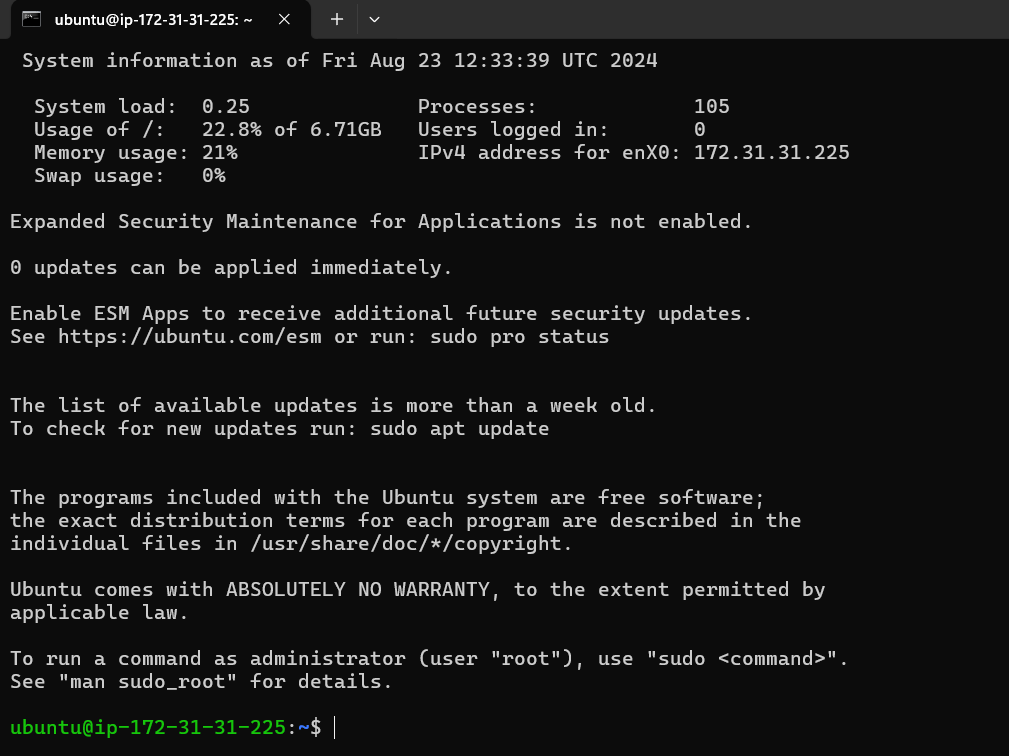
-- now connected to your EC2 instance via SSH
✅STEP 2: Log in to GitHub:
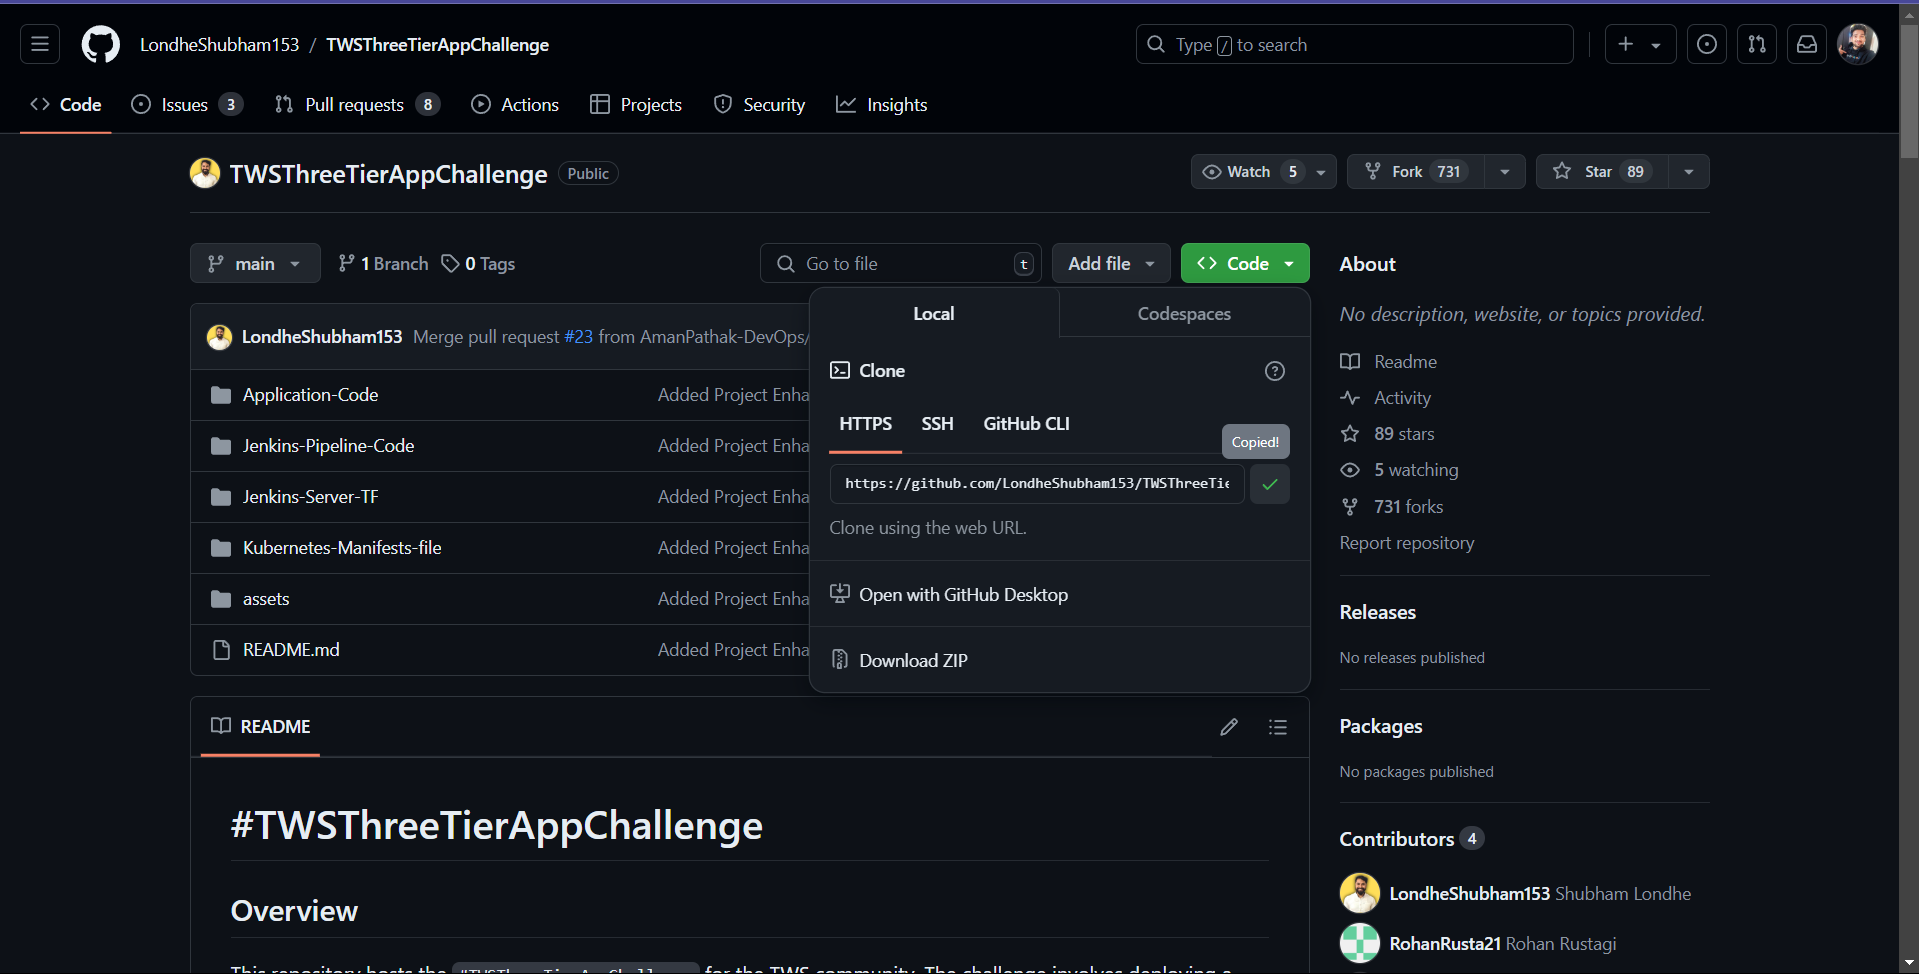
Copy Repository URL:
Open the GitHub repository containing your code.
Click on the "Code" button to reveal the repository URL.
Copy the URL provide
(it should look like github.com/username/repository.git).
Clone the Repository in terminal:
Use the git clone command followed by the copied URL:

✅STEP 3: Install Docker
sudo apt-get update
sudo apt install docker.io
docker ps


sudo chown $USER /var/run/docker.sock
Docker file
# Use the official Node.js 14 image as a base image
FROM node:14

# Set the working directory in the container
WORKDIR /app

# Copy the package.json and package-lock.json files to the container
COPY package*.json ./

# Install the application's dependencies inside the container
RUN npm install

# Copy the rest of the application code to the container
COPY .

# Expose Port to the container
EXPOSE 3000

# Specify the command to run when the container starts
CMD ["npm", "start"]
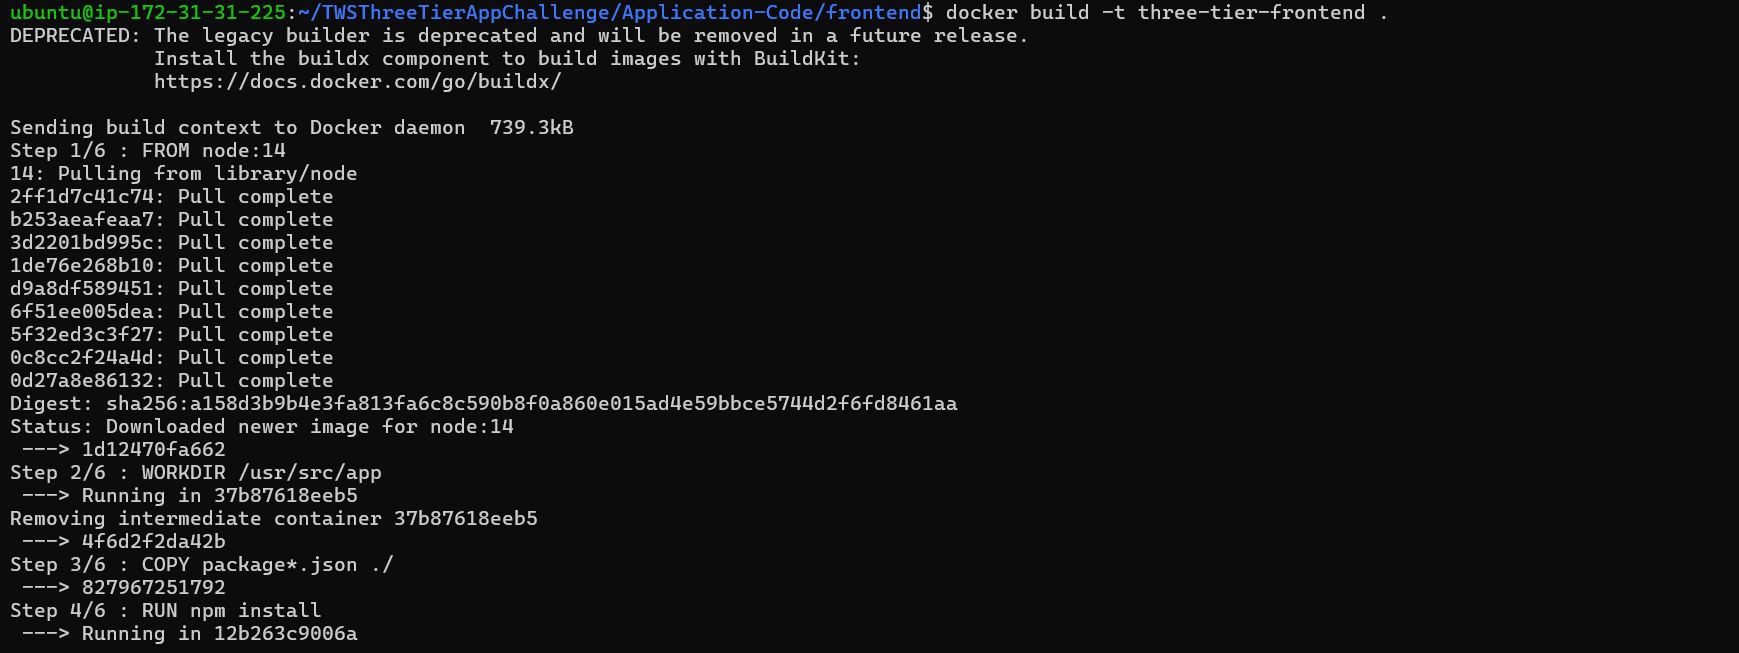
"Now, create a Docker container from the Docker image."
docker build -t threetierfrontend .
docker images

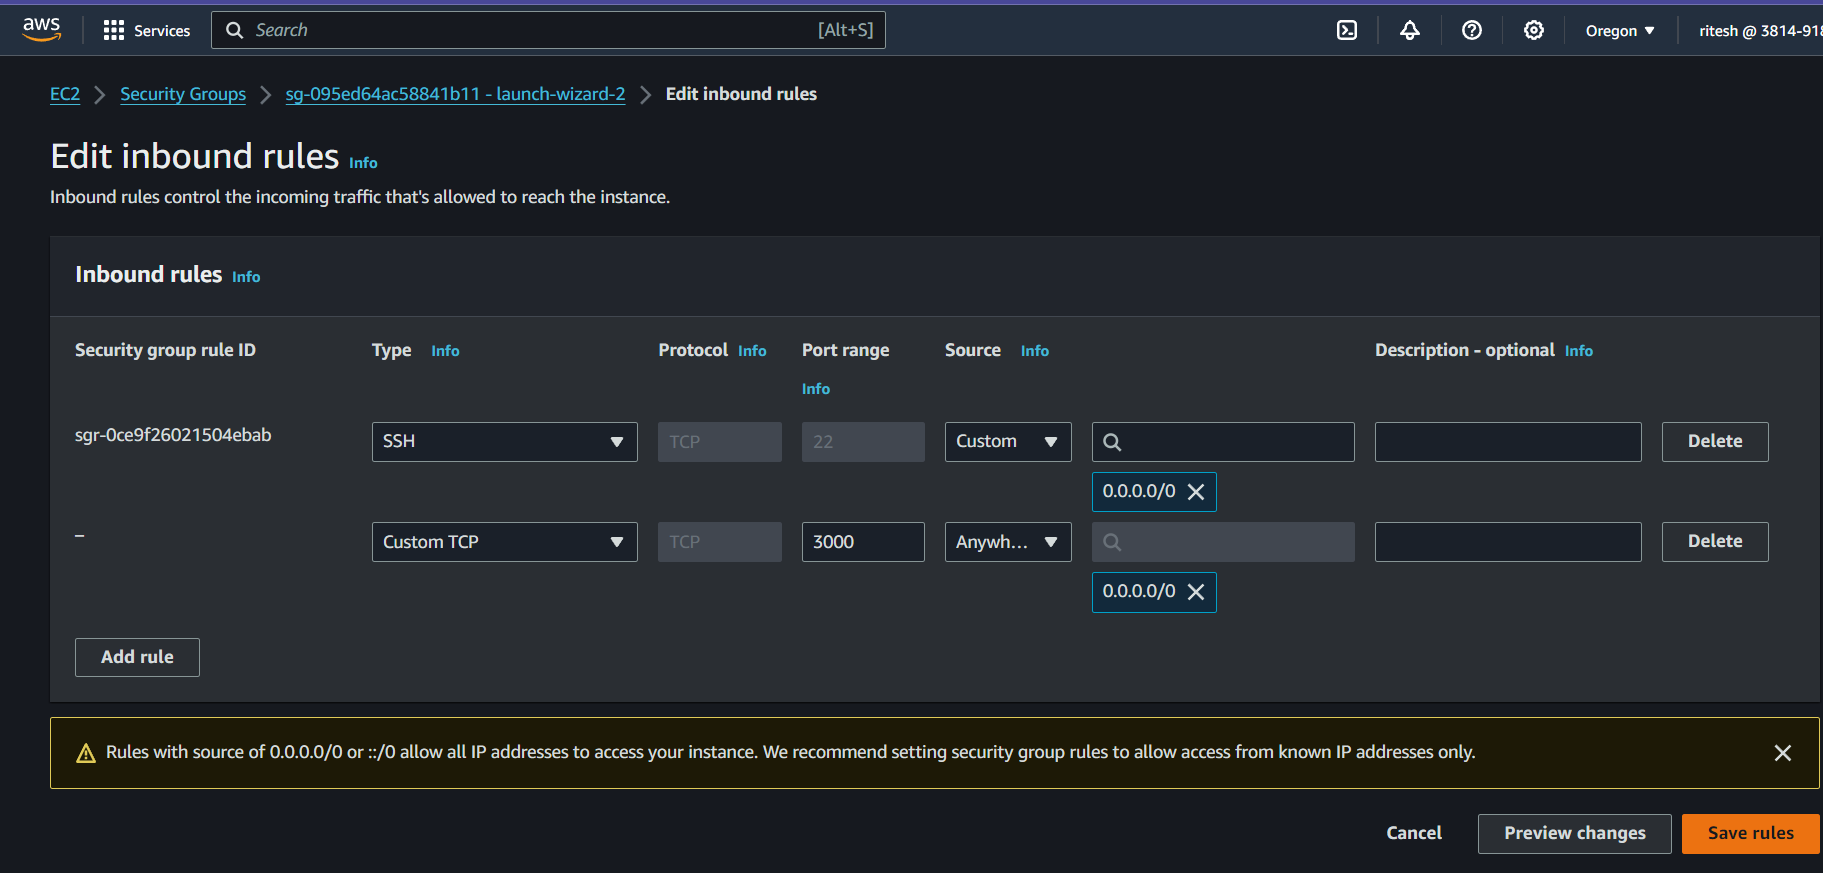
"Now, navigate to the instance's security group to enable traffic on port 3000."
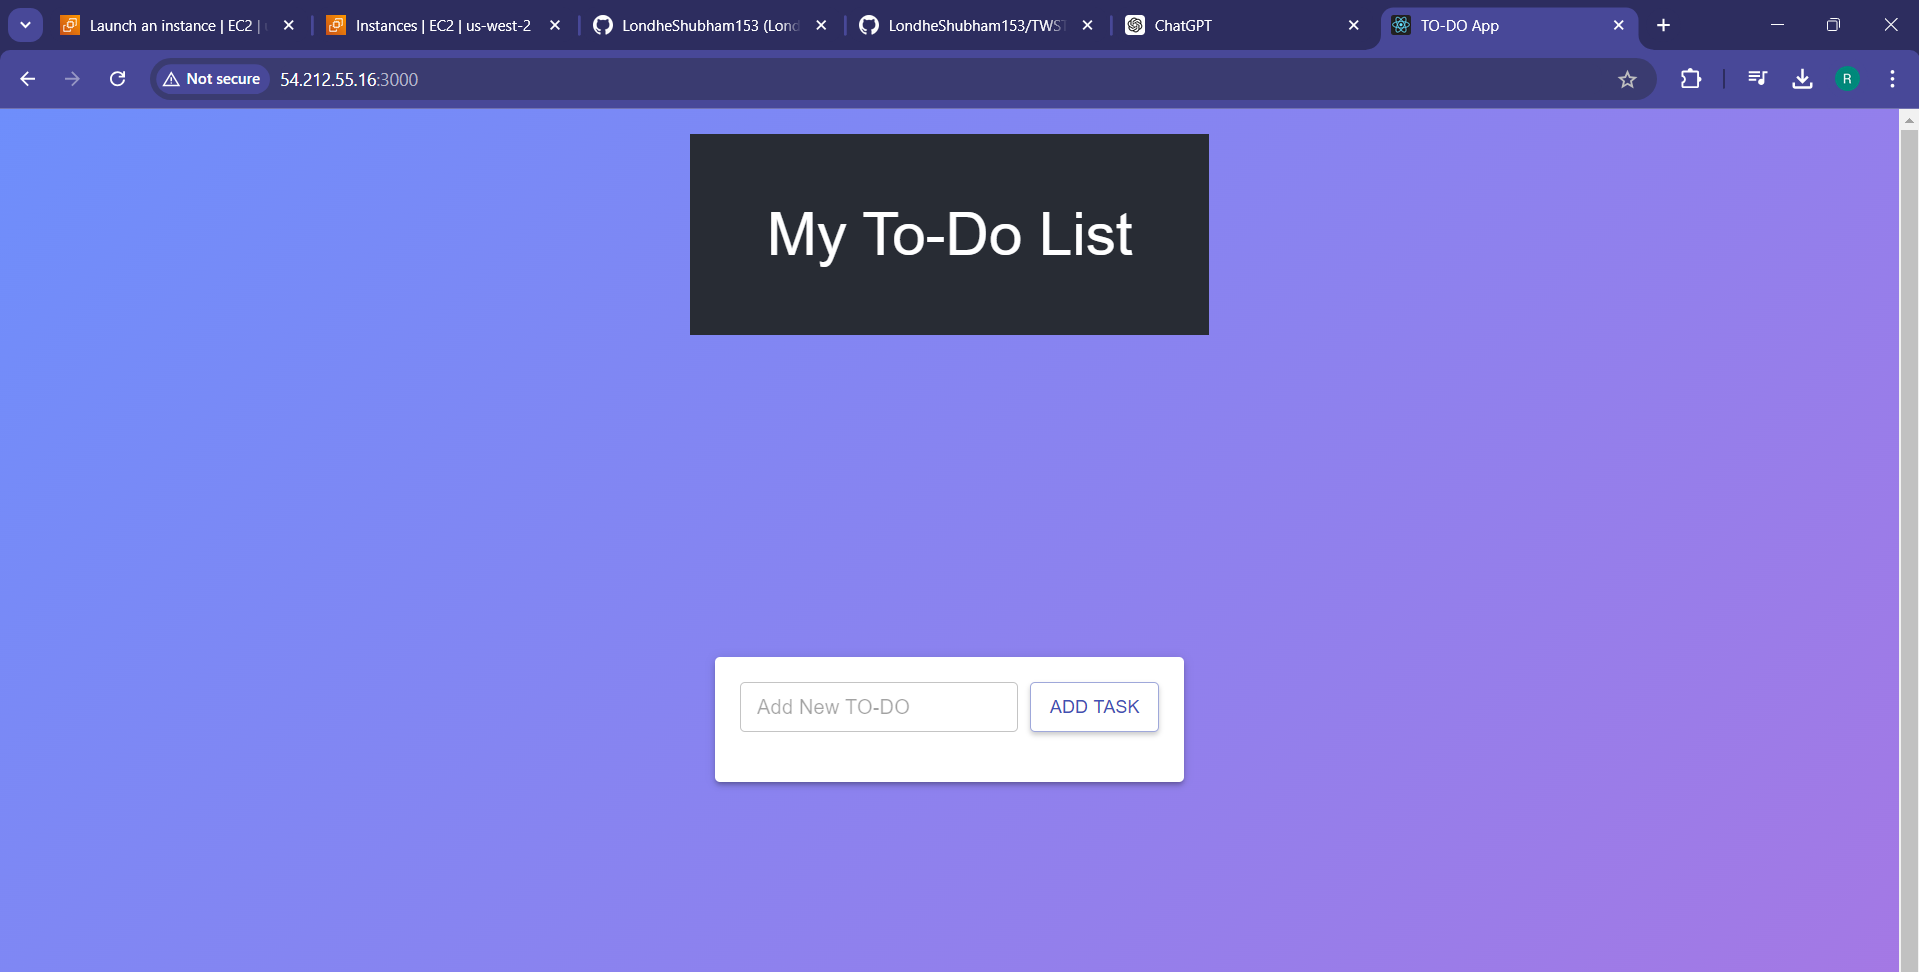
docker run -d -p 3000:3000 threetierfrontend:latest


"After creation, go to the browser.”
✅STEP 4: Install AWS CLI v2
“AWS CLI is a command-line tool for interacting with AWS services, providing developers and administrators a powerful way to manage AWS resources and automate tasks.
It supports cross-platform use, structured output formats, and enables scripting for resource management across various AWS services.”
Download the AWS CLI Installer:
Go to the official AWS CLI Website.
- Download the AWS CLI for LINUX Ubuntu users.

Run the following commands:
curl "https://awscli.amazonaws.com/awscli-exe-linux-x86_64.zip" -o "awscliv2.zip"Unzip the Installer:
- Install
unzipif it's not already installed:
- Install
        sudo apt update
        sudo apt install unzip
- Unzip the downloaded file
unzip awscliv2.zip
Run the Installer:
- Run the install script:
sudo ./aws/install
Verify the Installation:
- Check the AWS CLI version:
aws --version
Configure AWS CLI:
- In your terminal, type:
aws configure
✅STEP 5: IAM Configuration
AWS Identity and Access Management (IAM) is used to securely manage access to AWS services and resources. It allows you to create and control AWS users and groups, define fine-grained permissions, and enhance security by enforcing the principle of least privilege within your AWS environment.
Create a user with AdministratorAccess.
Generate Security Credentials: Access Key and Secret Access Key

"After specifying the user details, proceed to set permissions by navigating to 'Attach policies' and select 'AdministratorAccess' to grant the user full administrative privileges."

"Finally, select the 'Create user' button to complete the process."
"After creating the user, navigate to 'Security credentials,' click on 'Create access key' in the 'Access keys' section, and then select 'CLI' for programmatic access. After selecting 'CLI' in the 'Create access key' step, proceed to create the access key by clicking the 'Create access key' button."
"After obtaining the keys, open the terminal and run aws configure. Provide the access key and secret key when prompted."

✅STEP 6: Amazon Elastic Container Registry
(ECR) is a fully managed container registry service provided by AWS. It allows users to store, manage, and deploy Docker container images. ECR integrates with other AWS services, such as Amazon ECS (Elastic Container Service), making it easier to build, store, and deploy containerized applications in the AWS ecosystem.
Create a Repository:
In the ECR dashboard, click on the "Create repository" button.
Enter a repository name (e.g., my-docker-repo).
Optionally, add a tag for the repository.
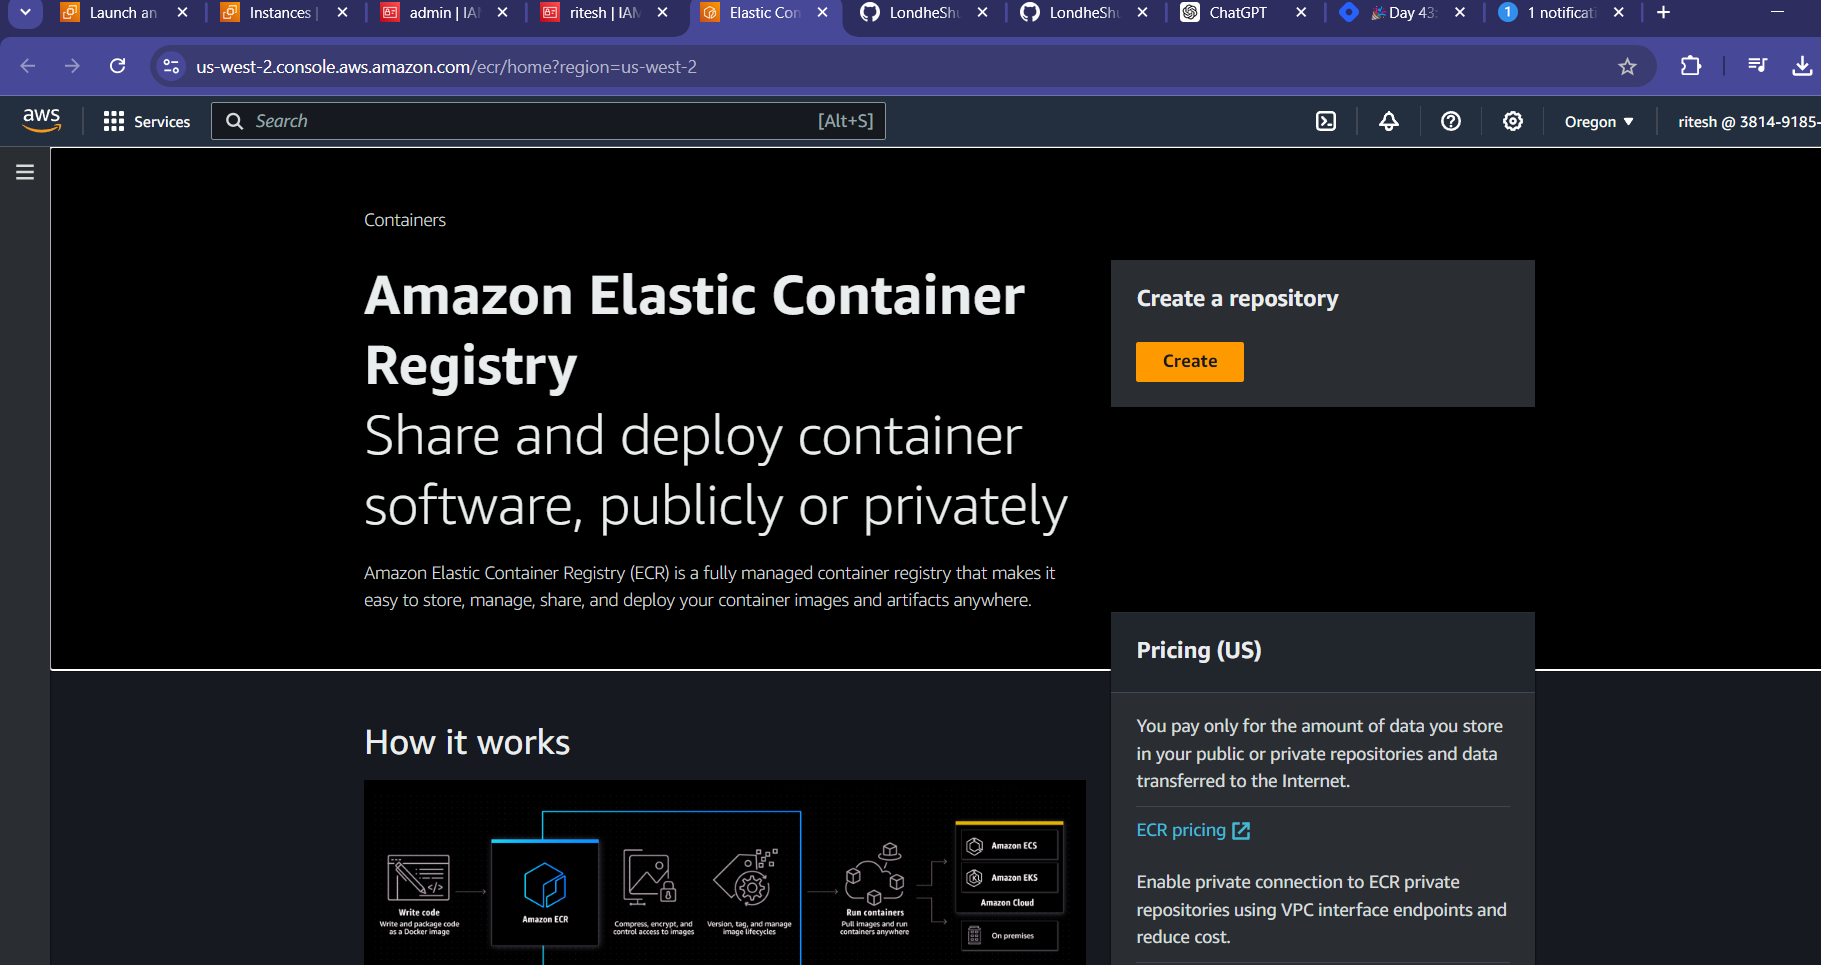
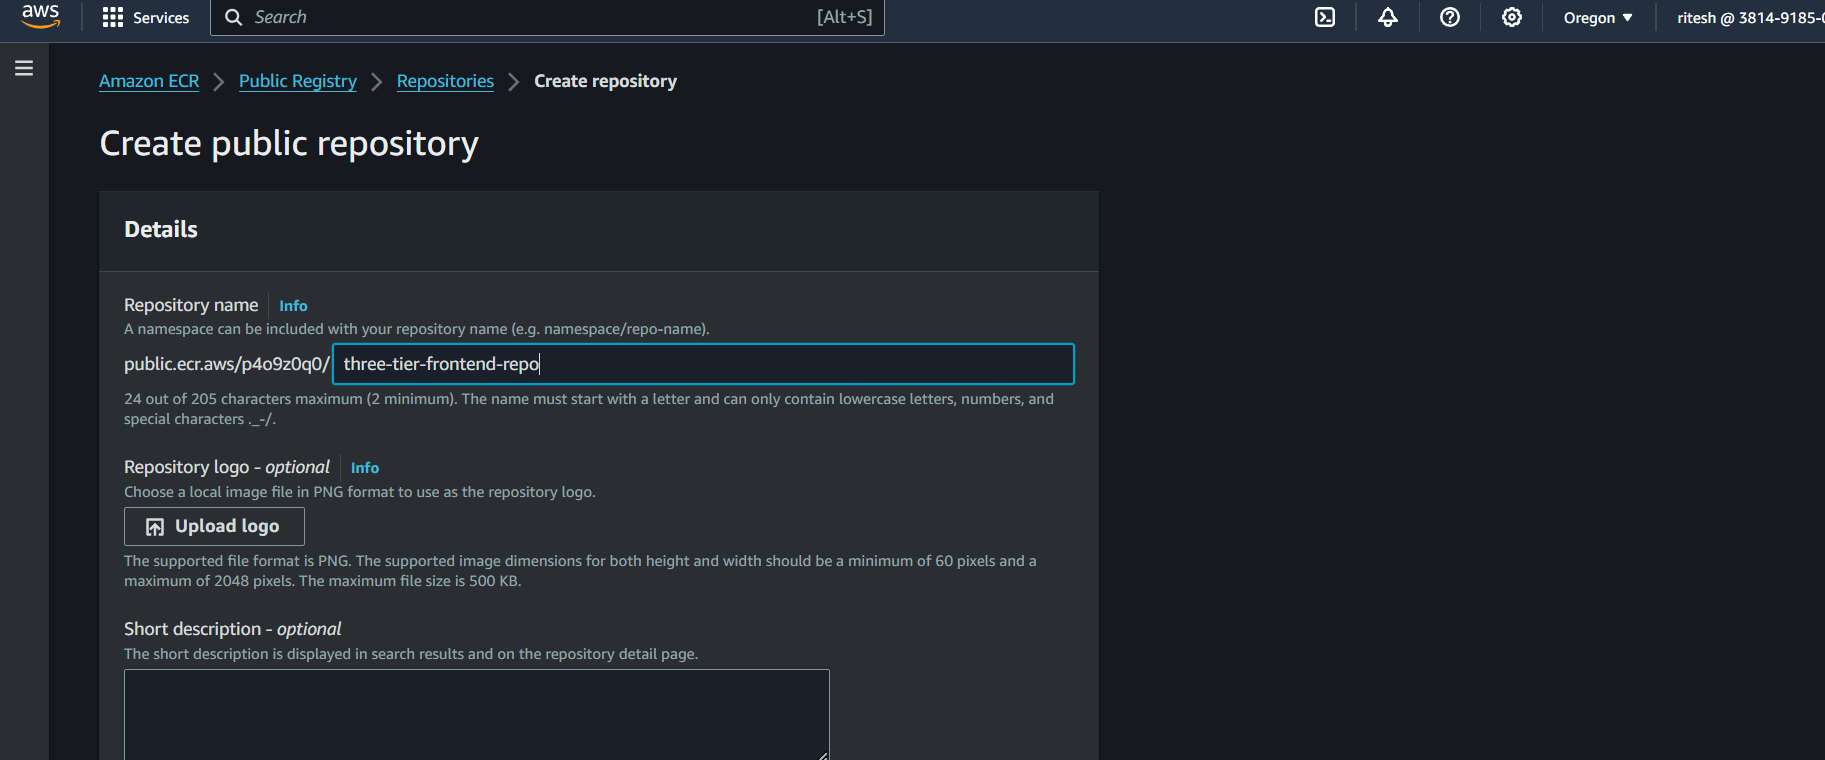

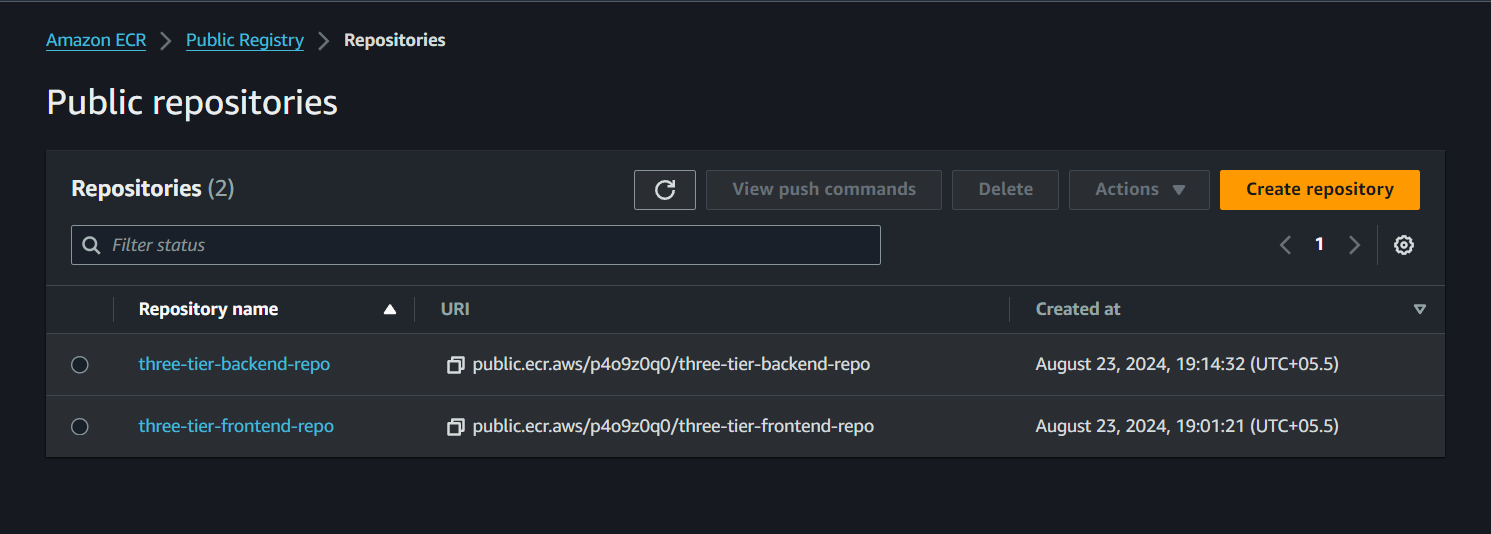
After creating the ECR repository, open the created repository.
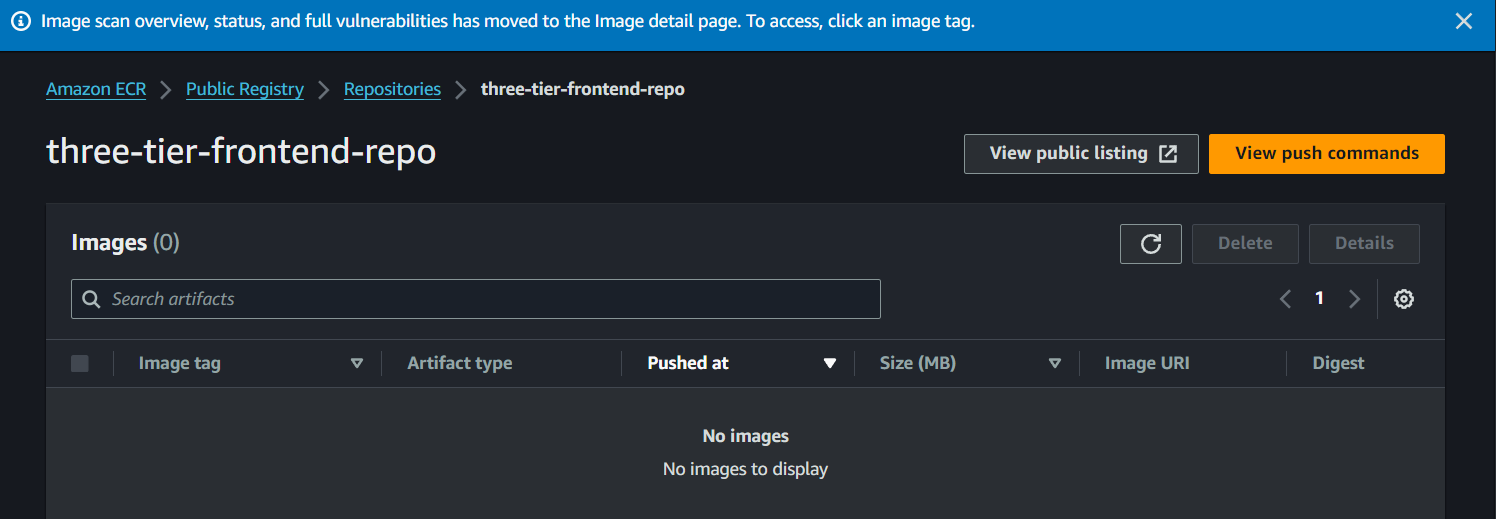
The repository is currently empty as no images have been pushed to it.
To get the push command, click the "View push commands" button in the upper-right corner and follow the instructions provided.
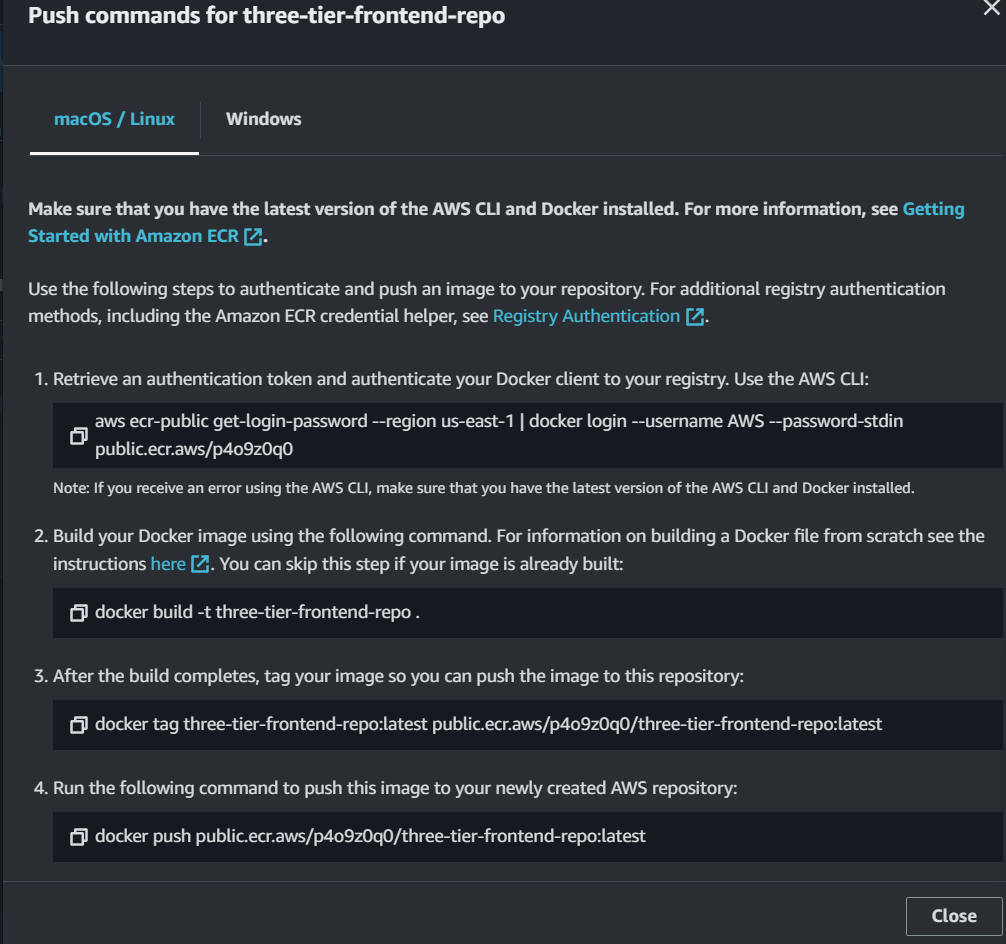
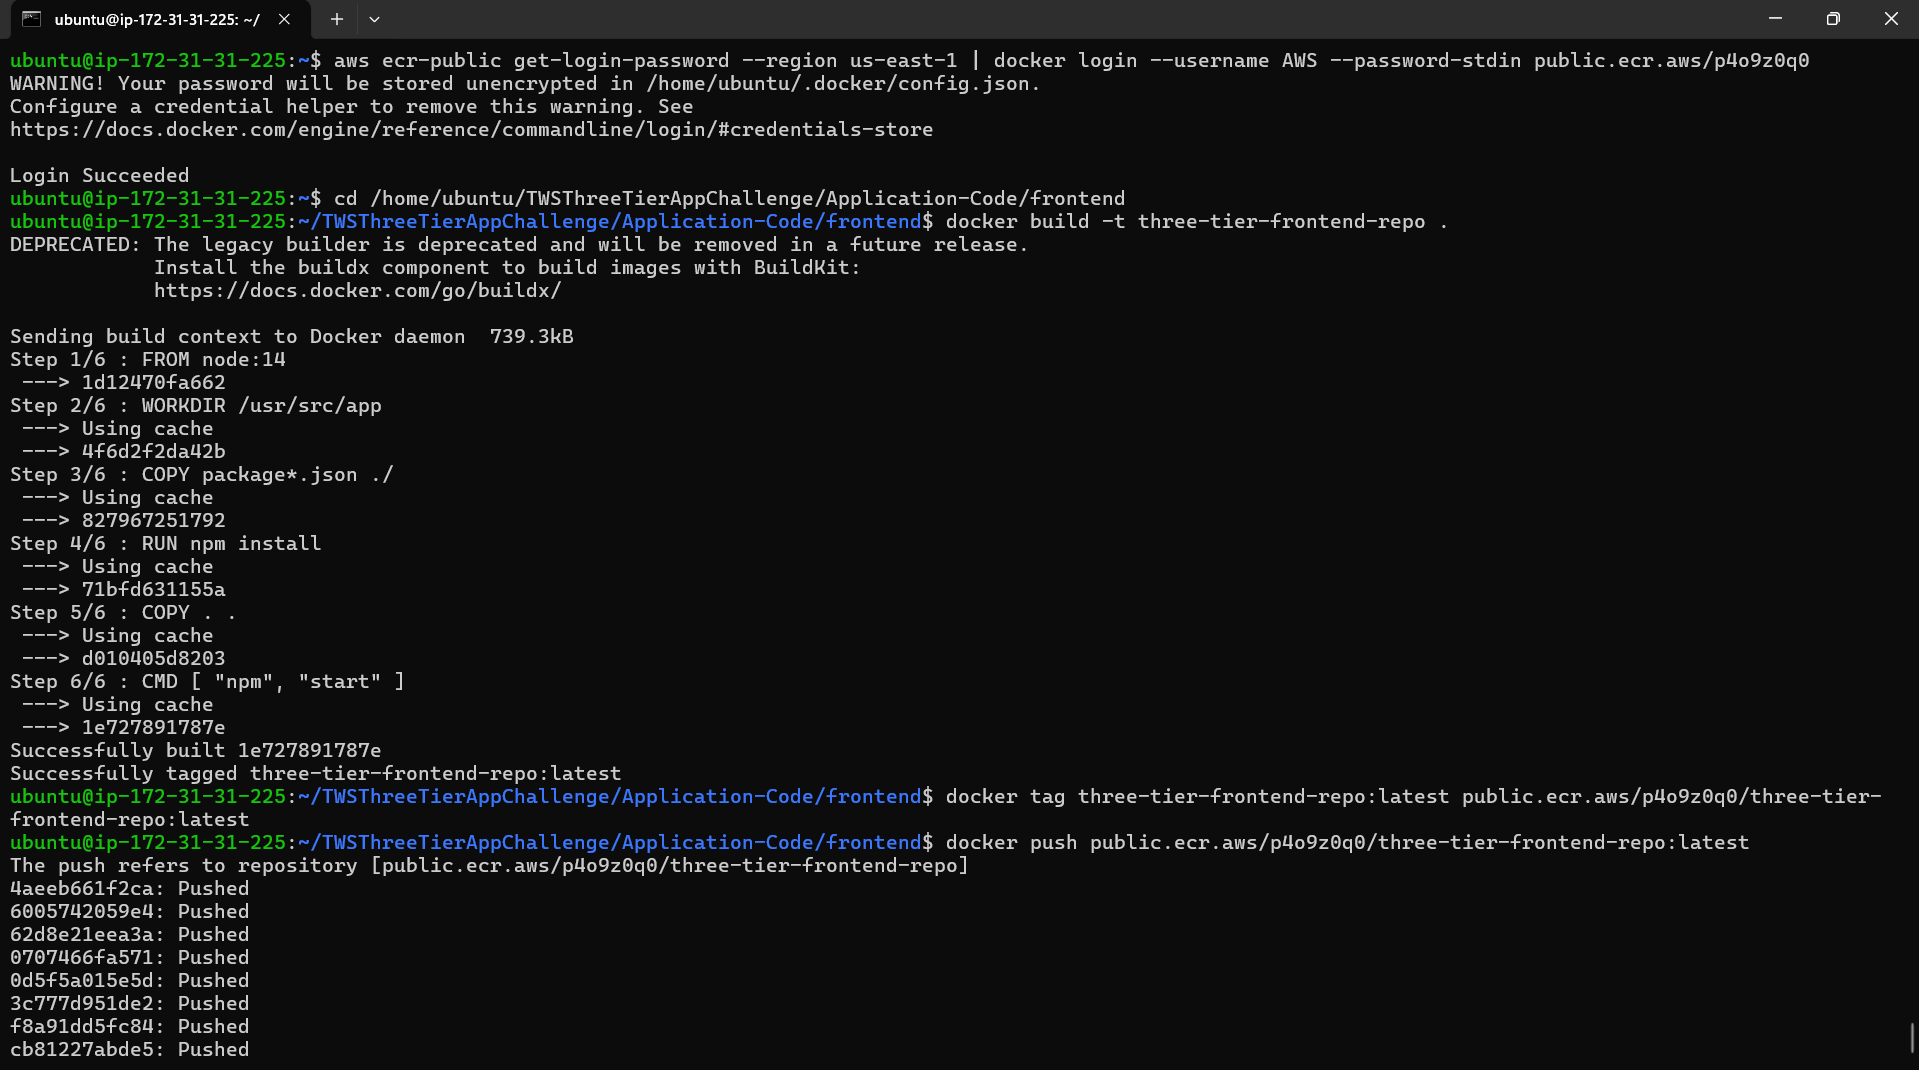
After successfully pushing the image to ECR, you should see the image listed in the ECR repository.
✅STEP 7:Backend Docker file
# Use the official Node.js 14 image as a base image
FROM node:14

# Set the working directory in the container
WORKDIR /app

# Copy the package.json and package-lock.json files to the container
COPY package*.json ./

# Install the application's dependencies inside the container
RUN npm install

# Copy the rest of the application code to the container
COPY . .

# Expose Port to the container
EXPOSE 8080

# Specify the command to run when the container starts
CMD ["node", "index.js"]

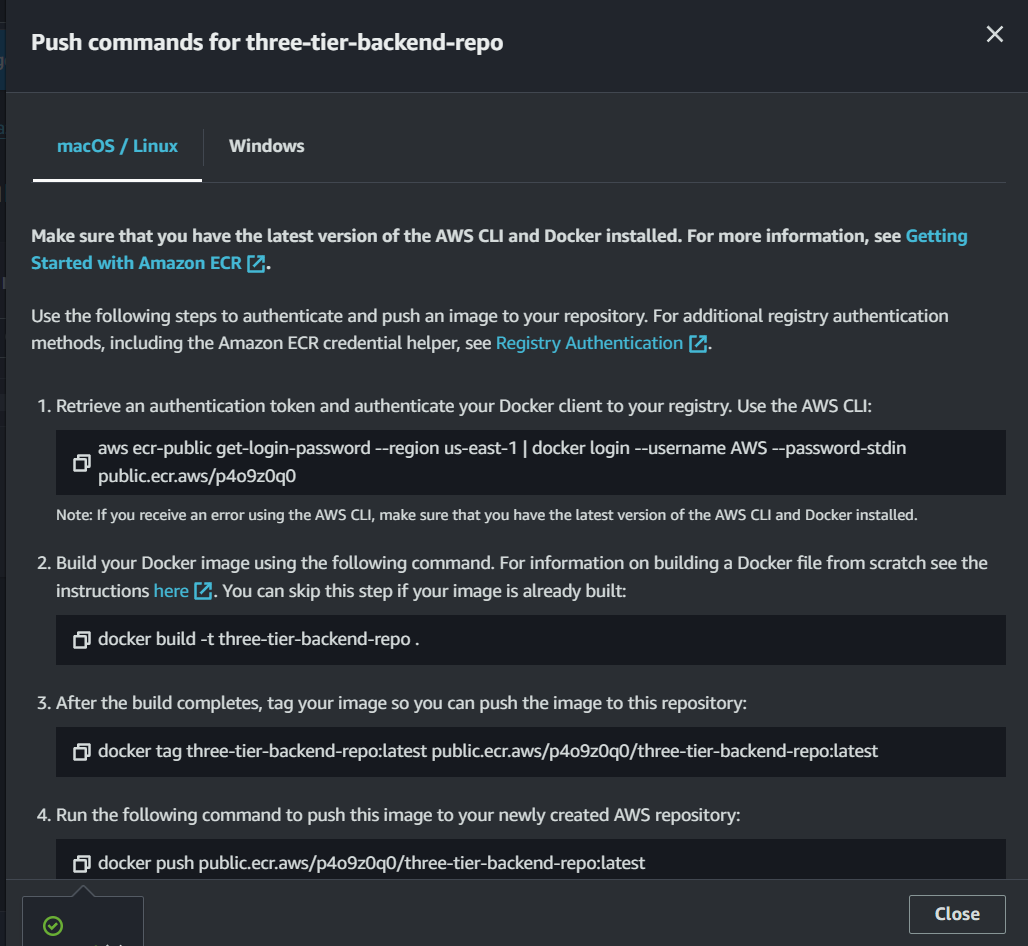
To push the three-tier-backend Docker image to Amazon ECR, follow these steps:

The docker logs command is used to view the logs generated by a running Docker container.
“The error indicates that there's an issue with connecting to the MongoDB database, which can lead to errors in database interactions within the application.”
✅STEP 8: Install kubectl and eksctl
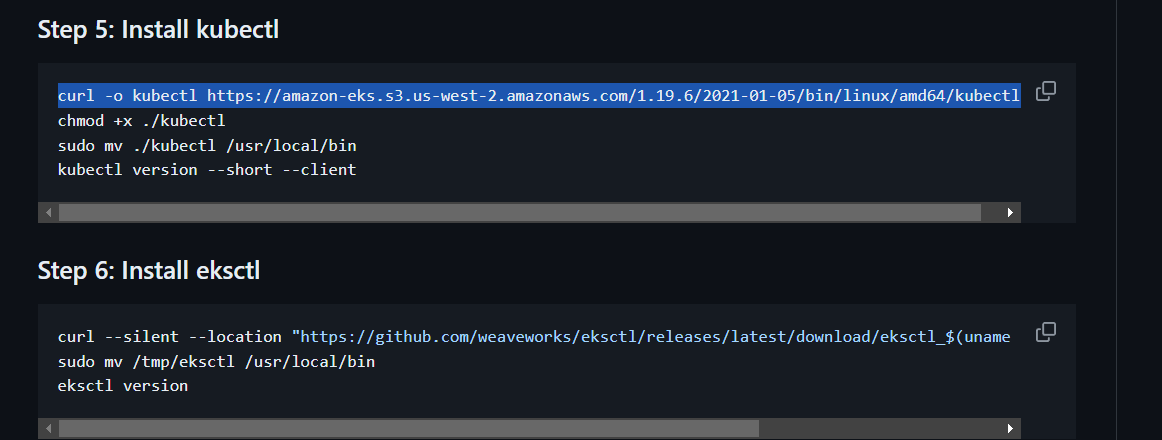


# Download kubectl binary
curl -o kubectl https://amazon-eks.s3.us-west-2.amazonaws.com/1.19.6/2021-01-05/bin/linux/amd64/kubectl

# Make kubectl binary executable
chmod +x ./kubectl

# Move kubectl binary to /usr/local/bin
sudo mv ./kubectl /usr/local/bin

# Check kubectl version
kubectl version --short --client
# Download eksctl binary
curl --silent --location "https://github.com/weaveworks/eksctl/releases/latest/download/eksctl_$(uname -s)_amd64.tar.gz" | tar xz -C /tmp

# Move eksctl binary to /usr/local/bin
sudo mv /tmp/eksctl /usr/local/bin

# Check eksctl version
eksctl version
✅STEP 09: Setup EKS Cluster

eksctl create cluster --name three-tier-cluster --region us-west-2 --node-type t2.medium --nodes-min 2 --nodes-max 2
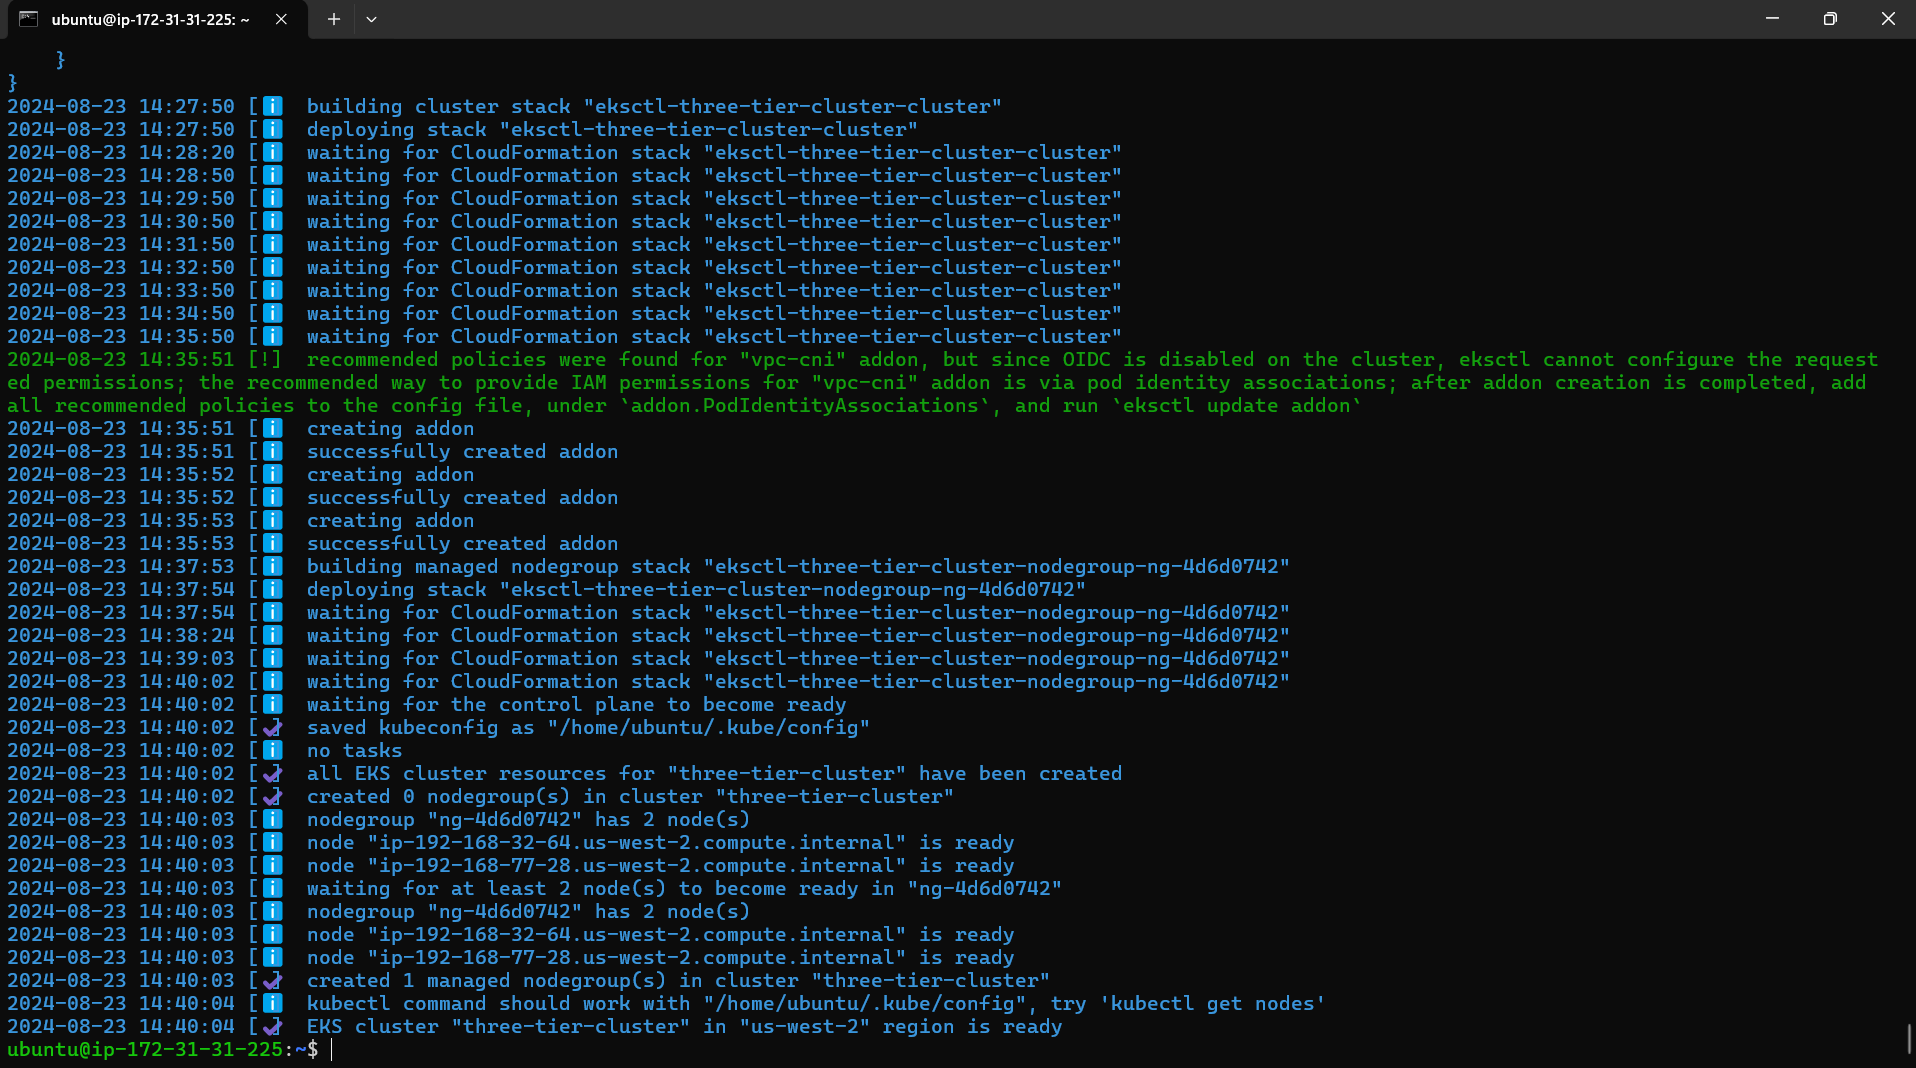
"This information can be viewed in the AWS CloudFormation console."
Amazon Elastic Kubernetes Service(EKS), is a managed Kubernetes service provided by Amazon Web Services (AWS). Kubernetes is an open-source container orchestration platform that automates the deployment, scaling, and management of containerized applications.
"Here, two nodes are created in the Kubernetes cluster."
kubectl get nodes


Database
✅STEP 10: Create namespace and Run Manifests files
In Kubernetes, a namespace is a virtual environment that organizes resources, separating teams or projects within the same cluster. It enhances resource management, isolation, and overall organization.
kubectl create namespace workshop

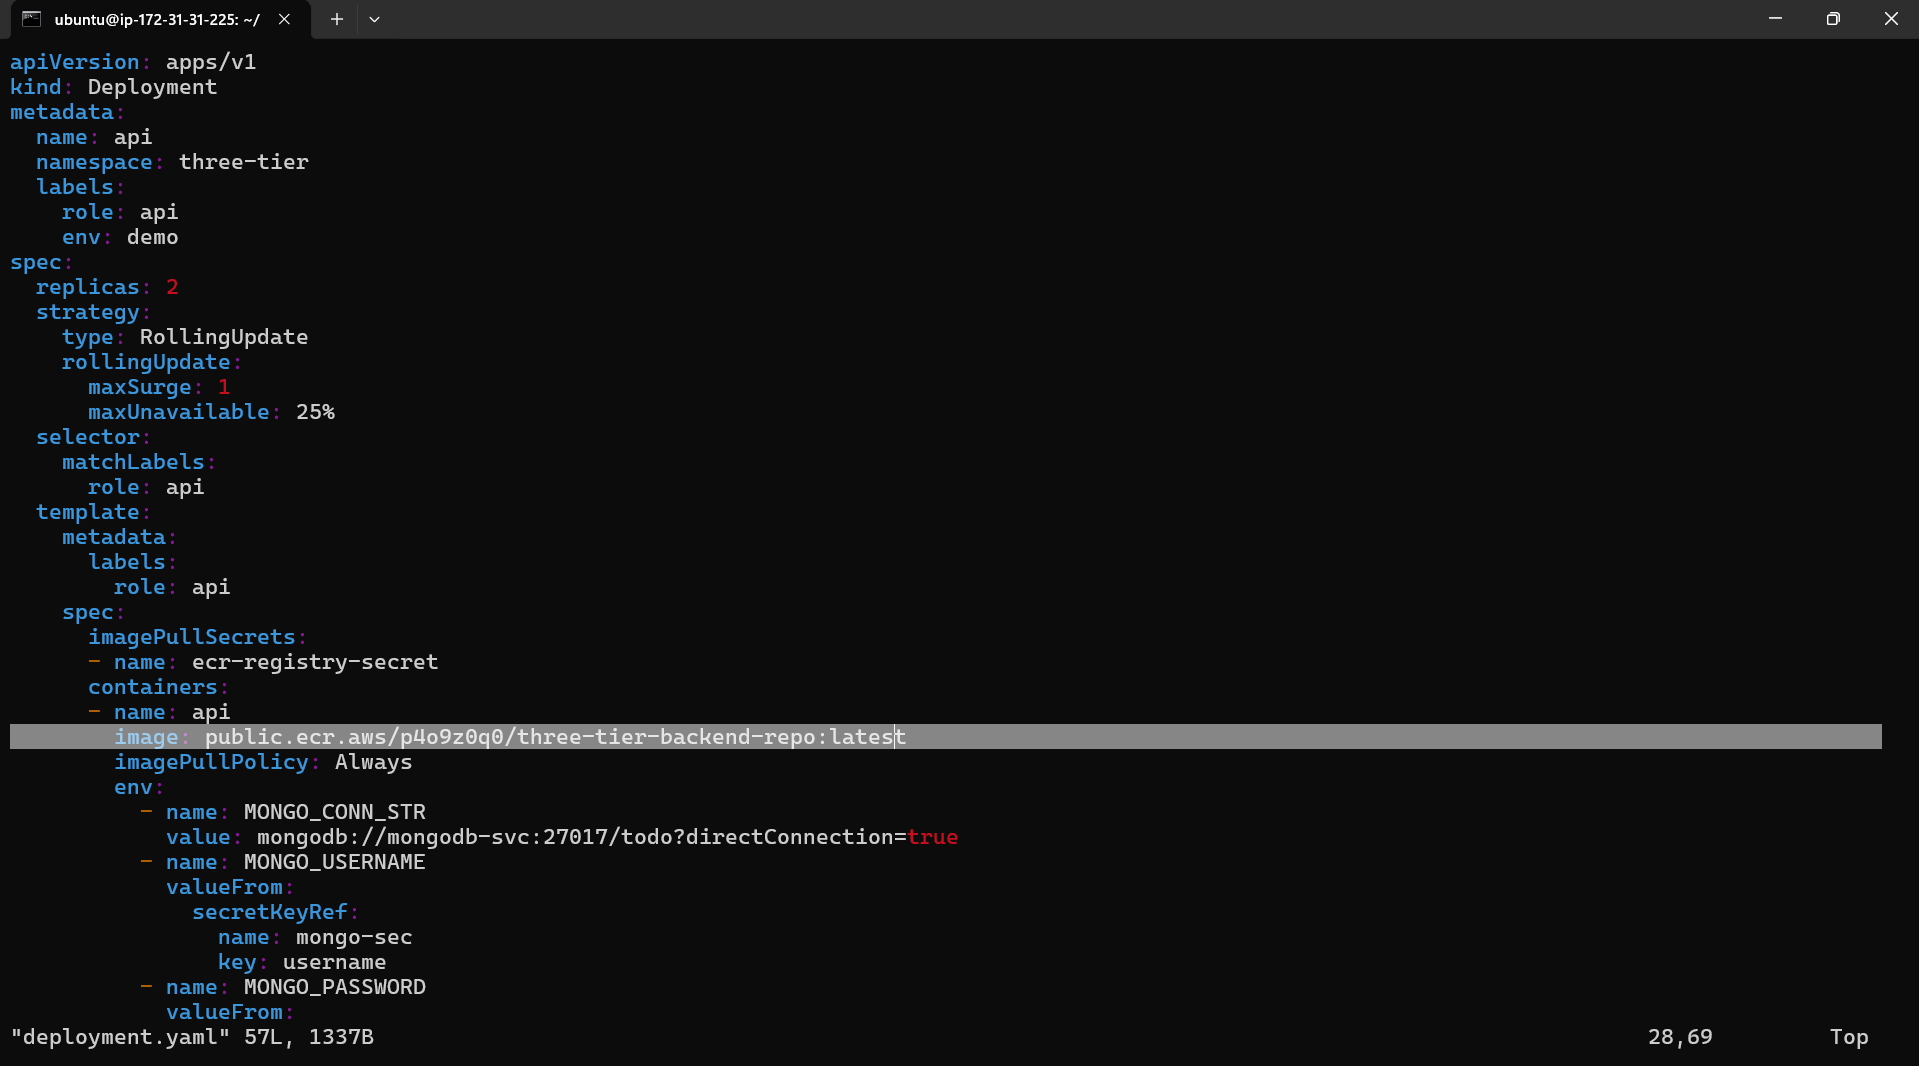
backend-deployment.yaml
apiVersion: apps/v1
kind: Deployment
metadata:
  name: api
  namespace: workshop
  labels:
    role: api
    env: demo
spec:
  replicas: 1
  strategy:
    type: RollingUpdate
    rollingUpdate:
      maxSurge: 1
      maxUnavailable: 25%
  selector:
    matchLabels:
      role: api
  template:
    metadata:
      labels:
        role: api
    spec:
      containers:
      - name: api
        image: public.ecr.aws/c8x9f9q0/three-tier-backend:latest
        imagePullPolicy: Always
        env:
        - name: MONGO_CONN_STR
          value: mongodb://mongodb-svc:27017/todo?directConnection=true
        - name: MONGO_USERNAME
          valueFrom:
            secretKeyRef:
              name: mongo-sec
              key: username
        - name: MONGO_PASSWORD
          valueFrom:
            secretKeyRef:
              name: mongo-sec
              key: password
        ports:
        - containerPort: 8080
        livenessProbe:
          httpGet:
            path: /ok
            port: 8080
          initialDelaySeconds: 2
          periodSeconds: 5
        readinessProbe:
          httpGet:
            path: /ok
            port: 8080
          initialDelaySeconds: 5
          periodSeconds: 5
          successThreshold: 1
backend-service.yaml
apiVersion: v1
kind: Service
metadata:
  name: api
  namespace: workshop
spec:
  ports:
  - port: 8080
    protocol: TCP
  type: ClusterIP
  selector:
    role: api


Now connect to database

frontend-deployment.yaml
apiVersion: apps/v1
kind: Deployment
metadata:
  name: frontend
  namespace: workshop
  labels:
    role: frontend
    env: demo
spec:
  replicas: 1
  strategy:
    type: RollingUpdate
    rollingUpdate:
      maxSurge: 1
      maxUnavailable: 25%
  selector:
    matchLabels:
      role: frontend
  template:
    metadata:
      labels:
        role: frontend
    spec:
      containers:
      - name: frontend
        image: public.ecr.aws/c8x9f9q0/three-tier-frontend:latest
        imagePullPolicy: Always
        env:
        - name: REACT_APP_BACKEND_URL
          value: "http://app.trainwithshubham.com/api/tasks"
        ports:
        - containerPort: 3000
frontend-service.yaml
apiVersion: v1
kind: Service
metadata:
  name: frontend
  namespace: workshop
spec:
  ports:
  - port: 3000
    protocol: TCP
  type: ClusterIP
  selector:
    role: frontend


✅STEP 11: Install AWS Load Balancer

# Download the IAM policy document
curl -O https://raw.githubusercontent.com/kubernetes-sigs/aws-load-balancer-controller/v2.5.4/docs/install/iam_policy.json

# Create an IAM policy named AWSLoadBalancerControllerIAMPolicy
aws iam create-policy --policy-name AWSLoadBalancerControllerIAMPolicy --policy-document file://iam_policy.json

# Associate IAM OIDC provider with the EKS cluster
eksctl utils associate-iam-oidc-provider --region=us-east-1 --cluster=three-tier-cluster --approve

# Create an IAM service account for the AWS Load Balancer Controller
eksctl create iamserviceaccount --cluster=three-tier-cluster --namespace=kube-system --name=aws-load-balancer-controller --role-name AmazonEKSLoadBalancerControllerRole --attach-policy-arn=arn:aws:iam::695171514664:policy/AWSLoadBalancerControllerIAMPolicy --approve --region=us-east-1
✅STEP 12: Install Helm and Deploy AWS Load Balancer Controller
sudo snap install helm --classic
helm repo add eks https://aws.github.io/eks-charts
helm repo update eks
helm install aws-load-balancer-controller eks/aws-load-balancer-controller -n kube-system --set clusterName=three-tier-cluster --set serviceAccount.create=false --set #serviceAccount.name=aws-load-balancer-controller
kubectl get deployment -n kube-system aws-load-balancer-controller
full_stack_lb.yaml
apiVersion: networking.k8s.io/v1
kind: Ingress
metadata:
  name: mainlb
  namespace: workshop
  annotations:
    alb.ingress.kubernetes.io/scheme: internet-facing
    alb.ingress.kubernetes.io/target-type: ip
    alb.ingress.kubernetes.io/listen-ports: '[{"HTTP": 80}]'
spec:
  ingressClassName: alb
  rules:
    - host: app.trainwithshubham.com
      http:
        paths:
          - path: /api
            pathType: Prefix
            backend:
              service:
                name: api
                port:
                  number: 8080
          - path: /
            pathType: Prefix
            backend:
              service:
                name: frontend
                port:
                  number: 3000
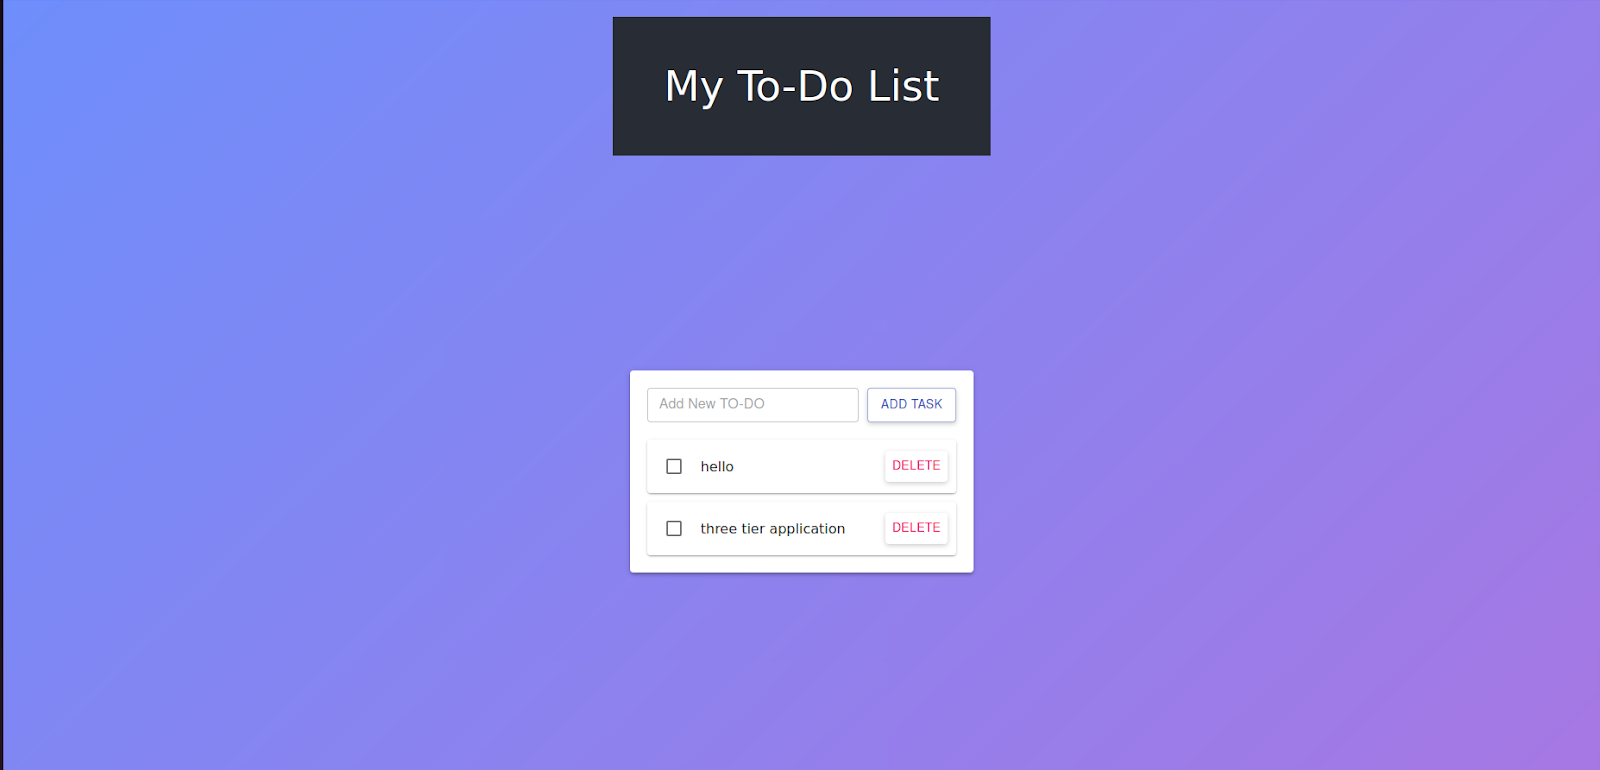
kubectl apply -f full_stack_lb.yaml
✅Step 13: Clean or delete the EKS cluster
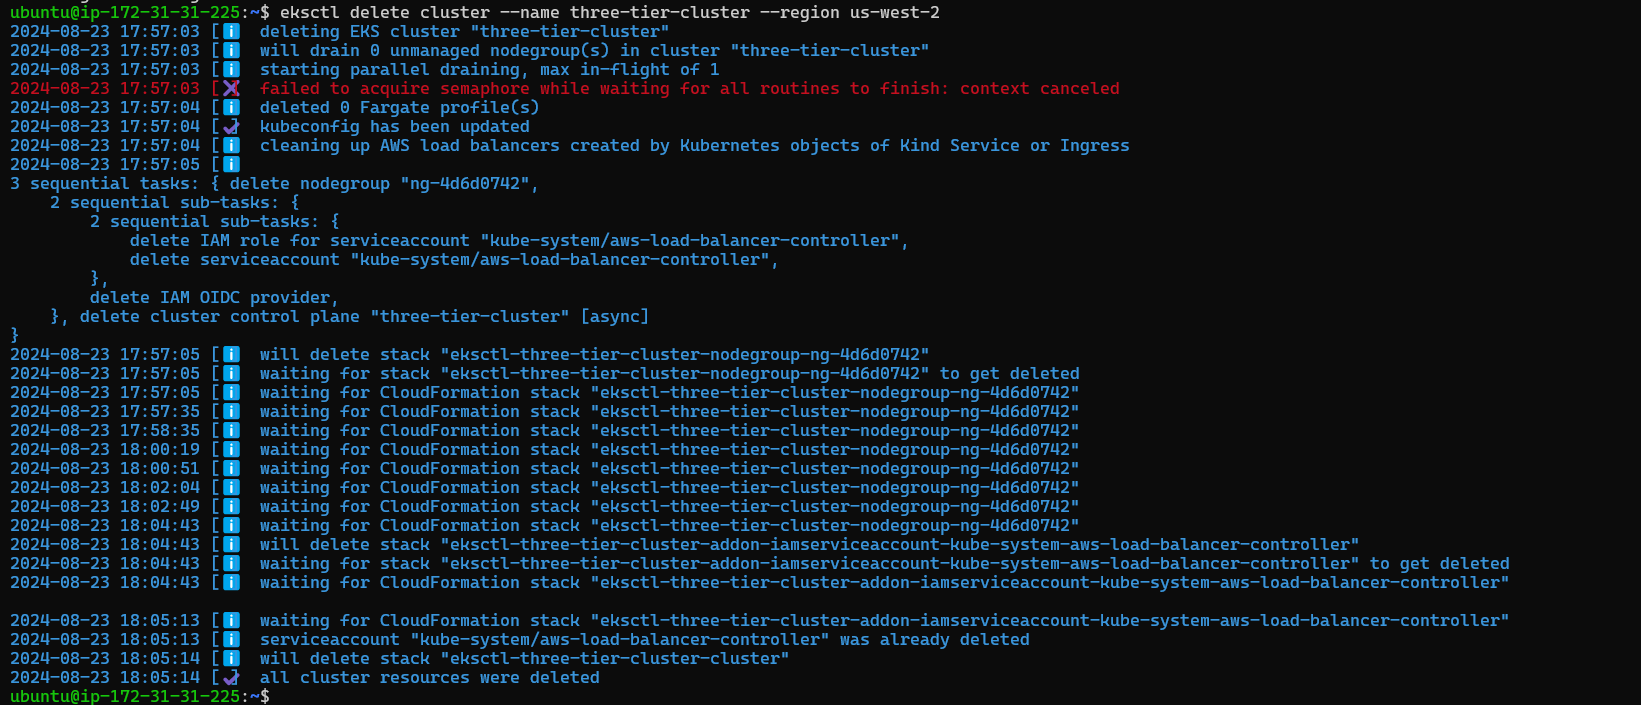
eksctl delete cluster --name three-tier-cluster --region us-west-2
Conclusion:
Today, we brought together the main parts of a web application—frontend, backend, and database—and deployed them in the cloud using Kubernetes. It’s like setting up an online store where users can shop and everything runs smoothly in the background. By using AWS, we made sure our app is ready to handle real-world traffic and can easily scale up! 🚀
Happy learning!😊
Subscribe to my newsletter
Read articles from Ritesh Dolare directly inside your inbox. Subscribe to the newsletter, and don't miss out.
Written by

Ritesh Dolare
Ritesh Dolare
👋 Hi, I'm Ritesh Dolare, a DevOps enthusiast dedicated to mastering the art of DevOps.