Protecting Your EC2 Instance with AWS WAF
 Akanksha Giri
Table of contents
Introduction
AWS WAF is a web application firewall that lets you monitor the HTTP(S) requests that are forwarded to your protected web application resources. With AWS WAF, you can control access based on criteria such as IP addresses or query string values, allowing or blocking requests accordingly. WAF allows you to oversee and filter HTTP and HTTPS requests directed to services such as Amazon API Gateway, Amazon CloudFront, or an Application Load Balancer.
The service relies on three key components: Access Control Lists (ACLs), Rules, and Rule Groups.
Web ACLs protect groups of AWS resources by defining rules that determine how requests are inspected. You can set default actions to allow or block requests based on criteria like IP addresses, country of origin, malicious scripts, and request size. Web ACLs can also limit request rates.
Rules within web ACLs or rule groups define how web requests are inspected and handled. They can filter based on criteria such as suspicious scripts, malicious IPs, geographical origins, and SQL injection attempts.
Rule Groups are collections of reusable rules that can be managed by AWS, third parties, or created by you. Unlike web ACLs, rule groups do not have default actions and must be used within web ACLs to protect resources.
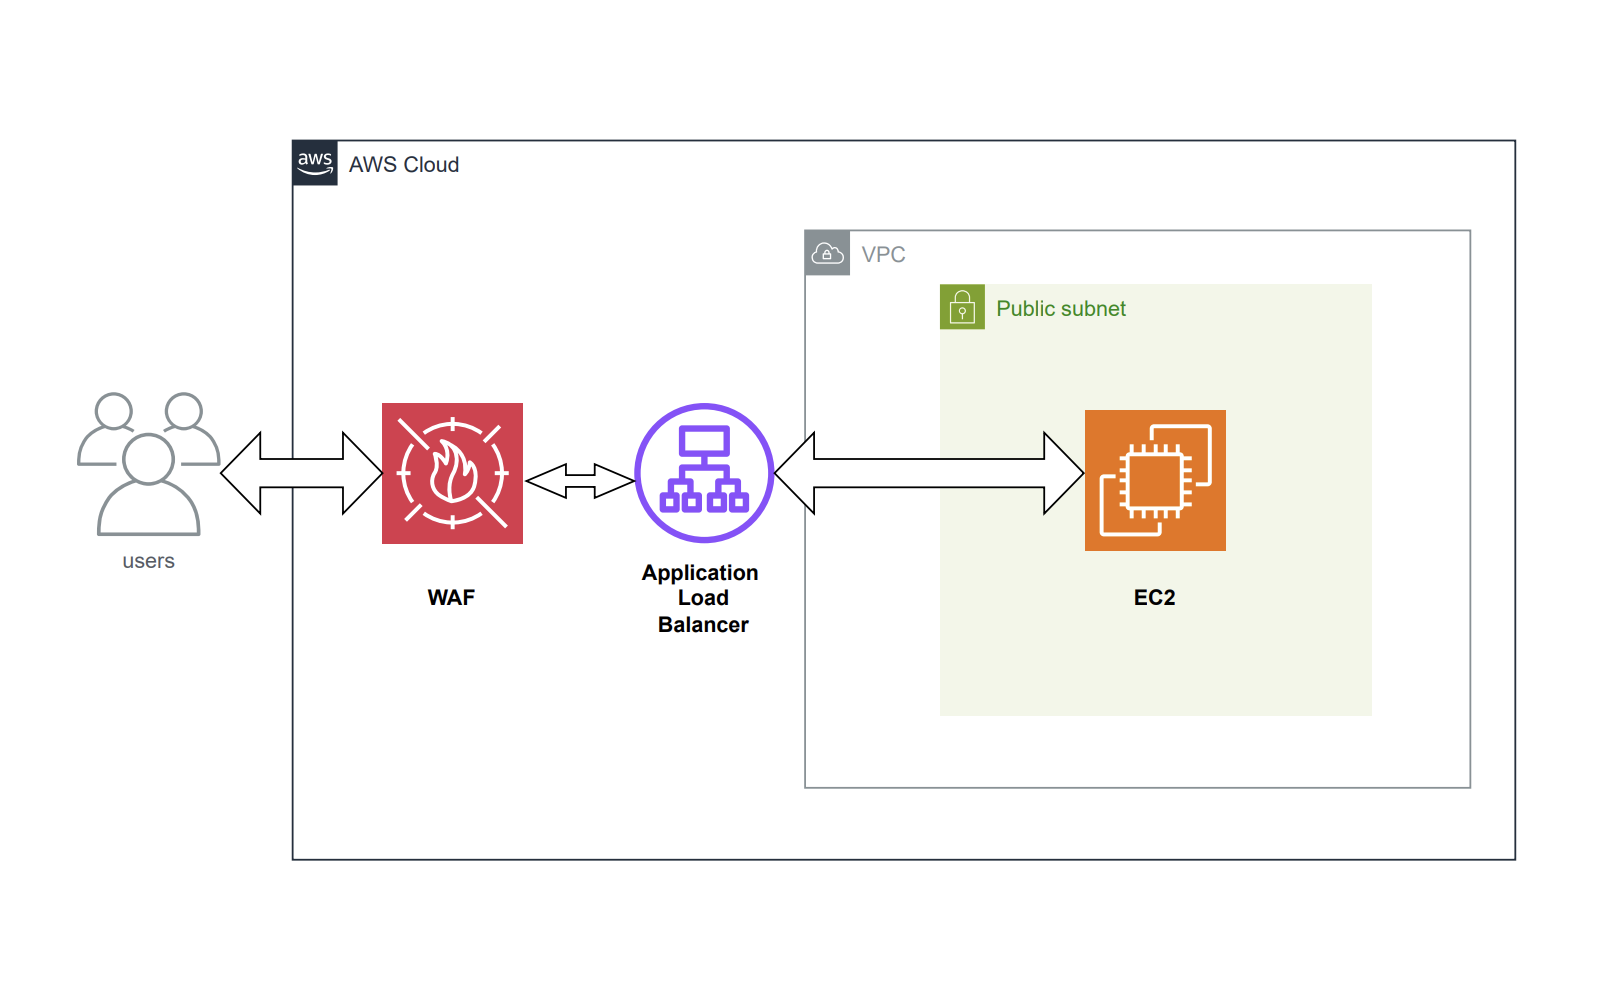
In this blog, we will set up AWS WAF (Web Application Firewall) with an Application Load Balancer to manage access to an EC2 instance. We'll enhance the security of the EC2 instance by using AWS WAF to block traffic from specific IP addresses.
Setting up the Environment
VPC Creation:
I created a new VPC and named it
project-vpc. with public subnets each in different Availability Zones (us-east-1aandus-east-1b).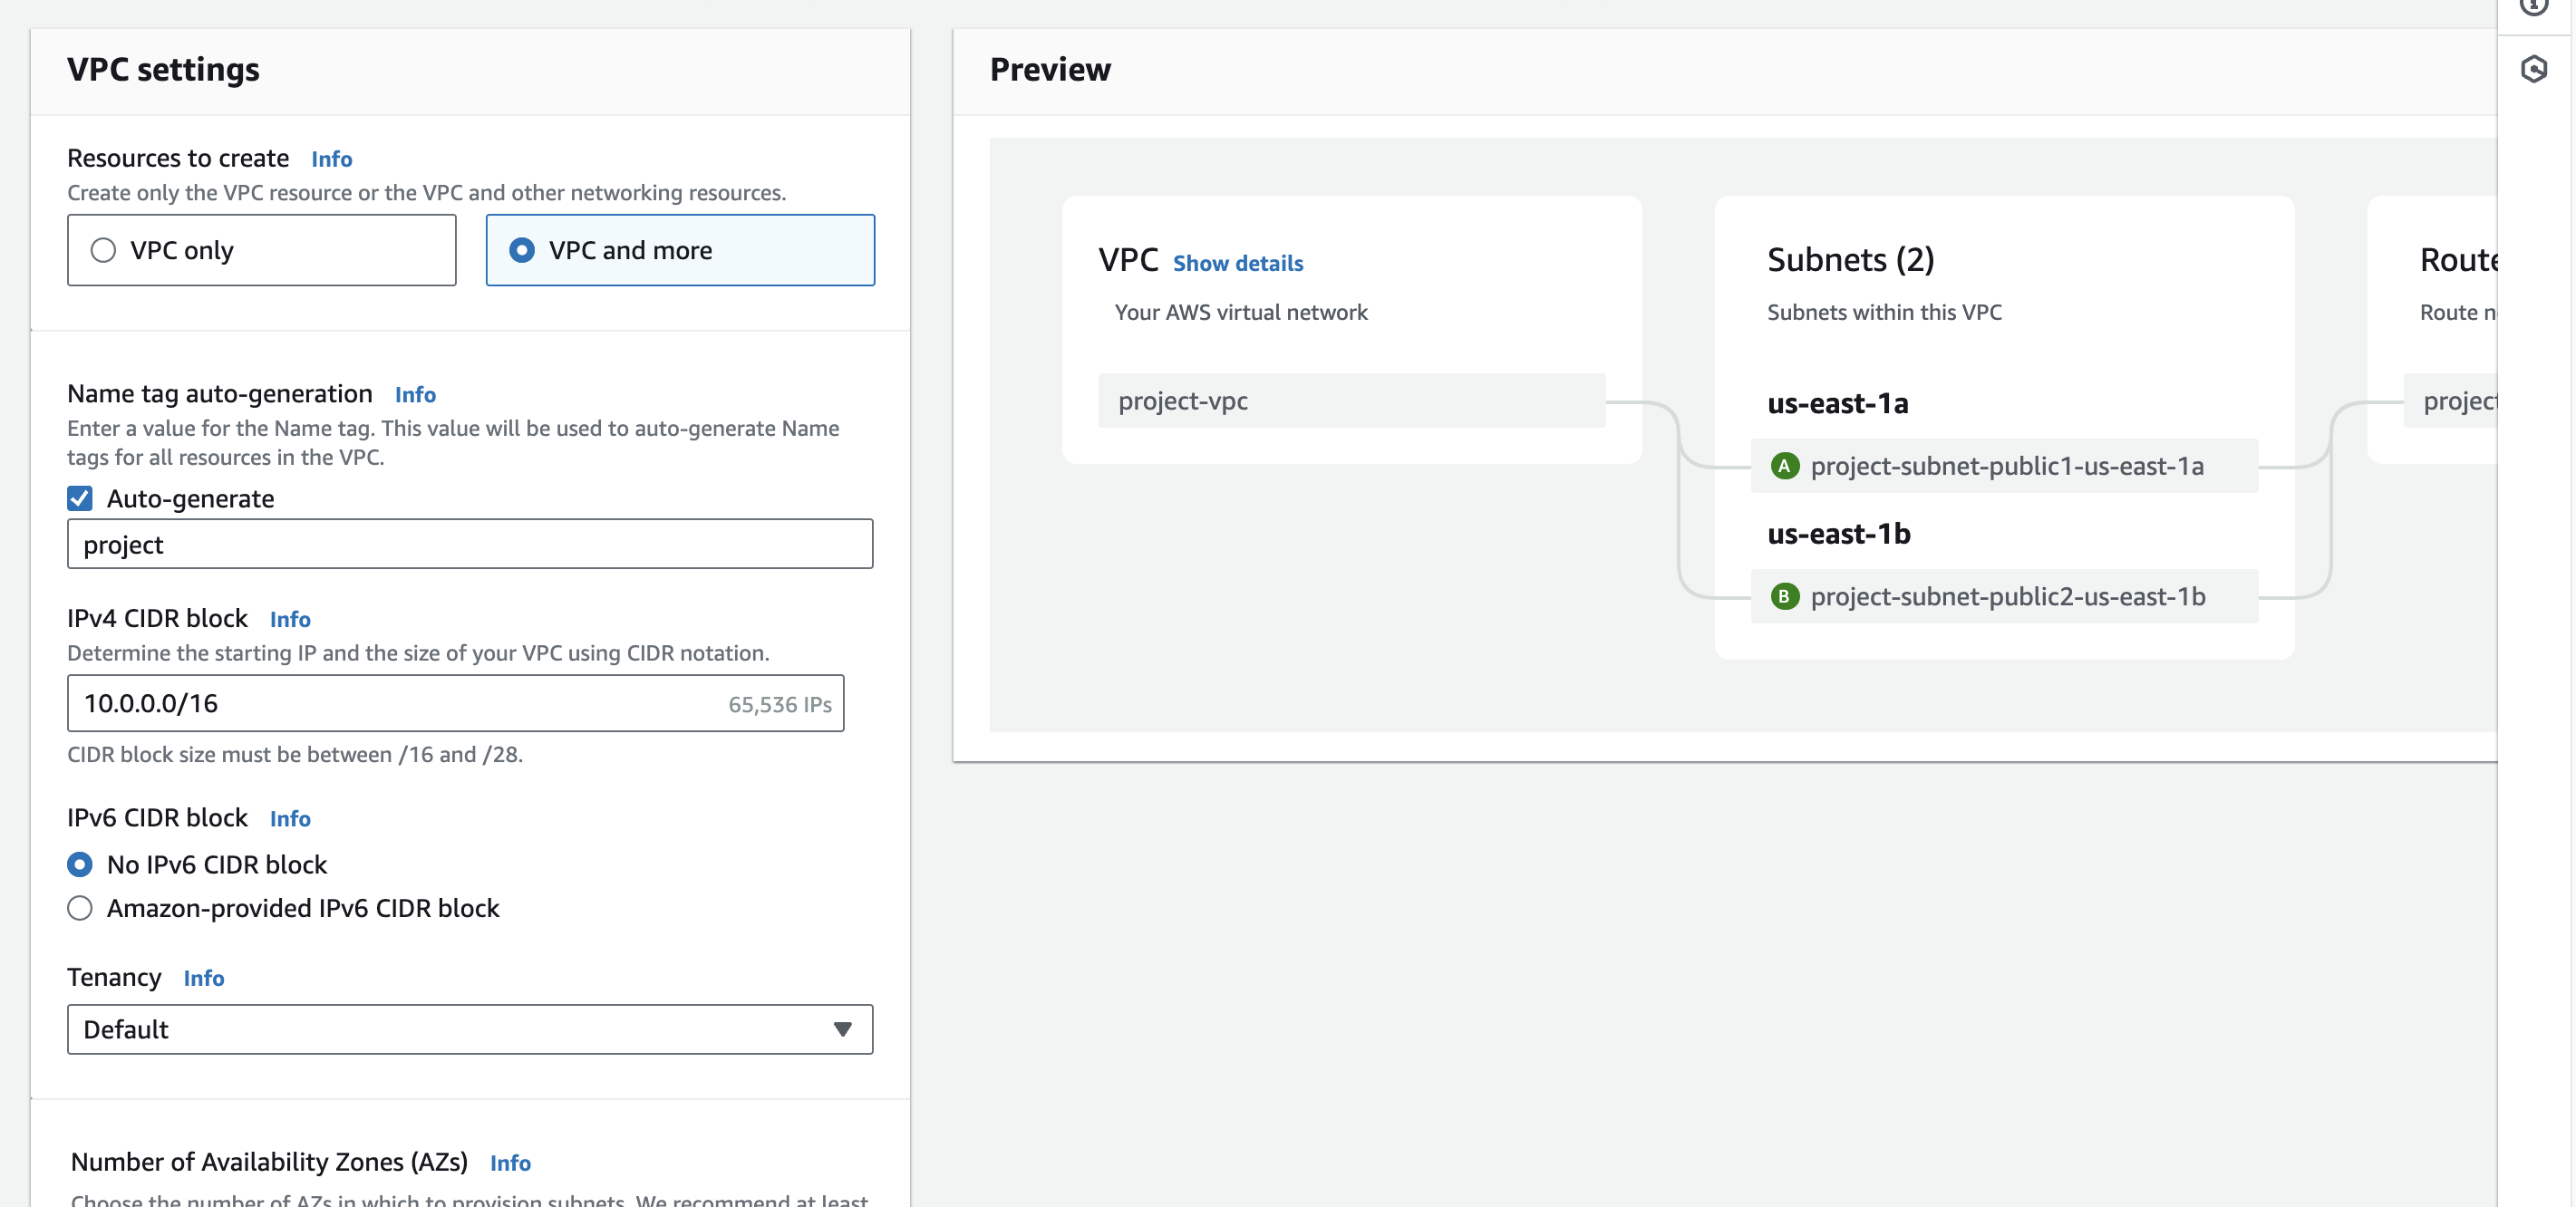
Launching EC2 instance:
I launched an EC2 instance name
'project-instance'in the'project-vpc'VPC located in the us-east-1a region with the following configuration:AMI: Amazon Linux 2023
AMI Instance Type: t2.micro
Network Settings:
VPC:
project-vpcSubnet: us-east-1a
Security Group: Configured to allow HTTP requests (port 80)
User Data: To automate the setup of a simple web server, I used the following user data script during the instance launch:
 #!/bin/bash
 yum update -y
 yum install -y httpd
 systemctl start httpd
 systemctl enable httpd
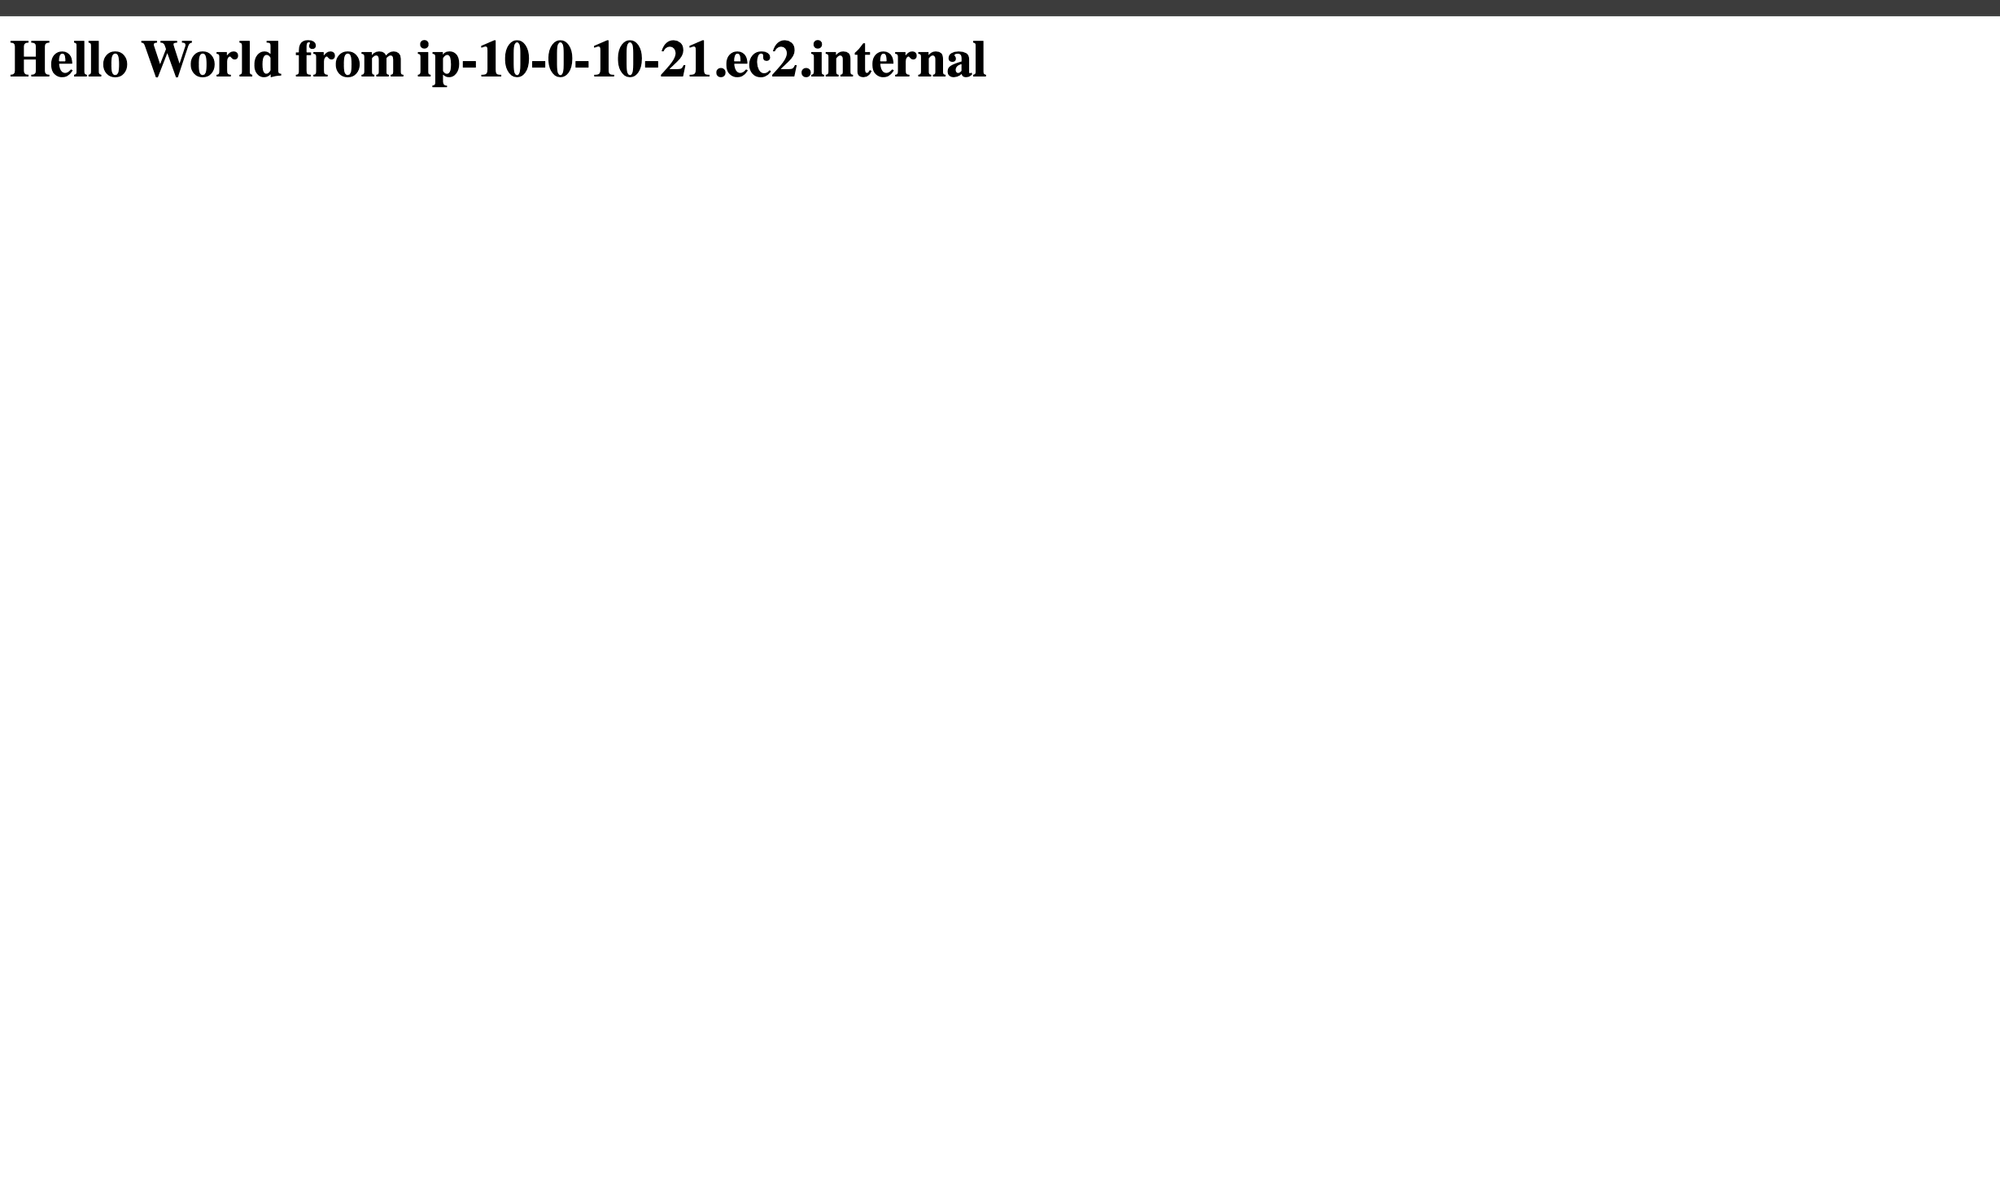
 echo "<h1>Hello World from $(hostname -f)</h1>" > /var/www/html/index.html
This script updates the instance, installs the Apache HTTP server, starts the service, ensures it starts on boot, and creates a simple HTML page displaying a "Hello World" message from the server's hostname.
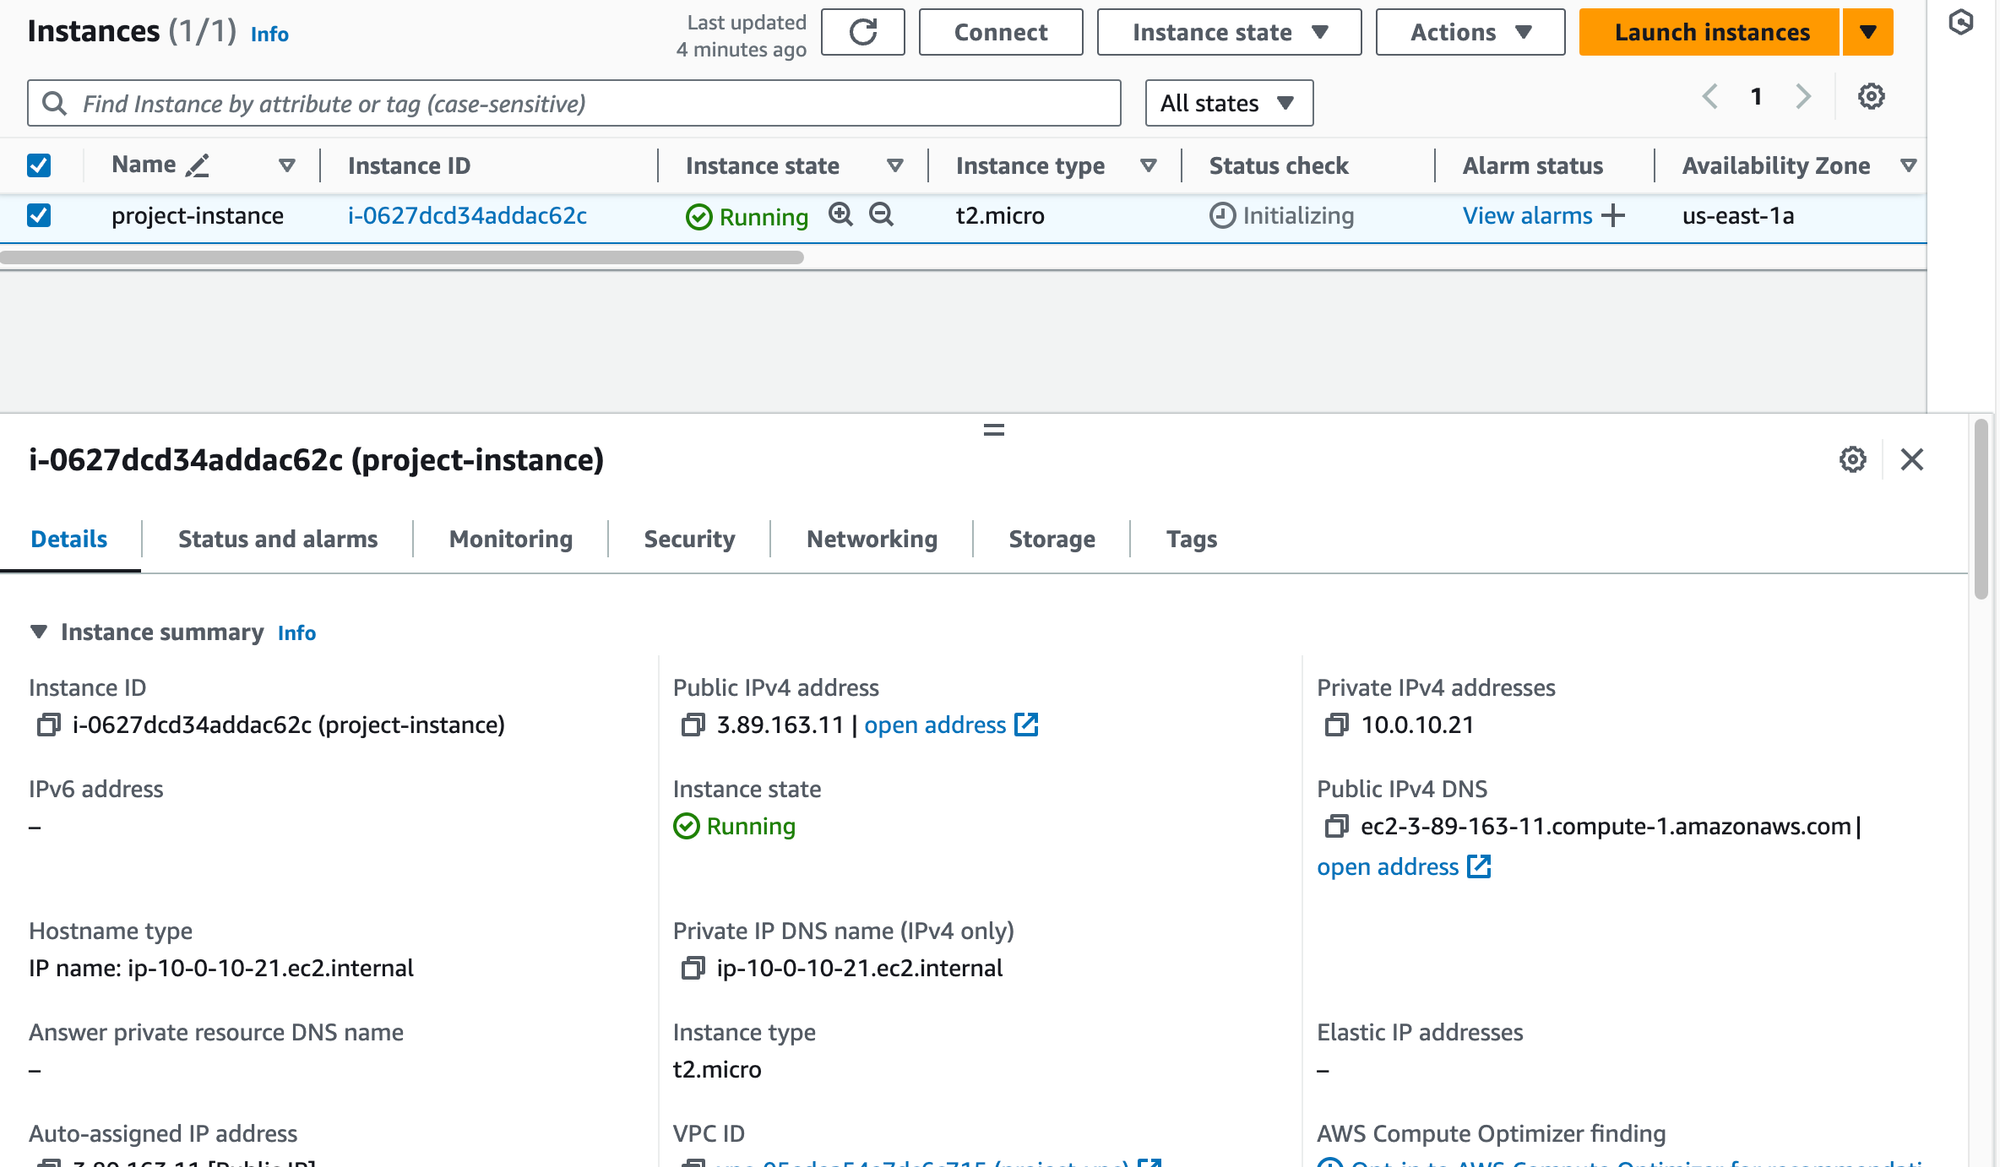
After navigating to the public IP address of the EC2 instance, following page will appear:
Setting up Load Balancer:
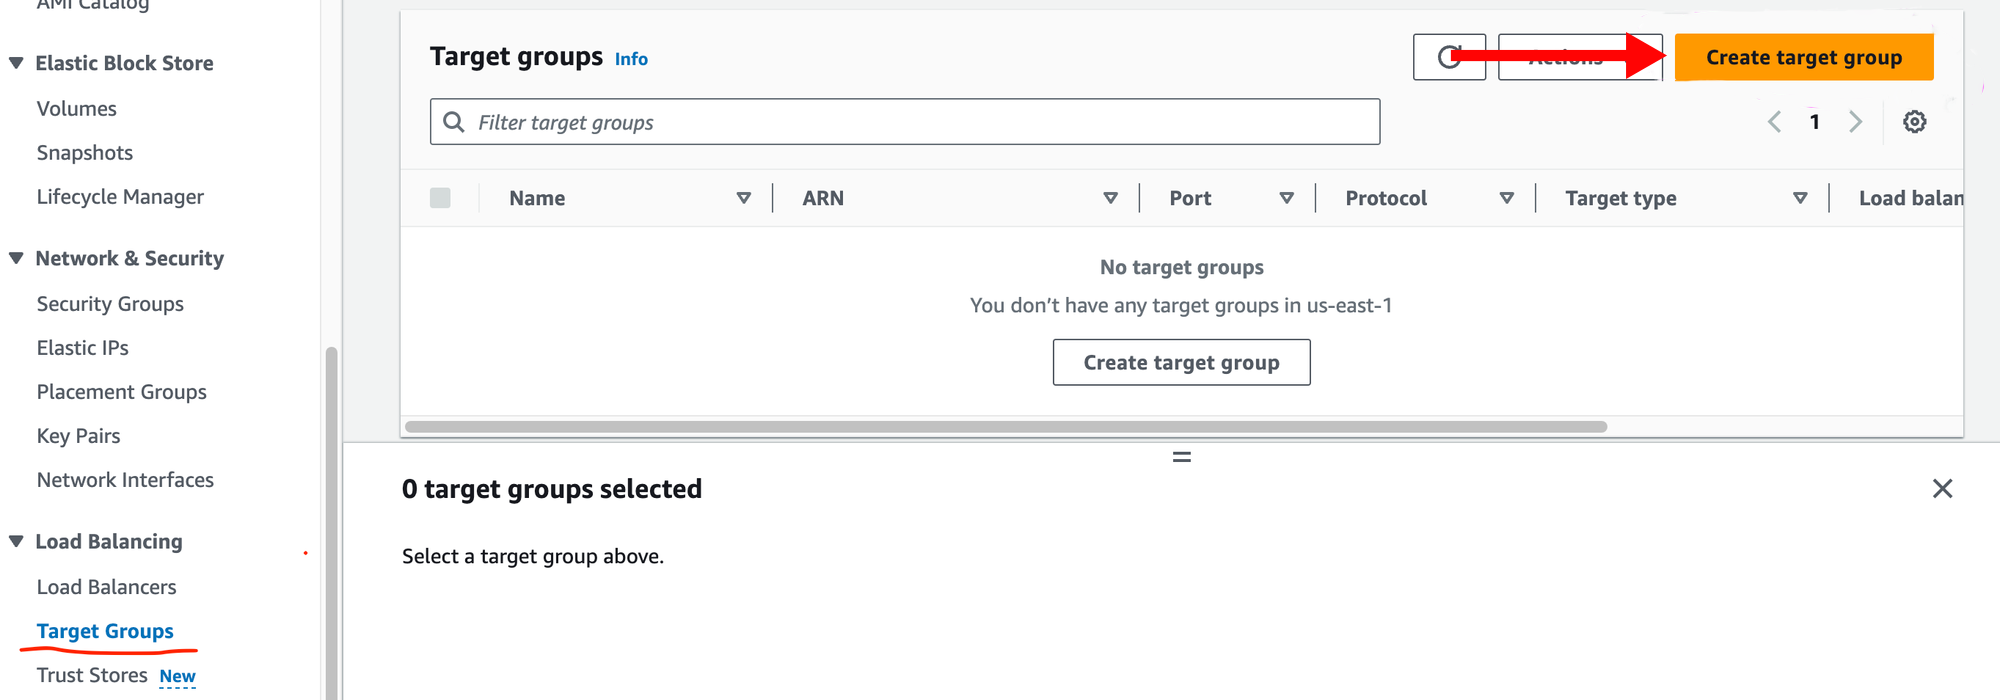
Next we'll move on to create an Application Load Balancer(ALB). However, before we create an ALB, we need to setup a Target Group. The Target Group will include the EC2 instances that the Load Balancer will route traffic to. You can't directly associate an Application Load Balancer with an EC2 instance; instead, you must first create a Target Group, add your EC2 instances to this group, and then link the Load Balancer to the Target Group. This setup ensures that traffic is correctly distributed among the instances defined within the Target Group.
On EC2 dashboard, select Target Group,
Configure Basic Settings:
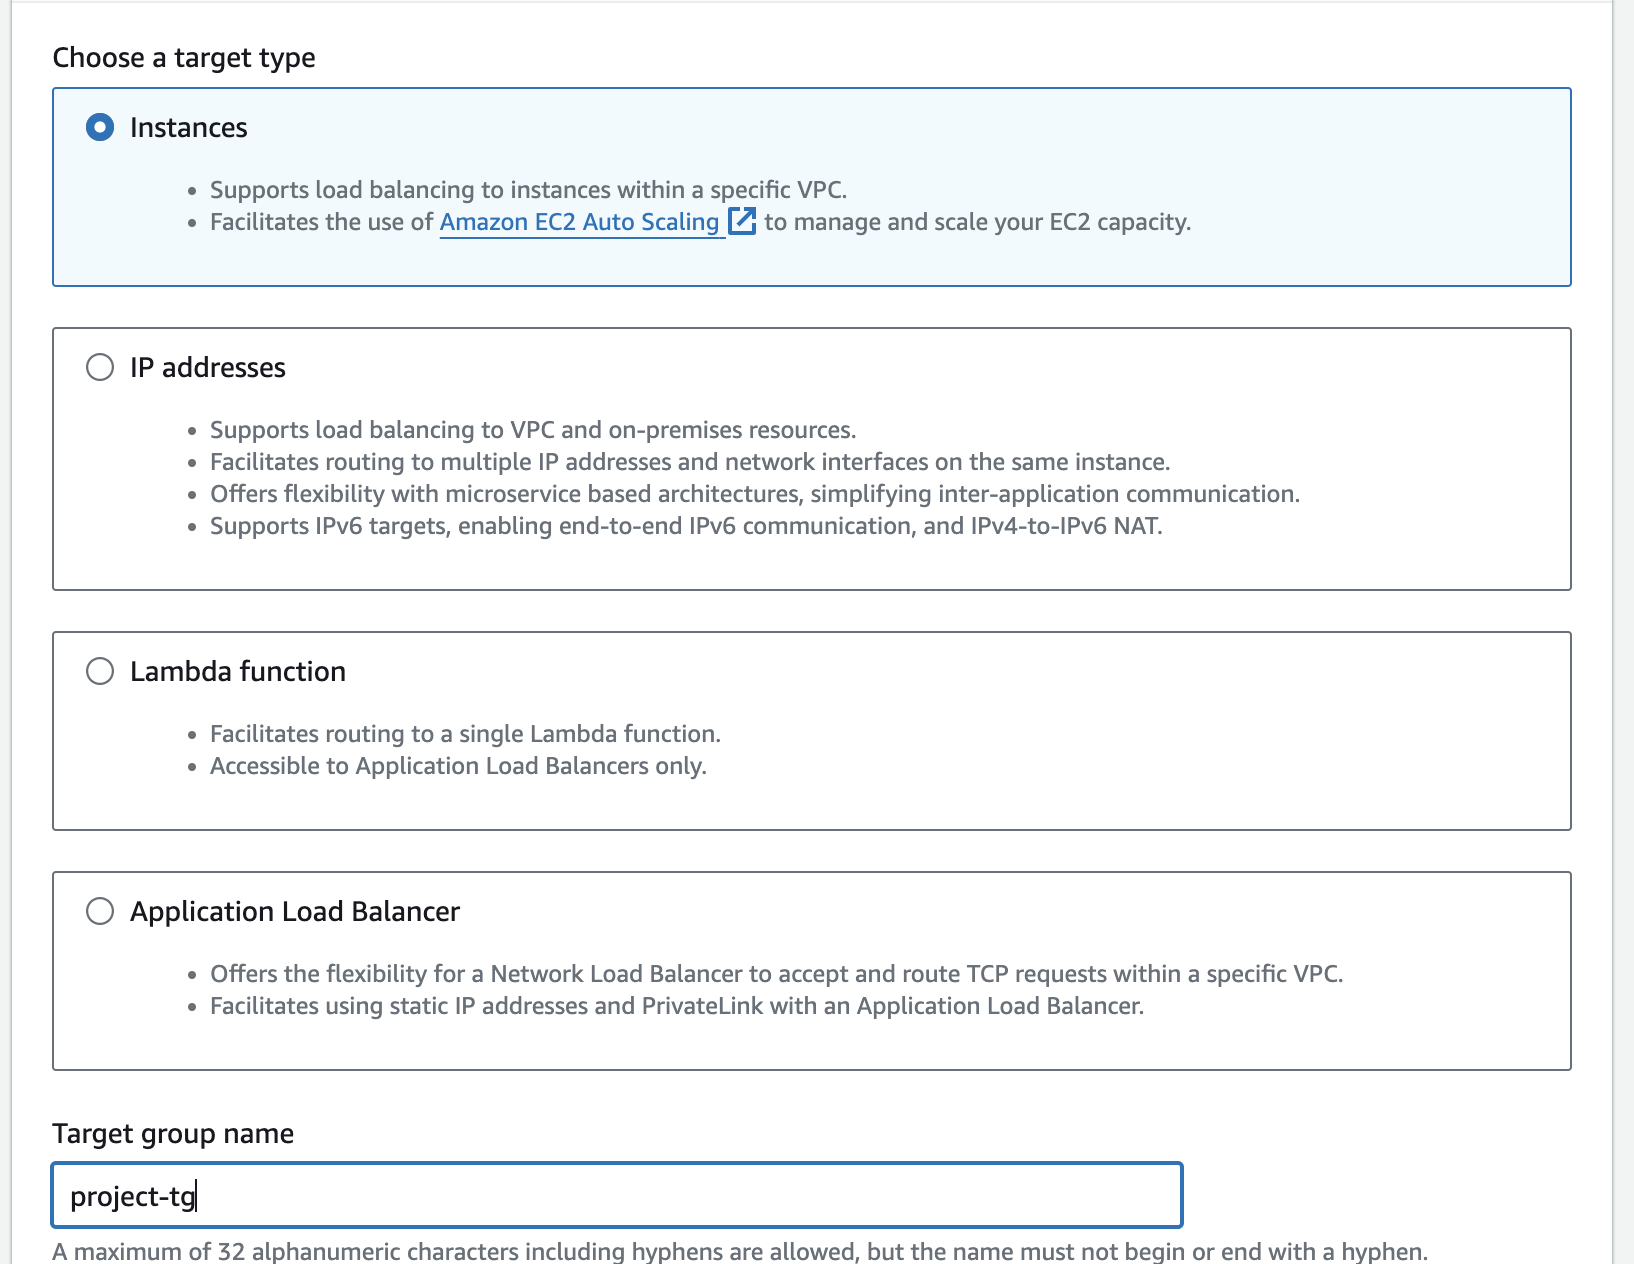
Target type: Select "Instances" to register EC2 instances as our target
Group Name: Enter a name for the target group,
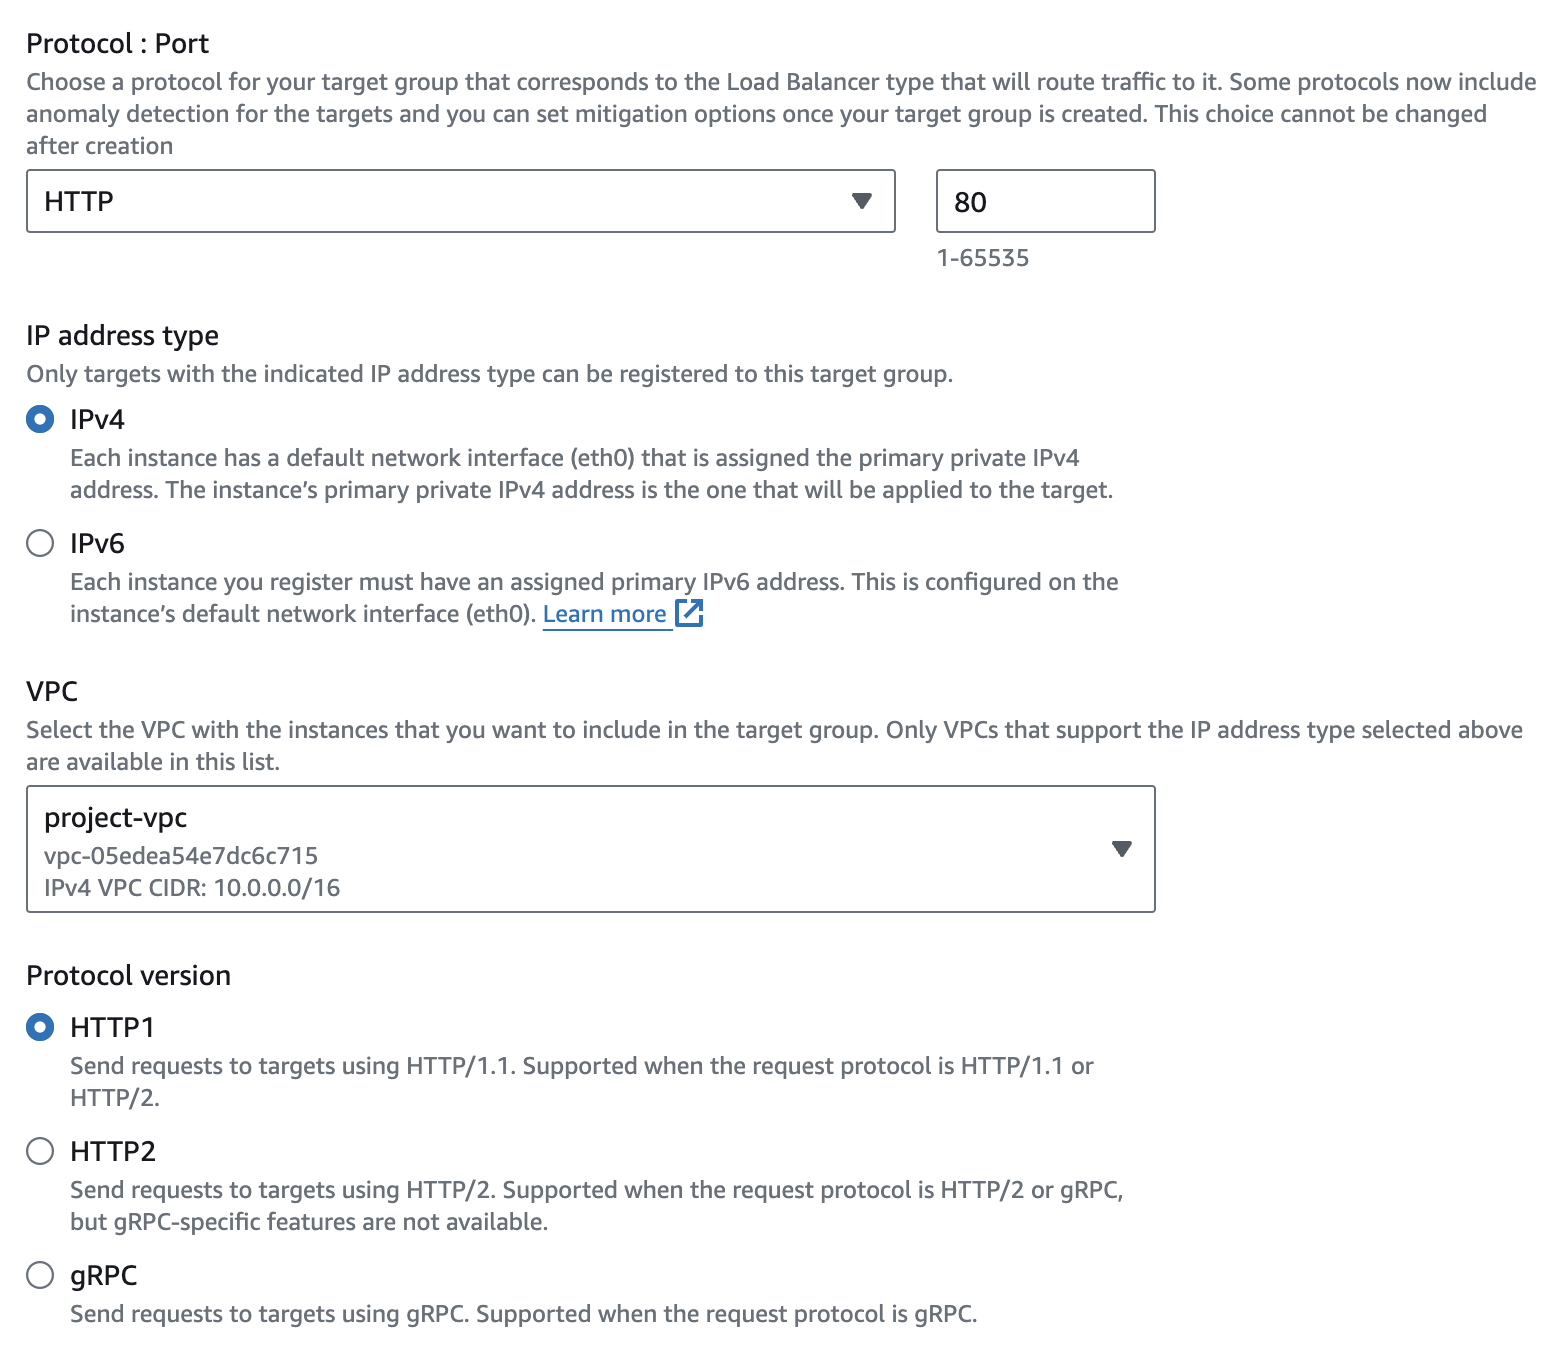
project-tgProtocol: Choose the protocol that the target group will use to communicate with the instances (HTTP)
VPC: Select the VPC with instance that we want to include in the target group
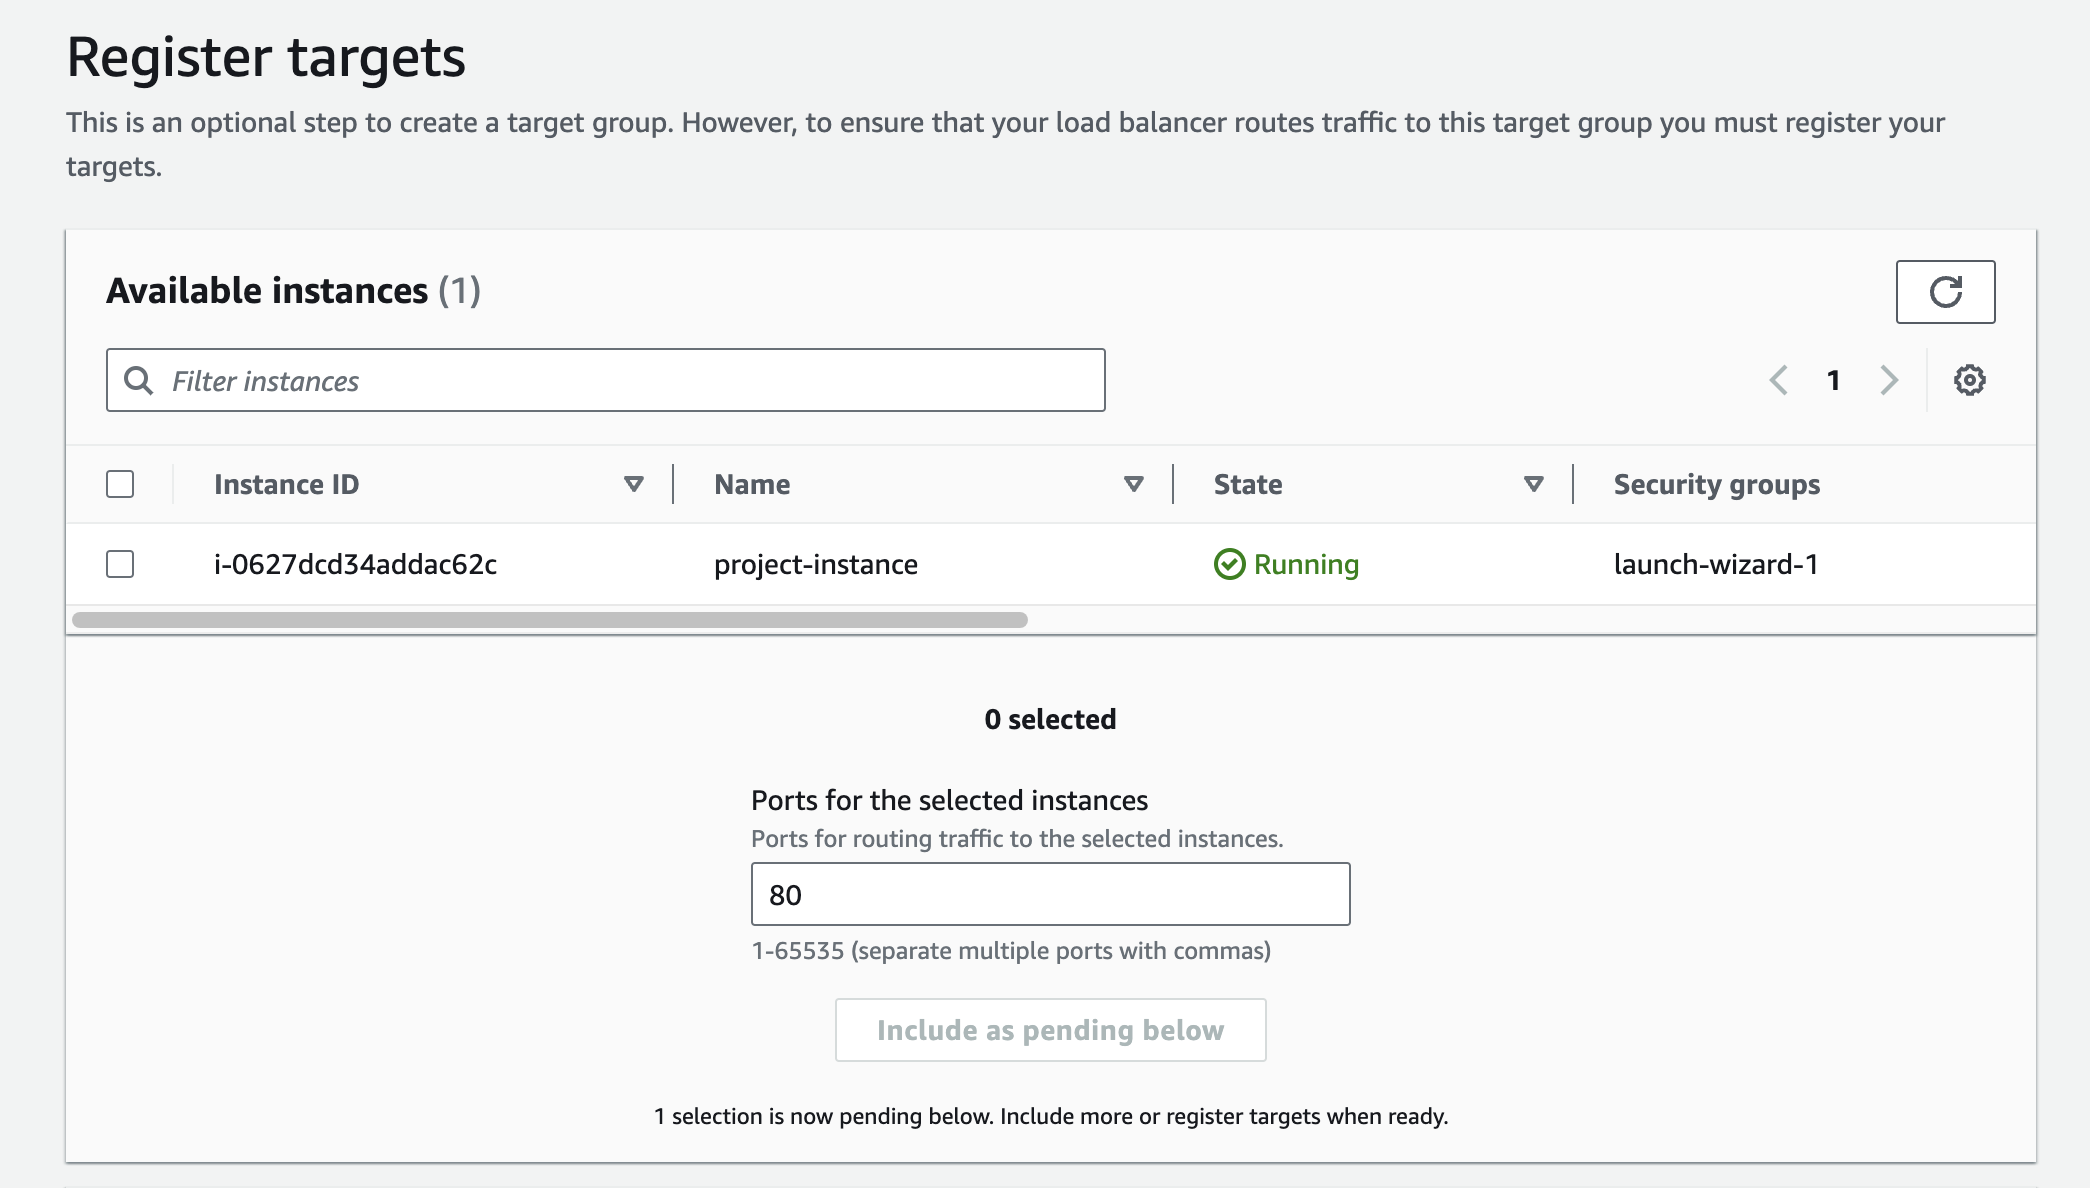
Then select the EC2 instance we'd created and Include as pending below. Then review your target group configuration and click Create target group .
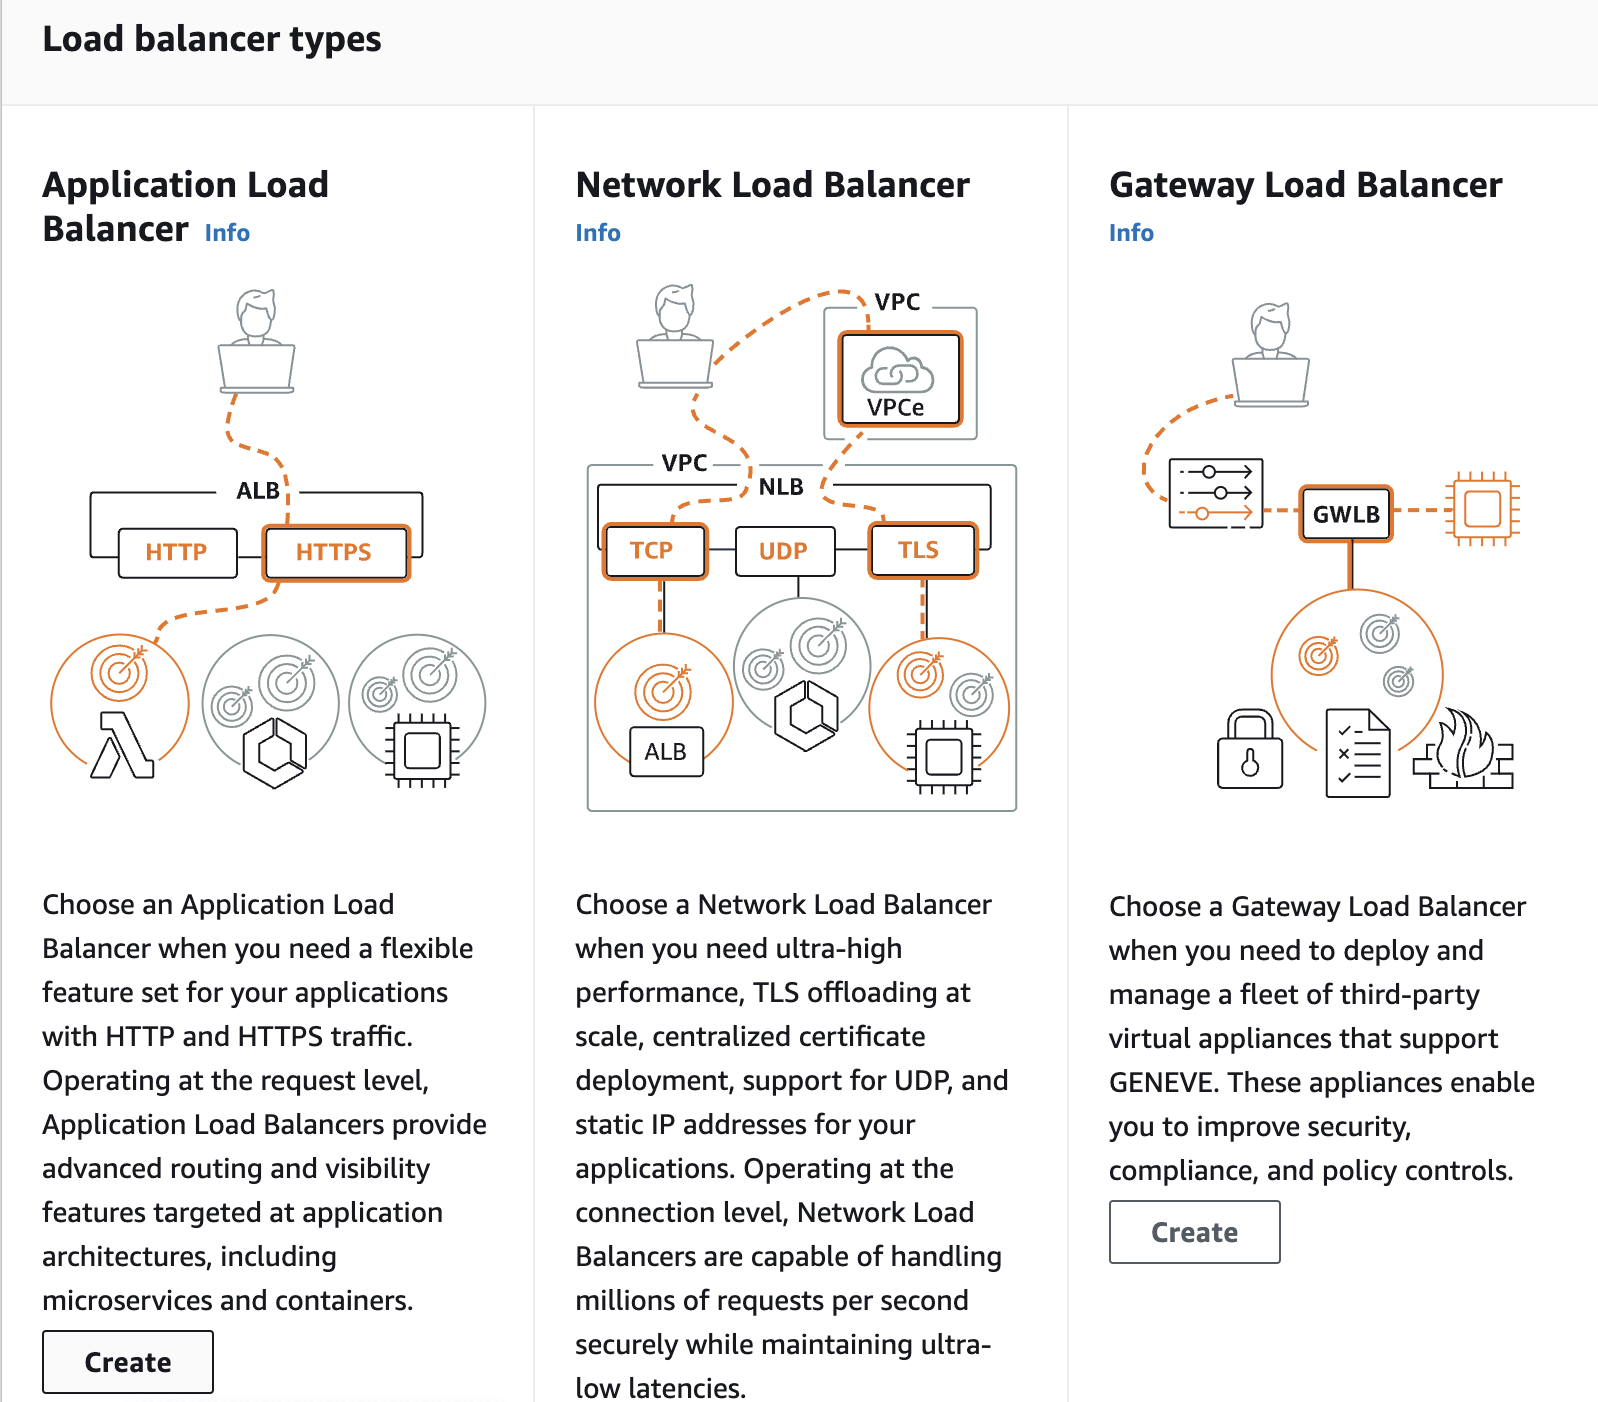
Now, we will just create our application load balancer. In the load balancer options, select Application Load Balancer.

Configure Basic Settings:
Name: Give your ALB a descriptive name.
Scheme: Choose "Internet-facing" as we want to expose your ALB to the internet.
Network mapping: Select the VPC for load balancer to operate on (in our case it's
project-vpc) and subnets on which the load balancer will distribute traffic to targets.Security Group: Create and assign the security group to the ALB to allow HTTP request.
Target Group: Associate the target group created earlier
(project-tg)with the ALB.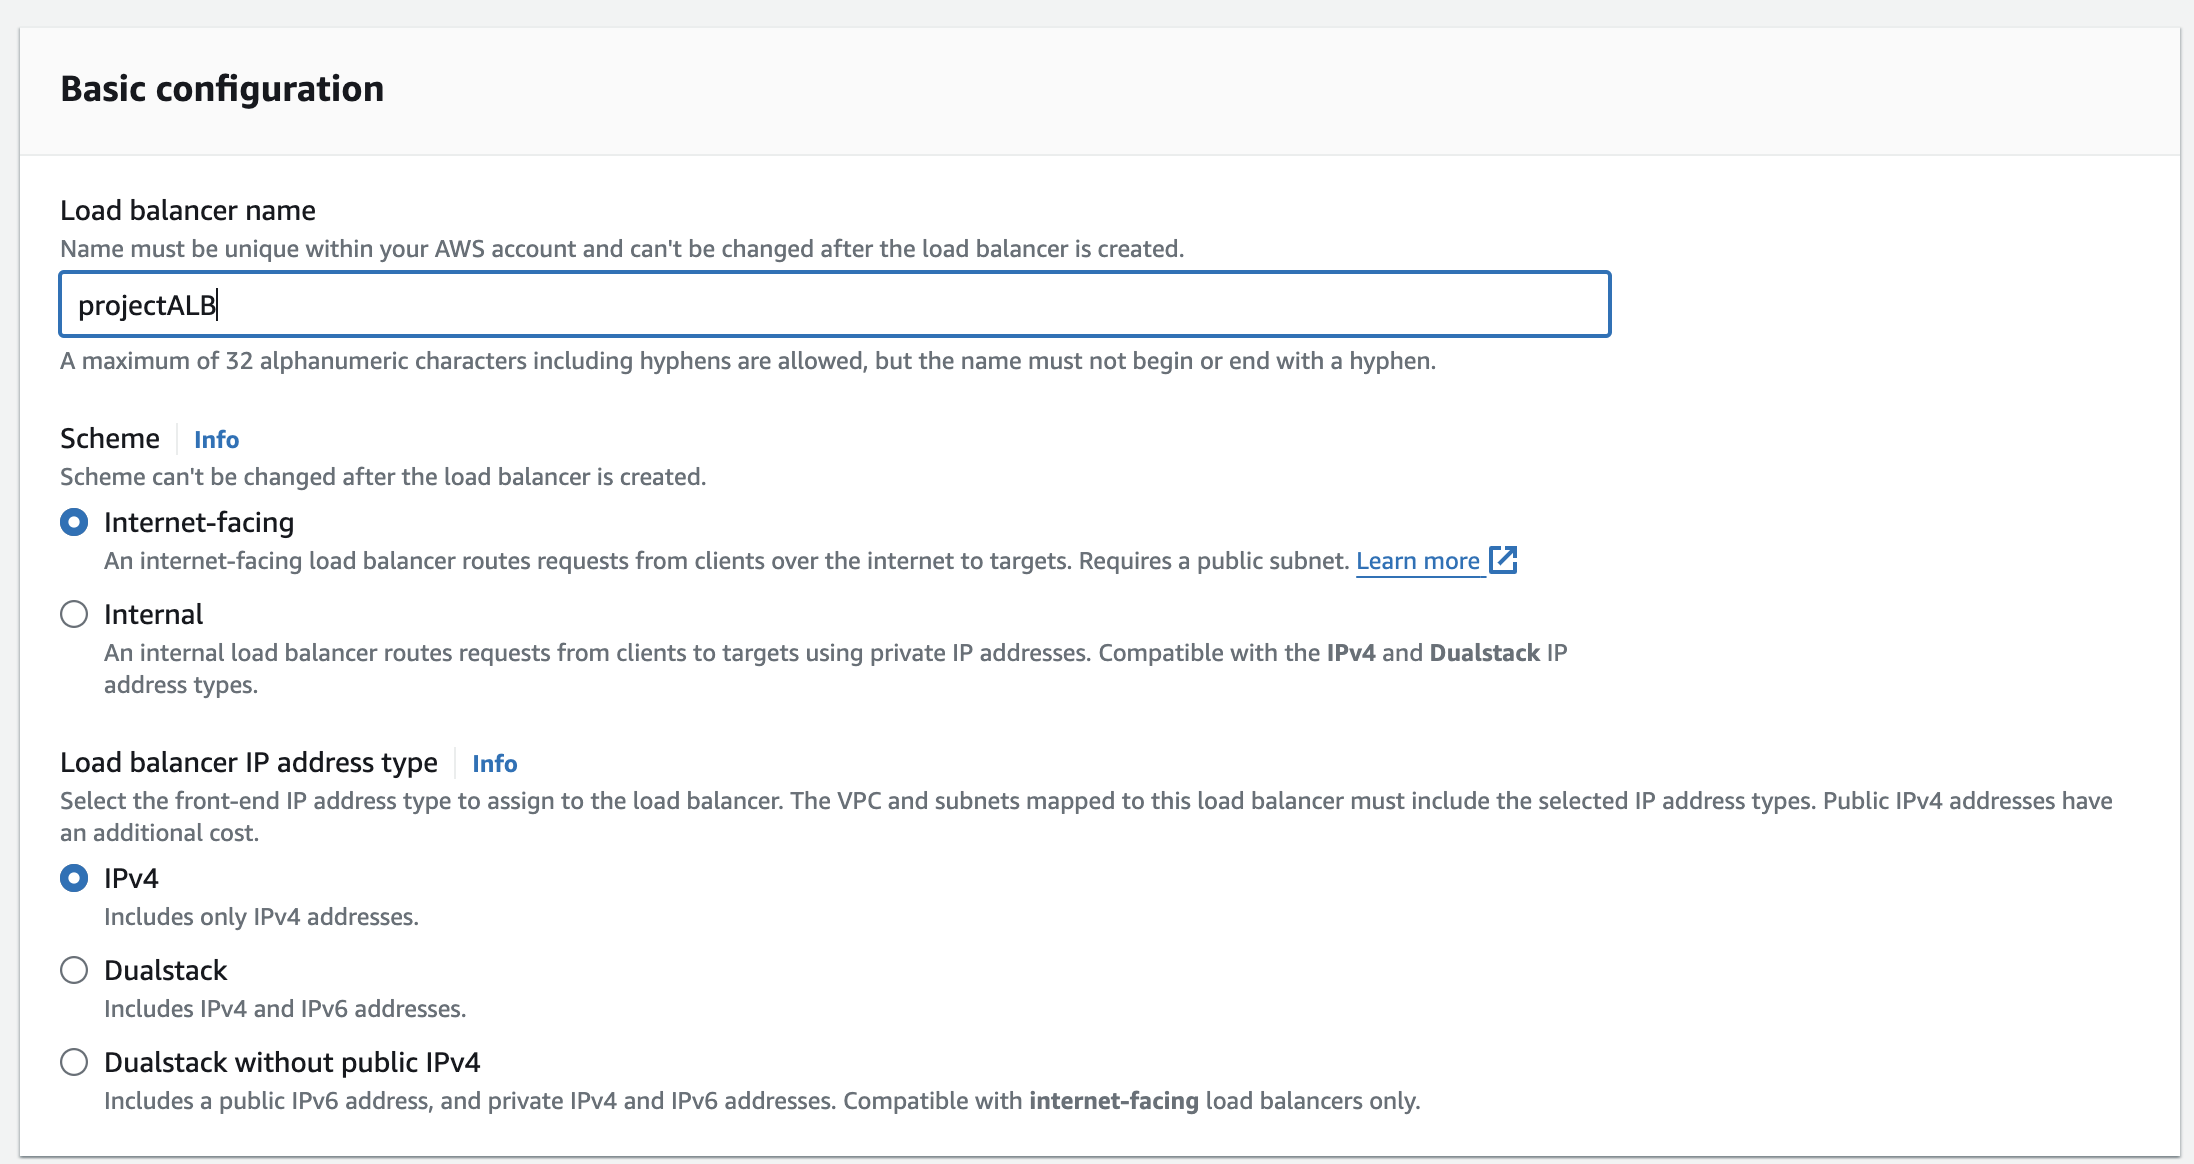
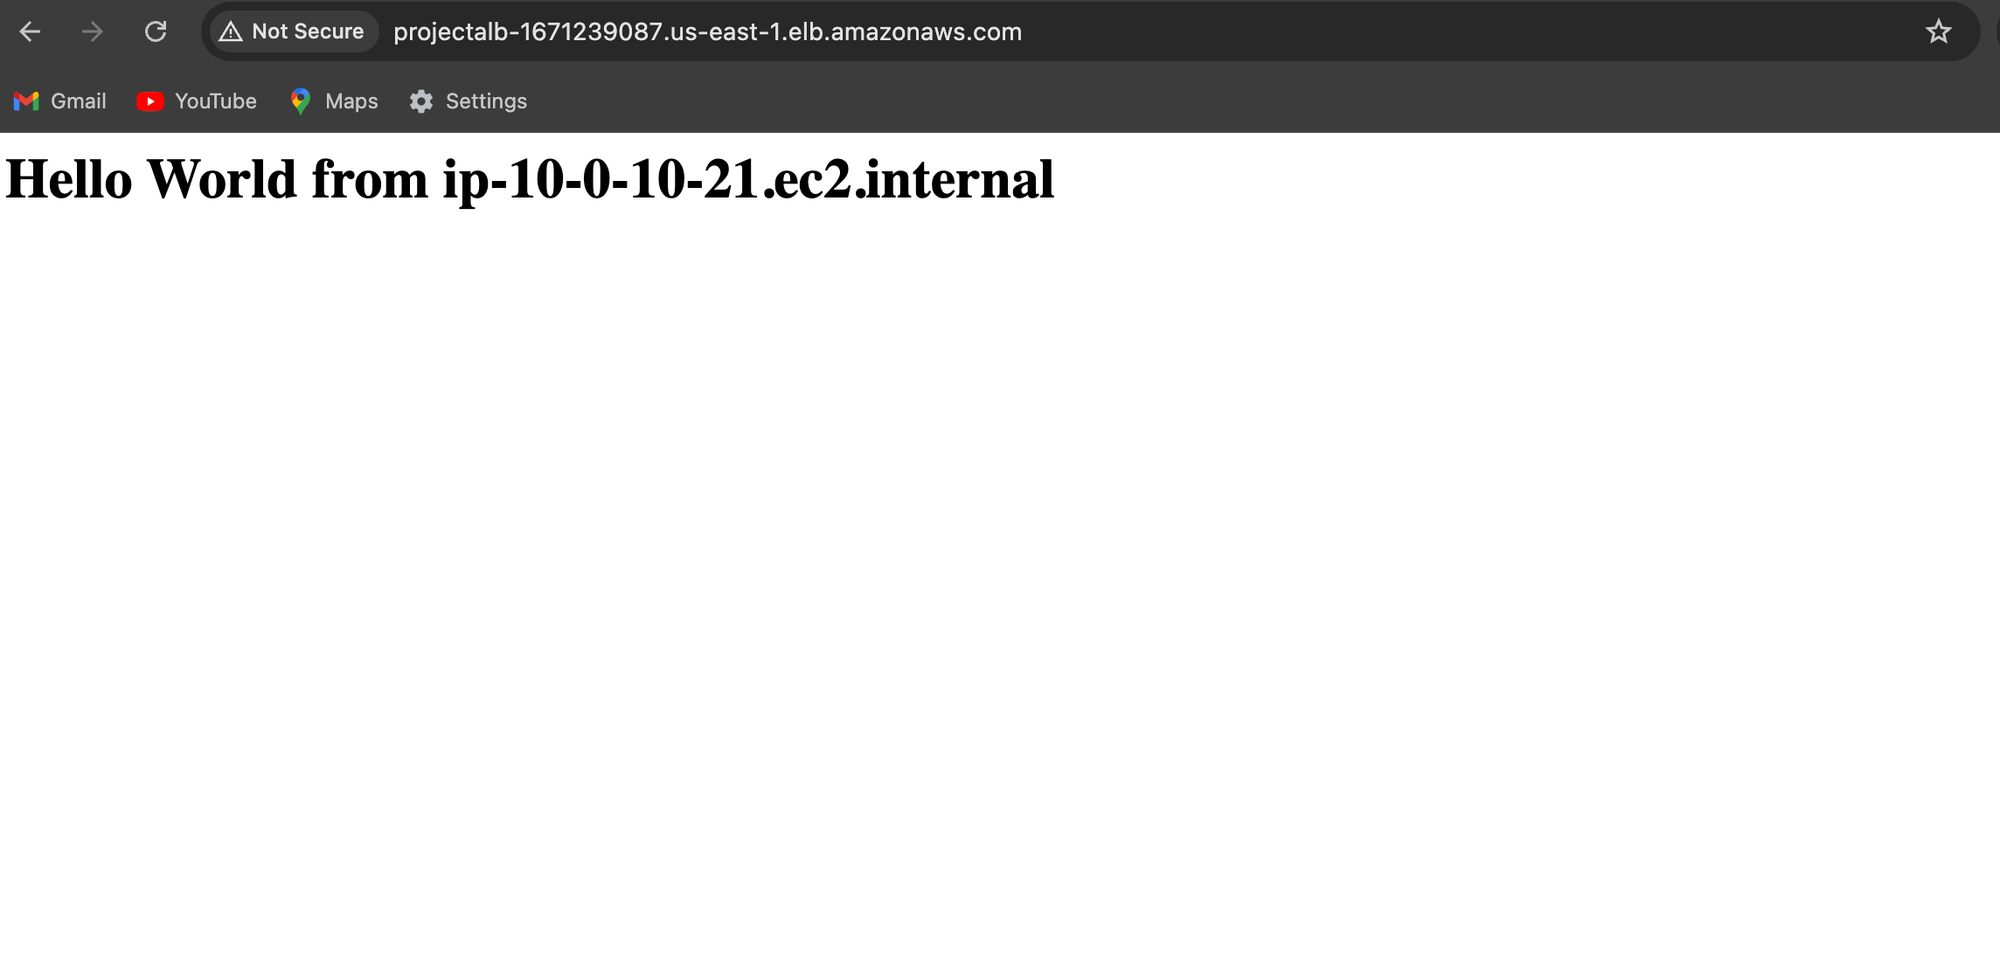
Navigate to ALB's DNS name or IP address to ensure it's working correctly and distributing traffic to your target instances. Here you can see the homepage now we are able to access our EC2 instance homepage using our application load balancer so ALB is distributing traffic correctly to our instance.
Creating Web ACLS (Web Application Firewall):
Now we navigate to WAF Dashboard
Let’s begin with creating IP sets. An IP Set lets you define a list of IP addresses or ranges to either block or allow. In this case, we want to block access from our laptop’s IP address to the EC2 instance, so we'll set up an IP Set with our laptop’s IP address.
In the WAF Dashboard, select
IP Setsand clickCreate IP set.IP set details:
Name:Enter a name for the IP sets
Region: AWS WAF is regional, so you must select the same region as your ALB and EC2 instance. In our case it's US East.
IP addresses: IP set only accepts IP ranges. So we'll specify laptop's IP address in CIDR notation.

Now we'll move on to create Web ACLs. On WAF Dashboard select Create Web ACL.
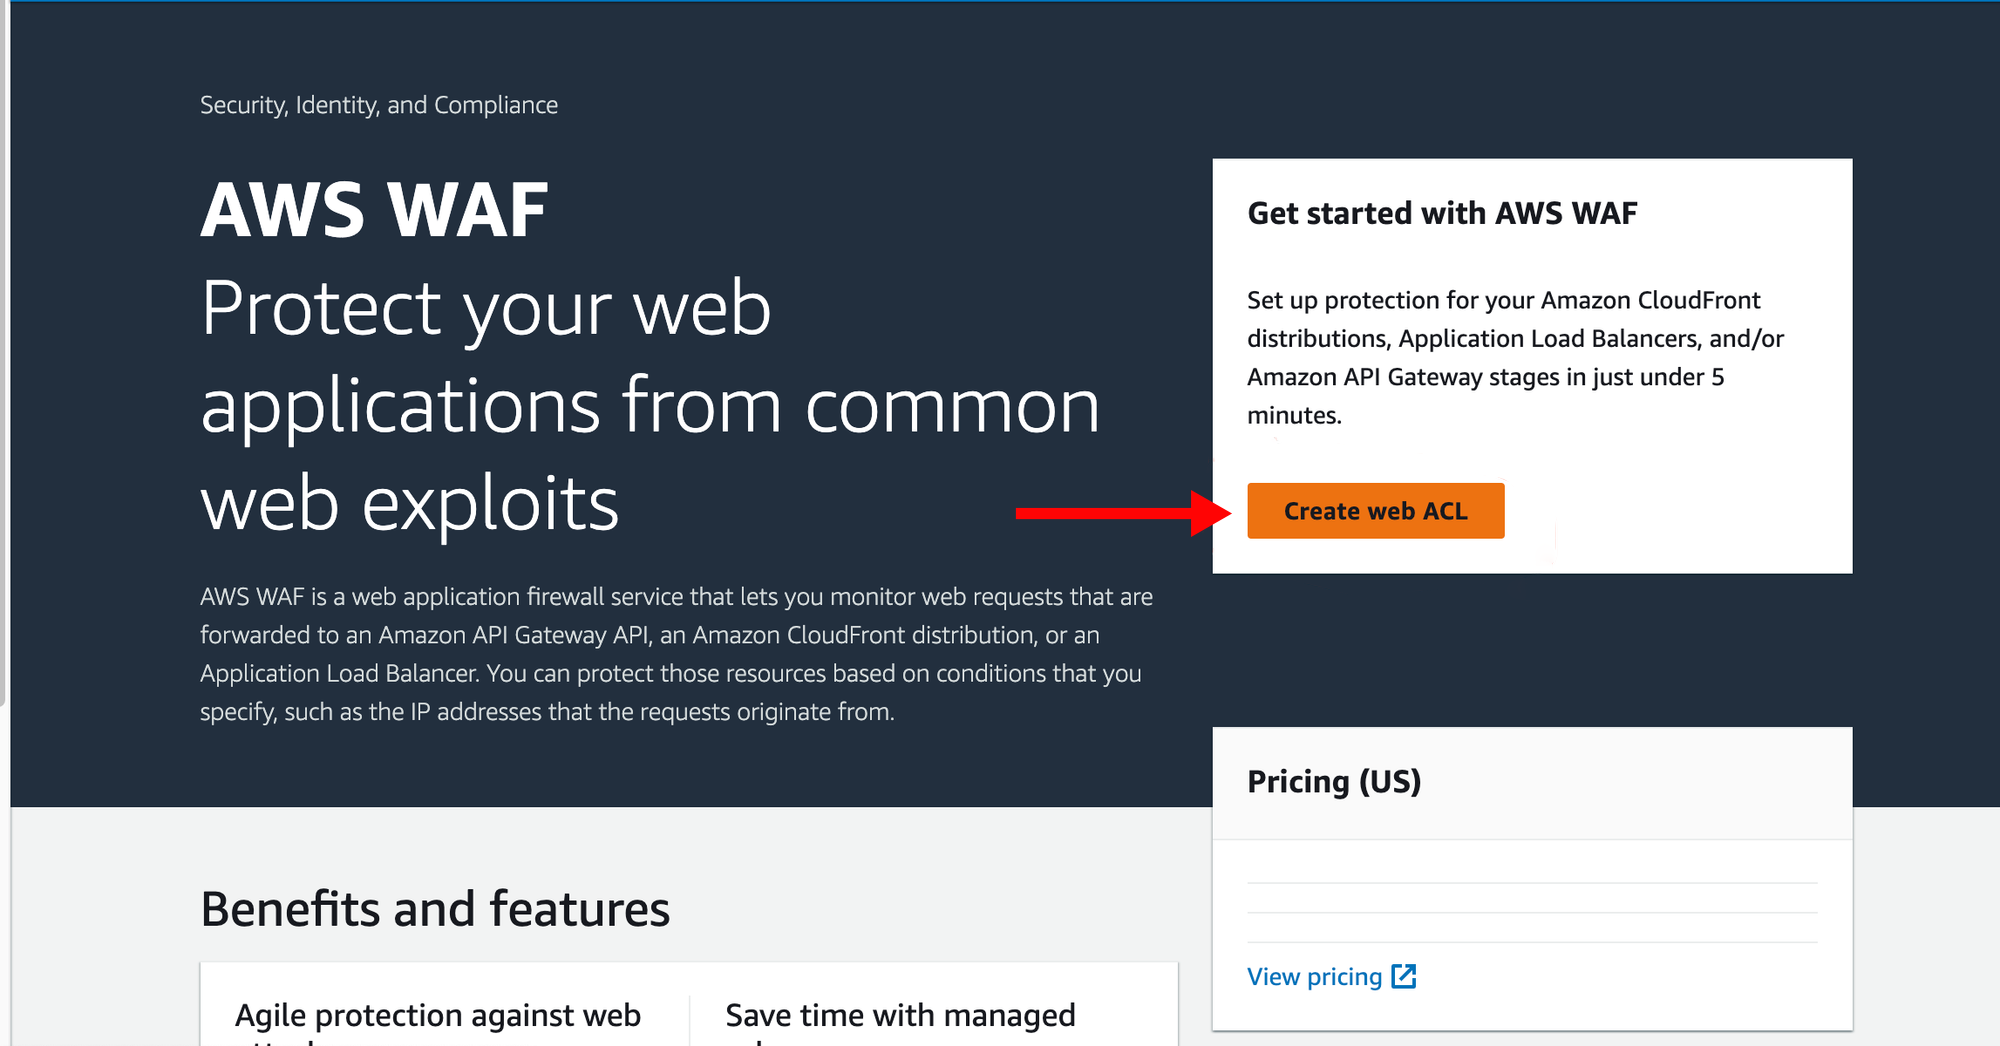
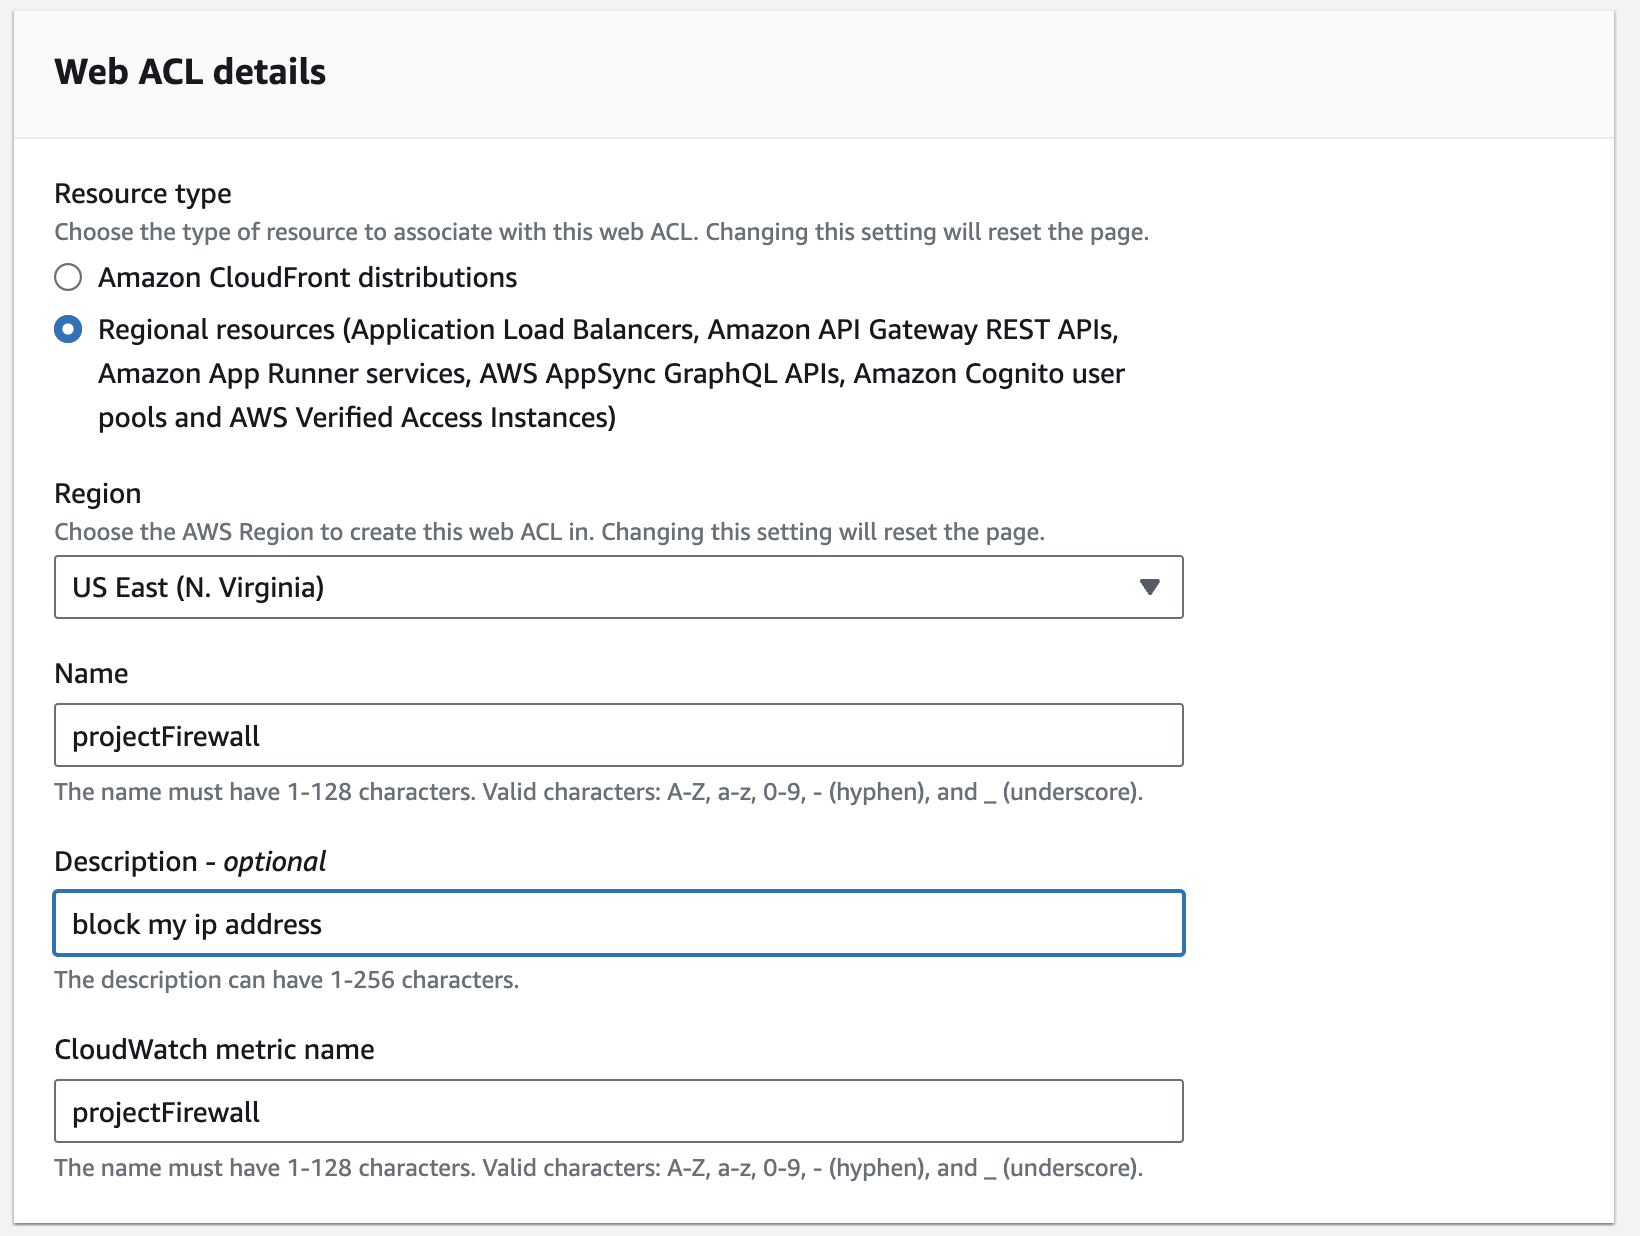
Select the Resource type as Regional resource , as we're going to deploy it in ALB.
As mentioned earlier, AWS WAF is regional, so you must select the same region as your ALB and EC2 instance. In our case it's US East(N.Virginia).
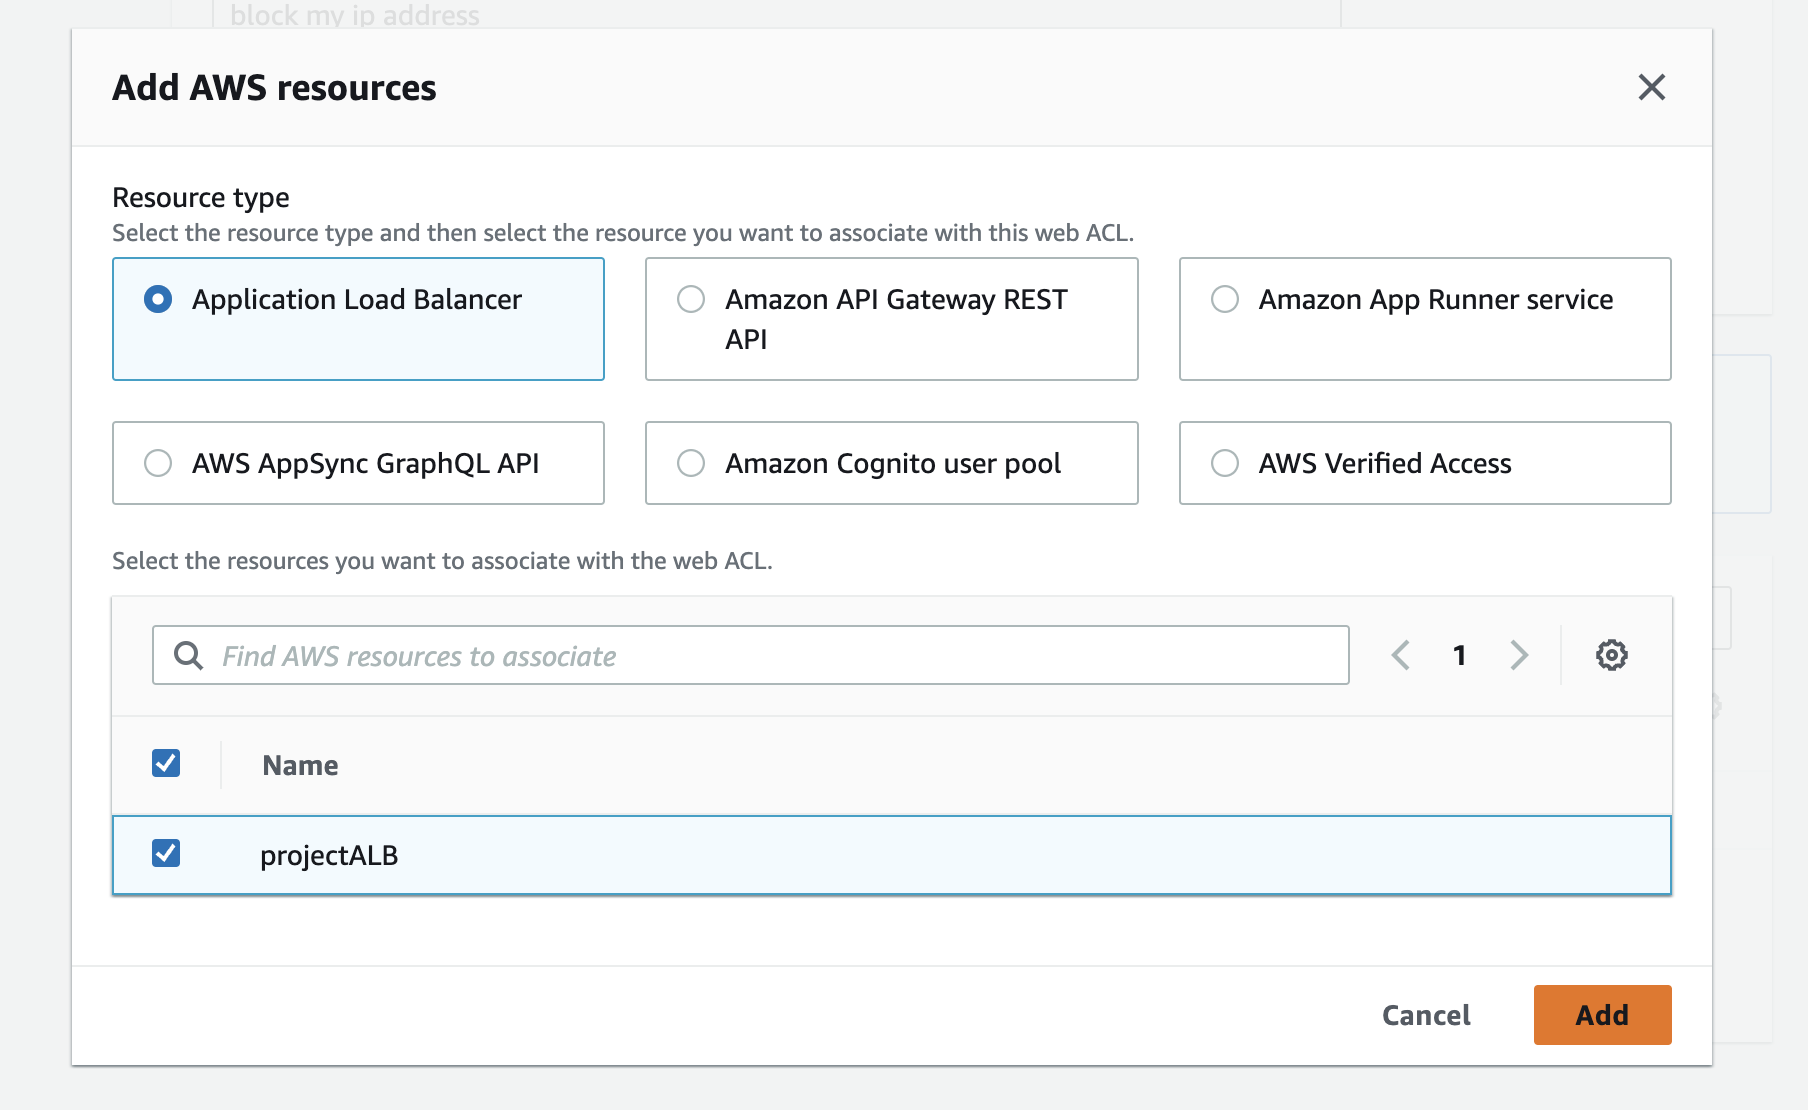
Then to associate the WAF Web ACL with your Application Load Balancer (ALB), add the AWS resource as Application Load Balancer and then the select our ALB (projectALB) created earlier.

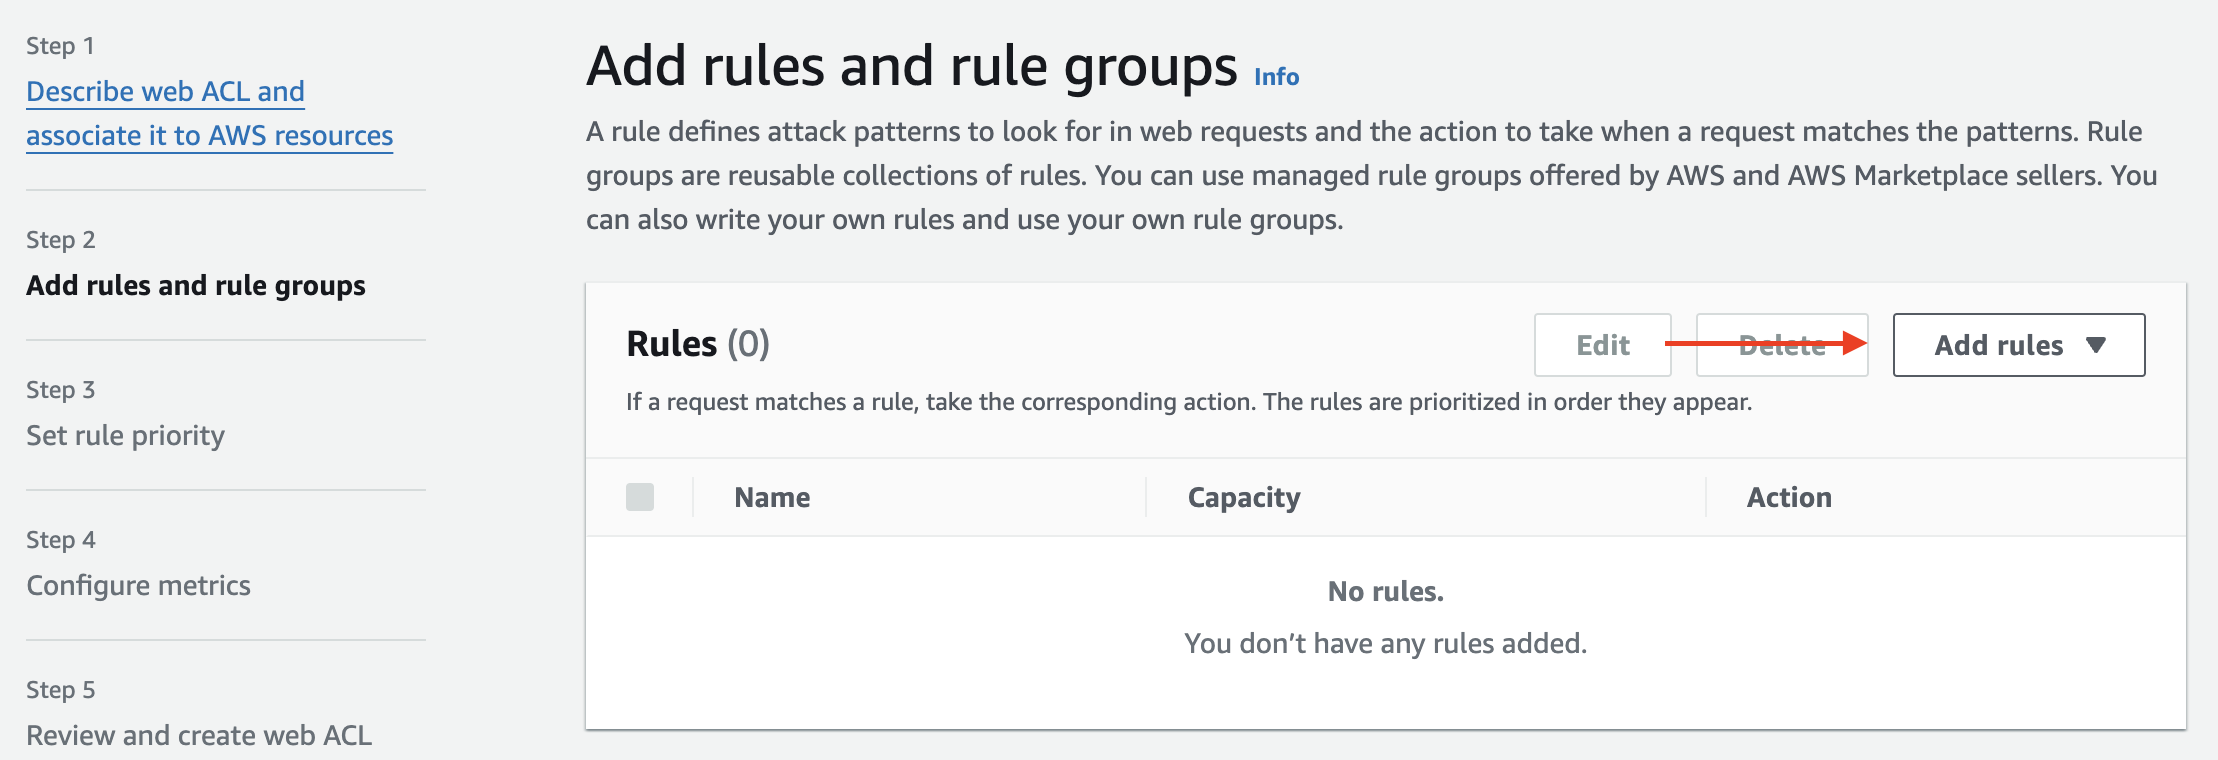
Next, we add rules to filter the traffic. To do this, select the Add rules option. This allows you to define specific conditions under which traffic will be allowed or blocked based on your IP Set or other criteria.
Under “Add rules,” you have two options: Add managed rule group or to add my own rules and rule group
AWS provides predefined sets of rules for common threats, such as SQL injection attacks. These managed rule groups offer an easy way to enhance your security without needing to create rules from scratch. For more details on available managed rules, check out the AWS Managed Rules rule groups list.
In our case we'll choose to add my own rules and rule groups.

In AWS WAF, when adding your own rules and rule groups, you can choose from three different types of rules.
IP Set: This is used to identify and block or allow requests based on the IP addresses of the requesters.
Rule Builder: This allows you to create custom rules where you can inspect requests for specific patterns. These are used for Blocking SQL injection attempts, filtering requests based on headers, or limiting the number of requests a user can make in a given time period.
Rule Group: Combines multiple rules into a single, reusable group for easier management.
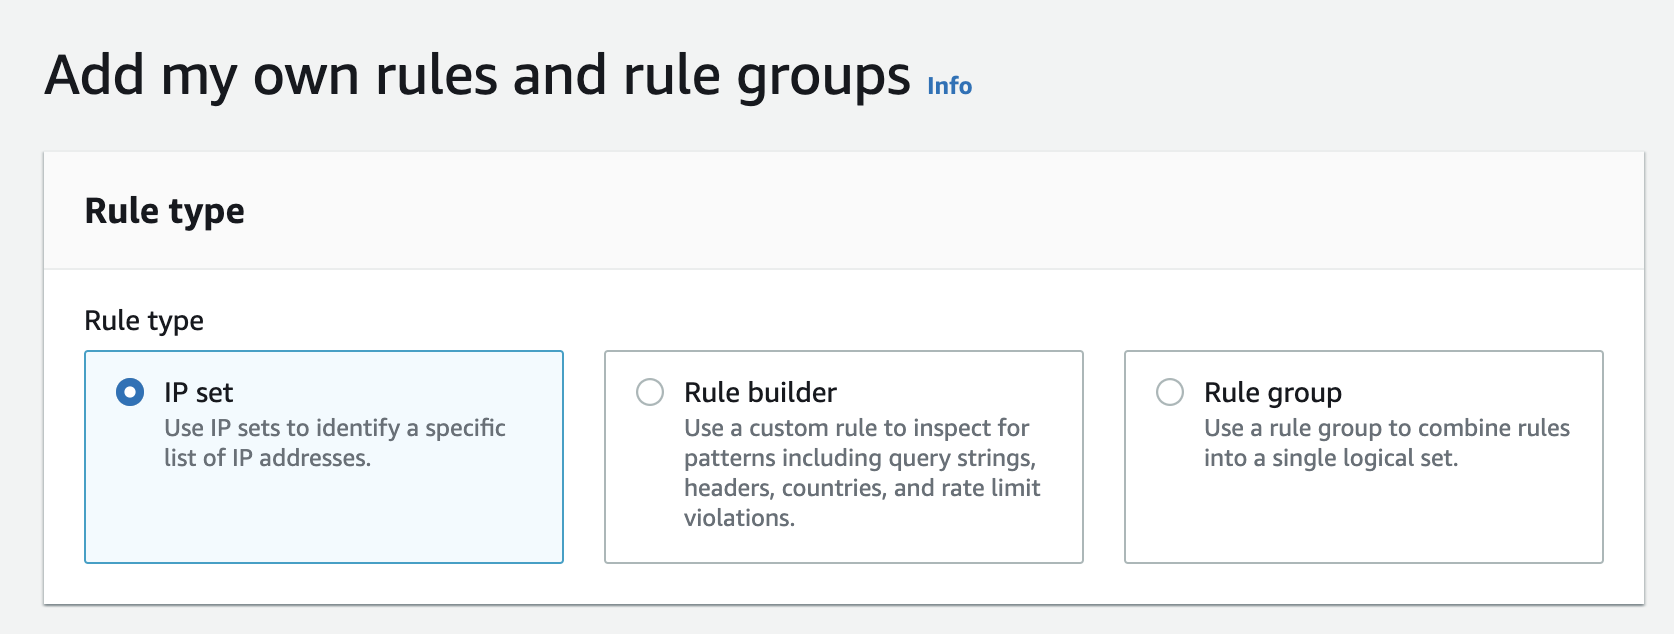
We'll choose
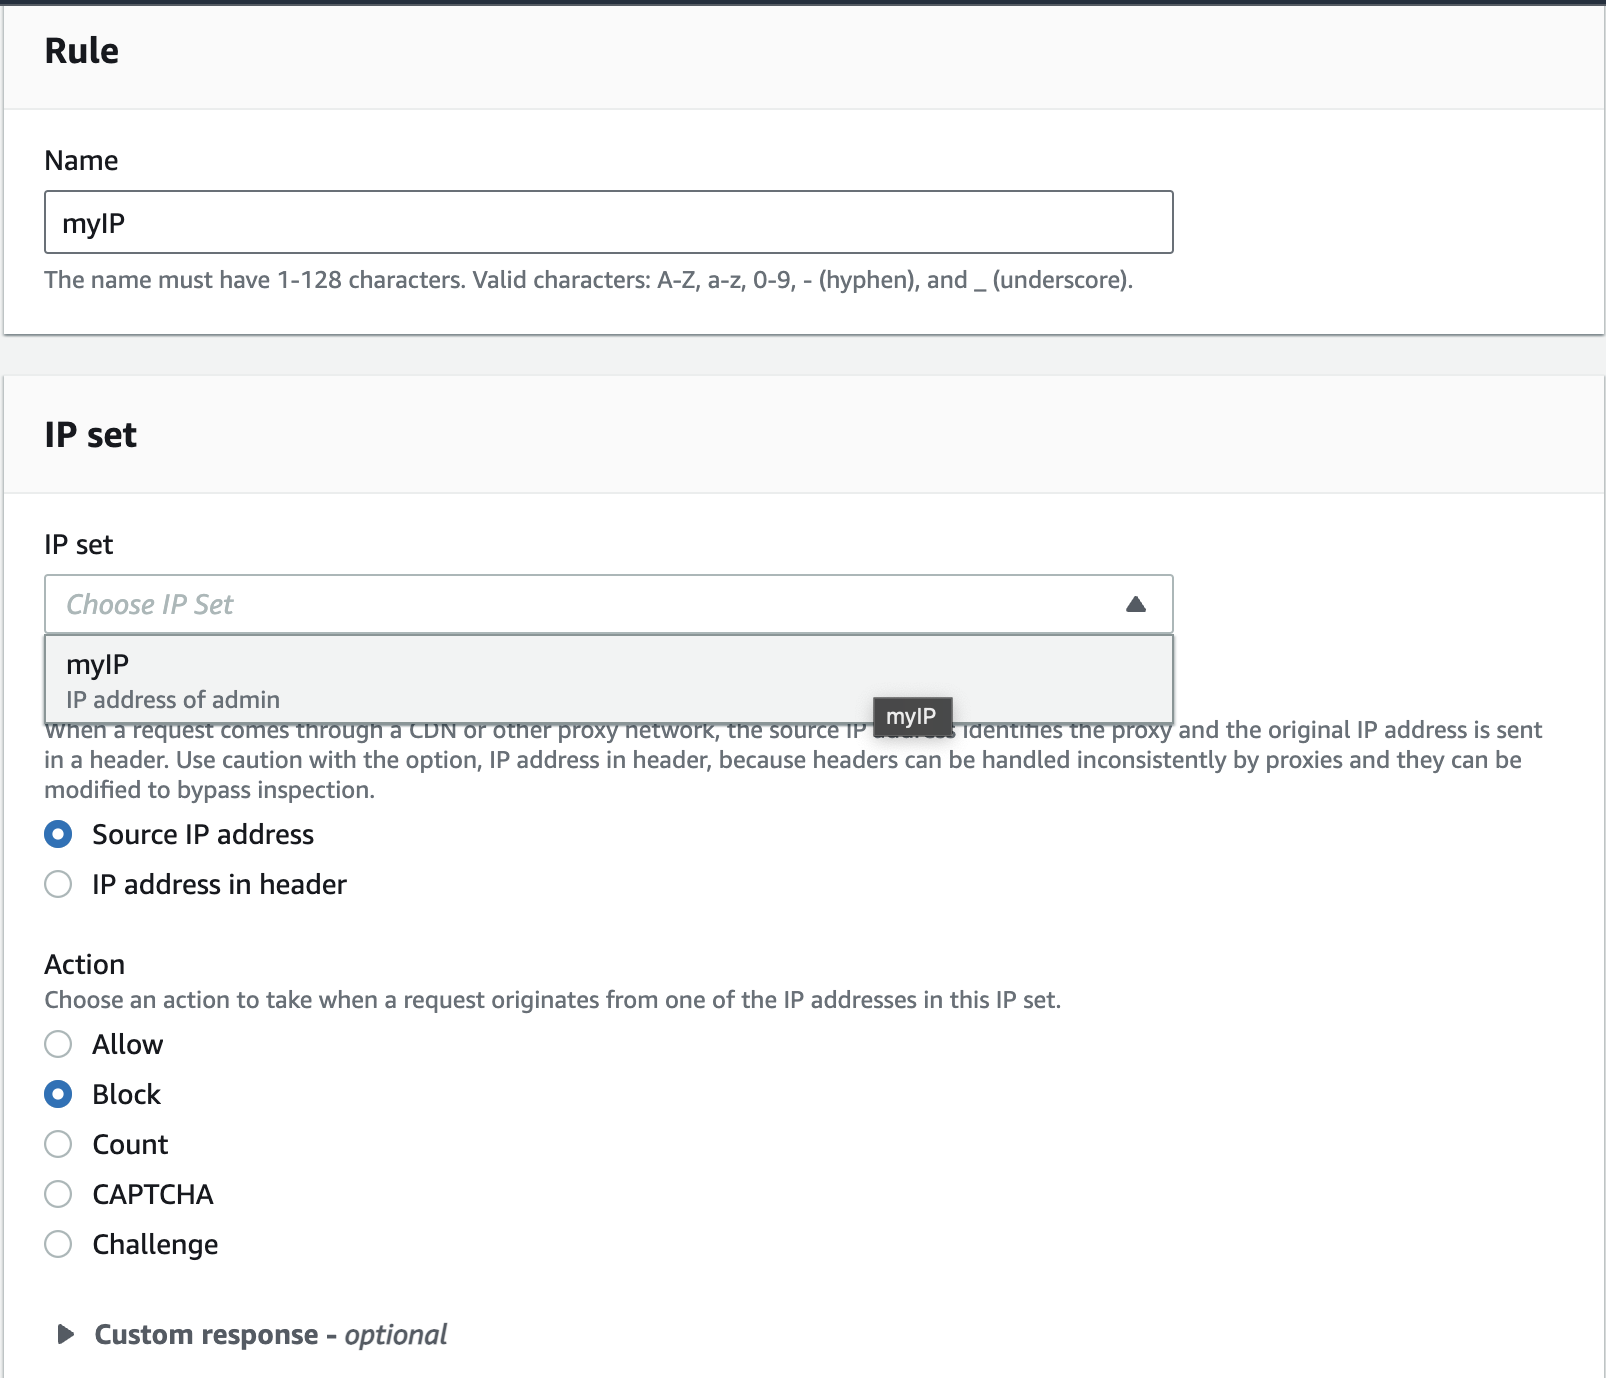
IP set, as we want to block a specific IP defined in IP set.Name the rule and select the IP set created earlier.Choose Action as
Blockto block the traffic from our laptop.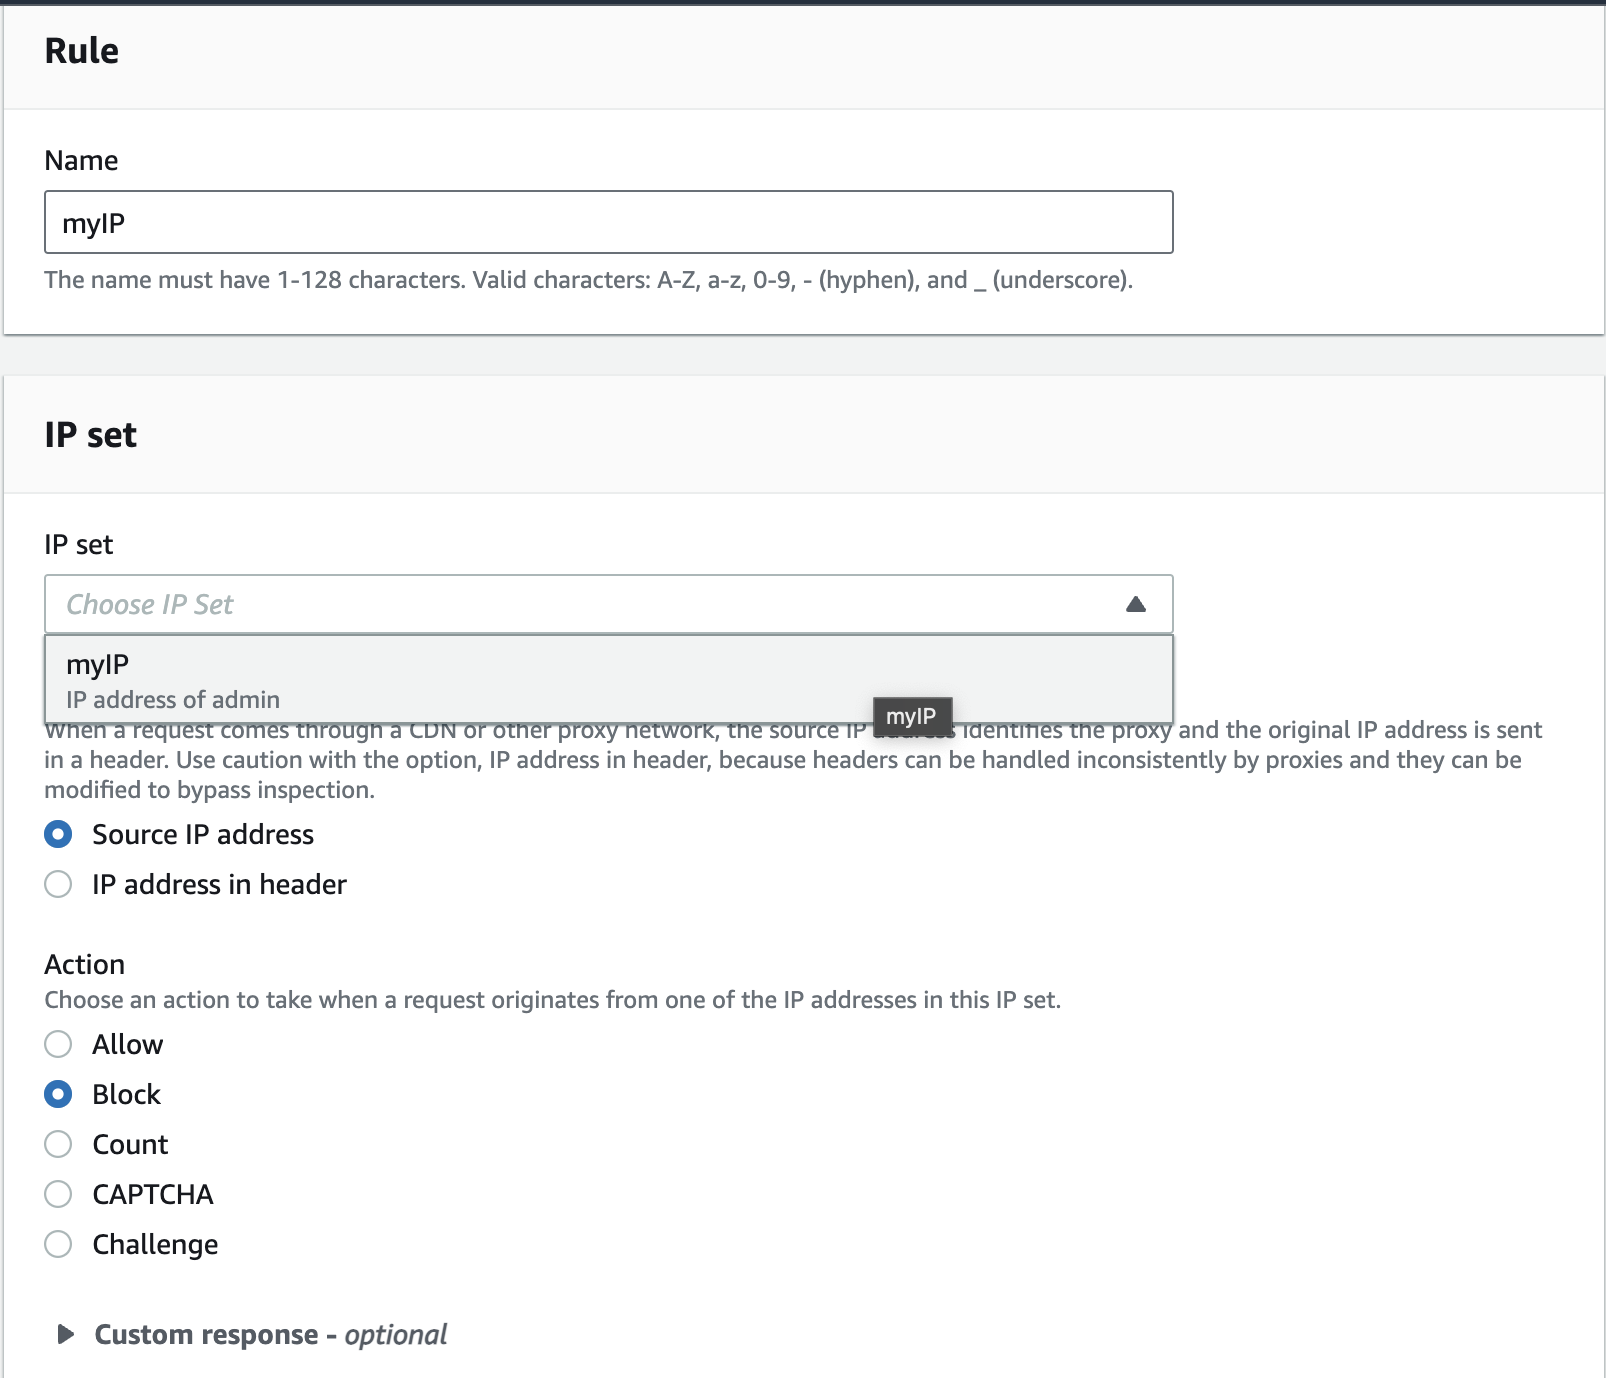
Now choose our added rule
myIP.
Next, review the configurations and create the Web ACL.
Once the Web ACL is created, we can navigate to the
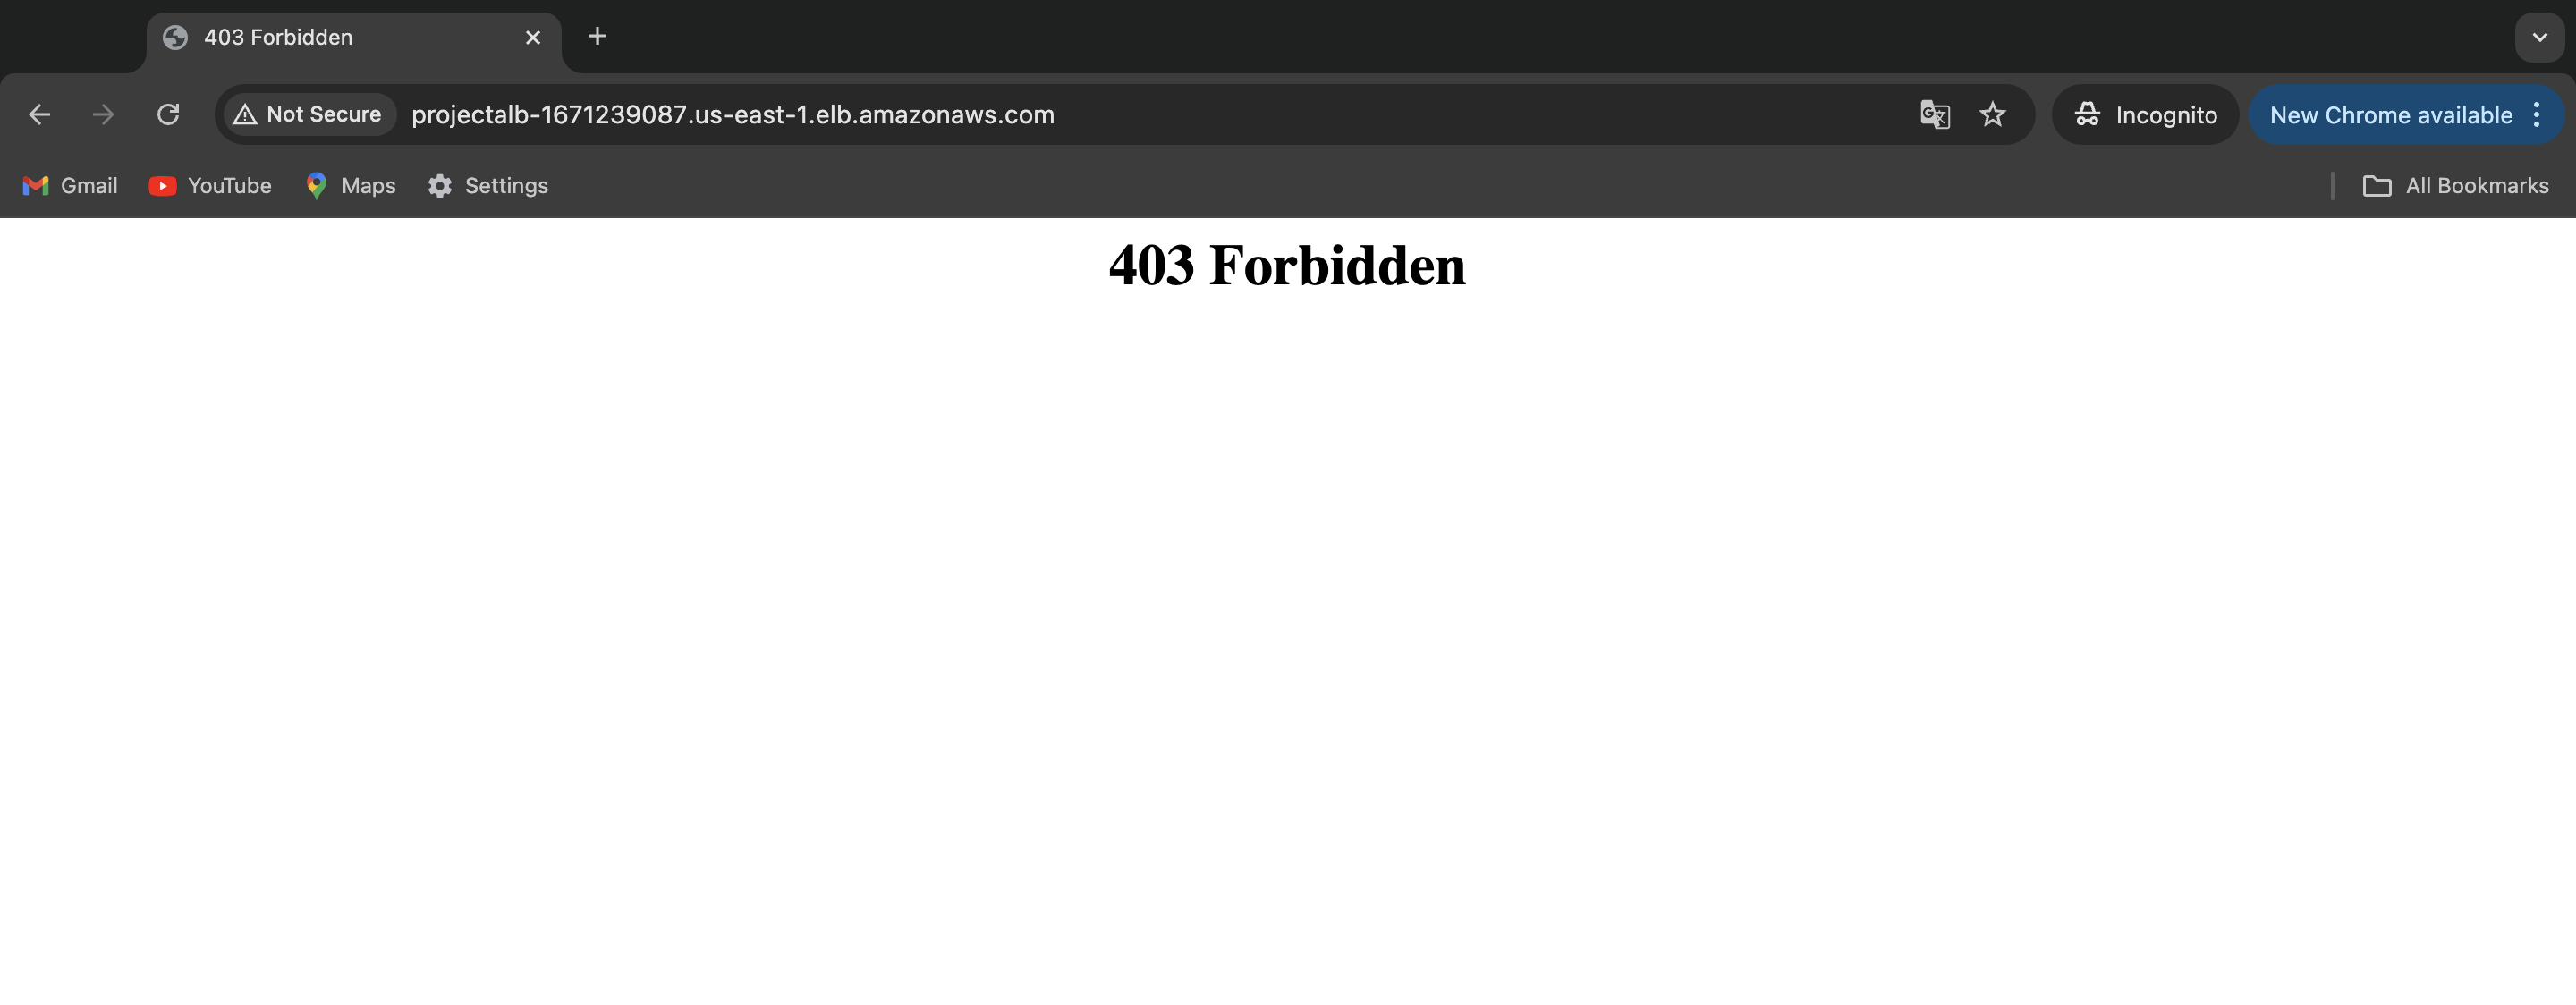
Rulestab to see the rule we added. Additionally, under theAssociated AWS Resourcestab, we will see the Application Load Balancer (ALB) associated with the Web ACL.Now, when we navigate to the ALB's DNS name or IP address from our laptop, we'll see a "403 Forbidden" error. This confirms that the IP Set rule is successfully blocking access from our laptop's IP address to the EC2 instance.
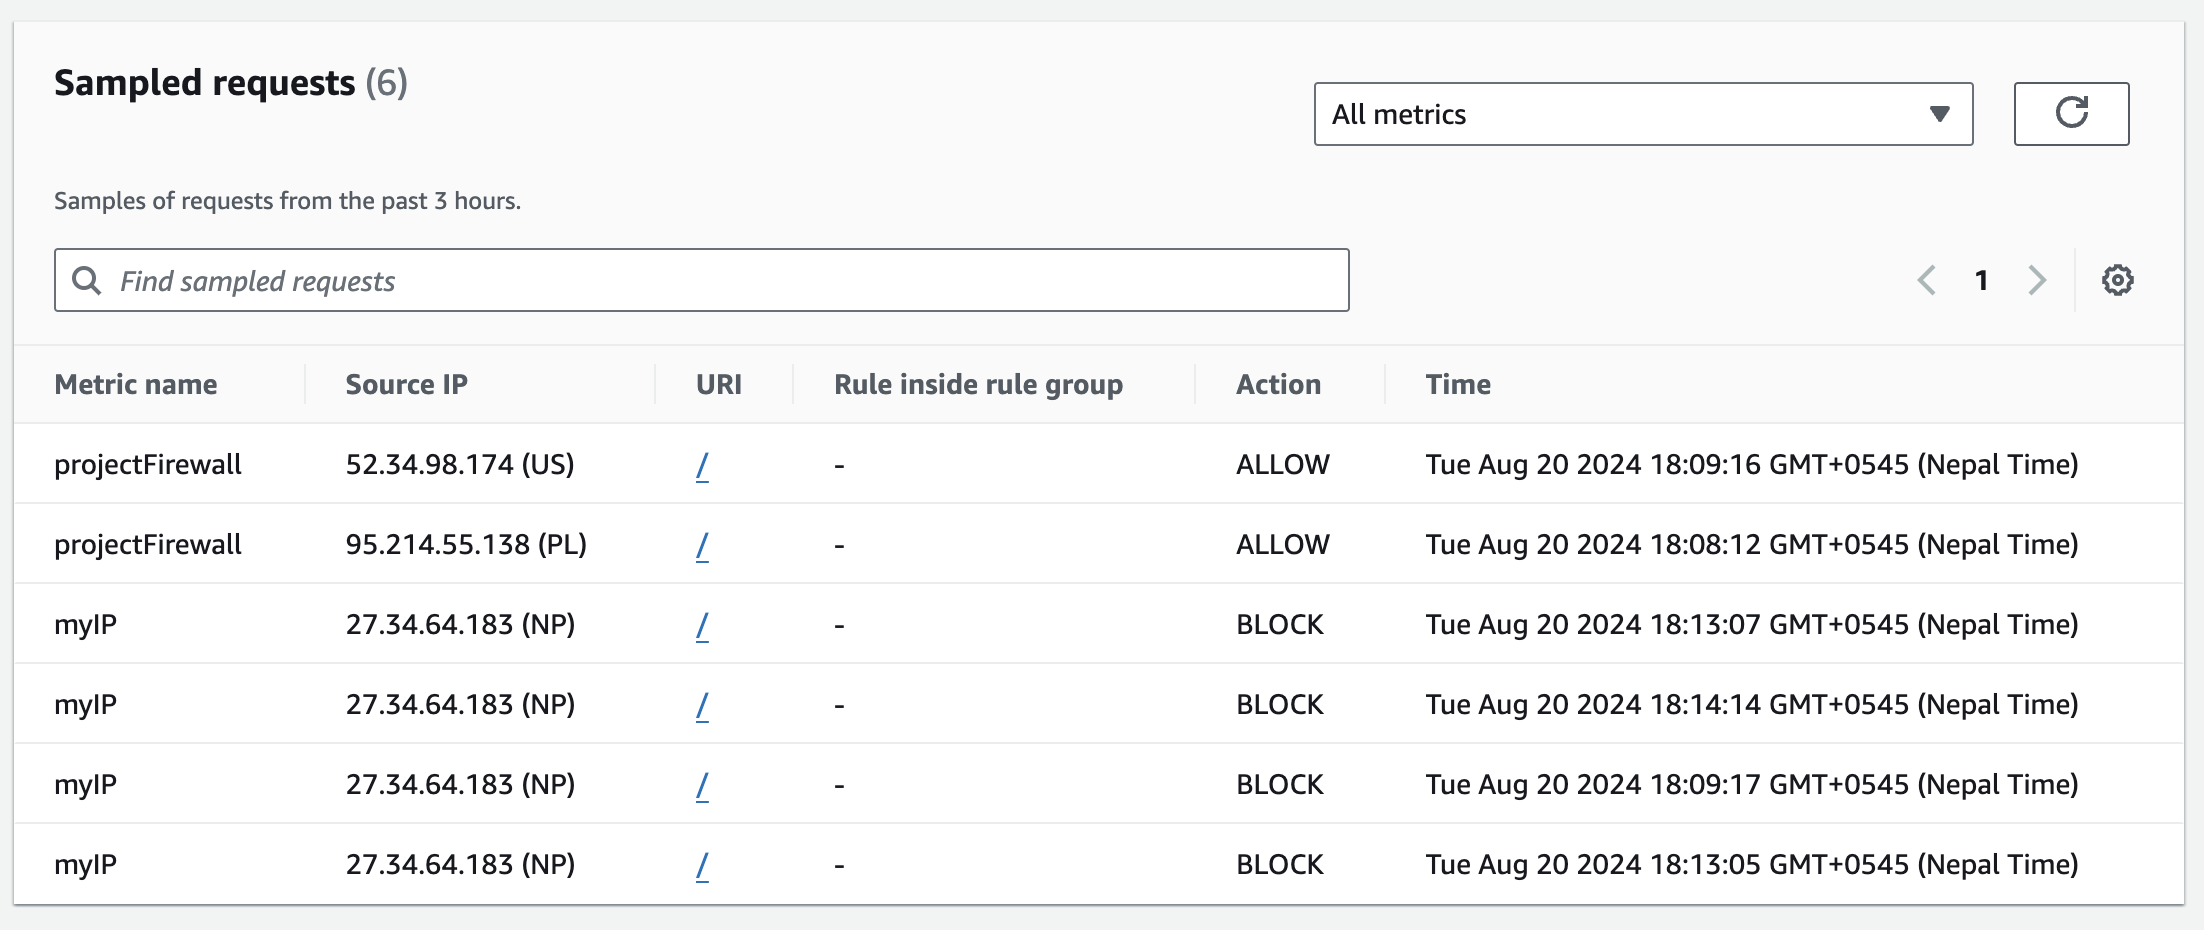
We can confirm that the AWS WAF is effectively blocking traffic from our laptop by checking the Sampled requests tab in the Web ACL dashboard. As shown in the image, we can see multiple entries for your laptop’s IP address (27.34.64.183), all marked with the action BLOCK. This confirms that our IP Set rule is working as expected and successfully preventing access from our specified IP address to the EC2 instance.
Subscribe to my newsletter
Read articles from Akanksha Giri directly inside your inbox. Subscribe to the newsletter, and don't miss out.
Written by
