Automating CI/CD with a Docker-Integrated Jenkins Declarative Pipeline: GitHub, Docker, and Webhooks in Action
 Sandhya Babu
Overview:
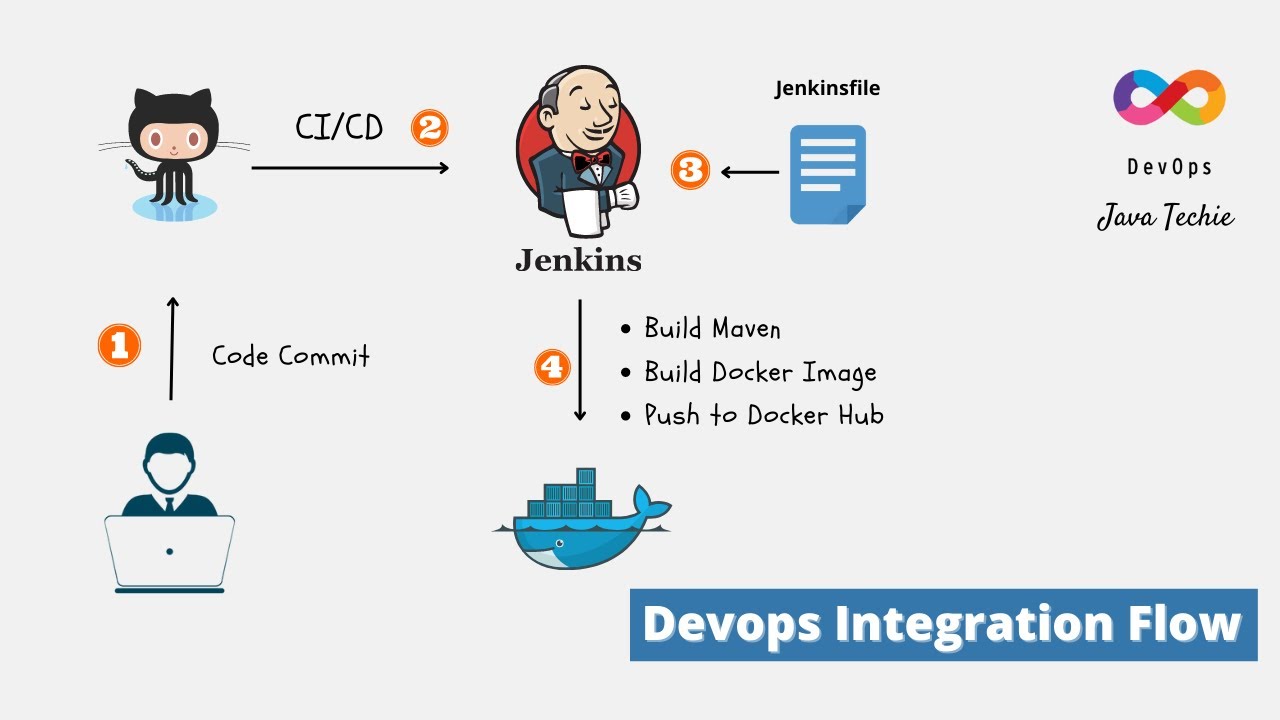
This project demonstrates how to automate the build and deployment process using Jenkins, Docker, GitHub, and webhooks. By setting up a declarative Jenkins pipeline, we’ll automate the process of building a Docker image from a GitHub repository, running a simple Node.js application, and pushing the Docker image to Docker Hub. To achieve complete automation, we will use webhooks to trigger the pipeline upon every commit to the repository.
Objective:
The objective of this project is to create a Jenkins pipeline that:
Automate the build and deployment process using Jenkins.
Create a Jenkins pipeline that builds a Docker image from a GitHub repository, runs a simple Node.js application, and pushes the image to Docker Hub.
Integrate Docker with Jenkins for a streamlined CI/CD pipeline.
Automate the entire process using GitHub webhooks.
Prerequisites:
Before getting started, ensure you have the following:
Jenkins installed (running on an EC2 instance or a local machine).
Docker installed and configured in Jenkins.
A GitHub account and a repository for the project.
Jenkins plugins: Git, Docker Pipeline, GitHub Integration
Docker Hub account to push your Docker images.
Adding Docker Hub Credentials to Jenkins
Open Jenkins in your web browser.
Navigate to “Manage Jenkins” from the left-hand menu.
Click on “Manage Credentials”.
Select the appropriate domain (e.g., Global credentials).
Click on “Add Credentials” on the left-hand menu.
Fill in the credentials form:
Kind: Username with password
Scope: Global (if you want it to be available to all jobs)
Username: Your Docker Hub username
Password: Your Docker Hub password
ID: dockerhub-credentials-id (this should match the ID used in your Jenkinsfile)
Description: Docker Hub credentials
Click “OK” to save the credentials.
Step-by-Step Instructions:
1. Setting Up the GitHub Repository:
Create a new repository on GitHub.
Clone the repository locally
git clone https://github.com/YourUsername/YourRepo.git
cd YourRepo
Create the Dockerfile and Jenkinsfile:
touch Dockerfile Jenkinsfile
Dockerfile Content:
# Use an official Node.js runtime as a parent image
FROM node:14

# Set the working directory
WORKDIR /usr/src/app

# Copy the Dockerfile and Jenkinsfile (for simplicity in this demo)
COPY Dockerfile Jenkinsfile ./

# Create a simple Node.js application
RUN echo "console.log('Hello, Jenkins and Docker!');" > app.js

# Expose the application port
EXPOSE 8080

# Command to run the application
CMD ["node", "app.js"]
Jenkinsfile Content:
pipeline {
    agent any
    environment {
        DOCKERHUB_CREDENTIALS = credentials('your-dockerhub-credentials-id')
    }
    stages {
        stage('Checkout') {
            steps {
                git branch: 'main', url: 'https://github.com/YourUsername/YourRepo.git'
            }
        }
        stage('Build Docker Image') {
            steps {
                script {
                    docker.build('your-dockerhub-username/yourapp:latest')
                }
            }
        }
        stage('Push to Docker Hub') {
            steps {
                script {
                    docker.withRegistry('https://index.docker.io/v1/', 'your-dockerhub-credentials-id') {
                        docker.image('your-dockerhub-username/your-app:latest').push()
                    }
                }
            }
        }
    }
}
Here's a list of placeholders in the original Jenkinsfile syntax where users need to replace their own information:
credentials('your-dockerhub-credentials-id')- Replace
'your-dockerhub-credentials-id'with the actual ID of your Docker Hub credentials stored in Jenkins.
- Replace
git branch: 'main', url: 'https://github.com/YourUsername/YourRepo.git'Replace
'main'with your target branch name if different.Replace
'https://github.com/YourUsername/YourRepo.git'with the URL of your GitHub repository.
docker.build('your-dockerhub-username/yourapp:latest')- Replace
'your-dockerhub-username/yourapp:latest'with your Docker Hub username and the name/tag of your Docker image.
- Replace
docker.withRegistry('https://index.docker.io/v1/', 'your-dockerhub-credentials-id')Replace
'https://index.docker.io/v1/'if using a different registry URL (though for Docker Hub, this is correct).Replace
'your-dockerhub-credentials-id'with the same Docker Hub credentials ID used earlier.
docker.image('your-dockerhub-username/your-app:latest').push()- Replace
'your-dockerhub-username/your-app:latest'with your Docker Hub username and the name/tag of your Docker image.
- Replace
Commit and Push Changes to GitHub:
git add Dockerfile Jenkinsfile
git commit -m "Added Dockerfile and Jenkinsfile"
git push origin main
Set Up Jenkins Pipeline:
Create a New Pipeline Job in Jenkins:
Open your Jenkins dashboard.
Click on "New Item".
Enter the job name (e.g., "Docker Jenkins Pipeline").
Select "Pipeline" as the project type and click "OK".
Under "Build Triggers":
Scroll down to the "Build Triggers" section.
Check the box for "GitHub hook trigger for GITScm polling". This ensures the pipeline triggers automatically when you push code to your GitHub repository.
Write the Pipeline Script:
- In the "Pipeline" section, select "Pipeline script" and paste the following script( Jenkinsfile)
Save the Pipeline:
- Click "Save" to store your pipeline configuration.
Run the Pipeline:
Option 1: Manually Trigger the Pipeline from Jenkins
Open Jenkins in Your Web Browser:
- Access your Jenkins dashboard (e.g.,
http://your-jenkins-url:8080).
- Access your Jenkins dashboard (e.g.,
Navigate to Your Pipeline Job:
- Click on the name of your Pipeline job (e.g., "Docker Jenkins Pipeline").
Click on "Build Now" to Trigger the Pipeline Manually:
On the left-hand side of the job page, click "Build Now".
This will manually trigger the pipeline and start the build process.


Configure GitHub Webhook:
Go to your GitHub repository.
Navigate to Settings > Webhooks.
Add a new webhook:
Payload URL: http://your-jenkins-url/github-webhook/
Content type: application/json
Secret: (optional, but recommended for security)
Option 2: Trigger the Pipeline via GitHub Webhook/Testing the automation
- Check "GitHub hook trigger for GITScm polling":
Ensure that the "GitHub hook trigger for GITScm polling" option is enabled under Build Triggers in your Jenkins job configuration.
- Navigate to Your Project Directory:
On your local machine, navigate to your project directory, and push a new commit to the repository:
cd /path/to/your/project
echo "Triggering webhook" >> README.md
git add README.md
git commit -m "Test webhook"
git push origin main
Alternatively, go back to the GitHub Webhook settings, and you’ll see a Recent Deliveries section where you can manually “Redeliver” the latest payload to see if Jenkins picks it up.
- Monitor Jenkins:
Check your Jenkins job to see if the build is triggered automatically after the push.
You can monitor the Jenkins job logs to see if they receive the webhook event.
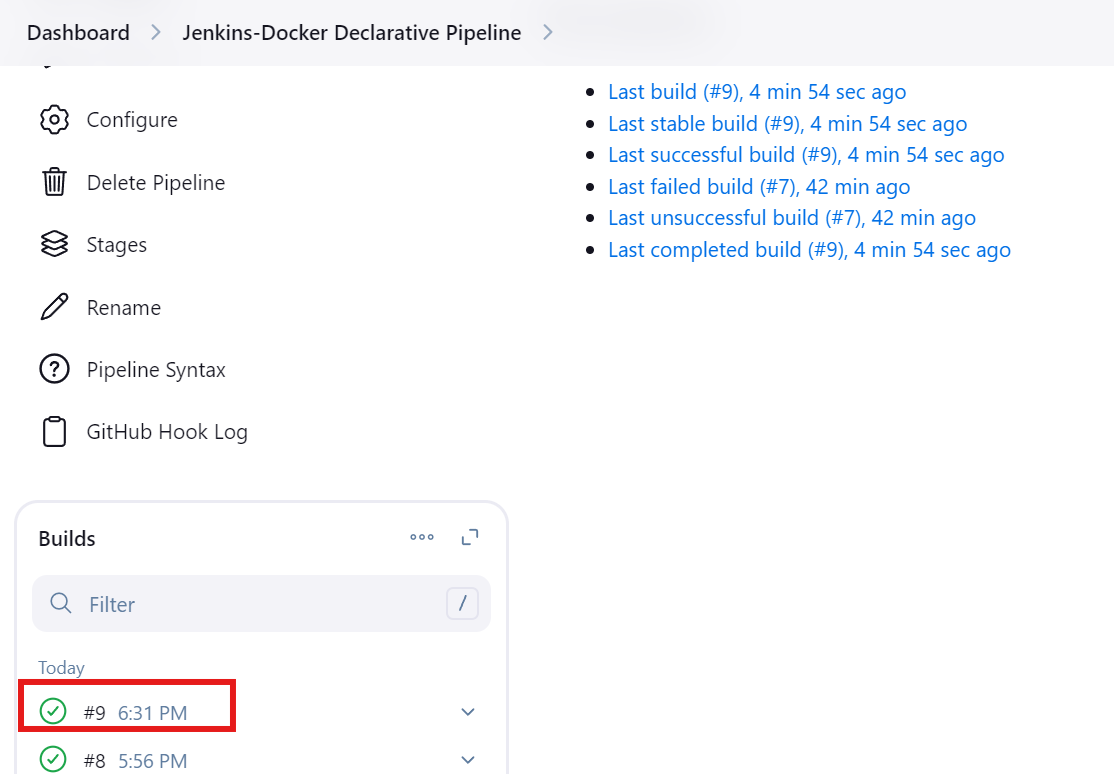
The #9 build is triggered automatically after the push.

Outcome:
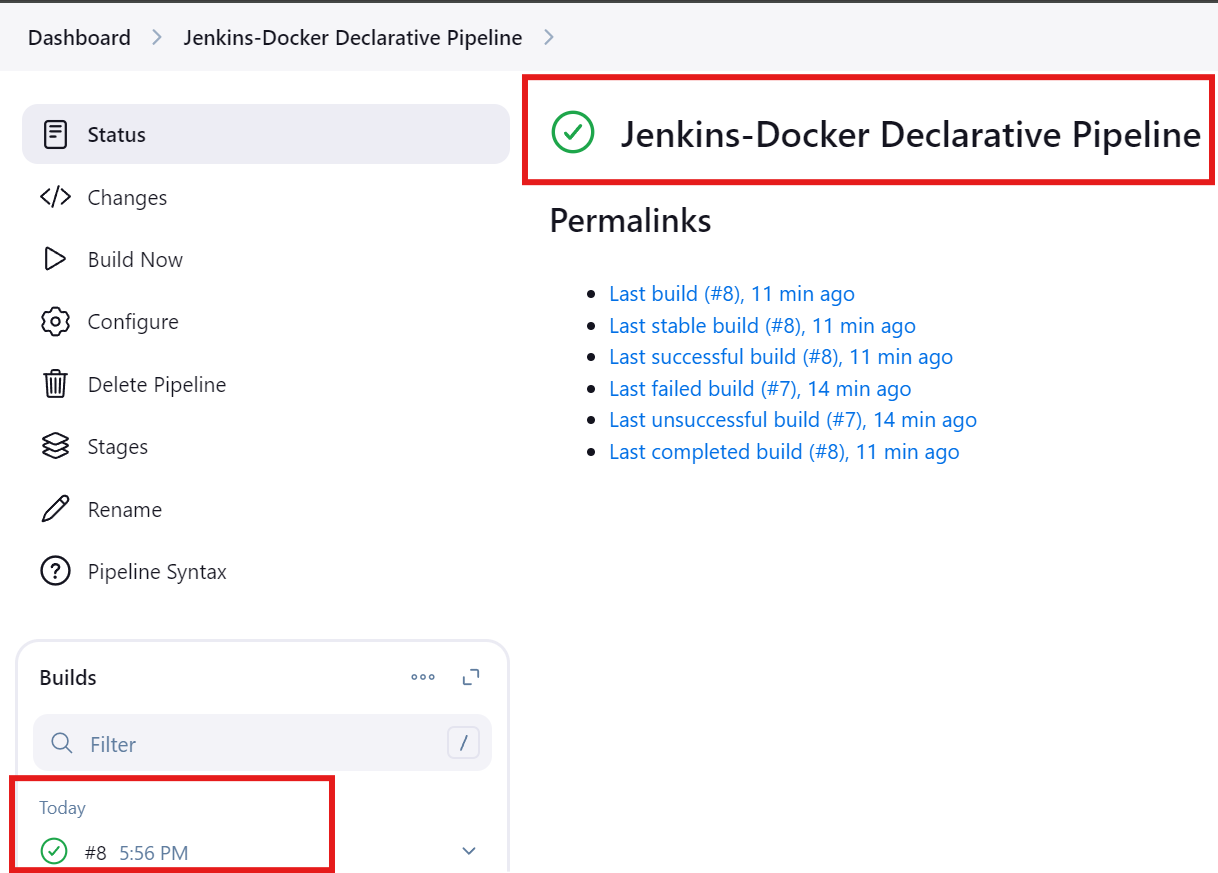
This project automated the process of building a Docker image, running a simple Node.js application, and pushing the image to Docker Hub using Jenkins Declarative Pipeline and webhooks. The integration of GitHub webhooks ensures the process is fully automated upon every code change.
Node.js application running inside the container.
Troubleshooting:
Git Checkout Issues: If Jenkins fails to fetch the repository, ensure the correct branch is specified and the repository URL is correct.
Docker Build Errors: Ensure Docker is correctly configured in Jenkins and that the Dockerfile syntax is valid.
Webhook Not Triggering: Double-check the webhook URL in GitHub and make sure Jenkins is accessible from GitHub.
Conclusion:
Setting up a Jenkins CI/CD pipeline for building and pushing Docker images to Docker Hub is an essential move toward automating the software development process. This pipeline plays a crucial role in streamlining deployment workflows, providing developers with a reliable system for managing containerized applications.
By integrating Jenkins into the development pipeline, the process of building Docker images starts automatically whenever code changes are made. Jenkins takes care of everything from building the application to creating Docker images. Once built, these images are pushed to Docker Hub, making it easy to version and track them.
The CI/CD pipeline introduces consistency, scalability, and speed into application deployment. Developers can focus more on improving code while Jenkins handles the complex tasks involved in the Docker image lifecycle. This setup not only boosts productivity but also ensures that well-versioned and high-quality Docker images are delivered.
In summary, implementing this Jenkins CI/CD pipeline empowers teams with a structured approach to building, testing, and deploying containerized applications. Leveraging Docker Hub for managing and distributing these images brings more agility and reliability into the development process, fostering a more efficient and collaborative environment.
Subscribe to my newsletter
Read articles from Sandhya Babu directly inside your inbox. Subscribe to the newsletter, and don't miss out.
Written by

Sandhya Babu
Sandhya Babu
🌟 Aspiring DevOps Engineer | Cloud & DevOps Enthusiast🌟 Hello! I’m Sandhya Babu, deeply passionate about DevOps and cloud technologies. Currently in my exploring phase, I’m learning something new every day, from tools like Jenkins, Docker, and Kubernetes to the concepts that drive modern tech infrastructures. I have hands-on experience with several Proof of Concept (POC) projects, where I've applied my skills in real-world scenarios. I love writing blogs about what I've learned and sharing my experiences with others, hoping to inspire and connect with fellow learners. With certifications in Azure DevOps and AWS SAA-C03, I’m actively seeking opportunities to apply my knowledge, contribute to exciting projects, and continue growing in the tech industry. Let’s connect and explore the world of DevOps together!