Form validation in Nuxt and Vuetify using VeeValidate ft. composition API
 Asfaq Leeon
Form validation is a basic need in any frontend application. But if we need to do a validation from scratch, it could be a tedious and error-prone. There are some awesome libraries exist for the most popular frontend framework. You already know that Nuxt is built on top of VueJS and Vuetify is the Vue UI component framework. The VeeValidate is a form library for VueJS. In this article, I'll using the Vuetify form components in a Nuxt project and the Vuetify has built-in support for VeeValidation. Using VeeValidation I'll validate those from components. Also today I'm using the Vue's composition API.
Installation
Obviously you need Node, npm, yarn etc installed in you machine. I'll use yarn for this article. Also, please note that this is August 2024. I'm using the current latest version of Nuxt(v3.13) and Vuetify(3.7.0) etc.
First generate a Nuxt project in cli. Navigate to your directory and run this command
npx nuxi@latest init form-validation
Here form-validation is the project name. This will ask one question that which package manager you want to use. I chose the yarn. You can select as your choice.
Now navigate to the project directory and run the project to see that everything is fine. If everything works perfectly then install Vuetify.
First install the modules
yarn add -D vuetify vite-plugin-vuetify
yarn add @mdi/font
Next integrate in nuxt.config.ts file.
import vuetify, { transformAssetUrls } from 'vite-plugin-vuetify'

export default defineNuxtConfig({
  compatibilityDate: '2024-04-03',
  devtools: { enabled: true },
  build: {
    transpile: ['vuetify'],
  },
  modules: [
    (_options, nuxt) => {
      nuxt.hooks.hook('vite:extendConfig', (config) => {
        // @ts-expect-error
        config.plugins.push(vuetify({ autoImport: true }))
      })
    },
  ],
  vite: {
    vue: {
      template: {
        transformAssetUrls,
      },
    },
  },
})
Next, we need to initialise Vuetify by Nuxt at startup so, the main Vue app instance can access it. To do so, create the folder plugins in the project root directory. Inside that folder I've created a file named as vuetify.ts. You can give any name because it will be loaded by Nuxt automatically. In vuetify.ts paste this code.
// import this after install `@mdi/font` package
import '@mdi/font/css/materialdesignicons.css'

import 'vuetify/styles'
import { createVuetify } from 'vuetify'

export default defineNuxtPlugin((app) => {
  const vuetify = createVuetify({
    // ... your configuration
  })
  app.vueApp.use(vuetify)
})
Next install VeeValidate
yarn add @vee-validate/nuxt
We also need a typed schema builder for VeeValidate. Using this schema, VeeValidate can generate forms. But how we will see this later.
yarn add @vee-validate/yup
Now integrate those it in nuxt
import vuetify, { transformAssetUrls } from 'vite-plugin-vuetify'

export default defineNuxtConfig({
  compatibilityDate: '2024-04-03',
  devtools: { enabled: true },
  build: {
    transpile: ['vuetify'],
  },
  modules: [
    (_options, nuxt) => {
      nuxt.hooks.hook('vite:extendConfig', (config) => {
        // @ts-expect-error
        config.plugins.push(vuetify({ autoImport: true }))
      })
    },
    '@vee-validate/nuxt',
  ],
  vite: {
    vue: {
      template: {
        transformAssetUrls,
      },
    },
  },
})
Here, inside modules array, I've integrated.
The code
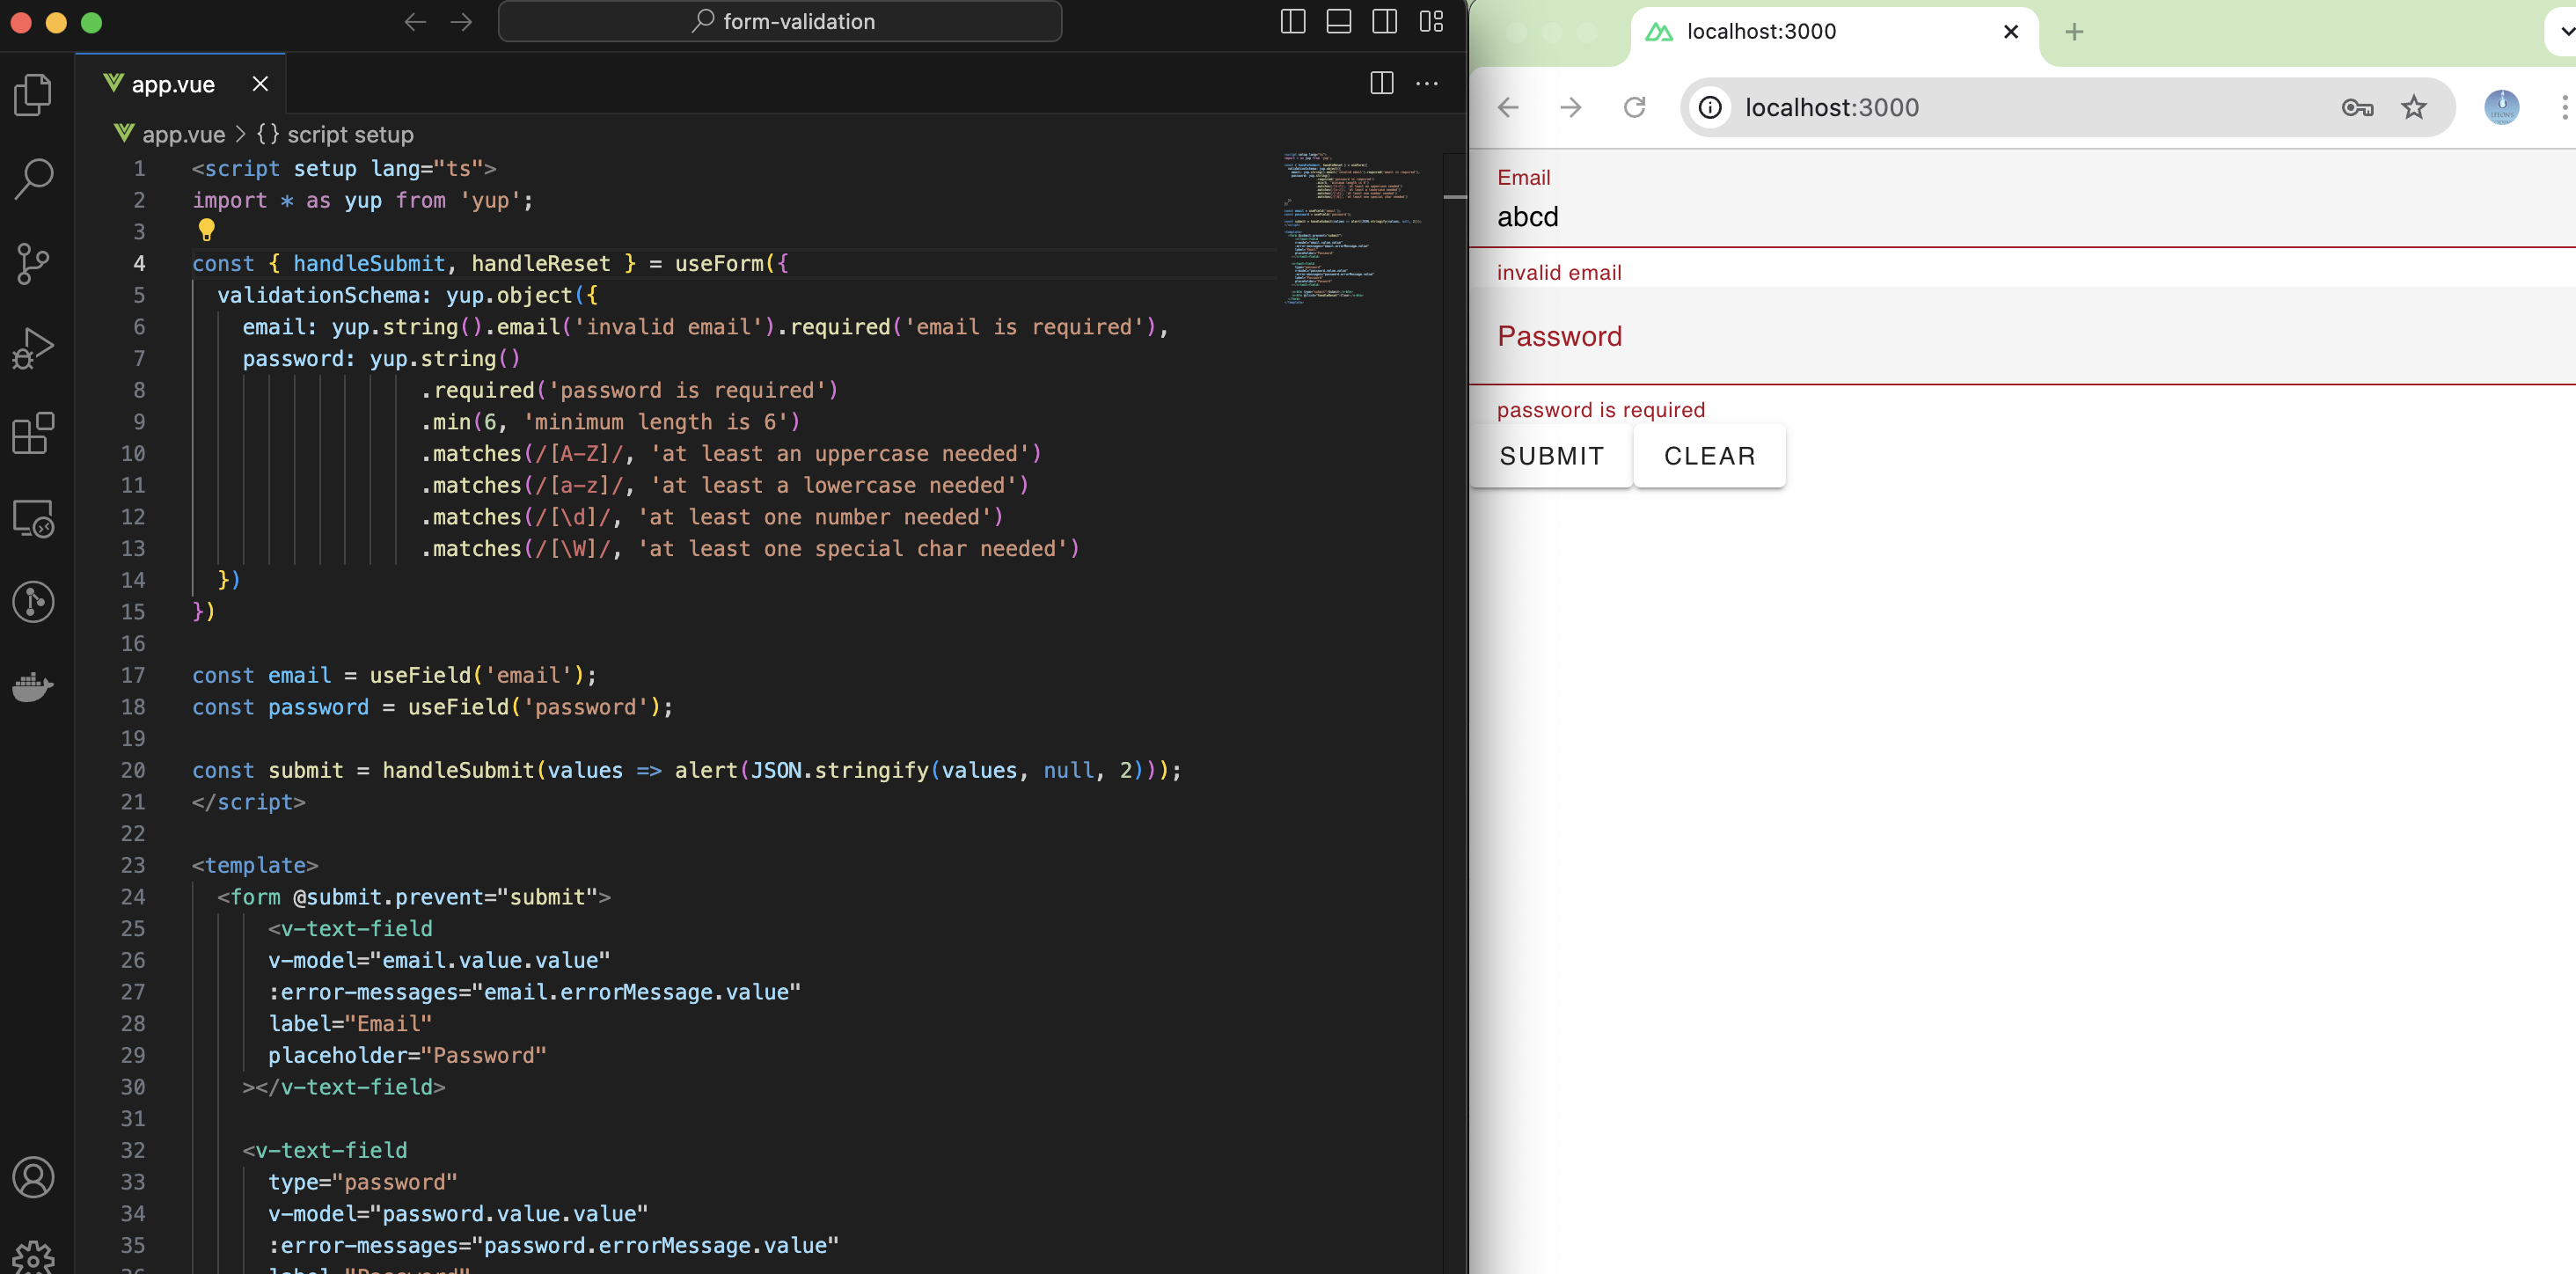
Let go to some serious business. As a simple form validation thing, I want to do it only app.vue. First remove the boilerplate code in app.vue. Inside <template>, lets define some Vuetify components. Here is the full app.vue content.
<script setup lang="ts">
import * as yup from 'yup';

const { handleSubmit, handleReset } = useForm({
  validationSchema: yup.object({
    email: yup.string().email('invalid email').required('email is required'),
    password: yup.string()
                  .required('password is required')
                  .min(6, 'minimum length is 6')
                  .matches(/[A-Z]/, 'at least an uppercase needed')
                  .matches(/[a-z]/, 'at least a lowercase needed')
                  .matches(/[\d]/, 'at least one number needed')
                  .matches(/[\W]/, 'at least one special char needed')
  })
});

const email = useField('email');
const password = useField('password');

const submit = handleSubmit(values => alert(JSON.stringify(values, null, 2)));
</script>

<template>
  <form @submit.prevent="submit">
      <v-text-field
      v-model="email.value.value"
      :error-messages="email.errorMessage.value"
      label="Email"
      placeholder="Password"
    ></v-text-field>

    <v-text-field
      type="password"
      v-model="password.value.value"
      :error-messages="password.errorMessage.value"
      label="Password"
      placeholder="Pasword"
    ></v-text-field>

    <v-btn type="submit">Submit</v-btn>
    <v-btn @click="handleReset">Clear</v-btn>
  </form>
</template>
Explanation
Here inside the <template> tag or element, I've defined a form element. The submit is handled by the submit function defined in the <script>, I'll go there later. and the .prevent is for preventing the form's default behaviour of redirection to another page after clicking the submit button. Inside form, I've added 2 Vuetify v-text-field components one is for email and one is for password.
In both cases, the common html properties are label, placeholder. Also the type attribute in password section so the text typed inside this component isn't visible.
The v-text-field component accepts several props. The most important is v-model. It allows 2 way binding. I'll show shortly where I've declared those. Another important attribute is :error-messages. Clearly it is a v-bind directive which is nothing but a attribute binding. The attribute error-messages is defined by the VeeValidate.
Also, by defining the type="submit" of submit button, it triggers the submission. And handleReset is defined in the <script> section.
Now come to the script part. Here I've defined the email and password field here.
const email = useField('email');
const password = useField('password');
Those are VeeValidate components and those are bind with <template> part v-bind. The validation part is written here.
const { handleSubmit, handleReset } = useForm({
  validationSchema: yup.object({
    email: yup.string().email('invalid email').required('email is required'),
    password: yup.string()
                  .required('password is required')
                  .min(6, 'minimum length is 6')
                  .matches(/[A-Z]/, 'at least an uppercase needed')
                  .matches(/[a-z]/, 'at least a lowercase needed')
                  .matches(/[\d]/, 'at least one number needed')
                  .matches(/[\W]/, 'at least one special char needed')
  })
});
See how it is easy to setup validation with yup and VeeValidate useForm. The yup has built-in validation method like email, required, min length and custom regex using matches() method. All has one common argument which is nothing but the errorMessage.
The useForm returns many objects, I capture only submit and reset objects using destructuring.
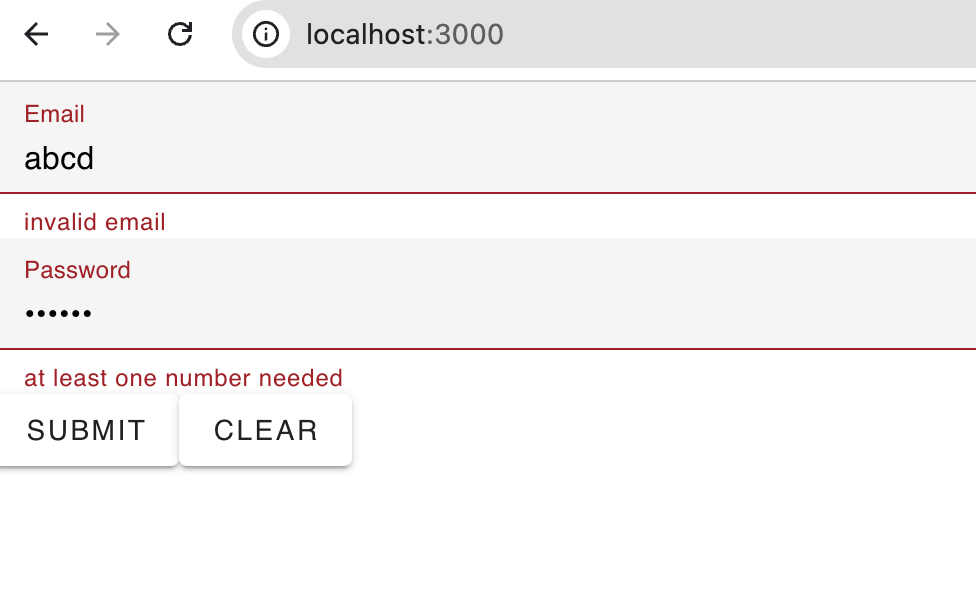
The final output will looks like this

Conclusion
This was a pretty basic example but I think I've covered some cool thing of form validation in Nuxt+Vue. Hope you've enjoyed this article. If you like this then you can give me a thumb. Happy coding.
Subscribe to my newsletter
Read articles from Asfaq Leeon directly inside your inbox. Subscribe to the newsletter, and don't miss out.
Written by
