Steps to Resolve Ubuntu OS Boot Failures and Boost Disk Space Using GParted
 Peter Njuguna
Have you ever encountered a heart-stopping moment when your Ubuntu OSrefuses to boot? Recently, I faced this exact scenario with my Ubuntu 22.04 installation. In this blog post, I'll walk you through how I resolved the boot issue and expanded my disk space using GParted. Whether you're a Linux newbie or a seasoned user, this guide will help you navigate similar challenges.
The Boot Problem
One morning, my Ubuntu 22.04 OS greeted me with a black screen and a cryptic message:
/dev/sda4: clean xxxxxx/xxxxx files, xxxxxxxx/xxxxxx blocks
Step 1: Booting in Recovery Mode
To troubleshoot, I booted Ubuntu in recovery mode.
Here's how:
Restart your computer.
Press and hold Shift during boot to access the GRUB menu.
Select "Advanced options for Ubuntu."
Choose a recovery mode option.
In recovery mode, I cleared the cache, which allowed the system to boot normally.
Step 2: Addressing Low Disk Space
After booting, I received another warning:
"Low Disk Space on "Filesystem root"

To investigate, I ran this command in the terminal:
df -h
This confirmed that /dev/sda4 was 100% full.
Step 3: Analyzing Disk Usage
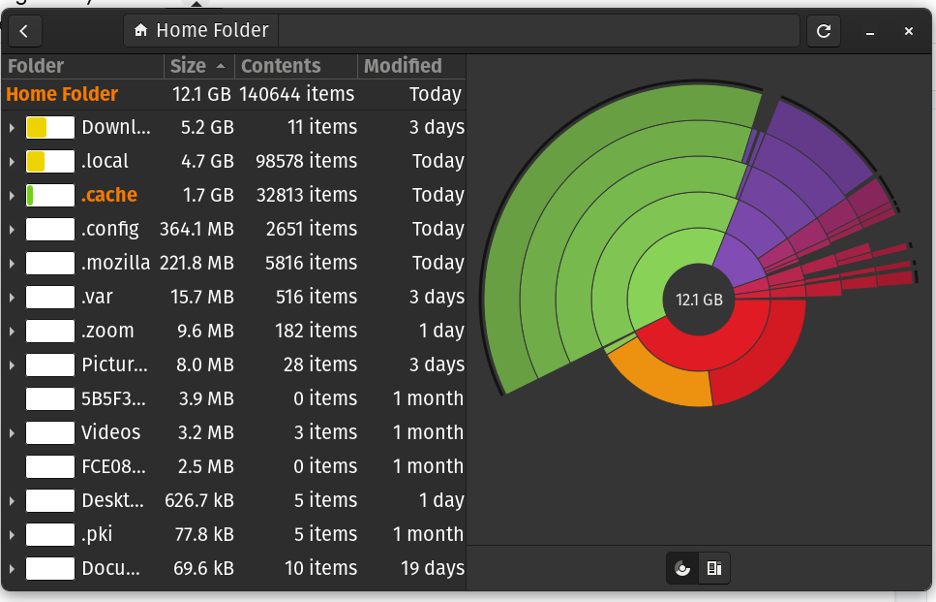
I used the Disk Analyzer tool (also known as Baobab) to check my disk usage. However, all the files seemed important, so deleting them wasn't an option.

Enter GParted: The Disk Partition Savior
What is GParted? GParted (GNOME Partition Editor) is a free, open-source partition editor for managing your disk partitions graphically. It's a powerful tool that lets you resize, copy, and move partitions without losing data.
Key features of GParted:
Resize, create, and delete partitions
Move partitions
Check and repair file systems
Set partition flags
How to Use GParted to Expand Disk Space:
Create a bootable Ubuntu USB drive:
Download the Ubuntu ISO from ubuntu.com
Use a tool like Etcher to create a bootable USB
Boot from the USB drive:
Restart your computer
Enter BIOS/UEFI settings (usually by pressing F2, F12, or Del during boot)
Set USB as the first boot device
Choose "Try Ubuntu" from the boot menu
Install GParted: Open a terminal and run:
 sudo apt-get update
 sudo apt-get install gparted
Launch GParted:
sudo gpartedResize partitions:
Select the partition you want to shrink
Right-click and choose "Resize/Move"
Adjust the size, leaving unallocated space
Apply the changes
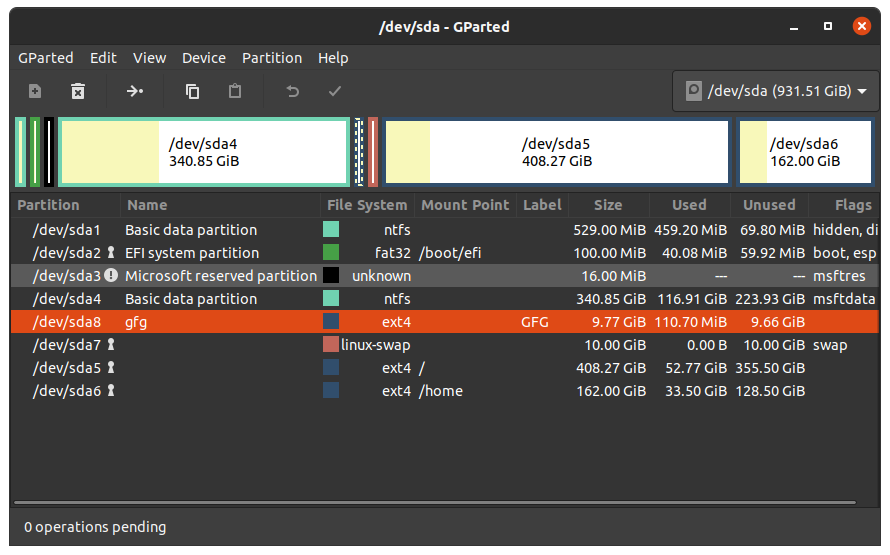
Select your root partition (/dev/sda4 in this case)
Resize it to use the unallocated space
Apply changes

- Reboot your system
Conclusion
By using GParted, I was able to expand my root partition and resolve the low disk space issue. Remember to always back up your important data before making changes to disk partitions.
Have you ever used GParted or faced similar Ubuntu issues? Share your experiences in the comments below!
Subscribe to my newsletter
Read articles from Peter Njuguna directly inside your inbox. Subscribe to the newsletter, and don't miss out.
Written by

Peter Njuguna
Peter Njuguna
Hello there! I am a full-stack software developer with a passion for front-end development. With years of experience under my belt, I bring a unique combination of technical skills and creative vision to every project I work on. I am dedicated to delivering visually appealing and intuitive interfaces that provide an exceptional user experience. Whether it's building responsive web applications or crafting complex full-stack applications, I am committed to delivering high-quality, scalable, and maintainable code. I am always seeking new challenges and opportunities to grow and stay on the cutting edge of the latest industry trends and technologies. I am excited to share my insights and expertise with you on this platform. Let's learn and grow together!