Sort It Out
 Aleksander Stojanowski
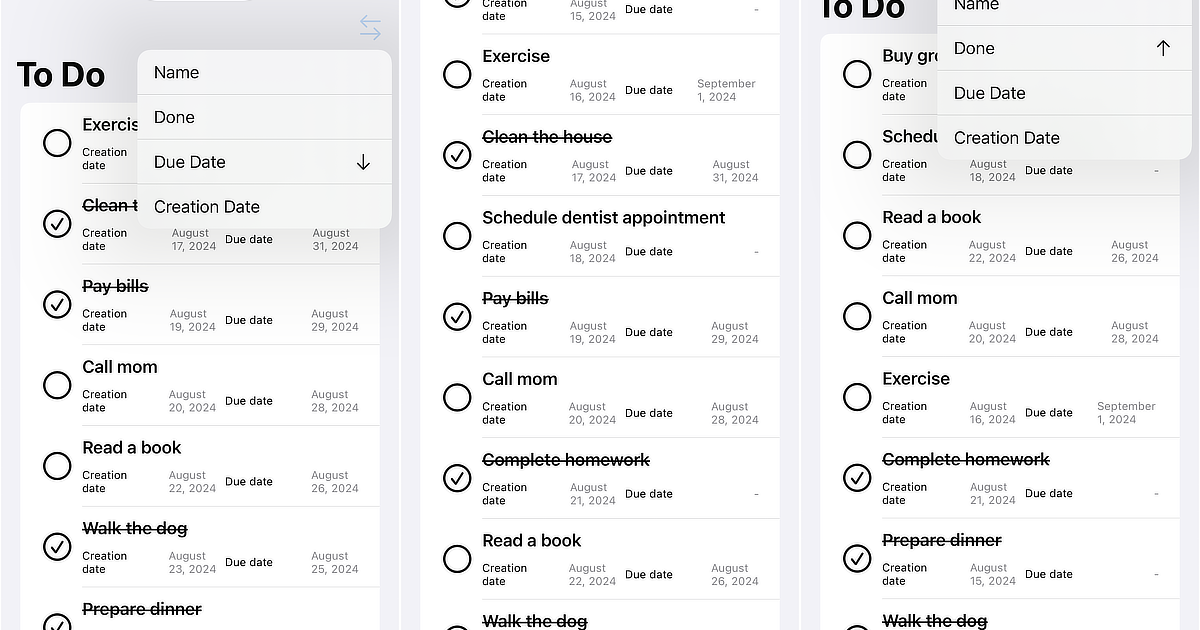
Every app contains data that is shown to the user, and in most cases, users like to have at least a little control over how the data is displayed to them. The easiest way to give users some control is to allow them to choose by which property and in what order they want to sort the information. Most applications have more than one screen with some form of records, so following the DRY principle, we should at least try to create a somewhat generic solution. Let's try to do it!
First Things First
Before we dive into creating a sort menu, we need to have something to sort. First, we'll create a simple SwiftData model and some helpers. (I've written a separate article on how I tend to work with SwiftData in previews, so I'll skip most of the details.)
import Foundation
import SwiftData
import UIKit

@Model
final class ToDoItem: Codable {
    private enum CodingKeys: CodingKey {
        case name
        case done
        case dueDate
        case creationDate
    }

    var name = ""
    var done = false
    var dueDate: Date?
    let creationDate = Date.now

    init(name: String = "", done: Bool = false, dueDate: Date? = nil) {
        self.name = name
        self.done = done
        self.dueDate = dueDate
    }

    required init(from decoder: Decoder) throws {
        let container = try decoder.container(keyedBy: CodingKeys.self)
        name = try container.decode(String.self, forKey: .name)
        done = try container.decode(Bool.self, forKey: .done)
        dueDate = try container.decodeIfPresent(Date.self, forKey: .dueDate)
        creationDate = try container.decode(Date.self, forKey: .creationDate)
    }

    func encode(to encoder: Encoder) throws {
        var container = encoder.container(keyedBy: CodingKeys.self)
        try container.encode(name, forKey: .name)
        try container.encode(done, forKey: .done)
        if let dueDate {
            try container.encode(dueDate, forKey: .dueDate)
        }
        try container.encode(creationDate, forKey: .creationDate)
    }
}

@MainActor
final class PreviewModelContainerProvider {
    static let shared = PreviewModelContainerProvider()

    private let toDoItems: [ToDoItem]
    let modelContainer: ModelContainer

    var modelContext: ModelContext {
        modelContainer.mainContext
    }

    var toDoItem: ToDoItem {
        guard let item = toDoItems.first else {
            fatalError("There is no data loaded")
        }
        return item
    }

    private init() {
        let configuration = ModelConfiguration(isStoredInMemoryOnly: true)
        do {
            modelContainer = try ModelContainer(for: ToDoItem.self, configurations: configuration)
        } catch {
            fatalError("Could not create ModelContainer")
        }

        guard let previewData = NSDataAsset(name: "ToDoItemPreviewsData")?.data else {
            fatalError("Preview data not found")
        }

        do {
            toDoItems = try JSONDecoder().decode([ToDoItem].self, from: previewData)
            for toDoItem in toDoItems {
                modelContext.insert(toDoItem)
            }
        } catch {
            fatalError("Could not decode preview data")
        }
    }
}
Here, we have a JSON file with the stub data that we need to add to our Preview Assets.
[
    {
        "done": false,
        "name": "Buy groceries",
        "creationDate": 746172000
    },
    {
        "dueDate": 746258400,
        "name": "Walk the dog",
        "done": true,
        "creationDate": 746085600
    },
    {
        "dueDate": 746344800,
        "creationDate": 745999200,
        "done": false,
        "name": "Read a book"
    },
    {
        "name": "Complete homework",
        "done": true,
        "creationDate": 745912800
    },
    {
        "done": false,
        "dueDate": 746517600,
        "name": "Call mom",
        "creationDate": 745826400
    },
    {
        "dueDate": 746604000,
        "done": true,
        "name": "Pay bills",
        "creationDate": 745740000
    },
    {
        "done": false,
        "creationDate": 745653600,
        "name": "Schedule dentist appointment"
    },
    {
        "dueDate": 746776800,
        "name": "Clean the house",
        "creationDate": 745567200,
        "done": true
    },
    {
        "creationDate": 745480800,
        "done": false,
        "name": "Exercise",
        "dueDate": 746863200
    },
    {
        "name": "Prepare dinner",
        "done": true,
        "creationDate": 745394400
    }
]
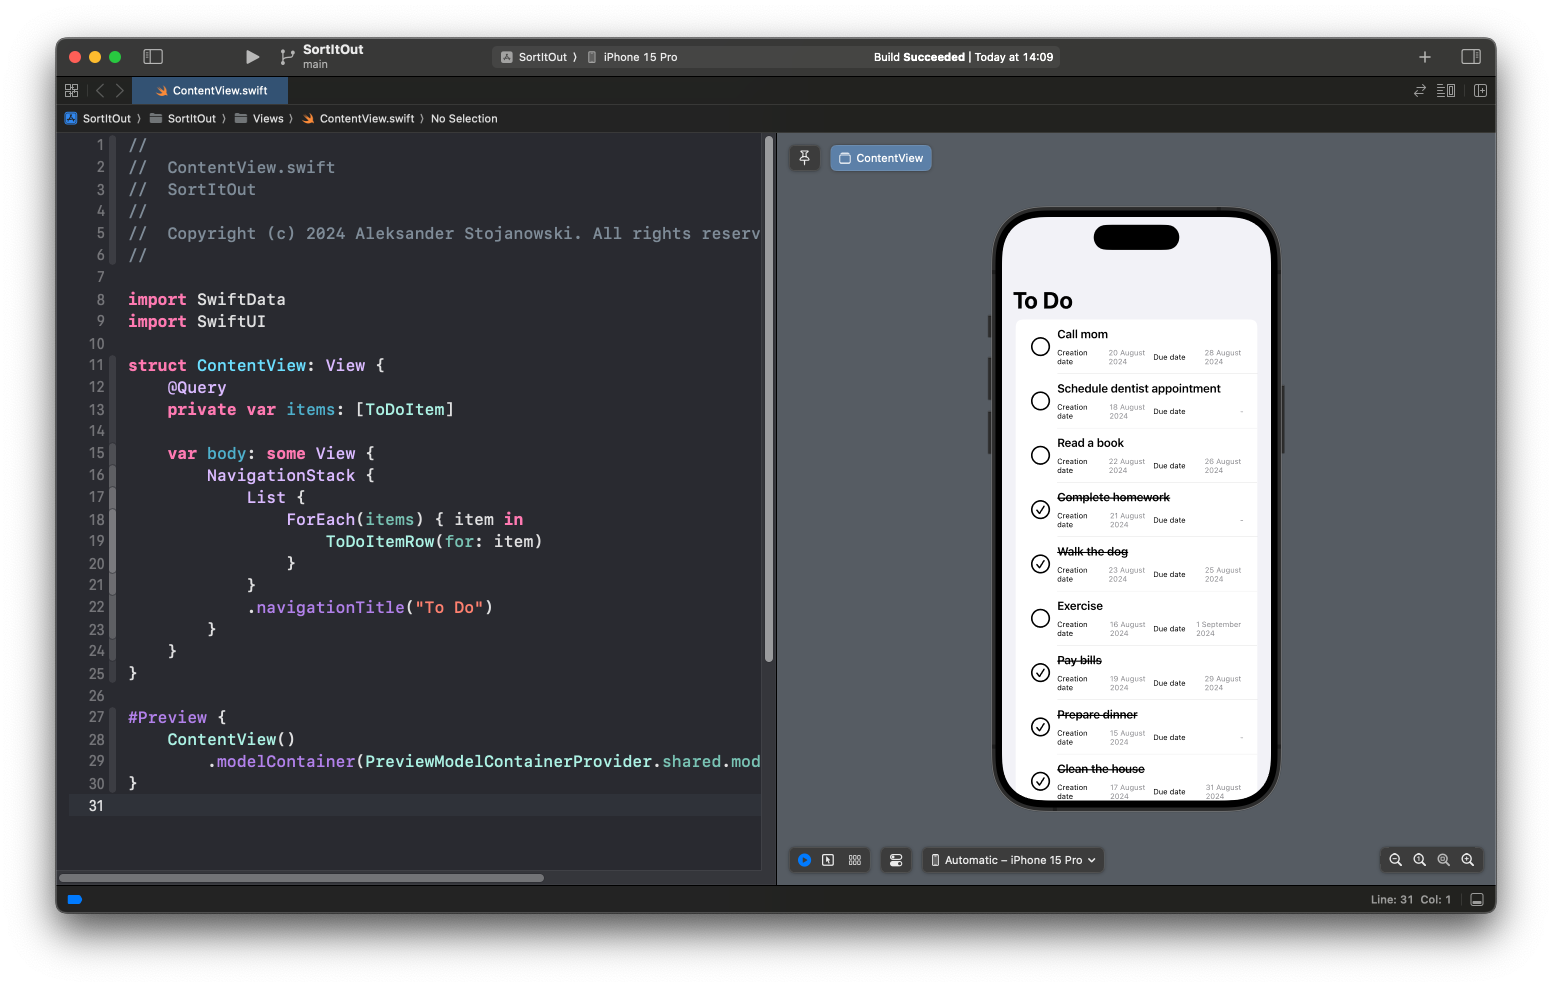
The last thing we need to do is create a simple UI to display our data. Let's create a list with rows presenting all the information that each ToDoItem contains.
import SwiftData
import SwiftUI

struct ToDoItemRow: View {
    private let toDoItem: ToDoItem

    init(for toDoItem: ToDoItem) {
        self.toDoItem = toDoItem
    }

    var body: some View {
        Button {
            toDoItem.done.toggle()
        } label: {
            HStack {
                Image(systemName: toDoItem.done ? "checkmark.circle" : "circle")
                    .font(.title)
                VStack(alignment: .leading) {
                    Text(toDoItem.name)
                        .font(.headline)
                        .strikethrough(toDoItem.done)
                    HStack {
                        LabeledContent("Creation date") {
                            Text(toDoItem.creationDate.formatted(date: .long, time: .omitted))
                        }
                        LabeledContent("Due date") {
                            Text(toDoItem.dueDate?.formatted(date: .long, time: .omitted) ?? "-")
                        }
                    }
                    .font(.caption2)
                }
            }
        }
        .buttonStyle(.plain)
    }
}

struct ContentView: View {
    @Query
    private var items: [ToDoItem]

    var body: some View {
        NavigationStack {
            List {
                ForEach(items) { item in
                    ToDoItemRow(for: item)
                }
            }
            .navigationTitle("To Do")
        }
    }
}

#Preview {
    ContentView()
        .modelContainer(PreviewModelContainerProvider.shared.modelContainer)
}
With all that in place, we have a solid foundation to continue our work. Let's dive in!

Brace Yourselves - Sorting Is Coming
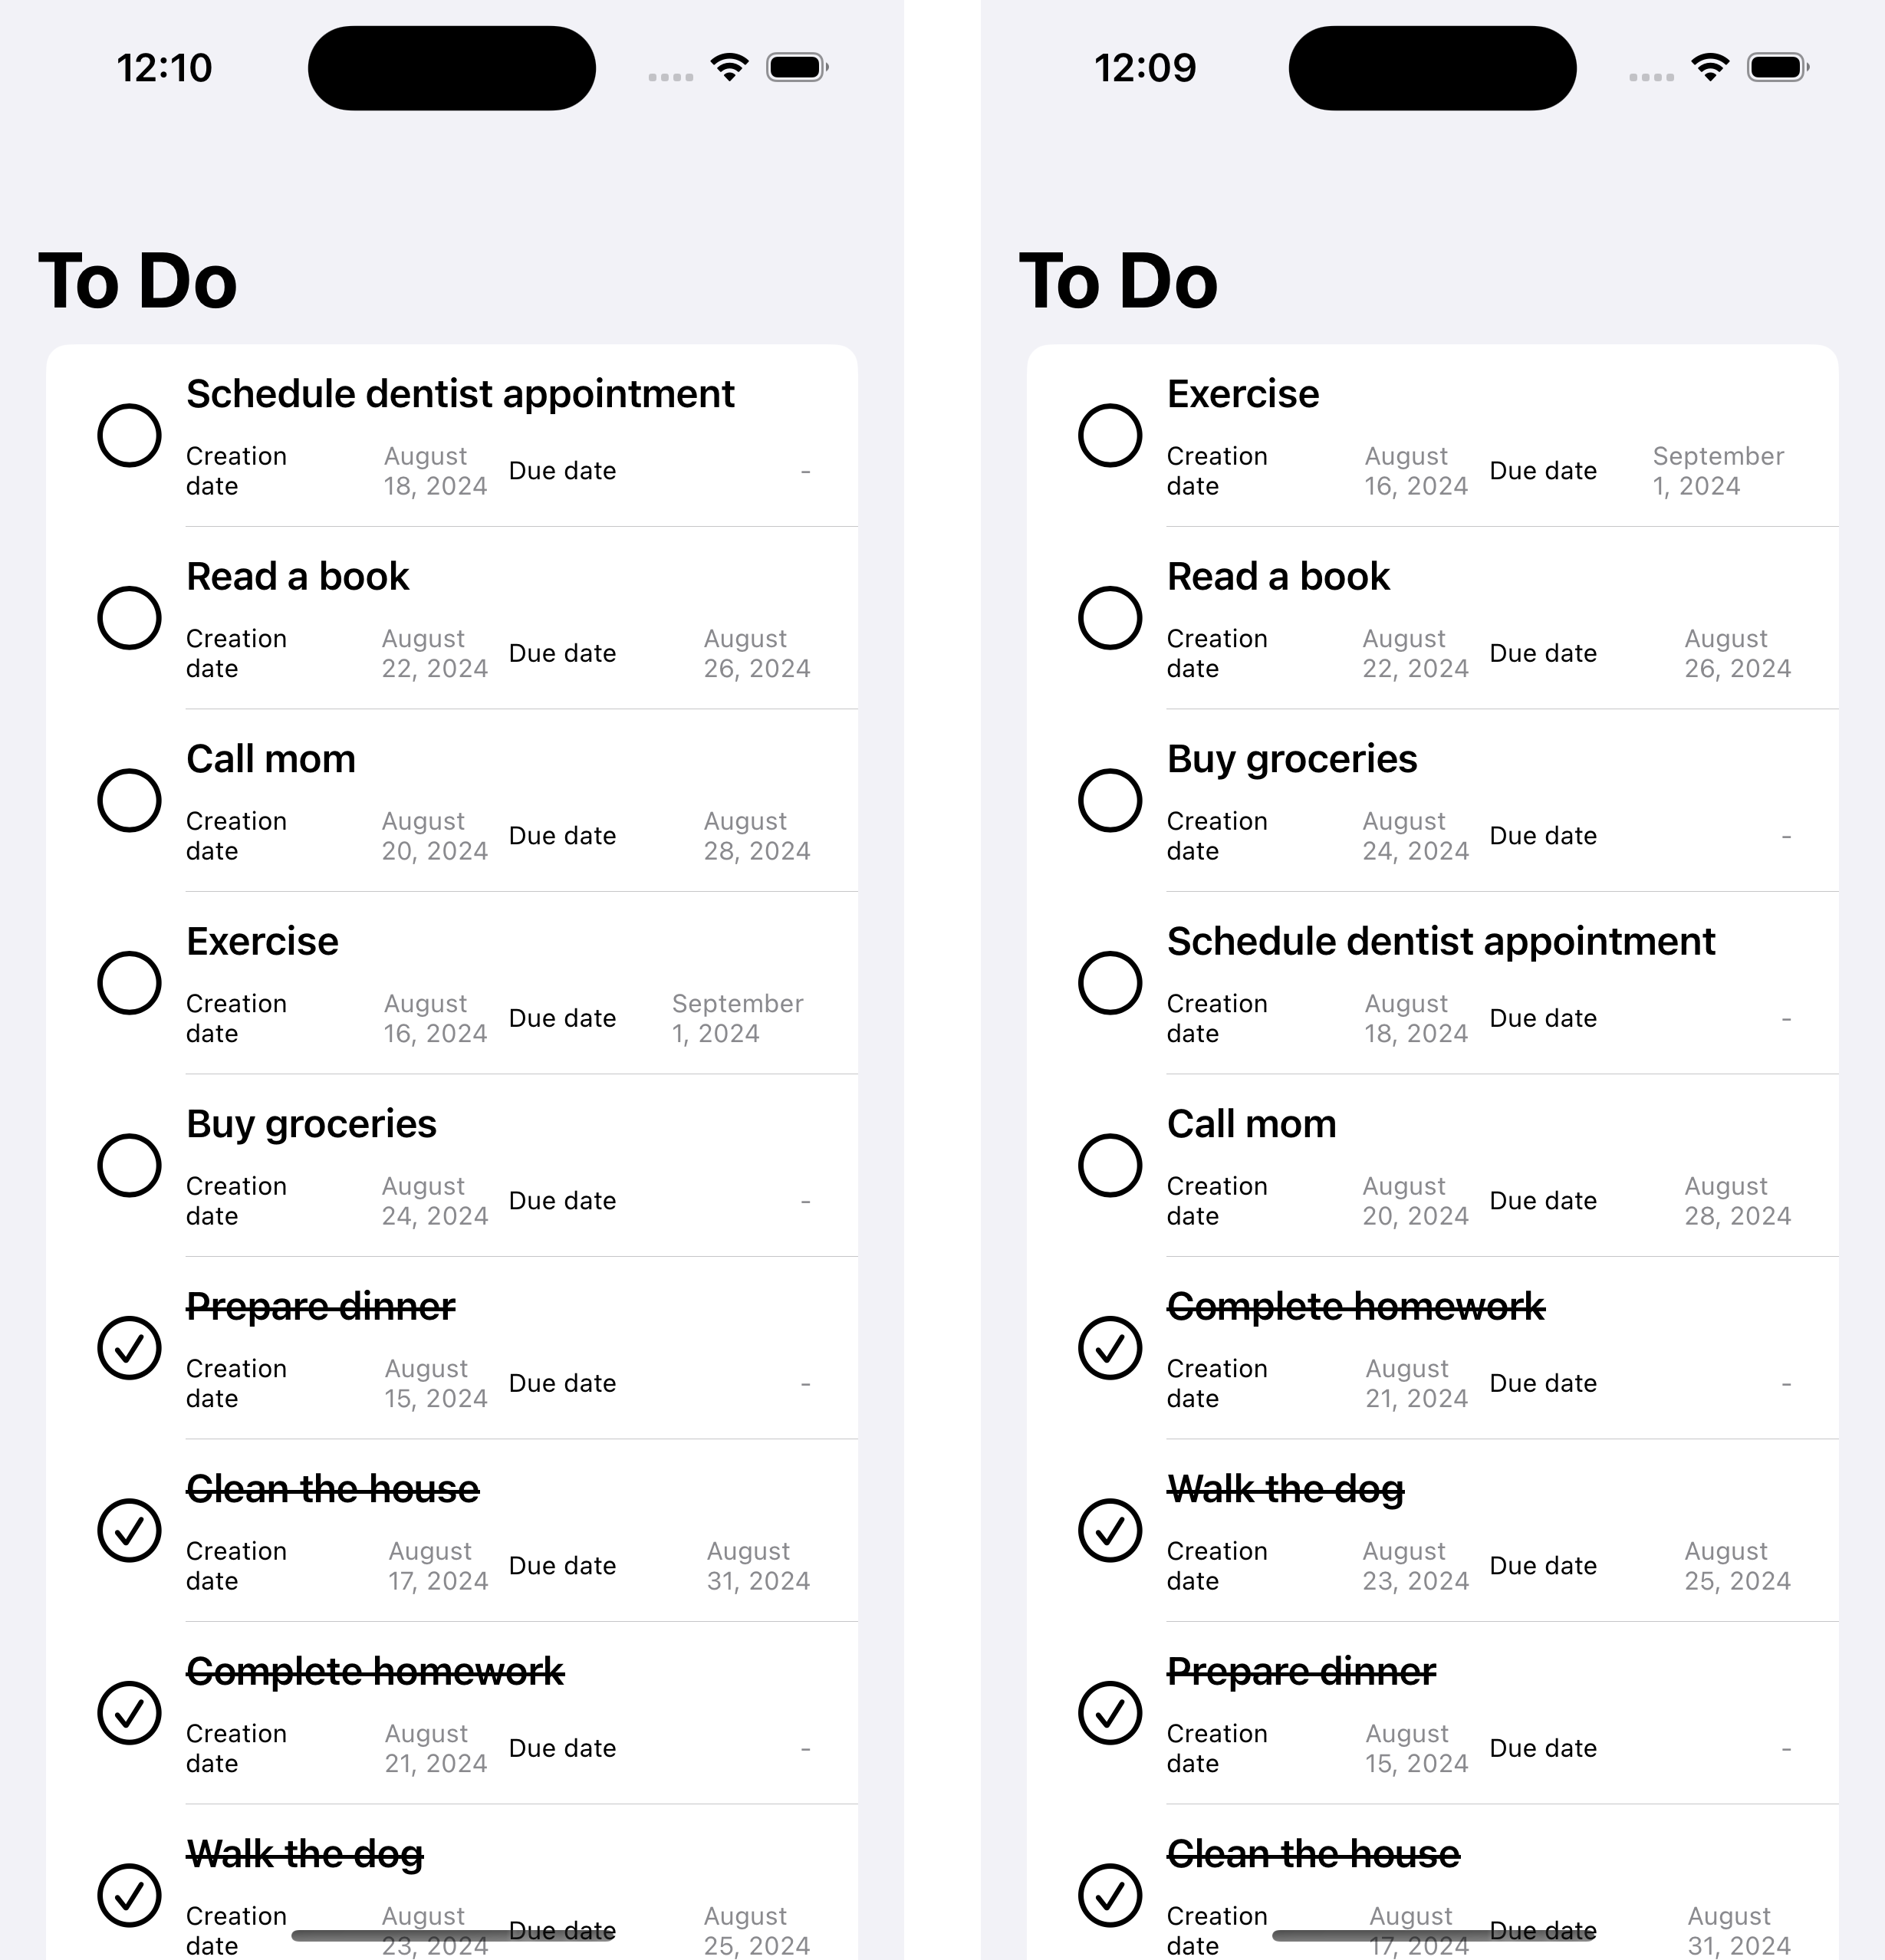
As you may have noticed, every time our app (or rather the preview) reloads, the data is presented in a different order. This is because each time we load our data in the preview helper, it creates new entries in memory, and we haven't specified any sorting for our @Query. We can fix that really quickly.
@Query(sort: [SortDescriptor(\ToDoItem.name)])
private var items: [ToDoItem]
Much better, we no longer have a random element, even in our previews. However, we want to allow users to change the sort parameter and order dynamically. This is a bit trickier, as we can't just create a @State with our sort descriptors. We need to extract the @Query to a separate View and feed it with our dynamic sort descriptors.
struct ToDoItemsListing: View {
    @Query
    private var items: [ToDoItem]

    init(sort sortDescriptors: [SortDescriptor<ToDoItem>]) {
        _items = Query(
            sort: sortDescriptors,
            animation: .default
        )
    }

    var body: some View {
        List {
            ForEach(items) { item in
                ToDoItemRow(for: item)
            }
        }
    }
}

struct ContentView: View {
    var body: some View {
        NavigationStack {
            ToDoItemsListing(sort: [SortDescriptor(\.name)])
                .navigationTitle("To Do")
        }
    }
}
That's it! We can now easily and dynamically change the sorting. However, there is one caveat: we can't sort by the done property of our ToDoItem. This is because Bool doesn't conform to the Comparable protocol. Luckily, that's a really simple fix.
import Foundation

extension Bool: Comparable {
    public static func < (lhs: Bool, rhs: Bool) -> Bool {
        !lhs && rhs
    }
}
Now, all properties of our model can be used for sorting. We can dynamically change SortDescriptors, so we are ready to give users control over the order in which the application presents data.
Trust Me, I'm a User
Before we give users control, we need to make sure all the gears are ready for that. We want users to be able to choose between the properties of our model. This sounds like a task for some enum. Let's create one for our ToDoItem. Of course, a simple enum is not enough; we need something more, like some form of SortDescriptor provider.
extension ToDoItem {
    enum ToDoItemSortDescriptorProvider {
        case name
        case done
        case dueDate
        case creationDate

        var sortDescriptors: [SortDescriptor<ToDoItem>] {
            switch self {
            case .name:
                [SortDescriptor(\.name)]
            case .done:
                [SortDescriptor(\.done)]
            case .dueDate:
                [SortDescriptor(\.dueDate)]
            case .creationDate:
                [SortDescriptor(\.creationDate)]
            }
        }
    }
}
Nice! But… let's think about what happens if we use those single-item SortDescriptor lists. Take, for example, the descriptor for the done property. It sorts items as it should, with false items on top and true items on the bottom, but all other properties are not considered.

Fortunately, we return a list of sort descriptors, so we just need to add more descriptors for each case. For that, we need to arbitrarily choose an order for them, so let's use this as the default order: done, dueDate, name, and creationDate. This seems to make the most sense.
var sortDescriptors: [SortDescriptor<ToDoItem>] {
    let doneDescriptor = SortDescriptor(\ToDoItem.done)
    let dueDateDescriptor = SortDescriptor(\ToDoItem.dueDate)
    let nameDescriptor = SortDescriptor(\ToDoItem.name)
    let creationDateDescriptor = SortDescriptor(\ToDoItem.creationDate)
    switch self {
    case .name:
        return [nameDescriptor, doneDescriptor, dueDateDescriptor, creationDateDescriptor]
    case .done:
        return [doneDescriptor, dueDateDescriptor, nameDescriptor, creationDateDescriptor]
    case .dueDate:
        return [dueDateDescriptor, doneDescriptor, nameDescriptor, creationDateDescriptor]
    case .creationDate:
        return [creationDateDescriptor, doneDescriptor, dueDateDescriptor, nameDescriptor]
    }
}
Much better! Next, we need to actually use it. Since we want it to be changeable by the user, we need to add some @State to our view.
@State
private var sortDescriptorProvider = ToDoItem.ToDoItemSortDescriptorProvider.done

var body: some View {
    NavigationStack {
        ToDoItemsListing(sort: sortDescriptorProvider.sortDescriptors)
            .navigationTitle("To Do")
    }
}
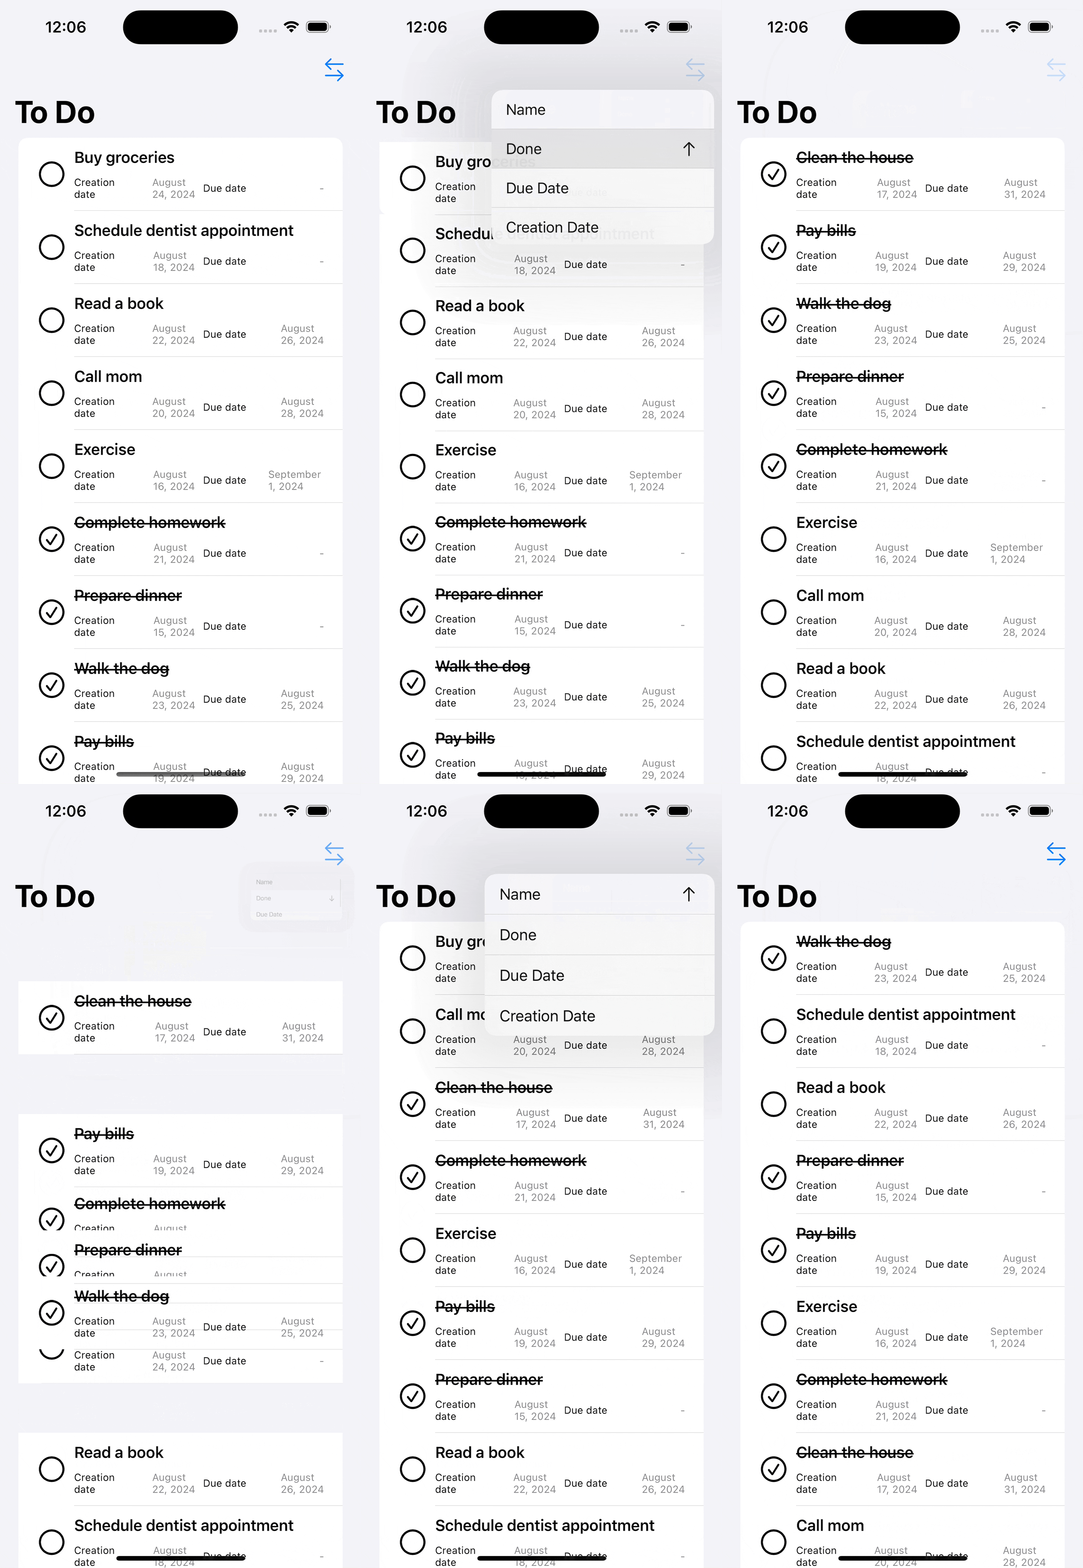
The easy part is behind us. Now, we need to create a UI that allows the user to change sorting parameters. There are many possible ways to implement such an interaction, but we'll create a menu accessible from the toolbar.
Of course, we could create this menu manually, but a large part of the code would be the same for each sort property. To avoid that, let's first make our enum conform to the CaseIterable protocol, especially since this change is trivial. However, that's not all we need to do before we can use it. It would be nice to have a conversion between our enum and a user-readable string. This is also painless; we just need to add a raw value for it. The last thing we need to add is yet another protocol conformance, this time to Identifiable, as we want to use it in a ForEach view builder.
enum ToDoItemSortDescriptorProvider: String, CaseIterable, Identifiable {
    case name = "Name"
    case done = "Done"
    case dueDate = "Due Date"
    case creationDate = "Creation Date"

    var id: Self {
        self
    }
    ...
}
With that in place, we can create our Menu pretty straightforwardly.
ToDoItemsListing(sort: sortDescriptorProvider.sortDescriptors)
    .navigationTitle("To Do")
    .toolbar {
        Menu {
            ForEach(ToDoItem.ToDoItemSortDescriptorProvider.allCases) { provider in
                Button {
                    withAnimation {
                        sortDescriptorProvider = provider
                    }
                } label: {
                    if provider == sortDescriptorProvider {
                        Label(provider.rawValue, systemImage: "checkmark")
                    } else {
                        Text(provider.rawValue)
                    }
                }
            }
        } label: {
            Label("Sort", systemImage: "arrow.left.arrow.right")
        }
    }
Finally, we have a menu that the user can use to choose which property the application should use to sort and present data. However, there is a flaw in the current solution: the user can choose the property but not the sort order (ascending or descending). Luckily, our code is easily modifiable to handle that as well. All we need to do is change the provider's sortDescriptors property into a method that accepts SortOrder and modify the sort menu a little.
enum ToDoItemSortDescriptorProvider: String, CaseIterable, Identifiable {
    ...
    func sortDescriptors(order: SortOrder) -> [SortDescriptor<ToDoItem>] {
        let doneDescriptor = SortDescriptor(\ToDoItem.done, order: order)
        let dueDateDescriptor = SortDescriptor(\ToDoItem.dueDate, order: order)
        let nameDescriptor = SortDescriptor(\ToDoItem.name, order: order)
        let creationDateDescriptor = SortDescriptor(\ToDoItem.creationDate, order: order)
        switch self {
        case .name:
            return [nameDescriptor, doneDescriptor, dueDateDescriptor, creationDateDescriptor]
        case .done:
            return [doneDescriptor, dueDateDescriptor, nameDescriptor, creationDateDescriptor]
        case .dueDate:
            return [dueDateDescriptor, doneDescriptor, nameDescriptor, creationDateDescriptor]
        case .creationDate:
            return [creationDateDescriptor, doneDescriptor, dueDateDescriptor, nameDescriptor]
        }
    }
}

struct ContentView: View {
    @State
    private var sortDescriptorProvider = ToDoItem.ToDoItemSortDescriptorProvider.done
    @State
    private var sortOrder = SortOrder.forward

    var body: some View {
        NavigationStack {
            ToDoItemsListing(sort: sortDescriptorProvider.sortDescriptors(order: sortOrder))
                .navigationTitle("To Do")
                .toolbar {
                    Menu {
                        ForEach(ToDoItem.ToDoItemSortDescriptorProvider.allCases) { provider in
                            Button {
                                withAnimation {
                                    if provider == sortDescriptorProvider {
                                        sortOrder = sortOrder == .forward ? .reverse : .forward
                                    } else {
                                        sortDescriptorProvider = provider
                                        sortOrder = .forward
                                    }
                                }
                            } label: {
                                if provider == sortDescriptorProvider {
                                    Label(
                                        provider.rawValue,
                                        systemImage: sortOrder == .forward ? "arrow.up" : "arrow.down"
                                    )
                                } else {
                                    Text(provider.rawValue)
                                }
                            }
                        }
                    } label: {
                        Label("Sort", systemImage: "arrow.left.arrow.right")
                    }
                }
        }
    }
}
We created a nice solution that allows the user to select not only the sort property but also the sort order. Moreover, the code is simple and maintainable, but it is not portable. Let's say we have a second model and a view presenting it. We would need to create almost all of the code again, just this time for the new model and its properties. We need to change that and stick to the DRY principle.

Prepare for More
Think a bit about what we can make generic in our case. The ToDoItemSortDescriptorProvider seems to be a good candidate, despite the fact that it needs to be different for each model. The sort menu we built operates directly on the enum for the ToDoItem provider, but it doesn't care about what information it provides, just how it provides it. That's an excellent candidate to abstract as a protocol that provider enums should conform to. We can even make it a bit more readable and add a helper property for our user-readable value, so we'll start with that.
import Foundation
import SwiftData

protocol SortDescriptorProvider: CaseIterable, Identifiable, RawRepresentable where RawValue == String, AllCases: RandomAccessCollection {
    associatedtype Model: PersistentModel

    func sortDescriptors(order: SortOrder) -> [SortDescriptor<Model>]
}

extension SortDescriptorProvider {
    var id: Self {
        self
    }

    var name: String {
        rawValue
    }
}
There is one limitation to this approach. Even though our protocol implements the RawRepresentable protocol with the associatedtype forced to String, when implementing concrete providers (considering we implement it as an enum), we need to repeat the raw value type that the provider supplies. Let's make our ToDoItemSortDescriptorProvider conform to our new protocol.
enum ToDoItemSortDescriptorProvider: String, SortDescriptorProvider {
    case name = "Name"
    case done = "Done"
    case dueDate = "Due Date"
    case creationDate = "Creation Date"

    func sortDescriptors(order: SortOrder) -> [SortDescriptor<ToDoItem>] {
            ...
    }
}
We could even remove some code here, which is always nice.
Now we need to make use of this new protocol and have the sort menu use it. For that, we need to extract it into another view. Doing that is also a good opportunity to clean up and refactor the code a bit.
struct SortMenu<Provider>: View where Provider: SortDescriptorProvider {
    @Binding
    private var sortProvider: Provider
    @Binding
    private var sortOrder: SortOrder

    init(sortProvider: Binding<Provider>, sortOrder: Binding<SortOrder>) {
        _sortProvider = sortProvider
        _sortOrder = sortOrder
    }

    var body: some View {
        Menu {
            ForEach(Provider.allCases) { provider in
                if provider == sortProvider {
                    currentProviderButton
                } else {
                    button(for: provider)
                }
            }
        } label: {
            Label("Sort", systemImage: "arrow.left.arrow.right")
        }
    }

    private var currentProviderButton: some View {
        Button {
            sortOrder = sortOrder == .forward ? .reverse : .forward
        } label: {
            Label(
                sortProvider.name,
                systemImage: sortOrder == .forward ? "arrow.up" : "arrow.down"
            )
        }
    }

    private func button(for provider: Provider) -> some View {
        Button {
            sortProvider = provider
            sortOrder = .forward
        } label: {
            Text(provider.name)
        }
    }
}

struct ContentView: View {
    ...
    var body: some View {
        ...
            .toolbar {
                SortMenu(sortProvider: $sortDescriptorProvider.animation(), sortOrder: $sortOrder.animation())
            }
    }
}
That's it; we are ready for more models and more views with a sort menu to come!
What's Next?
Right now, it might seem like we didn't save much code and even had to write more to achieve the same simple result. That's true in this particular case, but think about more realistic examples, such as models with relationships where the application presents a list of entities that links to another list of different entities. With this approach, for each such list, we need a provider enum (or struct, or class, depending on what you choose), two state variables, and one line with the SortMenu view.
One might also ask if this approach is suitable for other persistent data frameworks, and the answer is yes, it is! I chose SwiftData because I've been working with it the most lately and came up with this idea specifically for that framework, but nothing prevents you from using it for something else. All you need to do is change the SortDescriptor type used by SwiftData to some other type (e.g., SortComparator for Core Data), and you can basically use the same code.
The whole solution can be found on my GitHub, and each section of this article is a separate commit in the repository.
Subscribe to my newsletter
Read articles from Aleksander Stojanowski directly inside your inbox. Subscribe to the newsletter, and don't miss out.
Written by

Aleksander Stojanowski
Aleksander Stojanowski
Hi, I'm Olek - short for Aleksander if you're outside of Poland. I'm a software engineer with over 9 years of professional experience, plus many more as an amateur developer. I'm based in Poland, where I currently work as a graphics driver software engineer by day. By night, I'm a passionate Apple platforms developer, constantly exploring new ways to create and innovate.