Mastering Multiple Domains: How to Set Up a Web Server with Virtual Hosts on Ubuntu
 Pushpendra B
In the realm of web development, hosting, and deployment, a single server often hosts multiple websites. This is where virtual hosts come in, acting as magical portals that differentiate between different domains all residing on the same machine. Today, we’ll explore the world of Ubuntu web servers and configuring virtual hosts to efficiently manage your web empire!
Getting Started: Web Server Installation
First things first, we need a web server. there are a lot of web servers available in the market. but, Apache, a free and open-source powerhouse, is a popular choice for Ubuntu. Open your terminal and update the package list:
sudo apt update

or for Redhat and centos

sudo yum update
Now, install Apache with this command:
sudo apt install apache2

I’ve already Installed so you will see like this.
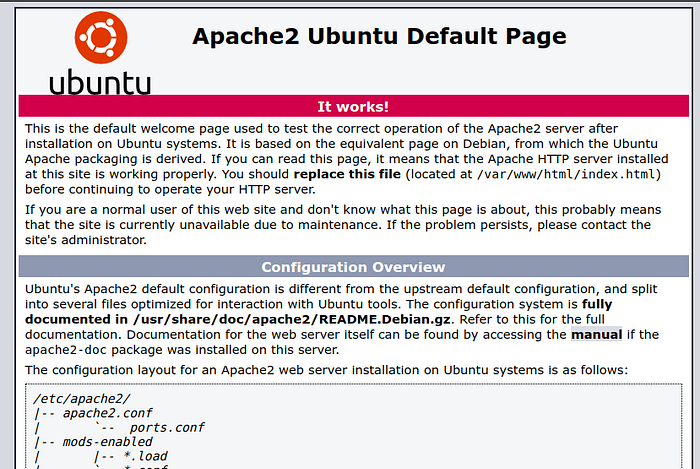
This will install and configure Apache on your system. after installation completed you can test the Apache by browsing the IP of the server or localhost in your ubuntu server. Below is the default Apache page. which is available on path “/var/www/html/”
You can edit the “index.html” under our path “/var/www/html/”.

Moving Forward: Hosting Your Site and Utilizing Virtual Hosts
Now that we’ve covered the basics of setting up your web server, let’s delve into hosting your site. As your web presence expands, managing multiple sites efficiently becomes crucial. Consider a scenario where your server has a specific configuration “X,” and one of your sites only utilizes “X/4” or one core of that configuration. In such cases, valuable resources are left idle. This is where Apache’s Virtual Host functionality comes to the rescue.
What are Virtual Hosts?
Virtual hosts are configuration files that instruct Apache on how to manage requests for various domains. Each virtual host file outlines a document root, indicating the directory housing the website’s files. Apache utilizes this data to serve the appropriate content when a domain is accessed.
Before we proceed with creating a Virtual Host, let’s create a website named overflowbyte.techand direct it to our server using our system’s host entry. Additionally, we’ll create a public_html directory within your domain directory. This directory will store the content to be served to your visitors.
Step 1: Creating a directory for our website (domain)
mkdir /var/www/overflowbyte.tech
mkdir /var/www/overflowbyte.tech/public_html/

Now go to our created directory and create an index.html file.
cd /var/www/overflowbyte.tech/public_html
nano index.html
after creating index.htmlpaste the below HTML code
<html>
<head>
 <title> Welcome to overflowbyte.tech </title>
</head>
<body>
 <p> I'm running this website on an Ubuntu Server server!
</body>
</html>
We have created our own site and our default index.htmlpage and before moving with our Virtual Host file to browse our website we are going to setup the permission as per the USER because we have created the above directory and file with the ownership of root user. If you want your regular user to be able to modify files in these web directories, you can change the ownership for a particular user with these commands:
sudo chown -R $USER:$USER /var/www/overflowbyte.tech/public_html
The $USER variable will take the value of the user you are currently logged in as when you press ENTER. By doing this, the regular user now owns the public_html subdirectories where you will be storing your content.
You should also modify your permissions to ensure that read access is permitted to the general web directory and all of the files and folders it contains so that the pages can be served correctly:
sudo chmod -R 755 /var/www
Your web server now has the permissions it needs to serve content, and your user should be able to create content within the necessary folders. The next step is to create content for your virtual host sites.
Otherwise, we won’t be able to browse our newly created website because server doesn’t know for which site this request is? and will display our default page of Apache.
Creating Virtual Host Files
Here’s where the magic happens! Let’s create a virtual host file for a domain named “overflowbyte.tech”. Virtual host files are instrumental as they specify the precise configuration of your virtual hosts, guiding the Apache web server on how to respond to different domain requests.
Apache comes with a default virtual host file called 000-default.conf. You can copy this file to create virtual host files for each of your domains.
Since we’re setting this up locally, we’ll need to add a Host entry in our system to direct our domain overflowbyte.tech to our VM’s IP.
I’ve already done my Host entry to point to my server, as I don’t want my browser to query DNS outside of my system. you can also learn how to create Host entry by following Host entry tutorial.
Moving on first step to create Virtual Host. Copy the default configuration file over to the first domain:
- Copy the Default Configuration:
Start by copying the default Apache configuration file:
sudo cp /etc/apache2/sites-available/000-default.conf /etc/apache2/sites-available/overflowbyte.tech.conf
Be aware that the default Ubuntu configuration requires that each virtual host file should end in .conf.
Open the new file in your preferred text editor with root privileges:
cd /etc/apache2/sites-available/
nano overflowbyte.tech.conf
Below is default file after opening in nano. (we can remove the comments in the default file). I’ve remove the comments and below is the file. If you want to see default file then you can check 000-default.conffile in /etc/apache2/site-available directory.
You’ll see a bunch of directives. Here’s what to modify:
ServerAdmin: Replace this with your email address.
DocumentRoot: This should point to the directory containing your website’s files (e.g., /var/www/mydomain.com).
ServerName: Specify the domain name this virtual host handles (e.g., mydomain.com).
<VirtualHost *:80>
        ServerAdmin webmaster@localhost
        DocumentRoot /var/www/html
        ErrorLog ${APACHE_LOG_DIR}/error.log
        CustomLog ${APACHE_LOG_DIR}/access.log combined
</VirtualHost>
Now we will start editing our virtual host file.
Moving forward we should have our email in ServerAdmin so users can reach us in case Apache experiences any error:
ServerAdmin admin@overflowbyte.tech
We would also need to set the DocumentRoot directive to point to the directory where our site files are hosted on:
DocumentRoot /var/www/overflowbyte.tech/public_html
The default file doesn’t come with a ServerName directive, so we’ll have to add and define it by adding this line below the last directive. It establishes the base domain for the virtual host definition.:
ServerName overflowbyte.tech
This ensures people reach the right site instead of the default one when they type in overflowbyte.tech.
Now that we’re done configuring our site, below is the our Virtual Host file for domain “overflowbyte.tech”, let’s save and activate it in the next step!
<VirtualHost *:80>
        ServerAdmin webmaster@localhost
        ServerName  overflowbyte.tech
        DocumentRoot /var/www/overflowbyte.tech/public_html

        ErrorLog ${APACHE_LOG_DIR}/error.log
        CustomLog ${APACHE_LOG_DIR}/access.log combined

</VirtualHost>
Enabling the New Virtual Host Files
Now we have created your virtual host files, we must enable them to access. Apache includes some tools that allow you to do this.
We’ll be using the a2ensite tool to enable each of your sites. If you would like to read more about this script, you can refer to the a2ensite documentation.
sudo a2ensite overflowbyte.tech.conf

But before browsing our created website we first need to disable the defualt apache2 page. We can use the following command to disable:
sudo a2dissite 000-default.conf
Now the time to take the changes effect by reloading apache2. As it becomes necessary to restart any service, whenever need to change and reflect them.
sudo systemctl reload apache2

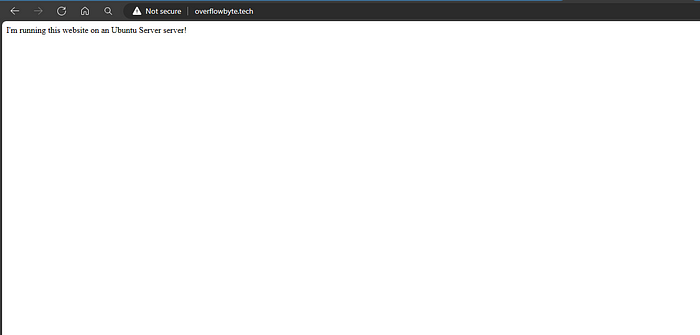
Finally we need to see the result of all the work done right!

Congratulations! You’ve successfully configured a virtual host on your Ubuntu web server. Now you can repeat this process to create virtual hosts for all your domains, keeping your web empire organised and thriving!
Bonus Tip: Don’t forget to set up your domain name to point to your server’s IP address for users to access your websites from the outside world.
Subscribe to my newsletter
Read articles from Pushpendra B directly inside your inbox. Subscribe to the newsletter, and don't miss out.
Written by

Pushpendra B
Pushpendra B
I am a cloud enthusiast and a full time system administrator with passion for designing robust and efficient cloud architectures to empower businesses. As an AWS Certified Cloud Practitioner, I leverage my skills in Windows Server, DNS, Kubernetes, ECS, Route53, Docker, Ansible, KubeFlow, and Linux to create innovative solutions. I'm constantly expanding my knowledge, currently delving into MSSQL and Kubernetes, and staying updated on the latest cloud trends.