Shiny: A Powerful Tool for Interactive Visualization in R
 Sebastian Rodrigo ARCE BRACAMONTE
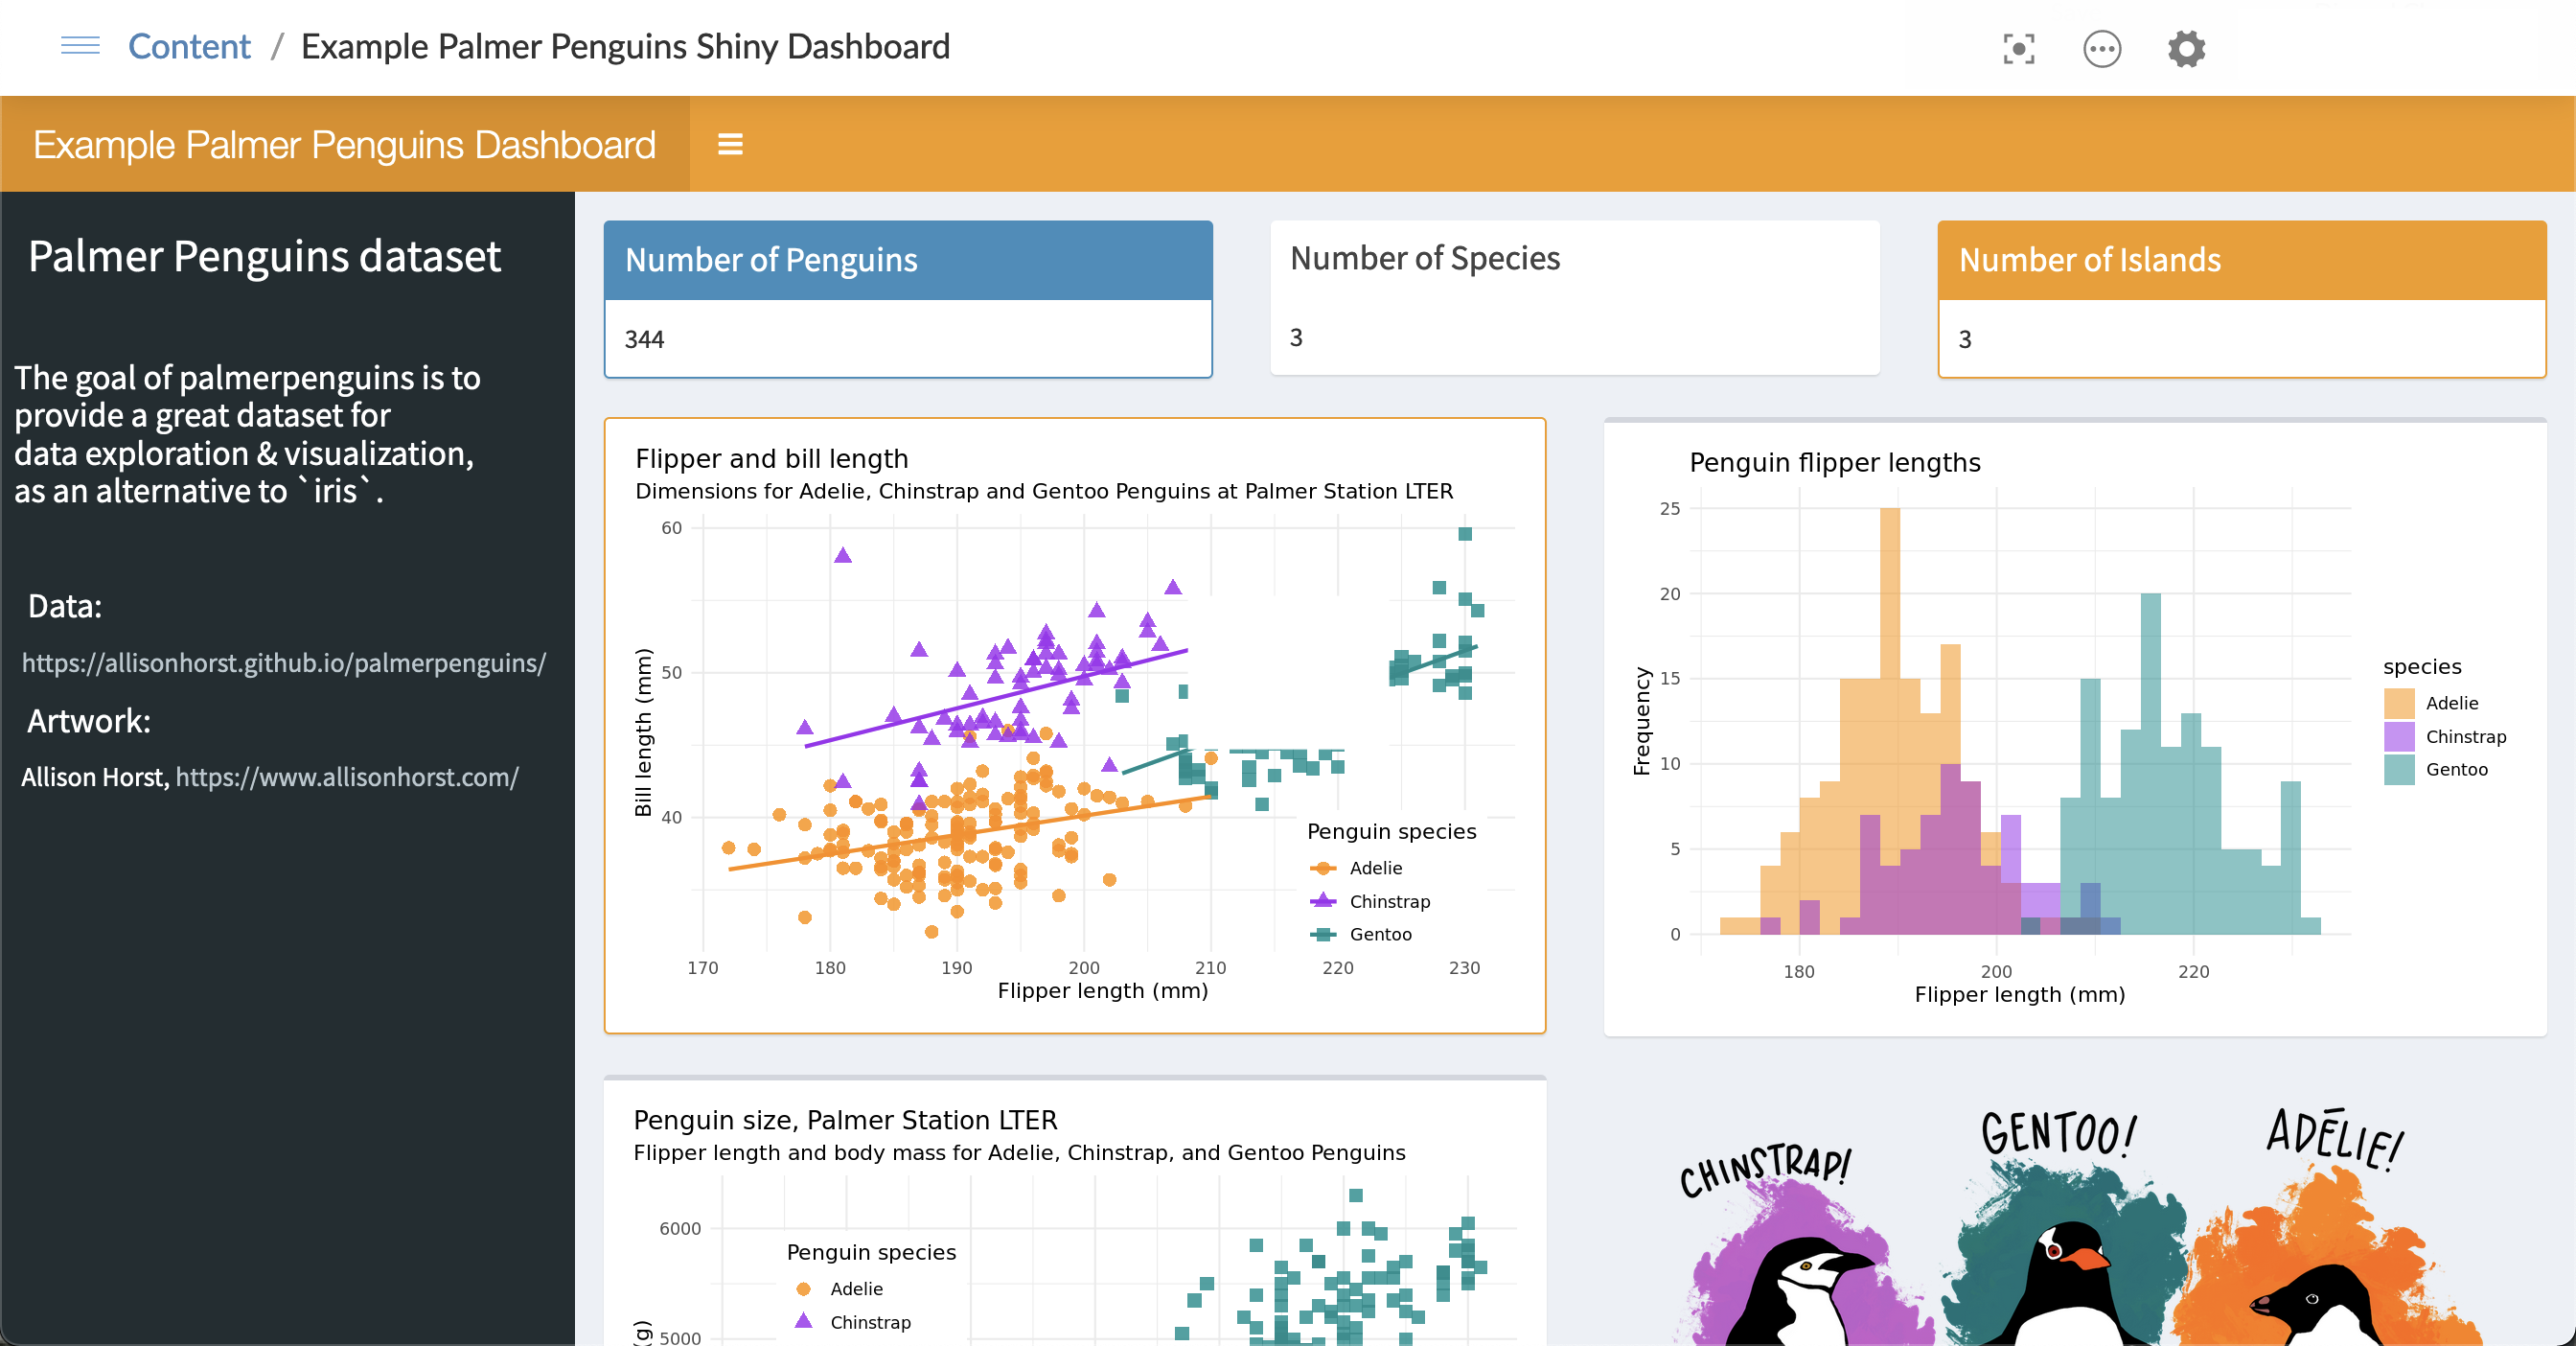
Shiny is a framework in R that allows users to build interactive web applications without needing to master web technologies like HTML, CSS, or JavaScript. This tool is particularly valuable for data scientists, as it simplifies the creation of dashboards and interactive reports, making it easy to share analysis and results in a dynamic and accessible way.
What is Shiny?
Shiny is an R package developed by RStudio that enables the creation of interactive web applications with minimal coding effort. These applications can range from simple plots to complex dashboards that handle multiple data sources and visual elements in real-time.
Key Features of Shiny
Dynamic Interactivity: Shiny allows users to interact with data in real-time, adjusting parameters and seeing the results instantly.
Full Integration with R: It leverages R's statistical and graphical capabilities.
Easy Deployment: Shiny apps can be easily deployed on any web server, including cloud services like Shinyapps.io, AWS, or Azure.
Basic Structure of a Shiny Application
A Shiny application consists of two main parts: the user interface (UI) and the server.
UI (User Interface): Defines the layout and appearance of the application.
Server: Contains the logic that defines how the app should respond to user inputs.
Code Example: Creating a Simple Shiny App
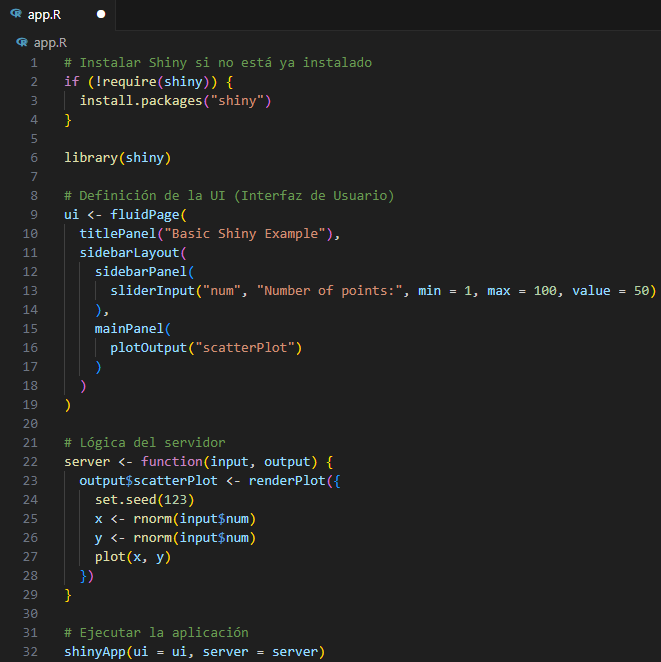
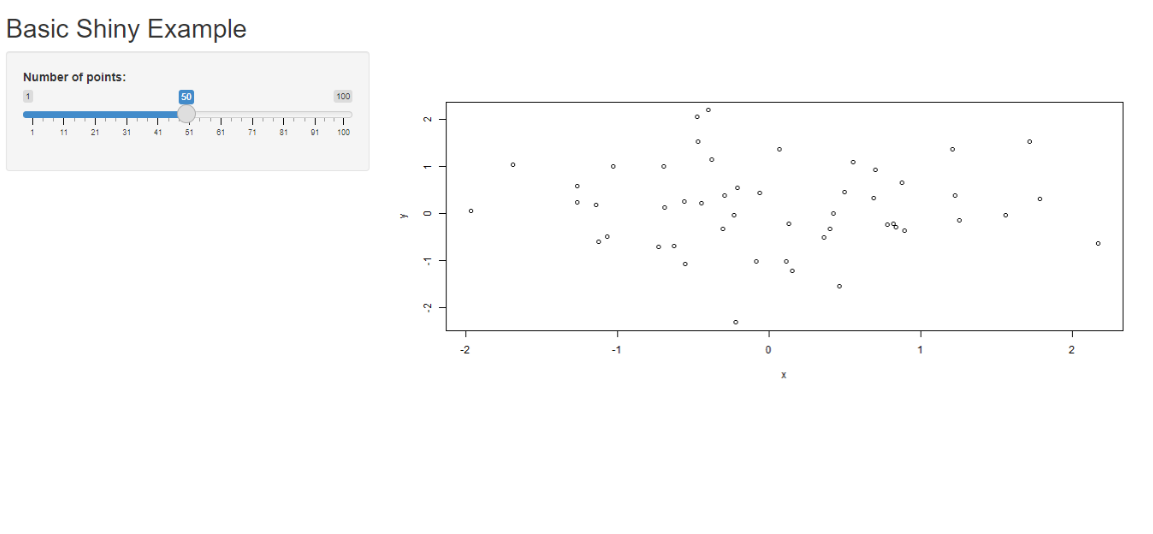
Here is a basic example of a Shiny application that allows the user to select a number of points and visualize a randomly generated scatter plot.
Install Shiny if not already installed
if (!require(shiny)) { install.packages("shiny") }
library(shiny)
This block checks if the shiny package is installed. If it isn't, it installs the package automatically. Then, it loads the shiny library into the R environment, allowing you to use the functions and structures needed to create Shiny applications.
UI definition
ui <- fluidPage( titlePanel("Basic Shiny Example"), sidebarLayout( sidebarPanel( sliderInput("num", "Number of points:", min = 1, max = 100, value = 50) ), mainPanel( plotOutput("scatterPlot") ) ) )
This block defines the user interface of the Shiny application:
fluidPage(): Creates a fluid page that adjusts to the screen size.titlePanel("Basic Shiny Example"): Adds a title to the page.sidebarLayout(): Organizes the UI into a sidebar and a main panel.sidebarPanel(): Contains the user input elements. In this case, a slider (sliderInput) allows the user to select the number of points to plot, with a range of 1 to 100 and a default value of 50.mainPanel(): Contains the output of the application, which is a scatter plot (plotOutput) displayed under the namescatterPlot.
Server logic
server <- function(input, output) { output$scatterPlot <- renderPlot({ set.seed(123) x <- rnorm(input$num) y <- rnorm(input$num) plot(x, y) }) }
This block defines the server logic, where data processing occurs:
output$scatterPlot <- renderPlot({ ... }): Defines the outputscatterPlot, which is rendered as a plot.set.seed(123): Sets a seed for random number generation, ensuring that the results are reproducible.x <- rnorm(input$num): Generatesinput$numrandom numbers following a normal distribution for thexcoordinates.y <- rnorm(input$num): Generatesinput$numrandom numbers following a normal distribution for theycoordinates.plot(x, y): Creates a scatter plot with thexandyvalues.
Run the application
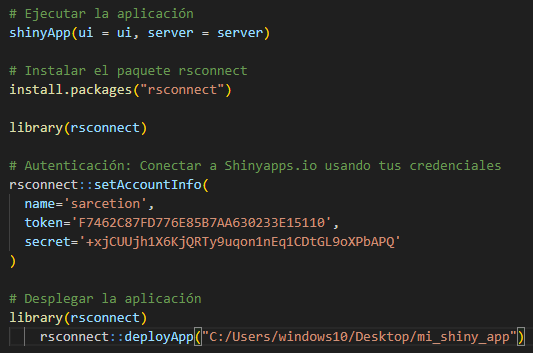
shinyApp(ui = ui, server = server)
This line of code runs the Shiny application by combining the user interface (ui) and server logic (server). The resulting application displays an interactive scatter plot, where the number of points can be adjusted using the slider.
Deploying on the Cloud
To deploy this application in the cloud, you can use the Shinyapps.io service, which offers a free tier for basic usage. Below are the basic steps:
Install the rsconnect Package:
install.packages("rsconnect")
library(rsconnect)
Authentication: Connect to Shinyapps.io using your credentials:
rsconnect::setAccountInfo
(
name='your_username',
token='your_token',
secret='your_secret'
)
Deploy the Application: Navigate to the directory where your app is located and use:
rsconnect::deployApp()
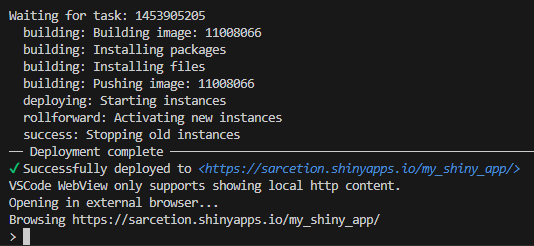
This will upload your app to Shinyapps.io, making it accessible from any web browser.
Use Cases for Shiny
Real-Time Monitoring Dashboards: Companies use Shiny to create dashboards that track key metrics in real-time.
Educational Applications: Shiny is useful for creating interactive tools that help students understand statistical and mathematical concepts.
Data Exploration: Analysts can use Shiny to create apps that allow users to interactively explore large datasets.
Conclusion
Shiny is an extremely versatile tool that has gained popularity for its ability to simplify the creation of interactive web applications in R. Whether for data exploration, education, or real-time metrics monitoring, Shiny provides an accessible platform to turn data analysis into useful, shareable interactive applications.
Subscribe to my newsletter
Read articles from Sebastian Rodrigo ARCE BRACAMONTE directly inside your inbox. Subscribe to the newsletter, and don't miss out.
Written by
