Debugging: Controlling 7 Segment 4 Digit LCD - part 4
 Sam Lee
Now that the code error has been resolved, the lights are coming on, but the desired numbers are not displayed. It seems the data transmission part is resolved, and we need to check if the correct data is being sent.
First, the bit() function is only available in Arduino. So, I looked into what the bit() function does in Arduino.
#define bit(b) (1UL << (b))
I confirmed that this operation is being performed.
Since this function sends rows from 0 to 3, bit(3-row) would be as follows:
bit(3-0) = 0000 0001 << 3 = 0000 1000
bit(3-1) = 0000 0001 << 2 = 0000 0100
bit(3-2) = 0000 0001 << 1 = 0000 0010
bit(3-3) = 0000 0001 << 0 = 0000 0001
We can see that it performs bit operations in this manner. So, we declare #define bit(b) (1UL << (b)) in our code as well. This way, we can perform the same operation without changing the code.
Additionally, we can see that the 0th digit is the 5th bit, the 1st digit is the 6th bit, the 2nd digit is the 7th bit, and the 3rd digit is the 8th bit. Looking at the displayNumber() function, it performs modulo and division operations to send the numbers from the last digit. So, if we send 1234, it will display 4 in the 0th digit, 3 in the 1st digit, 2 in the 2nd digit, and 1 in the 3rd digit in reverse order.
To explain it more easily, I will draw a picture.
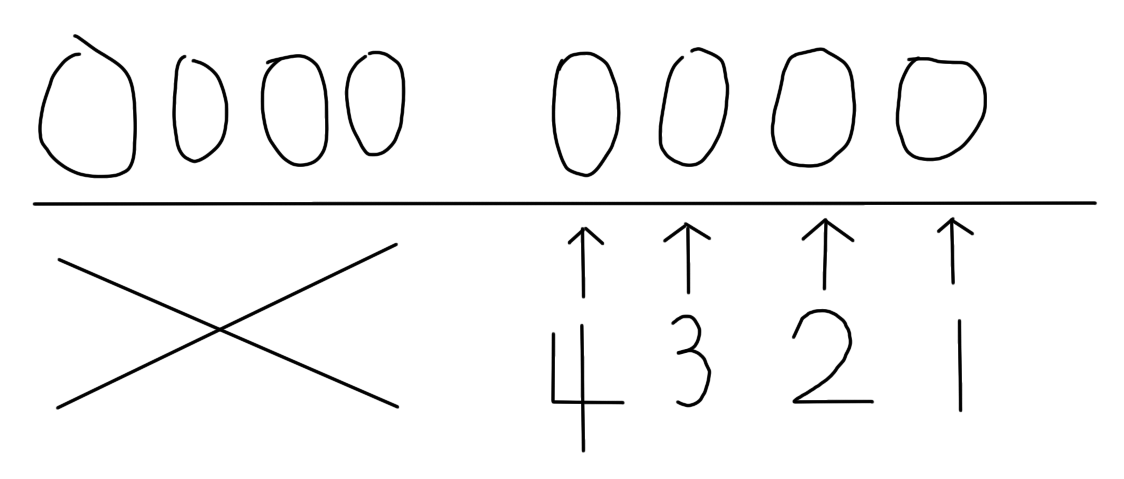
Now that we know what to send to the address, let's check what to send to the data.
As explained in the shift register section, we communicate with this module by sending 8-bit addresses and 8-bit data to the SR and LR. The 8-bit address determines which Digit (Row) to turn on, and the 8-bit data determines which LED to turn on.

Do you remember this picture? The address part determines 12, 9, 8, 6, and the data part determines A, B, C, D, E, F, G, DP (Decimal Point).
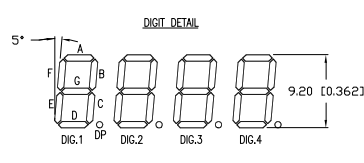
In the end, if I want to create the number 1, I need to turn on B and C and turn off the rest. If I want to create the number 5, I need to turn on A, F, G, C, and D and turn off the rest. If we send 8 bits, it would look roughly like this. The reason it's in reverse order is that it's LSB - Least Significant Bit.
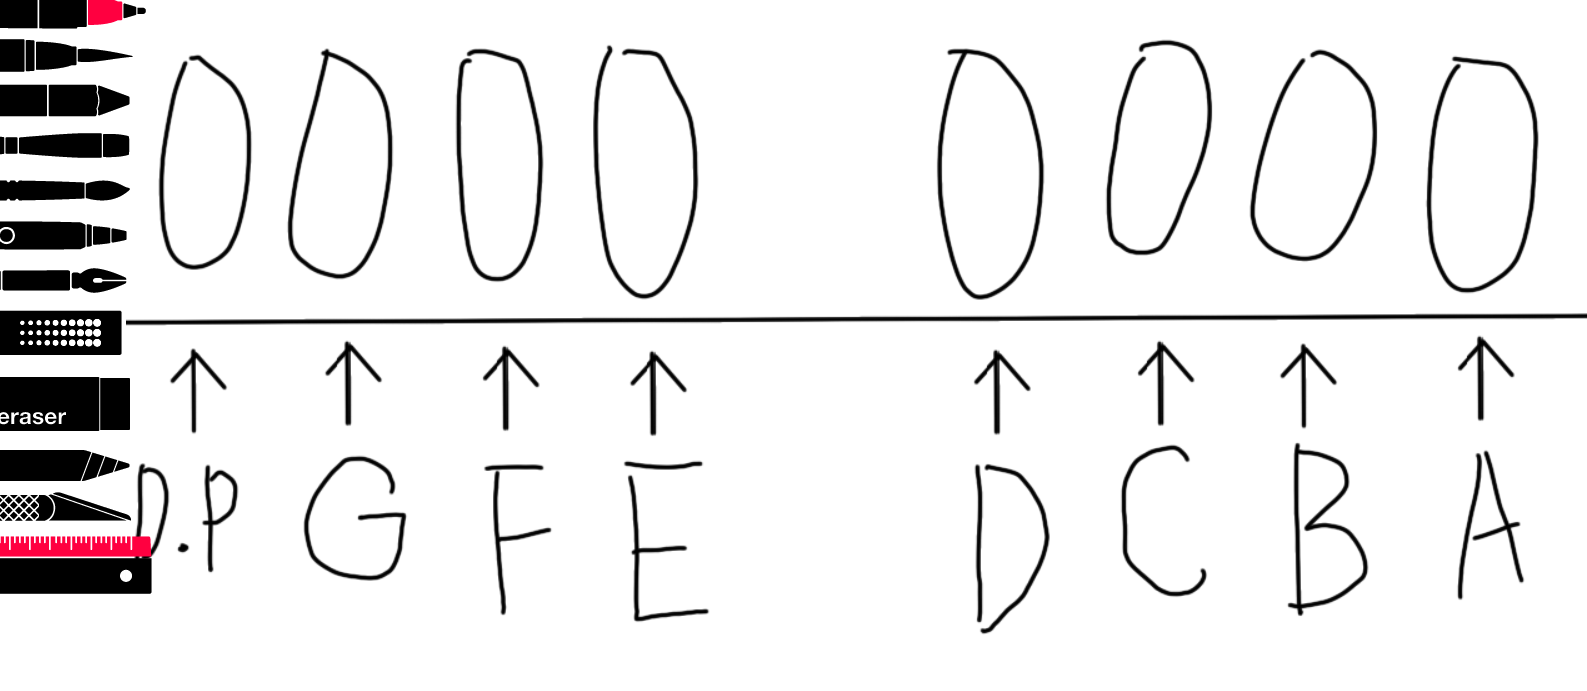
In this way, if we convert the hexadecimal numbers written in the initialized array to binary bits:
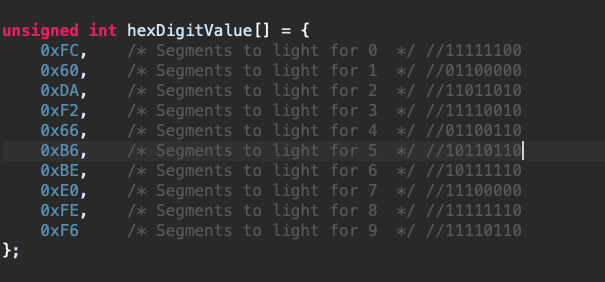
So, it is possible to compare like this, and by turning on various numbers, I found out that it follows this format.
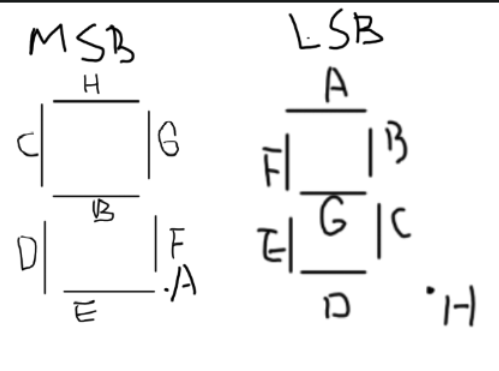
Huh? This looks familiar...
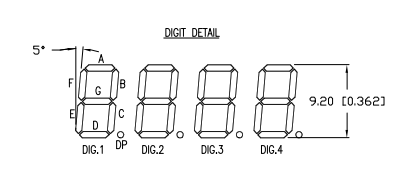
That's right... I didn't know there was a Digit Detail in the datasheet. I found this out after figuring it all out by myself.
So, after coding and debugging, I can see that it works properly.
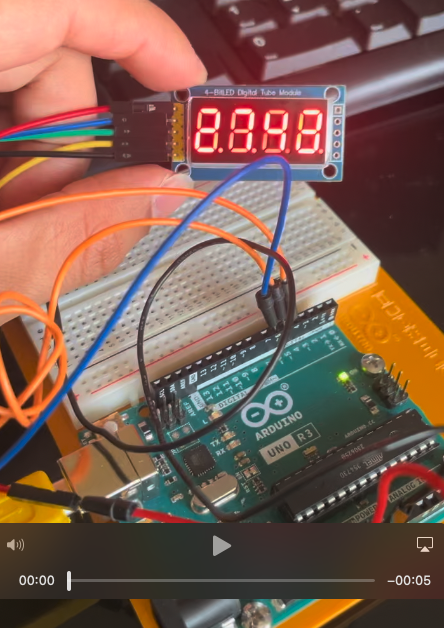
It displays numbers from 1 to 9999, but it's a shame I can't upload a video. Currently, it displays the number 2743.
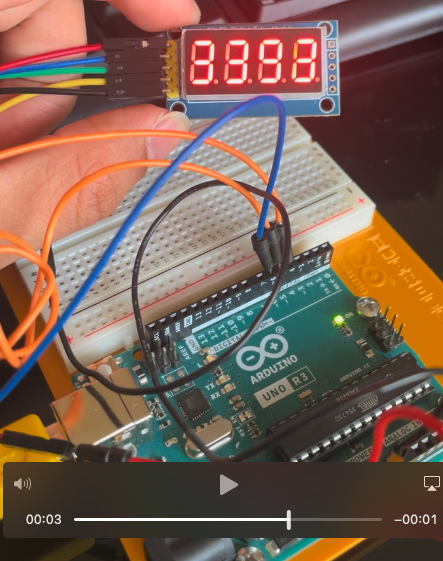
A few seconds later, it displays the number 3353.
Since I figured out how to turn on the LEDs using the Digit Detail, I can also send alphabets like this, not just numbers. - I wrote 1234 and LOVE.
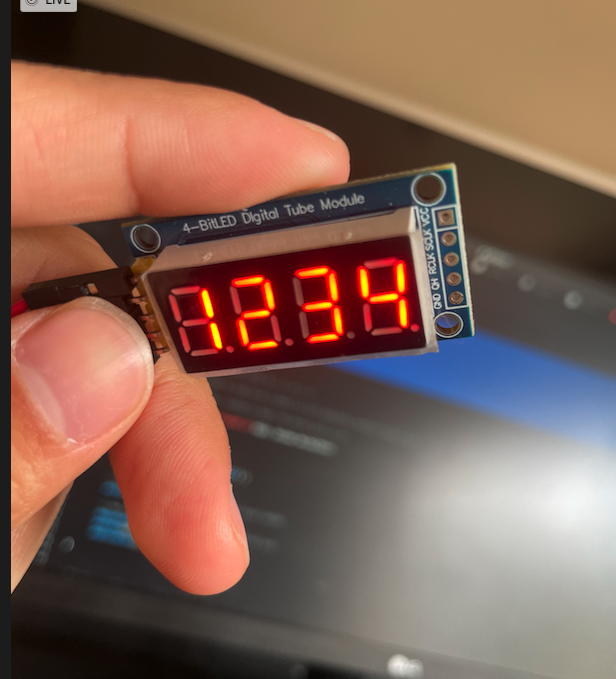
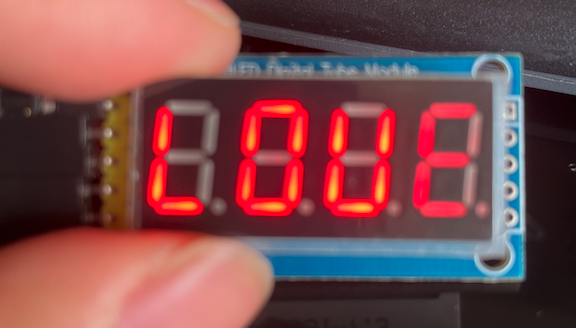
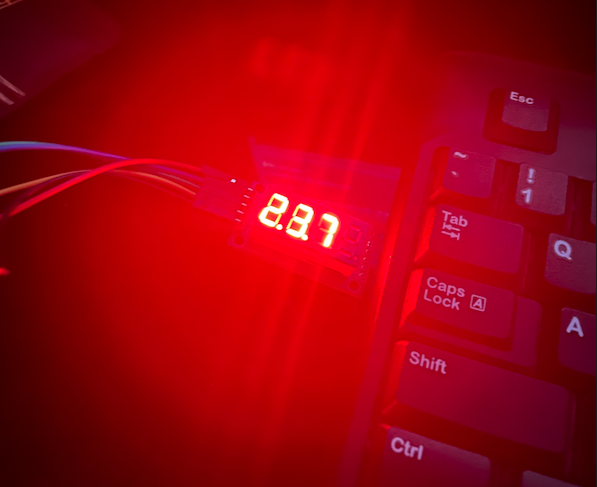
So, I tried to display the number 23.7, but one problem that occurred this time is that this LED starts from the first digit and doesn't use the last digit. Since we only need to display up to one decimal place, it seems more appropriate to use (_nn.n) instead of (nn.n_). So, I will try to move the digit.
So,
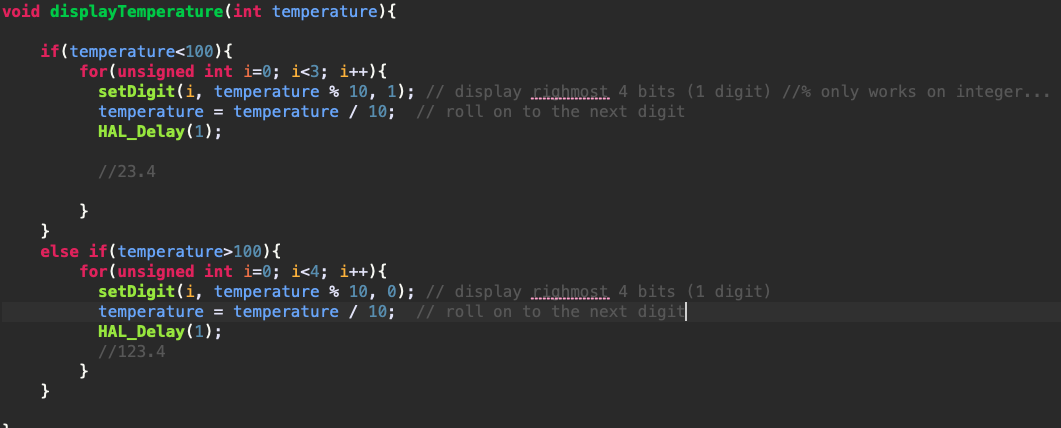
I wrote the code like this to adjust the value of i to 3 and 4, determining whether to use the 1st digit.
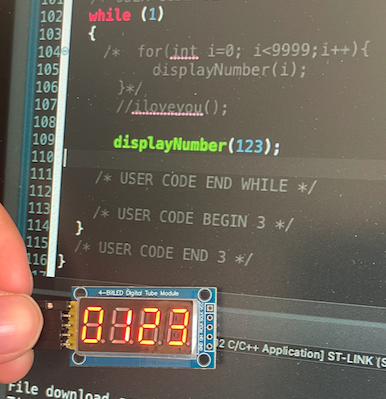
Then, when I write 123, it displays 0123, and when I write 12, it displays 0012.
How can we display only 12 instead of 0012?
First, let's do a simple calculation to see why 0012 is displayed.
12 % 10 = 2 // It makes sense that 2 comes out.
12 / 10 = 1 // It is normal that 1 comes out.
1 % 10 = 1 // It is normal that 1 comes out here too.
1 / 10 = 0.1 = 0 // Since it is an int type, 0 comes out. Then we don't want to use this 0.
0 % 10 = 0 // This is the same.
This is how it works. 10/0 is undefined, but 0/10 is still a value, so it is eventually displayed as a value.
Then, should we handle 0 as Null? If the temperature is 20.0, it will come in as N2.NN Then, there will be another problem. Therefore, 0 must be still there.
In the end, I concluded that it is difficult to solve this with a for loop method, and I decided to break the for loop to solve this.
So, I created a static variable called m_tempercount and turned on the 4th, 3rd, 2nd, and 1st digits in turn. And if the tempercount exceeds 4, it resets. And if it is above 9.9 degrees, it allows the 2nd digit to be turned on, and if it is above 99.9 degrees, it allows the last 1st digit to be turned on.
static uint8_t m_tempercount = 0;

void displayTemperature(int temperature){

    int n1, n2, n3, n4;

/*    n1 = (int) temperature % 10; //4
    n2 = (int) ((temperature % 100)) / 10; // 3
    n3 = (int) ((temperature)) / 100; //2
    n4 = (int) ((temperature)) / 1000; //1
*/
    n1 = (int) temperature % 10; //4
    n2 = (int) (temperature/10) % 10; //3
    n3 = (int) (temperature/100) % 10; //2
    n4 = (int) (temperature/1000) % 10; // 1
/*
           setDigit(0, 1234%10,0);
          setDigit(1, (1234/10)%10,0);
          setDigit(2, (1234/100)%10,0);
          setDigit(3, (1234/1000)%10,0);
*/
    switch (m_tempercount) {

    case 0:
        //          setDigit(i, temperature % 10, 0); // display righmost 4 bits (1 digit)
        setDigit(0, n1, 0);
        break;
    case 1:
        setDigit(1, n2, 0);
        break;
    case 2:
        if (temperature > 99) {
            setDigit(2, n3, 0);
        }
        break;
    case 3:
        if (temperature > 999) {
            setDigit(3, n4, 0);
        }
        break;
    default:
        break;
    }

    m_tempercount++;

    if (temperature > 999 && m_tempercount >= 5) {
        m_tempercount = 0;
    }else if(temperature > 99 && m_tempercount >= 4){
        m_tempercount = 0;
    }else if(temperature <= 99 && m_tempercount >= 3){
        m_tempercount = 0;
    }

}
Second error.
Now we can turn on the desired number on the desired digit.
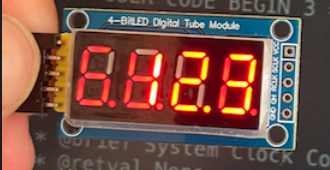
When we turn on 123 like this, it turns on well using only the 2nd, 3rd and 4th digits, but we can see that 6. is faintly displayed in the first digit, and other parts are faintly lit where 1 is turned on.
When the 7-segment is told to turn on 1234, it doesn't turn on 1234 all at once, but rather,
1
2
3
4
It can only turn on one at a time. So, I suspected that there might be an error in the process of sending a single number.
1
2
3 = Error!
4
Like this.
So, I set a debugging point and ran the debugging to see if there was a problem when displaying a certain digit, and I found this problem.
This is a picture taken at the debugging point where 1 and 2 of 1234 are turned on.
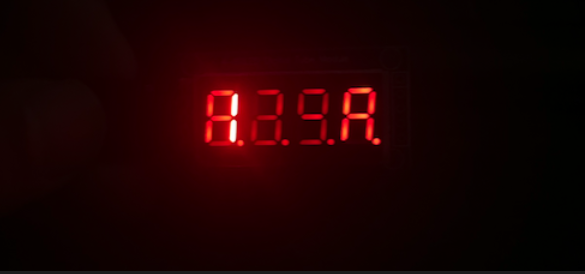
1 is mainly lit, but faintly lit in the shape of A in the 1st digit, and faintly lit in the 4th digit. We can see that the 2nd and 3rd digits are even more faintly lit.
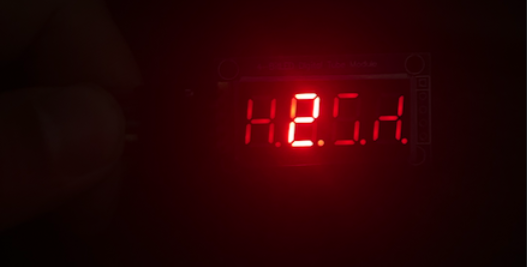
When we turn on the 2nd digit, it is mainly lit, but it looks like H 2. 5 Inverse Y.
So, I thought a lot. How should we solve this?
First, I tried giving hal_delay just in case. When I gave hal_delay, it seemed to solve the problem a little.
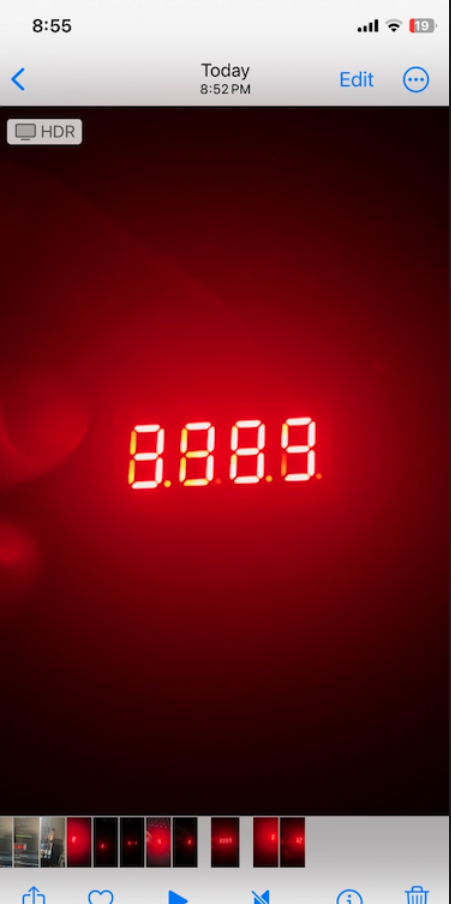
Before giving it a delay - It is too overlapped to know what number is displayed. It seems to be 3789 but I cannot tell exactly what number it is.
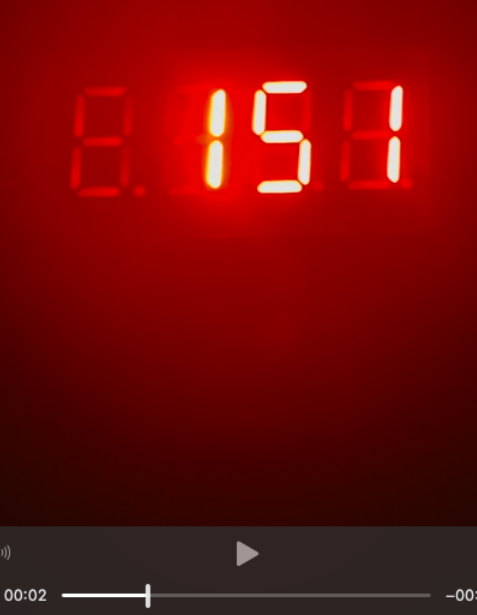
After giving the delay - We can faintly see something around, but at least we can understand that 151 is displayed.
Jumping to the conclusion, the problem was with RCLK.

Looking at this diagram, we can see that all digits' ABCDEFG DP come from pins 11, 7, 4, 2, 1, 10, 5, 3. This means that it is impossible to send different data to different digits simultaneously.
It is possible to turn on all digits at once by turning on 12, 9, 8, 6, but to do so, we can only display the same number because they share the same data. For example, nnnn, n = 0~9. 9999, 8888, 7777... We can only display the same number.
setDigit(0b11110000, n, 0) n is the number we want to turn on. If we give this code, it is possible.
And looking at the code, we can see that the rowselector sends specific bits by shifting 1, so it doesn't send bits to turn on all digits like 0b1111 0000. And if we perform bit operations on the data, we can see that it is sent well.
So, the problem is with the way the module receives the data.
So, I was looking at the displayTemperature() function and thought that the setDigit() function might be wrong. And I tried delaying the rclck.
Oh... it works?
Looking at the existing Arduino code, it sends data, lowers RCLK, sends the address, and raises it again. But I sent the data, sent the address, and raised and lowered RCLK.
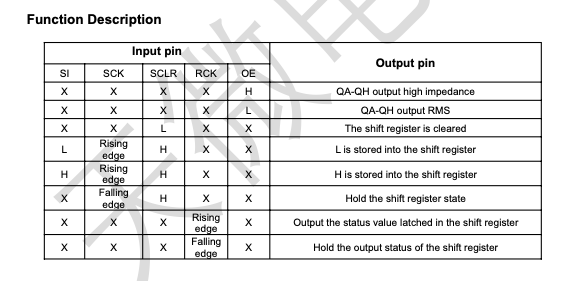
The problem was right here. Looking at the RCLK column, we can see that when it goes up to 1, it outputs the stored data as a result. And when it goes down to 0, it stores the data.
So, if we set RCLK to 1 after sending data and keep RCLK at 1 while sending row data, it doesn't meet the timing diagram requirements, causing data to be improperly stored or multiple bits to change simultaneously, leading to unexpected results.
So, the second error was also resolved.
Now, we can clearly display the number 327, and we can see that the 1st digit is not used at all.
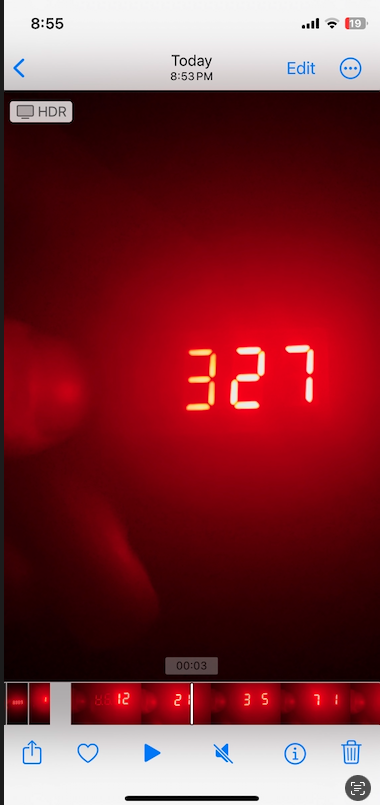
Now that the FND control is complete, let's move on to developing the next module.
Subscribe to my newsletter
Read articles from Sam Lee directly inside your inbox. Subscribe to the newsletter, and don't miss out.
Written by
