Launching your First Kubernetes Cluster with Nginx running
 Rajat Chauhan
Exploring Minikube and Pods in Kubernetes
Kubernetes has revolutionized the way we manage and deploy applications, especially in the world of microservices and containerized environments. However, setting up a full-fledged Kubernetes cluster can be resource-intensive and complex, particularly for developers who are just getting started. This is where Minikube comes into play. In this blog, we'll dive into what Minikube is, explore its features, and also take a closer look at the concept of Pods—the fundamental building blocks of Kubernetes.
What is Minikube?
Minikube is a lightweight tool that allows you to quickly set up a local Kubernetes cluster on macOS, Linux, and Windows. It's designed to make it easier for developers to test and develop applications in a Kubernetes environment without needing access to a full-scale cluster. Minikube can deploy as a virtual machine (VM), a container, or on bare metal, making it versatile for various development environments.
Unlike a full Kubernetes setup, Minikube is a pared-down version, but it still provides all the core functionalities and benefits of Kubernetes with much less effort. This makes it an excellent option for beginners who are new to containers and Kubernetes, as well as for specific use cases like edge computing and the Internet of Things (IoT).
Key Features of Minikube
Minikube is packed with features that make it a powerful tool for local Kubernetes development. Some of its key features include:
Supports the Latest Kubernetes Releases: Minikube supports the latest Kubernetes release and up to six previous minor versions, ensuring that you have access to the most recent features and security updates.
Cross-Platform Compatibility: Whether you're using Linux, macOS, or Windows, Minikube is designed to work seamlessly across all major operating systems.
Flexible Deployment Options: You can deploy Minikube as a virtual machine, a container, or on bare metal, depending on your environment and use case.
Multiple Container Runtimes: Minikube supports various container runtimes, including CRI-O, containerd, and Docker. This flexibility allows you to choose the runtime that best suits your needs.
Direct API Endpoint: Minikube provides a direct API endpoint for faster image load and build, improving the efficiency of your development workflow.
Advanced Kubernetes Features: Minikube includes advanced features such as LoadBalancer support, filesystem mounts, FeatureGates, and network policies, enabling you to simulate a production-like environment.
Addons for Kubernetes Applications: Minikube offers a range of add-ons that can be easily installed to extend its functionality, such as the metrics server, Ingress controllers, and more.
Support for CI Environments: Minikube is compatible with common CI environments, making it a valuable tool for continuous integration and testing pipelines.
Understanding the Concept of Pods
Now that we've covered Minikube, let's delve into one of the most crucial concepts in Kubernetes: Pods.
Pods are the smallest and simplest deployable units in Kubernetes. They represent a single instance of a running process in your cluster and are the basic building blocks for deploying applications. Each Pod encapsulates one or more containers, which share the same network namespace, IP address, and storage volumes. This allows the containers within a Pod to communicate easily and share data.
The name "Pod" is derived from the analogy of a pod of whales or a pea pod, emphasizing that the containers within a Pod are closely related and should be co-located. In essence, a Pod models an application-specific "logical host" and can be seen as a group of tightly coupled containers that are always scheduled together.
Key Characteristics of Pods:
Shared Context: All containers within a Pod share the same storage, network resources, and runtime environment. This shared context ensures that the containers can interact with each other efficiently.
Co-Scheduled and Co-Located: Containers within a Pod are always co-scheduled on the same node and share the same lifecycle. This means that they start, run, and terminate together.
Logical Host: A Pod can be considered a logical host for its contained applications, making it easier to manage tightly coupled processes as a single unit.
Use Cases for Pods:
Single Container Pods: In most cases, a Pod contains a single container, effectively acting as a wrapper around the container. This is the most common usage pattern in Kubernetes.
Multi-Container Pods: In scenarios where multiple containers need to work closely together, such as a logging agent that processes data from a web server, these containers can be grouped into a single Pod. They share the same network and storage resources and can communicate using inter-process communication (IPC).
Understanding Pods is fundamental to mastering Kubernetes, as they serve as the foundation for building more complex workloads like Deployments, StatefulSets, and DaemonSets.
Task-01
\=> Minikube Installation <=
Task-02
Deploy a simple Nginx application
- Create POD using
deployment.yml
apiVersion: apps/v1
kind: Deployment
metadata:
  name: nginx-deployment
  namespace: nginx
spec:
  replicas: 1
  selector:
    matchLabels:
      app: nginx-app
  template:
    metadata:
      labels:
        app: nginx-app
    spec:
      containers:
        - name: nginx-container
          image: nginx:latest
- Apply
deployment.ymlfile
kubectl apply -f deployment.yml
- Create service for the application using
service.ymlfile
apiVersion: v1
kind: Service
metadata:
  name: nginx-service
  namespace: nginx
spec:
  selector:
    app: nginx-app   # Use the appropriate label to match your pod
  ports:
    - protocol: TCP
      port: 80       # Port in the service
      targetPort: 80 # Port in the pod
  type: NodePort
- Apply
services.ymlfile
kubectl apply -f service.yml
- Verify service status
kubectl get svc -o wide

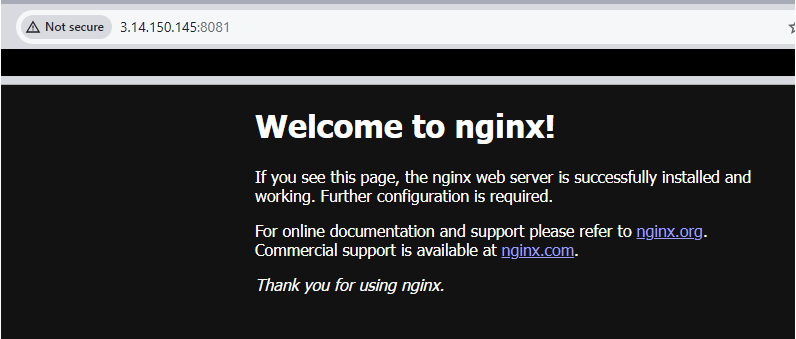
- Expose port to access application on browser,

- Now try to access

💡 If you need help or have any questions, just leave them in the comments! 📝 I would be happy to answer them!
💡 If you found this post useful, please give it a thumbs up 👍 and consider following for more helpful content. 😊
Thank you for taking the time to read! 💚
Subscribe to my newsletter
Read articles from Rajat Chauhan directly inside your inbox. Subscribe to the newsletter, and don't miss out.
Written by

Rajat Chauhan
Rajat Chauhan
Rajat Chauhan is a skilled Devops Engineer, having experience in automating, configuring, deploying releasing and monitoring the applications on cloud environment. • Good experience in areas of DevOps, CI/CD Pipeline, Build and Release management, Hashicorp Terraform, Containerization, AWS, and Linux/Unix Administration. • As a DevOps Engineer, my objective is to strengthen the company’s applications and system features, configure servers and maintain networks to reinforce the company’s technical performance. • Ensure that environment is performing at its optimum level, manage system backups and provide infrastructure support. • Experience working on various DevOps technologies/ tools like GIT, GitHub Actions, Gitlab, Terraform, Ansible, Docker, Kubernetes, Helm, Jenkins, Prometheus and Grafana, and AWS EKS, DevOps, Jenkins. • Positive attitude, strong work ethic, and ability to work in a highly collaborative team environment. • Self-starter, Fast learner, and a Team player with strong interpersonal skills • Developed shell scripts (Bash) for automating day-to-day maintenance tasks on top of that have good python scripting skills. • Proficient in communication and project management with good experience in resolving issues.