Building a Stellar Account Using SDKs
 Joanne Muthoni
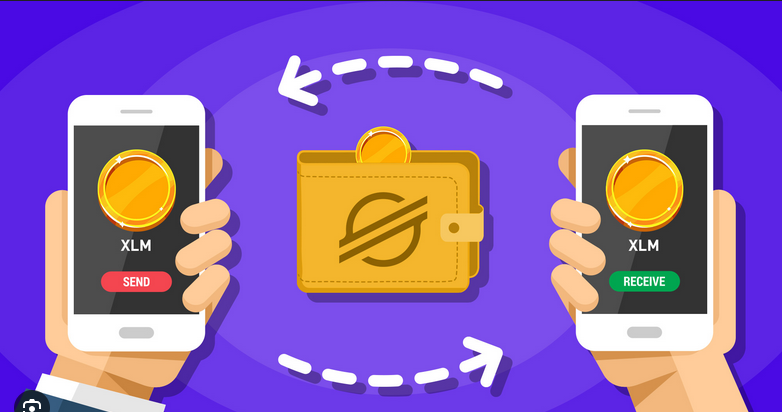
Accounts are a fundamental building block on Stellar. They hold your balances and allow you to send and receive payments, as well as buy and sell assets.
Before you start developing on Stellar, you'll need an account. In this guide, I'll walk you through how to create an account and demonstrate how sending and receiving transactions work.
Overview
in this step by step guide we will create a stellar account using Js stellar SDKs to interact with the stellar network.
create a new stellar account
view accounts details like balances
send and receive payments
view the transaction history
Step 1: setting up your folder
we start by creating a new folder and a Js file for our code and install the stellar SDKs that will allow us to interact with the stellar blockchain.
- open your terminal and run the following commands
mkdir stellar_account
cd stellar_account
touch stellar.js
now we need to install the Stellar SDK
npm install @stellar/stellar-sdk
step 2: Creating your account
creating your key pair
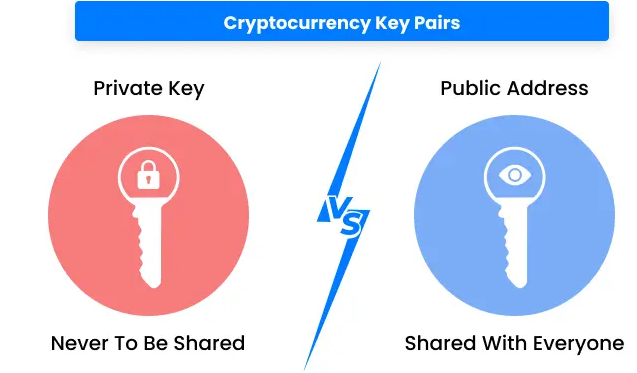
A Stellar account has a keypair: a public key and a secret key. The public key is shared with others to identify your account and verify that you authorized a transaction. However, the secret key is private information that proves you own your account and gives you access to it. You should never share your secret key with anyone under any circumstances.

In the stellar.js file add the following code.
import * as StellarSdk from "@stellar/stellar-sdk";

// Set up the Stellar server for the testnet
const server = new StellarSdk.Horizon.Server(("https://horizon-testnet.stellar.org")
The import - imports the stellar SDK so we ca use its functionality.
create your account:
const StellarSdk = require('stellar-sdk');
// create a completely new and unique pair of keys
// see more about KeyPair objects: https://stellar.github.io/js-stellar-sdk/Keypair.html
const pair = StellarSdk.Keypair.random();

pair.secret();
// SAV76USXIJOBMEQXPANUOQM6F5LIOTLPDIDVRJBFFE2MDJXG24TAPUU7
pair.publicKey();
// GCFXHS4GXL6BVUCXBWXGTITROWLVYXQKQLF4YH5O5JT3YZXCYPAFBJZB
Now that we have our key pairs, they do not yet create an account. This is because the account does not exist until it has been funded. Think of it like opening a bank account: you need to make a minimum deposit to activate the account and show that you are serious about using it. Similarly, on Stellar, your account must be funded before it becomes an actual account.
Stellar requires a minimum balance of 1 XLM for the account to be recorded on the ledger. Until your key pair receives funding, it is not recognized as an account on the Stellar network.
Step3: Geting Funds
The next step is to fund our account to make it a real account. We'll use the test network, where we can receive 10,000 test XLM from Friendbot, a friendly account funding tool. We'll send the public key we just created to Friendbot, and it will create and fund the account using the public key as the account ID.
Add the following code to stellar.js:
// Function to create a test account using Friendbot
async function createTestAccount(publicKey) {
  try {
    const response = await fetch(`https://friendbot.stellar.org?addr=${encodeURIComponent(publicKey)}`);
    const responseJSON = await response.json();
    console.log("SUCCESS! You have a new account :)\n", responseJSON);
    return responseJSON;
  } catch (error) {
    console.error("ERROR creating test account!", error);
    throw error;
  }
}

// Function to create a new account on the Stellar network
async function createNewAccount(parentKeypair) {
  try {
    const server = new StellarSdk.Server("https://horizon-testnet.stellar.org");
    const parentAccount = await server.loadAccount(parentKeypair.publicKey()); // Ensure parent account exists
    const childAccount = StellarSdk.Keypair.random(); // Generate a new random account

    // Create a transaction to create the new account
    const createAccountTx = new StellarSdk.TransactionBuilder(parentAccount, {
      fee: StellarSdk.BASE_FEE,
      networkPassphrase: StellarSdk.Networks.TESTNET,
    })
      .addOperation(
        StellarSdk.Operation.createAccount({
          destination: childAccount.publicKey(),
          startingBalance: "5",
        })
      )
      .setTimeout(180)
      .build();

    // Sign the transaction with the parent account
    createAccountTx.sign(parentKeypair);

    // Submit the transaction
    const txResponse = await server.submitTransaction(createAccountTx);
    console.log("Transaction successful:", txResponse);
    console.log("Created the new account:", childAccount.publicKey());

    return childAccount.publicKey();
  } catch (error) {
    console.error("ERROR creating new account!", error.response || error);
    throw error;
  }
}
Now we have funding in our account lets look on how we can check our details and balances
Step4: Getting Account Details
Just as we do with a our bank accounts we love to see the details and be update with our balances it is the same case with stellar we are going to see on how how we can see the accounts details.
add the code on stellar.js file
// Load the account information from the Stellar network using the public key
server.loadAccount('PUBLIC_KEY')
    .then(account => {
        // Log the account ID (public key) to the console
        console.log('Balances for account:', account.accountId());

        // Loop through each balance associated with the account
        account.balances.forEach(balance => {
            // Log the asset type and the balance for that asset to the console
            console.log('Type:', balance.asset_type, ', Balance:', balance.balance);
        });
    })
    .catch(error => {
        // Handle any errors that occur while loading the account
        console.error('Error loading account:', error);
    });
this fetches the account details from the Stellar Network using the Public key
step5: sending and receiving funds
sending funds
For you to send and receive payments you will need two accounts make sure you create the other account one for sending and the other to receive payments.
Stellar stores and communicates transaction data in binary format called External Data Representation (XDR)
XDR is optimized for network performance but unreadable to human eye , the horizon stellar API, and stellar SDKs converts XDR into friendlier formats
How to sent 10 lumen to an account:
 // Load the source account using its secret key
 const sourceKeys = StellarSdk.Keypair.fromSecret("SCZANGBA5YHTNYVVV4C3U252E2B6P6F5T3U6MM63WBSBZATAQI3EBTQ4");

 // Define the destination account's public key
 const destinationId = "GA2C5RFPE6GCKMY3US5PAB6UZLKIGSPIUKSLRB6Q723BM2OARMDUYEJ5";

 // Variable to hold the built transaction, in case we need to resubmit it
 let transaction;

 // First, check if the destination account exists
 server
   .loadAccount(destinationId)
   .catch(error => {
     // Handle the error if the destination account does not exist
     if (error instanceof StellarSdk.NotFoundError) {
       throw new Error("The destination account does not exist!");
     } else {
       // Re-throw the error if it's something else
       throw error;
     }
   })
   .then(() => {
     // Load up-to-date information on the source account
     return server.loadAccount(sourceKeys.publicKey());
   })
   .then(sourceAccount => {
     // Start building the transaction
     transaction = new StellarSdk.TransactionBuilder(sourceAccount, {
       fee: StellarSdk.BASE_FEE,
       networkPassphrase: StellarSdk.Networks.TESTNET,
     })
       .addOperation(
         StellarSdk.Operation.payment({
           destination: destinationId,
           // Specify the asset type as native (Stellar Lumens)
           asset: StellarSdk.Asset.native(),
           amount: "10", // Amount to send
         })
       )
       // Add an optional memo to the transaction
       .addMemo(StellarSdk.Memo.text("Test Transaction"))
       // Set a timeout of 3 minutes for the transaction
       .setTimeout(180)
       .build();

     // Sign the transaction with the source account's secret key
     transaction.sign(sourceKeys);

     // Submit the transaction to the Stellar network
     return server.submitTransaction(transaction);
   })
   .then(result => {
     // Log the successful transaction result
     console.log("Success! Results:", result);
   })
   .catch(error => {
     // Handle any errors that occurred during the process
     console.error("Something went wrong!", error);

     // If the result is unknown (no response, timeout, etc.), you can resubmit the transaction
     // server.submitTransaction(transaction);
   });
This function sends 10 lumens to the specified account.
Receive payments
If the payer successfully sends assets to you, those assets will automatically be added to your account. As the receiver, you don't need to take any action—just wait for the lumens to arrive.
Step6: Viewing the transaction history
You'll likely be curious to see the transaction history of your account, including the payments sent and received. The following function will guide you on how to do that
export async function fetchPayments(accountId) {
  try {
    // Fetch operations related to the account from the Horizon testnet API
    const response = await fetch(
      `https://horizon-testnet.stellar.org/accounts/${accountId}/operations`
    );
    const data = await response.json();

    // Map the operations to extract payment details
    const payments = data._embedded.records.map((op) => ({
      type: op.type,
      amount: op.amount,
      asset: op.asset_type === "native" ? "lumens" : `${op.asset_code}:${op.asset_issuer}`,
      from: op.from,
      to: op.to,
      timestamp: op.created_at,
    }));

    // Filter out sent payments
    const sentPayments = payments.filter((payment) => payment.from === accountId);

    // Filter out received payments
    const receivedPayments = payments.filter((payment) => payment.to === accountId);

    // Return the filtered sent and received payments
    return { sentPayments, receivedPayments };
  } catch (error) {
    console.error("Error fetching payments:", error);

    // Return empty arrays if there's an error
    return { sentPayments: [], receivedPayments: [] };
  }
}
This function makes a request to the Horizon API to retrieve all operations related to a given account.
Conclusion
With your Stellar account set up, you're now equipped to send and receive payments, and even track your transaction history. This foundational knowledge opens the door to developing on the Stellar network and creating new, innovative applications. Whether you're building financial tools, integrating blockchain technology, or exploring decentralized solutions, Stellar provides a robust platform for your ideas to flourish. Now that you have the basics down, it's time to start developing and see where your creativity takes you!
Resources
Subscribe to my newsletter
Read articles from Joanne Muthoni directly inside your inbox. Subscribe to the newsletter, and don't miss out.
Written by
