Create EC2 with Custom User Data & Connect via Instance Connect and SSH
 Muhammad Hamza Shabbir
EC2 stands for Elastic Compute Cloud. EC2 is an on-demand computing service on the AWS cloud platform. Under computing, it includes all the services a computing device can offer to you along with the flexibility of a virtual environment. It also allows the user to configure their instances as per their requirements i.e. allocate the RAM, ROM, and storage according to the need of the current task.
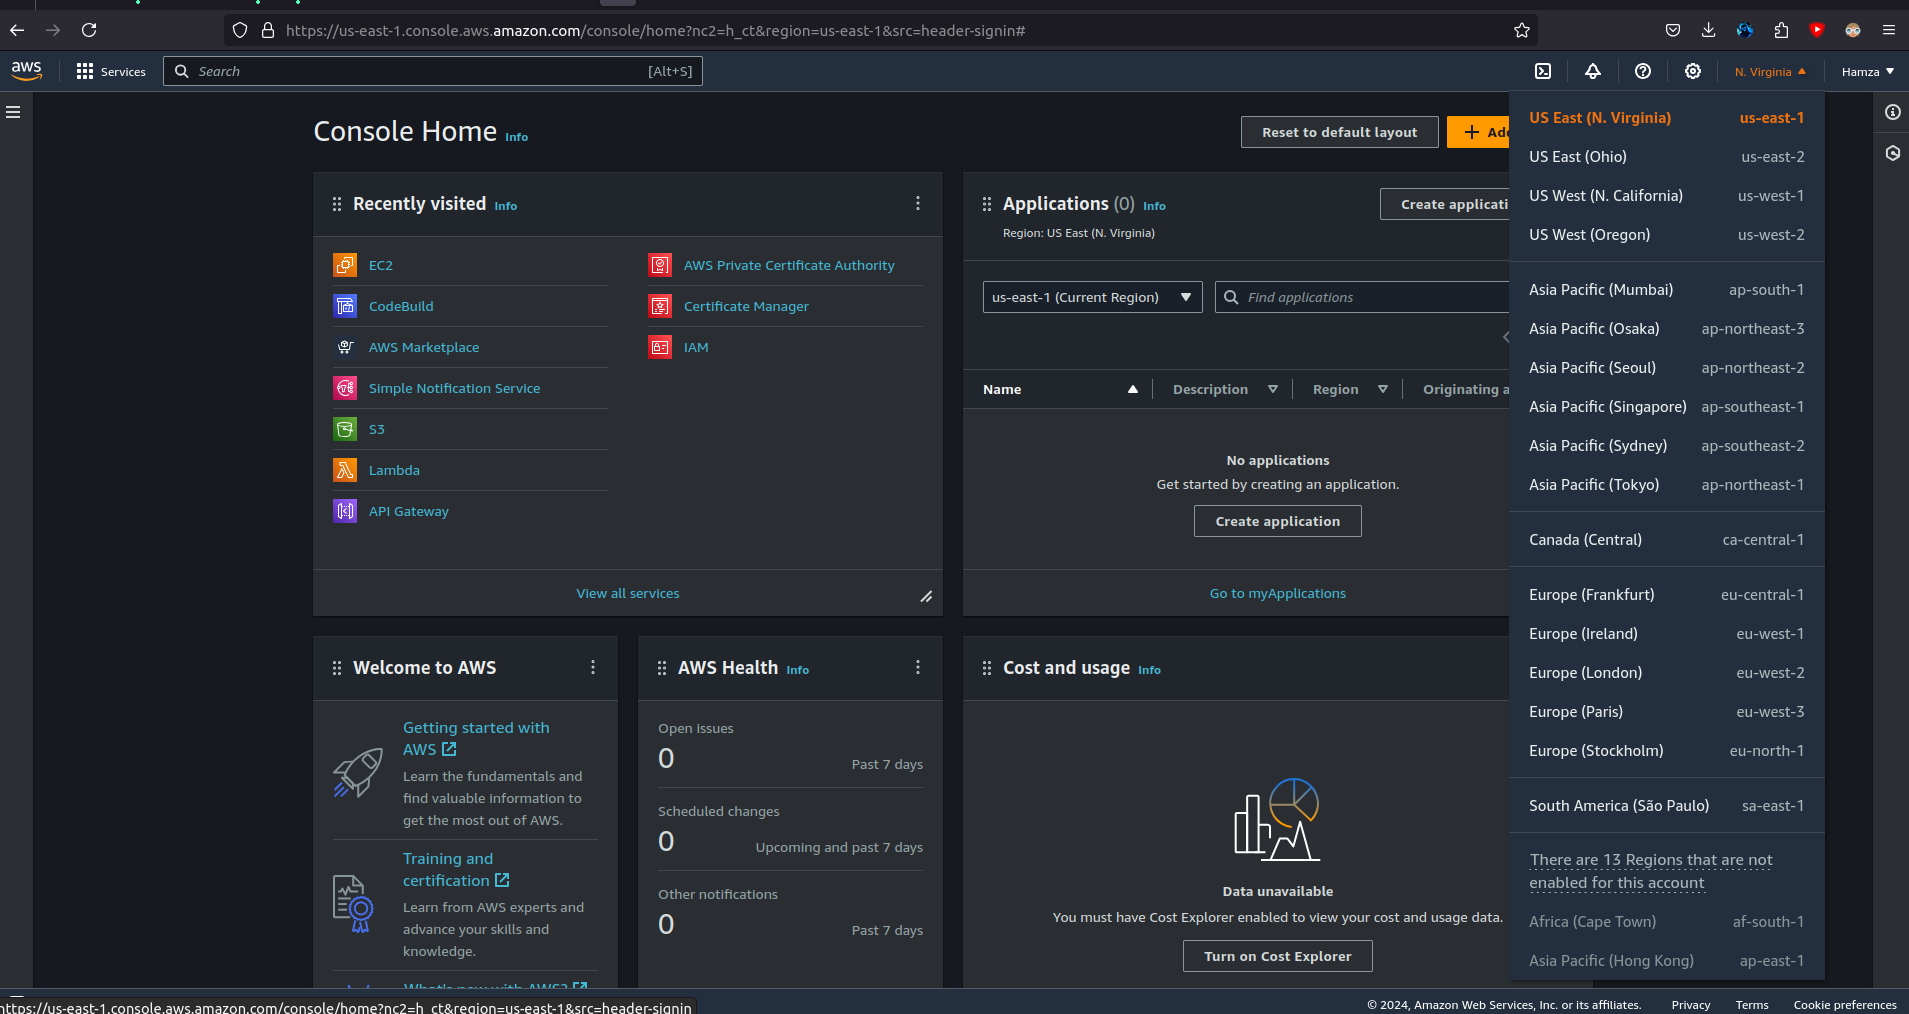
Step 1: First, log into your AWS account and click on sign in to the console.

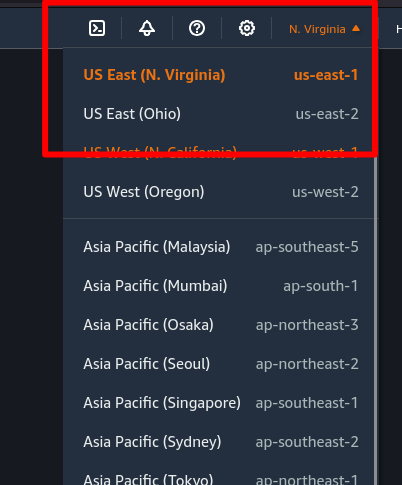
Step 2: Choose the region from the top right corner in which region you deployed the EC2.
Step 3: Click on services present on the left of the AWS management console, i.e. the primary screen. From the drop-down menu of options, tap on “EC2”.

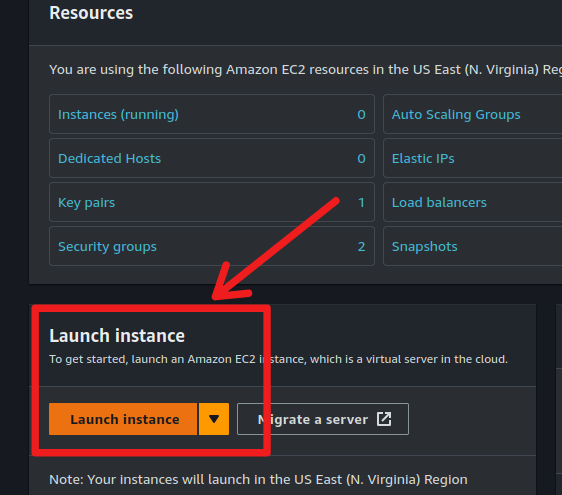
Step 4: Click on the launch instance, after clicking on it you will be redirected to a launch page where we can create an instance. Configure all the requirements to Create a new instance like the name of the instance as shown in the figure below.
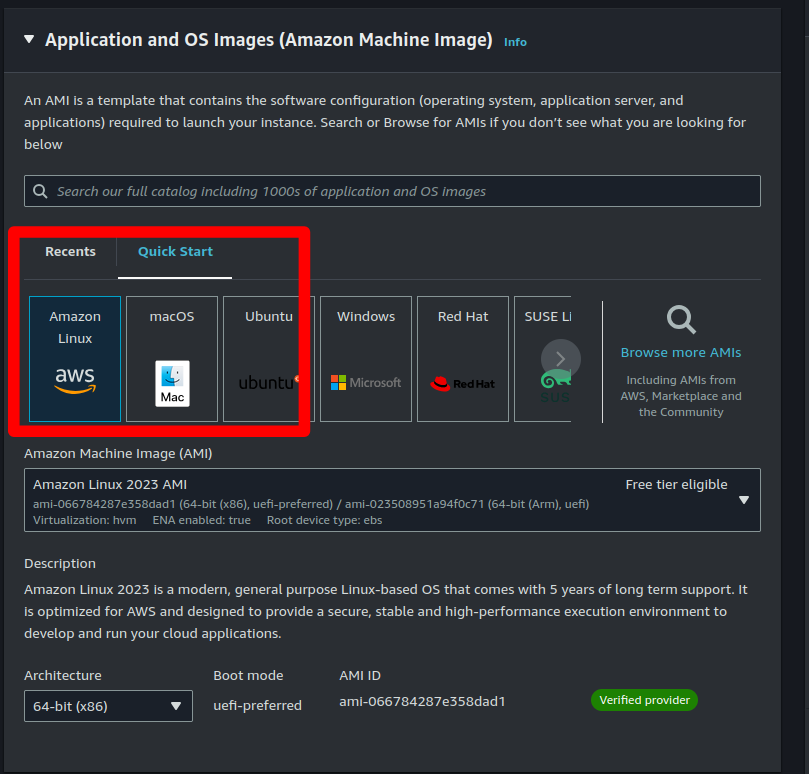
Step 5: Type name of instance and Select AMI – Required operating system from the available. There are different types of OS available select the OS as per your requirement.
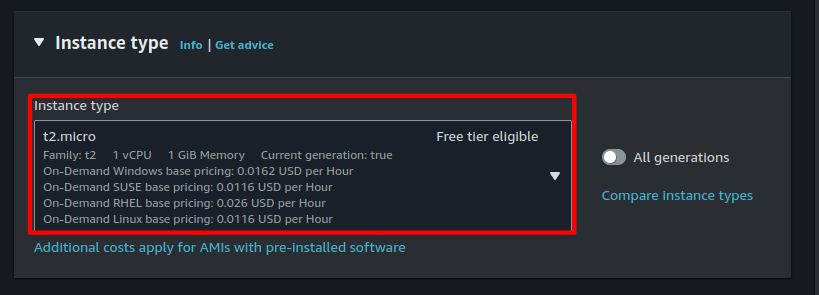
Step 6: By default, it selects a free tier of storage. (IF YOU ARE ELIGIBLE FOR THE FREE TIER). From the available storage specifications, select a free tier-eligible storage service. The instance type includes the no.of CPU's required and the Memory required for your application. By default, the instance type is t2.micro which is a free tier-eligible service. Do not select any other which leads to the billing amount.
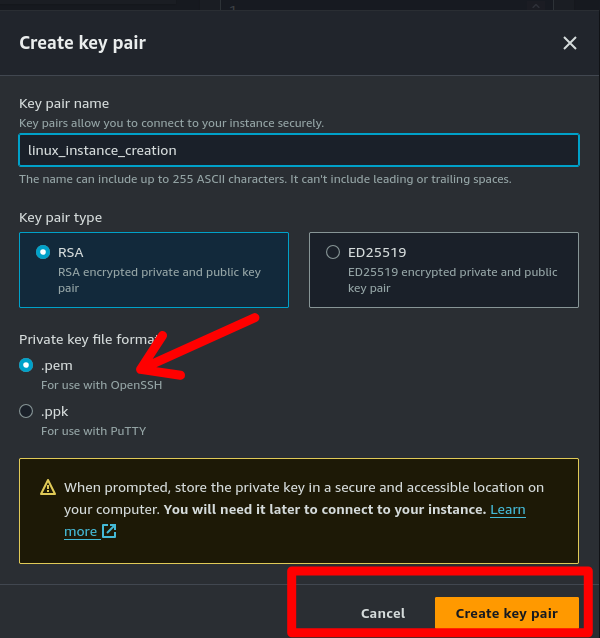
Step 7: Now, create a key-value pair, by clicking on Create new key pair. A window will pop up for creating key pair as shown below. The key value pair plays a major role while connecting to the EC2-Instance it will act as an SSH-Key to connect to the instance. Create Key-Pair Enter name>>Select “.pem” and create. Automatically key pair which was created will be downloaded. Select the created key pair.
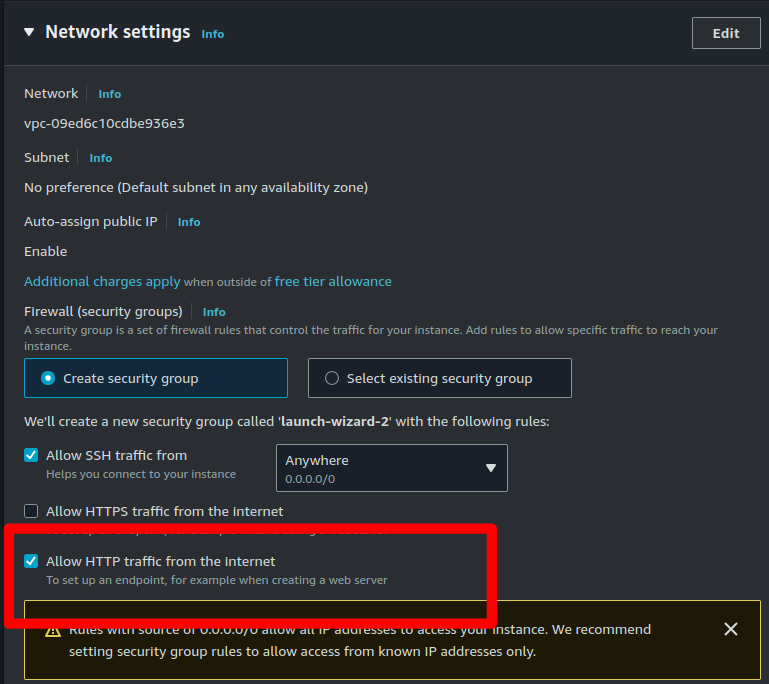
Step 8: Keep the network settings as default settings also check the HTTP checkbox show in below image and make changes if required Storage. As mentioned in the picture, Free tier eligible can get up to 8GB for Linux and 30GB for windows.
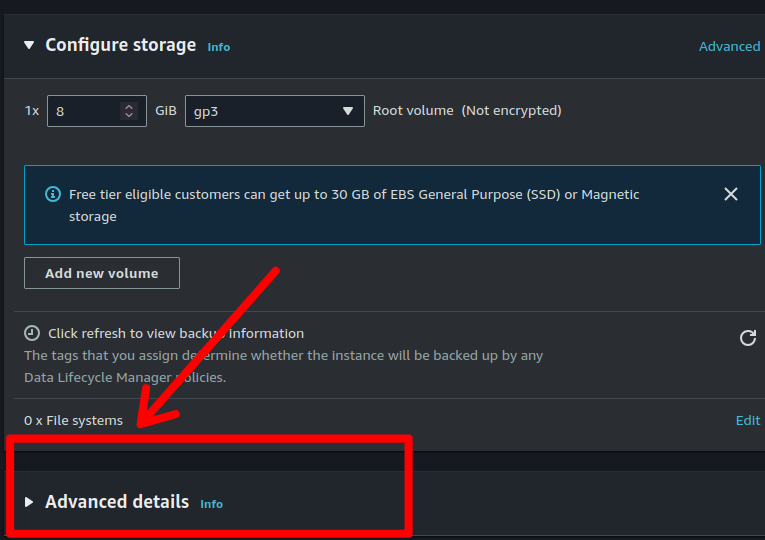
Step 9: Click on the Advanced Details button and scroll down to the bottom. Here, you will find the User data field where you can insert the code to automatically install the Apache web server. This code will also add content to the default root directory. The output will be visible in the browser when you access the instance's public IP.
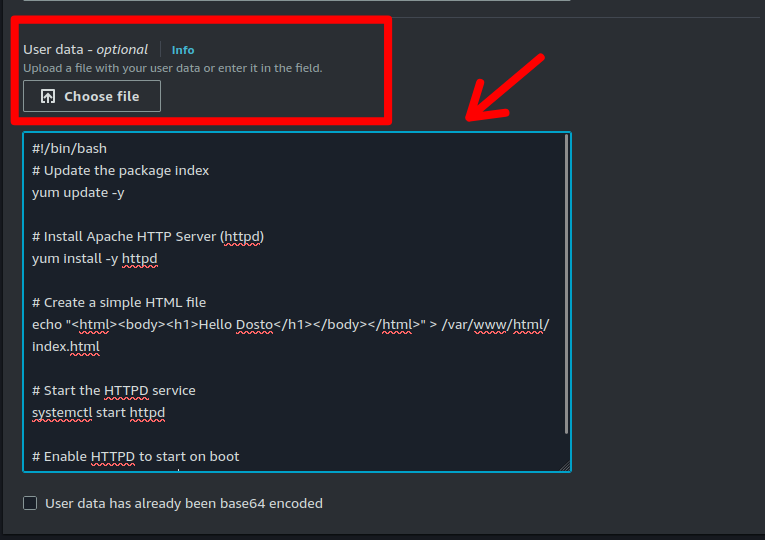
#!/bin/bash
# Update the package index
yum update -y

# Install Apache HTTP Server (httpd)
yum install -y httpd

# Create a simple HTML file
echo "<html><body><h1>Hello Dosto</h1></body></html>" > /var/www/html/index.html

# Start the HTTPD service
systemctl start httpd

# Enable HTTPD to start on boot
systemctl enable httpd
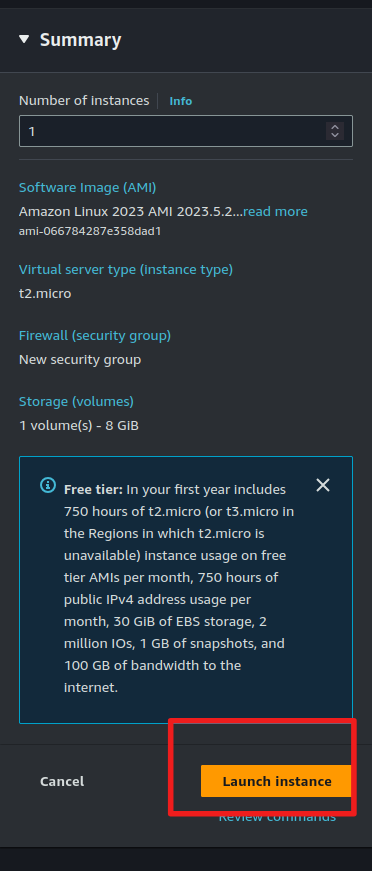
Step 10: Finally, verify that all selected options are eligible for the free tier, and click on Launch instance. That’s it! Your instance will be created.
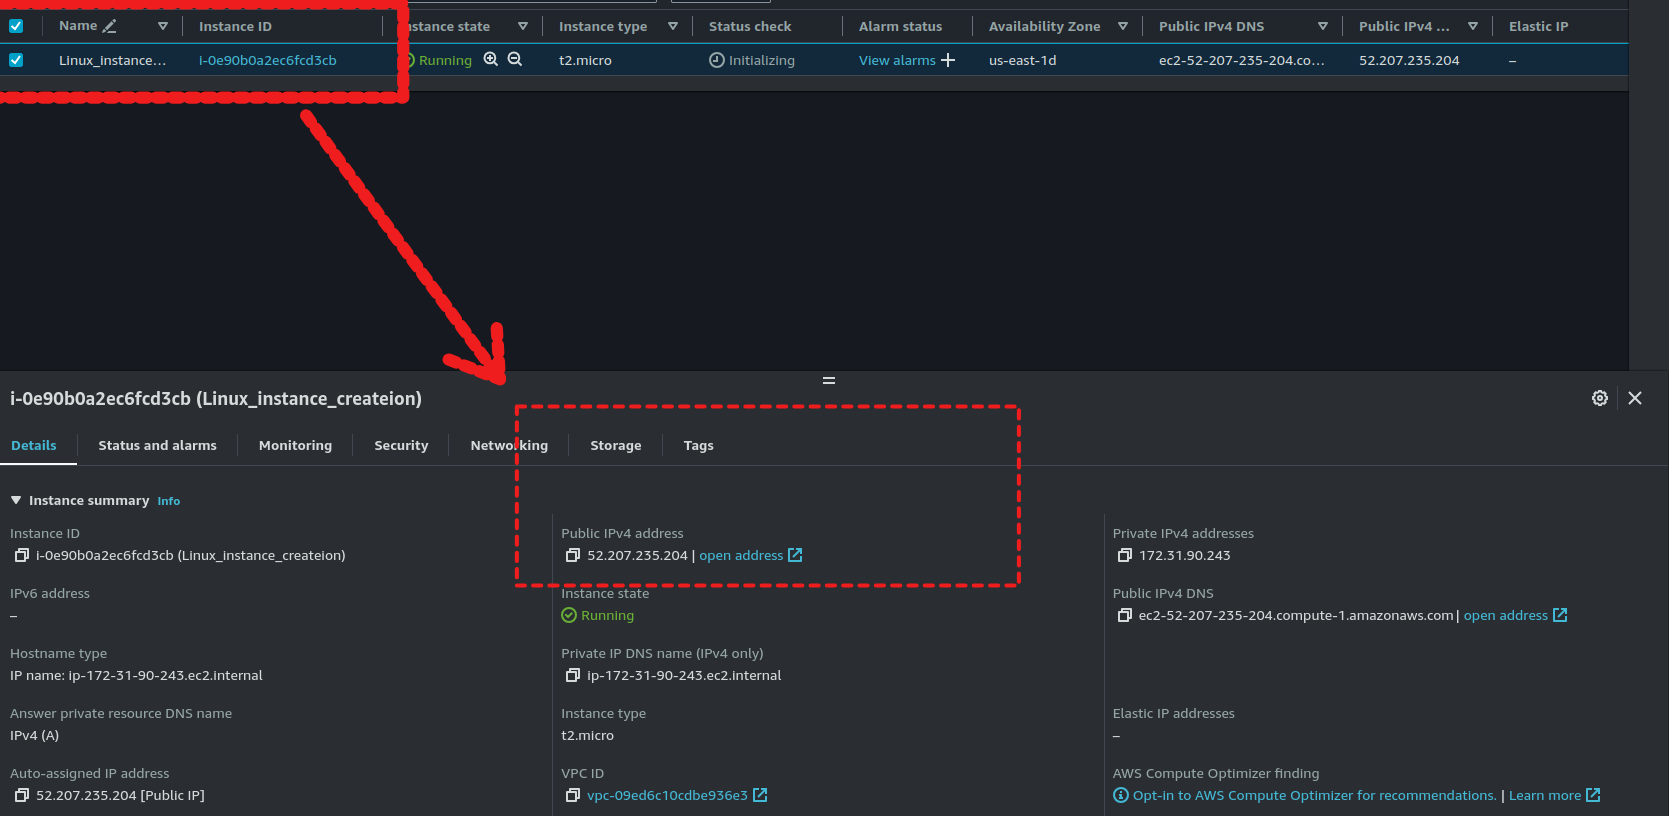
Step 11: Select the instance you just created, copy its public IP, and paste it into your browser’s address bar. You should see the output defined in the previous steps.
Steps to Connect to the Terminal Using Instance Connect and SSH-Key
Step 1: Select the server you want to connect to and click on the Connect button at the right top corner
Step 2: Click on Connect. A new tab will open where you can connect to the instance.
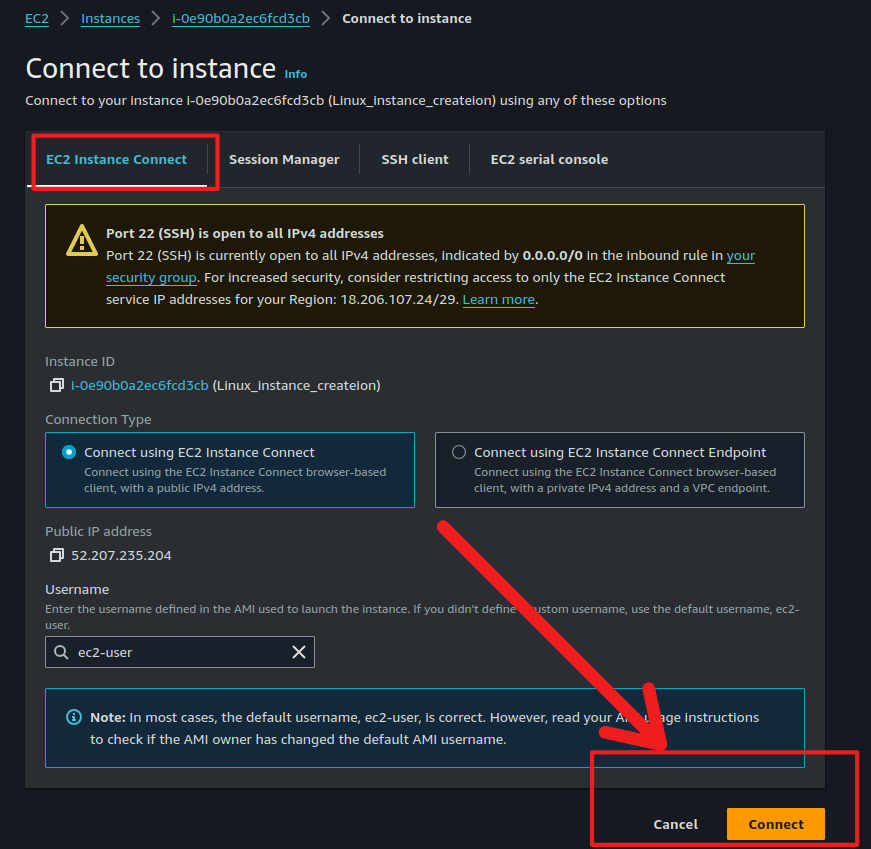
Step 3: Follow Step 1, then click on SSH client to establish the connection.
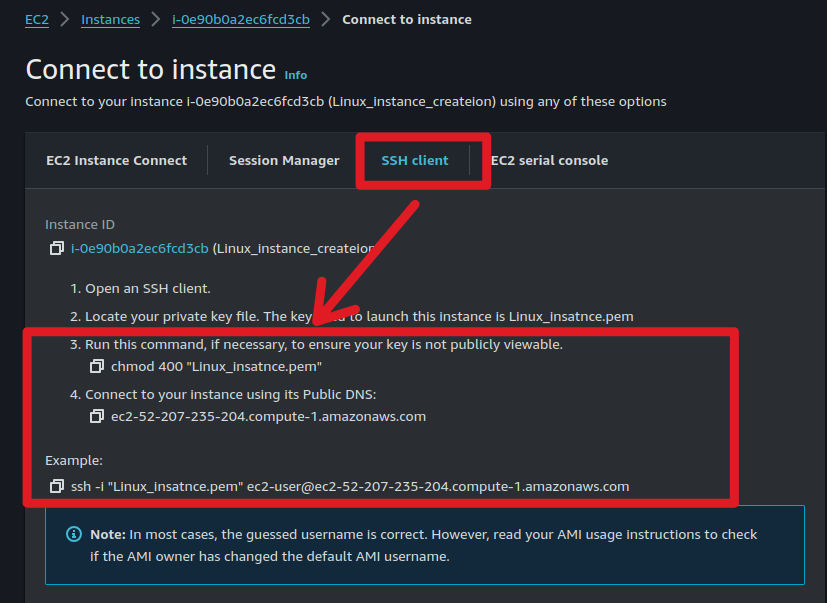
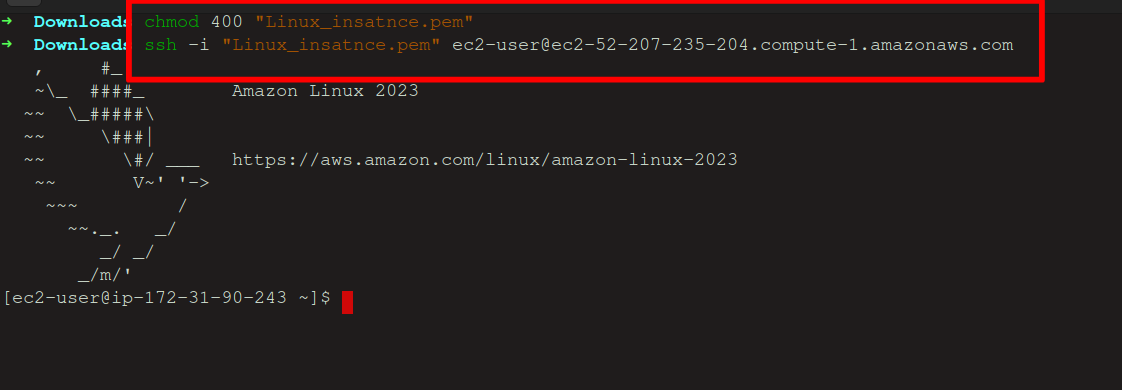
Step4: Copy the example command, and open your terminal, Power-Shell, or CMD. Navigate to the folder where the key.pem file was downloaded in step 7, then paste the copied command. After that, type "yes." You can now connect to the EC2 instance through the terminal.
EC2 (Elastic Compute Cloud) is an on-demand computing service on AWS that offers flexible virtual computing environments. This guide provides step-by-step instructions to launch an EC2 instance, configure it, and connect via SSH. Key steps include logging into AWS, selecting a region, launching an instance, configuring settings, creating a key pair, and entering user data to install Apache. Finally, it details verifying the instance setup and accessing it through a browser, as well as connecting to the terminal using the instance connect and SSH key.
Thank you so much for following my blog! Please like and follow me for more upcoming Dev-ops-related content. You can also follow me on LinkedIn and other platforms. Expand your knowledge by exploring the topic of my latest blog:
Subscribe to my newsletter
Read articles from Muhammad Hamza Shabbir directly inside your inbox. Subscribe to the newsletter, and don't miss out.
Written by

Muhammad Hamza Shabbir
Muhammad Hamza Shabbir
I am a seasoned DevOps Engineer with a strong background in automating, configuring, and optimizing cloud-based infrastructures on AWS, Azure, and Google Cloud Platform (GCP). My expertise lies in deploying containerized applications using Docker and Kubernetes, enhancing CI/CD pipelines, and implementing server-less functions to drive efficiency with certifications in Azure, AWS, and GCP