How to Deploy a Static Website on AWS S3
 Muhammad Hamza Shabbir
If you're looking to deploy a simple static website quickly and efficiently, AWS S3 is a great option. In this tutorial, we'll walk through the steps to create an S3 bucket, upload your website files, configure it for static hosting, and make it publicly accessible. You can get the static website code from this URL: https://github.com/852hamza/digital_timer. Just fork or download the zip file into your local system to complete this lab.
Step 1: Create an S3 Bucket
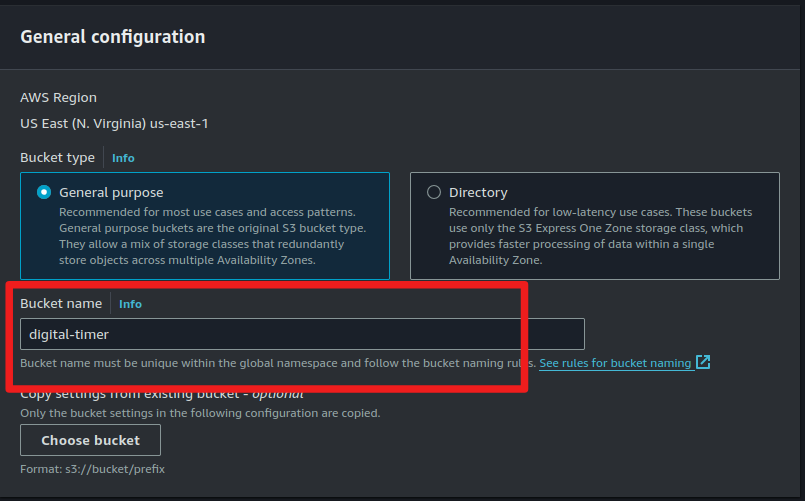
The first step is to create an S3 bucket where your website files will be stored. Make sure to choose a unique name for the bucket, preferably one that matches your website's domain name.
Open the S3 console in the AWS Management Console.
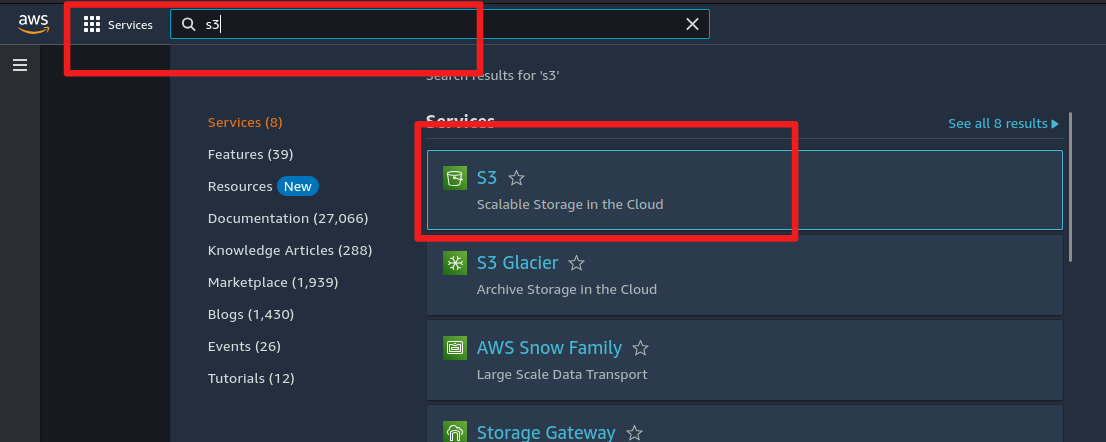
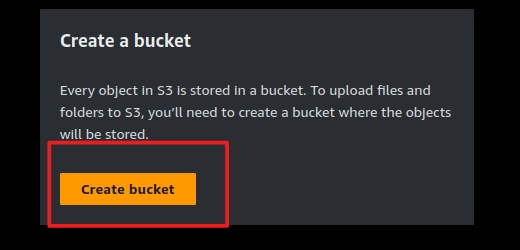
Click on "Create bucket."
Enter a unique bucket name that reflects your website's domain.
Block Public Access Settings:
To ensure your bucket is secure by default, keep the "Block all public access" checkbox is unchecked.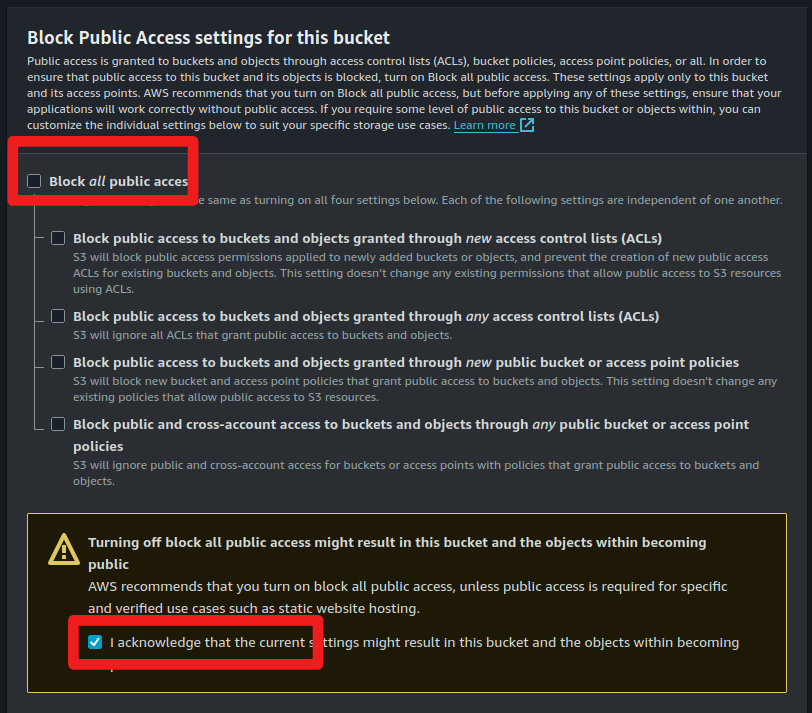
Leave other settings as default unless you need specific configurations.
Click "Create bucket."

Step 2: Upload Website Files
After creating the bucket, the next step is to upload your static website files, such as HTML, CSS, JS, and images.
Open your bucket by clicking on its name in the S3 console.

Click on "Upload."

Add files or folders containing your website's assets.
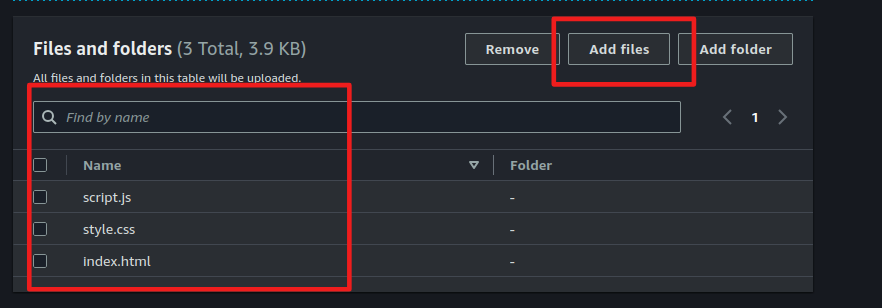
Click "Upload" to start the process.

Step 3: Configure the Bucket for Static Website Hosting
S3 provides an option to enable static website hosting, allowing your bucket to serve files directly via HTTP.
Go to the "Properties" tab within your bucket.

Scroll down to "Static website hosting."

Enable static website hosting and Enter your index document (e.g.,
index.html).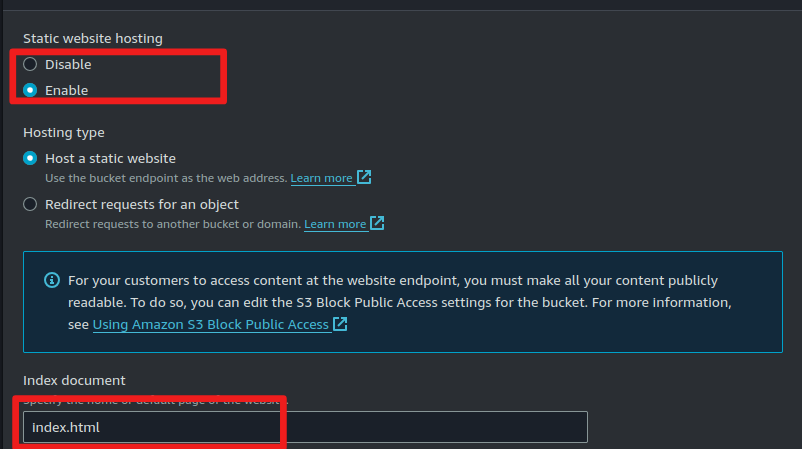
Optionally, specify an error document (e.g.,
error.html).Save the changes.

Step 4: Set Bucket Policy for Public Access
To make your website publicly accessible, you'll need to configure a bucket policy that allows public read access.
Navigate to the "Permissions" tab in your bucket.

Click on "Bucket Policy."

Add the following policy code to make your bucket publicly accessible and click on save changes:
{
    "Version": "2012-10-17",
    "Statement": [
      {
        "Sid": "PublicReadGetObject",
        "Effect": "Allow",
        "Principal": "*",
        "Action": "s3:GetObject",
        "Resource": "arn:aws:s3:::your-bucket-name/*"
      }
    ]
  }
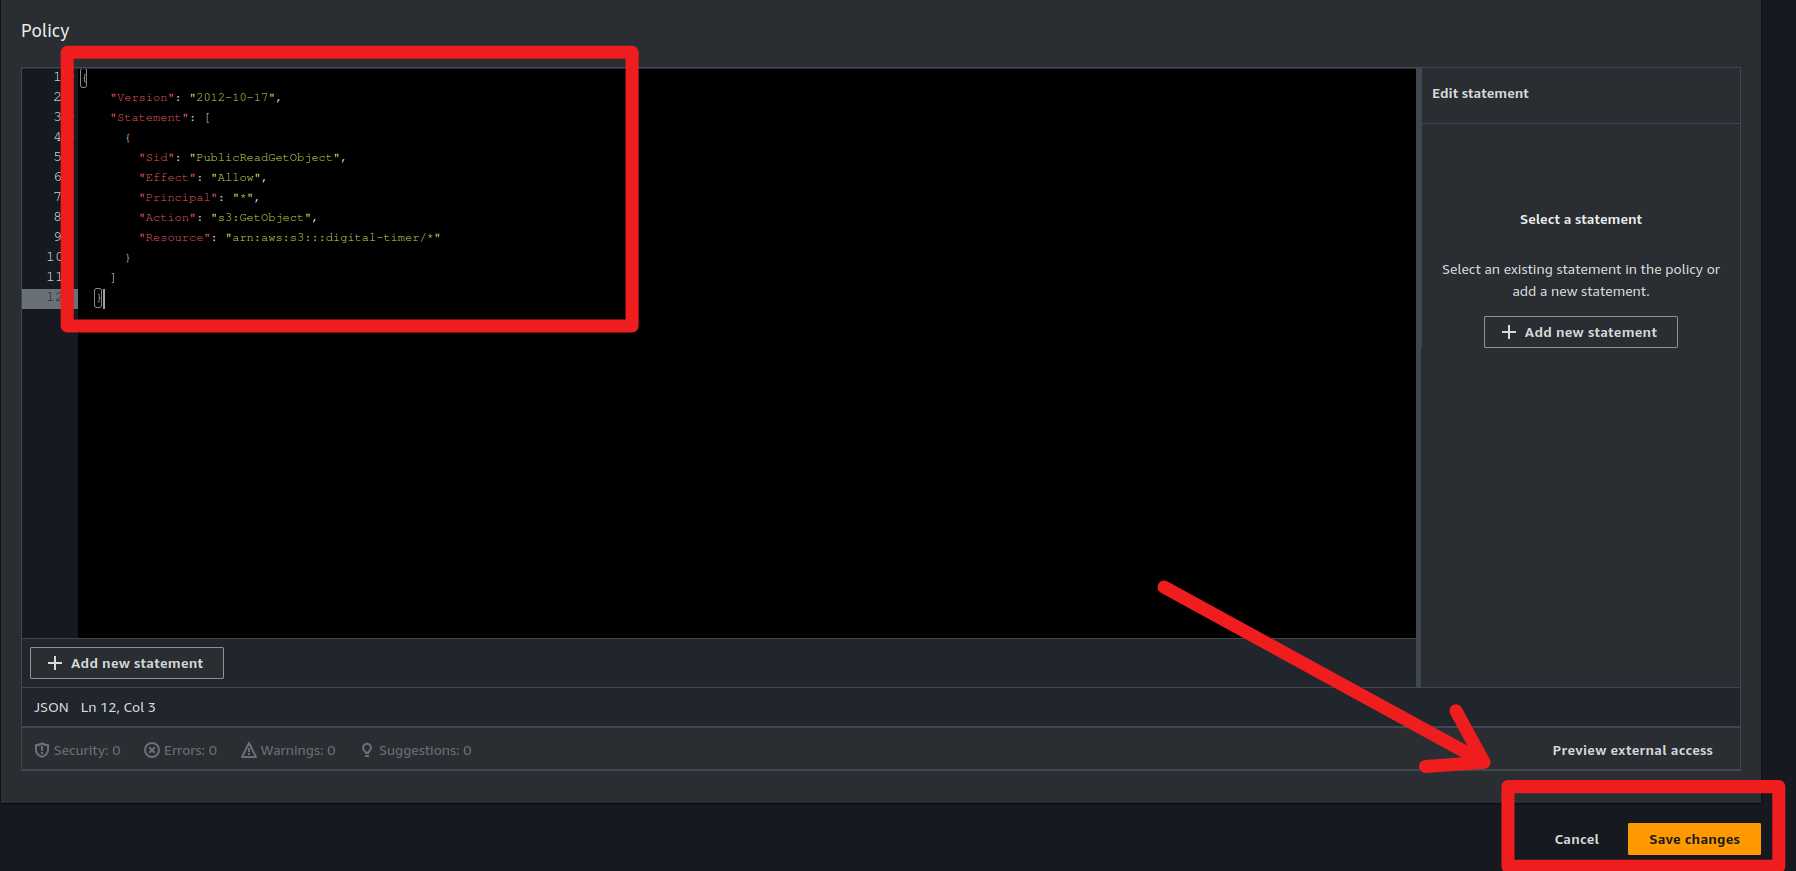
4. Copy the static bucket link from the Properties tab.
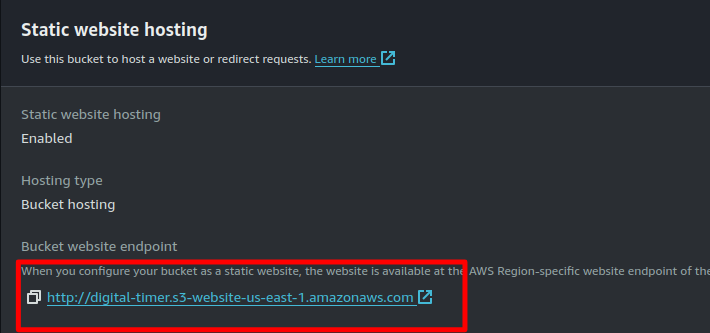
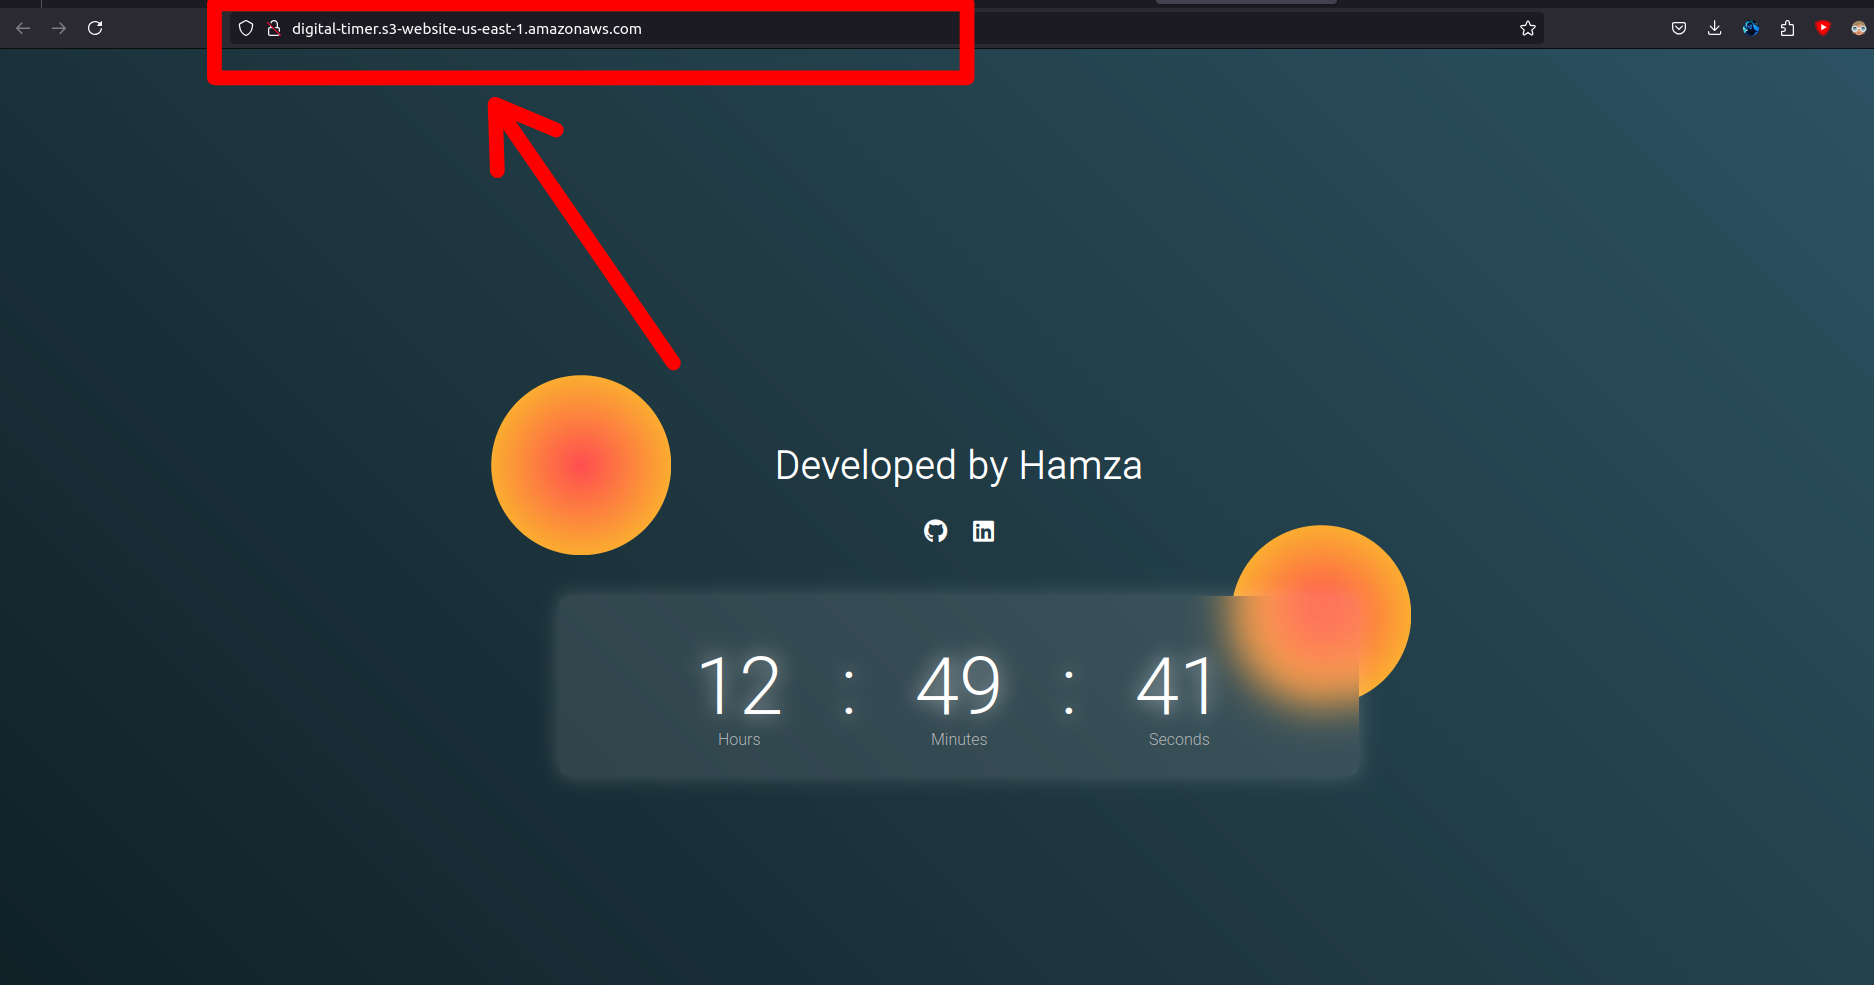
5. Open a new browser tab and paste the link. You will see the output of your static website that you have just deployed.
If you're looking to quickly deploy a simple static website, AWS S3 offers an efficient solution. This tutorial covers creating an S3 bucket, uploading website files, configuring static hosting, and setting up public access. Follow these steps to host your static site: create an S3 bucket, upload site files, enable static website hosting, and set a public access policy. Visit the provided GitHub URL for sample static website code.
Subscribe to my newsletter
Read articles from Muhammad Hamza Shabbir directly inside your inbox. Subscribe to the newsletter, and don't miss out.
Written by

Muhammad Hamza Shabbir
Muhammad Hamza Shabbir
I am a seasoned DevOps Engineer with a strong background in automating, configuring, and optimizing cloud-based infrastructures on AWS, Azure, and Google Cloud Platform (GCP). My expertise lies in deploying containerized applications using Docker and Kubernetes, enhancing CI/CD pipelines, and implementing server-less functions to drive efficiency with certifications in Azure, AWS, and GCP