Day 47: AWS Elastic Beanstalk
 Pooja Bhavani
Today, we explore the new AWS service- Elastic Beanstalk. We'll also cover deploying a small web application (game) on this platform
What is AWS Elastic Beanstalk?
AWS Elastic Beanstalk is a service used to deploy and scale web applications developed by developers.
It supports multiple programming languages and runtime environments such as Java, .NET, PHP, Node.js, Python, Ruby, Go, and Docker.
Why do we need AWS Elastic Beanstalk?
Previously, developers faced challenges in sharing software modules across geographically separated teams.
AWS Elastic Beanstalk solves this problem by providing a service to easily share applications across different devices.
Advantages of AWS Elastic Beanstalk
Highly scalable
Fast and simple to begin
Quick deployment
Supports multi-tenant architecture
Simplifies operations
Cost efficient
Components of AWS Elastic Beanstalk
Application Version: Represents a specific iteration or release of an application's codebase.
Environment Tier: Defines the infrastructure resources allocated for an environment (e.g., web server environment, worker environment).
Environment: Represents a collection of AWS resources running an application version.
Configuration Template: Defines the settings for an environment, including instance types, scaling options, and more.
Elastic Beanstalk Environment
There are two types of environments: web server and worker.
Web server environments are front-end facing, accessed directly by clients using a URL.
Worker environments support backend applications or micro apps.
Task-01
Deploy the 2048-game using the AWS Elastic Beanstalk.
sudo apt-get update && sudo apt-get upgrade -y

- Now create folder called 2048 and create a Dockerfile.
mkdir 2048
cd 2048
vim Dockerfile
FROM ubuntu:22.04

RUN apt-get update
RUN apt-get install -y nginx zip curl

RUN echo "daemon off;" >> /etc/nginx/nginx.conf
RUN curl -o /var/www/html/master.zip -L https://codeload.github.com/gabrielecirulli/2048/zip/master
RUN cd /var/www/html/ && unzip master.zip && mv 2048-master/* . && rm -rf 2048-master master.zip

EXPOSE 80

CMD ["/usr/sbin/nginx", "-c", "/etc/nginx/nginx.conf"]

- Now install docker on your system and give permission.
sudo apt-get install docker.io -y
sudo chown $USER /var/run/docker.sock

- Now build your docker image using this command.
docker build . -t 2048-game

- Now run the docker container using this command.
docker run -d -p 80:80 2048-game

- Now copy your IP address in your new tab and play the game.

Now deploy your application in AWS Elastic Beanstalk.
- Go to your AWS management console and navigate to AWS Elastic Beanstalk.
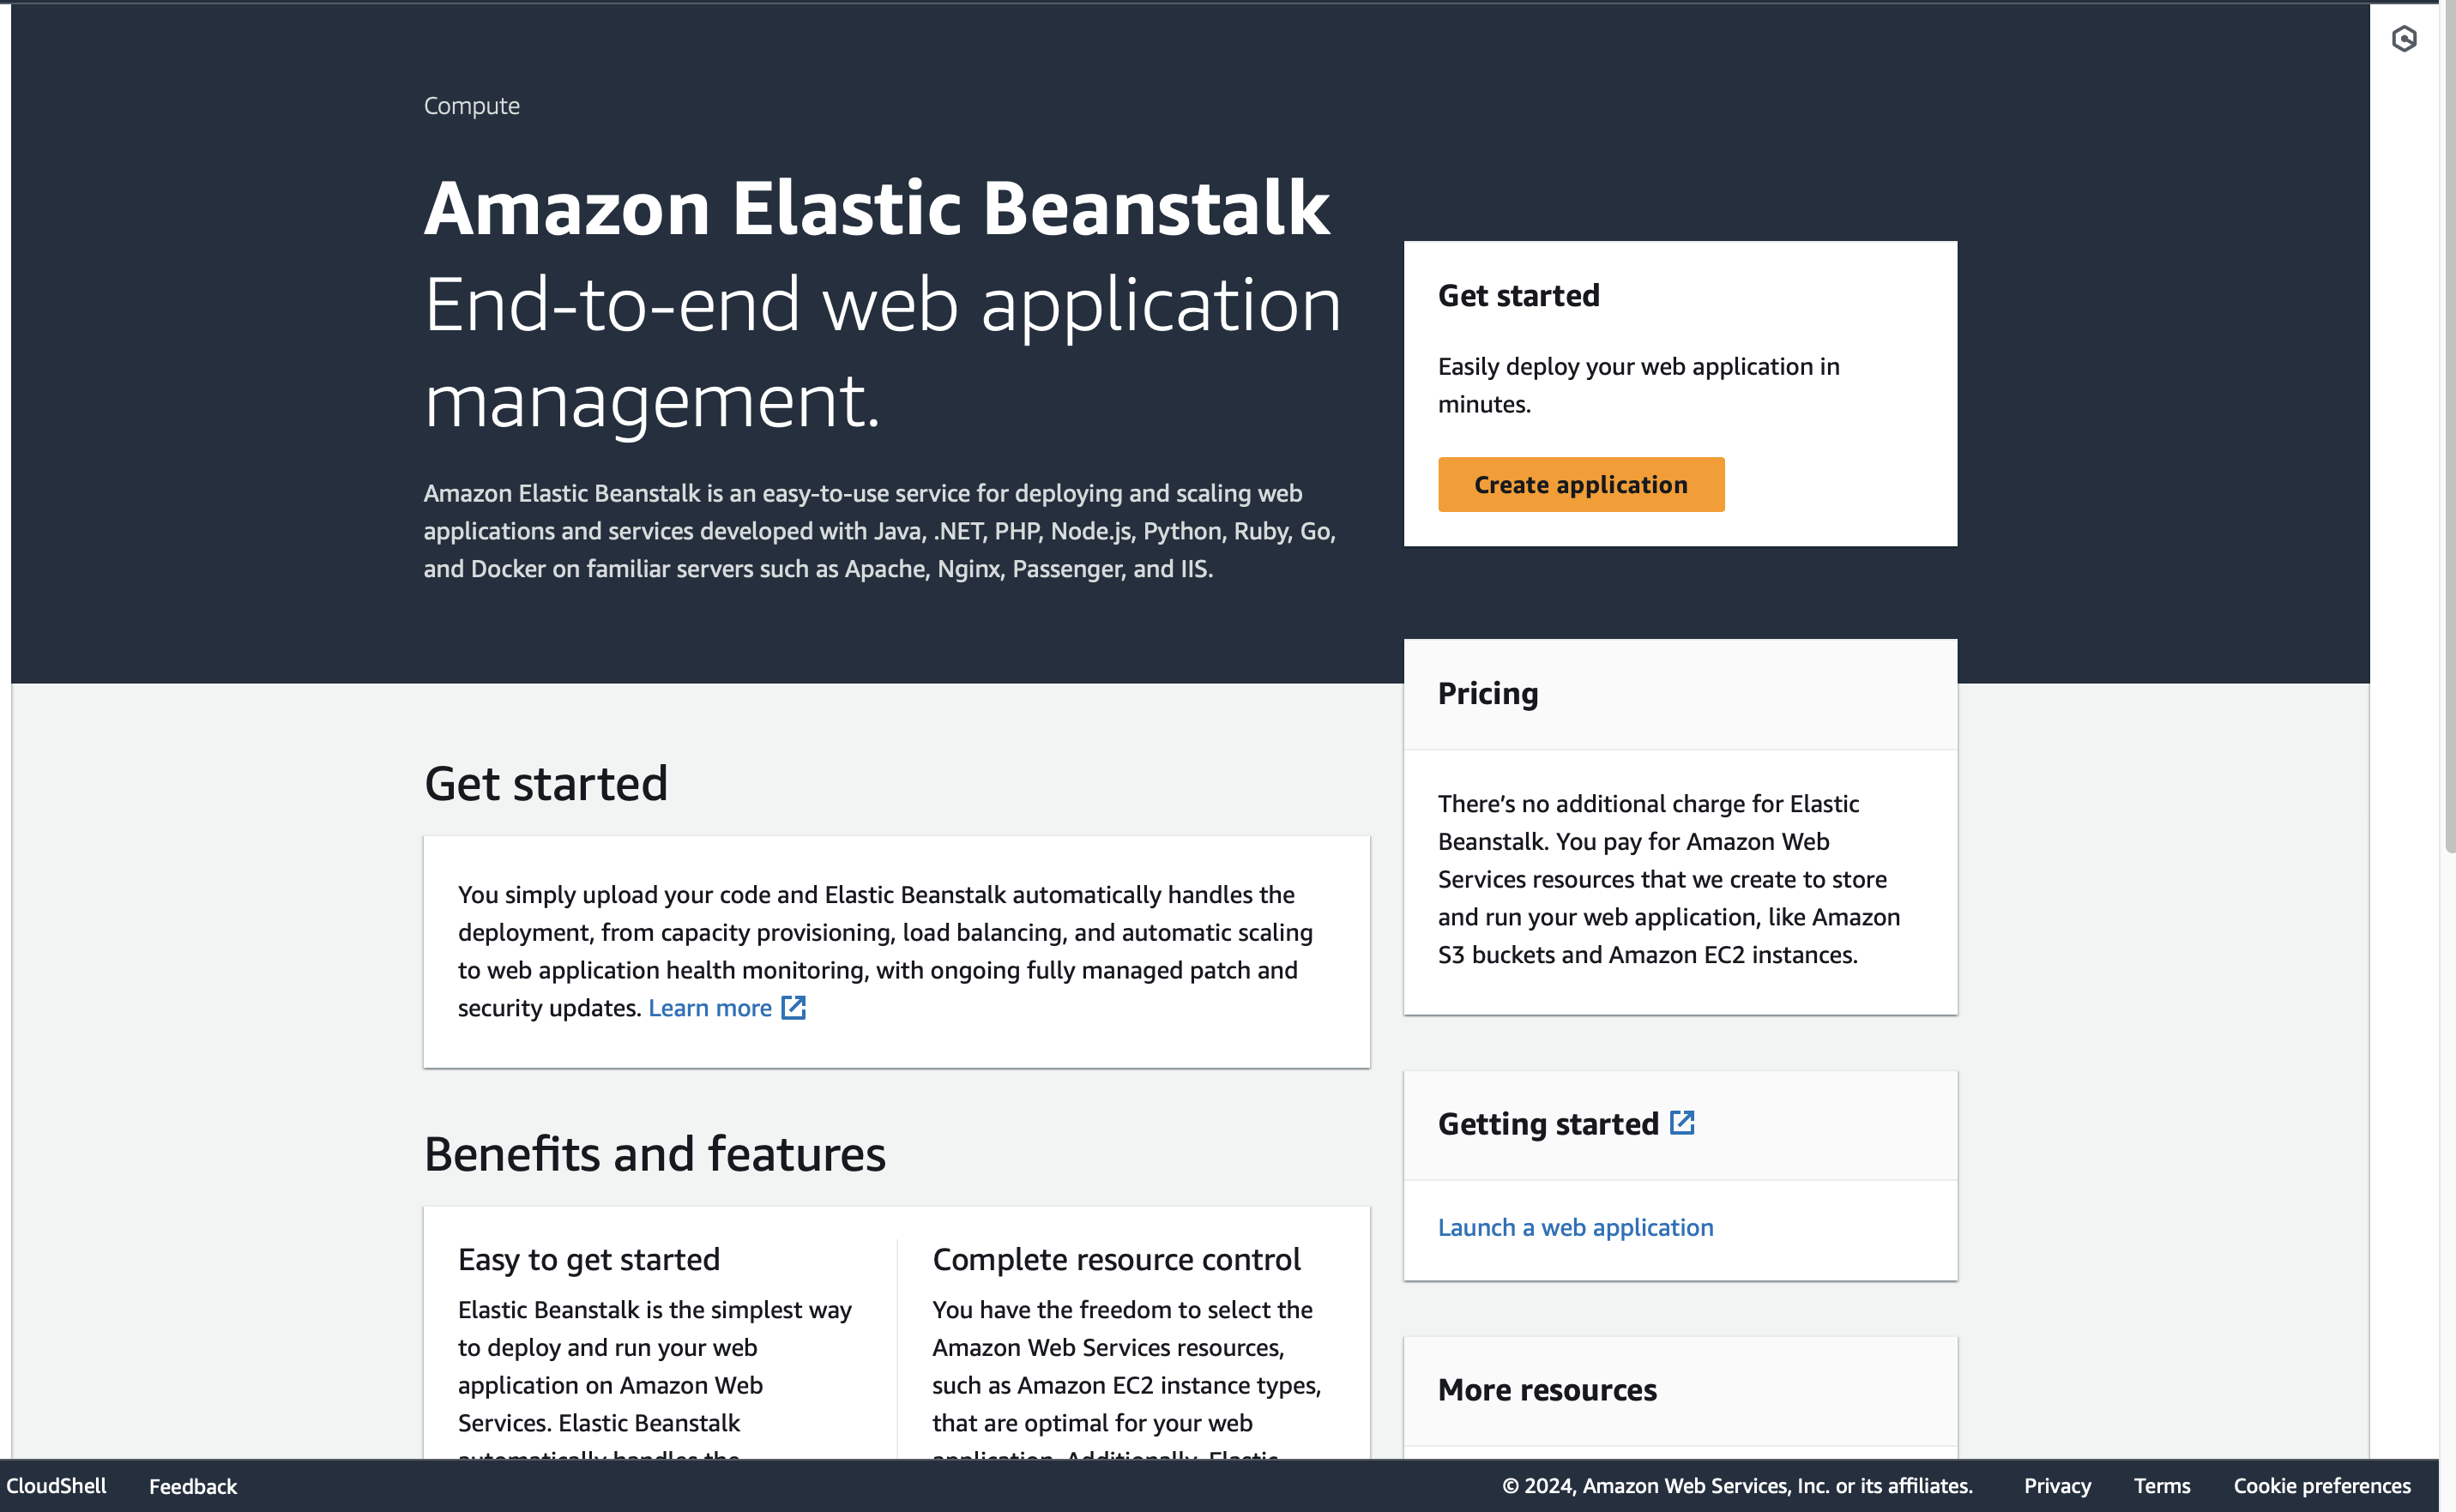
- Now click on Create application.
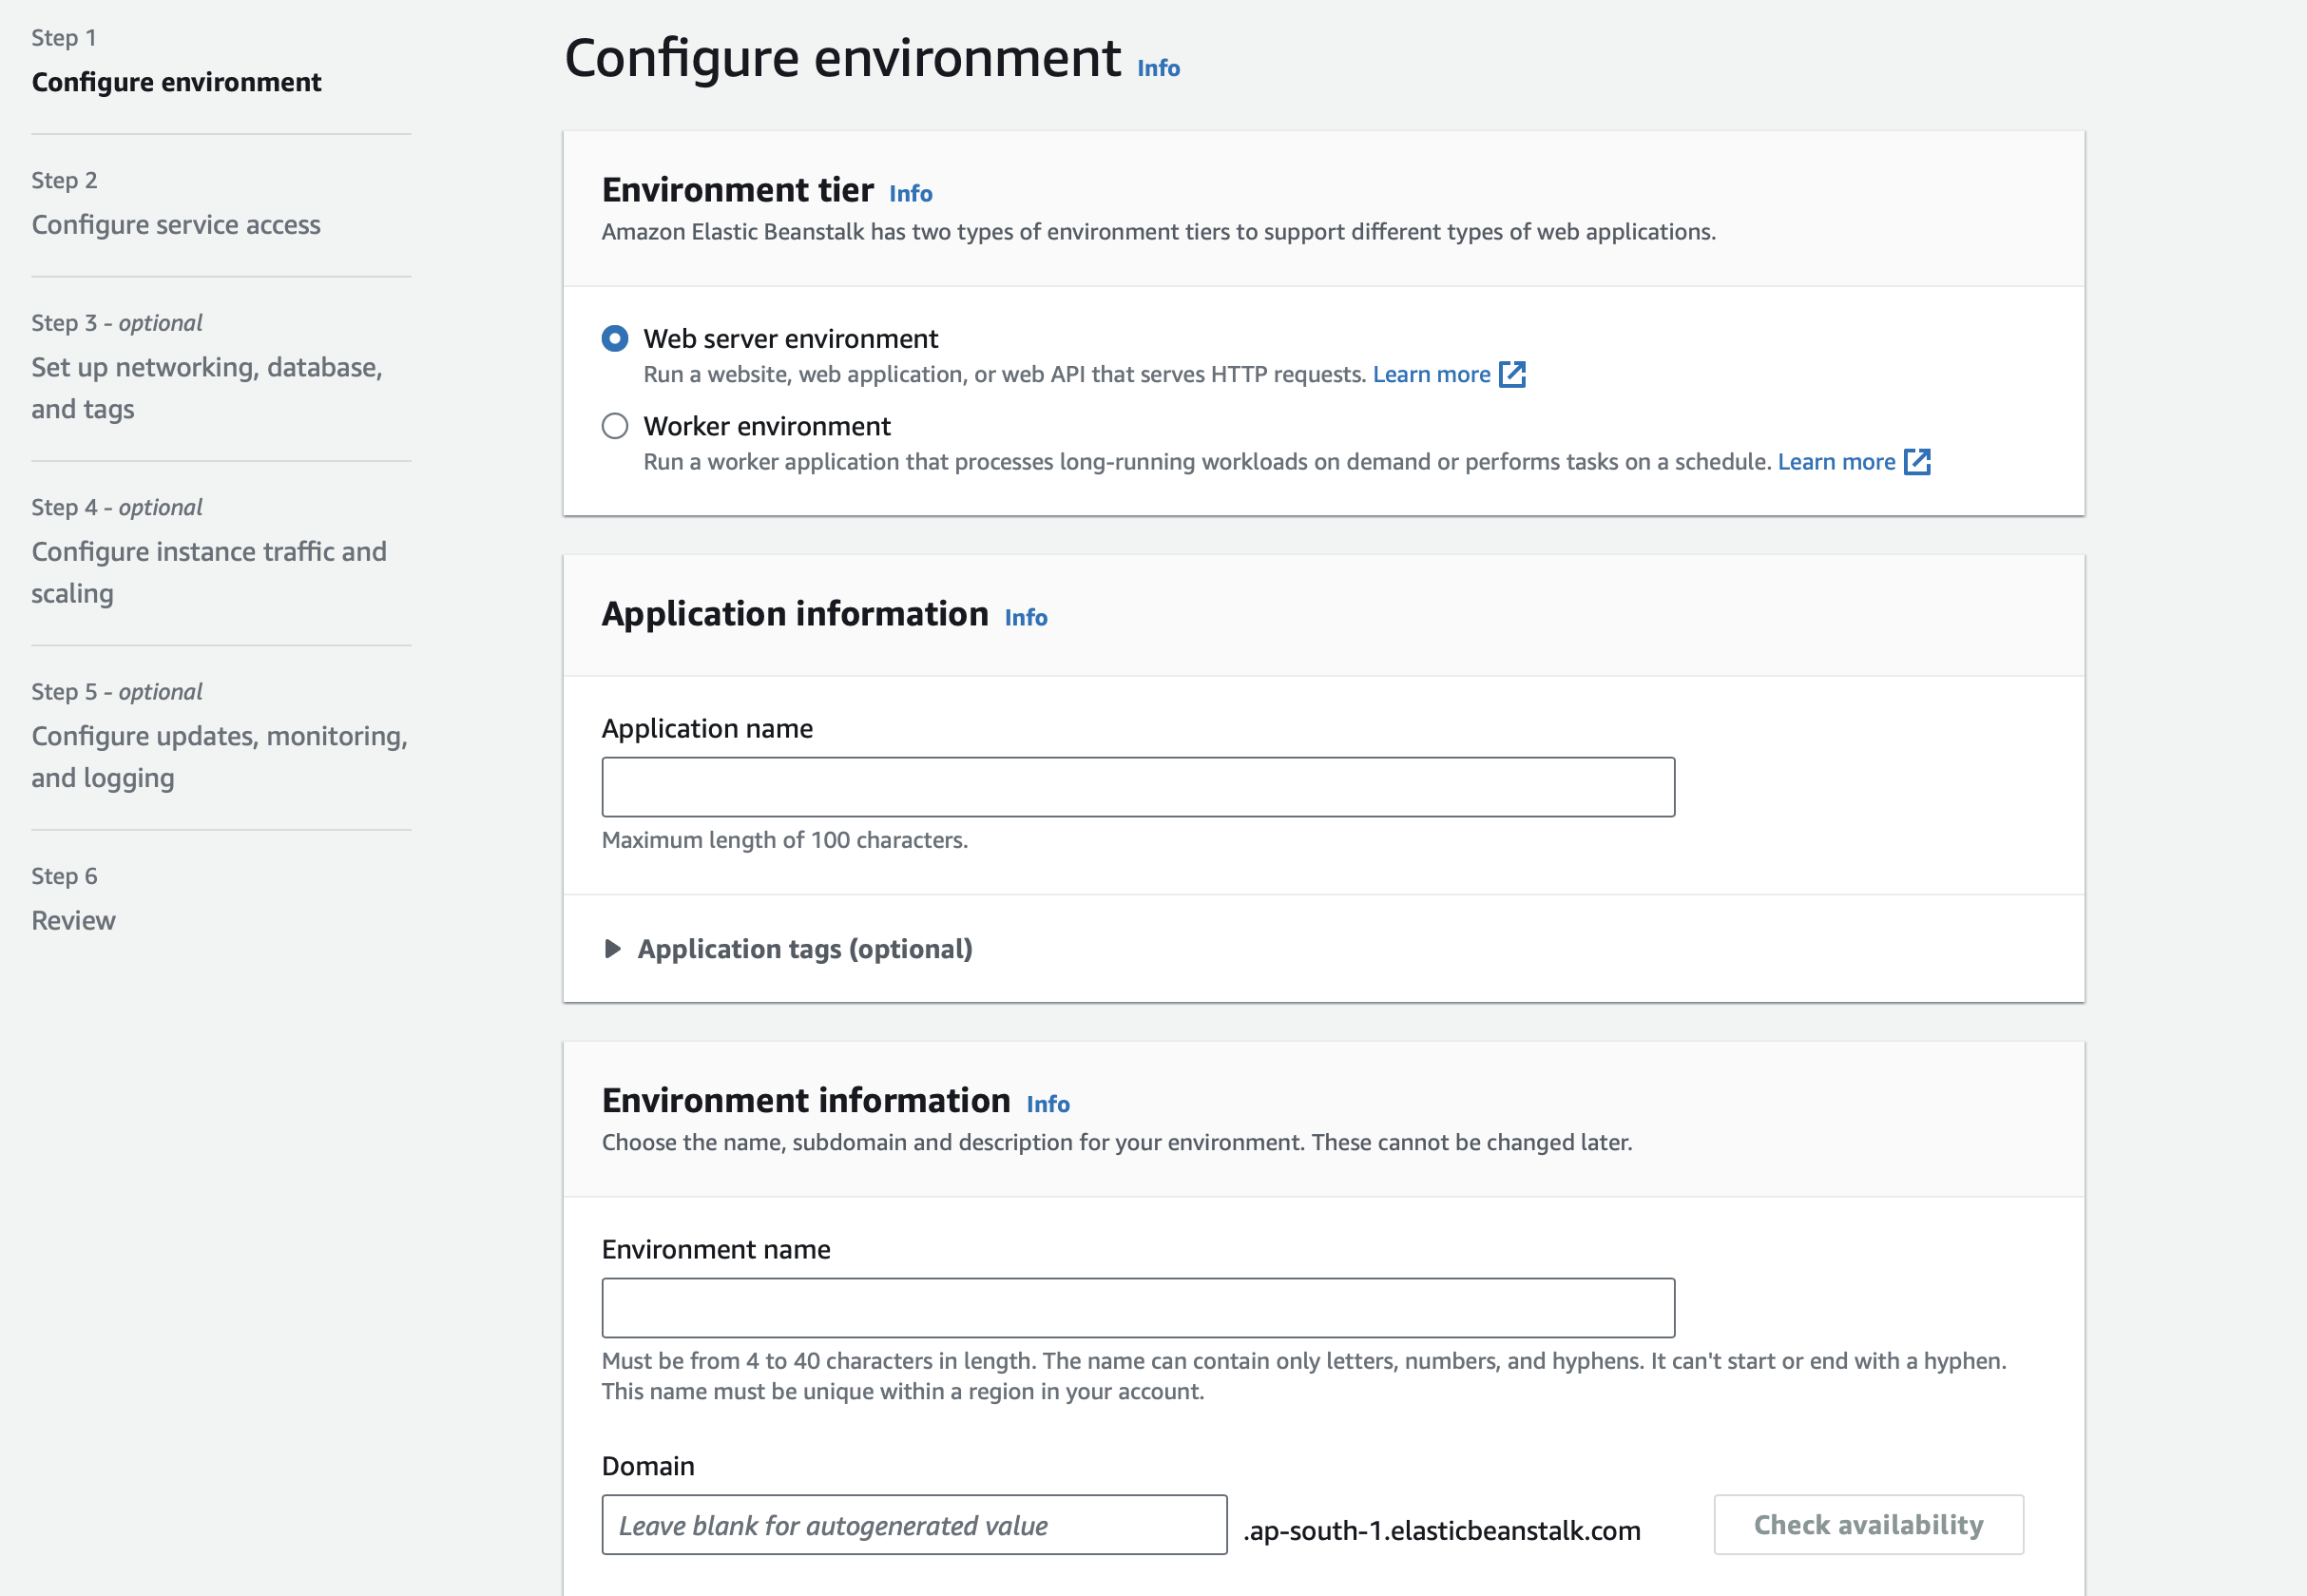
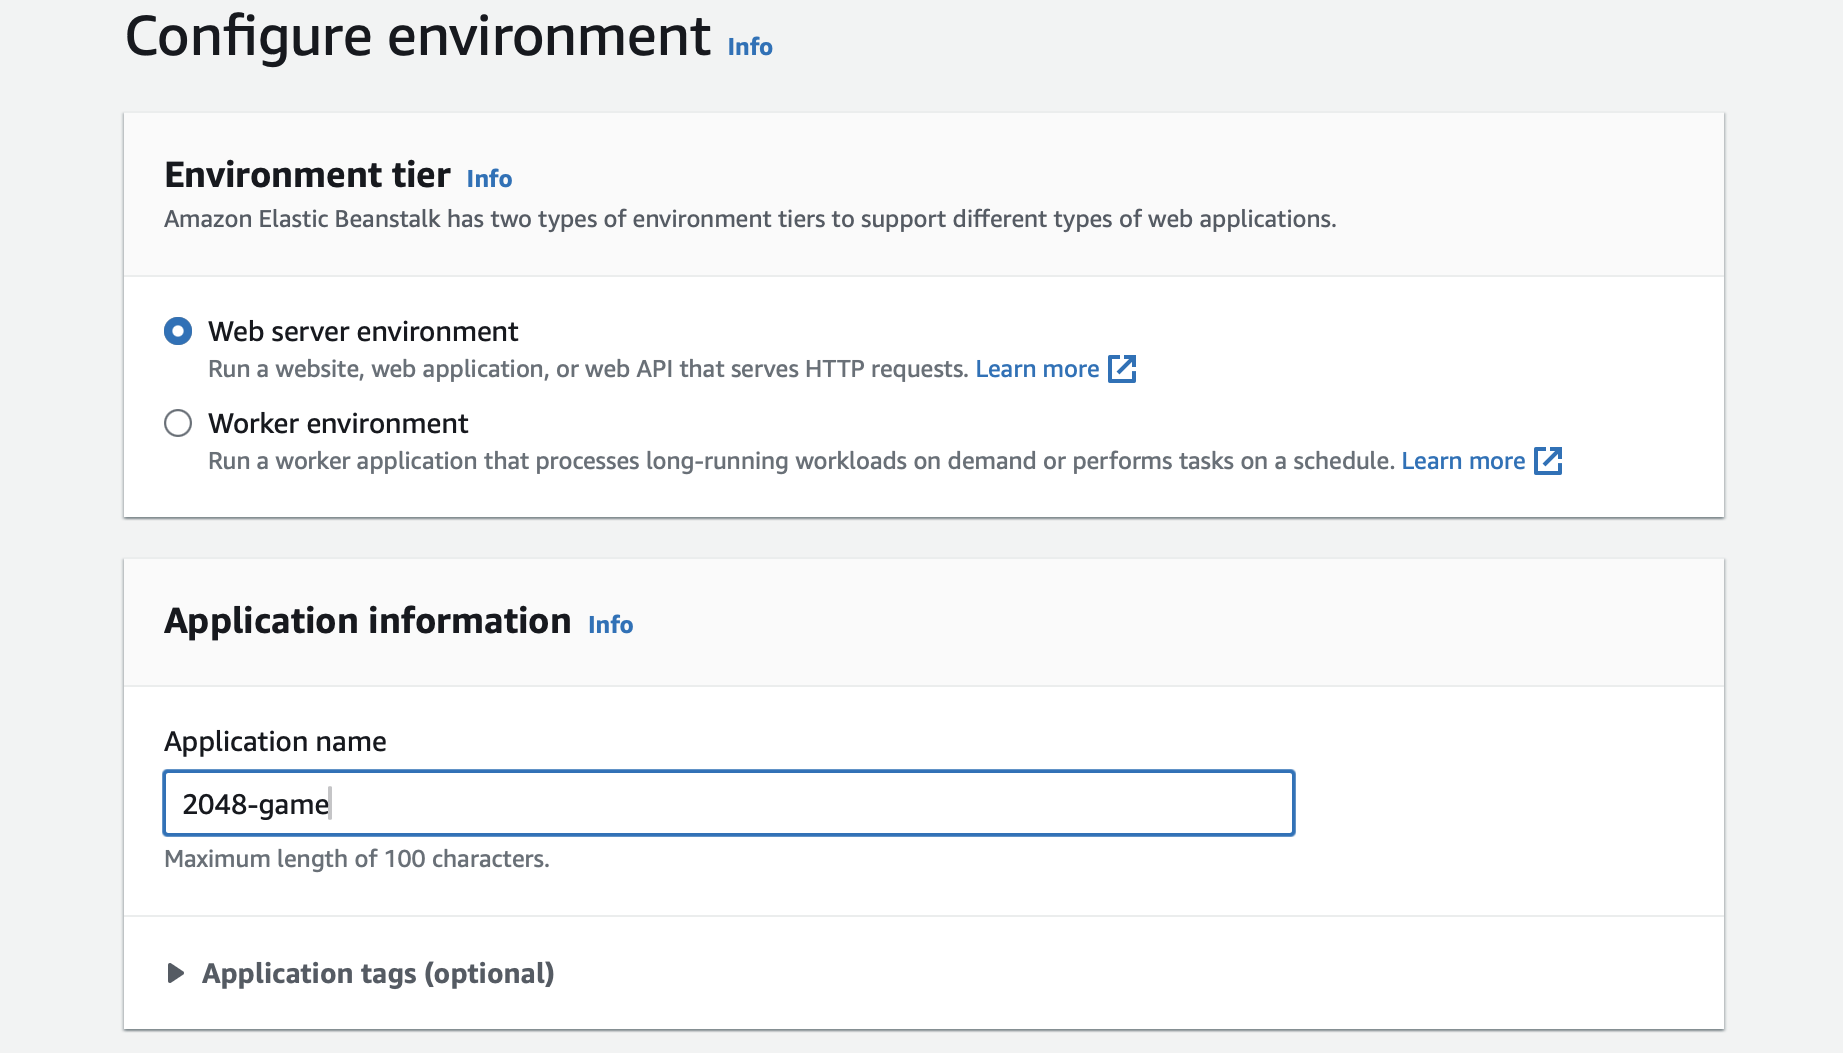
- In the Configure environment keep Environment tier as default and in Application information write your Application name.
- In the Environment information keep it as default.

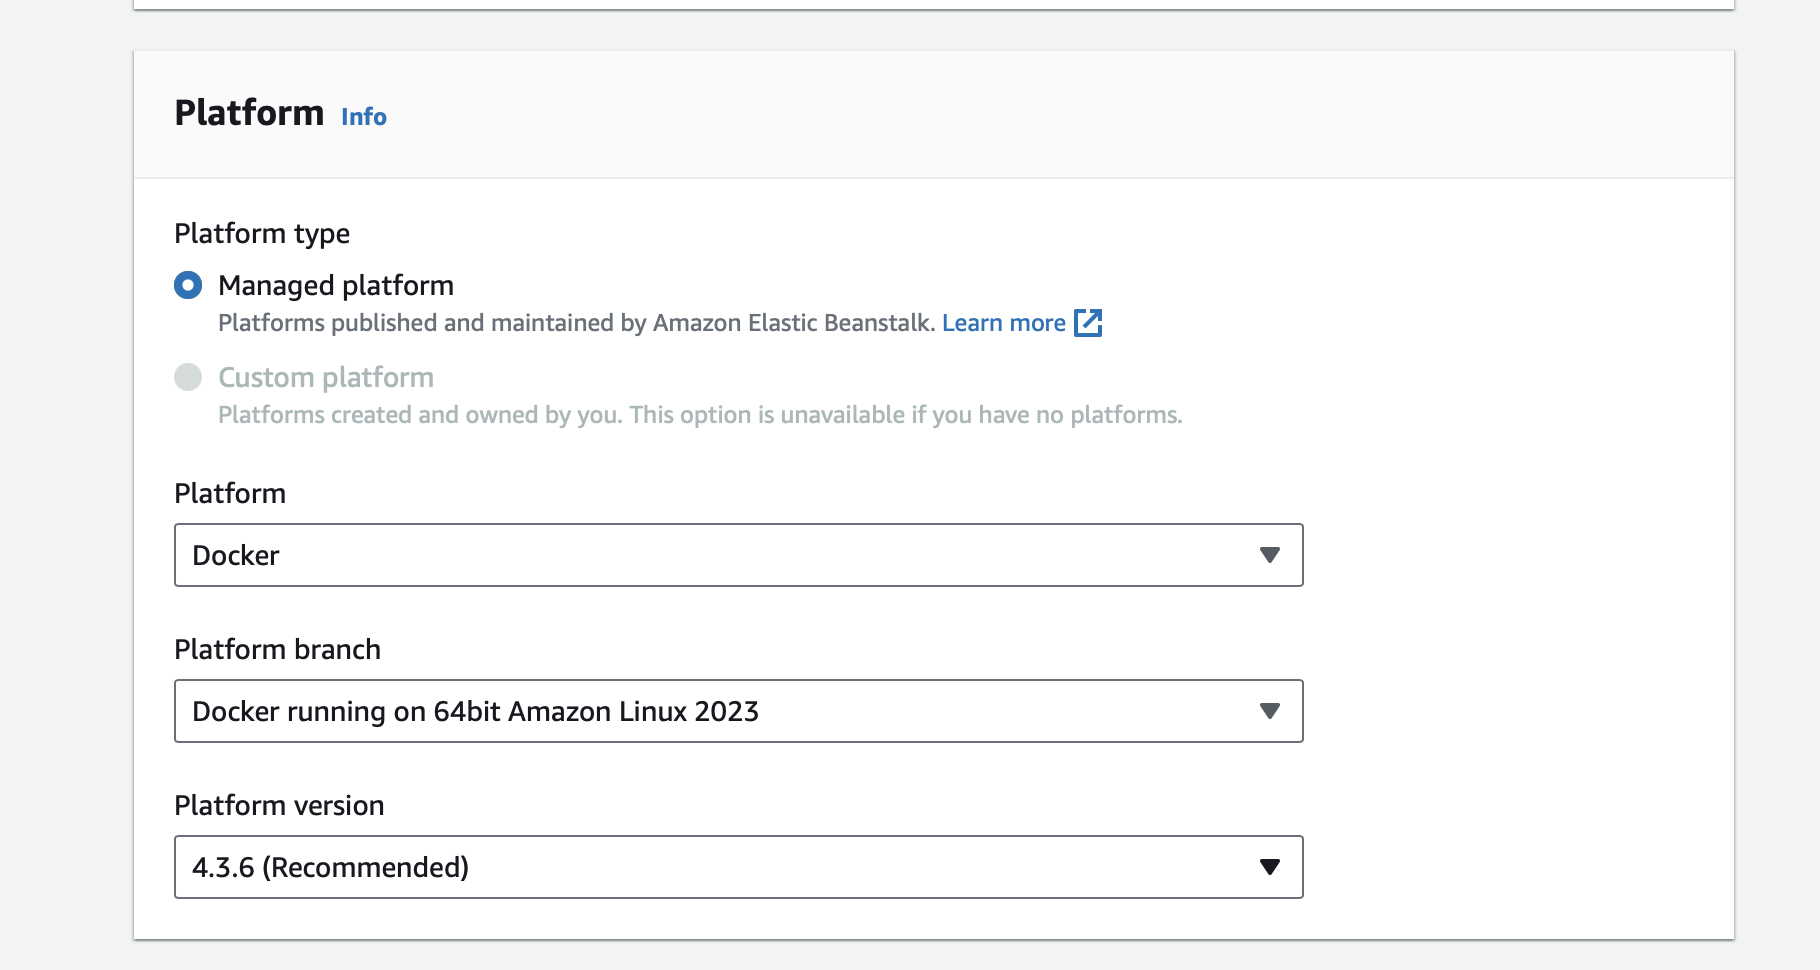
- Now in the platform choose as a Docker.
In the application code you have to upload your Dockerfile. To upload your Dockerfile follow this steps.
Go to your AWS EC2 instance and copy your Example SSH command and past it on terminal where you have download your .pem file and past this command.
scp -i "<your pemfile>" ubuntu@ec2-50-16-44-28.compute-1.amazonaws.com:/home/ubuntu/<yourfoldername>/Dockerfile .


- Now go to your Download folder and see your Dockerfile will come.

- Now come back to to your previous page of AWS elastic beanstalk in Application code click on Upload your code and In version label write "2048-source" and click on Local file and select Choose file and Upload your Dockerfile and in Presets keep it as default and click on Next.

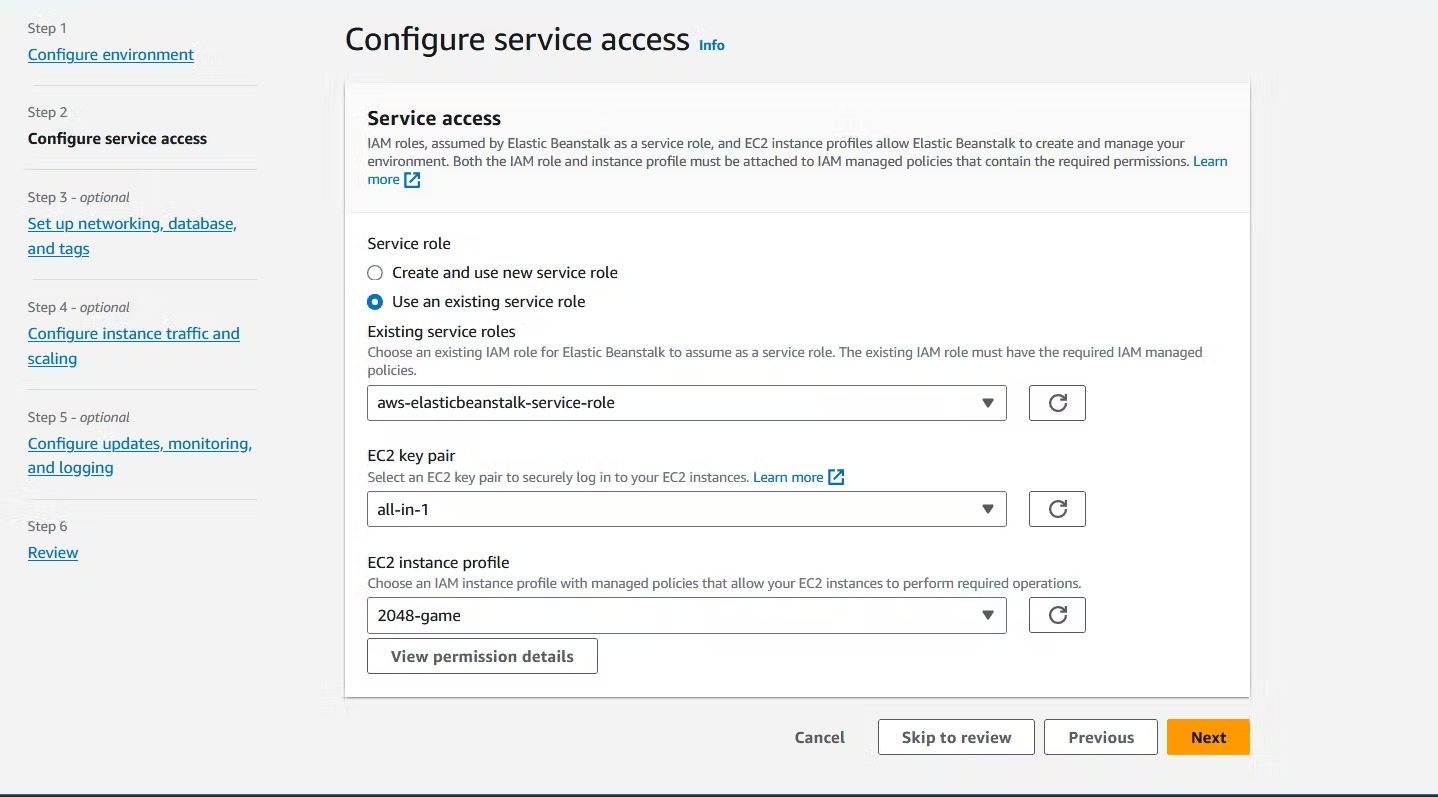
- Now in "Configure service access" select "Use an existing service role" and in "EC2 key pair" keep your "key pair."
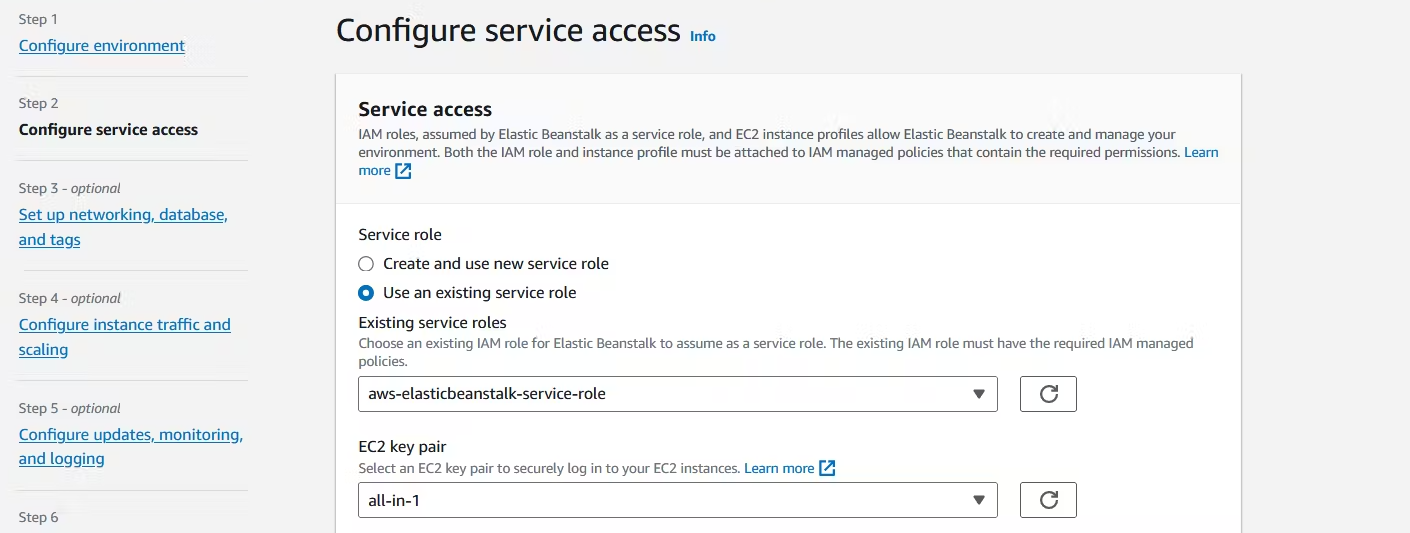
- In EC2 instance profile click on "View permission detail" and in top right Click on IAM console.

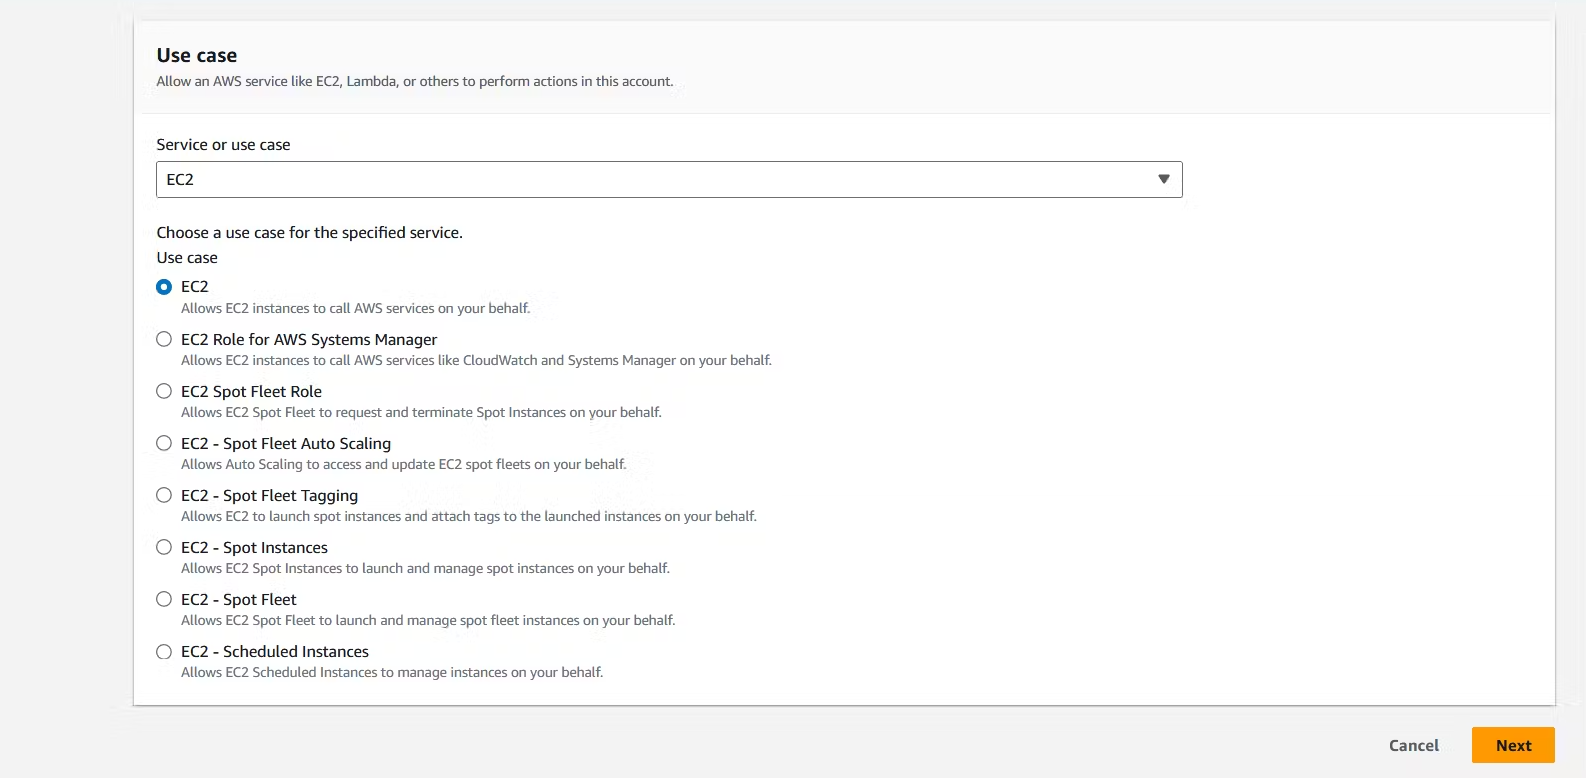
- In the left side click on Roles in the Select trusted entity choose AWS service in the use case select EC2 and click on Next

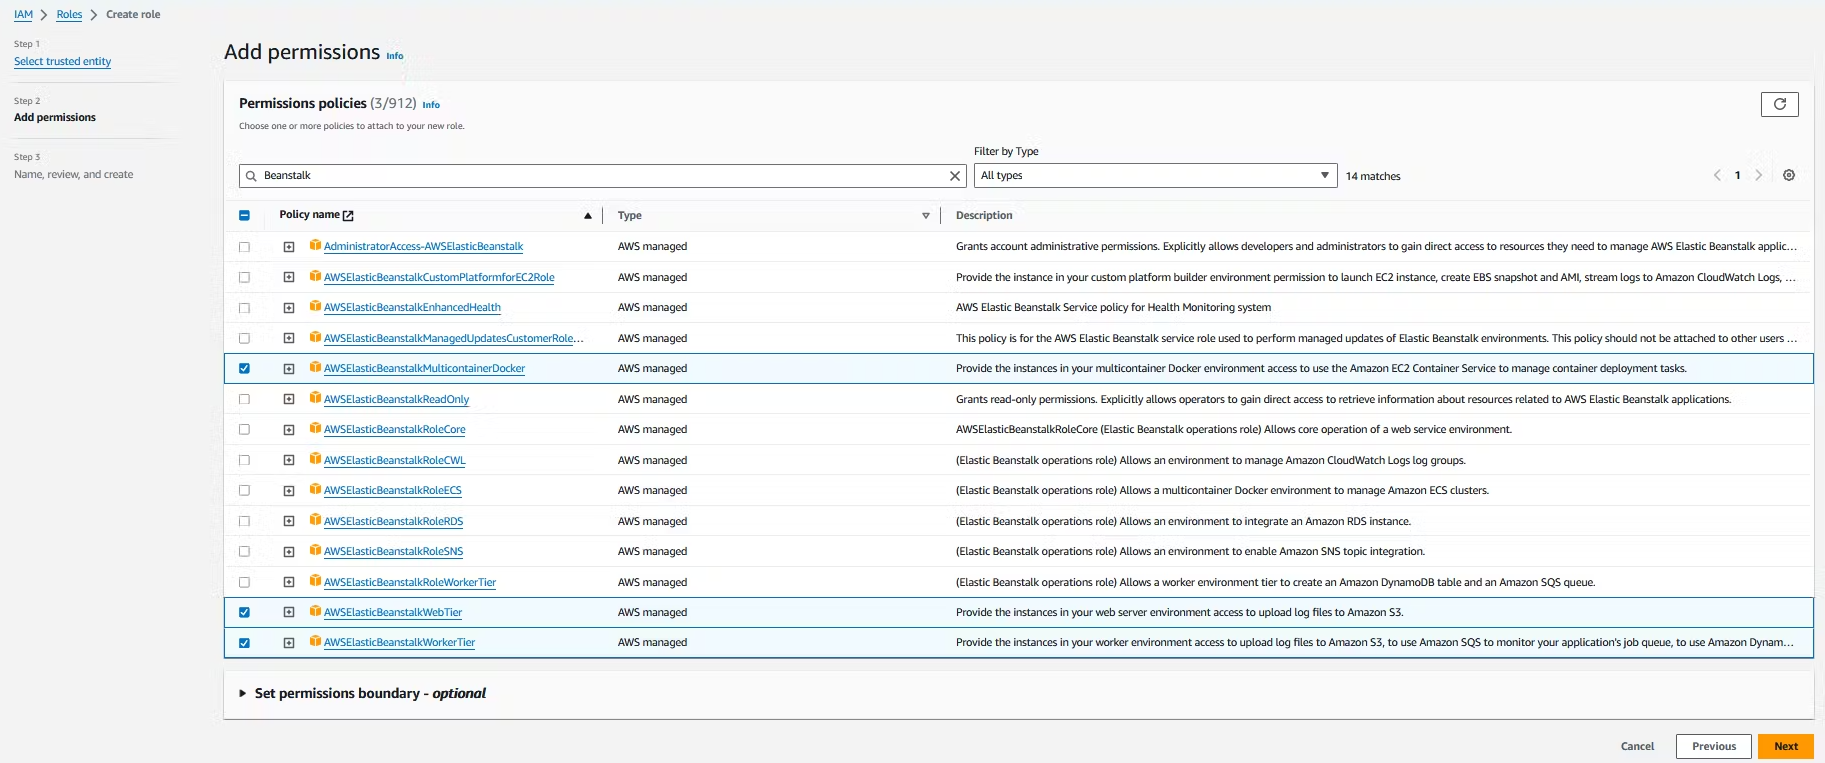
- Now search and select for "AWSElasticBeanstalkMulticontainerDocker", "AWSElasticBeanstalkWebTier", "AWSElasticBeanstalkWorkerTier" and click on "Next."
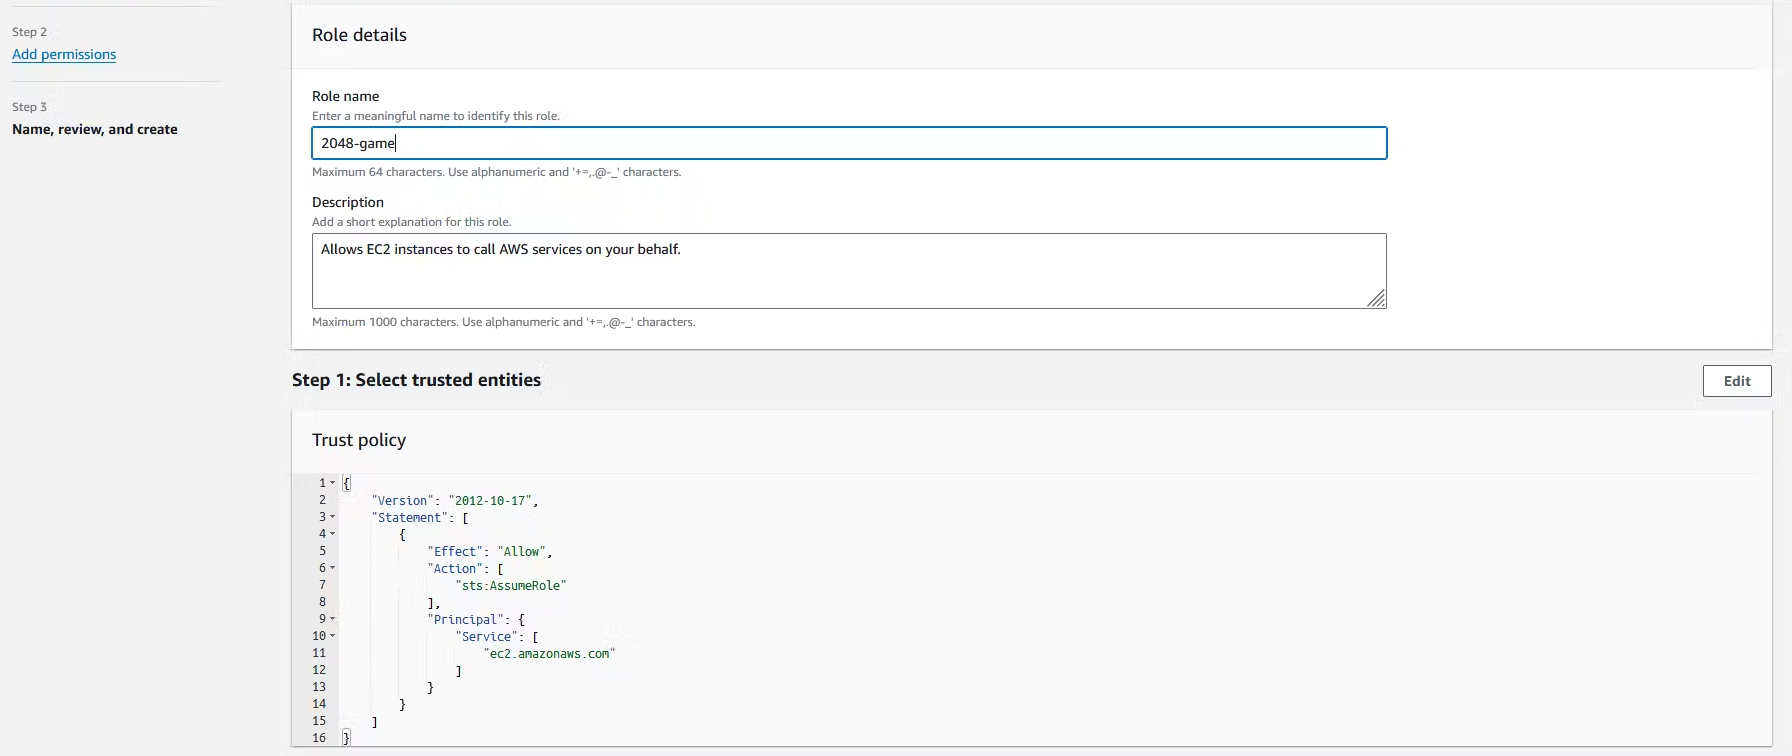
- Now write your Role name and review your steps one by one and click on create role.
- Now come back to Configure service access and refresh to EC2 instance profile and select the role which you create recently and click on Next.
- In Set up networking, database, and tags - optional select default VPC and in Instance setting click Activate for Public IP address and select Instance subnet and click on Skip to review and click on Submit.


- Wait until when its get success.

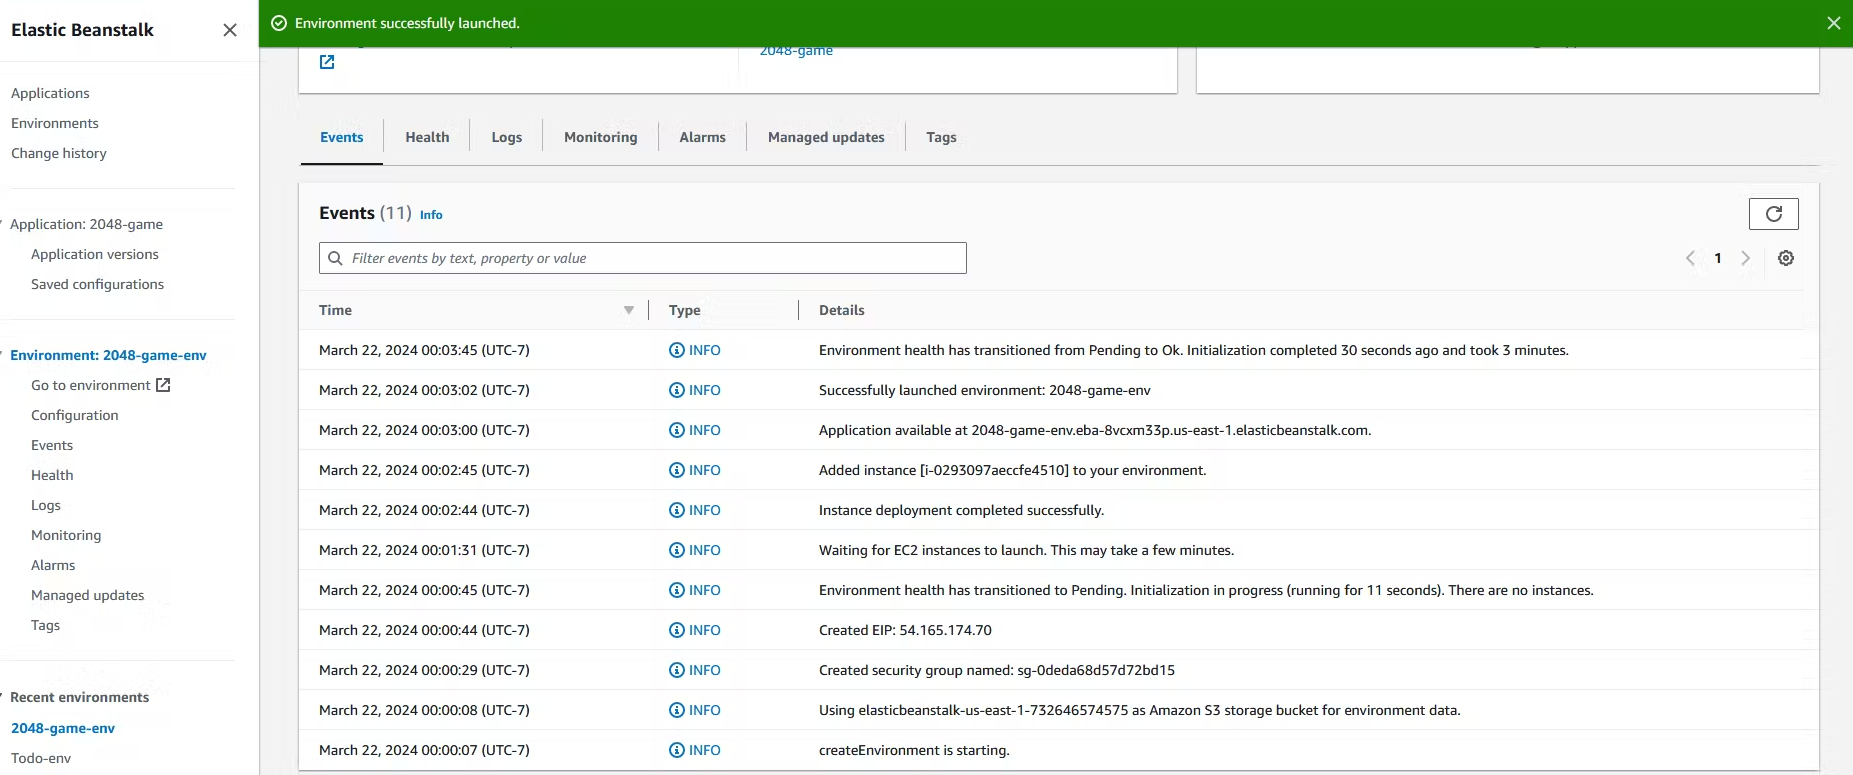
- Now click on Domain to access your game.

Subscribe to my newsletter
Read articles from Pooja Bhavani directly inside your inbox. Subscribe to the newsletter, and don't miss out.
Written by

Pooja Bhavani
Pooja Bhavani
Hi, I am Pooja Bhavani, an enthusiastic DevOps Engineer with a focus on deploying production-ready applications, infrastructure automation, cloud-native technologies. With hands-on experience across DevOps Tools and AWS Cloud, I thrive on making infrastructure scalable, secure, and efficient. My journey into DevOps has been fueled by curiosity and a passion for solving real-world challenges through automation, cloud architecture, and seamless deployments. I enjoy working on projects that push boundaries whether it's building resilient systems, optimizing CI/CD pipelines, or exploring emerging technologies like Amazon Q and GenAI. I'm currently diving deeper into platform engineering and GitOps workflows, and I often share practical tutorials, insights, and use cases from my projects and experiences. ✨ Let’s connect, collaborate, and grow together in this ever-evolving DevOps world. Open to opportunities, ideas, and conversations that drive impactful tech!
