Configuring RDP Access on AWS EC2 Linux Instances Using Chrome RDP
 Muhammad Hamza Shabbir
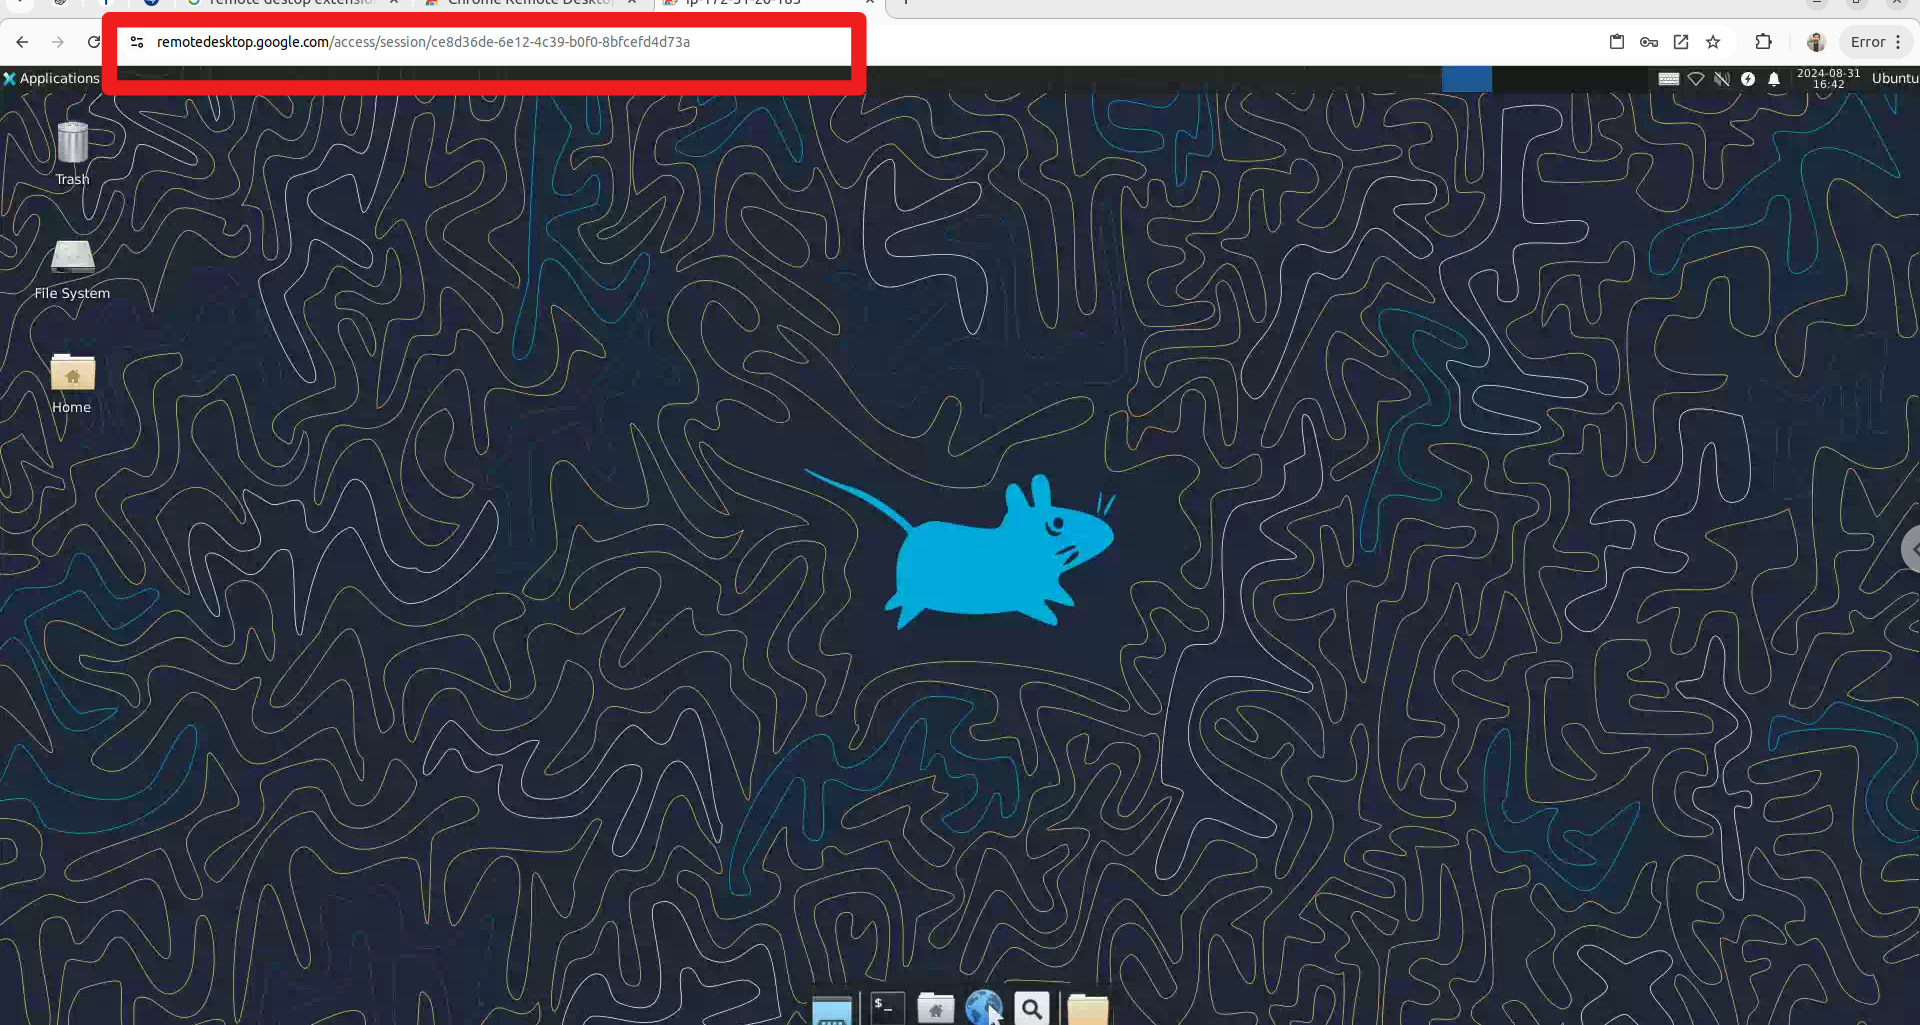
In the ever-evolving landscape of cloud computing, having RDP capabilities on a Linux server provides immense flexibility and power. This comprehensive guide will walk you through setting up a graphical desktop environment on an Amazon EC2 instance. From launching the server to establishing a secure remote desktop connection, follow these steps to unlock a more intuitive way of managing your server's resources and applications.
Step 1:
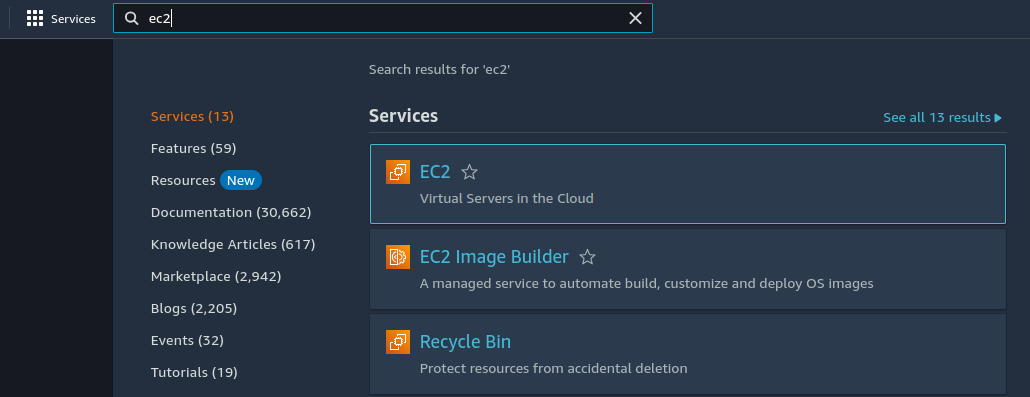
Click on services present on the left of the AWS management console, i.e. the primary screen. From the drop-down menu of options, tap on “EC2”.
Step 2:
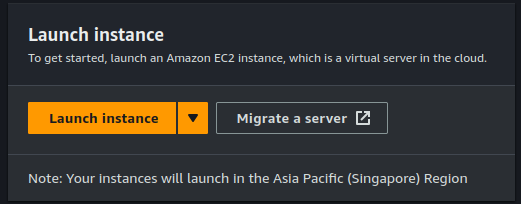
Click on the launch instance, after clicking on it you will be redirected to a launch page where we can create an instance. Configure all the requirements to Create a new instance like the name of the instance as shown in the figure below.
Step 3:
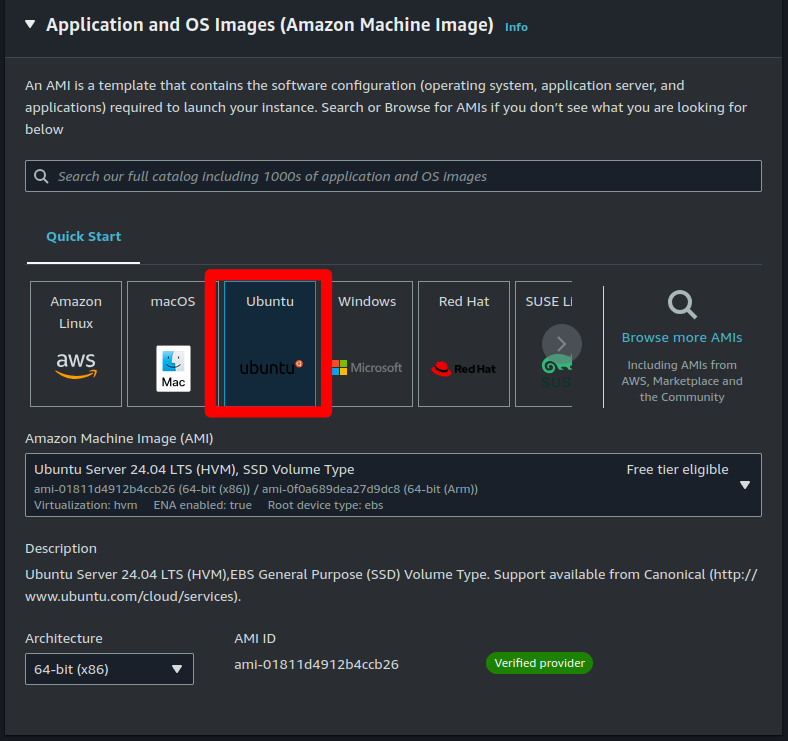
Name of instance and Select AMI – Required operating system from the available. There are different types of OS available select the OS as per your requirement.

Step 4:
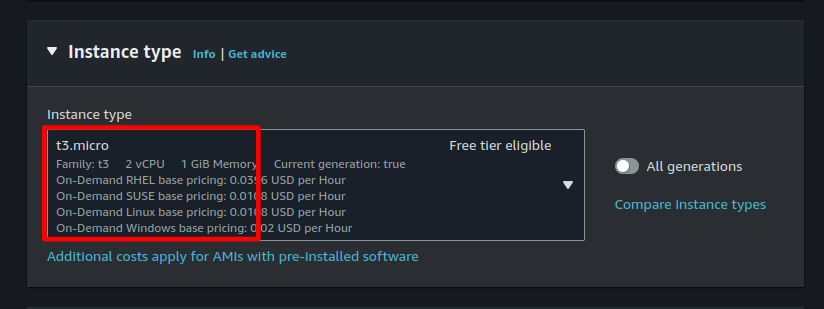
By default, it selects a free tier of storage. From the available storage specifications, select a free tier-eligible storage service. The instance type includes the no.of CPU's required and the Memory required for your application. By default, the instance type is t2.micro which is a free tier-eligible service. But we can choose t3.micro for complete this lab.
Step 5:
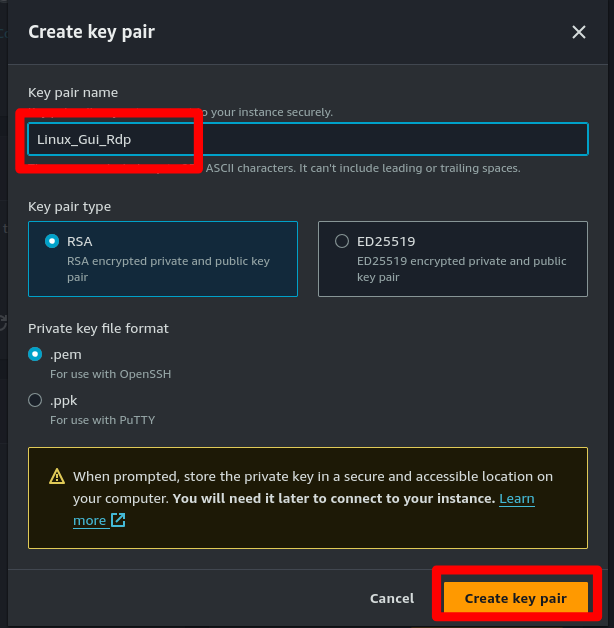
Now, create a key-value pair, by clicking on Create new key pair. A window will pop up for creating key pair as shown below. The key value pair plays a major role while connecting to the EC2-Instance it will act as an SSH-Key to connect to the instance. Create Key-Pair Enter name>>Select “.pem” and create. Automatically key pair which was created will be downloaded. Select the created key pair.
Step 6:
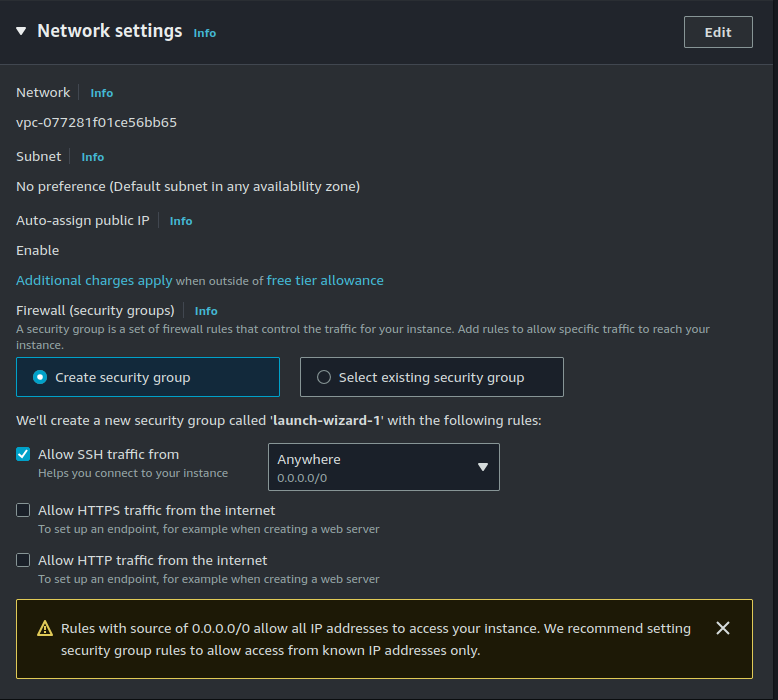
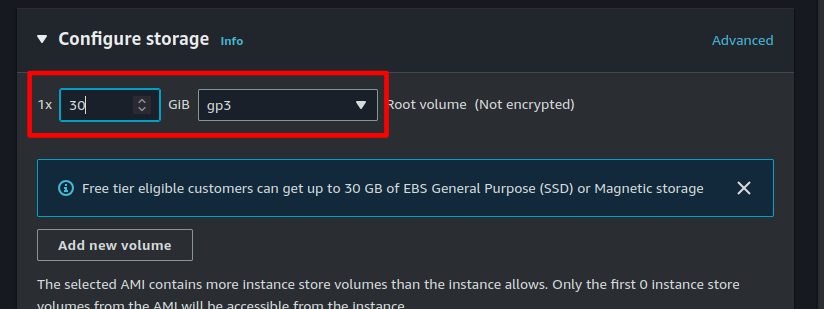
Keep the network settings as default settings and make changes if required Storage. As mentioned in the picture, Free tier eligible can get up to 8GB for Linux and but we use 30GB for Linux.
Step 7:
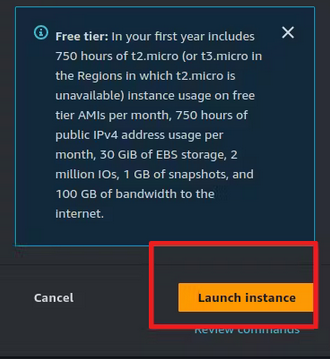
Finally, verify that all selected options are eligible for the free tier, and click on Launch instance. That’s it! Your instance will be created.
Step 8:
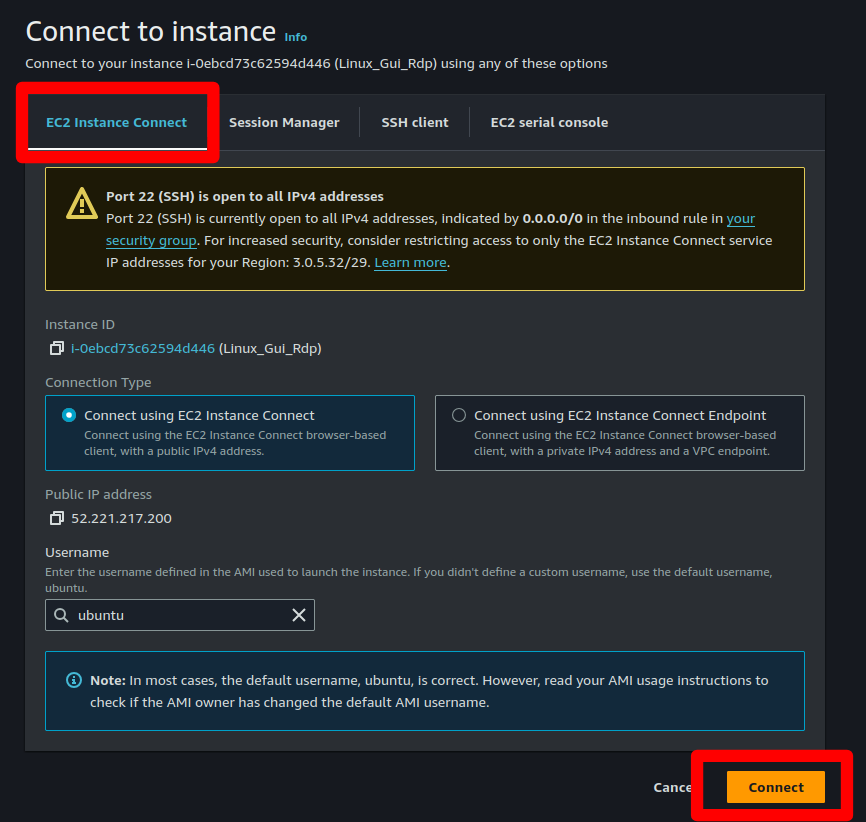
Select the created server and click on the Connect button at the right top corner.

Click on Connect. A new tab will open where you can connect to the instance.
Step 9:
To increase the memory, we can add 5GB of swap space using commands.

sudo swapon --show
sudo fallocate -l 5G /swapfile
sudo chmod 600 /swapfile
sudo mkswap /swapfile
sudo swapon /swapfile

Step 10:
For RDP access within the Linux virtual machine, we need to add the RDP port to the EC2 security group's inbound rules.


Step 11:
Installation of GUI in Linux use this command.
sudo apt update && sudo apt install xfce4 xfce4-goodies

sudo apt install xrdp
sudo systemctl enable xrdp
echo xfce4-session > ~/.xsession
sudo service xrdp restart

# Download the Chrome Remote Desktop package
wget https://dl.google.com/linux/direct/chrome-remote-desktop_current_amd64.deb

# Install the package
sudo dpkg -i chrome-remote-desktop_current_amd64.deb

# Fix any broken dependencies that might occur during installation
sudo apt-get install -f

# For checking the status of running chrome service
sudo systemctl status chrome-remote-desktop@$USER
Step 12:
To connect to Linux RDP from your local system using Chrome, go to this link: https://remotedesktop.google.com/headless and follow the steps shown in the images.

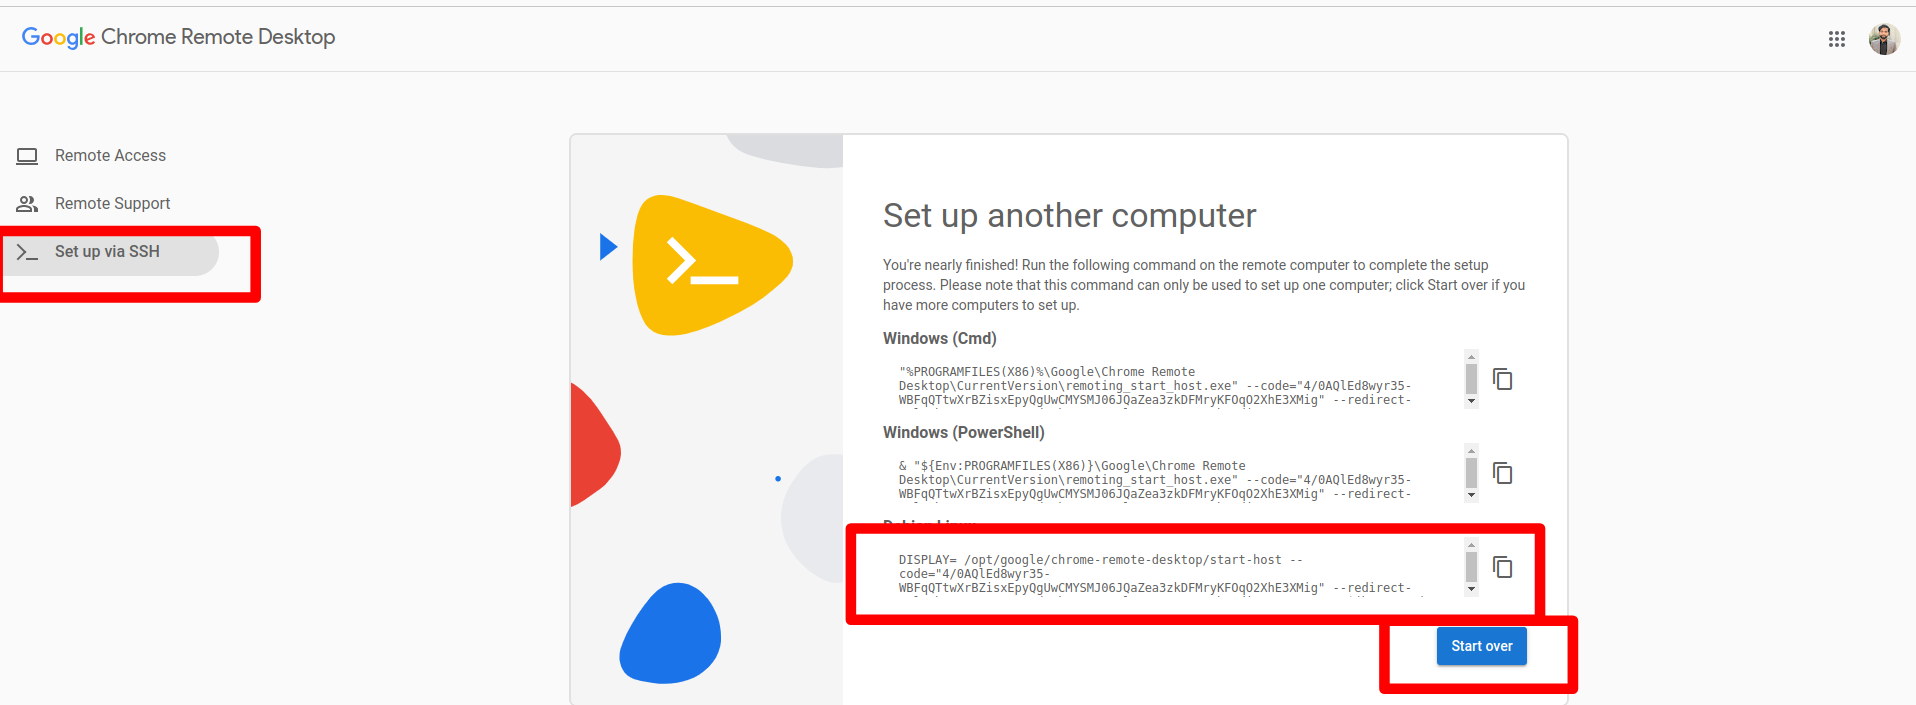
Copy the highlighted code into Notepad

#Example:

DISPLAY= /opt/google/chrome-remote-desktop/start-host --code="4/0AQFrac9bAqYotckiP6-c_efjjqW09ypY8deEDNxOmQ" --redirect-url="https://remotedesktop.google.com/_/oauthredirect" --name=$(hostname)
Step 13:
Go to the EC2 terminal, paste the copied code, and press enter. You will be prompted to enter a 6-digit pin, which is required when you connect this EC2 instance with RDP from Chrome.

Step 14:
After completing step 12, open your local Chrome and follow the steps.


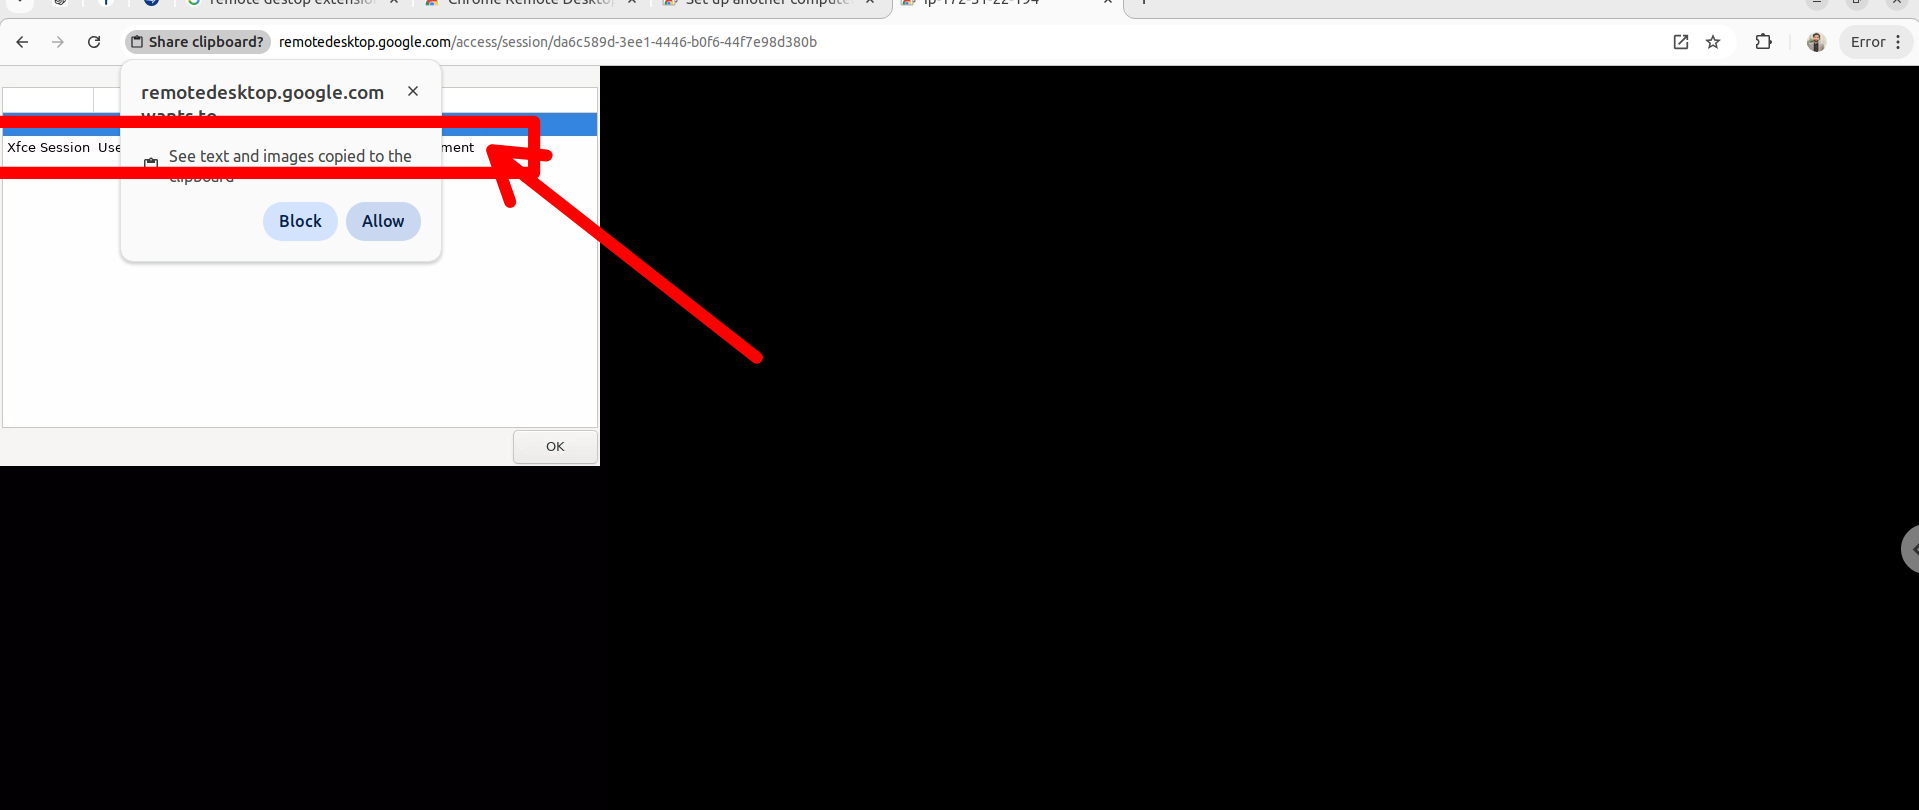
You have now successfully connected to the Linux machine via Chrome's RDP extension.
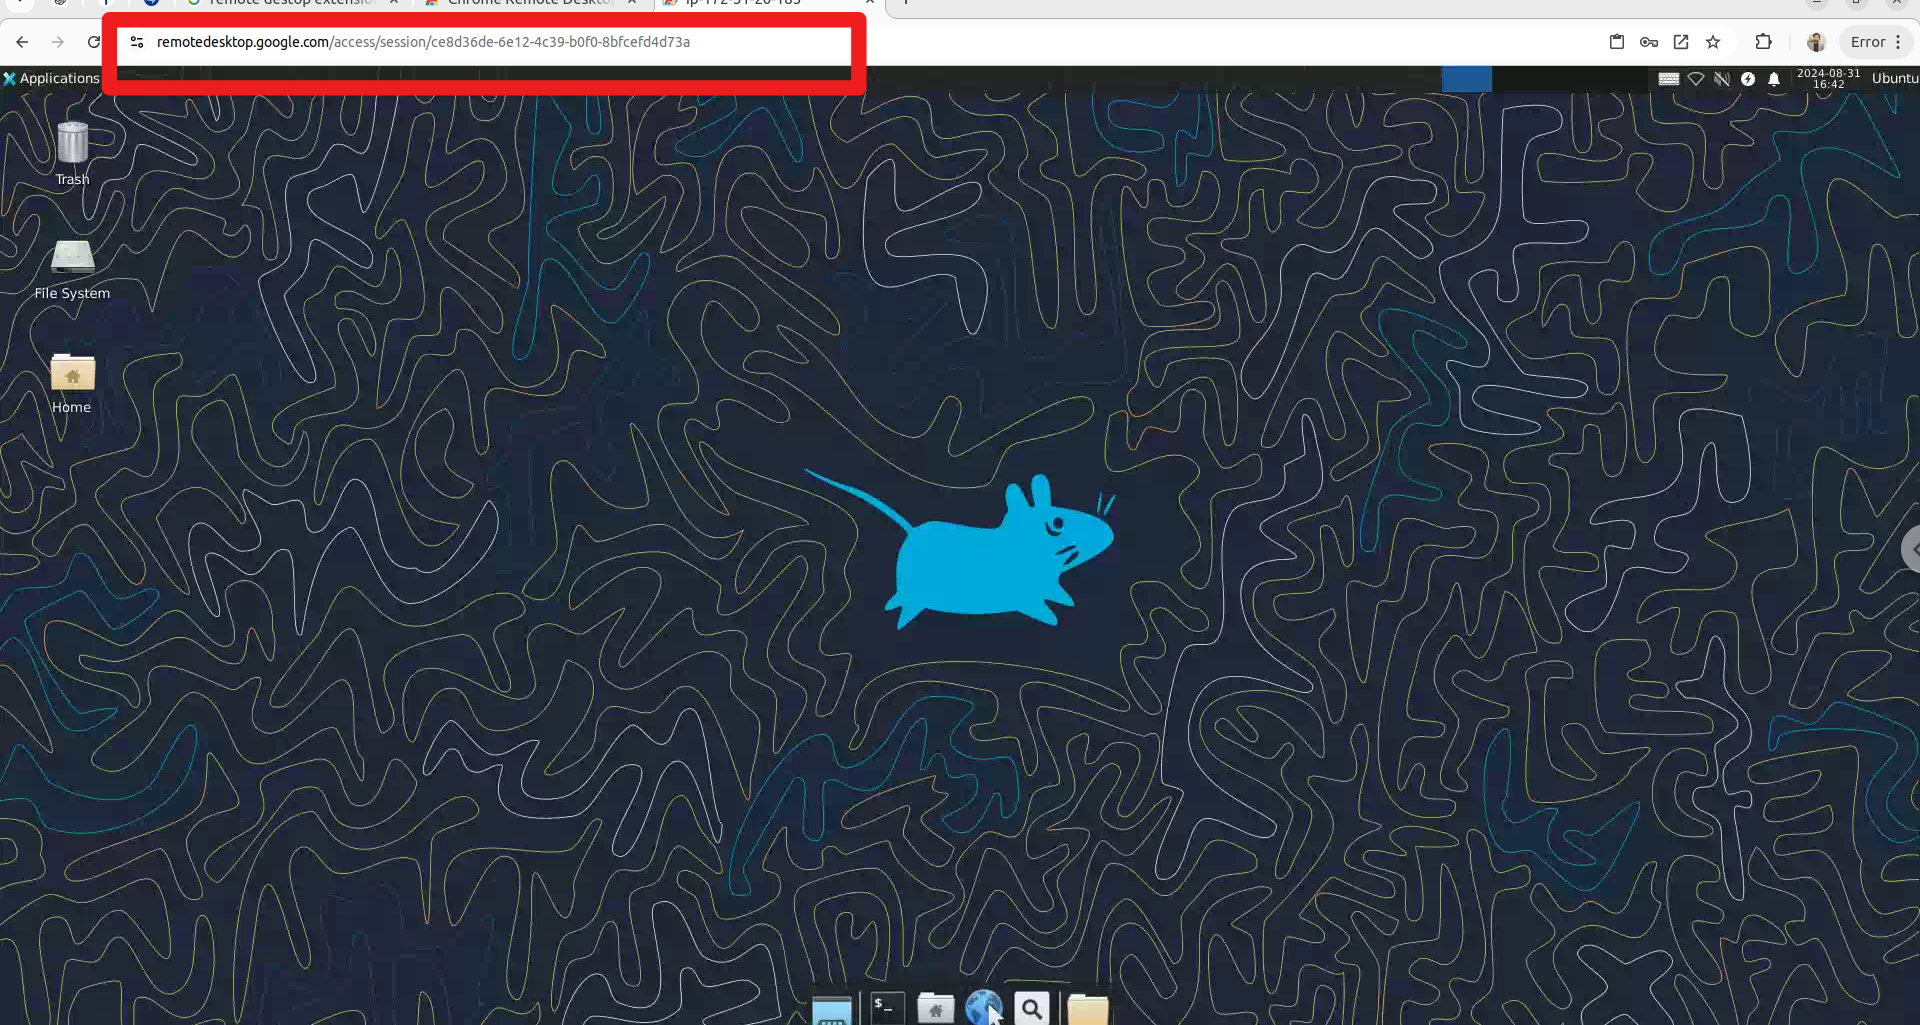
Step 15:
To verify, create a file from the RDP interface and then check if it has been created inside the Linux VM.

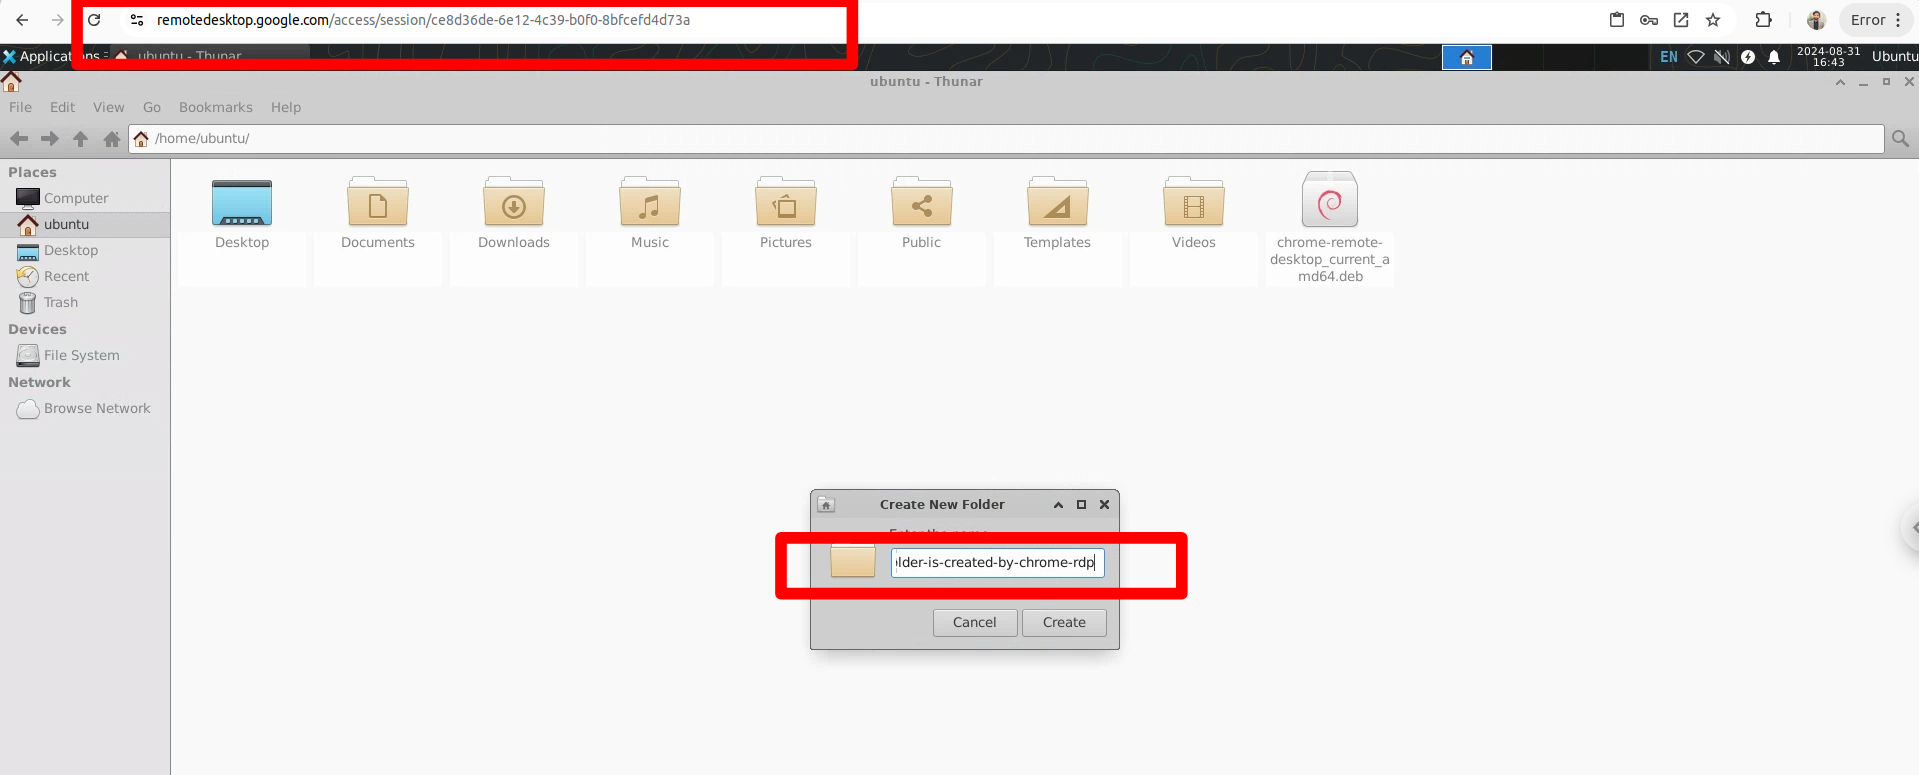
Now you should see the same file inside the Linux VM that you created from the RDP side.

This guide provides a step-by-step process for setting up a graphical desktop environment on an Amazon EC2 instance. It covers launching and configuring the EC2 instance, creating a key-value pair for secure connection, adjusting network settings, and installing necessary software for remote desktop functionality using Chrome Remote Desktop. Follow these steps to gain a powerful and flexible way to manage your server resources remotely.
Subscribe to my newsletter
Read articles from Muhammad Hamza Shabbir directly inside your inbox. Subscribe to the newsletter, and don't miss out.
Written by

Muhammad Hamza Shabbir
Muhammad Hamza Shabbir
I am a seasoned DevOps Engineer with a strong background in automating, configuring, and optimizing cloud-based infrastructures on AWS, Azure, and Google Cloud Platform (GCP). My expertise lies in deploying containerized applications using Docker and Kubernetes, enhancing CI/CD pipelines, and implementing server-less functions to drive efficiency with certifications in Azure, AWS, and GCP