How to Become an Unreal Automation Expert
 freeCodeCamp
By Tim Grossmann
Table of contents
- Automating Workflows with Blueprints, C++, and Python
- Why the Unreal Engine is interesting
- Writing our own automated project clean-up script using Python
- Learn how to automate and optimise workflows with scripting on Udemy
Automating Workflows with Blueprints, C++, and Python
Every job has repetitive tasks and processes that can be automated. Those tasks can take up a significant amount of your time.
Someone with only basic knowledge about scripting can build a script that might cut down the time to execute those tasks to a bare minimum. In the long run, this time saving accumulates into additional hours that can be used for more productive work.
Learning how to automate things, therefore, is an invaluable skill. A skill that can be acquired in different, more specific sectors and then applied to other, more general ones.
Especially considering the current difficult times, learning a new skill that will have a significant impact on your employability is vital.
In this article, we want to describe the importance of automation when working with real-time software like the Unreal Engine.
Why the Unreal Engine is interesting
Epic’s Unreal Engine is one of the most popular game and real-time 3D applications out there. It's used for the creation of entertainment content like games and interactive setups.
Disciplines like virtual and augmented reality require the usage of sophisticated processes that, just like any other pipeline, can be optimised through automation.
In addition to that, the gaming and 3D real-time market is continually growing, which increases the demand for talent.
According to a study conducted by Burning Glass Technologies, a labor market analytics firm, the average salaries for Unreal developers increased by 22% last year, the wages for Artists, by 51%.
 Source: [https://www.unrealengine.com/en-US/blog/demand-for-unreal-engine-and-real-time-3d-skills-at-all-time-high](https://www.unrealengine.com/en-US/blog/demand-for-unreal-engine-and-real-time-3d-skills-at-all-time-high" rel="nofollow noopener)
Why use Blueprints for workflow and even game programming
In addition to the general C++ programming interface, the Unreal Engine provides a graphical programming system called Blueprints. They expose the full functionality as C++ code, which means that everything, including in-game features, can be programmed without huge performance drawbacks.
The graphical interface allows us to quickly compose entities into a flow to create functionality. Looking at an example that sets the material for a static mesh actor, we can see that the Blueprint is easily readable.
 Blueprints script to set a material for a static mesh actor
Why use C++ for workflow and game programming
The “native” approach to coding for the unreal engine is C++. It is used to create in-game logic, simplify level creation and workflows, and improve the development pipeline. It’s more complex and difficult to learn then Blueprints but can add an additional boost in run-time and performance.
Its performance advantage makes it the language of choice for essential, lower-level operations such as rendering and physics in game development. For developers that are already proficient with C++, it is a convenient addition to be able to automate processes without learning an additional language directly.
Why use Python for workflow optimisation
Compared to Blueprints or C++, Python is one of the de-facto standard languages used for automating tasks. It’s simple to learn, understandable, and extremely versatile since it can run on nearly any platform without additional effort.
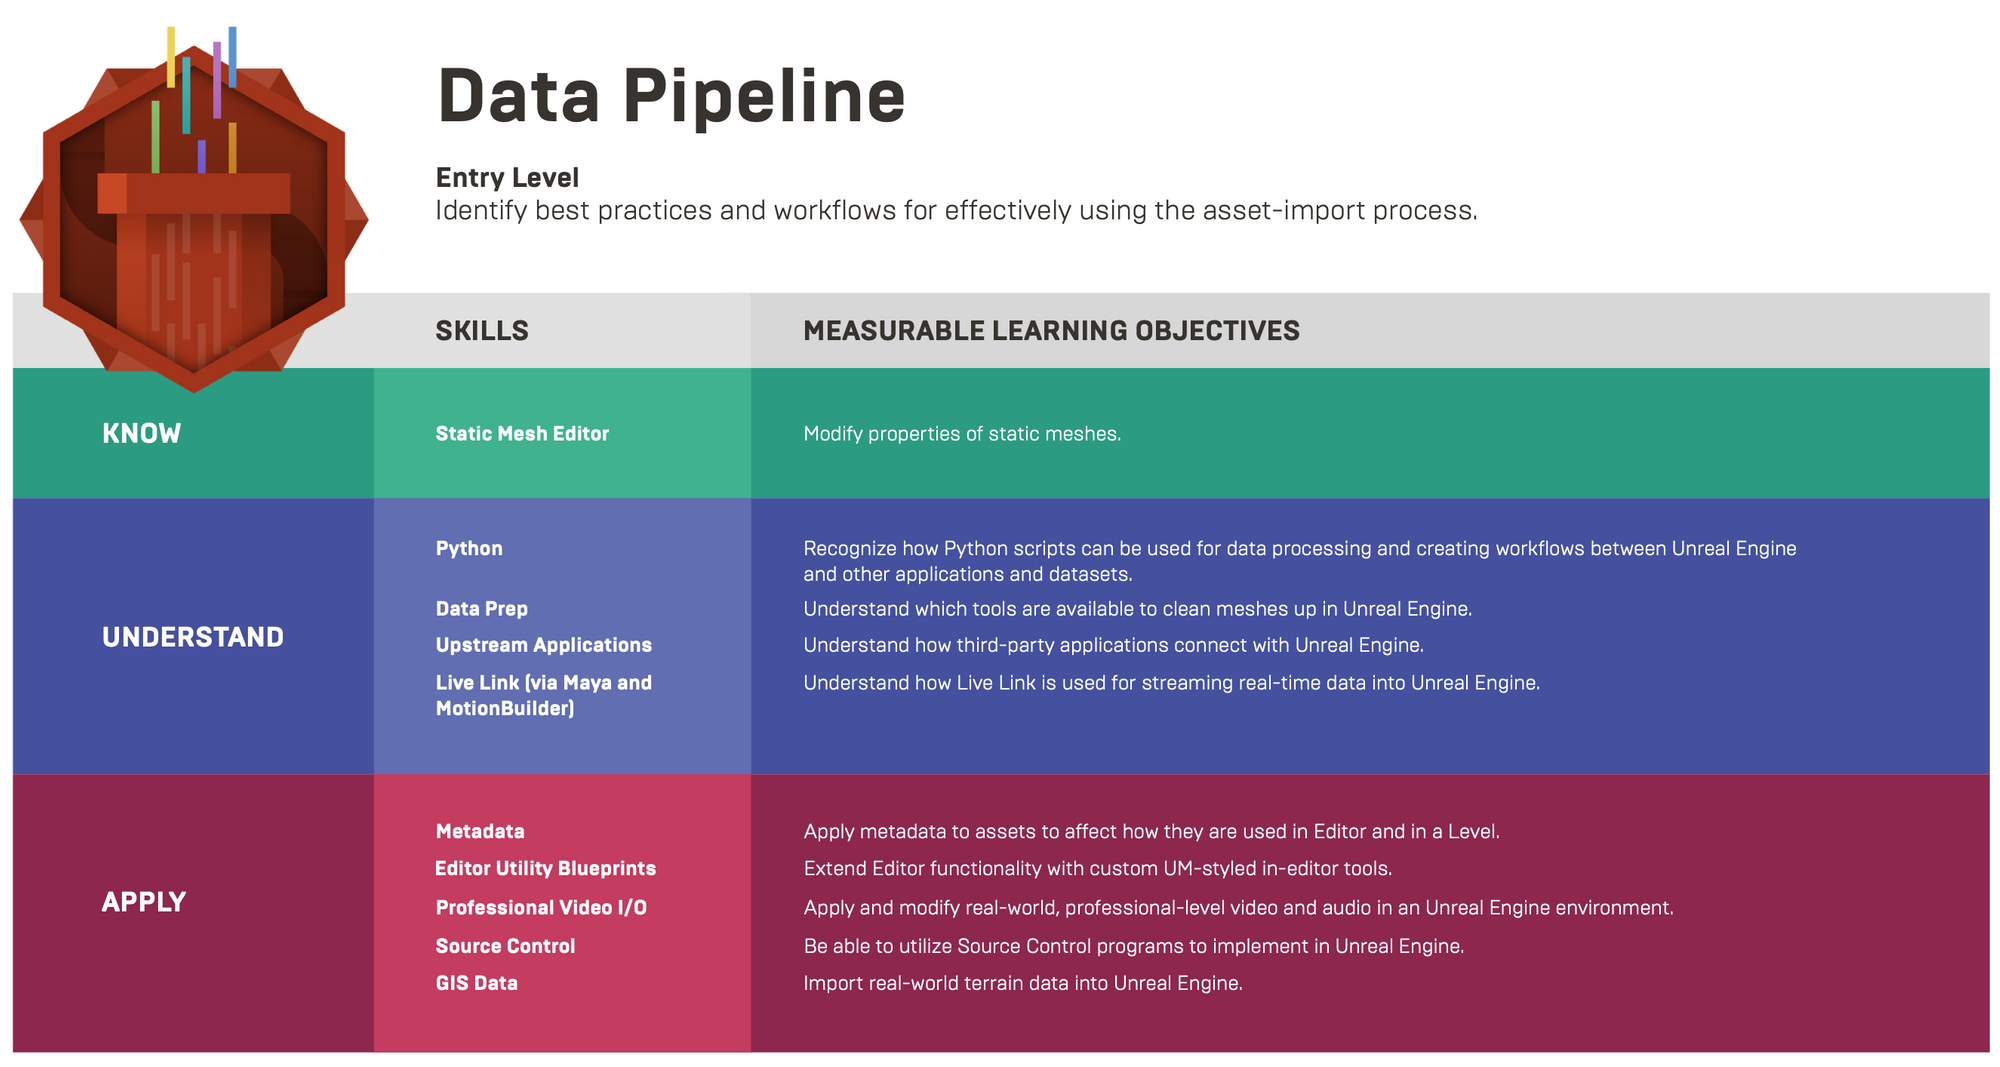
Epic lists Python as one of the required skills, for example, for Data Pipeliners in their Creator’s Field Guide to Emerging Careers in Interactive 3D.
 https://epicgames.ent.box.com/s/n12ixy53l8cknz73npimsr54frkvm72c
The Unreal Engine has full Python scripting support. Unfortunately, it is not suitable for real-time and in-game scripting, but can only be used for Unreal Editor scripting. Python’s simplicity, however, makes it an incredible option for fast prototyping of pipeline automation.
Epic themselves try to promote the usage of Python using the documentation, API docs, and even a recorded webinar about Python scripting for the Unreal Engine.
Writing our own automated project clean-up script using Python
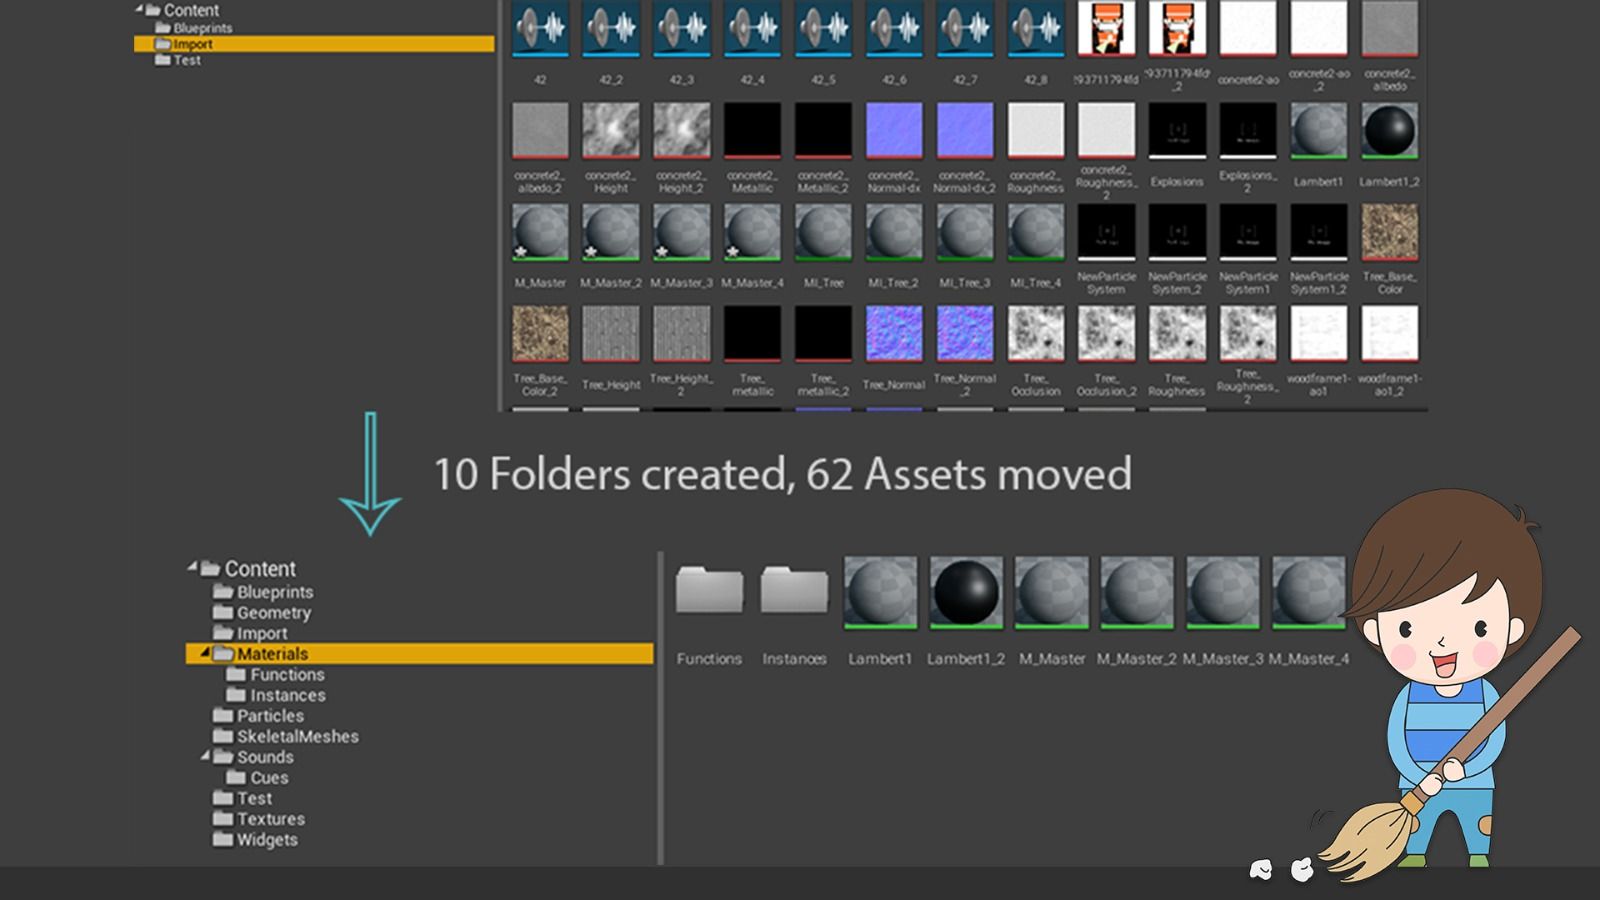
Larger projects can get messy fast. Having a script at hand that can do a clean-up by looking at all of our selected assets and automatically moving them into appropriate folders helps us drastically improve our workflow.
The below schematic drawing explains the idea behind the script.

As of now, the by default version of Python set in Unreal is Python 2.7. If you want to use Python 3, you can follow the process described here to switch to Python 3.
To begin with, we first need to import the unreal library into our scope. Once we have done this, we can create class instances of the elementary classes. For now, we only need the [EditorUtilityLibrary](https://docs.unrealengine.com/en-US/PythonAPI/class/EditorUtilityLibrary.html?highlight=editorutilitylibrary) which enables us to get a list of all the selected assets.
We can get the number of selected assets by using Python's len() method and use Unreal's logging method to get output on the Debug Log in the Unreal Engine.
import unreal

# create unreal class instances
editor_util = unreal.EditorUtilityLibrary()

# get the selected assets
selected_assets = editor_util.get_selected_assets()
num_assets = len(selected_assets)

unreal.log(num_assets)
The code snippet above will print a single number to the Debug Log. For each of the selected assets, we now want to get some information like the asset name and class.
The Unreal [ObjectBase](https://docs.unrealengine.com/en-US/PythonAPI/class/_ObjectBase.html?highlight=objectbase#unreal._ObjectBase) object has several helper methods to get the name, class, and other attributes. We will make use of the get_fname() and get_class() methods.
for assets in selected_assets:
    # get the class instance and the clear text name
    asset_name = asset.get_fname()
    asset_class = asset.get_class()

    unreal.log("{} - {}".format(asset_name, asset_class))
However, this will only give us the class definition and not the clear text name of the class itself, which we want to use for folder creation.
To get the display name instead of the class definition, we need to create an instance of the [SystemLibrary](https://docs.unrealengine.com/en-US/PythonAPI/class/SystemLibrary.html?highlight=systemlibrary). It's get_class_display_name() method takes a class definition and returns the class name as String.
# create unreal class instances
editor_util = unreal.EditorUtilityLibrary()
system_lib = unreal.SystemLibrary()

...

for assets in selected_assets:
    # get the class instance and the clear text name
    asset_name = asset.get_fname()
    asset_class = asset.get_class()
    class_name = system_lib.get_class_display_name(asset_class)

    unreal.log("Name: {} - Class: {}".format(asset_name, class_name))
Now we can see something like this "Name: NewMaterial - Class: Material" printed to our log. This is precisely the kind of information we needed.
The last step is to "rename" our assets to a given location. For example, every Material will be renamed to "/Material/<Name of Material Asset>" which will move it into the according to folders.
To "rename" assets, we need an additional class. The rename_loaded_asset() method is part of the EditorAssetLibrary, so we need to create an instance of this class first. In addition to that, we have to create a new location to which the asset will be relocated.
To keep this more platform-independent, we will use the os module and its path.join() method.
Once we have created the new_path variable, we can use it in the method call to rename_loaded_asset() to relocate our current asset.
import os
import unreal

# create unreal class instances
editor_util = unreal.EditorUtilityLibrary()
system_lib = unreal.SystemLibrary()
editor_asset_lib = unreal.EditorAssetLibrary()

...

for assets in selected_assets:
    # get the class instance and the clear text name
    asset_name = asset.get_fname()
    asset_class = asset.get_class()
    class_name = system_lib.get_class_display_name(asset_class)

    # assemble new path and relocate asset
    new_path = os.path.join("/Game", class_name, asset_name)
    editor_asset_lib.rename_loaded_asset(asset_name, new_path)

    unreal.log("Moved {} to {}".format(asset_name, new_path))
Executing this script in the Unreal Engine, the log will provide you with such a message: "Moved NewMaterial to /Game/Material/NewMaterial".
Observing our project, we can now see that all the selected assets have been cleaned into folders named according to their classes.
As you can see, creating a basic script is quite simple. Of course, we need to take care of error handling, suitable logging, and a friendly user interface for more sophisticated tools, but even simple scripts can save a lot of time.
But does it pay off?
To show you how big the demand for automation in this sector is, here is a screenshot of the monthly sales of a tool with functionality containing the script we created in this article.

Of course, it is essential to understand the needs of users and artists working in the Unreal Engine to know which tasks are suitable for automation.
Learn how to automate and optimise workflows with scripting on Udemy
To help close the gap of Unreal scripting resources, we created an extensive Udemy on-demand course to learn Unreal Engine Editor scripting from scratch.
You can use the promo code, AUTOMATEUNREAL20. You can get the course for as little as $10 now. That’s less than three Frappuccinos from Starbucks!

If you have any questions or feedback, feel free to reach out to us on Twitter or directly in the discussion section of the course :)
Subscribe to my newsletter
Read articles from freeCodeCamp directly inside your inbox. Subscribe to the newsletter, and don't miss out.
Written by

freeCodeCamp
freeCodeCamp
Learn to code. Build projects. Earn certifications—All for free.