Cloud Security with AWS IAM
 yyounos shaik
Difficulty : Easy Time : 1 Hour Cost : 0€
What you'll need : An AWS account - Create one here!
Services Needed: AWS IAM, Amazon EC2
Overview
In AWS, a user is a person or a computer that can do things on the AWS cloud.
You use AWS Identity and Access Management (IAM) to control who is authenticated (signed in) and authorized (has permissions) to use your account's resources.
Get Ready to Create:
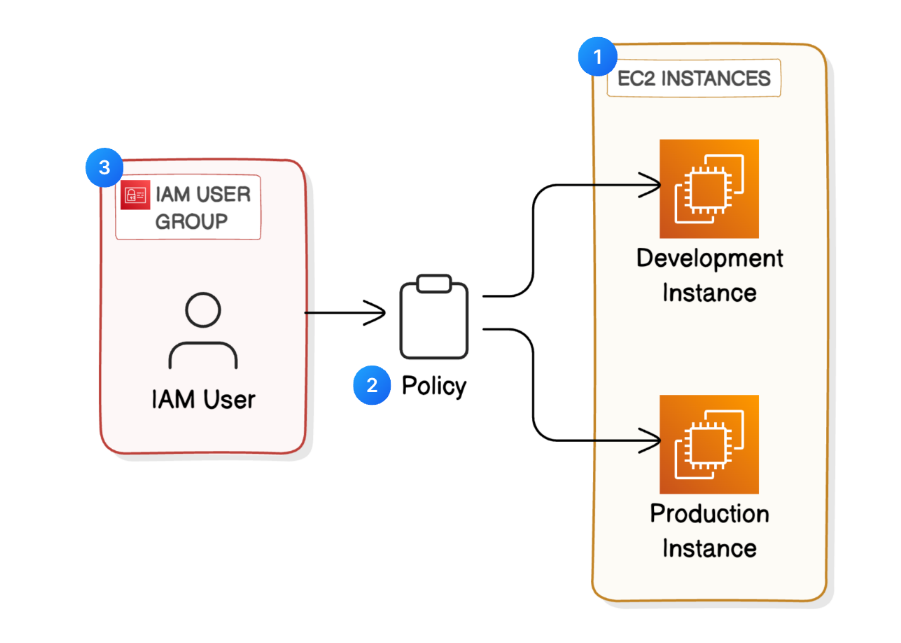
💻 EC2 instances
📏 IAM Policies
👩👩👧👧 IAM Users and User Groups
🔖 AWS Account Alias
Lets Get Started...
Step 1: Launch EC2 instances with tags.
what is EC2?
A legendary AWS service! Amazon EC2 is a service that lets you to rent and use virtual computers in the cloud. They're like your personal computers, but thet live on the internet instead of being physically infront of you. You can create, customize, and use these computers for all different reasons, from running applications to hosting websites.
Post..EC2= Elastic Compute Cloud.
Here are the three words mean:
Elastic = flexible. this service can easily adapt and change in size and power to fit your needs.
Compute = Computing power. EC2 provides virtual computers that can do various tasks, just like your personal computer.
Cloud = available over the internet.
Launching EC2 Instance:
log into your aws management console.
select the closest region near to you, e.g, Europe (Frankfurt) eu-central-1 region.
select Launch instances, you can keep the name of instance as you like.
Create Tags.
Tags
Tags are like labels you can attach attach to AWS resources for organisation. It helps us with identifying all resources with the same tag at once. It is optional to add tags but highly recommended.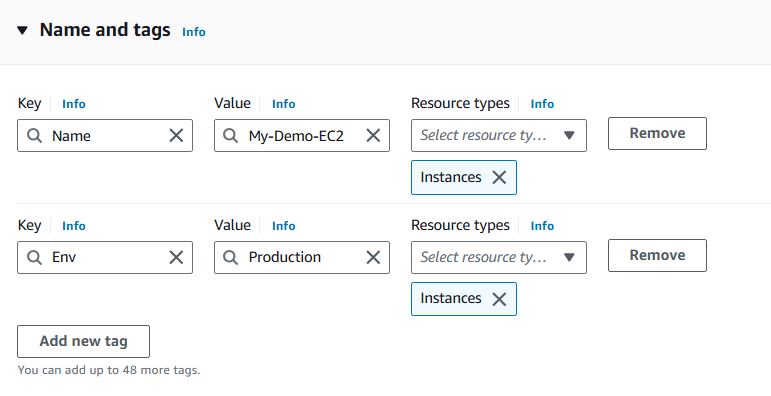
select AMI (Amazon Machine Images):
AMI
An AMI is a template that contains the software configuration (operating system, application server, and applications) required to launch your instance.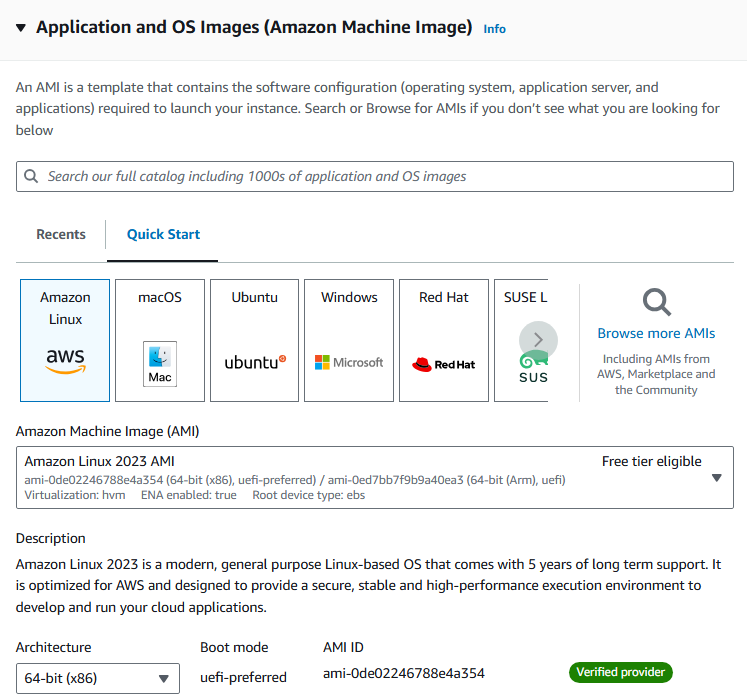
select instance type, which is free tier eligible.
Instance Type
An Instance types comprise varying combinations of CPU, memory, storage, and networking capacity and give you the flexibility to choose the appropriate mix of resources for your applications. Each instance type includes one or more instance sizes, allowing you to scale your resources to the requirements of your target workload.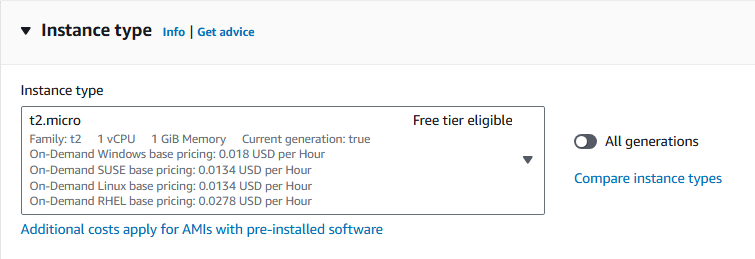
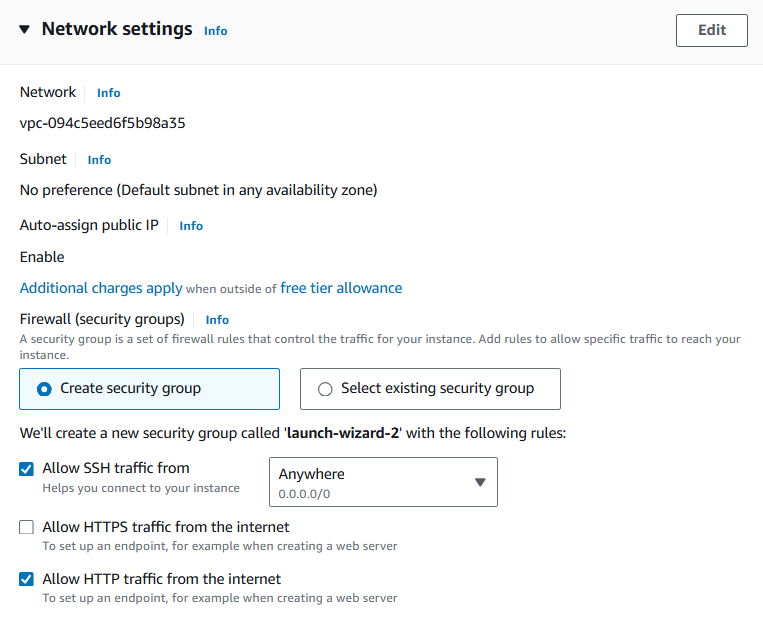
now for the network settings you can either:
create a new security group or
Select an existing security group.
Configure the Instance storage..
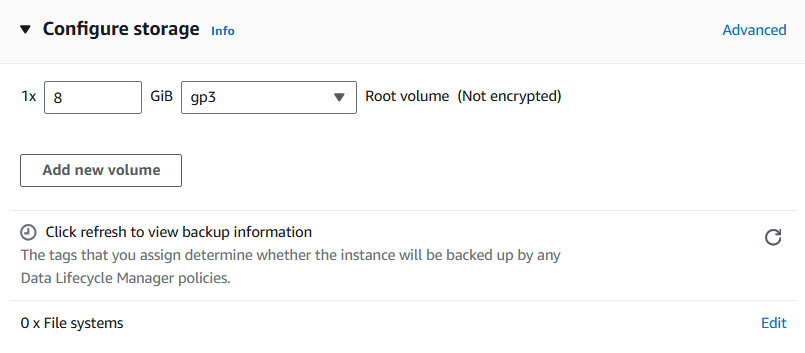
After configuring your instance storage, click on launch instance and wait fot it to move from creating state to running state.
similarly create one more ec2 instance for the development environment.

Development and production environments refer to different stages in software development lifecycle.
Development
The Development environment is where developers write, test and debug code before it's deployed to productipn, which is the live environment that your end users can use.
Step 2: create IAM policies
IAM: Identiy and Access Management.
IAM
- Head to you IAM Console.

Now on the left hand navigator panel of your IAM console choose Policies.
Policies
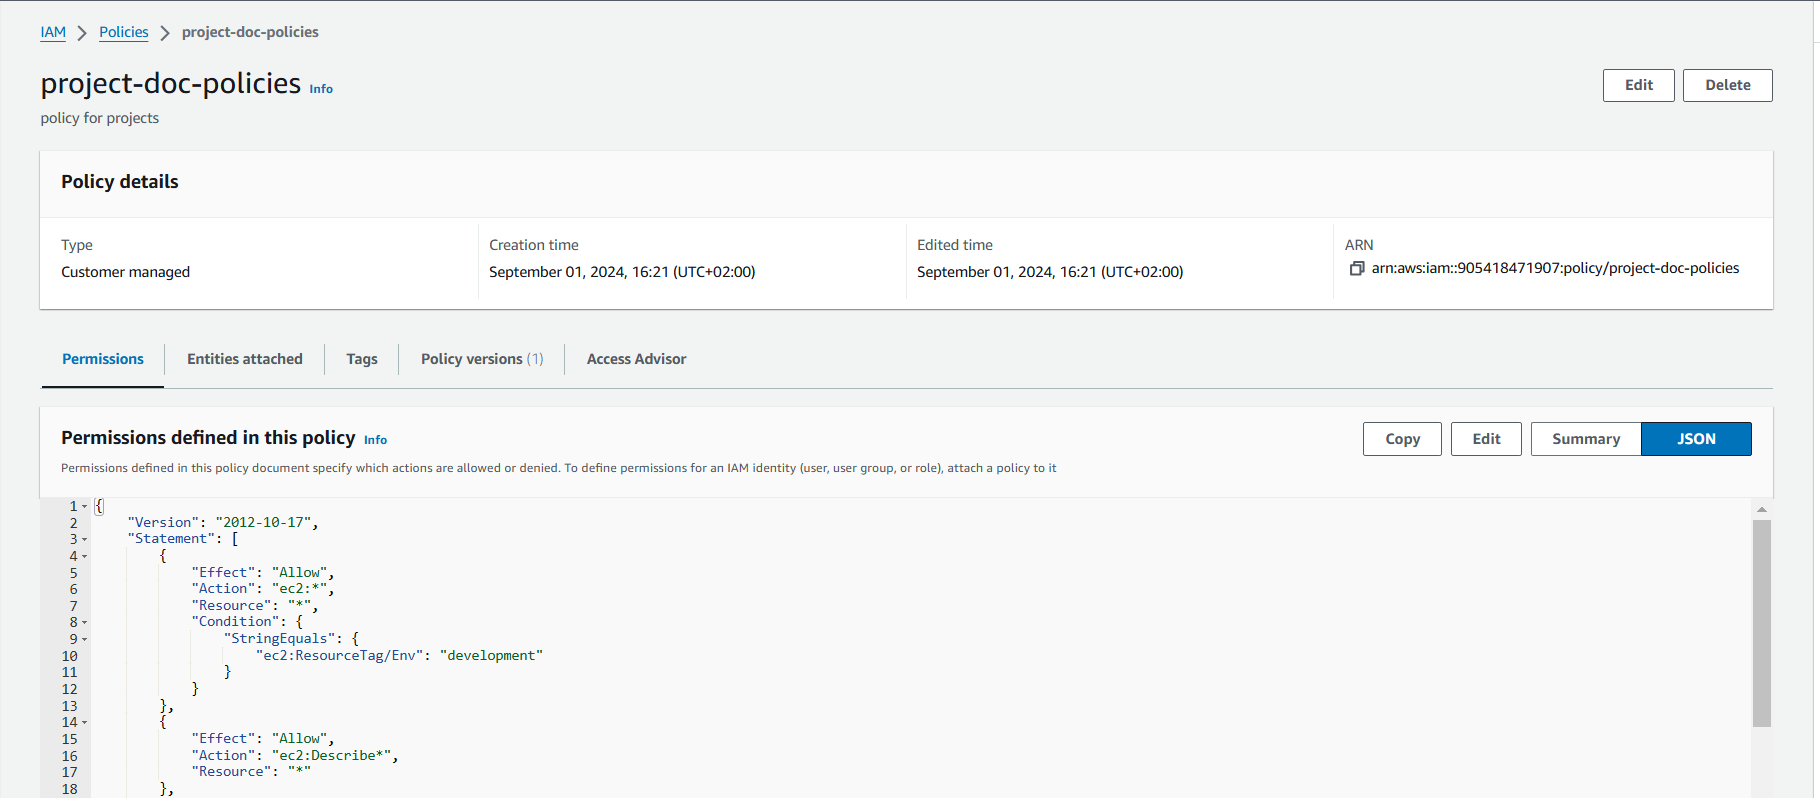
IAM policy is a rule for who can do what with your aws resources. Its all about Giving permissions to IAM users, gropus, or roles, saying what they can or can't do on certain resources, and when those rules kick in.- choose Create policy.
Swtich your policy editor tab to JSON.
{
    "Version": "2012-10-17",
    "Statement": [
        {
            "Effect": "Allow",
            "Action": "ec2:*",
            "Resource": "*",
            "Condition": {
             "StringEquals": {
                    "ec2:ResourceTag/Env" : "development"
            }
            }
            },
            {
                        "Effect": "Allow",
                        "Action":"ec2:Describe*" ,
                        "Resource":"*" },
                    {
                        "Effect": "Deny",
                    "Action":[
                        "ec2:DeleteTags",
                        "ec2:CreateTags"
                        ],
                        "Resource":"*"}]}
Review and Create.

Your policy is created.
Step 3: Create an AWS Account Alias
Head to your IAM dashboard.
In the right hand side of the dashboard create under Account Alias.
Alias
An account alias is a friendly name for your AWS account that can be use of your account ID to sign in the AWS Management Console.your AWS account's sign-in page has this URL by default:
https://Your_Account_Id.signin.aws.amazon.com/console/If you create an AWS account alias for your AWS account ID, your sign-in page URL look more like:
https://Your_Account_Alias.signin.aws.amazon.com/console/After Creating Your AWS Alias you can copy the URL and login with that account rather than the root account.
Step 4: Create IAM Users and User Groups
IAM user group
To set up you user group:
Name: create name of the group of your choice.
Attach permission policies: Project-for-docs.
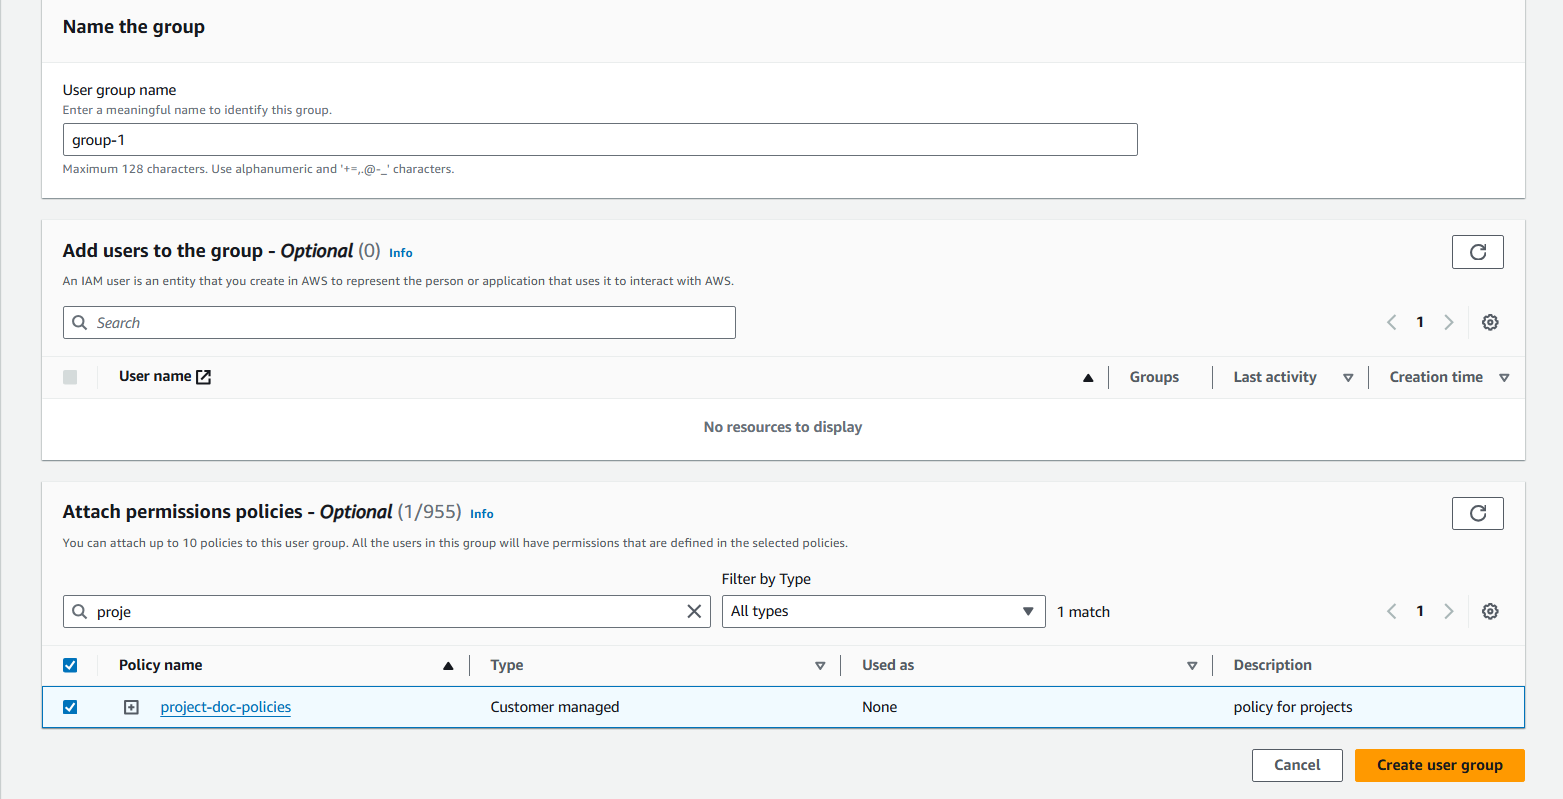
Select Create group. Success!
now let's add Users to your user group.
User group
Choose Users from the left hand navigation panel.
choose Create user! under user name, enter the user name of your choice.
tick the checkbox for provider user access to the aws management console.
Uncheck the box for users must create a new password at next sign-in-recommended.
Note: This does not sow up for every AWS account, but if you see a highlighted pop that asks "are you providing console access to a person?" - select I want to create an IAM user.
select Next when you're ready!
To set permissions for your ser, we'll simply add it to the user group you've created. Select the checkbox next to the user group name.
Select Next.
Select Create user!
It's a success - now you're seeing some specific sign-in details for your new user.
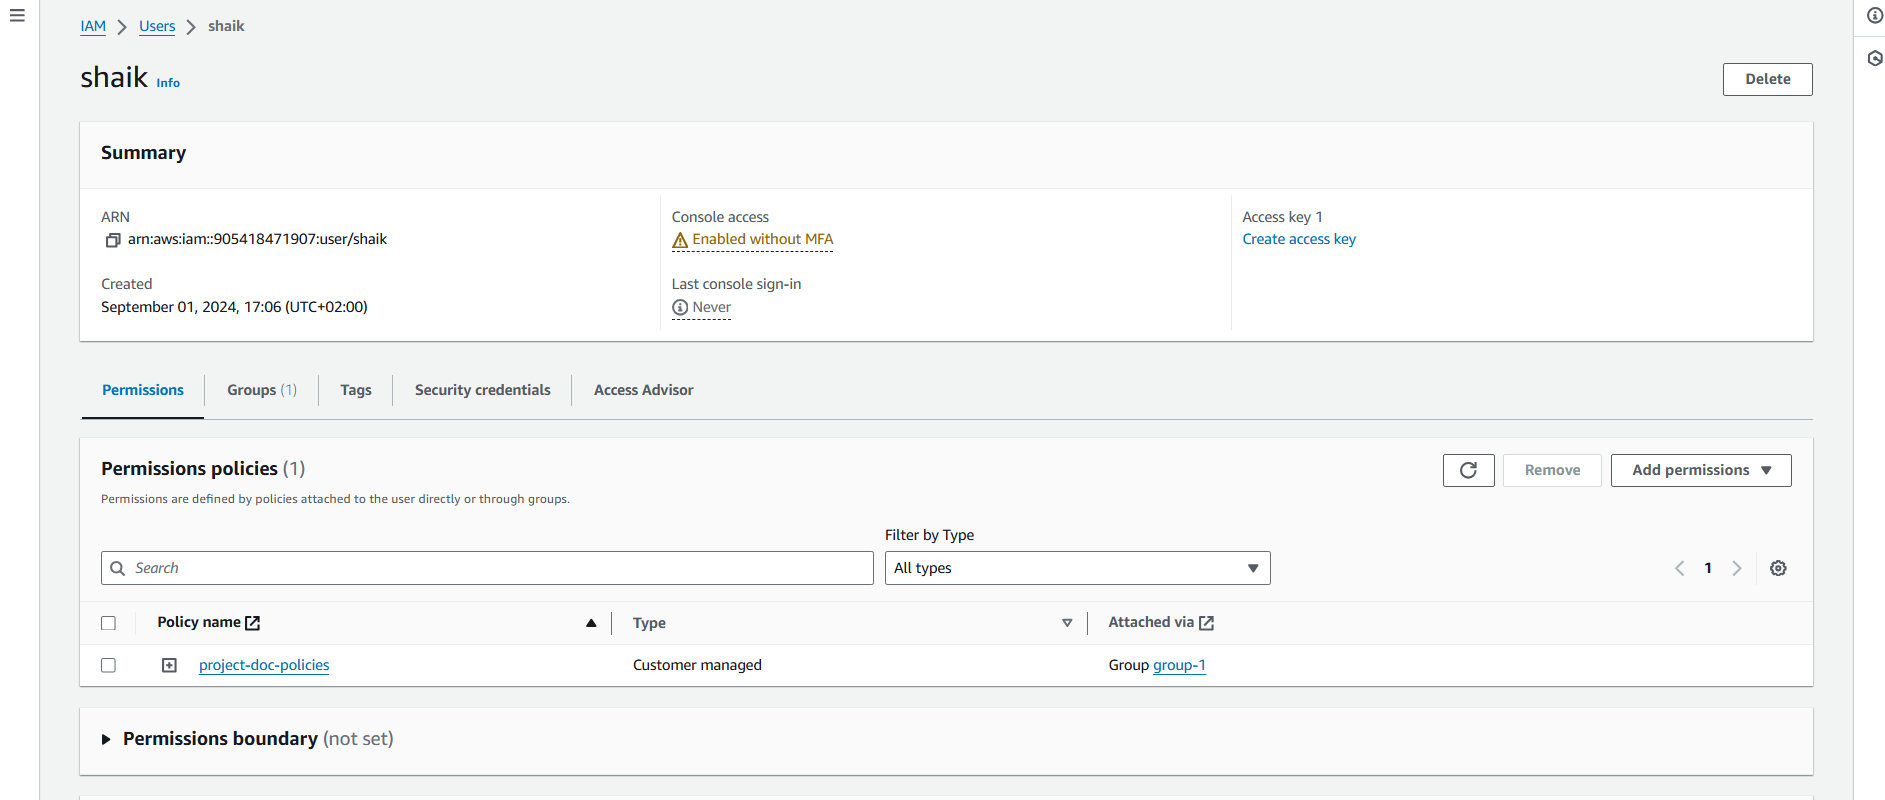
Step 5: Test your user's access
Copy the Console sign-in URL. Do not close this tab!
open a new Icognitio window on your browser.
Open the new console sign-in URL in your icognitio window.
Using the User name and Consile Password given in Your IAM tab, Let's log in!
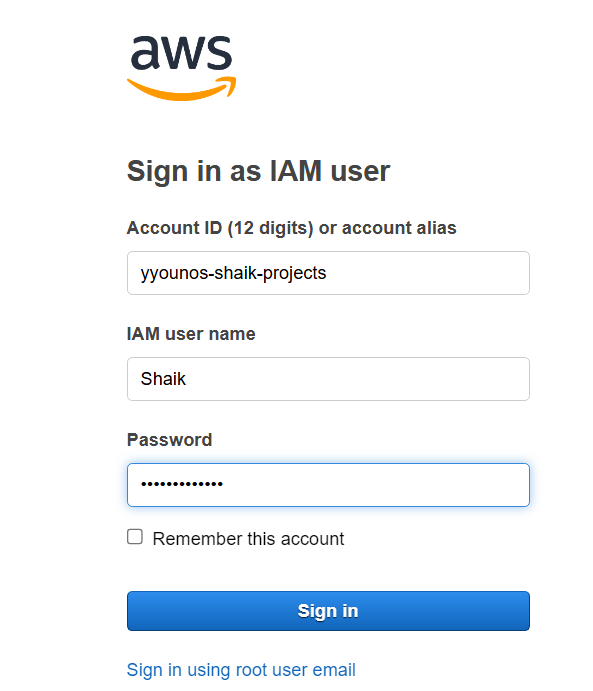
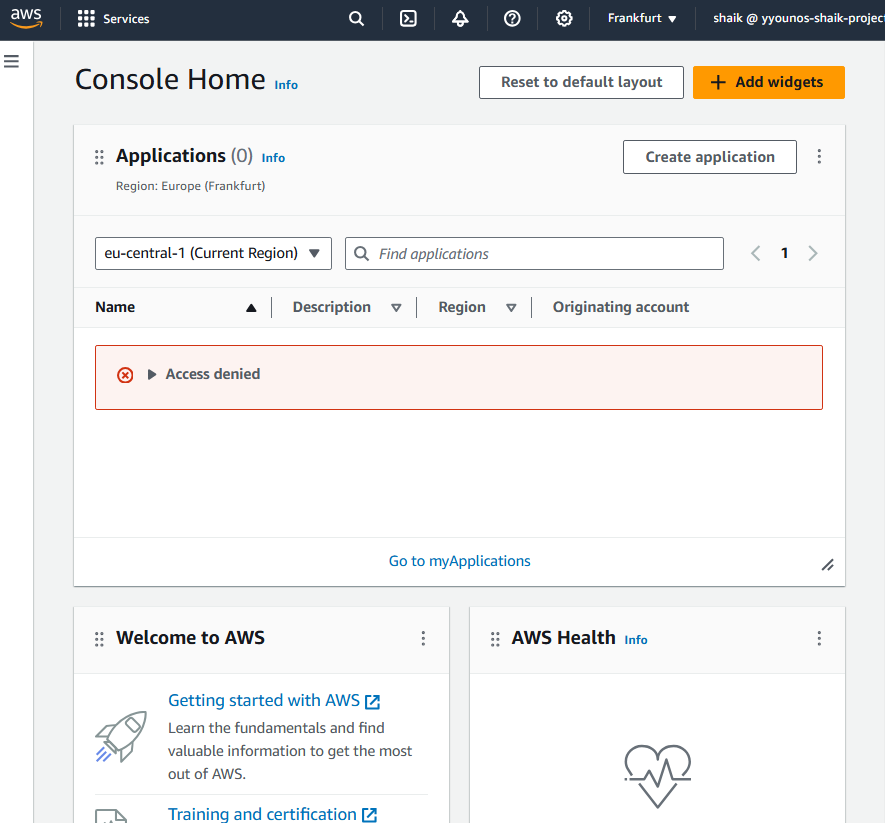
As a new user, you'll notice that some of your panels are showing Access denied already!
Now with my IAM Policy, IAM User Group and IAM User all set up, let’ s put it all together! To do this, I logged into my AWS account as a new user.
To log in as my IAM User, I used the URL given while creating the user.
Once I logged in, I noticed that I didn ’t have some permissions that I used to have with my usual login.
Head to your EC2 console, and make sure you're in the same region where you deployed your two EC2 instances.
Head to Instances.
Sleect your production Instance, and in the actions dropdown, select manage Instance state.
Let's try to stop this instance. Select the stop option, then change state.
select stop. when we hit the stop state the console is not allowing to stop the instance stating an error.

Now let's try to stop the development instance.
HEad back o the instances page, select the checkbox next to the user group name.
under the actions drop down, select manage intsance state.
select stop, then change state. select stop.
Success! The development instance is successfully stopped.

Summary
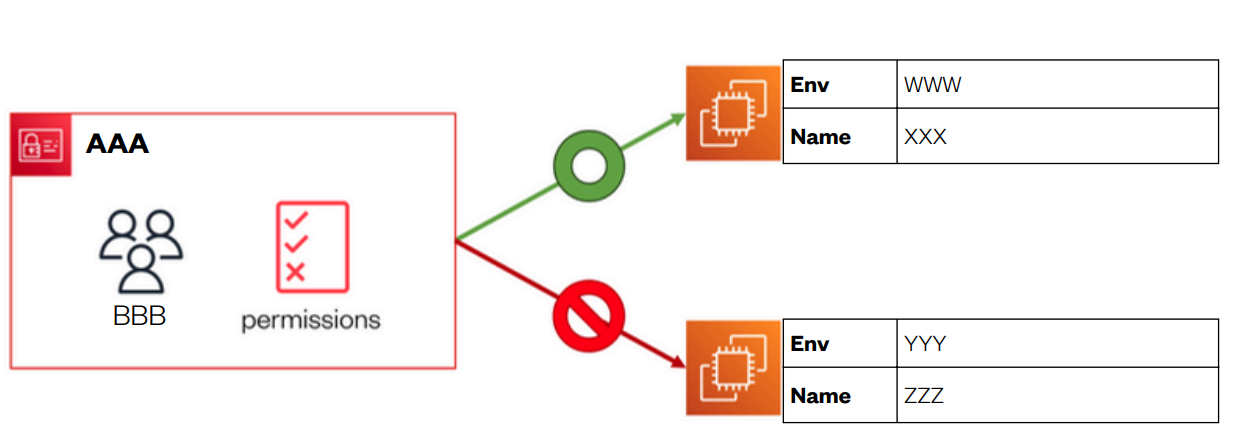
I created: An IAM User Group called "Group-1" with defined permissions using an IAM Policy.
An IAM User called "Shaik" that is added to the user group.
An EC2 instance with the Env tag production and Name "ec2-1".
An EC2 instance with the Env tag development and Name "ec2-2".
Subscribe to my newsletter
Read articles from yyounos shaik directly inside your inbox. Subscribe to the newsletter, and don't miss out.
Written by

yyounos shaik
yyounos shaik
An Aspring Cloud Engineer