Day 50: Your CI/CD pipeline on AWS - Part-1 🚀 ☁
 Pooja Bhavani
What is Code-commit ?
- CodeCommit is a managed source control service by AWS that allows users to store, manage, and version their source code and artifacts securely and at scale. It supports Git, integrates with other AWS services, enables collaboration through branch and merge workflows, and provides audit logs and compliance reports to meet regulatory requirements and track changes. Overall, CodeCommit provides developers with a reliable and efficient way to manage their codebase and set up a CI/CD pipeline for their software development projects.
Task-01 :

1. Go to the AWS management console and search for CodeCommit. Your interface will look like this:

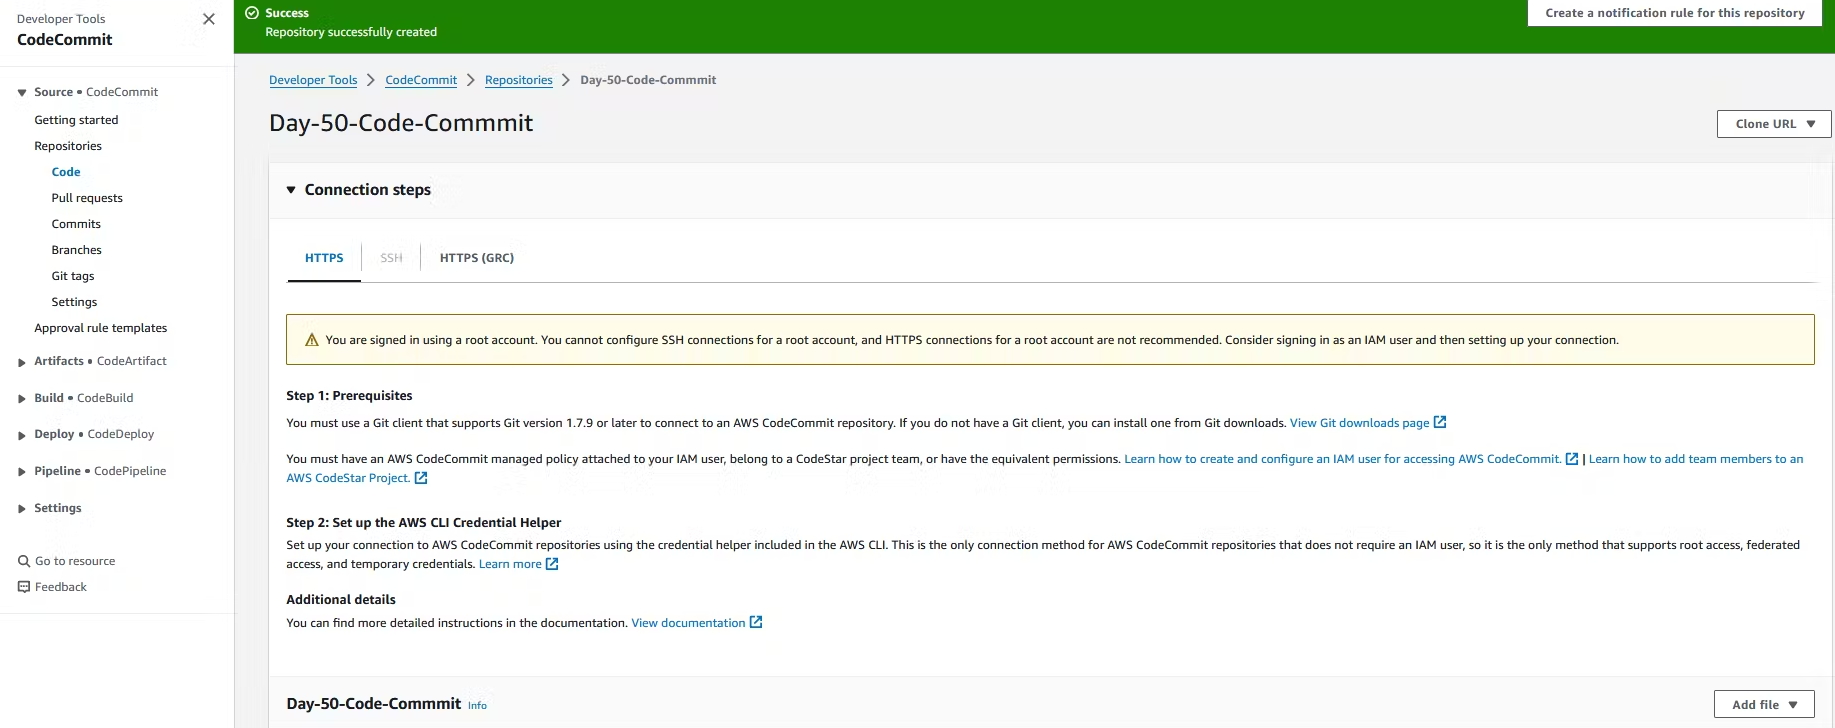
2. On the right side, you will see create repository. Click on it and enter your Repository name as Day-50-Code-Commit and Description as This is Day-50 Code Commit repository. Leave the rest as default and click on Create.

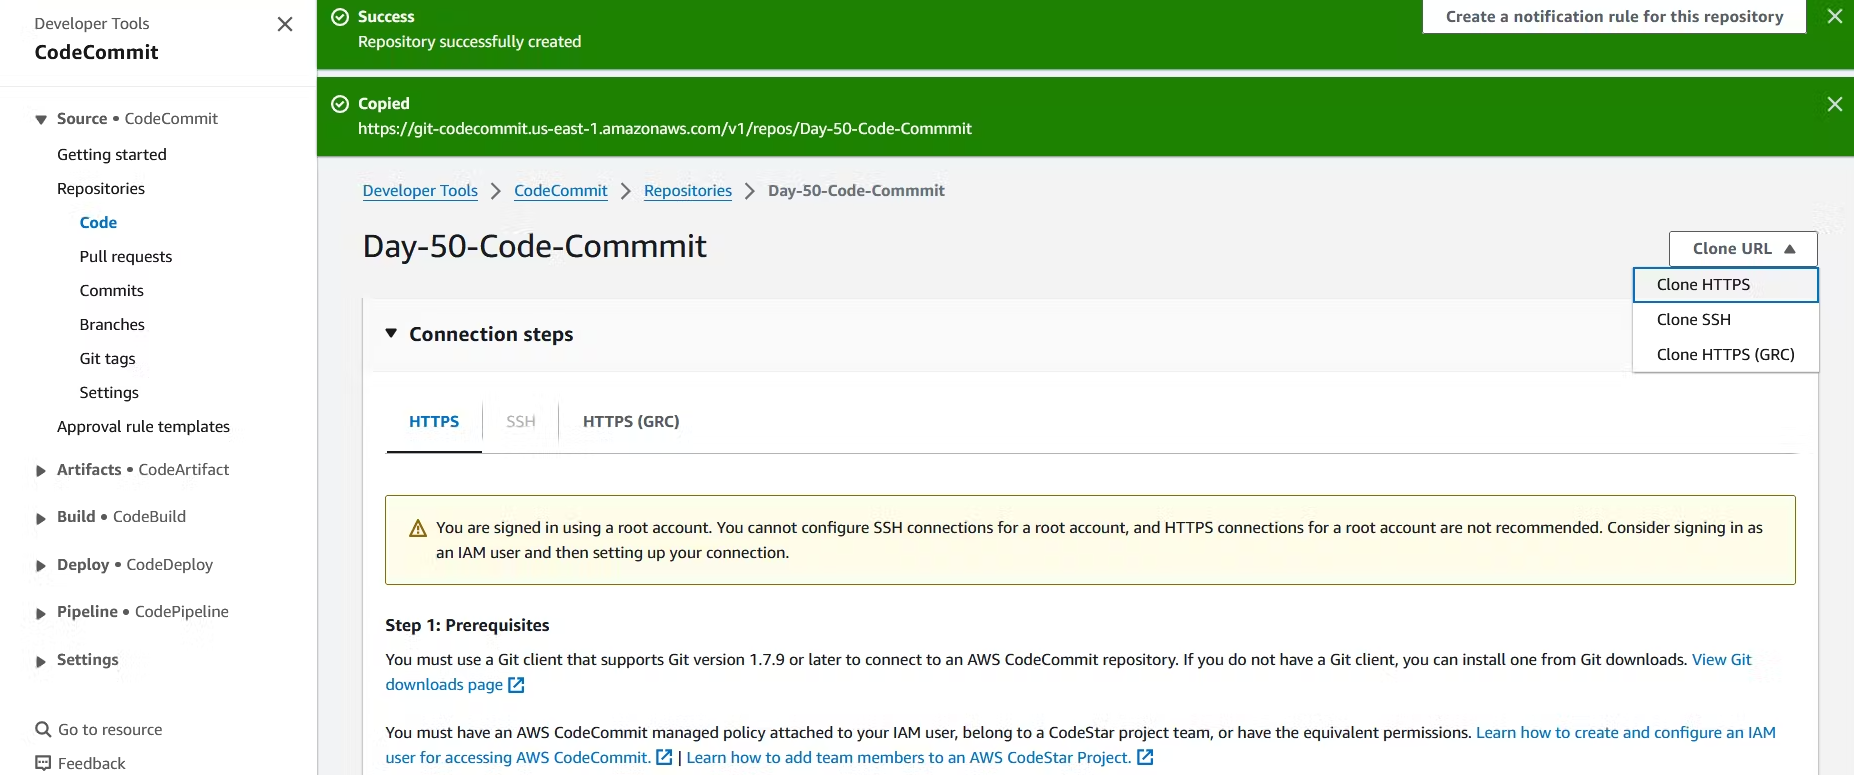
Here you will get a warning: You are signed in using a root account. You cannot configure SSH connections for a root account, and HTTPS connections for a root account are not recommended. Consider signing in as an IAM user and then setting up your connection. To solve this, create an IAM user.
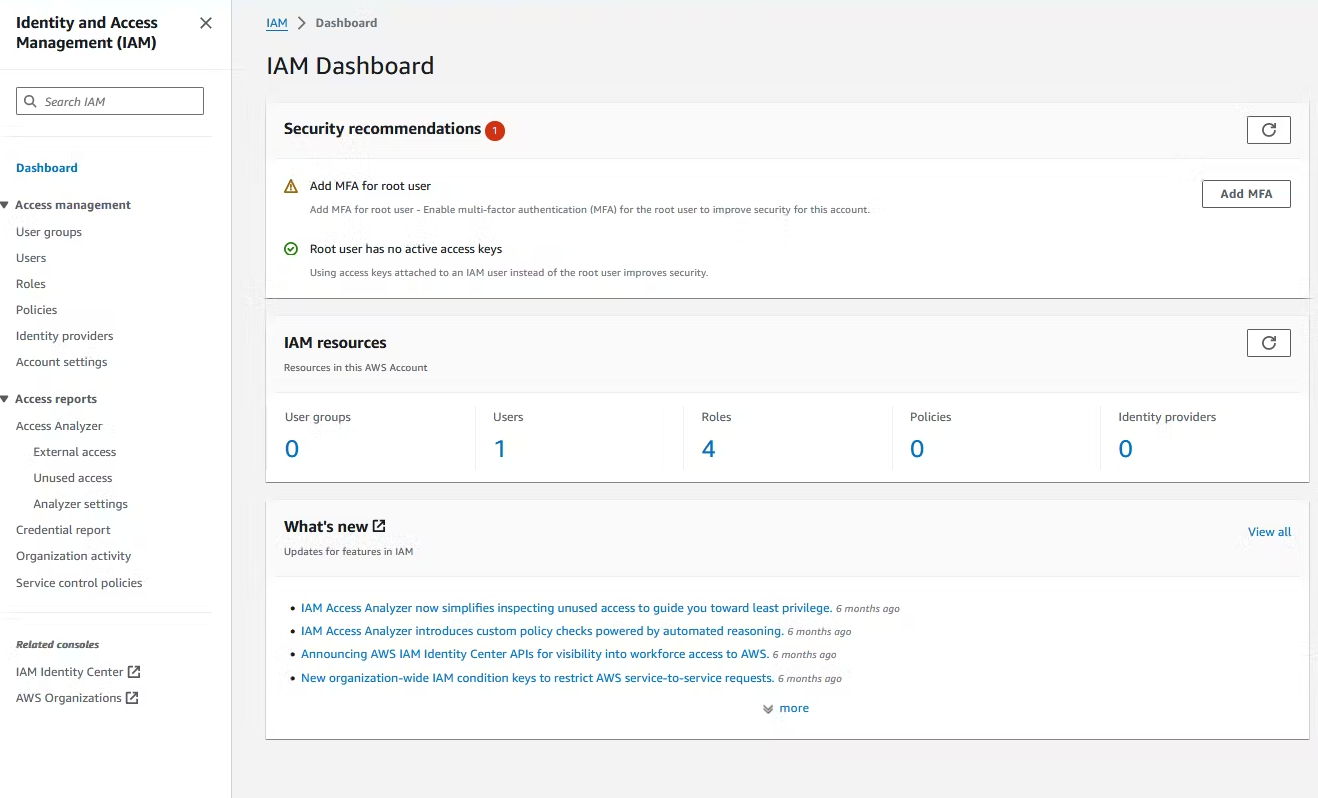
4. Now, in your AWS management console, search for IAM, and your interface will look like this:
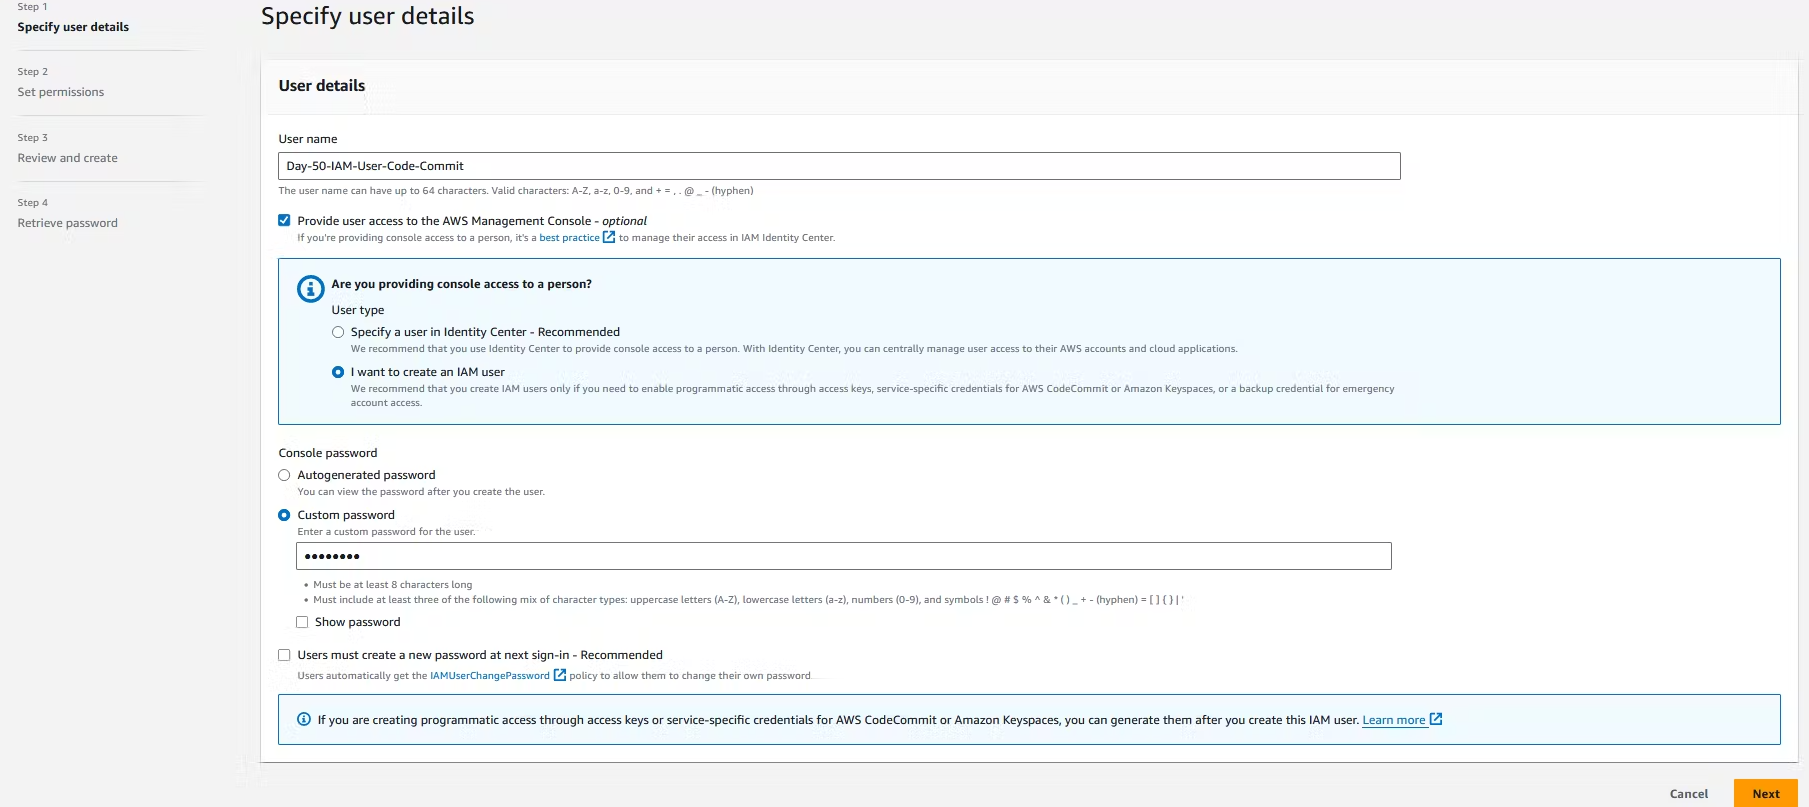
5. On the interface, you will see User. Click on it and then click on Create user. In User details, write your User name as Day-50-IAM-User-Code-Commit, select Provide user access to the AWS Management Console, choose I want to create an IAM user, select Custom password, enter your password, and click on Next.
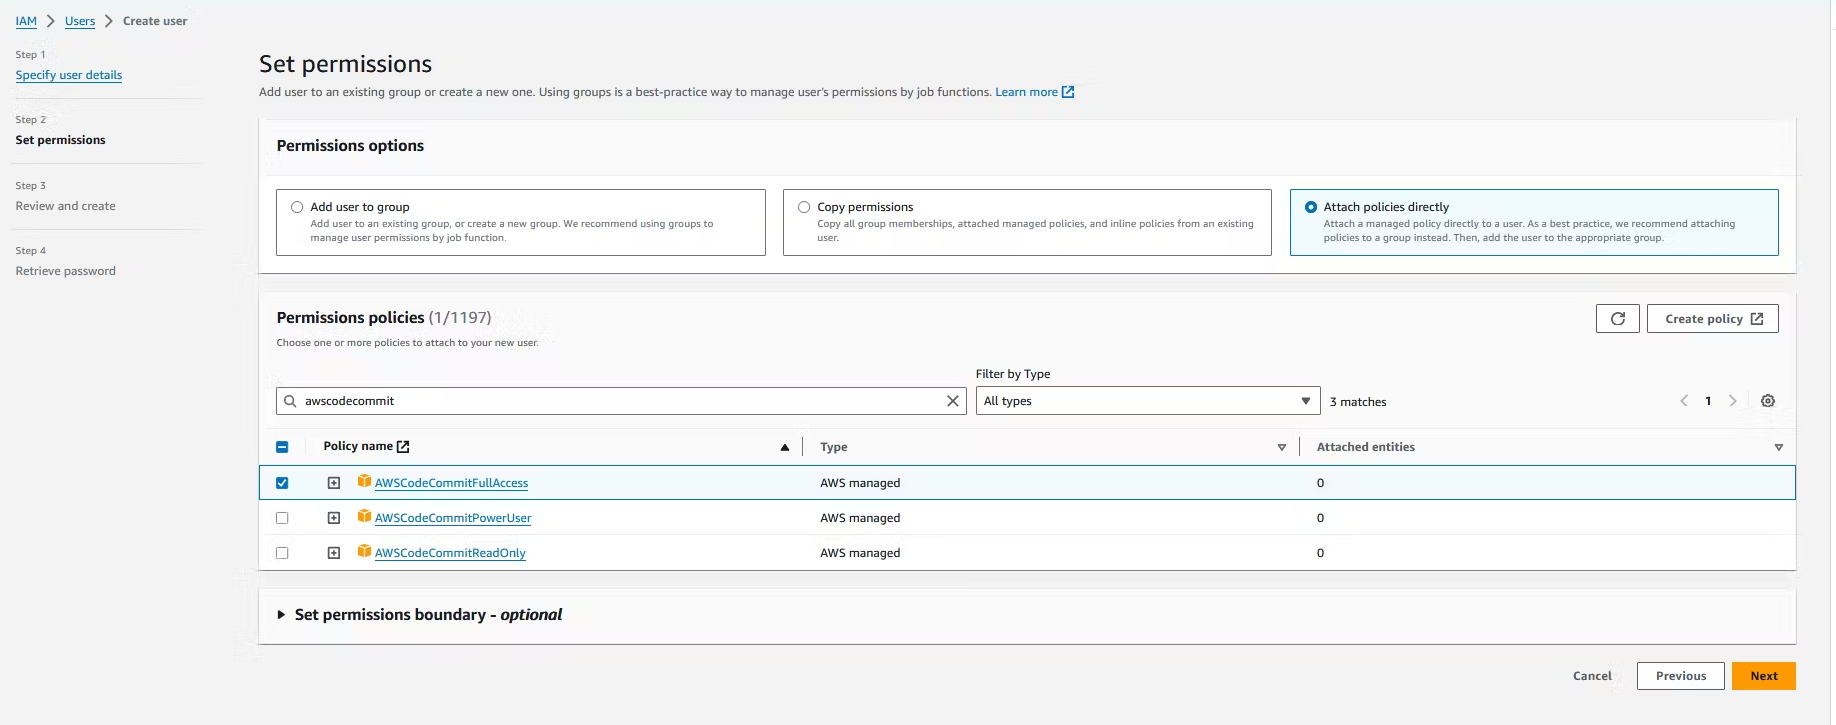
6. After that, you have to select Attach policies directly and in the permission policies search for AWSCodeCommitFullAccess. Click on Next and then click on Create user.
7. Now click on Download .csv file to download your IAM Username and Password.
8. After that, come back to the IAM Console and click on Users. Select the user you created. On the screen, you will see Security credentials. Click on it and scroll down. You will see HTTPS Git credentials for AWS CodeCommit. Click on Generate credentials and then click on Download credentials.

9. After that, to clone your repository to your local machine, come back to your CodeCommit console and click on the repository you created. On the right side, you will see Clone URL. Click on it, select Clone HTTPS, and copy the link you see on the screen. Paste it somewhere for future use.
9. Then go to your local machine, update your system, and use git clone to clone the repository you copied from the CodeCommit console. You can use these commands.
sudo apt-get update && sudo apt-get upgrade -y
git clone <Past CodeCommit Clone HTTPS link>
10. After cloning your repository, it will ask you to paste your CodeCommit username and password from the file called Generate credentials. List the files to see if your repository has been copied to your local machine.
Task-02

1. After cloning your repository, enter into your repository and write the HTML file.
 <!DOCTYPE html>
<html>
<body>

<h1>Day-50</h1>
<p>AWS CodeCommit.</p>

</body>
</html>
2. Now add and commit the file using the git command.
git add <filename>
git commit -m "your message"
3. Now check which branch your repository is in and push your file to the AWS CodeCommit console using the git command. It will ask for your CodeCommit credentials; paste your credentials.
git branch
git push origin master
4. Now go to your CodeCommit console, refresh the page, and you will see your index.html file that you created on your local machine.

This completes the tasks for Day 50. Stay tuned for the next steps in setting up your CI/CD pipeline on AWS!
Subscribe to my newsletter
Read articles from Pooja Bhavani directly inside your inbox. Subscribe to the newsletter, and don't miss out.
Written by

Pooja Bhavani
Pooja Bhavani
Hi, I am Pooja Bhavani, an enthusiastic DevOps Engineer with a focus on deploying production-ready applications, infrastructure automation, cloud-native technologies. With hands-on experience across DevOps Tools and AWS Cloud, I thrive on making infrastructure scalable, secure, and efficient. My journey into DevOps has been fueled by curiosity and a passion for solving real-world challenges through automation, cloud architecture, and seamless deployments. I enjoy working on projects that push boundaries whether it's building resilient systems, optimizing CI/CD pipelines, or exploring emerging technologies like Amazon Q and GenAI. I'm currently diving deeper into platform engineering and GitOps workflows, and I often share practical tutorials, insights, and use cases from my projects and experiences. ✨ Let’s connect, collaborate, and grow together in this ever-evolving DevOps world. Open to opportunities, ideas, and conversations that drive impactful tech!