Streamlining AI integration with Vercel AI SDK
 Koustav Chatterjee
What is Vercel AI SDK ?
In an era where AI is rapidly transforming digital experiences, integrating machine learning models into web applications has become crucial. However, this task can be challenging, especially when dealing with different AI providers. Vercel AI SDK emerges as a solution, offering a streamlined way to incorporate AI capabilities into your Next.js projects. The Vercel AI SDK is a set of tools and libraries that Vercel provides to simplify the integration of AI and machine learning models into web applications. The SDK is designed to work seamlessly with Vercel's platform, enabling developers to quickly deploy, scale, and manage AI-powered features in their applications.
Why use Vercel AI SDK?
The integration of large language models (LLMs) into web applications involves complexities such as managing API differences, handling diverse authentication methods, and optimizing model performance and is dependent heavily on the model provider one uses. The Vercel AI SDK provides a solution to this problem by abstracting the differences between various models. Let's understand it with an easy example.
Set up the Next JS project
First, create a new Next.js project by running the following command in your terminal:

After running the command, the below prompts will appear:
What is your project named? my-app
Would you like to use TypeScript? No / Yes
Would you like to use ESLint? No / Yes
Would you like to use Tailwind CSS? No / Yes
Would you like your code inside a `src/` directory? No / Yes
Would you like to use App Router? (recommended) No / Yes
Would you like to use Turbopack for `next dev`?  No / Yes
Would you like to customize the import alias (`@/*` by default)? No / Yes
What import alias would you like configured? @/*
Respond to the prompts as follows:
Project Name:
ai-testingTypeScript:
YesESLint:
YesTailwind CSS:
Yes(optional based on your preference)App Router:
Yes(recommended)Turbopack:
Yes(optional)Import Alias:
@/*(default or customize as needed)"
Replace the "what is your project name" with your desired project name. Here we will be using "ai-testing" as the name and select the rest of the prompts according to your needs.
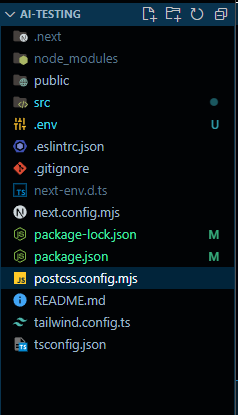
After installing all the necessary dependencies, the folder structure will look something like this:

Installing necessary dependencies and packages
For the tutorial, we will be using Groq as the provider. The Groq provider is available via the @ai-sdk/openai module as it is compatible with the OpenAI API. You can install it with the command
npm install @ai-sdk/openai
To use Groq, you can create a custom provider instance with the createOpenAI function from @ai-sdk/openai:
Example,
import { createOpenAI } from '@ai-sdk/openai';
// Initialize the Groq provider with your API key and endpoint
const groq = createOpenAI({
  baseURL: 'https://api.groq.com/openai/v1',
  apiKey: process.env.GROQ_API_KEY,
});
Language Models
We will be using the "llama3-8b-8192" model. You can use any model of your choice.
Example,
const model = groq('llama3-8b-8192');
Writing your Code
Under the "src" folder right click on the app folder and create a new folder and name it "api". Inside the "api" folder create another new folder with the name of the route you want to use for your backend. Here we will use "generate-message" as the route. Inside this folder create a "route.ts" file which will contain all the code. Inside the "route.ts" file write the following code:
import { generateText } from 'ai';
import { createOpenAI, openai } from '@ai-sdk/openai';

const groq = createOpenAI({
    baseURL: 'https://api.groq.com/openai/v1',
    apiKey: process.env.GROQ_API_KEY,
  });

// API route handler
export async function POST(req: Request) {
  const { prompt }: { prompt: string } = await req.json();

  const { text } = await generateText({
    model: groq('llama3-8b-8192'),
    system: 'You are a helpful assistant.',
    prompt,
  });

  return Response.json({ text });
}
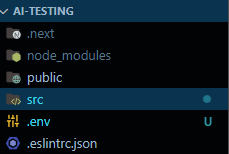
Visit GroqCloud to generate your API key. After that inside your "api-testing" folder create a ".env" file to store the API key so that it can be accessed in the code above by process.env.GROQ_API_KEY.

Inside the .env file write a variable name and paste the api key.
GROQ_API_KEY= xxxxxxxxxxx
This .env file is secret, no one but only you can access it, and it can be used to store data that you want to keep private or hidden.
Start the Server
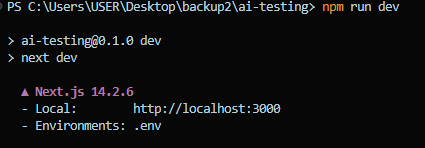
Start the server by using the "npm run dev" command in the terminal.

Testing your API end-point
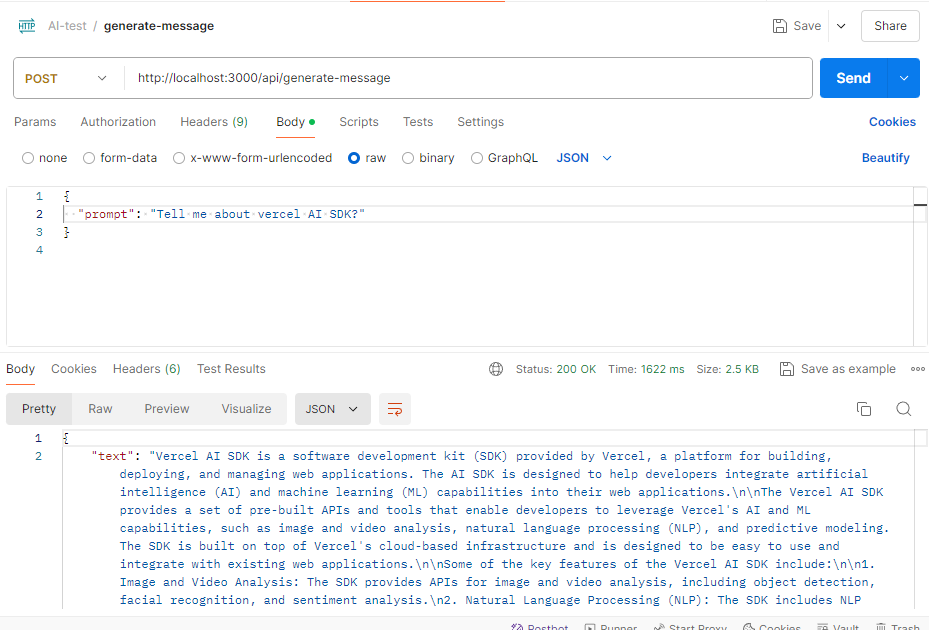
Fire your API testing tool like Postman. Create a blank collection and name it "ai-test". Click on the three dots beside the collection name and click on add request. Select POST request and type the URL "http://localhost:3000/api/generate-message"

After this, select the body tab, then, select raw, and then select type JSON as the format of data.

Hit the send button to see the result.

After sending the request, you should receive a JSON response with the above generated text. If you encounter any errors, ensure your API key is correctly set in the .env file, and your server is running without issues.
Conclusion
With your AI-powered endpoint now live, you've successfully integrated a sophisticated language model into your Next.js application using the Vercel AI SDK and Groq. This setup not only simplifies AI integration but also paves the way for adding advanced features like real-time chatbots, personalized content generation, and more. Continue exploring the possibilities and enhance your application with the power of AI.
Subscribe to my newsletter
Read articles from Koustav Chatterjee directly inside your inbox. Subscribe to the newsletter, and don't miss out.
Written by

Koustav Chatterjee
Koustav Chatterjee
I am a developer from India with a passion for exploring tech, and have a keen interest on reading books.