React on Firebase!🔥: Part 2
 Subrata Ch
This post will explore how to scaffold a basic React app for our ToDo application. We will add functionality that allows users to add a new task to the list. We will not connect our app to the Google Firebase database at this stage. We will use a front-end tool called Vite to set up the development environment.
Setting Up the Environment:🛠️
: Install Node.js and npm, then create a new React app using Vite. I assume you have basic knowledge of using VS Code. Create a " todo " directory and open the project folder in VS Code. Press Ctrl+Shift+` to open the terminal and type the following:
1. First, create a new Vite project with React.
    npm create vite todo

    ? Select a framework: » - Use arrow-keys. Return to submit.
        Vanilla
        Vue
     >  React
        Preact
        Lit
        Svelte
        Solid
        Qwik
        Others
Use arrow key to select React and press enter.

    √ Select a framework: » React
    ? Select a variant: » - Use arrow-keys. Return to submit.
       TypeScript
       TypeScript + SWC
    >  JavaScript
       JavaScript + SWC
       Remix ↗

Select JavaScript and press enter
   Scaffolding project in C:\React\todo...

2. Change active directory to todo
    cd todo
3. Install the necessary dependencies:
    npm install
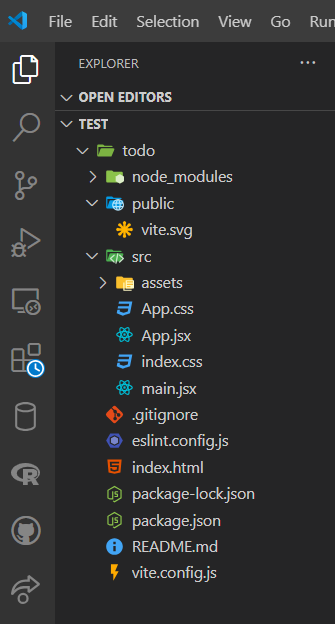
If this is done then you should see a project structure as follows in VS code:

Let's now run the app:
4. Let's now run the app
    npm run dev
And you should see something like this telling that a server is running:

  VITE v5.4.2  ready in 343 ms

  ➜  Local:   http://localhost:5173/
  ➜  Network: use --host to expose
  ➜  press h + enter to show help
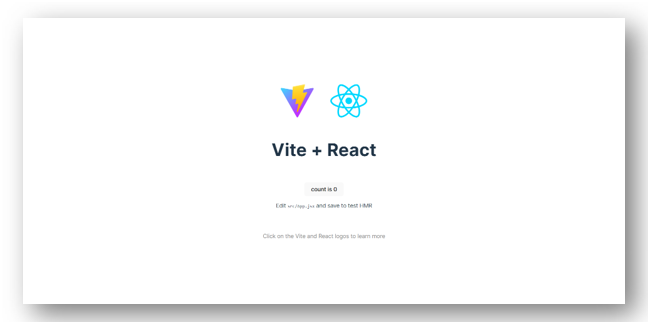
Now click on the Local URL provided while pressing the Ctrl key and this
should fireup the app in the browser as follows:

Refactoring code:🔁
We will keep most of these files since some contain important configurations which we will need in the future. However, for now, we will clean up and refactor some of the codes from the scaffold to fit our purpose. Starting with the index.html in the root folder, we will add the CSS Bootstrap 5 CDN:
inted.html
<!doctype html>
<html lang="en">
  <head>
    <meta charset="UTF-8" />
    <link rel="icon" type="image/svg+xml" href="/vite.svg" />
    <meta name="viewport" content="width=device-width, initial-scale=1.0" />
    <title>ADD TASK, Vite + React</title>
    <link href="https://cdn.jsdelivr.net/npm/bootstrap@5.0.2/dist/css/bootstrap.min.css" rel="stylesheet" integrity="sha384-EVSTQN3/azprG1Anm3QDgpJLIm9Nao0Yz1ztcQTwFspd3yD65VohhpuuCOmLASjC" crossorigin="anonymous">
  </head>
  <body>
    <div id="root"></div>
    <script src="https://cdn.jsdelivr.net/npm/bootstrap@5.0.2/dist/js/bootstrap.bundle.min.js" integrity="sha384-MrcW6ZMFYlzcLA8Nl+NtUVF0sA7MsXsP1UyJoMp4YLEuNSfAP+JcXn/tWtIaxVXM" crossorigin="anonymous"></script>
    <script type="module" src="/src/main.jsx"></script>
  </body>
</html>
Open the App.css file in the src folder and update this as follows:
App.css
/* src/App.css */
.App {
  width: 40%;
  margin: 50px auto;
  padding: 20px;
  font-family: Arial, sans-serif;
  border: 5px solid goldenrod;;
  box-shadow: 10px 10px 10px lightslategray;
  border-radius: 10px;
}
Now open the App.jsx file and update as follows: The comments may help you understand the meaning of each code bit.
App.jsx
import React, { useState } from "react";
import "./App.css"; // Import your custom CSS if any

const App = () => {
  const [tasks, setTasks] = useState([]); // State to store the list of tasks
  const [task, setTask] = useState(""); // State to store the current task input
  const [error, setError] = useState(""); // State to store the error message

  // Function to add a new task
  const addTask = (task) => {
    setTasks([...tasks, task]); // Add the new task to the existing tasks array
  };

  // Function to handle form submission
  const handleSubmit = (e) => {
    e.preventDefault(); // Prevent default form submission behavior

    if (task.trim() === "") {
      setError("Task cannot be empty"); // Set error message if the task input is empty
    } else {
      addTask({ id: Date.now(), text: task }); // Generate a unique ID and set the task text
      setTask(""); // Clear the input field after adding the task
      setError(""); // Clear the error message after successful submission
    }
  };

  return (
    <div className="App container mt-5">
      <h1 className="text-center mb-4">To-Do List v1 - (ADD TASK)</h1> {/* Main heading with Bootstrap styling */}

      {/* Task input form */}
      <form onSubmit={handleSubmit} className="mb-4">
        <div className="input-group">
          <input
            type="text"
            value={task}
            onChange={(e) => setTask(e.target.value)}
            className="form-control"
            placeholder="Add a new task"
          />
          <button type="submit" className="btn btn-primary ms-2">
            Add Task
          </button> {/* Submit button with Bootstrap styling */}
        </div>
        {error && <p className="text-danger mt-2">{error}</p>} {/* Error message with Bootstrap styling */}
      </form>

      {/* Task list rendering */}
      <ul className="list-group">
        {tasks.map((task, index) => (
          <li key={task.id} className="list-group-item">
            {index + 1}: {task.text}
          </li>
        ))}
      </ul>
    </div>
  );
};

export default App; // Export the App component as the default export
Go to main.jsx in the src folder and switch off the index.css as follows:
main.jsx
import { StrictMode } from 'react'
import { createRoot } from 'react-dom/client'
import App from './App.jsx'
// import './index.css'

createRoot(document.getElementById('root')).render(
  <StrictMode>
    <App />
  </StrictMode>,
)
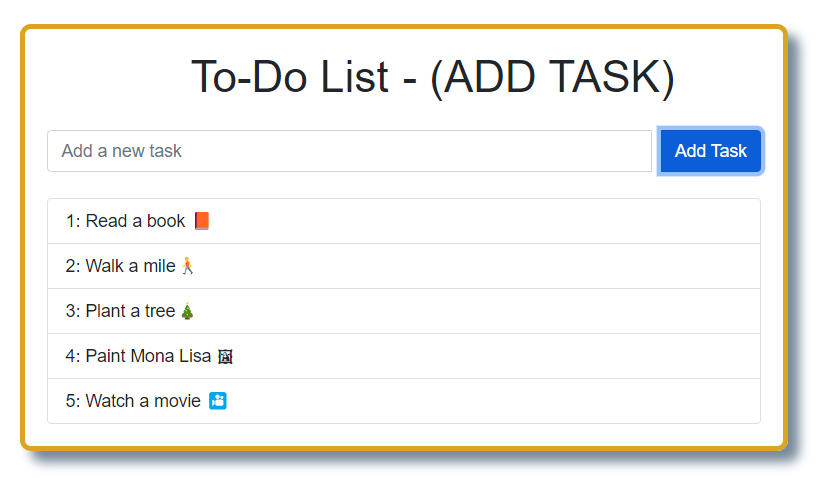
Now, when you return to the browser, you should see our initial app looking like this:

With the added list of tasks 🚵:

If you look at App.jsx, you'll notice I haven't created any components. Instead, I used a straightforward approach with simple functions within a single App component, which was then exported to main.js. This is because it's often challenging for someone new to React to plan everything from the start. My advice is to use this approach initially. Once you become more familiar with React, you can separate each functionality into its components and files.
🗝 Key things to watch out for: 👀
➡ AddTask function: 📝
  // Declaring state variables
  const [tasks, setTasks] = useState([]); // State to store the list of tasks
  const [task, setTask] = useState(""); // State to store the current task input
  const [error, setError] = useState(""); // State to store the error message

  // Function to add a new task
  const addTask = (task) => {
    setTasks([...tasks, task]);
  // Add the new task to the existing tasks array, use of spread operator
  };
➡ handleSubmit function: 📤
  // Function to handle form submission
  const handleSubmit = (e) => {
    e.preventDefault(); // Prevent default form submission behavior

    if (task.trim() === "") {
      setError("Task cannot be empty"); // Set error message if the task input is empty
    } else {
      addTask({ id: Date.now(), text: task }); // Generate a unique ID and set the task text
      setTask(""); // Clear the input field after adding the task
      setError(""); // Clear the error message after successful submission
    }
  };
➡ Binding handleSubmit with forms onSubmit event: 📣
<form onSubmit={handleSubmit} className="mb-4">
➡ Using input fields onChange event to setTask 💫
onChange={(e) => setTask(e.target.value)}
💡 Notes about React's onSubmit & onChange handlers ♧: React's onSubmit and onChange handlers differ from JavaScript's native event handling in a few key ways, primarily due to the way React manages the Virtual DOM and synthetic events. These synthetic events are React's cross-browser wrapper around the browser's native events. They have the same interface as native events, but React manages them to ensure consistent behaviour across different browsers.
Hence, In React, when you use onSubmit or onChange, you're actually using these synthetic events, which might behave slightly differently than native events, especially in terms of event pooling and performance optimisations.
➡ Task list rendering: 📋
{/* Task list rendering with map method */}
{/* index variable was used to keep the sequence */}
  <ul className="list-group">
        {tasks.map((task, index) => (
          <li key={task.id} className="list-group-item">
            {index + 1}: {task.text}
          </li>
        ))}
  </ul>
Here, we haven't used the Firebase database yet. We'll add that in the final part of our series. However, in the next part (Part 3), we will introduce a new feature called toggleTaskDone. When the user clicks on a task to mark it as done, it will move to the end of the list and be highlighted with a CSS style to show it is completed.
Subscribe to my newsletter
Read articles from Subrata Ch directly inside your inbox. Subscribe to the newsletter, and don't miss out.
Written by

Subrata Ch
Subrata Ch
Software Engineer & Consultant