🚀11 Microservice CICD Pipeline DevOps Project | Ultimate DevOps Pipeline🚀
 Divya vasant satpute
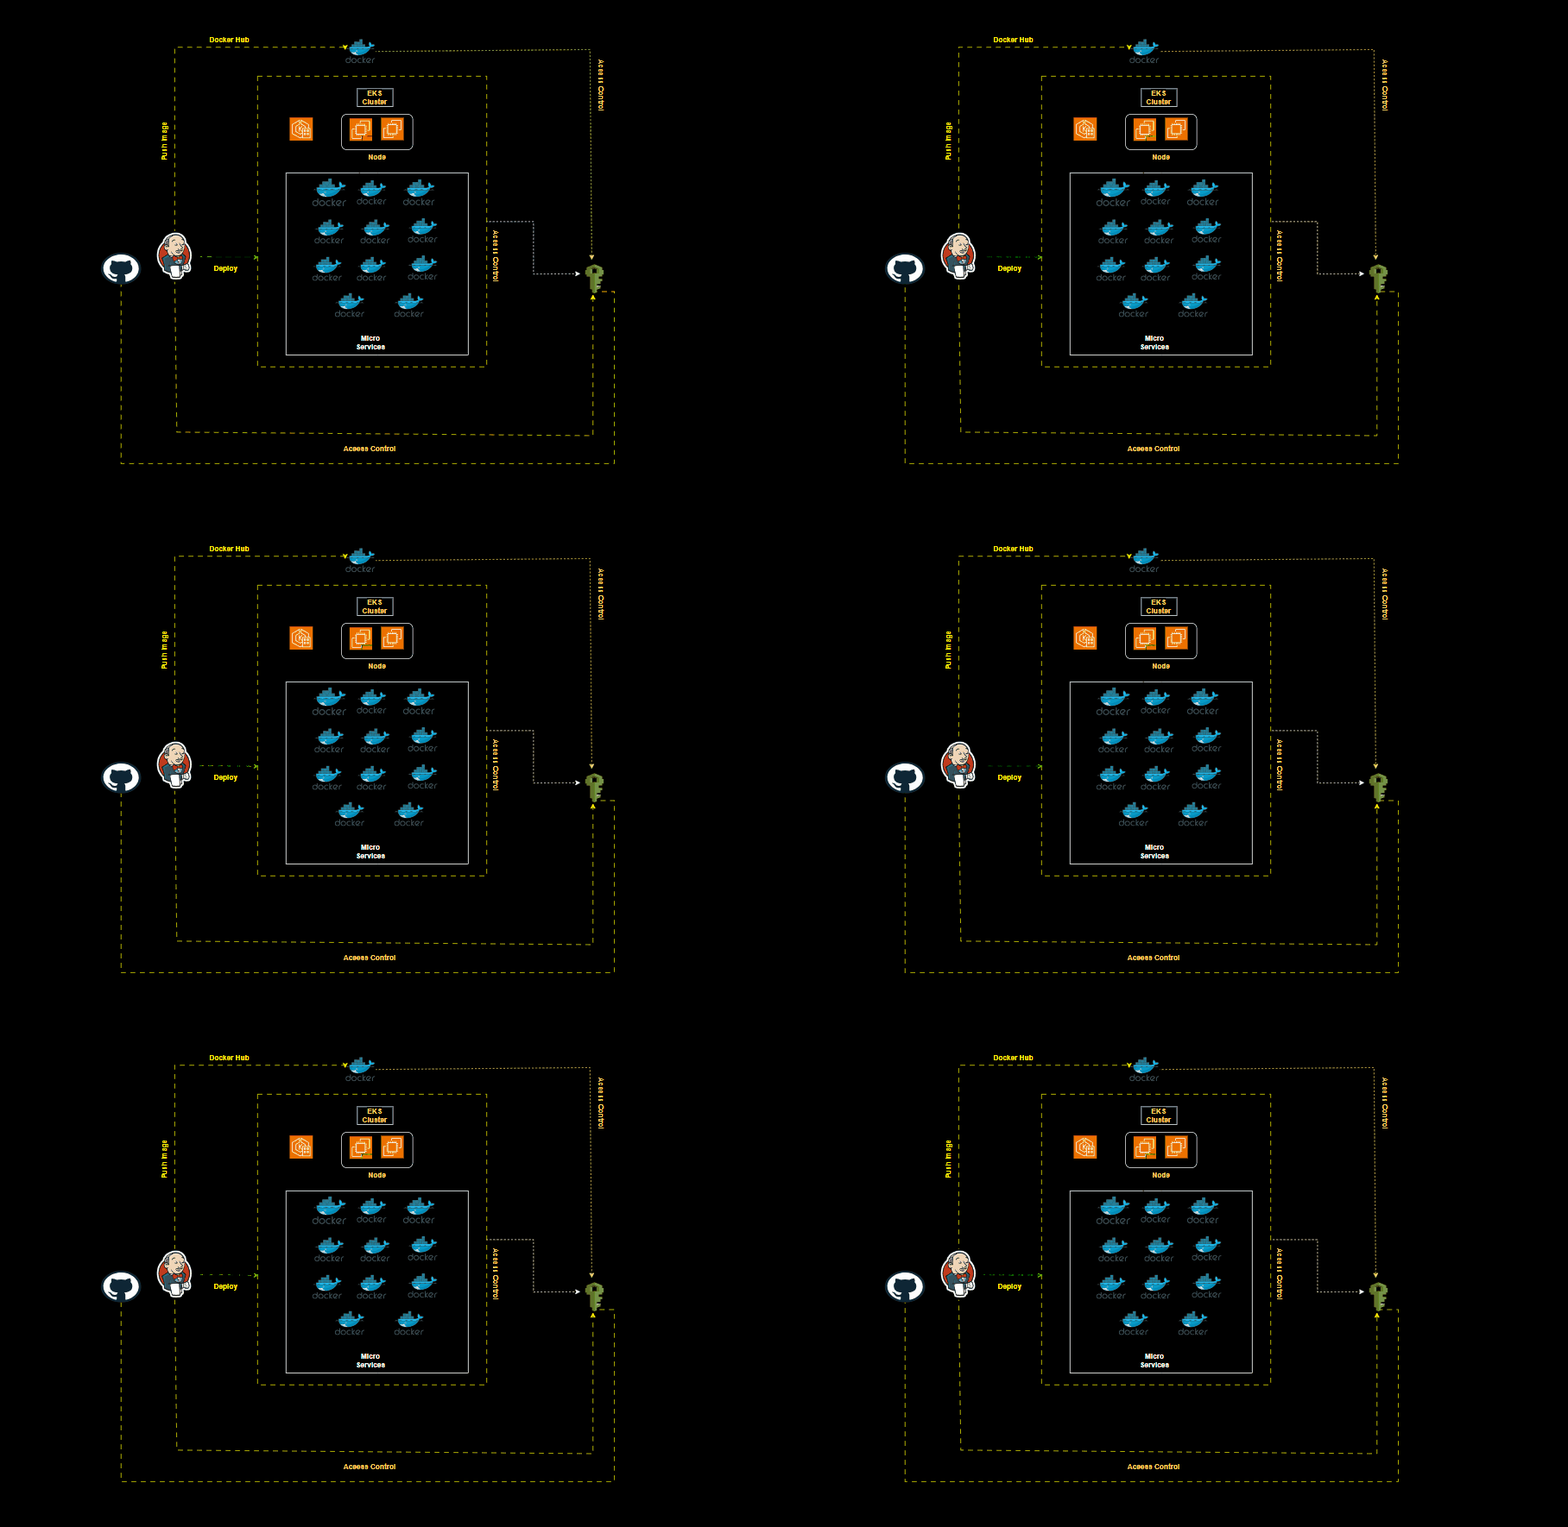
Embarking on a microservices project can be an exciting journey, filled with opportunities to create scalable, flexible, and resilient applications. Here’s a comprehensive, step-by-step guide to help you navigate this architectural paradigm and build a successful microservices-based application. Let’s dive in! 🌟
Prerequisites
First Create a user in AWS IAM with any name
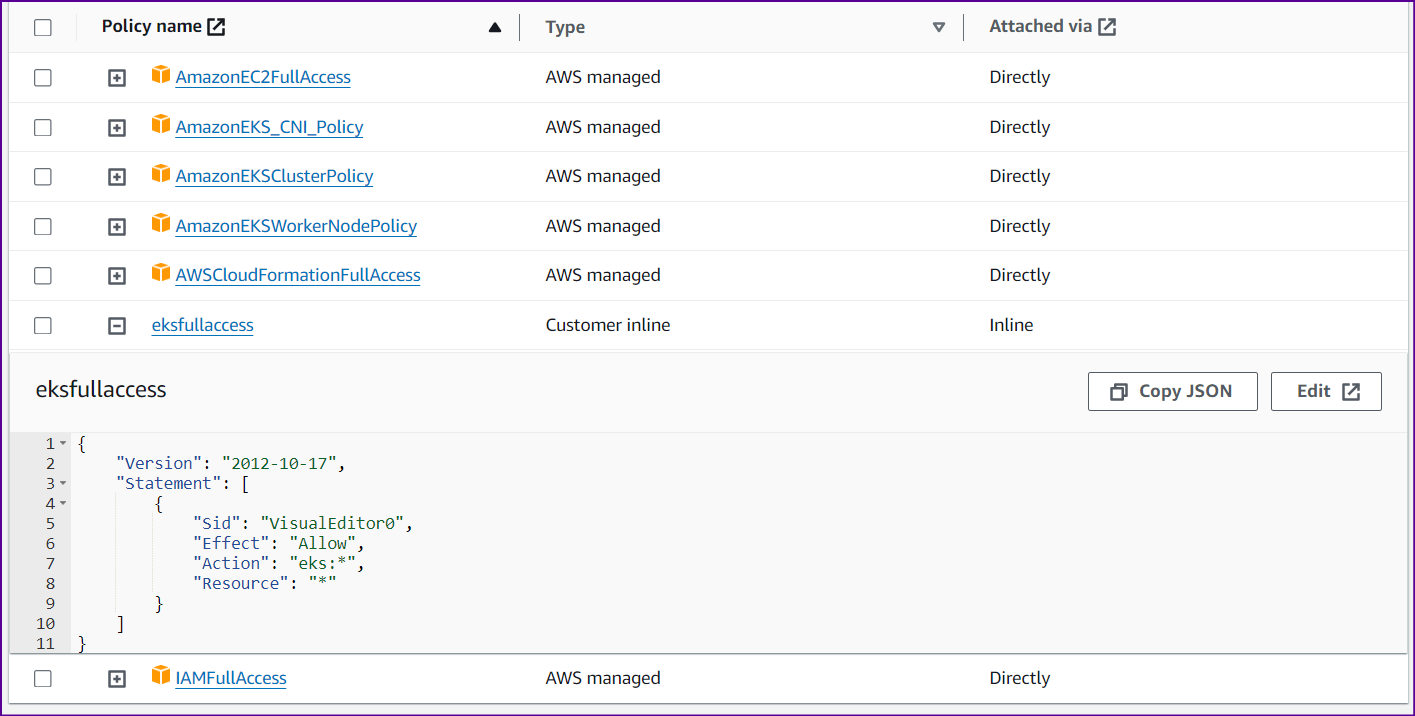
Attach Policies to the newly created user
AmazonEC2FullAccess
AmazonEKS_CNI_Policy
AmazonEKSClusterPolicy
AmazonEKSWorkerNodePolicy
AWSCloudFormationFullAccess
IAMFullAccess
One more policy we need to create with content as below
 {
     "Version": "2012-10-17",
     "Statement": [
         {
             "Sid": "VisualEditor0",
             "Effect": "Allow",
             "Action": "eks:*",
             "Resource": "*"
         }
     ]
 }
Create EC2 machine with t3medium
update the repo
sudo apt update -y
Make directory
mkdir script
change directory
cd script
make file
sudo vi 1.sh
paste it below commands in this file which install AWS CLI , KUBECTL, EKSCTL
curl "https://awscli.amazonaws.com/awscli-exe-linux-x86_64.zip" -o "awscliv2.zip"
sudo apt install unzip
unzip awscliv2.zip
sudo ./aws/install

curl -o kubectl https://amazon-eks.s3.us-west-2.amazonaws.com/1.19.6/2021-01-05/bin/linux/amd64/kubectl
chmod +x ./kubectl
sudo mv ./kubectl /usr/local/bin
kubectl version --short --client

curl --silent --location "https://github.com/weaveworks/eksctl/releases/latest/download/eksctl_$(uname -s)_amd64.tar.gz" | tar xz -C /tmp
sudo mv /tmp/eksctl /usr/local/bin
eksctl version
Give permission for Excuteble mode
sudo chmod +x 1.sh
Run the script
sudo ./1.sh

configure aws (give access key and secrete key which is you generate on aws console
aws configure

Now create EKS cluster
eksctl create cluster --name=EKS-1 \
                      --region=ap-south-1 \
                      --zones=ap-south-1a,ap-south-1b \
                      --without-nodegroup
#make sure you change region as per your region
Provide oidc provider
eksctl utils associate-iam-oidc-provider \
    --region ap-south-1 \
    --cluster EKS-1 \
    --approve
create node (replace your public key name and region and configure as per your requirement )
eksctl create nodegroup --cluster=EKS-1 \
                       --region=ap-south-1 \
                       --name=node2 \
                       --node-type=t3.medium \
                       --nodes=3 \
                       --nodes-min=2 \
                       --nodes-max=4 \
                       --node-volume-size=20 \
                       --ssh-access \
                       --ssh-public-key=DevOps \
                       --managed \
                       --asg-access \
                       --external-dns-access \
                       --full-ecr-access \
                       --appmesh-access \
                       --alb-ingress-access
Note : Open INBOUND TRAFFIC IN ADDITIONAL Security Group
Now our cluster is ready hurrayyyy
Installation of Jenkins
Prerequisites:
java 17 version installed
sudo vi jenkins.sh
Paste it in file below content
sudo wget -O /usr/share/keyrings/jenkins-keyring.asc \
  https://pkg.jenkins.io/debian-stable/jenkins.io-2023.key
echo "deb [signed-by=/usr/share/keyrings/jenkins-keyring.asc]" \
  https://pkg.jenkins.io/debian-stable binary/ | sudo tee \
  /etc/apt/sources.list.d/jenkins.list > /dev/null
sudo apt-get update
sudo apt-get install jenkins
Give permission to jenkins.sh file
sudo chmod +x jenkins.sh
Run the script
sudo ./jenkins.sh
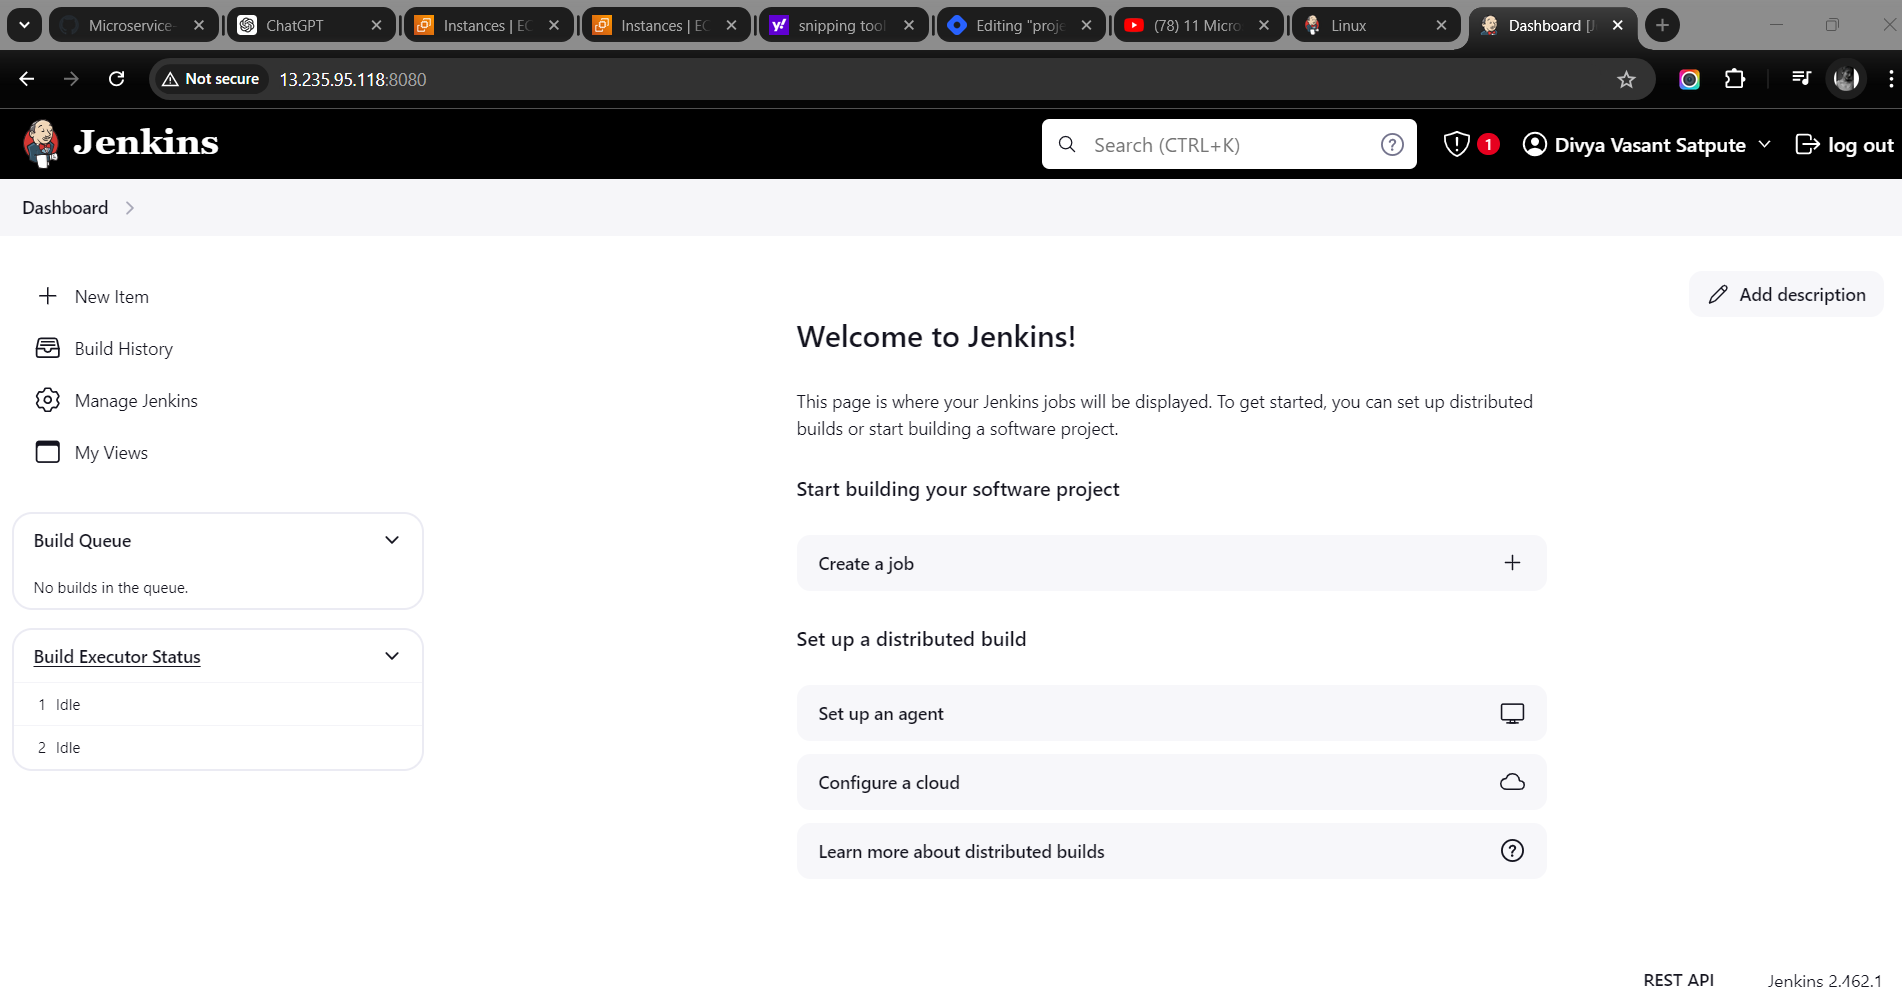
Access your Jenkins on Browser http://publicIP:8080/
Installation Docker
sudo apt install docker.io -y
Give permission to Docker socket
sudo chmod 666 /var/run/docker.sock
Installation plugins on Jenkins Dashboard
For Docker
Manage Jenkins ---> plugins ---> Available plugins
Docker
Docker pipeline
Docker Commons
Docker slaves
Docker build step
For Kubernetes
Kubernetes
Kubernetes CLI
Kubernetes API
Kubernetes Credentials Provider
for scanning
- Multibranch Scan Webhook Trigger
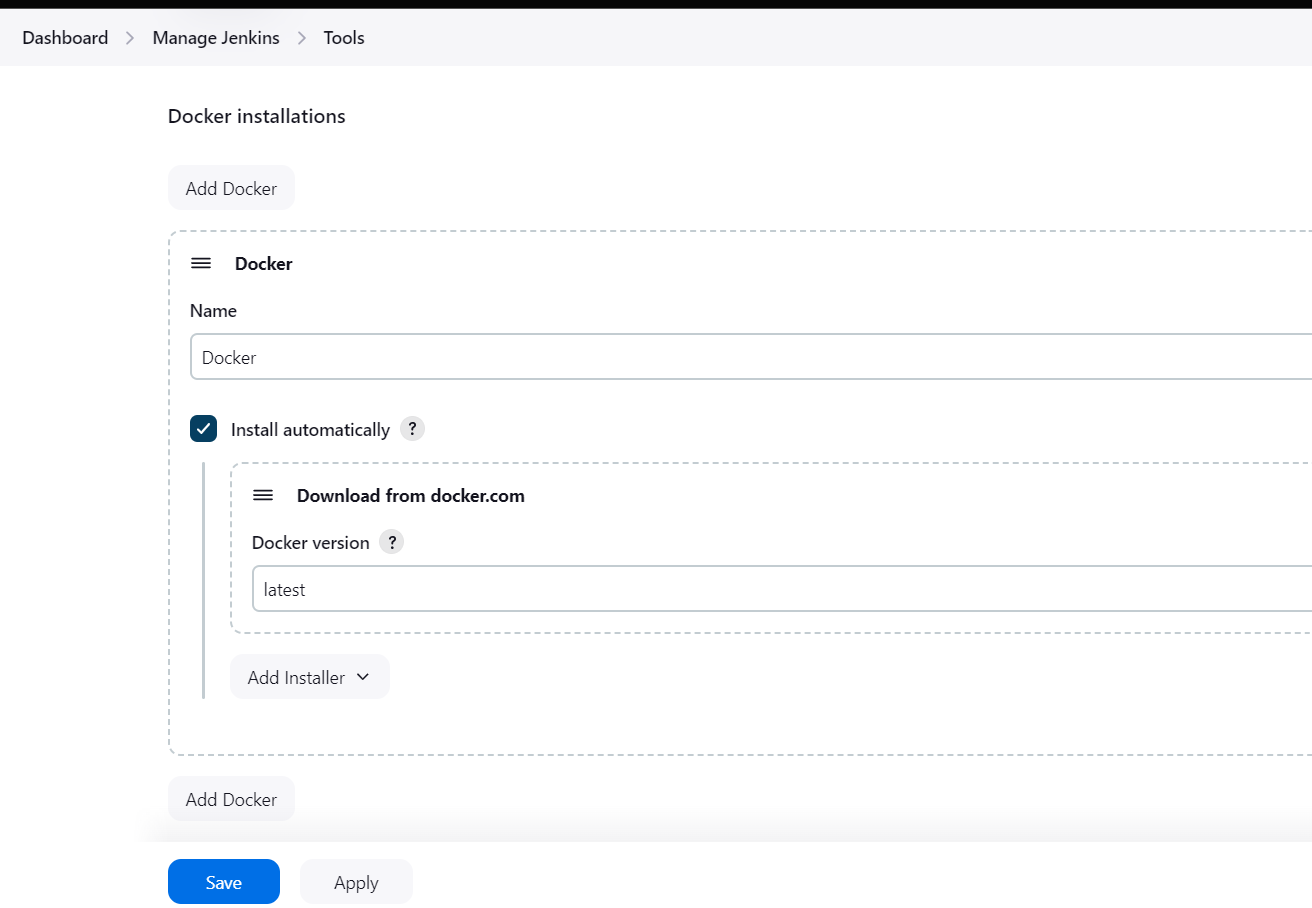
Installation of Tools on Jenkins dashboard
Manage Jenkins --->Global tools ---> docker installation
Credentials
Manage Jenkins---> Credentials----> Global Credentials
add token as a password for docker and also for github

Create Multibranch Pipeline
Go to New Item
give name of project
Select Multibranch pipeline
select Branch Source (Git)
select Scan Multibranch Pipeline Triggers
select Scan by webhook and add token
Create Webhook
Go to github repo ---->settings
select webhhok
add this two configuration make sure replace your information
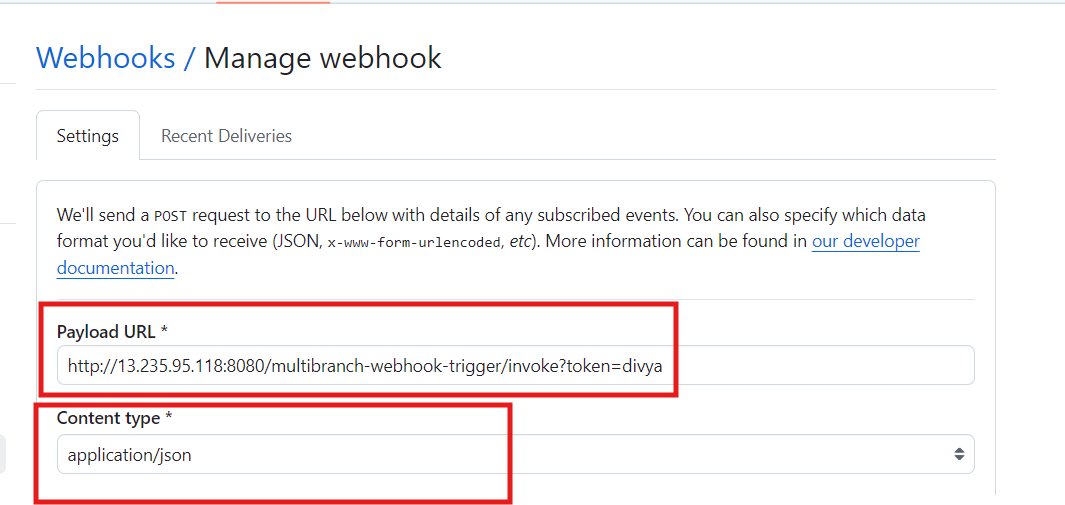

once you trigger the webhook its automatically job done
Deployment
Create namespace
kubectl create namespace webaaps

we have to create service account
sudo vi svc.yml
apiVersion: v1
kind: ServiceAccount
metadata:
  name: jenkins
  namespace: webapps
create this by run this command
kubectl apply -f svc.yml

create role for this service
vi role.yml
apiVersion: rbac.authorization.k8s.io/v1
kind: Role
metadata:
  name: app-role
  namespace: webaaps
rules:
  - apiGroups:
        - ""
        - apps
        - autoscaling
        - batch
        - extensions
        - policy
        - rbac.authorization.k8s.io
    resources:
      - pods
      - componentstatuses
      - configmaps
      - daemonsets
      - deployments
      - events
      - endpoints
      - horizontalpodautoscalers
      - ingress
      - jobs
      - limitranges
      - namespaces
      - nodes
      - pods
      - persistentvolumes
      - persistentvolumeclaims
      - resourcequotas
      - replicasets
      - replicationcontrollers
      - serviceaccounts
      - services
    verbs: ["get", "list", "watch", "create", "update", "patch", "delete"]
Create this by following command
kubectl apply -f role.yml

now bind it
sudo vi bind.yml
apiVersion: rbac.authorization.k8s.io/v1
kind: RoleBinding
metadata:
  name: app-rolebinding
  namespace: webaaps
roleRef:
  apiGroup: rbac.authorization.k8s.io
  kind: Role
  name: app-role
subjects:
- namespace: webaaps
  kind: ServiceAccount
  name: jenkins
Run this
kubectl apply -f bind.yml

Generate token using service account in the namespace
sudo vi sec.yml
apiVersion: v1
kind: Secret
type: kubernetes.io/service-account-token
metadata:
  name: mysecretname
  annotations:
    kubernetes.io/service-account.name: jenkins
create this by following command
kubectl apply -f sec.yml -n webaaps
we want token now display token by following command
kubectl describe secret mysecretname -n webaaps
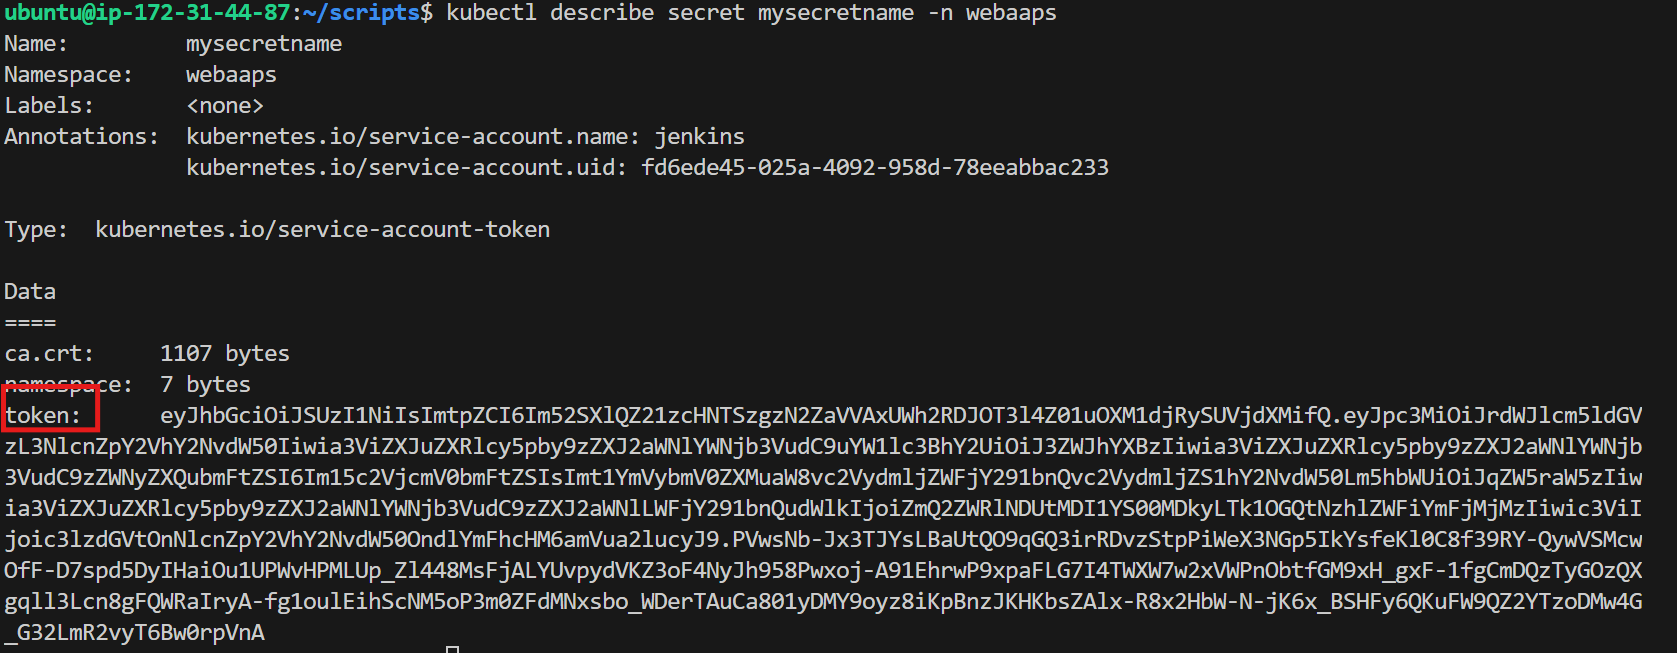
add this above token as a k8 creadentials
write deployment jenkinsfile replace this with your cluster information
pipeline {
    agent any

    stages {
        stage('Deploy Kubernetes') {
            steps {
                withKubeCredentials(kubectlCredentials: [[
                    caCertificate: '',
                    clusterName: 'EKS-1',
                    contextName: '',
                    credentialsId: 'k8-token',
                    namespace: 'webaaps',
                    serverUrl: 'https://FACF5859BB7FEC1D667A82242A1A14E0.gr7.ap-south-1.eks.amazonaws.com'
                ]]) {
                    sh "kubectl apply -f deployment-service.yml"
                    sleep 60
                }
            }
        }

        stage('Verify Deployment') {
            steps {
                withKubeCredentials(kubectlCredentials: [[
                    caCertificate: '',
                    clusterName: 'EKS-1',
                    contextName: '',
                    credentialsId: 'k8-token',
                    namespace: 'webaaps',
                    serverUrl: 'https://FACF5859BB7FEC1D667A82242A1A14E0.gr7.ap-south-1.eks.amazonaws.com'
                ]]) {
                    sh "kubectl get svc -n webaaps"
                }
            }
        }
    }
}
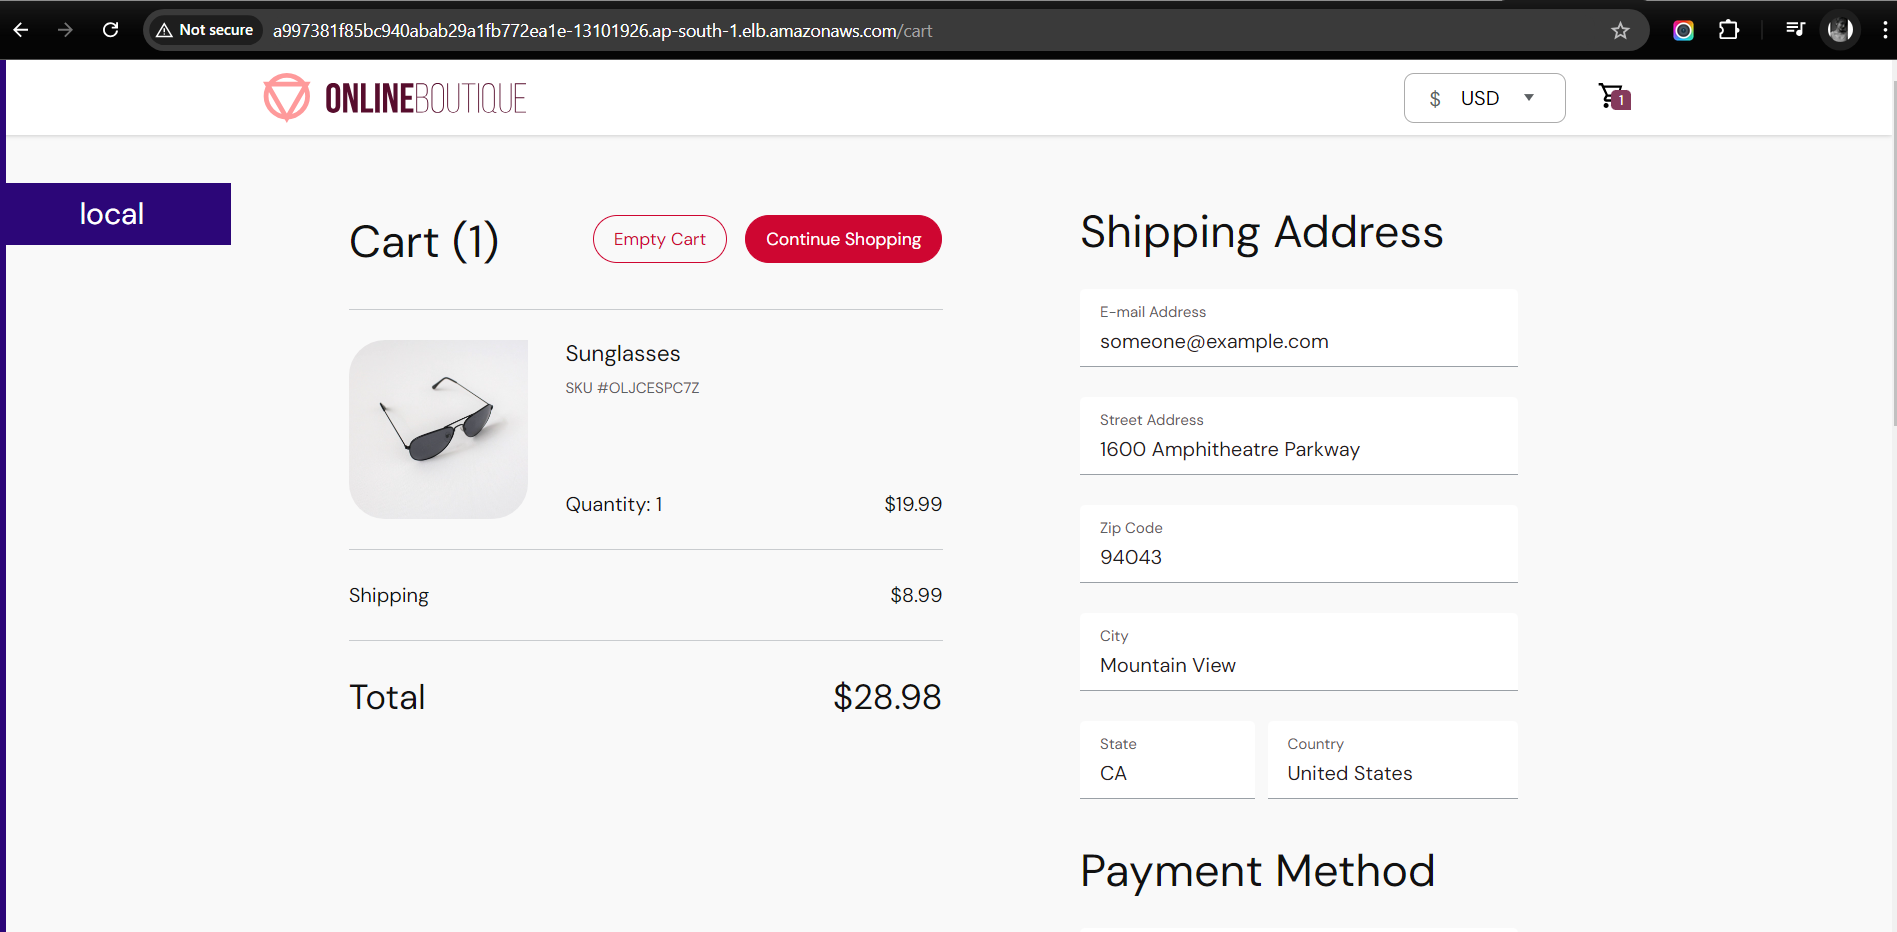
Acesss your application by this url : http://a997381f85bc940abab29a1fb772ea1e-13101926.ap-south-1.elb.amazonaws.com/
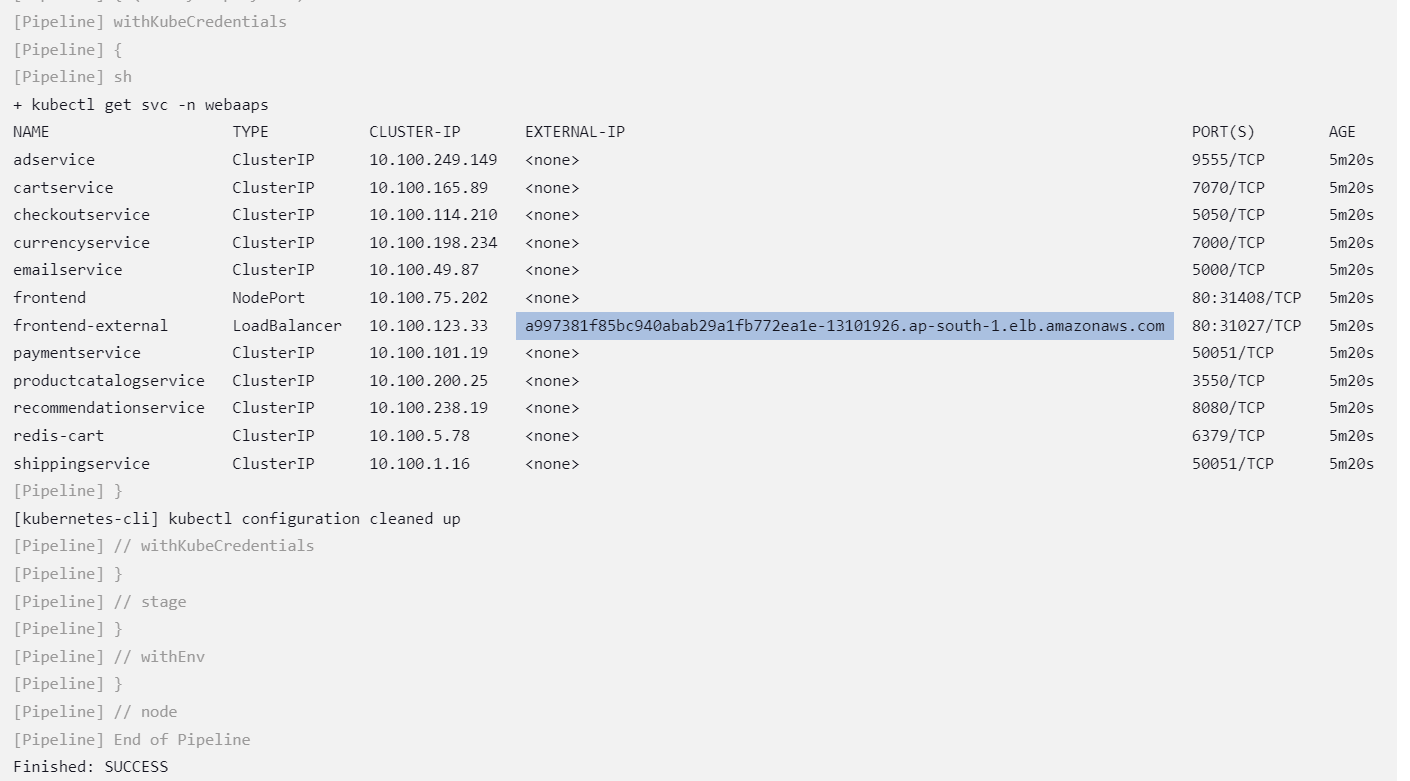
Test Result
Build Success
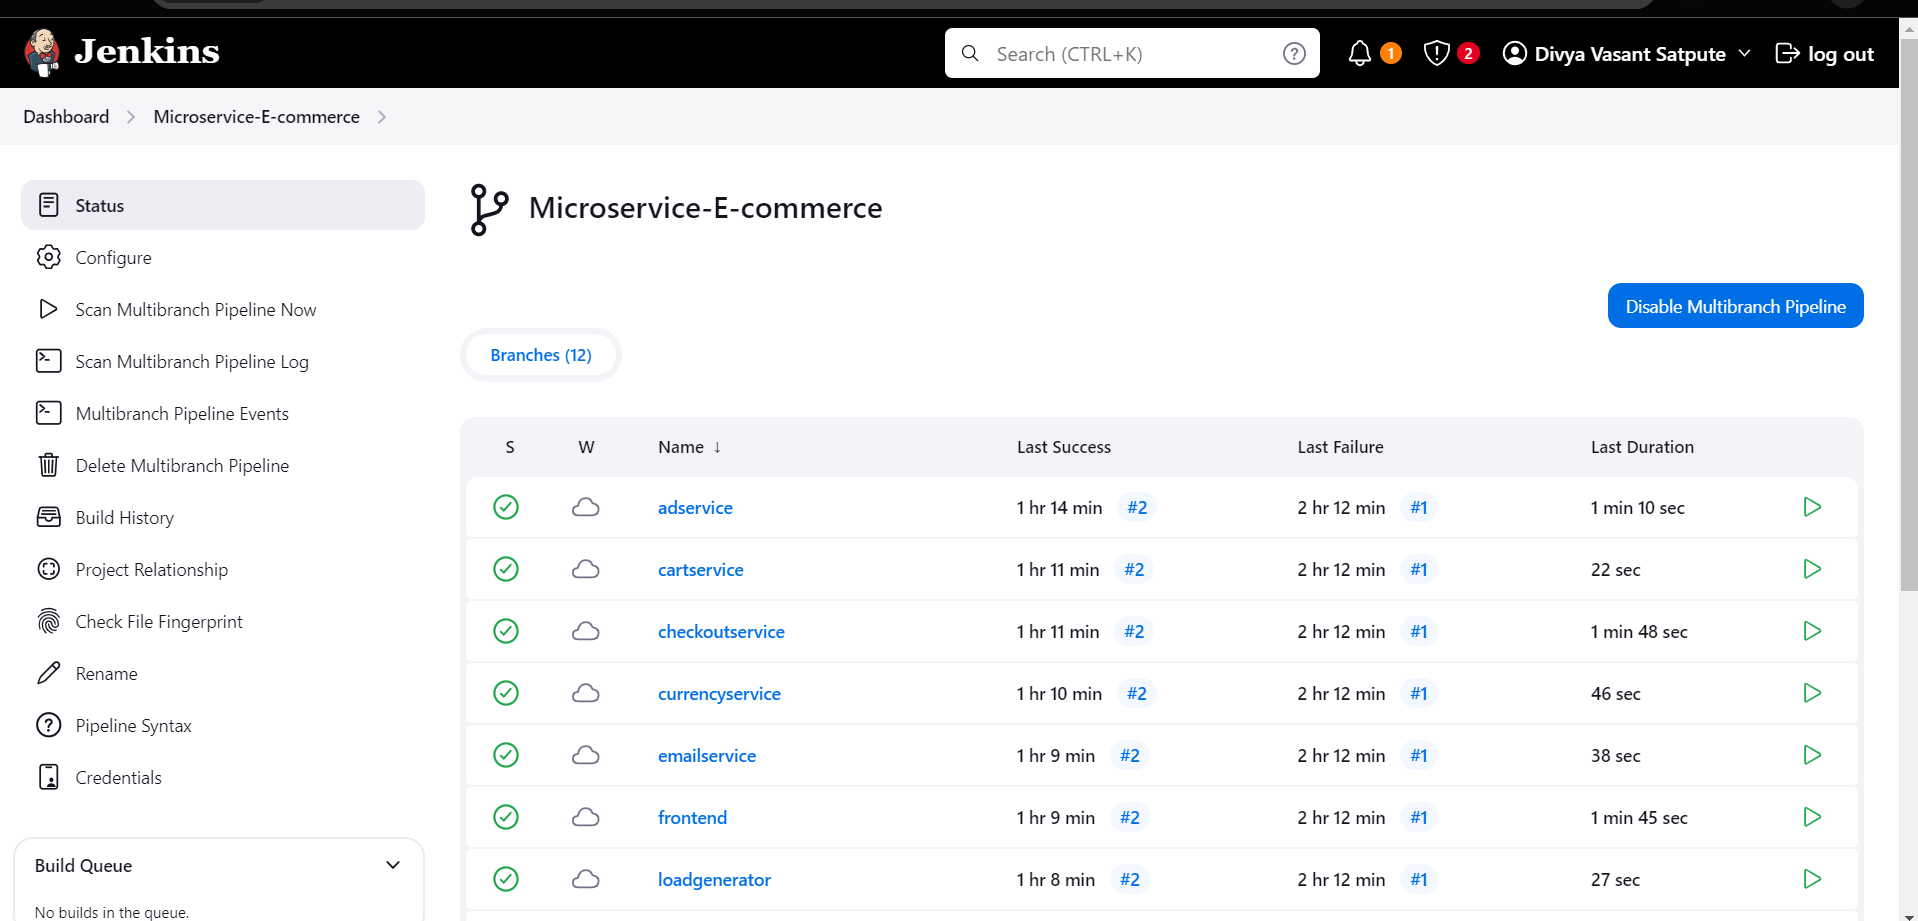
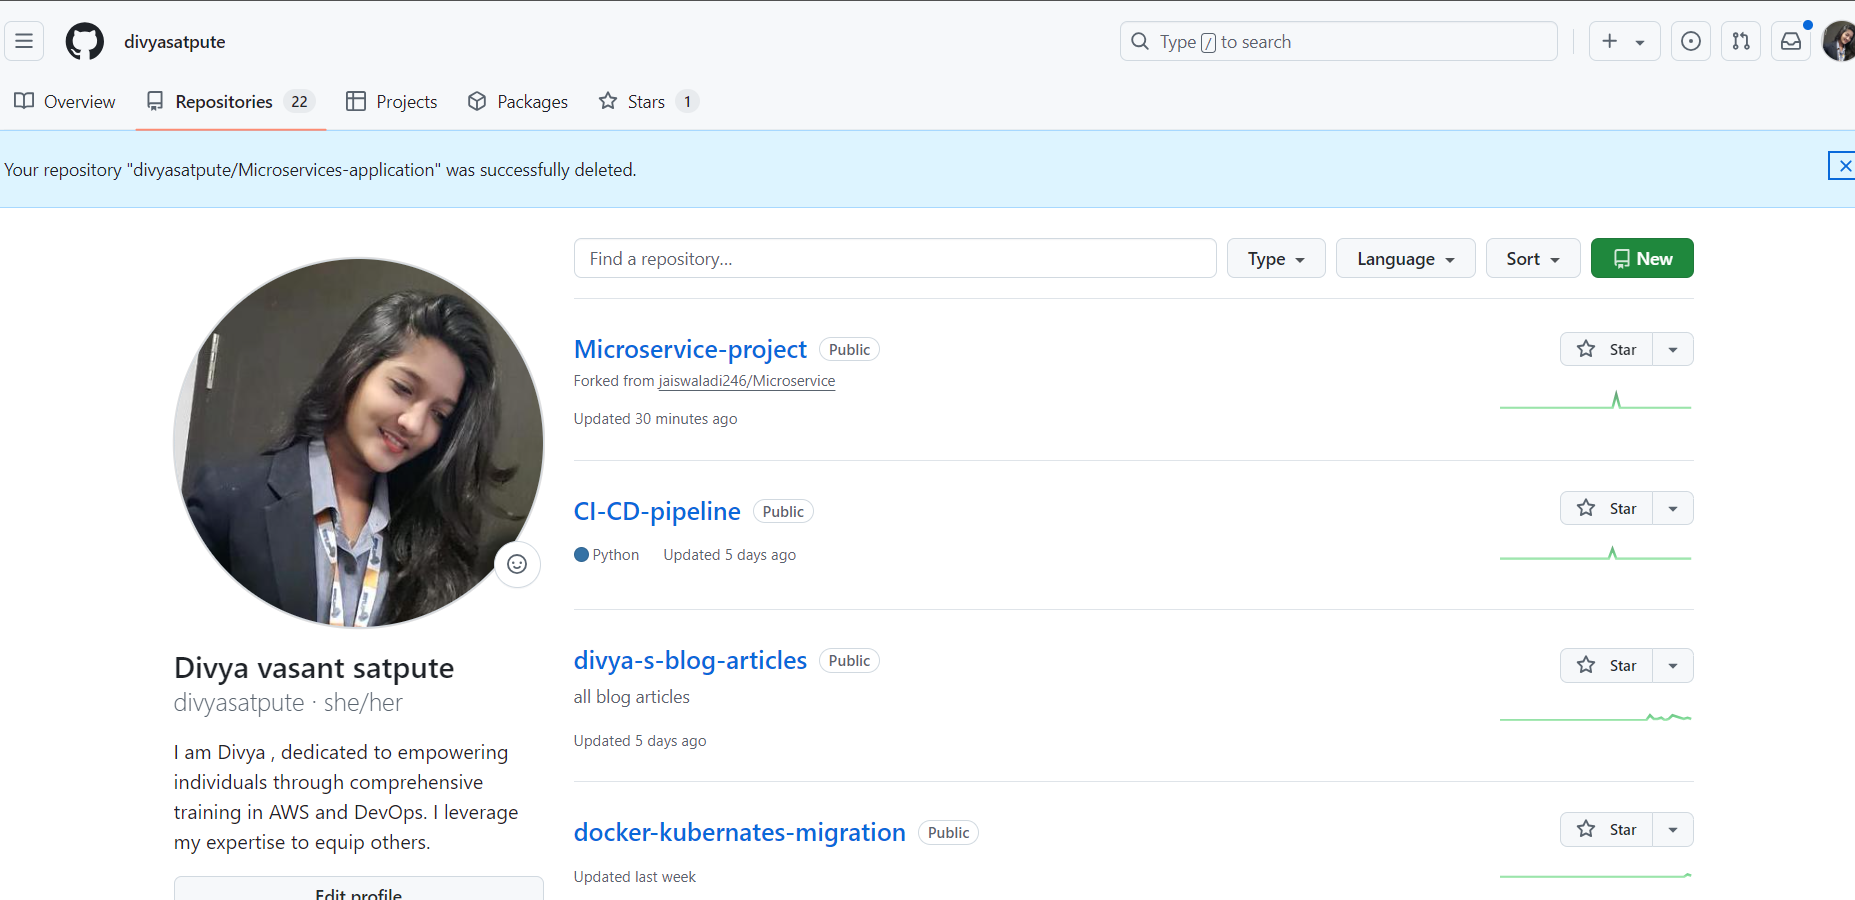
Github repo
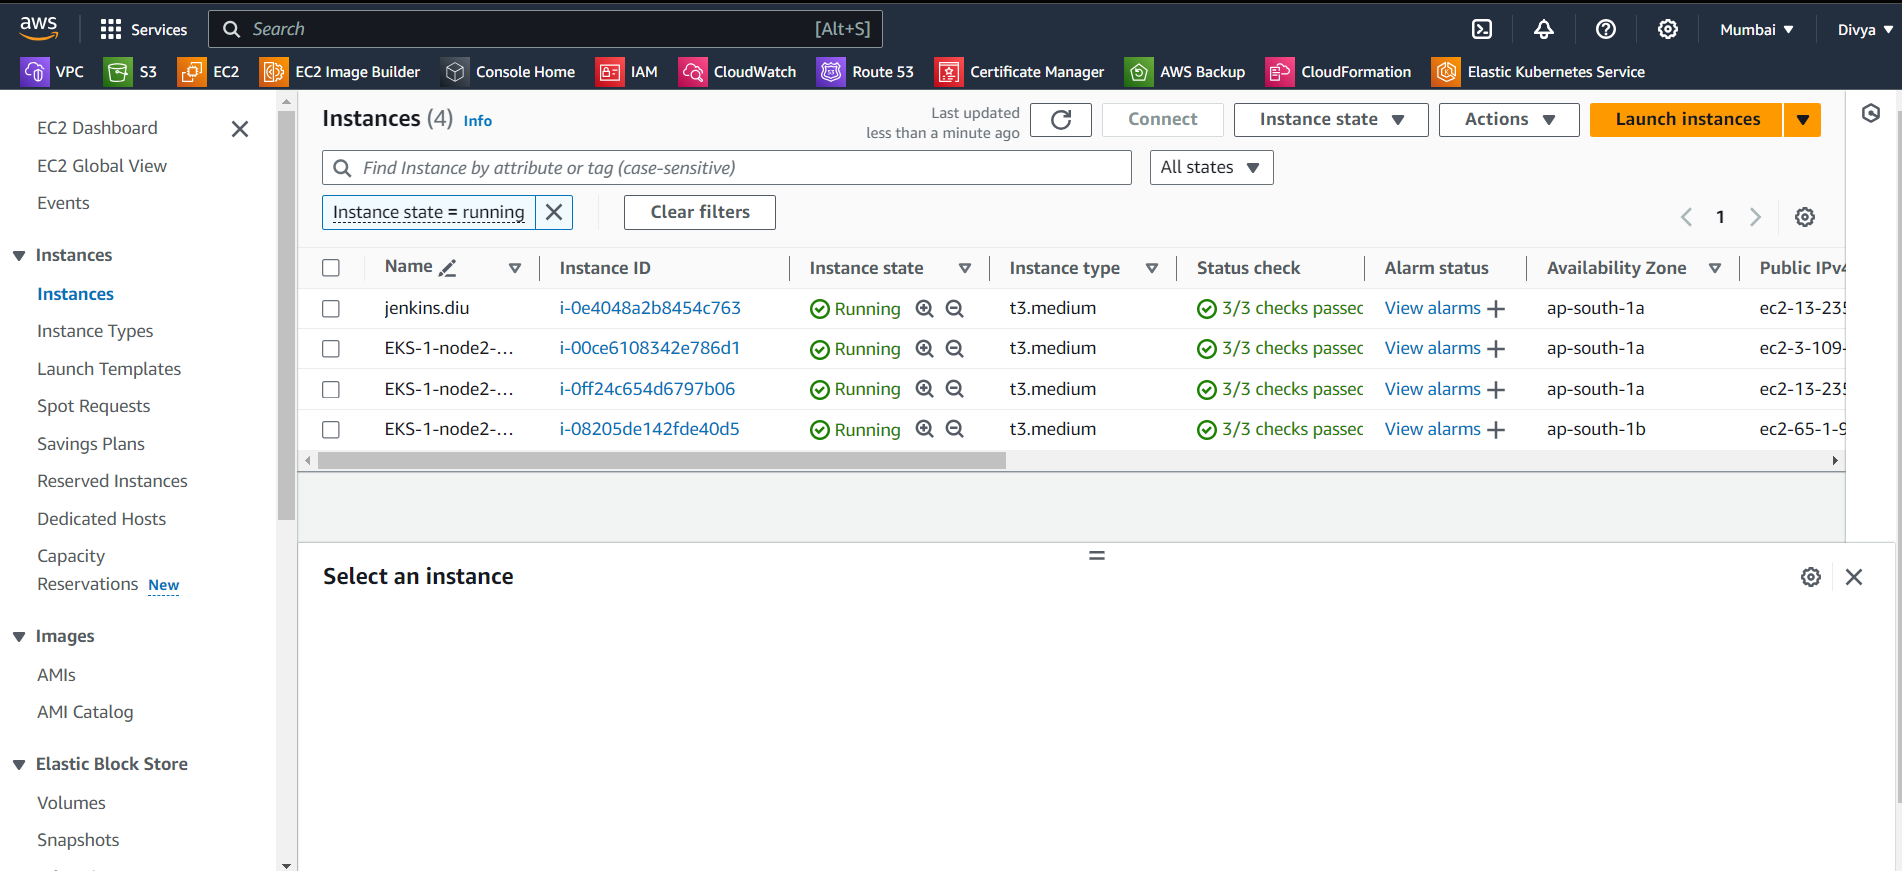
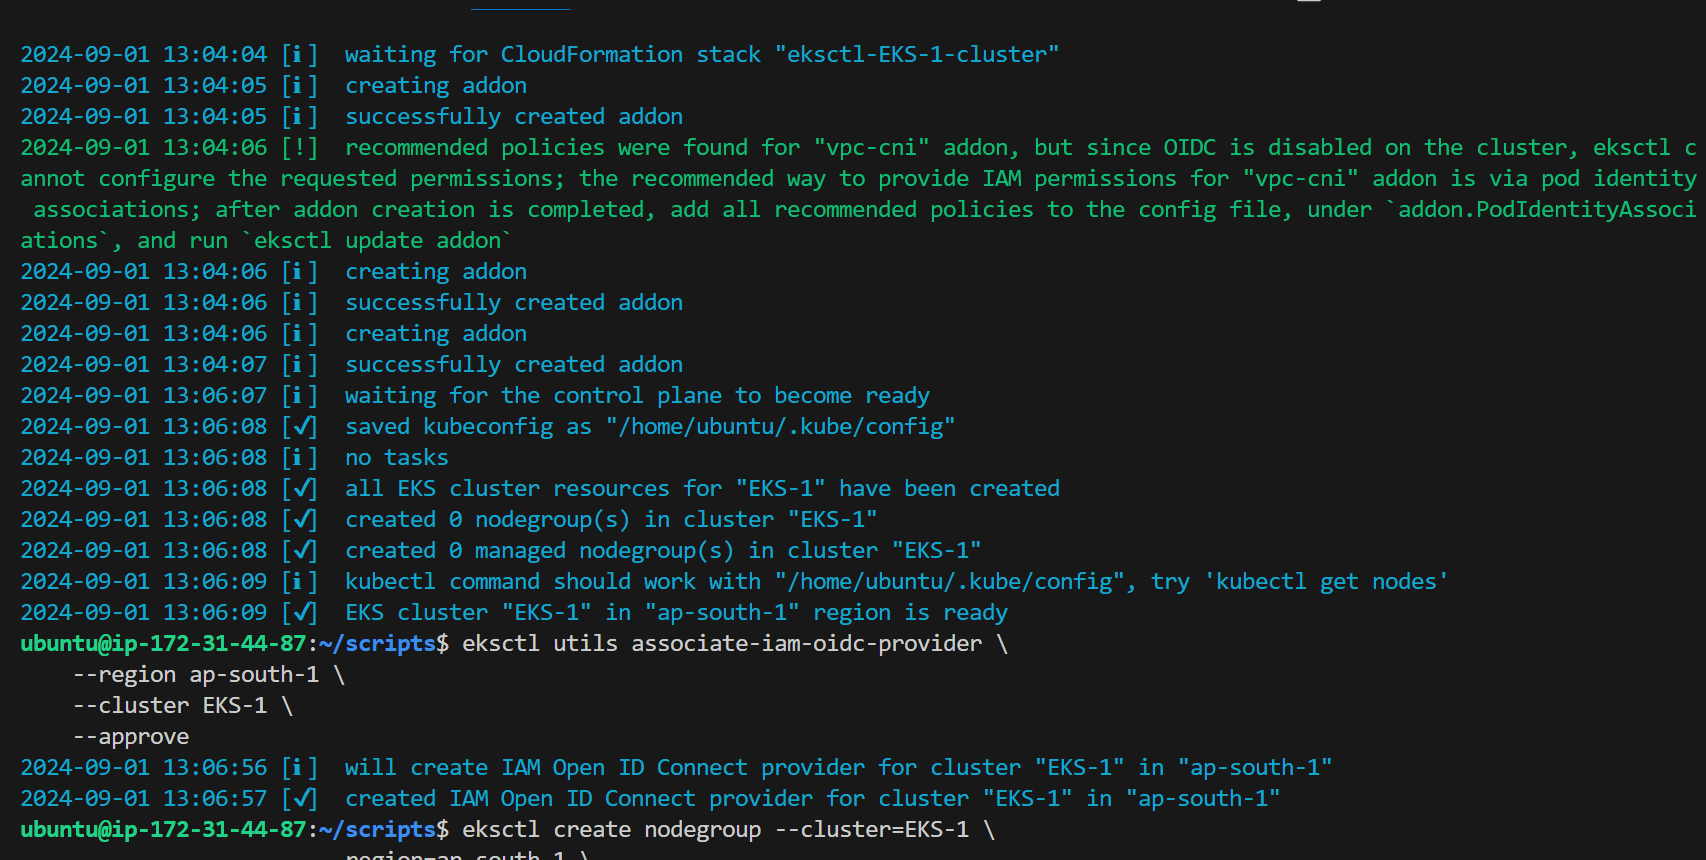
Cluster created successfully
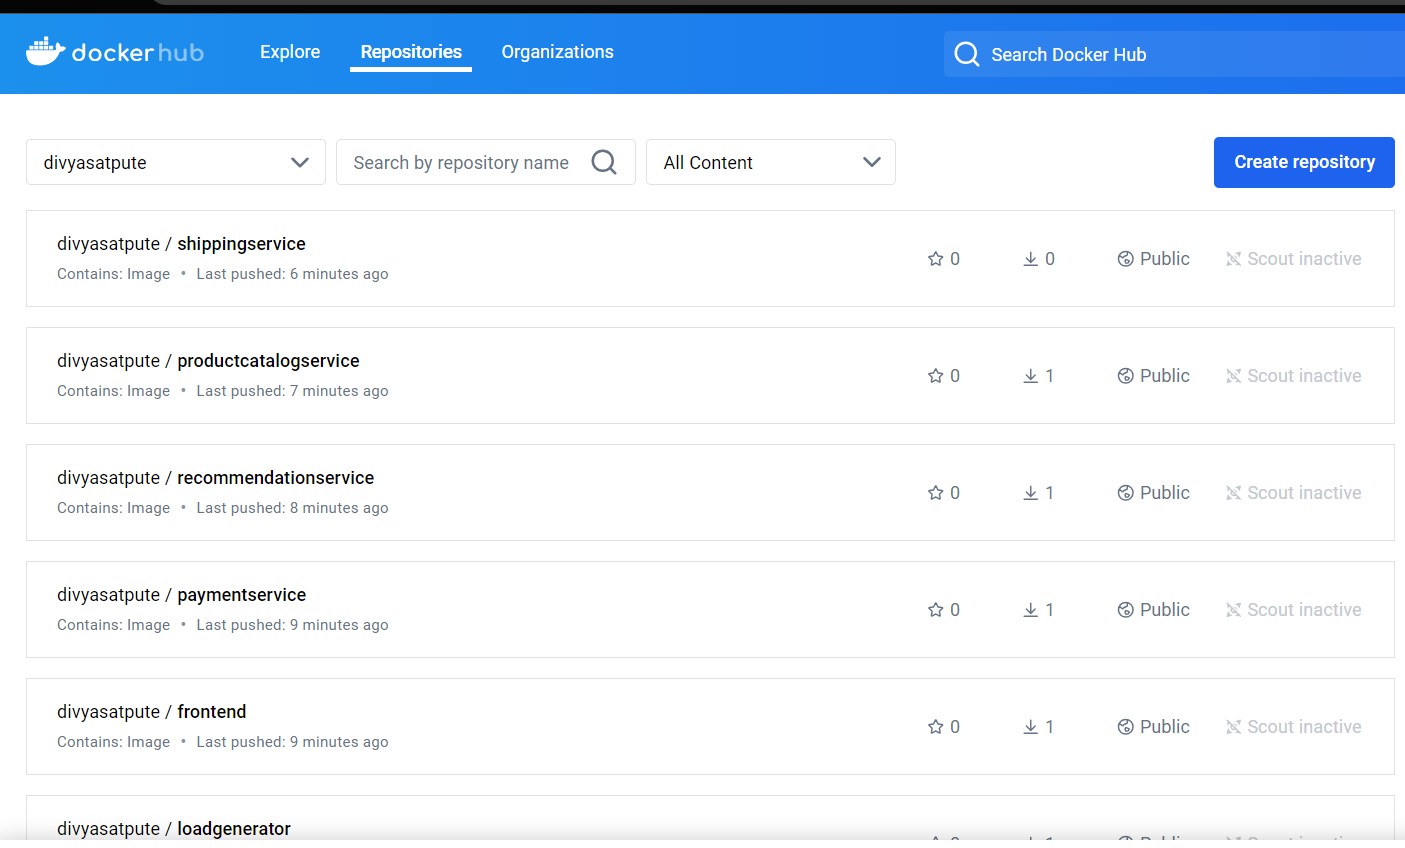
Docker hub
Final URL

Application

Conclusion 🌟
Building a microservices-based application is a rewarding endeavor that brings flexibility, scalability, and resilience to your software architecture. By following this step-by-step guide, you can navigate the complexities of microservices and create a robust application tailored to meet your needs. Happy building! 🚀💻
If you're looking to get a better grasp on Kubernetes deployments, you might find this video super helpful: Check it out here! 🎥✨
It’s packed with useful info and clear examples that can make everything click! Let me know if you have any questions or if there's anything else I can help with. 😊
Subscribe to my newsletter
Read articles from Divya vasant satpute directly inside your inbox. Subscribe to the newsletter, and don't miss out.
Written by

Divya vasant satpute
Divya vasant satpute
, I'm a seasoned DevOps engineer 🛠️ with a knack for optimizing software development lifecycles and infrastructure operations. 💡 Specializing in cutting-edge DevOps practices and proficient in tools like Docker, Kubernetes, Ansible, and more, I'm committed to driving digital transformation and empowering teams to deliver high-quality software with speed and confidence. 💻