End-to-end Guide to building a Reliable Authentication System for a Startup MVP - Part 2
 Taiwo Ogunola
In this part of our guide, we will walk you through the process of integrating Facebook OAuth for user authentication. This step-by-step tutorial will help you create a Facebook OAuth client, configure the necessary settings, and implement the Facebook Passport strategy in your application. By the end of this guide, you will have a fully functional Facebook OAuth integration, ready to enhance the security and user experience of your startup MVP.
Creating Facebook OAuth Client
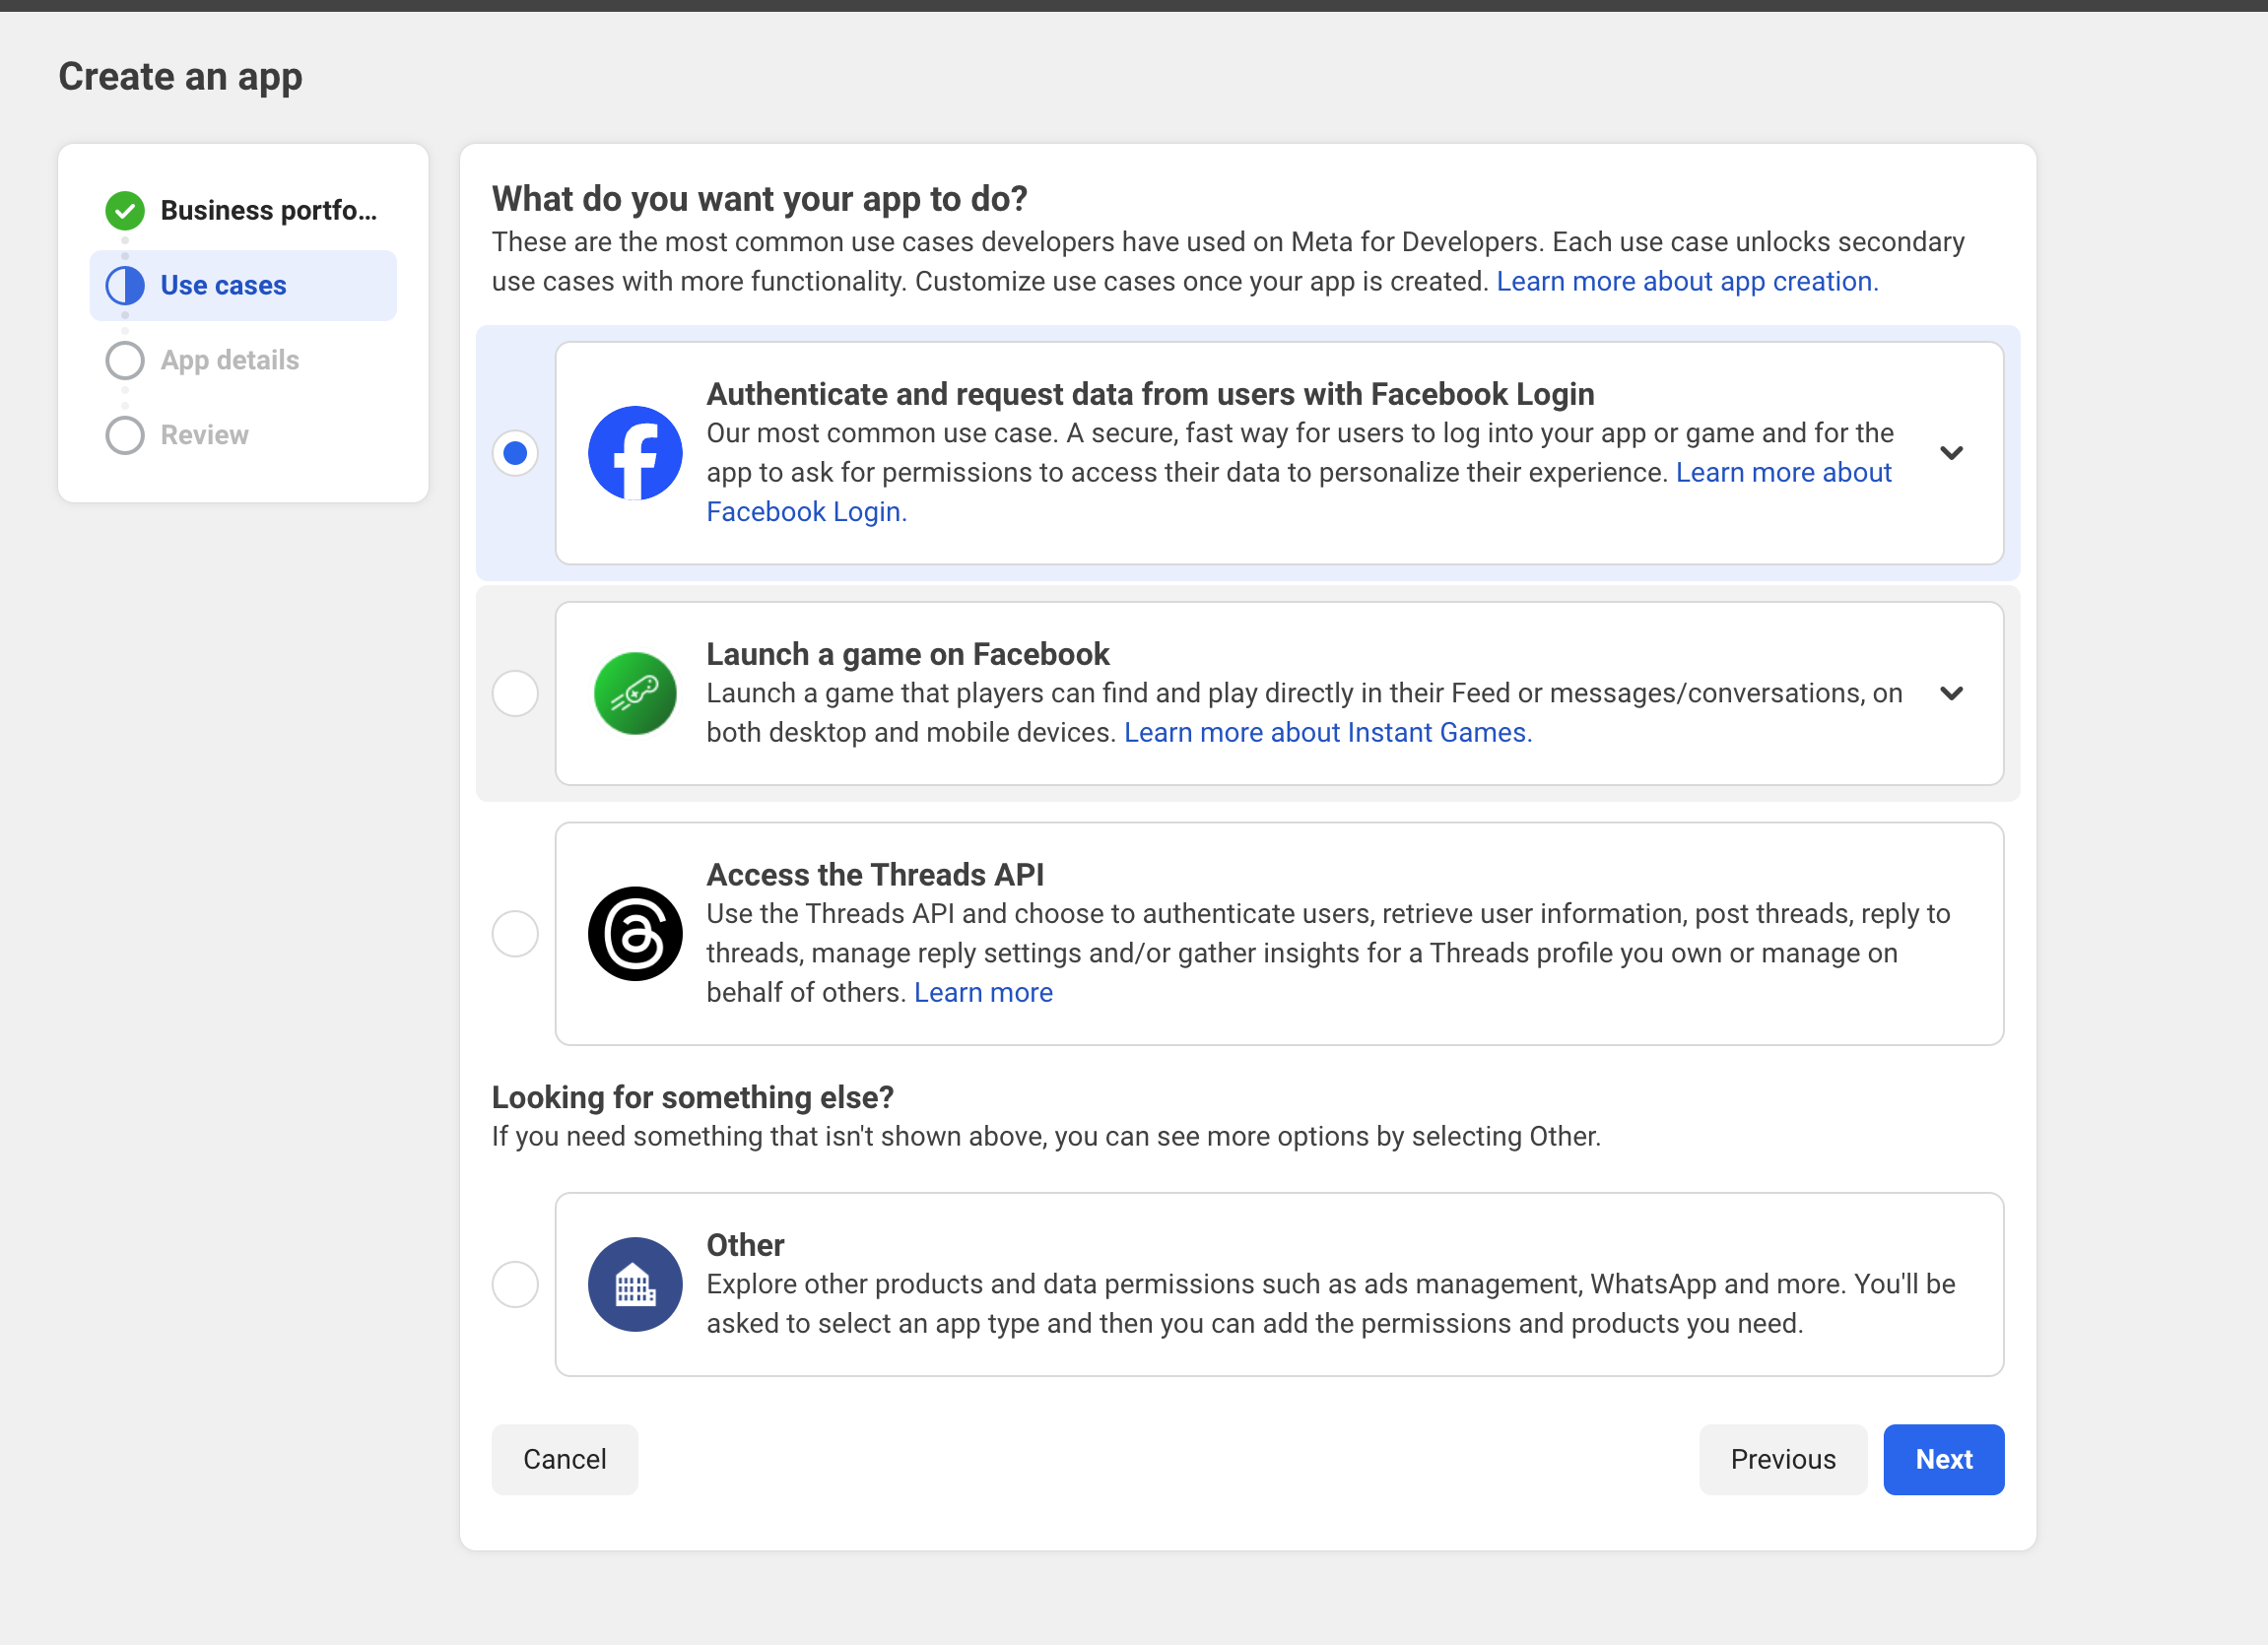
Head to Facebook for developers to create an OAuth client app:
Chose the first option Authenticate and request data from users with Facebook Login

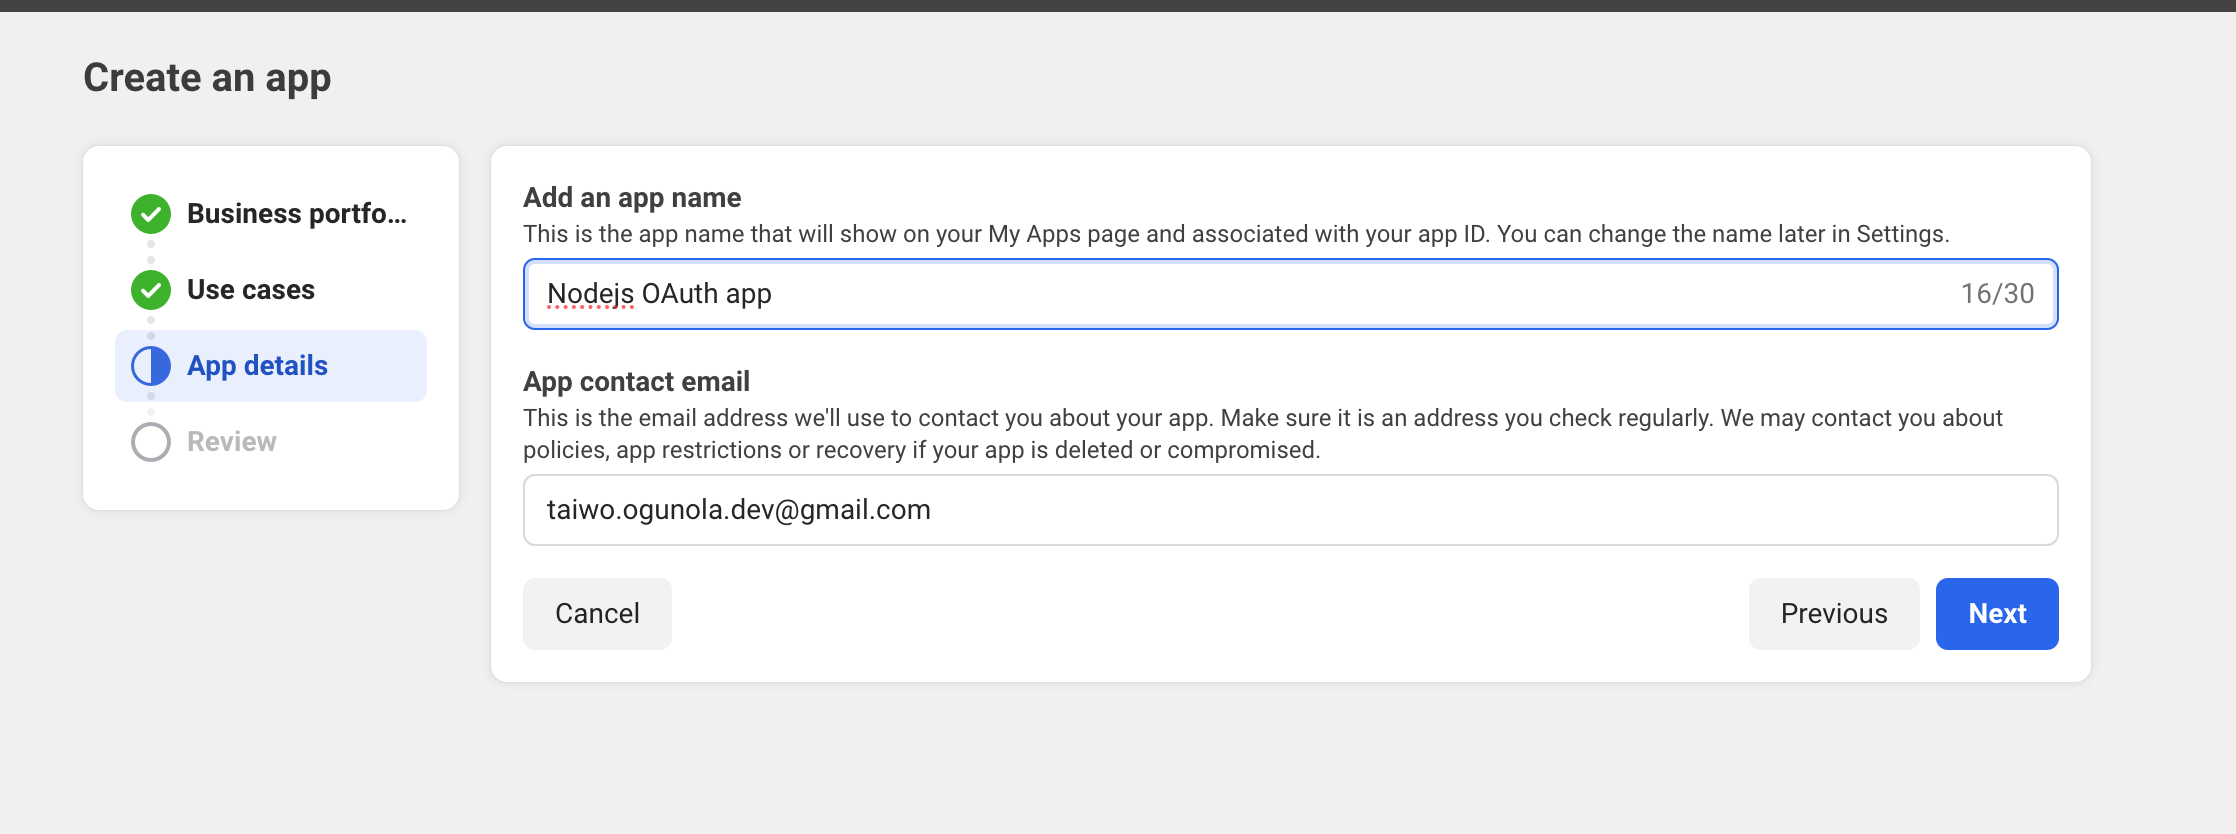
Add the necessary details for your app:

Review your changes, once you are done, you will be redirected to your dashboard.
On your dashboard, you will find the Basic Settings at the bottom left of the screen, click on Basic, you will find your App ID and your App Secrets.
Copy your secrets, FACEBOOK_OAUTH_CLIENT_ID is simply your App ID, FACEBOOK_OAUTH_SECRET is your App Secret.
FACEBOOK_OAUTH_CALLBACK_URL should match to your redirect callback on your server.

This callback URL is where the Facebook OAuth client will redirect your user after they have given your app consent. We will handle user creation at this URL in our app. You can add this on the Advanced settings page:

Make sure you have different OAuth client apps for each environment, such as development, staging, and production. In our setup, we use localhost because we are in development. In production, you would use your actual server domain URL.
Facebook Passport Strategy
In our facebook.strategy.ts file, we handle the callback in our validate method. This will set the user to the request object if findOAuthUserOrCreate is successful, and we can access the user in our controller via req.user.
  async validate(
    accessToken: string,
    _refreshToken: string,
    profile: Profile,
    done: VerifyCallback,
  ) {
    const { id, name, emails, profileUrl } = profile;
    const oAuthUser: OAuthUserType = {
      id,
      email: emails[0].value,
      firstName: name.givenName,
      lastName: name.familyName,
      picture: profileUrl,
      accessToken,
    };

    const user = await this.authService.findOAuthUserOrCreate(
      oAuthUser,
      'facebook',
    );

    return done(null, user);
  }
Facebook OAuth Routes
Two routes were defined in our facebook-auth.controller.ts:
GET /oauth/facebook: Will initiate the Facebook OAuth flow./oauth/facebook/callbackis the redirect call, where we will handle the user sign-on, make sure it matches the value on your Facebook dashboard.
And in our redirect callback, we are generating the tokens, setting the cookies, and then redirecting back to the frontend client:
  @Get('facebook')
  @UseGuards(AuthGuard('facebook'))
  async facebookAuth() {
    console.log('beginning facebook oauth');
  }

  @Get('facebook/callback')
  @UseGuards(AuthGuard('facebook'))
  async facebookAuthRedirect(
    @Req() req: RequestWithPassportUser,
    @Res() res: Response,
  ) {
    await this.tokenService.setAuthCookies(res, req.user);

    res
      .status(HttpStatus.OK)
      .redirect(
        this.configService.getOrThrow<string>('frontend_client_origin'),
      );
  }
We used the same callback for both sign-up and sign-in, but you can adjust this to fit your application by creating different callbacks and logic.
This process is almost the same for the majority of other strategies. You can browse various PassportJS strategies here.
Frontend Integration
- To initiate the OAuth flow, we simply open a browser window:
const signUpWithOauth = (provider: 'google' | 'facebook' | 'github') => {
    window.open(`${BASE_API_URL}/oauth/${provider}`, '_self');
};

const signInWithOauth = (provider: 'google' | 'facebook' | 'github') => {
    window.open(`${BASE_API_URL}/oauth/${provider}`, '_self');
};
- Once the OAuth provider authentication flow is complete, our backend server redirects back to our frontend client.
All the code can be accessed on this branch feat/BLOG-2-oauth-sign-ons on Github.
Conclusion
We have successfully integrated the Facebook OAuth flow. The process is similar for Google, GitHub, or any other OAuth provider.
In the next part, we will work on Magic Link authentication.
Subscribe to my newsletter
Read articles from Taiwo Ogunola directly inside your inbox. Subscribe to the newsletter, and don't miss out.
Written by

Taiwo Ogunola
Taiwo Ogunola
With over 5 years of experience in delivering technical solutions, I specialize in web page performance, scalability, and developer experience. My passion lies in crafting elegant solutions to complex problems, leveraging a diverse expertise in web technologies.