React on Firebase!🔥: Part 5
 Subrata Ch
Creating a Firebase project and database can be overwhelming for beginners because it involves multiple steps. So, I will break down the process into three simple steps and include important images for each step.
➡ Step 1: Setting up a Firebase project:
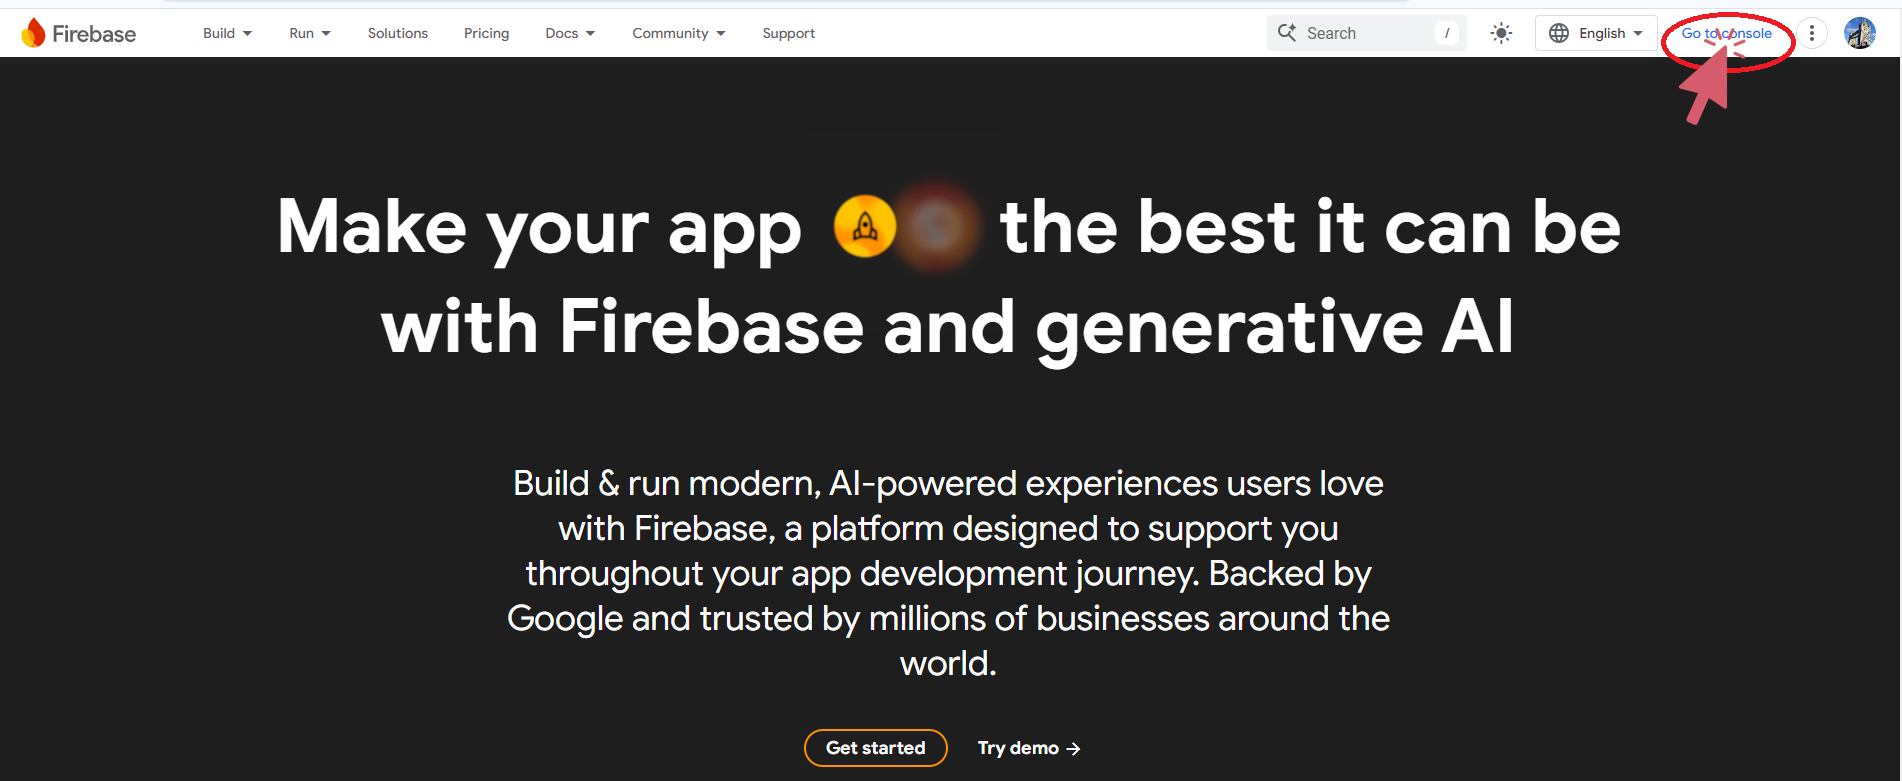
If you have a Google account, go to https://firebase.google.com. You will arrive at the Firebase home page. Click on 'Go to console' in the top-right corner, as shown in the image below:
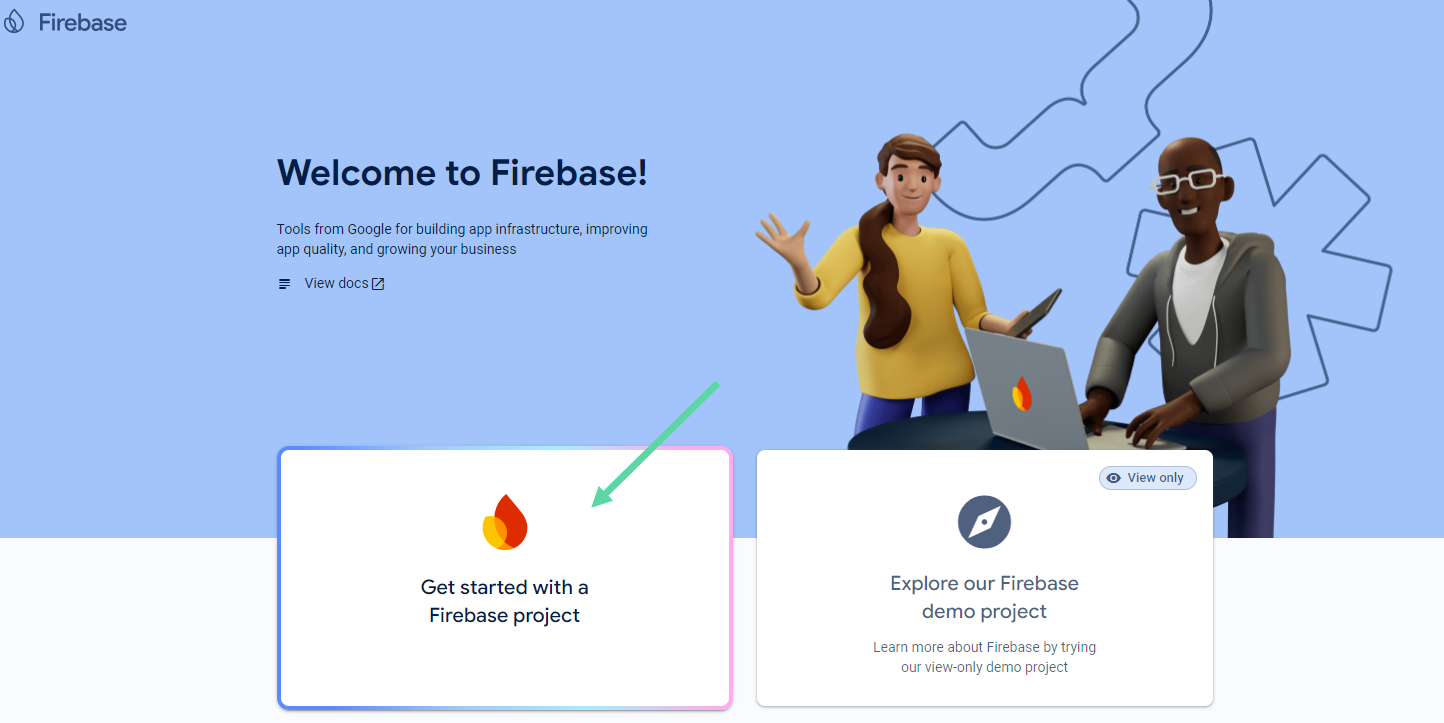
If you are doing this for the first time, you should see the following screen. Click on the "Get Started" box:
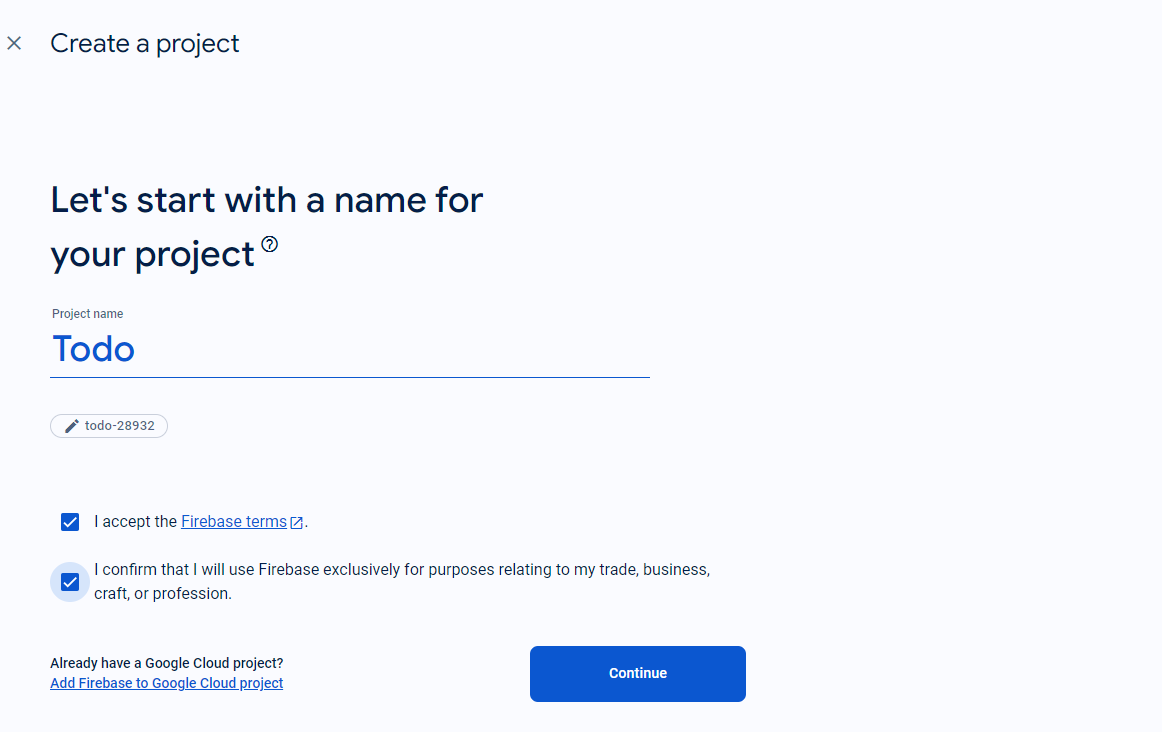
Now, give your project a name (in our case, it's 'Todo') and click on "Continue"...
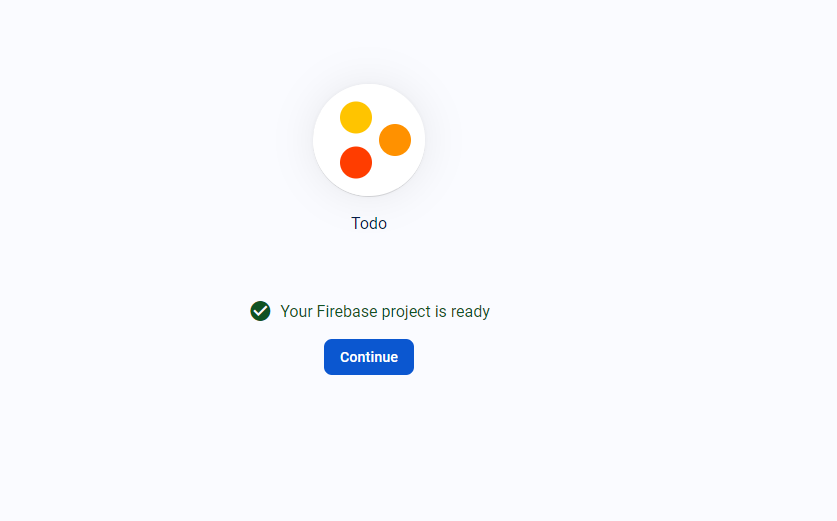
You will go through a few more screens (steps) and eventually see a message saying your project is ready:
➡ Step 2: Adding Firebase to your app:
After clicking on "Continue," you will arrive at a page where you can start creating your web app and add Firebase to it.
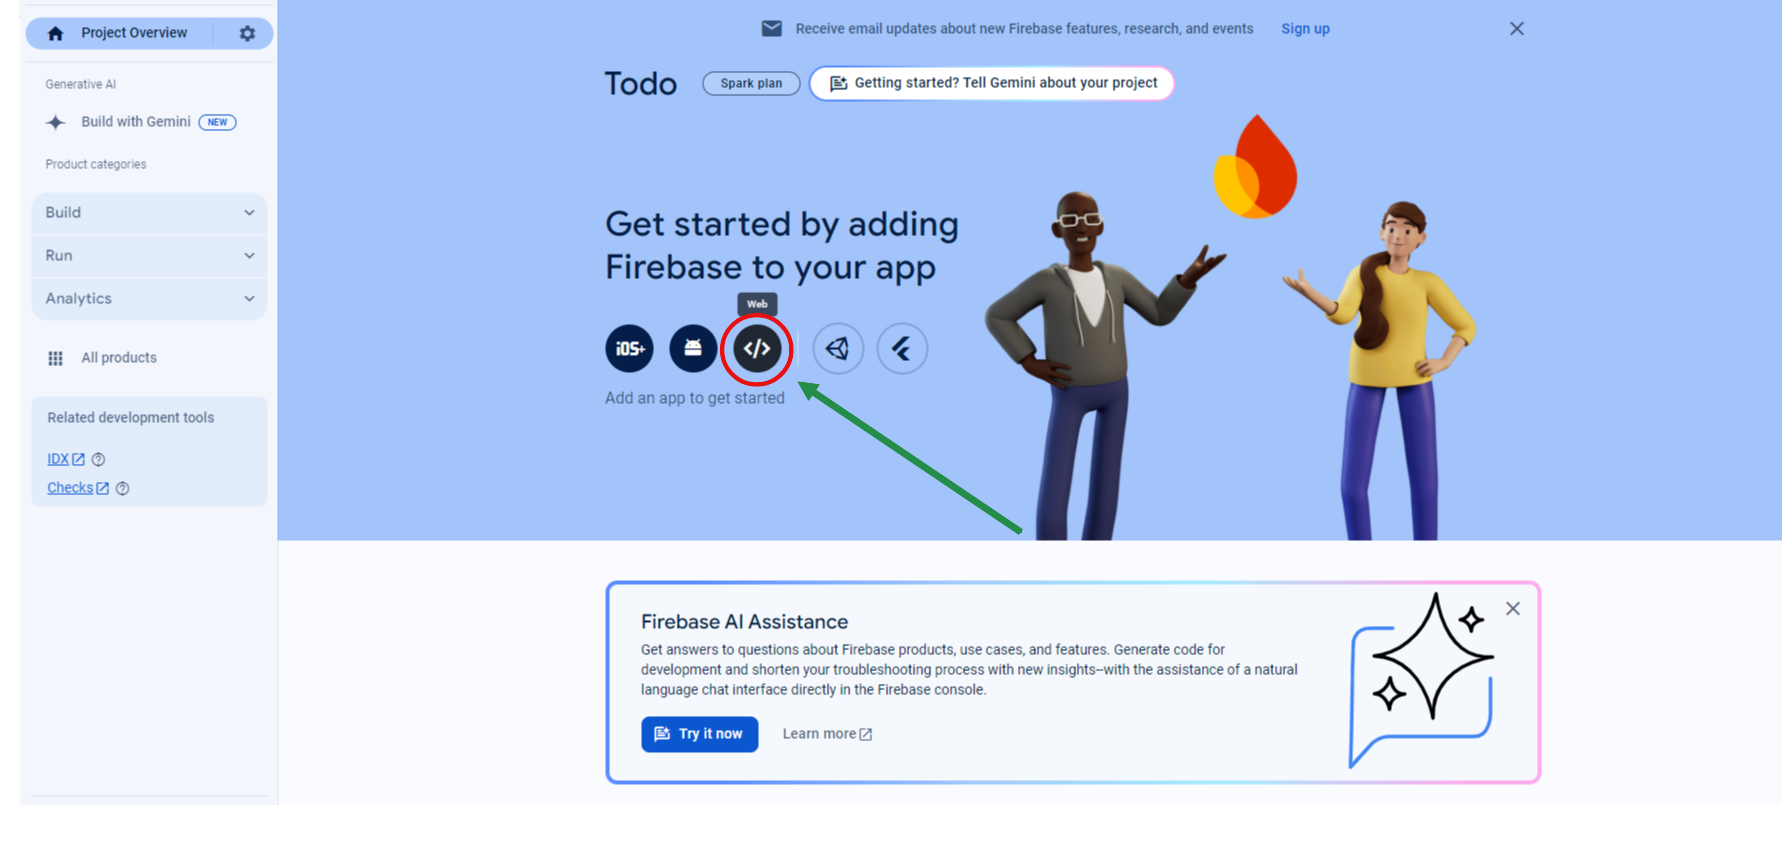
Click on the web icon as shown in the image above. Once clicked, you will go through several screens (steps) as follows:
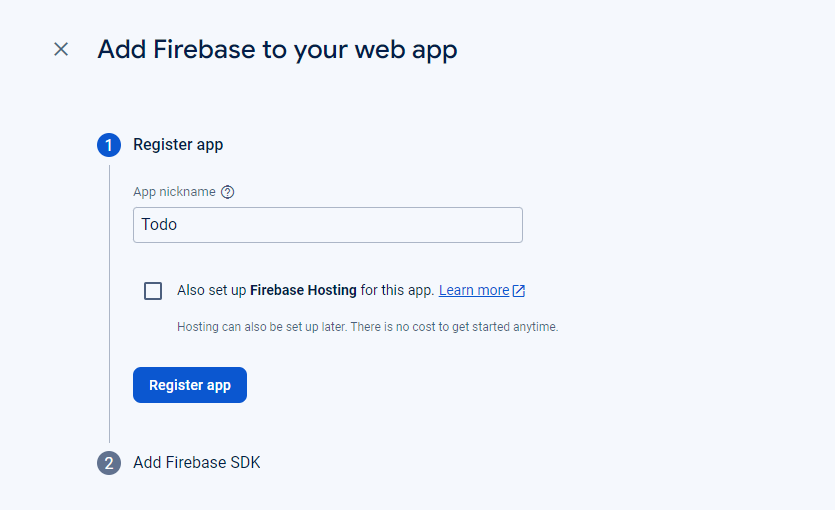
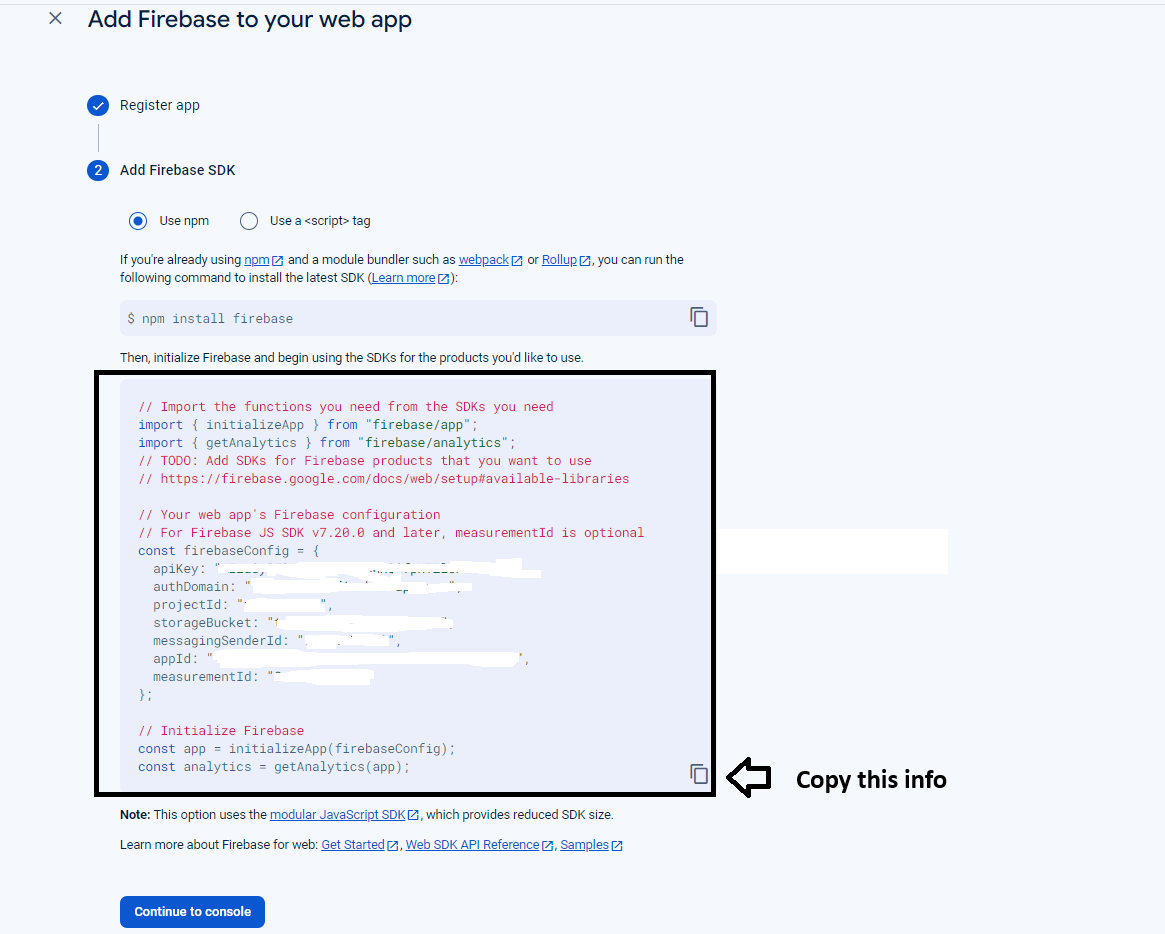
Once you click on "Register app," you will see a screen with important configuration information, as shown below. Do not share this information with others and make a copy of this script for later use. It contains essential details to connect your React app to the Firebase Database:
➡ Step 3: Create your own Realtime database for the app:
From the previous screen, you will be taken back to the console as shown below:
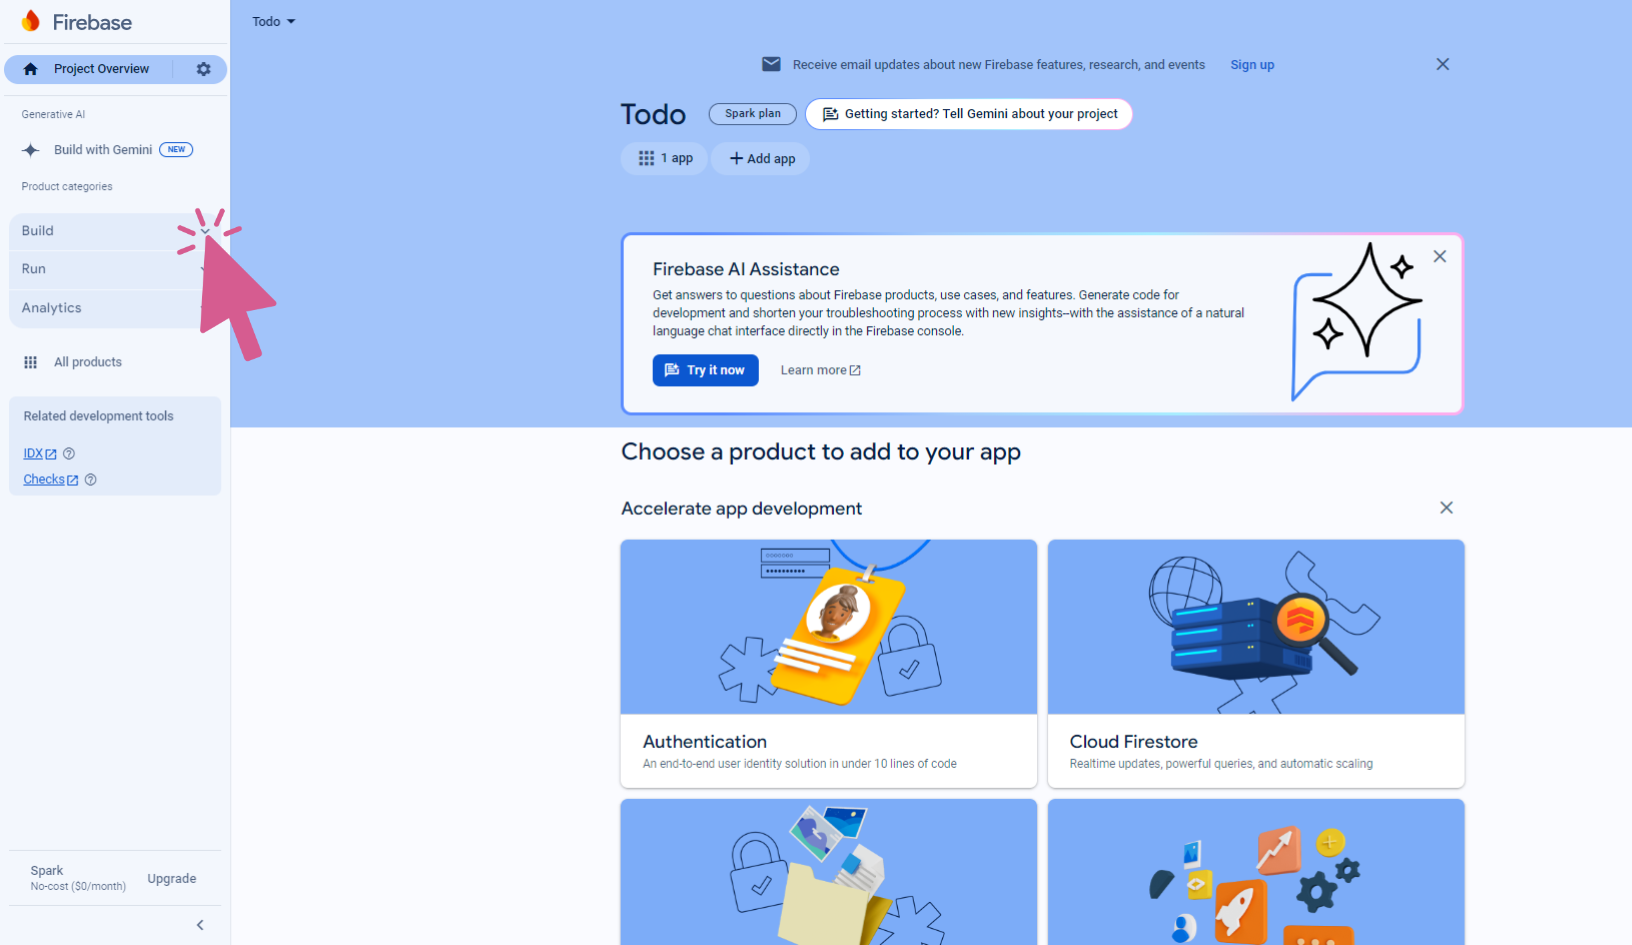
Here, click on the Build section as shown in the image above. This will open the sub-sections of the Build category as follows:
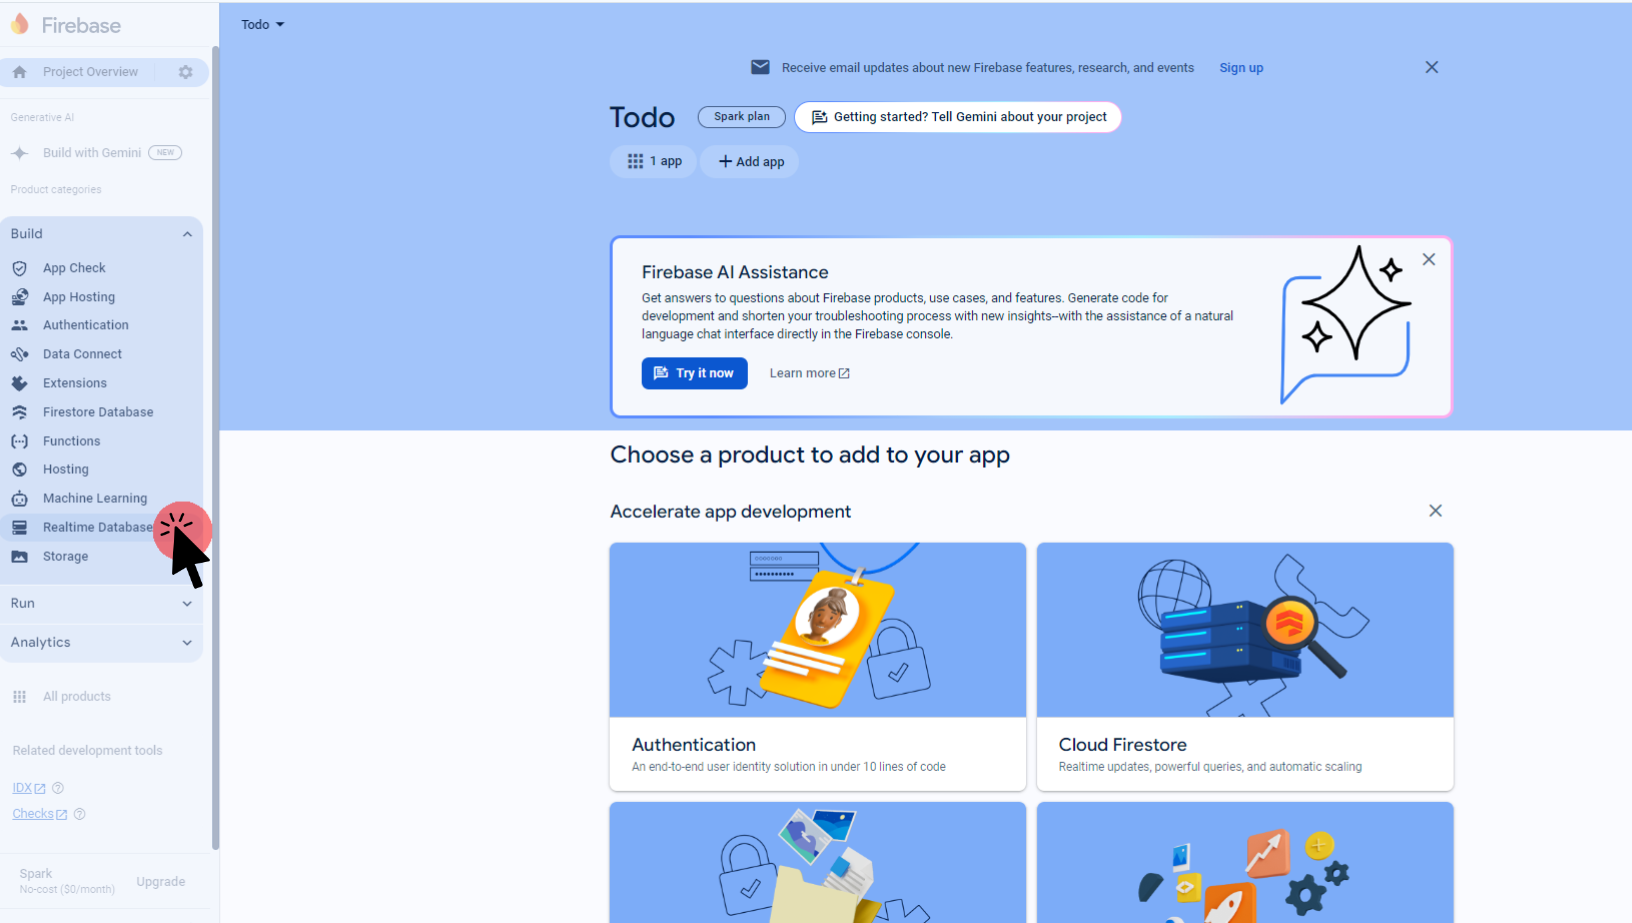
Here, click on the Realtime Database (Note: You will also see the Firestore Database, which often confuses new users). This will take you to the create database screen:
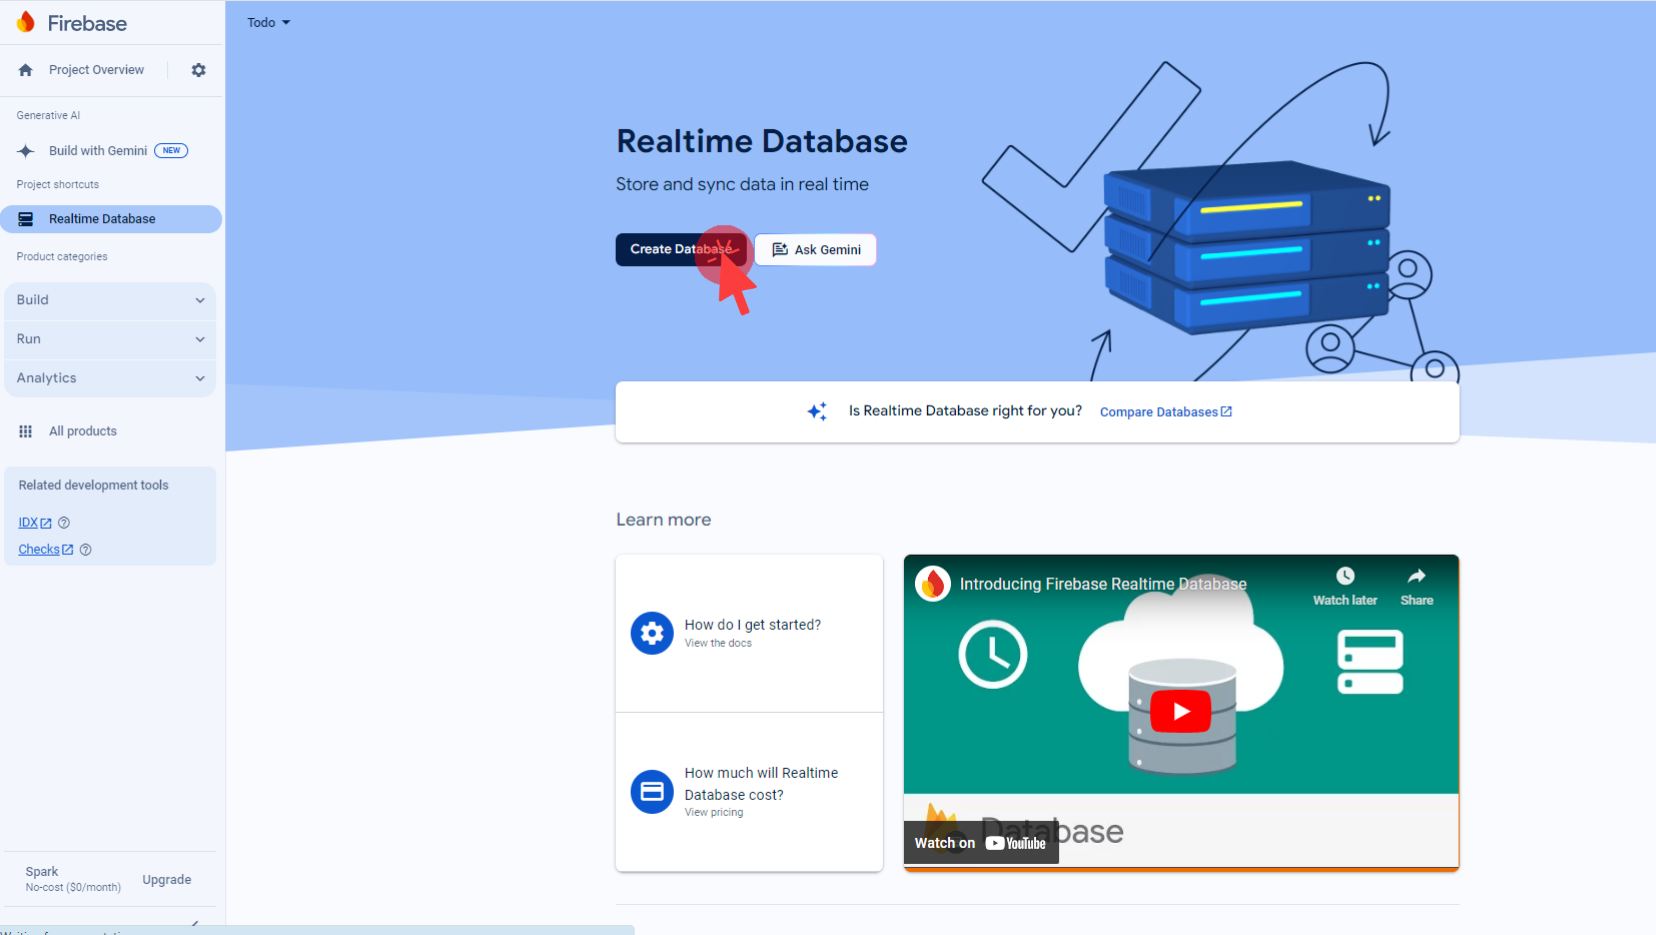
Click on the 'Create Database' button. This will lead you through a few more screens (again! 😂) as shown below:
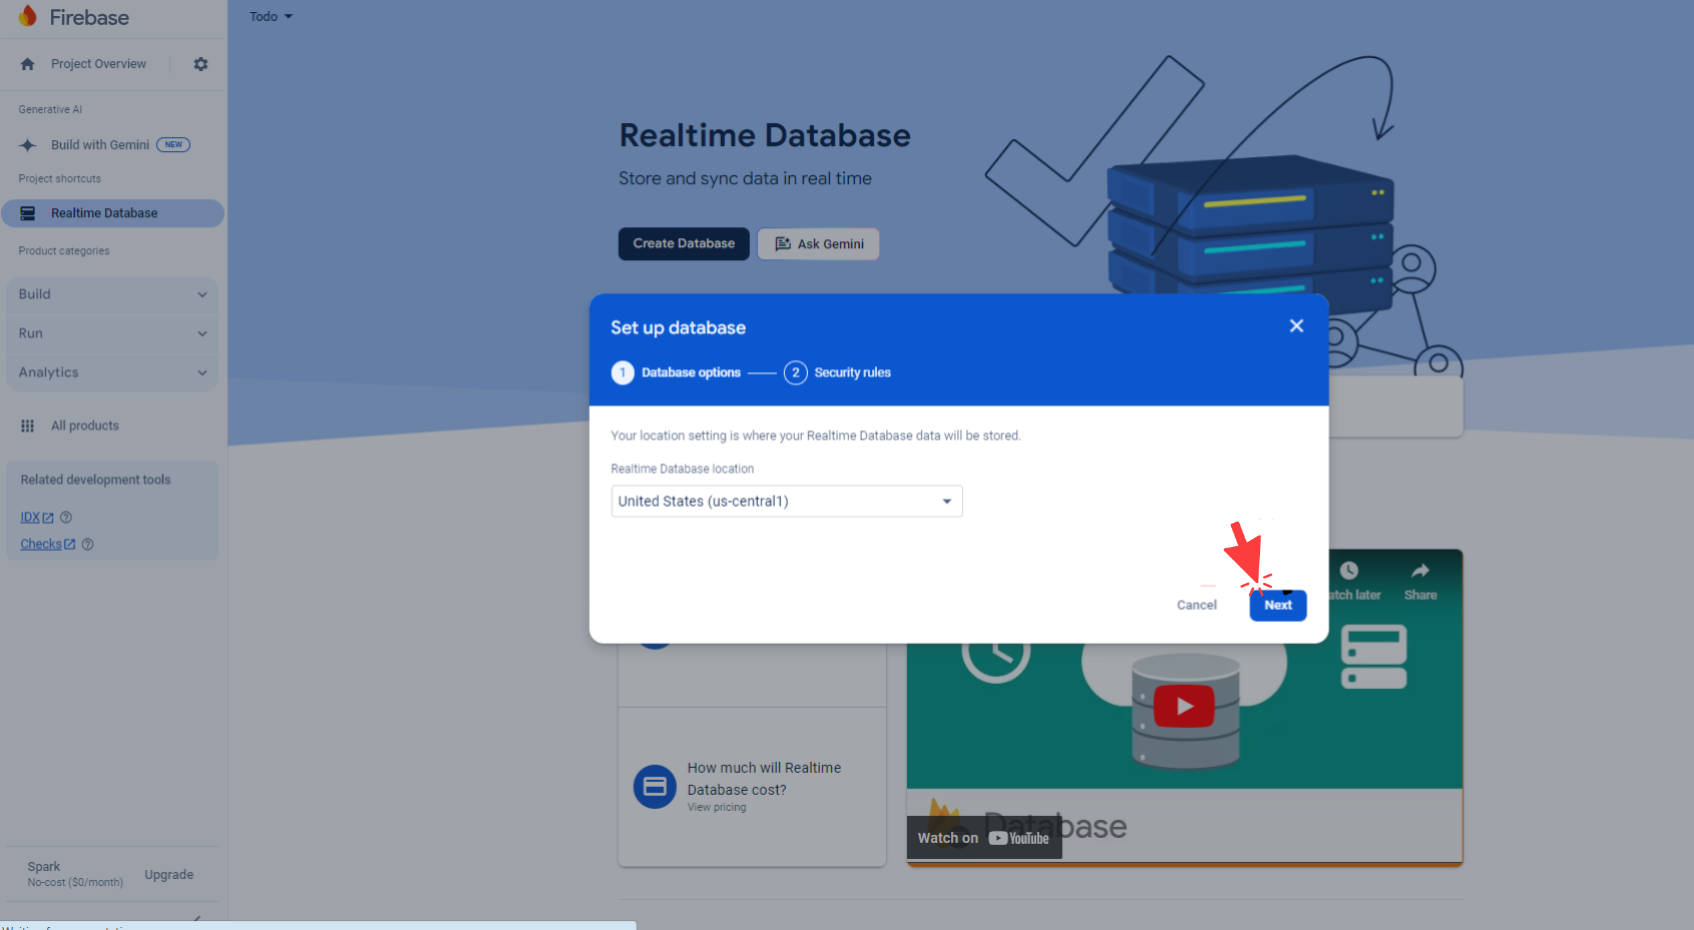
Click "Next" after selecting the desired location, and you will be taken to the next step:
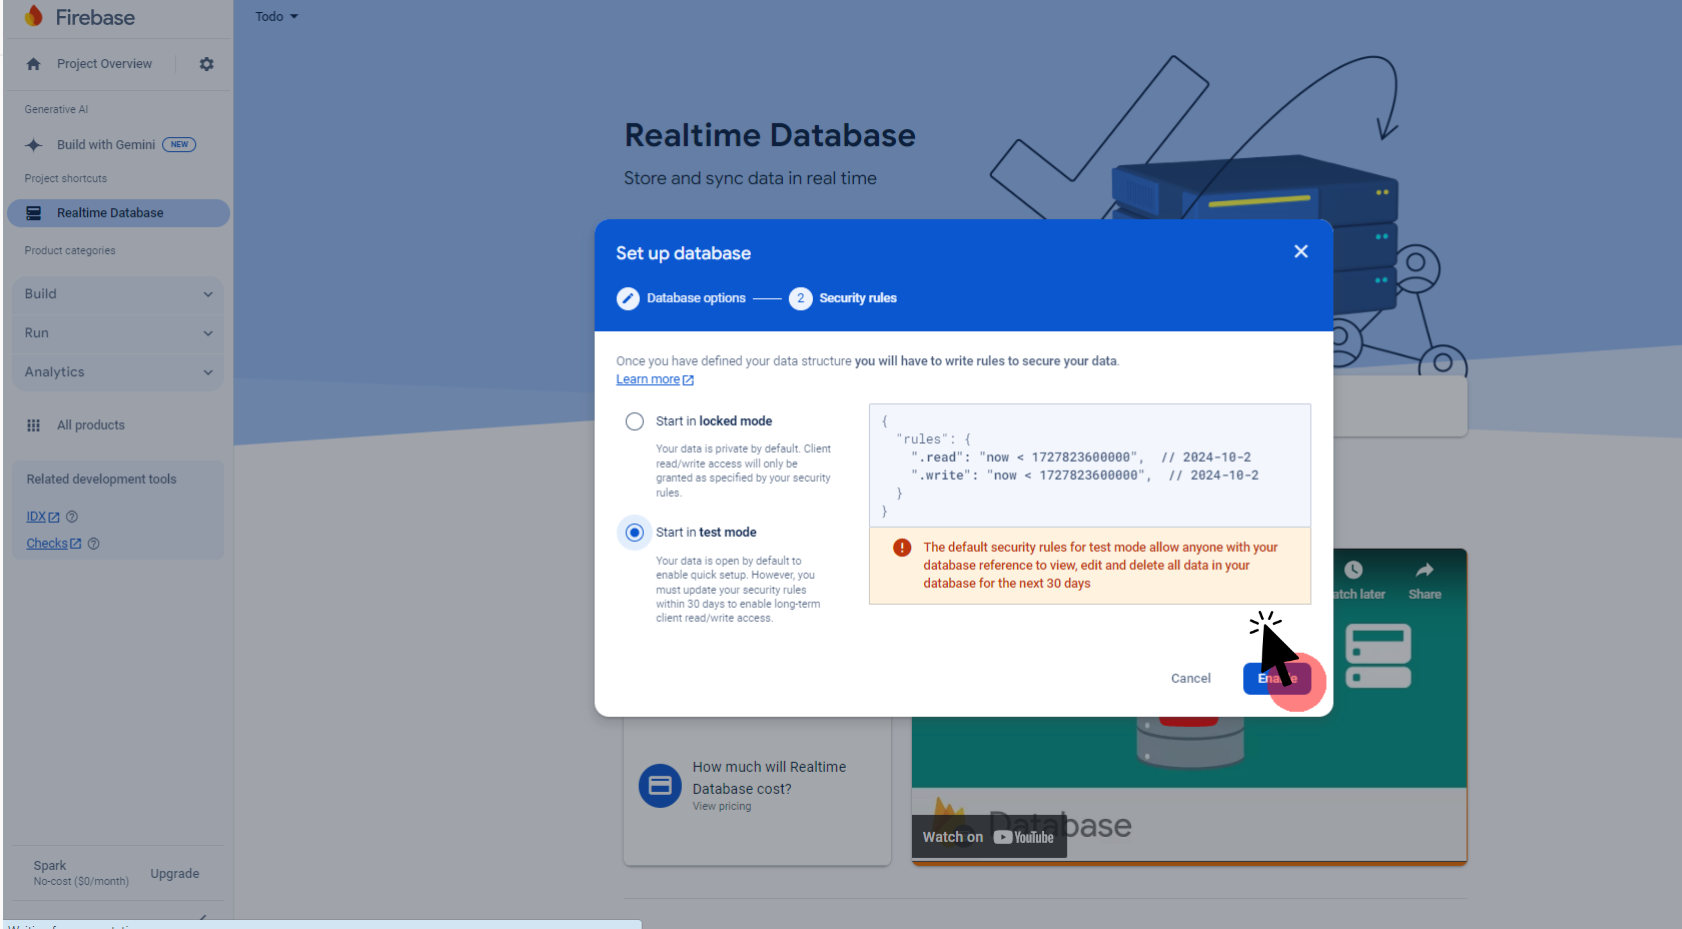
Here, select 'Start in test mode' and click on Enable. That's it. You are done with the setup process! 👏 😴 But where is the database?
Now, if you go back to the console, you will see your project as shown below:
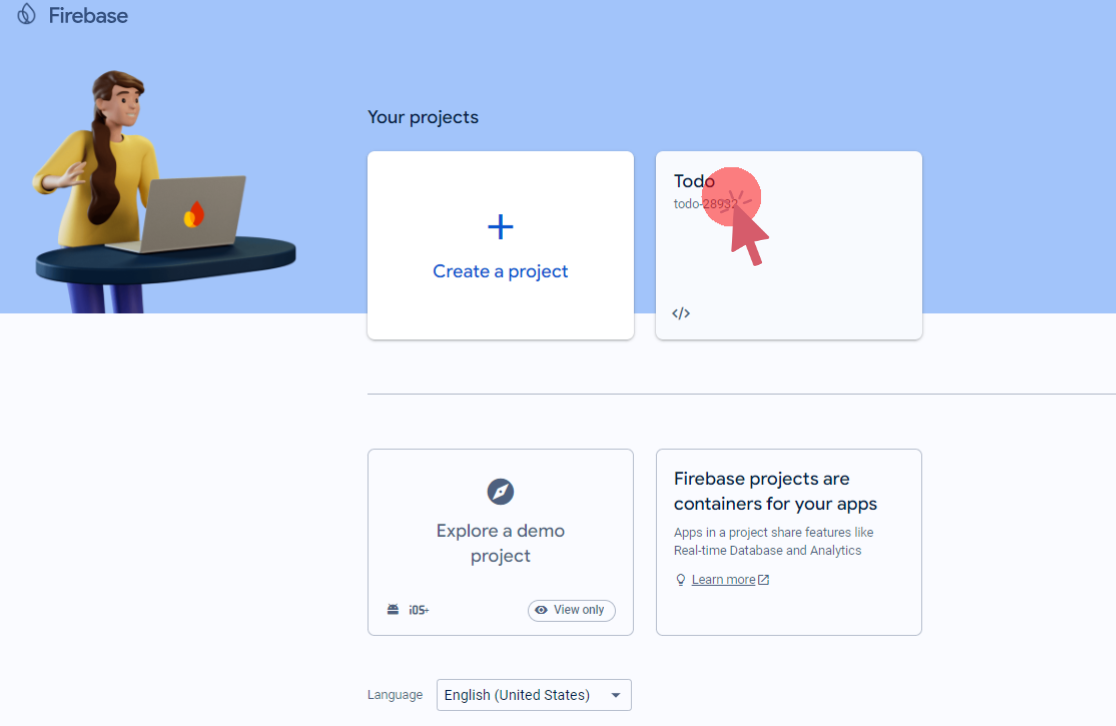
Here, select our Todo project, and this will take you to the Project overview screen:
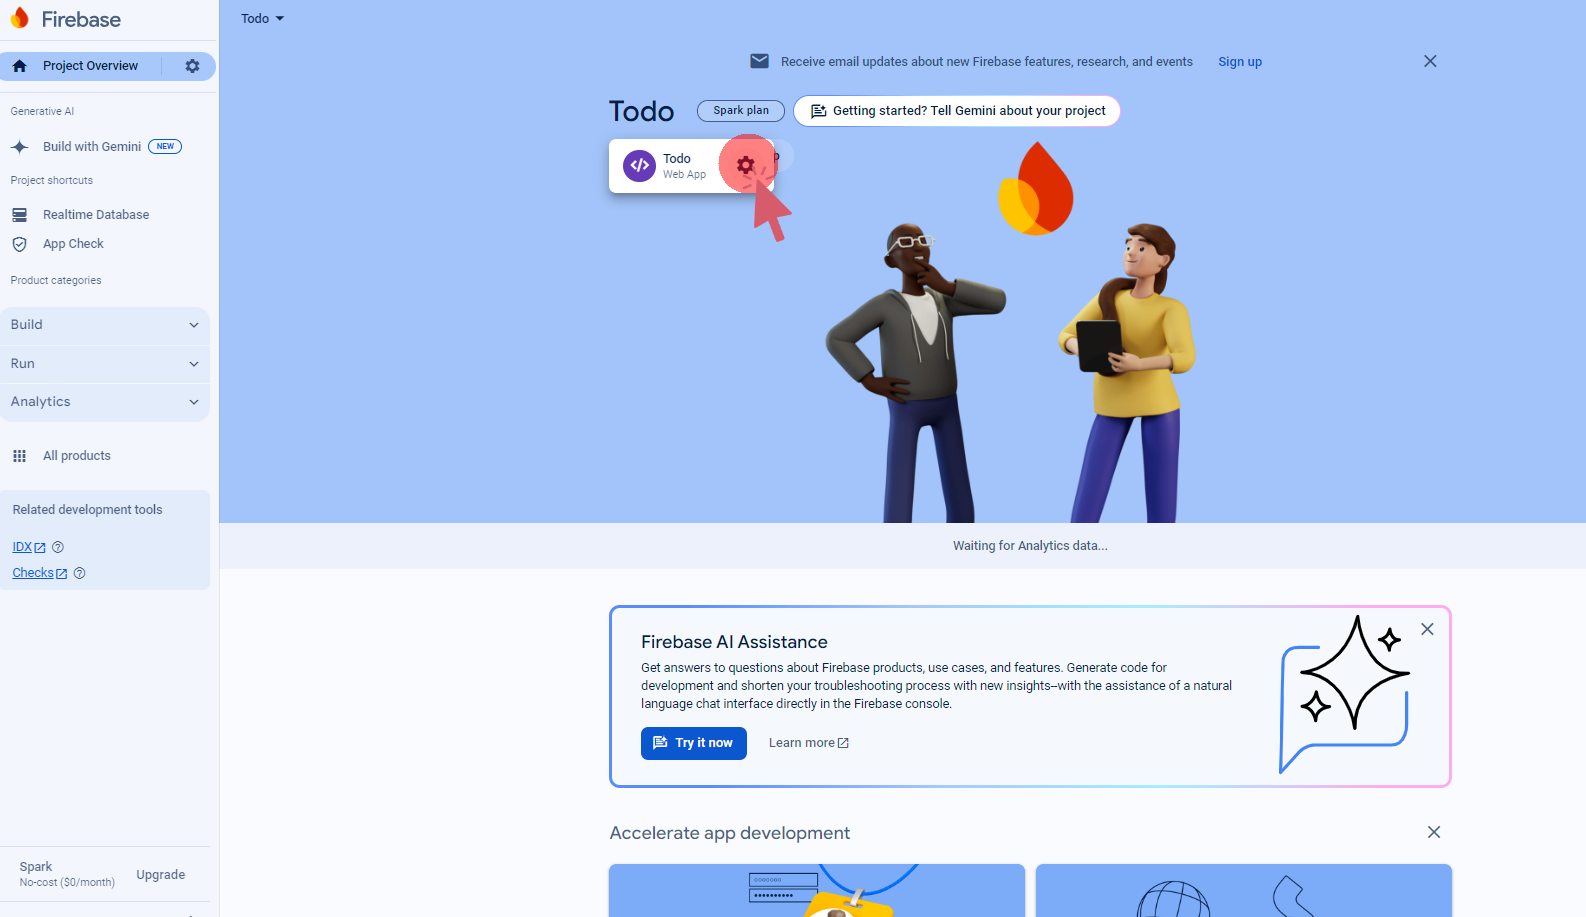
Now, click on the web configuration wheel 🎡 and in the next screen, click on 'Realtime Database' under the project shortcut section. You can also find this under the Build section. You should see your newly created database as follows:
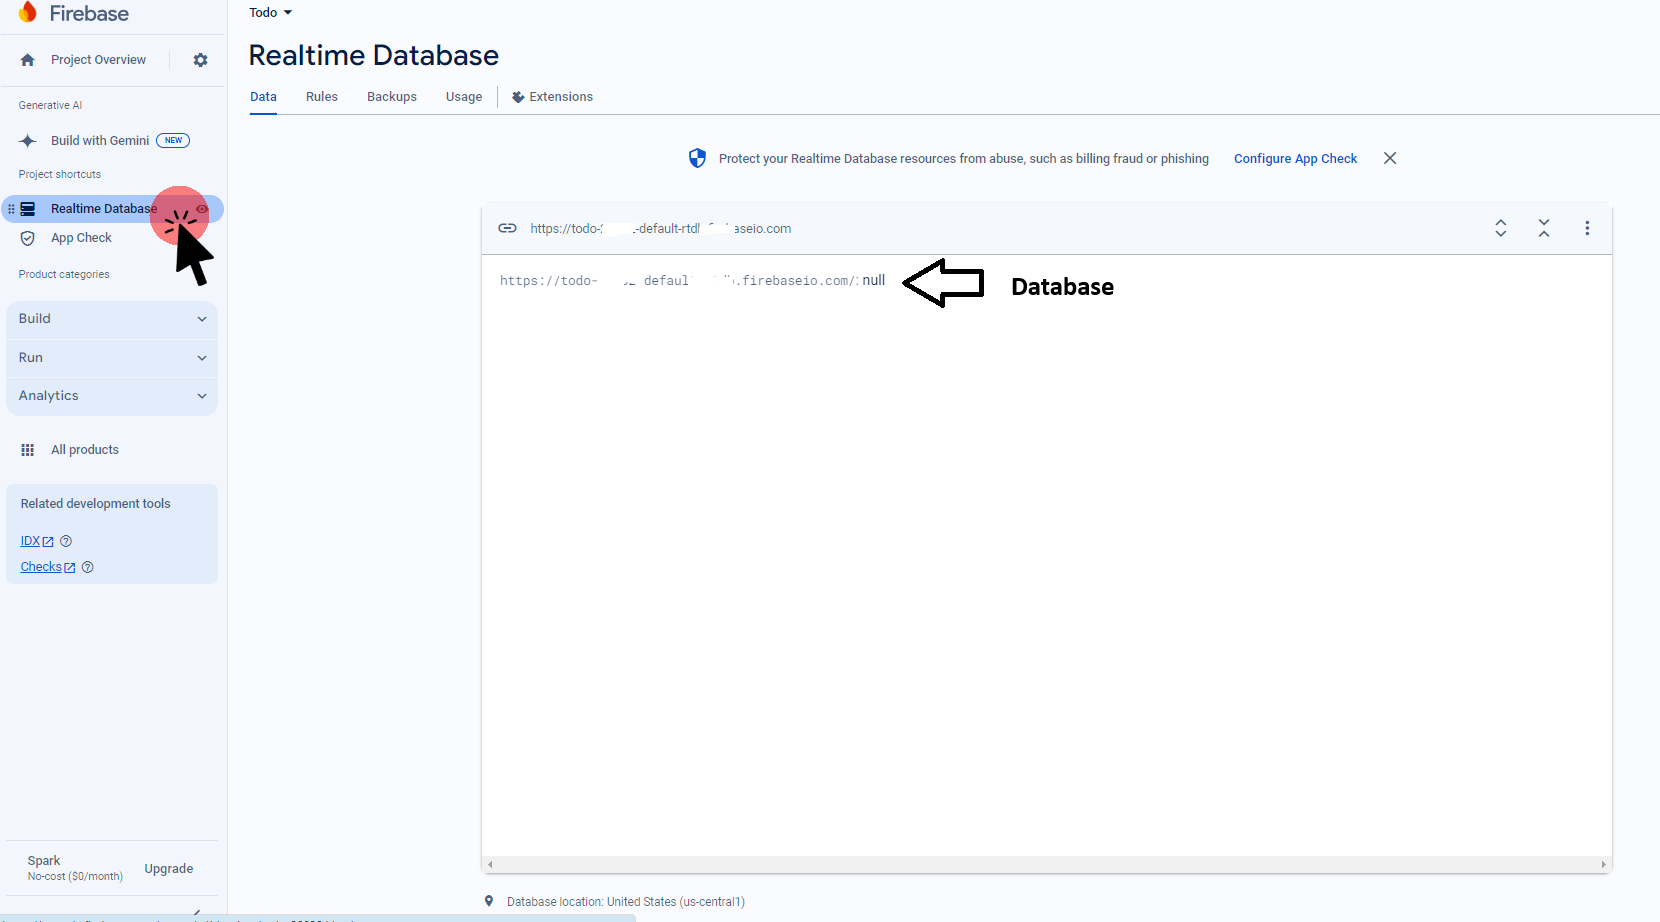
Our Todo database is now ready for integration in the next section. We will open our last project file (Part 4) in VC code and install the npm for Firebase in the terminal. Ctrl+shift+' or From the Terminal menu => New Terminal and type the following:
npm install firebase
This will add Firebase to package.json under dependencies
 "dependencies": {
    "firebase": "^10.13.0",
    "react": "^18.3.1",
    "react-dom": "^18.3.1"
  },
Now all we have to do is add the Firebase database configuration details and a few more updates 🃏 to our App.jsx file as follows:
App.jsx
import React, { useState, useEffect, useRef } from "react"; // Importing React and necessary hooks
import { initializeApp } from "firebase/app"; // Importing function to initialize Firebase app
import { getDatabase, ref, set, push, onValue, remove, update } from "firebase/database"; // Importing Firebase Realtime Database functions

// Firebase configuration object containing keys and identifiers for the app
const firebaseConfig = {
  apiKey: "YOUR apiKey",
  authDomain: "YOUR authDomain",
  databaseURL: "YOUR databaseURL",
  projectId: "YOUR projectId",
  storageBucket: "YOUR storageBucket",
  messagingSenderId: "messagingSenderId",
  appId: "YOUR appId",
  measurementId: "YOUR measurementId",
};

// Initialize Firebase app with the given configuration
const app = initializeApp(firebaseConfig);
// Get a reference to the Firebase Realtime Database
const db = getDatabase(app);''

const App = () => {
  const [tasks, setTasks] = useState([]); // State to store the list of tasks
  const [task, setTask] = useState(""); // State to store the current task input
  const [error, setError] = useState(""); // State to store any validation error messages
  const inputRef = useRef(null); // Reference to the input field for managing focus

  useEffect(() => {
    // useEffect hook to fetch tasks from the database on component mount
    const tasksRef = ref(db, "tasks"); // Reference to the 'tasks' node in the database
    onValue(tasksRef, (snapshot) => {
      // Listening for changes in the 'tasks' node
      const data = snapshot.val(); // Get the data from the snapshot
      // If data exists, map it to an array of tasks, otherwise set an empty array
      const taskList = data ? Object.keys(data).map((key) => ({ id: key, ...data[key] })) : [];
      setTasks(taskList); // Update the tasks state with the fetched data
    });
  }, []); // Empty dependency array ensures this effect runs only once on mount

  const addTask = async (task) => {
    // Function to add a new task to the database
    const tasksRef = ref(db, "tasks"); // Reference to the 'tasks' node
    const newTaskRef = push(tasksRef); // Create a new reference with a unique key
    await set(newTaskRef, { ...task, done: false }); // Set the new task data with 'done' as false
  };

  const deleteTask = async (id) => {
    // Function to delete a task from the database by its id
    const taskRef = ref(db, `tasks/${id}`); // Reference to the specific task by id
    await remove(taskRef); // Remove the task from the database
  };

  const toggleTaskDone = async (id) => {
    // Function to toggle the 'done' status of a task
    const task = tasks.find((task) => task.id === id); // Find the task by id in the current state
    const taskRef = ref(db, `tasks/${id}`); // Reference to the specific task by id
    await update(taskRef, { done: !task.done }); // Update the 'done' status in the database
  };

  const handleSubmit = (e) => {
    // Function to handle form submission
    e.preventDefault(); // Prevent default form submission behavior
    if (task.trim() === "") {
      // Check if the input is empty or only whitespace
      setError("Task cannot be empty!"); // Set an error message if validation fails
    } else {
      addTask({ text: task }); // Add the new task with the input text
      setTask(""); // Clear the input field
      setError(""); // Clear any existing error message
      inputRef.current.focus(); // Focus the input field for new task entry
    }
  };

  return (
    <div className="container mt-5">
      {/* Main container with Bootstrap spacing */}
      <h1 className="text-center mb-4">To-Do List</h1>
      {/* Header for the app */}
      <div className="row justify-content-center">
        {/* Row with centered content */}
        <div className="col-md-6">
          {/* Column with Bootstrap responsive width */}
          <form onSubmit={handleSubmit} className="mb-4">
            {/* Form for adding a new task */}
            <div className="input-group">
              {/* Bootstrap input group for better styling */}
              <input
                ref={inputRef}
                type="text"
                className="form-control"
                value={task}
                onChange={(e) => setTask(e.target.value)}
                placeholder="Add a new task"
              />
              {/* Text input field with dynamic value and change handler */}
              <button type="submit" className="btn btn-primary">
                Add Task
              </button>
              {/* Submit button to add the task */}
            </div>
            {error && <div className="text-danger alert alert-danger mt-2">{error}</div>}
            {/* Display validation error message if it exists */}
          </form>
          <ul className="list-group">
            {/* Unordered list to display tasks */}
            {tasks
              .sort((a, b) => a.done - b.done) // Sort tasks so that completed tasks are at the bottom
              .map((task, index) => (
                <li
                  key={task.id}
                  className={`list-group-item d-flex justify-content-between align-items-center ${
                    task.done ? "list-group-item-success" : ""
                  }`}
                >
                  {/* List item with dynamic class based on task completion */}
                  <span
                    className={task.done ? "text-decoration-line-through text-danger" : ""}
                    onClick={() => toggleTaskDone(task.id)}
                  >
                    {index + 1}: {task.text}
                  </span>
                  {/* Task text with a strike-through and red text if completed; click toggles completion */}
                  <button
                    className="btn btn-danger btn-sm"
                    onClick={() => {
                      if (window.confirm("Are you sure you want to delete this task?")) {
                        deleteTask(task.id); // Delete task if user confirms
                      }
                    }}
                  >
                    Delete
                  </button>
                  {/* Delete button with confirmation dialog */}
                </li>
              ))}
          </ul>
        </div>
      </div>
    </div>
  );
};

export default App; // Export the App component as the default export
Please Note: We have to add our firebase configuration information that we copied earlier during the database setup for const firebaseConfig ={} object.
Now, let's run the app.
npm run dev
# This will start the localhost server something like the follwoing:
 VITE v5.4.1  ready in 445 ms

  ➜  Local:   http://localhost:5173/
  ➜  Network: use --host to expose
  ➜  press h + enter to show help
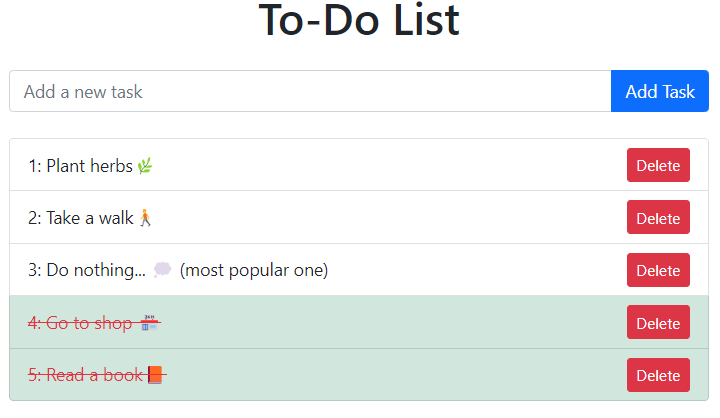
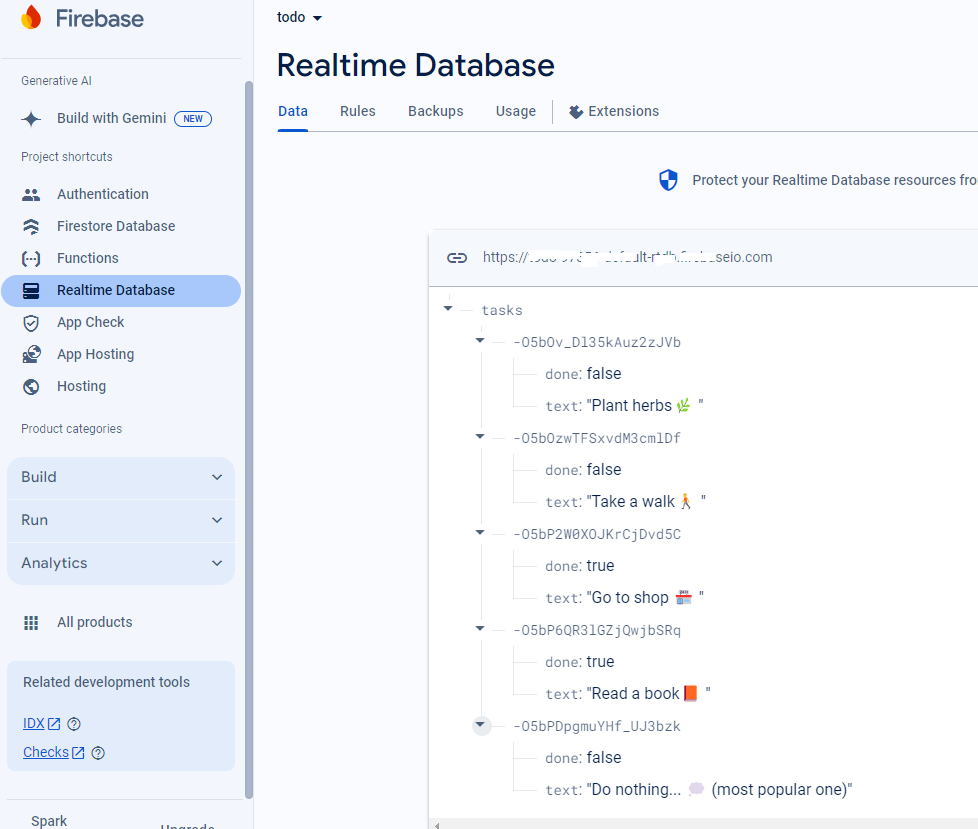
Please Ctrl+click the provided link and you will see our app is now running in the default browser. After adding and updating the task we shall be able to see like the following:
The UI:
The Realtime Firebase Database:
🗝 Key things to watch out for: 👀
➡ Database configuration part: 🛢️
import React, { useState, useEffect, useRef } from "react"; // Importing React and necessary hooks
import { initializeApp } from "firebase/app"; // Importing function to initialize Firebase app
import { getDatabase, ref, set, push, onValue, remove, update } from "firebase/database"; // Importing Firebase Realtime Database functions

// Firebase configuration object containing keys and identifiers for the app
const firebaseConfig = {
  apiKey: "YOUR apiKey",
  authDomain: "YOUR authDomain",
  databaseURL: "YOUR databaseURL",
  projectId: "YOUR projectId",
  storageBucket: "YOUR storageBucket",
  messagingSenderId: "messagingSenderId",
  appId: "YOUR appId",
  measurementId: "YOUR measurementId",
};

// Initialize Firebase app with the given configuration
const app = initializeApp(firebaseConfig);
// Get a reference to the Firebase Realtime Database
const db = getDatabase(app);''
➡ A common asynchronous call with await to all addTask, deleteTask, and toggleTaskDone functions with a reference to the 'tasks' node🪝⚓
 useEffect(() => {
    // useEffect hook to fetch tasks from the database on component mount
    const tasksRef = ref(db, "tasks"); // Reference to the 'tasks' node in the database
    onValue(tasksRef, (snapshot) => {
      // Listening for changes in the 'tasks' node
      const data = snapshot.val(); // Get the data from the snapshot
      // If data exists, map it to an array of tasks, otherwise set an empty array
      const taskList = data ? Object.keys(data).map((key) => ({ id: key, ...data[key] })) : [];
      setTasks(taskList); // Update the tasks state with the fetched data
    });
  }, []); // Empty dependency array ensures this effect runs only once on mount
➡ A common asynchronous call with await to all addTask, deleteTask, and toggleTaskDone functions with a reference to the 'tasks' node: ⏱️
  const addTask = async (task) => {
    // Function to add a new task to the database
    const tasksRef = ref(db, "tasks"); // Reference to the 'tasks' node
    const newTaskRef = push(tasksRef); // Create a new reference with a unique key
    await set(newTaskRef, { ...task, done: false }); // Set the new task data with 'done' as false
  };

  const deleteTask = async (id) => {
    // Function to delete a task from the database by its id
    const taskRef = ref(db, `tasks/${id}`); // Reference to the specific task by id
    await remove(taskRef); // Remove the task from the database
  };

  const toggleTaskDone = async (id) => {
    // Function to toggle the 'done' status of a task
    const task = tasks.find((task) => task.id === id); // Find the task by id in the current state
    const taskRef = ref(db, `tasks/${id}`); // Reference to the specific task by id
    await update(taskRef, { done: !task.done }); // Update the 'done' status in the database
  };
The End 🔚 : In conclusion, the ToDo app we've developed is a simple web application that combines the power of React with Google Firebase's real-time database. This app offers a smooth user experience with key features like adding tasks, toggling task completion, and deleting tasks with confirmation. The toggle function not only updates the task but also reorders the list dynamically, using CSS highlights to show completed tasks. Additionally, the app ensures data integrity with input validation to prevent invalid entries. By using Firebase, all task data is stored and synchronized in real-time, making this ToDo app a reliable and responsive tool for managing tasks across devices.
Subscribe to my newsletter
Read articles from Subrata Ch directly inside your inbox. Subscribe to the newsletter, and don't miss out.
Written by

Subrata Ch
Subrata Ch
Software Engineer & Consultant