Cloud Networking - buliding your Virtual Private Cloud (VPC)
 yyounos shaik
Difficulty : Easy Time : 60 min Cost : 0€
What you'll need : An AWS account - Create one here!
Services Needed: AWS VPC
Overview
Let's dive into the core of AWS networking by creating your very own Virtual Private Cloud (VPC).
Setting up and managing a VPC is a vital skill for anyone looking to master cloud infrastructure.
Let's get ready to:
☁️ Create an Amazon VPC.
🥅 Create a public subnet.
🚪 Create an internet gateway.

What is VPC?
If we imagine your AWS Region as a country, a Virtual Private Cloud (VPC) is like managing your own city inside that country. You can design neighborhoods (aka subnets, which you'll learn about in a second), traffic rules, and security measures to control how the different resources inside your VPC, like EC2 instances and S3 buckets, are connected and work together. Your city is isolated from other cities i.e. other AWS Accounts' VPCs, giving you full privacy and control over your VPC's layout and rules.
Step 1 : Create a VPC
In the AWS Management Console search field , type VPC,.
Select VPC from the drop down menu

In the left navigation pane, choose Your VPCs.
Make sure you're on the region that's close to you. Use the dropdown on the top right hand cormer to switch regions.
you'll notice that there is already a VPC in your account!

AWS provides a default VPC in each AWS account to help you quickly get started! This default VPC allows you to launch resources and test AWS services without needing to set up a VPC from scratch. In other words, this default VPC is the reason why you've been able to privately deploy resources like EC2 instances and even connect AWS services from the moment you've created yourAWS Account!
Choose Create VPC.
Choose VPC only.
Name Tag:
Demo-VPCIPv4 CIDR:
10.0.0.0/16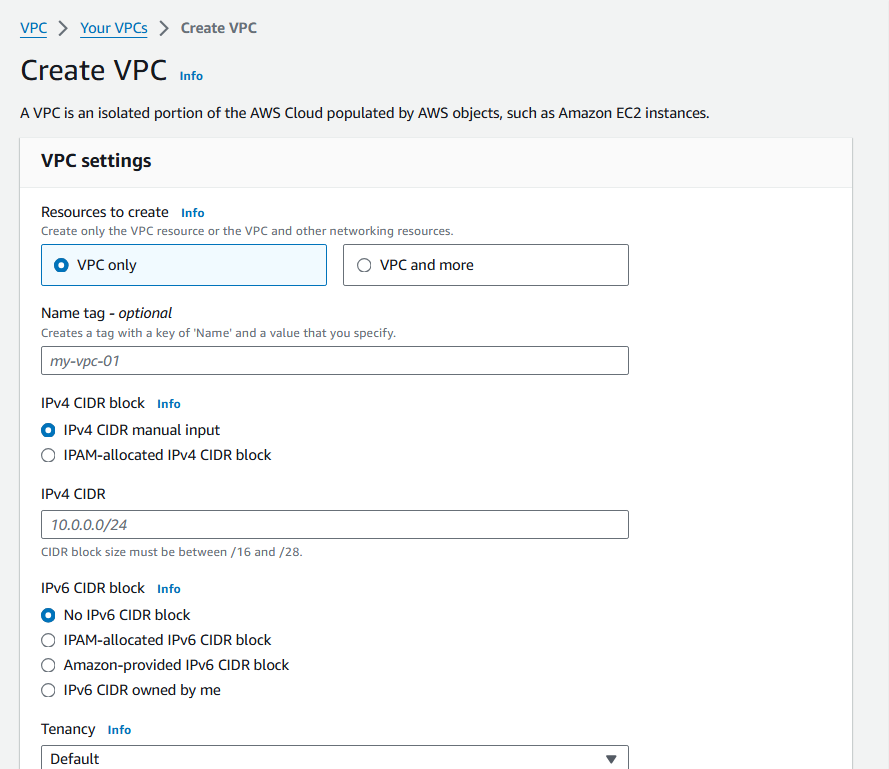
IPv4 stands for Internet Protocol version 4, which is the most widely used way to write an IP address. IPv4 address are written as four sets of numbers separated by dots (e.g., 192.168.0.1).
CIDR (which stands for Classless Inter-Domain Routing) is a way to assign a whole block of IP addresses, kind of like creating a zone/area in a city. (e.g., 10.0.0/6).
- Select Create VPC.
Step 2 : Create Subnets
What are Subnets and Why do we need them in the VPC?
Subnets are subdivisions within your VPC where you can launch AWS resources.
In the VPC Dashboard, under Virtual Private Cloud, choose Subnets
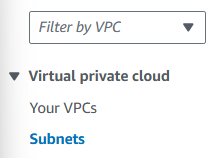
There might be subnets already Available in the the subnets section.
How are there already subnets Available?
The default VPC provided by AWS comes with predefined subnets in each Availability Zone of a Region, which means you'll see 3 subnets on your page if your Region has 3 Availability Zones. These default subnets are ready to use, helping you to quickly launch resources and test services without needing to create subnets manually.- You can choose the already available subnets or create a new one. You can select the Availability-Zone as well.
What are Availability Zones and how do they affect my VPC?
Choose Create Subnet.
Configure your subnet settings:
Subnet name: My-Demo-Subnet
Availability Zone: Select the first Availability Zone in the list.
IPv4 VPC CIDR block:
10.0.0.0/16IPv4 subnet CIDR block:
10.0.0.0/24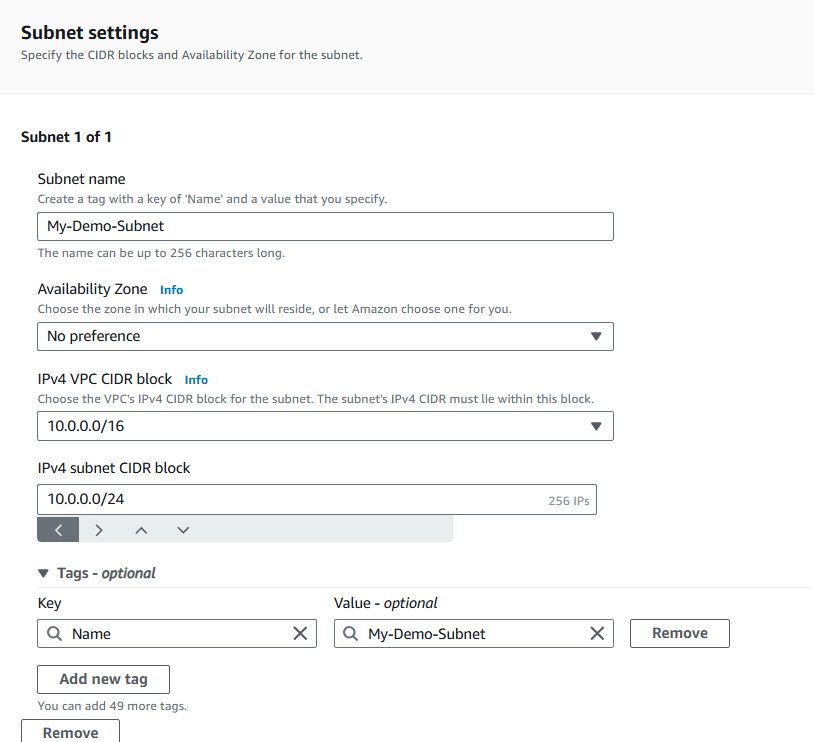
What is the difference Between public and Private subnet?
Select the checkbox next to My-Demo-Subnet.
In the Actions menu, select Edit subnet settings.
click the checkbox enable auto-assign public IPV4-address.

What does it mean to enable auto-assign public IPv4 address?
When you enable auto-assign public IPv4 address for a subnet, any EC2 instance launched in that subnet will automatically receive a public IP address. This makes the instance accessible from the internet without needing to manually assign a public IP - a huge time saver!- Choose save.
Step 3 : Create Internet Gateway
- In the left panel choose internet gateways.
What is an internet gateway?
There is an already existing internet gateway available which is the default gateway provided by the AWS.
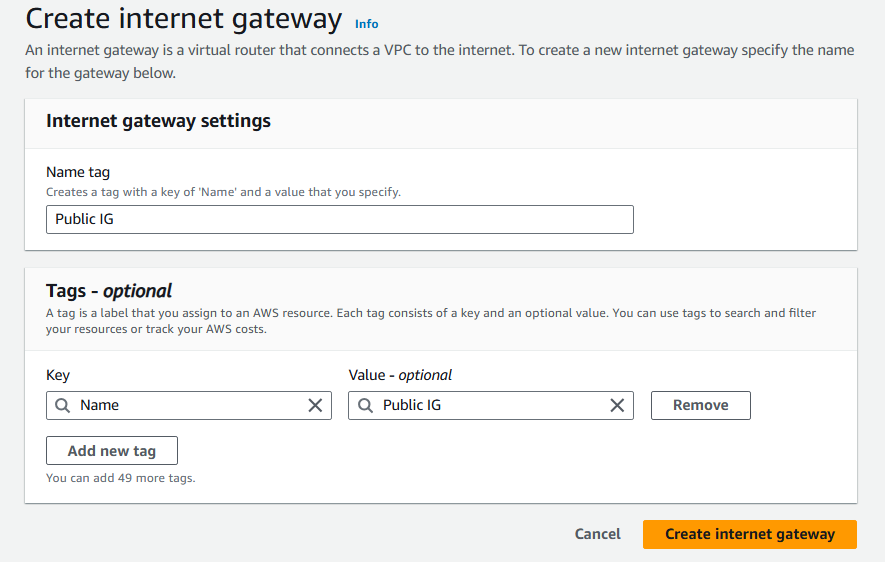
Choose create internet gateway.
Configure your internet gateway settings:
- Name tag:
Public IG
- Name tag:
Choose Create internet gateway
Select your newly created internet gateway and choose Actions, then Attach to VPC.
Select My-Demo VPC.
Select Attach internet gateway.
What does attaching an internet gateway to a VPC mean?
Attaching an internet gateway means resources in your VPC can now access the internet. The EC2 instances with public IP addresses also become accessible to users, so your applications hosted on those servers become public too.
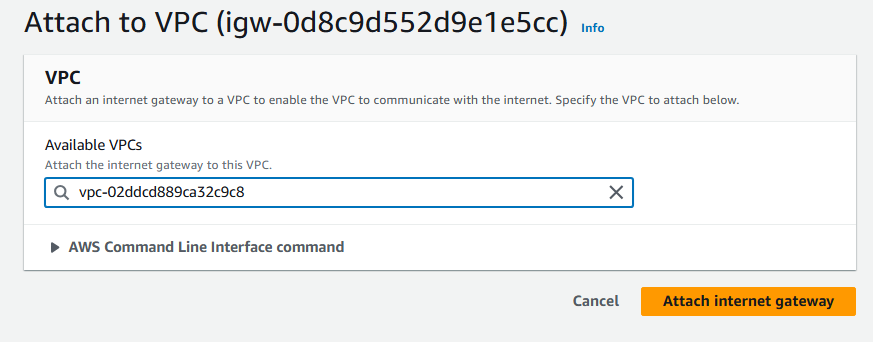
- After attaching the Internet Gateway to the vpc It's done, you have successfully created and initiated the VPC.
Summary
Even though you've created an Internet Gateway and attached it to your VPC, there's still a step left to go... you still have to tell instances in your public subnet how to get to the internet. This involves setting up route tables to direct traffic from your instances to your internet gateway! But the Great Part is we have learnt how to create VPC and attach the subnets to it.
Subscribe to my newsletter
Read articles from yyounos shaik directly inside your inbox. Subscribe to the newsletter, and don't miss out.
Written by

yyounos shaik
yyounos shaik
An Aspring Cloud Engineer