Highlight your code: scope highlight.js theme to a single component
 Emzar Panikashvili
Table of contents

The demo page is available here: https://nextjs-tailwind-highlight-js-theme-selector.vercel.app/
The code of the project: https://github.com/epanikas/nextjs-tailwind-highlight-js-theme-selector
We, software developers, are eager to showcase our work. In that, we are no different from other people. When it comes to a result of the work of a software developer, the code snippets would be an important part of it.
So, as a developer, you would be interested in presenting the code snippet you are proud of the most, in the most visually pleasing way.
Because you definitely don't want the bad visual image to ruin the impression of your wonderful piece of code.
Highlight.js to the rescue
Fortunately, there is a popular library - highlight.js - that does exactly this: given a code snippet it generates a piece of HTML, annotated with class names to denote code tokens, such as variables, methods, class names, and other programming language terms.
For example, consider this elementary Java class:
public class Person {
    private String name;
    private int age;
}
To apply highlight.js to it you would use the following code (typescript)
import hljs from 'highlight.js';

const code = ... // the string representing the preformatted code

const html = hljs.highlight(code, {language: "java"}).value;
The resulting HTML would have the following form:
<span class="hljs-keyword">public</span> <span class="hljs-keyword">class</span> <span class="hljs-title class_">Person</span> {
    <span class="hljs-keyword">private</span> String name;
    <span class="hljs-keyword">private</span> <span class="hljs-type">int</span> age;
}
Note the class names in the generated HTML - hljs-keyword, hljs-title class_ and hljs-type. These are exactly the CSS anchor points, on which we can hook the desired styling.
This code should be included in the tags <pre><code></code></pre> to present it in a pre-formatted way. The full HTML would be as follows:
<pre><code lang="java" class="hljs"><span class="hljs-keyword">public</span> <span class="hljs-keyword">class</span> <span class="hljs-title class_">Person</span> {
    <span class="hljs-keyword">private</span> String name;
    <span class="hljs-keyword">private</span> <span class="hljs-type">int</span> age;
}
</code>
</pre>
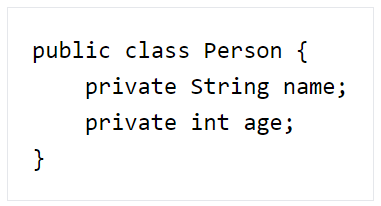
But as long as no theme is applied, the code snippet would look like this:

Pretty dull, huh...
highlight.js theme
But no worries, the situation can easily be fixed by applying one of many CSS styles, provided in the library. Each such file is called a theme.
However, the way to apply this CSS stylesheet is a bit... well.. old-schoolish?
<link rel="stylesheet" href="path-to-highlight.js/styles/a11y-light.css">
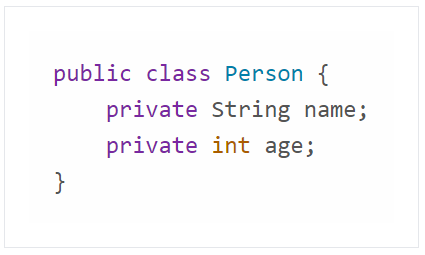
Here is the result:

Now, imagine a situation when, for some reason, you would like to present on the same page code snippets, styled with different themes.
For example, you are developing a blog platform, and you would like to present different code styles on the same page so that the user can make the code style choice for the blog.
Or consider a situation, when you would let the user choose the theme of your page - dark or light (dark themes are becoming more and more popular, and such functionality is quite present these days). In this case, you would expect the code styling to change accordingly.
Change the theme dynamically
In the modern world of React and Typescript, the ideal solution would be to have a component, that receives the language and the theme name as parameters. Then the component somehow (magically!) displays the code snippet with the requested theme.
And all that without messing up with the styles of other code snippets, potentially present on the page.
In this blog post, we will try to develop such a component. But before let's have a look at suggested solutions in the public domain (StackOverflow!).
It should come as no surprise that all the presented solutions would focus on changing the link to the theme stylesheet, present in the page head section.
For example, this is the way the highlight.js demo page works (from here):
document.querySelectorAll(".styles li a").forEach((style) => {
  style.addEventListener("click", (event) => {
    ...
    if (... should change theme ...) {
      // enable / disable the link tags
      document.querySelector(`link[title="${nextStyle}"]`).removeAttribute("disabled");
      document.querySelector(`link[title="${currentStyle}"]`).setAttribute("disabled", "disabled");
      ..
    }
  });
});
Another more React friendly, approach would suggest using the react-helmet plugin (from here)
This approach boils down to the same principle - change the stylesheet link. Simply this time react-helmet can be used to do that dynamically based on the component props:
import { Helmet } from 'react-helmet'

const themeName = "a11y-light"

<Helmet>
    <link rel="stylesheet" type="text/css" href=`path-to-highlight.js/styles/${themeName}.css` />
</Helmet>
Similar to the previous solution, the highlight.js theme is applied to the whole page.
This approach becomes even more cumbersome if we are developing a third-party code-highlighting component, intended to be included in another project.
In this case, the approach with a global stylesheet link is not desirable because normally we don't want to mess up with the head section of the page our library is included on.
Bug most importantly, the global styling is very much against the trend of CSS class name isolation (CSS as a module, emotion, etc...)
CSS scoping
One thing that is probably worth noticing in this context is the so-called CSS scoping.
The main idea of this feature is to limit the application of the CSS styles to a particular component selector.
Consider this CSS example:
@scope (.light-scheme) {
  :scope {
    background-color: plum;
  }
}

@scope (.dark-scheme) {
  :scope {
    background-color: darkmagenta;
    color: antiquewhite;
  }
}
This piece of CSS is pretty much self-explanatory: whenever a selector .light-theme is matching - apply background plum, otherwise, if the selector .dark-theme is matching, apply background darkmagenta, and change the text color (darkmagenta? plum? really? I haven't even heard of this kind of colors before... Where on earth the people are even taking them ?? )
The CSS scoping can be very useful in our context of dynamic theme changing.
We could pre-scope each theme to a component with the corresponding class name, and then... boom! it would be enough to add the corresponding class name to get our code highlighted in the desired way!
Pretty elegant, isn't it?
Here is an example of such hypothetical pre-scoped CSS:
@scope .a11y-light {
    .hljs {
        background: #fefefe;
        color: #545454
    }
}

@scope .a11y-dark {
    .hljs {
        background: #2b2b2b;
        color: #f8f8f2
    }
}
However, we'll need to include in the scoped section the whole theme. And we definitely don't want to use copy/pasting here, right?
Ok, it turns out that there is another CSS feature - import - which is intended to include the content of one CSS file into another.
Using this approach one would combine the scoping and importing as follows:
@scope .a11y-light {
    /* wrong inclusion, won't work... */
    @import "node_modules/highlight.js/styles/a11y-light.css";
}
@scope .a11y-dark {
    /* wrong inclusion, won't work... */
    @import "node_modules/highlight.js/styles/a11y-dark.css";
}
This way we could pre-scope each theme to the dedicated CSS selector, and then use it by changing class names, as suggested before.
Unfortunately, this promising idea has been crashed down by the merciless CSS importing rule (IntelliJ WebStorm error annotation):
Misplaced @import. Move CSS @import to top of the file
And yes.... apparently the @import statements are allowed on the top of the CSS file, and consequently cannot be used inside the @scope rule...
Such a disappointment ...
Preprocessing CSS files
Well, fear not! As they say
“It’s not whether you get knocked down; it’s whether you get up.” – Vince Lombardi
The idea with the pre-scoped CSS files is very promising, and let's see if we can achieve the same effect differently.
If only we could convert each highlight.js theme CSS file into a prefixed one, we could achieve the same effect as pre-scoping.
Consider this.
Instead of having CSS style as this:
.hljs {
  background: #2b2b2b;
  color: #f8f8f2
}
you would have this:
.a11y-dark .hljs {
  background: #2b2b2b;
  color: #f8f8f2
}
And the same for each highlight.js theme.
Well, the good news is that it is possible to achieve this by using the postcss postprocessor. The bad news is that it's not quite straightforward, and we'll need to have a script to pre-process all the themes.
Thanks to the postcss plugin postcss-selector-prefix we can pre-process CSS files by adding a predefined prefix.
Here is how it works:
import postcss from "postcss";
import postcssSelectorPrefix from "postcss-selector-prefix"
const css = .. // CSS content, loaded from a file
const plugin = postcssSelectorPrefix(".hljs-theme-a11y-light")
const prefixedCss = postcss([plugin]).process(css)

console.log("a11y-light css", prefixedCss.css);
Having that code at hand the only thing we need to do is to load the CSS files from a designated folder- in our case, it would be node_modules/highlight.js/styles - and convert it by prefixing the class names with the filename of the CSS file.
Postcss config file
However, using postcss programmatically, as shown above, is not the most common way postcss is supposed to be used.
The postcss processor is primarily intended to be used as part of the building chain, or rather, a loading chain, for such tools as Webpack.
This way it can be applied implicitly, so that everything will work well... kind of magically.
In most cases it does, and some popular frameworks, such as Next.js, even include the postcss as the standard part of their CSS loading chain.
Postcss is being configured by the special file - postcss.config.mjs - which, in particular, is supposed to have the plugins you would like to apply to your CSS.
Here is the postcss config file one would use to prefix the CSS file with a predefined prefix, for example, "a11y-light" (for a11y-light highlight.js theme).
/** @type {import('postcss-load-config').Config} */
const config = {
  plugins: {
    "postcss-selector-prefix": ".a11y-light",
  },
};

export default config;
We can test the result of such processing as follows:
postcss -o ./src/prefixed-a11y-light.css ./node_modules/highlight.js/styles/a11y-light.css
Running this command would output the CSS code similar to the desired result we have mentioned earlier:
.a11y-light .hljs {
  background: #fefefe;
  color: #545454
}
Ok, now what is left to do is to apply this processing on each CSS theme file, found in the folder highlight.js/styles, each theme with its respective prefix.
Working with Next.js and Tailwind
Let's now try to apply all this processing to a concrete use case - a Next.js based project, that uses Tailwind - a very popular (and highly recommended by yours truly!) CSS framework.
Tailwind provides a large set of predefined reusable CSS classes, which are being converted to an actual CSS by tailwind processor, implemented as a postcss plugin.
Here is the typical configuration of the postcss for such a project with Next.js and Tailwind:
/** @type {import('postcss-load-config').Config} */
const config = {
  plugins: {
    autoprefixer: {},
    tailwindcss: {},
  },
};

export default config;
It turns out that postcss is already a part of the Webpack CSS loading chain, used by Next.js under the hood.
For a curious reader, here is an excerpt of the relevant part of the Next.js' Webpack configuration (the procuring of which is far from obvious! )
{
  "sideEffects": true,
  "test": {},
  "issuerLayer": {...},
  "use": [
    {
      "loader": "<project-dir>node_modules/next/dist/build/webpack/loaders/next-flight-css-loader.js",
      ...
    },
    {
      "loader": "<project-dir>node_modules/next/dist/build/webpack/loaders/css-loader/src/index.js",
      ..
    },
    {
      "loader": "<project-dir>node_modules/next/dist/build/webpack/loaders/postcss-loader/src/index.js",
      ...
    }
  ]
}
But long story short, the idea was to develop the postcss configuration that would apply the prefix on highlight.js themes, and then combine this processing with the existing processing of postcss in Next.js (for example, to ).
Crashing against the harsh reality...
Unfortunately, this solution, which seemed quite elegant to me, apparently couldn't be applied.
After hours of searching, I couldn't find a reliable way of configuring postcss to process only a particular subset of files. In addition, and probably most importantly, I couldn't find a way to dynamically configure postcss so that it would apply the prefix plugin with the correct prefix, which would depend on the filename.
If we imagine a plugin - let's name it postcss-filename-prefixer - that would do that, it would have a configuration similar to this:
/** @type {import('postcss-load-config').Config} */
const config = {
  plugins: {
    "postcss-filename-prefixer": {
        filePattern: "highlight.js/styles/*.css",
        prefix: ".%filename%"
    },
  },
};

export default config;
If such a plugin existed, it could have been combined easily with a Tailwind plugin, giving a working solution for scoped styles for highlight.js themes.
Unfortunately, such a plugin doesn't exist currently, to the best of my knowledge. Probably its functionality can be achieved by combining several other postcss plugins. But that remains uncertain either...
According to my understanding, the main problem is the fact that postcss is really designed to work on a single file only, not on a set of files. And consequently, its plugins follow this paradigm.
Script to pre-process the highlight.js themes
If we can't configure postcss to properly pre-process CSS files implicitly, even though it is quite disappointing, we can still create a script that would do that explicitly.
Then this pre-processed set of CSS themes can either be exported or used directly in the project.
With all the information presented above, it should be quite straightforward to compose such a script:
import fs from "fs";
import postcss from "postcss";
import postcssSelectorPrefix from "postcss-selector-prefix"
import path from "path";

const dir = "./node_modules/highlight.js/styles";

const outDir = "./src/hljs/styles"

try {

    var outDirStat = fs.statSync(outDir);

    if (outDirStat.isDirectory()) {
        console.log("directory", outDir, "exists, deleting...")
        fs.rmSync(outDir, {recursive: true});
    }
    fs.mkdirSync(outDir, {recursive: true})
} catch (e) {
    fs.mkdirSync(outDir, {recursive: true})
}

const files: string[] = fs.readdirSync(dir);

for (const f of files) {

    const stat: fs.Stats = fs.statSync(`${dir}/${f}`);
    if (stat.isFile()) {
        if (f.endsWith(".css") && !f.endsWith(".min.css")) {

            console.log("processing", `${dir}/${f}`)

            var css = fs.readFileSync(`${dir}/${f}`, 'utf8').toString();

            const theme = f.substring(0, f.length - 4);
            const cssProcessor = postcss([postcssSelectorPrefix(`.hljs-theme-${theme}`)]);

            const res = cssProcessor.process(css)

            const outFile = `${outDir}/prefixed-${f}`
            fs.writeFile(outFile, res.css, err => {
                if (err) return console.error(err);
                console.log(`${outFile}: File created!`);
            });

        } else if (!f.endsWith(".min.css")) {
            fs.cpSync(path.resolve(dir, f), path.resolve(outDir, f))
        }
    }
}
This script would scan all the files in the highlight.js/styles folder ending with .css (and ignoring .min.css), and for each such file it would create a corresponding file prefixed-<original filename>.css, which would contain the prefixed CSS for the corresponding theme.
And we run this script as follows:
tsx src/scripts/prefix-highlight-js-themes.ts
The postcss plugin postcss-selector-prefix doesn't seem to have the associated type declarations, so I had to add it manually:
typings.d.ts
declare module "postcss-selector-prefix"tsconfig.json
  {
      "compilerOptions": {
          ...
          "typeRoots": [
              "./node_modules/@types",
              "./src/scripts/typings"
          ],
          ...
      },
      ...
  }
Code highlighting component
Finally, with all that preparatory work, we can (at last!) get our hands dirty to create the long-awaited code highlighting component! (as if the hands were not dirty enough from all the previous trial-and-errors!)
We assume that the highlight.js themes were pre-processed by the script, presented earlier, such that each theme contains already prefixed versions of the class names.
Here is the code of the component:
import hljs from 'highlight.js';


export class CodeCompProps {
    language: string;
    code: string;
    hljsTheme: string;

    constructor(language: string, code: string, hljsTheme: string) {
        this.language = language;
        this.code = code;
        this.hljsTheme = hljsTheme;
    }
}

export async function CodeComp(props: CodeCompProps) {

    const {language, code, hljsTheme} = props

    const html = hljs.highlight(code, {language}).value;

    console.log("importing ", `../../hljs/styles/prefixed-${hljsTheme}.css`)

    await import(`../../hljs/styles/prefixed-${hljsTheme}.css`)
    return (
        <div className={`p-4 inline-block text-left hljs-theme-${hljsTheme}`}>
            <pre>
                <code lang={language} className={"hljs"} dangerouslySetInnerHTML={{__html: html}}/>
            </pre>
        </div>
    )

}
One might notice the dynamic import of the corresponding CSS file.
Note that this import is being done from the preprocessed CSS files folder.
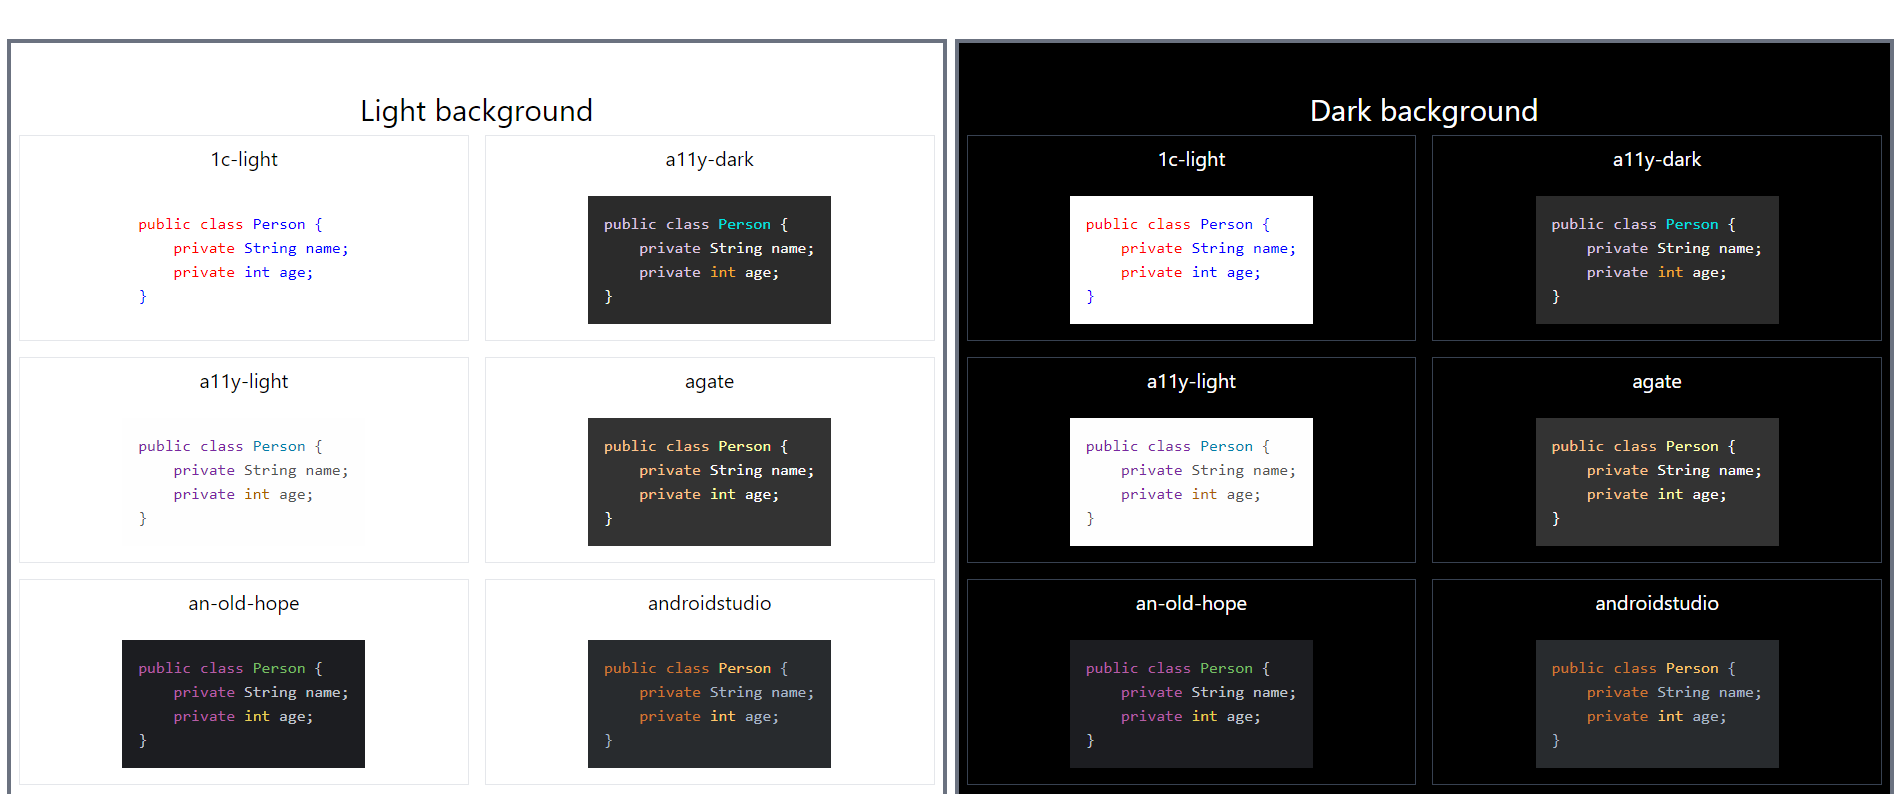
Here is the result:

the demo page is available here:
nextjs-tailwind-highlight-js-theme-selector
The code of the project can be found here:
epanikas/nextjs-tailwind-highlight-js-theme-selector (github.com)
Conclusion
In this article, we have discussed the problem of applying a highlight.js theme on a single component, such that the styling will only be scoped to this component.
The main difficulty we encountered was that the highlight.js themes were CSS files sharing the same class names. They are intended to be used as global page stylesheets.
Due to this particularity, the scoped application of the theme is not straightforward.
We have explored the following approaches to achieve the desired result:
a scoped CSS
pre-processing of CSS files using the postcss processor
a dedicated script, intended to convert each theme to a prefixed version
The approach with scoped CSS is not applicable since the import keyword is not allowed inside the scoped section.
The postcss processor approach, where each theme could have been processed to a prefixed version, was quite promising and elegant. Unfortunately, up to this moment, I couldn't pin down the necessary postcss plugins to achieve the desired result, even though there is a postcss-filename-prefix plugin, which is quite similar to what I was searching for.
Finally, we ended up creating a dedicated script to scan all the CSS files in a given folder (node_modules/highlight.js/styles) and preprocess them into their prefixed versions.
The script uses the postcss processor with the plugin postcss-selector-prefix.
Thanks to the prefixed versions of the highlight.js themes we could create a convenient code highlighting component, that would highlight the code according to the styling preferences, without applying this style globally.
References:
The project demo page: nextjs-tailwind-highlight-js-theme-selector
The code of the project: epanikas/nextjs-tailwind-highlight-js-theme-selector (github.com)
postcss plugins: https://postcss.org/docs/postcss-plugins
react-helmet tutorial: Getting Started with React-Helmet: A Beginner's Guide - DEV Community
highlight.js dynamic theming:
using react-helmet to change themes: how to use/implement input tags and custom jsx tag for syntax highlighting using Highlight.JS? · Issue #2462 · highlightjs/highlight.js (github.com)
html - How to dynamically change the theme using highlight.js? - Stack Overflow
Question: How do I change the style at runtime by clicking a button · Issue #2115 · highlightjs/highlight.js (github.com)
Enable Dynamically Changing Themes · Issue #194 · MurhafSousli/ngx-highlightjs (github.com)
highlight.js theme demo: https://highlightjs.org/demo/
CSS scope: https://developer.mozilla.org/en-US/docs/Web/CSS/:scope
Subscribe to my newsletter
Read articles from Emzar Panikashvili directly inside your inbox. Subscribe to the newsletter, and don't miss out.
Written by
