Cloud Networking - VPC Traffic Flow and Security
 yyounos shaik
Difficulty : Easy Time : 1 Hour Cost : 0€
What you'll need:
An AWS account - Create one here!
Part 1 - Build a Virtual Private Cloud
Services Needed: AWS VPC
Overview
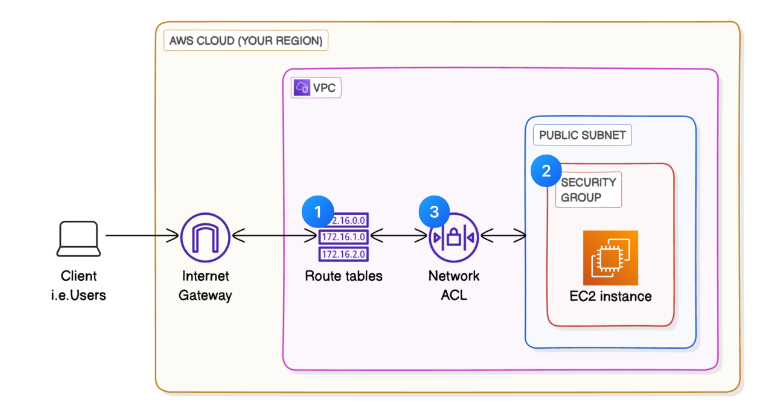
Lets dive deep the core of AWS networking by creating your own Virtual Private Cloud and manage the traffic flow and the security into your VPC.
Let's get ready to:
🚏 Create a route table.
👮♀️ Create a security group.
📋 Create a Network ACL (Network Access Control List).
Lets Get Started...
Step 1: Set up your VPC basics
💡Quick Overview about VPC
In your AWS Management Console's search bar, search for
VPC.Select VPC from the drop down menu.
in the left navigation pane, choose Your VPCs.
Make sure you're on the Region that's closest to you. Use the dropdown on the top right hand corner to switch Regions.
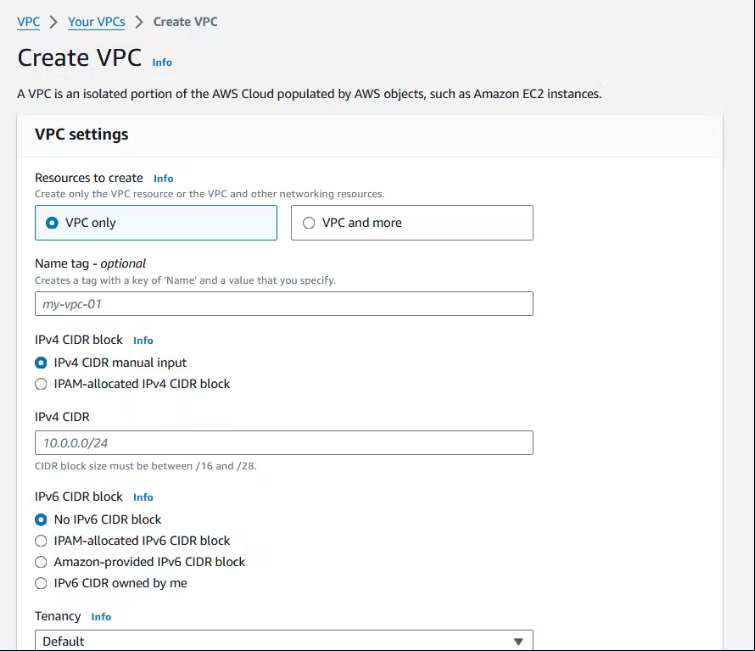
Choose Create VPC.
Choose VPC Only.
Name tag:
Demo-VPCIPv4 CIDR:
10.0.0.0/16Select Create VPC.
Create Subnets.
💡Quick Recap
Subnets are subdivisions within your VPC where you can launch AWS resources.In the VPC Dashboard, under Virtual Private Cloud, choose Subnets.
Choose Create subnet.
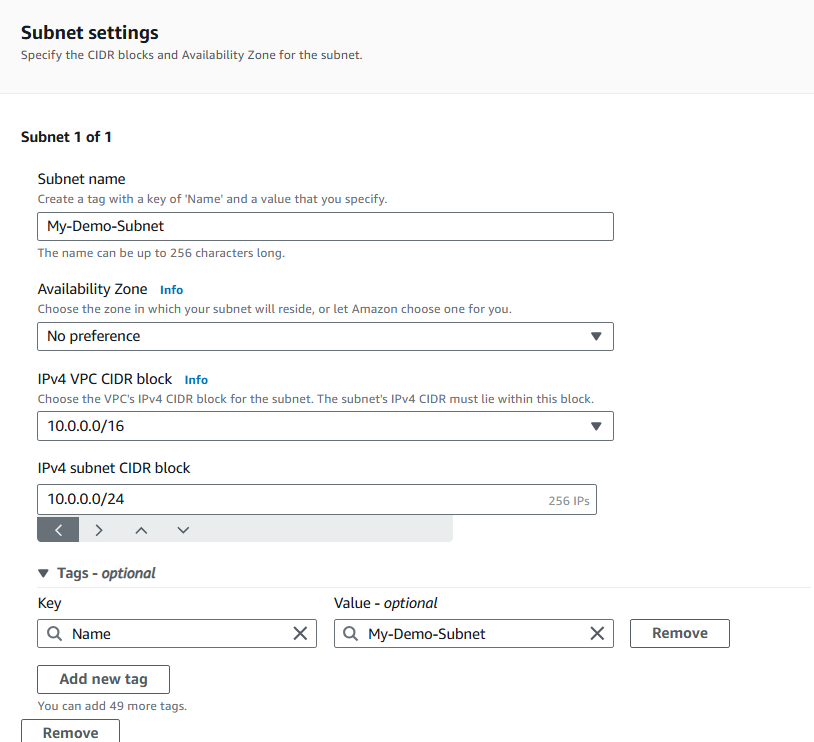
Configure your subnet settings:
Subnet name:
Public 1Availability Zone: Select the first Availability Zone in the list.
IPv4 VPC CIDR block:
10.0.0.0/16IPv4 subnet CIDR block:
10.0.0.0/24
Choose Create Subnet.
Select the checkbox next to Public 1.
In the Actions menu, select Edit subnet settings.
Check the box next to Enable auto-assign public IPv4 address.
Choose Save.
Create an Internet Gateway:
💡Time to connect our VPC to the internet... with an internet gateway.
In the left navigation pane, choose Internet gateways.
Choose Create internet gateway.
Configure your internet gateway settings:
- Name tag:
Demo IG
- Name tag:
Choose Create internet gateway.
Select your newly created internet gateway and choose Actions, then Attach to VPC.
Select Demo-VPC.
Select Attach internet gateway.
Step 2: Create a route table
💡What is route table?
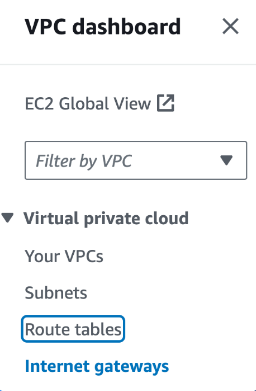
Refresh your page.
Select the checkbox for the first route table at the top of the list, then select the Routes tab.
Uncheck that route table, and switch to the bottom route table.
Select the Routes tab again.
Aha, the two tables have different routes!
💡Why do I have two route tables? What do they do?
Let's decode the routes inside this table:

Route 0.0.0.0/0 | igw- directs traffic to the default internet gateway.
Route 172.31.0.0/16 | local is helps manage internal traffic within the VPC.
💡AWS also created the other route table automatically when you set up Demo-VPC.

This route table has a single route that allows traffic within the 10.0.0.0/16 CIDR block to flow within the network.
There is no route with an internet gateway as the target! This means there is no route for traffic to leave your VPC.his route table has a single route that allows traffic within the 10.0.0.0/16 CIDR block to flow within the network.
There is no route with an internet gateway as the target! This means there is no route for traffic to leave your VPC.
💡So what do the destination and target columns mean in a route table?
Destination: The IP address range that traffic wants to reach.
Target: The road or path that the traffic will have to take to get to its destination.
igw-xxxxxx: Means the traffic is routed to the internet via the Internet Gateway.
local: Means the traffic stays within the VPC, allowing internal communication between resources.
Let's rename your Demo-VPC route table so it's easier to recognise.
Make sure you have your Demo-VPC route table selected - this is the route table with a single route to 10.0.0.0/16.
Select the pencil icon in the Name column of your route table.
Enter the name
Demo-Route-Table.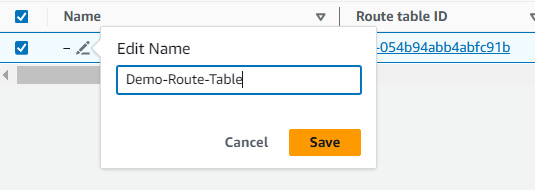
Select the Routes tab.
Choose Edit routes.
Choose Add route near the bottom of the page

Choose Save changes.
Choose the Subnet associations tab.
Under the Explicit subnet associations tab, choose Edit subnet associations

Select Public 1.
Choose Save associations.
Your subnet is now public because it is connected to the Internet via the internet gateway!
Step 3: Create a security group
let's add a security group so that users can access resources in your VPC.
💡What is a security group?
If VPCs are cities and subnets are neighbourhoods, a security group is a security checkpoint, or security guard, at the entrance for each building (resource) in that neighbourhood (subnet).
Every resource must be associated with a security group. This means security groups don't attach to a VPC or a subnet, they attach to a specific resource within that VPC/subnet. If you don't specify a security group when you launch a resource, it will use the default security group that AWS creates whenever you set up a VPC.
💡 Protocols and port numbers? What do they mean?
Protocols: With VPCs as our city and every resource as a building, think of protocols as different vehicles, like buses, taxis and trucks, to deliver data in different ways. Protocols are special rules that help data move across the internet, each designed to send data for a specific kind of task. Here are some protocols you might come across:
HTTP (Hypertext Transfer Protocol): This is the standard protocol for sending web pages over the internet. Just like buses carry passengers, HTTP carries web page data to your browser. Most website links start with HTTP, for example, https://www.Amazon.com/.
SMTP (Simple Mail Transfer Protocol): SMTP is the standard protocol used for sending emails across the Internet! It acts as a mailman, ensuring that your email reaches the correct inbox without errors.
FTP (File Transfer Protocol): FTP is like a delivery truck that is used for transporting large loads of files between computers on a network. It's a popular tool for uploading and downloading bulky items to and from servers, and developers often use FTP to upload website files directly to a hosting server from their local computers.
SSH (Secure Shell Protocol): SSH is like a secure, private car that allows encrypted communication directly with a server for private tasks such as managing software or configuring settings. In AWS and other cloud environments,
Port numbers: Think of port numbers as specific doors or delivery docks on a building where data will enter or exit. Each port number is designed for a specific protocol, helping servers (i.e. EC2 instances) direct incoming and outgoing traffic to the right application/process that's capable of processing that protocol. Without port numbers, an EC2 instance would struggle to manage incoming data correctly! It wouldn't know which application or service each piece of data should be directed to.
Some common port numbers are:
Port 80: for HTTP protocols delivering web pages.
Port 25: for SMTP protocols delivering email.
Port 21: for FTP protocols delivering file.
- In the left navigation pane, choose Security groups.
💡Why do we already have existing security groups?
Choose Create Security Group.
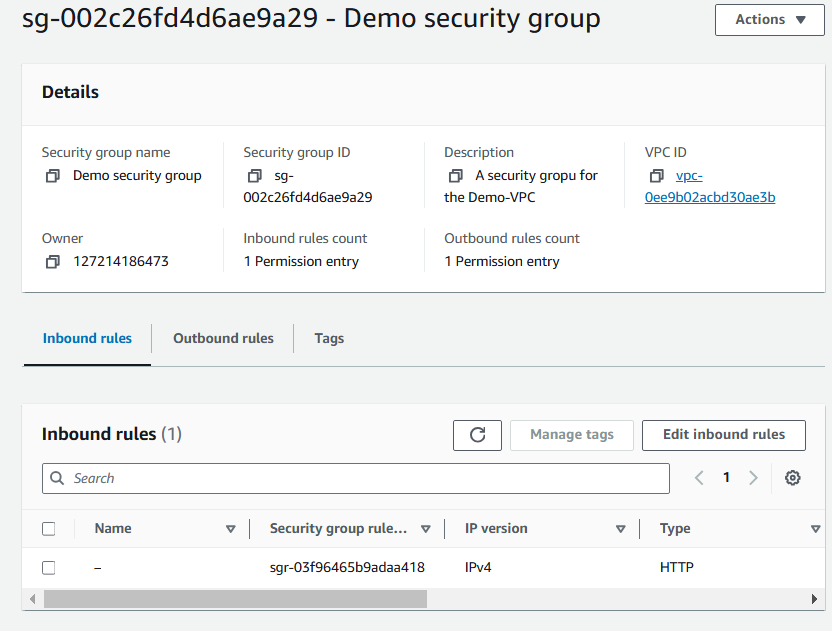
Security group name:
Demo Security GroupDescription:
A Security Group for the Demo-VPC.VPC: Demo VPC
Under the Inbound rules panel, choose Add rule.
Type:
HTTPSource:
Anywhere-IPv4
At the bottom of the screen, choose Create security group.
Step 4: Create a Network ACL
- In the left navigation pane, choose Network ACLs.
💡What are Network ACLs?
- Choose the network ACL that's associated with your Public 1 subnet, and check out the tabs for Inbound rules and Outbound rules.
💡Why are there ACLs in my account already?
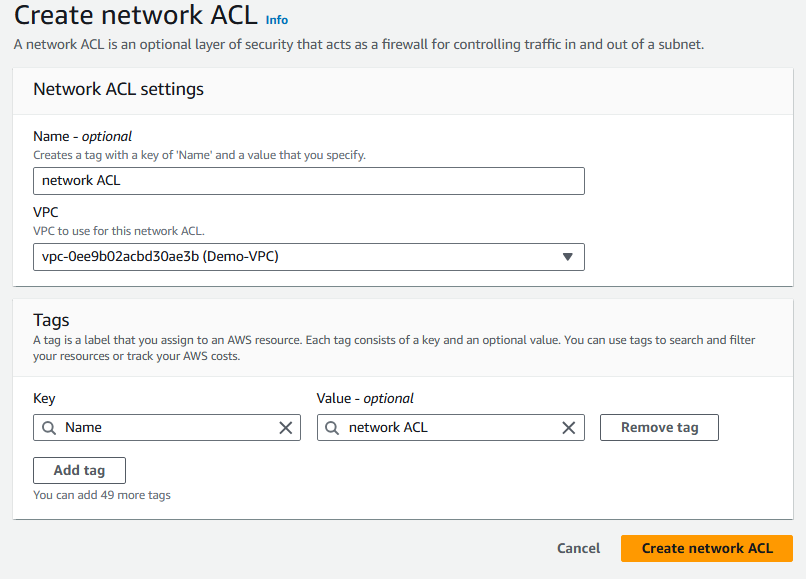
Select Create new network ACL.
Name:
Demo-VPC ACL.VPC: Demo- VPC.
Select Create network ACL.
Choose the network ACL that's associated with your Public 1 subnet, and check out the tabs for Inbound rules and Outbound rules.
Select the Inbound rules tab.
Select Edit inbound rules.
Select Add new rule.
Rule number:
100
💡 Why is 100 the rule number?
In network ACLs, rule numbers decide the order that rules are checked—lower numbers go first. Starting at 100 gives you room to add new rules before it if you need to.
Type: All traffic.
Source:
0.0.0.0/0
Click Save changes.
Select the Outbound rules tab.
Select Edit outbound rules.
Select Add new rule.
Rule number:
100Type: All traffic.
Source:
0.0.0.0/0
Save changes.
Now check: do you have an Allow rule for both your inbound and outbound rules? Do you have a subnet association to Public 1?
If yes, Congrats! you have successfully optimized the VPC security and network flow.If no, please check all the steps again.
Summary
Initally you have set up you own VPC with route tables, security groups and network ACL's.
Delete you resources once you have successfully set up everything so that you won't get charged for it...!
Subscribe to my newsletter
Read articles from yyounos shaik directly inside your inbox. Subscribe to the newsletter, and don't miss out.
Written by

yyounos shaik
yyounos shaik
An Aspring Cloud Engineer