Set up End-to-End LLMOps Pipeline with Prompt Flow, OpenAI Studio & GitHub Action
 Shubham Sahu
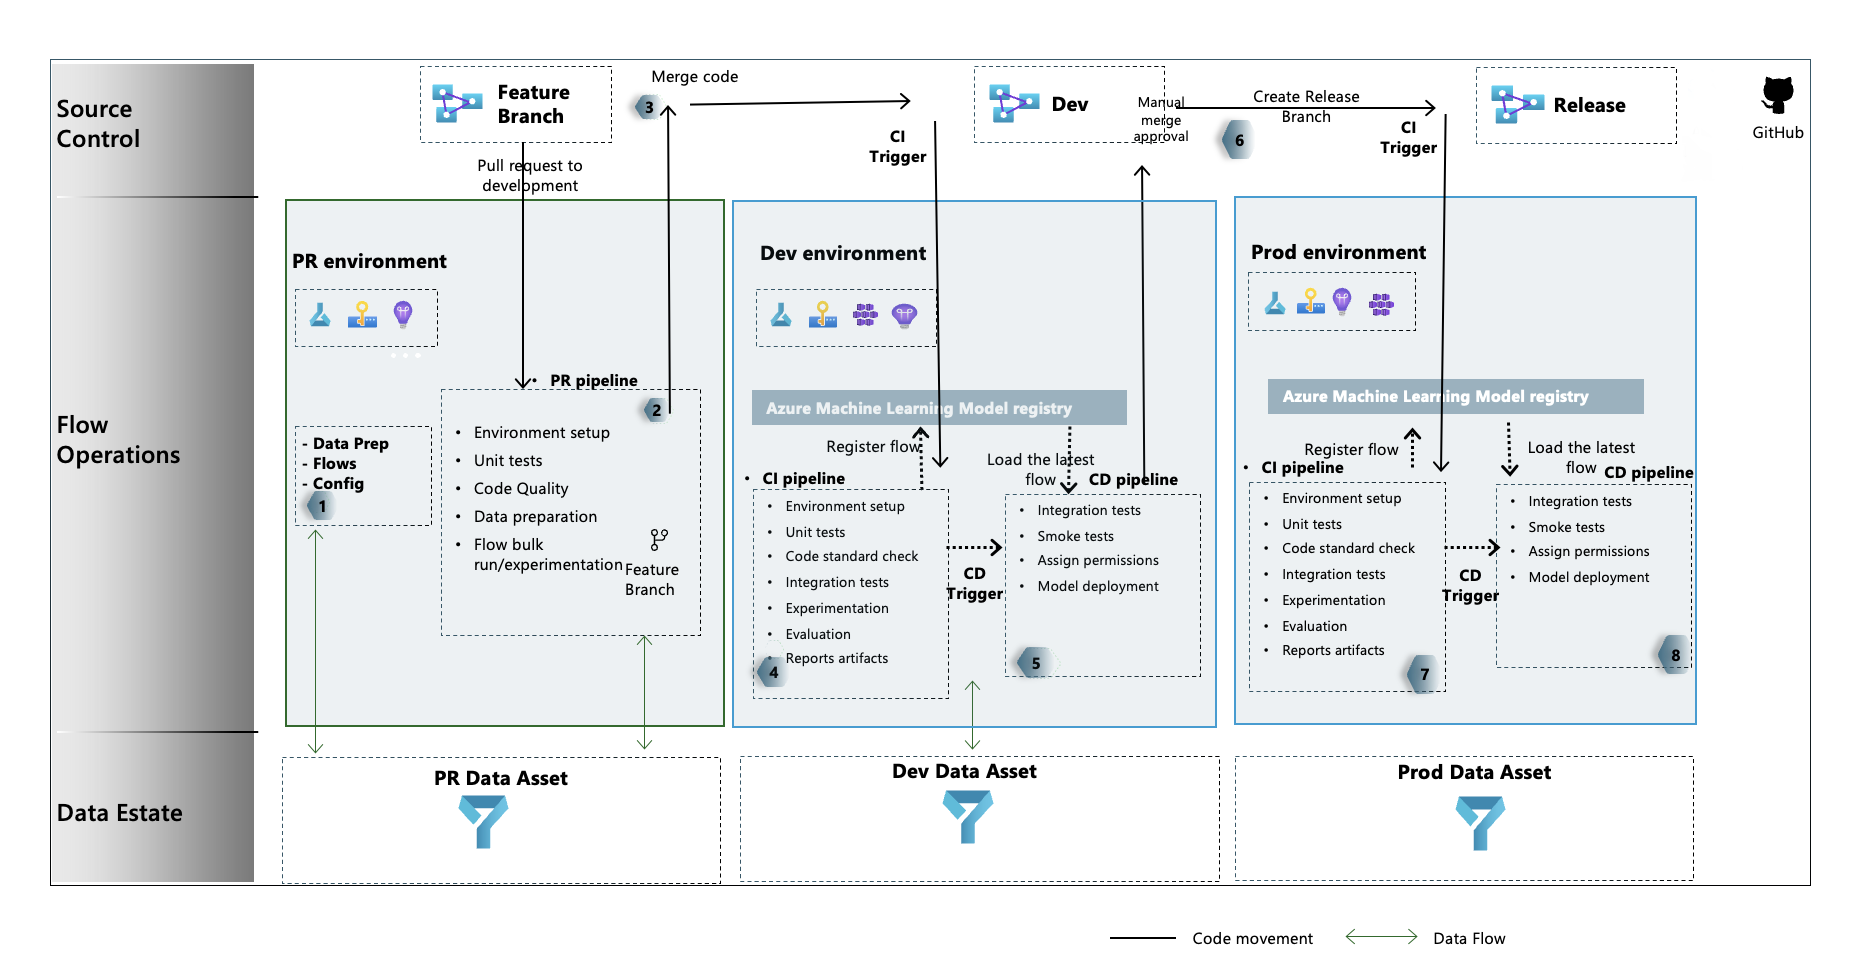
Azure Machine Learning allows you to integrate with GitHub Actions to automate the machine learning lifecycle. Some of the operations you can automate are:
Running Prompt flow after a Pull Request
Running Prompt flow evaluation to ensure results are high quality
Registering of prompt flow models
Deployment of prompt flow models
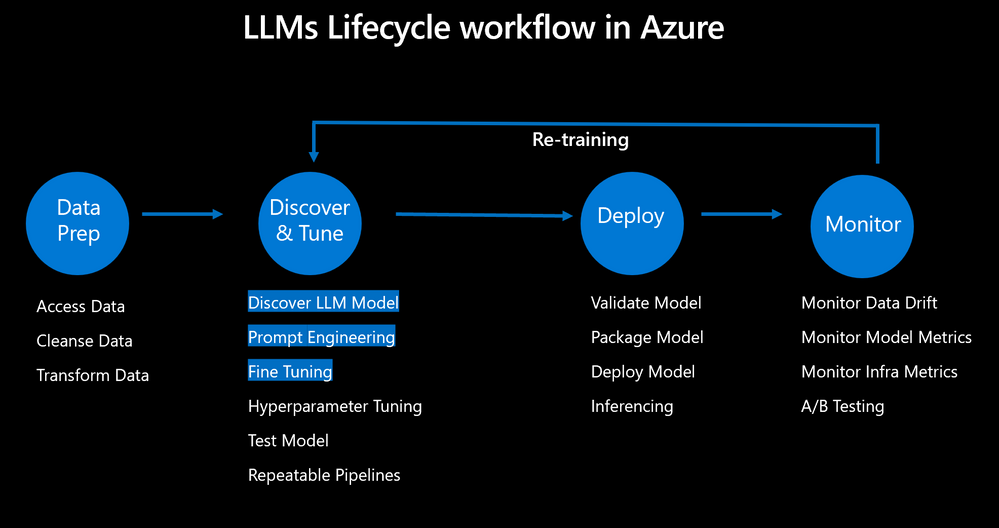
In this article, you learn about using Azure Machine Learning to set up an end-to-end LLMOps pipeline that runs a web classification flow that classifies a website based on a given URL. The flow is made up of multiple LLM calls and components, each serving different functions. All the LLMs used are managed and store in your Azure Machine Learning workspace in your Prompt flow connections
Prerequisites
An Azure subscription. If you don't have an Azure subscription, create a free account before you begin. Try the free or paid version of Machine Learning
A Machine Learning workspace
Azure OpenAI Account
Git running on your local machine
Set up authentication with Azure and GitHub
Before you can set up an Prompt flow project with Machine Learning, you need to set up authentication for Azure GitHub
Create service principal
Create one Prod service principal for this demo. You can add more depending on how many environments, you want to work on (Dev or Prod or Both). Service principals can be created using one of the following methods:
Create from Azure Cloud Shell
Launch the Azure Cloud Shell
If prompted, choose Bash as the environment used in the Cloud Shell. You can also change environments in the drop-down on the top navigation bar
Copy the following bash commands to your computer and update the projectName, subscriptionId, and environment variables with the values for your project. This command will also grant the Contributor role to the service principal in the subscription provided. This is required for GitHub Actions to properly use resources in that subscription.
Explain
 projectName="<your project name>"
 roleName="Contributor"
 subscriptionId="<subscription Id>"
 environment="<Prod>" #First letter should be capitalized
 servicePrincipalName="Azure-ARM-${environment}-${projectName}"
 # Verify the ID of the active subscription
 echo "Using subscription ID $subscriptionID"
 echo "Creating SP for RBAC with name $servicePrincipalName, with role $roleName and in scopes     /subscriptions/$subscriptionId"
 az ad sp create-for-rbac --name $servicePrincipalName --role $roleName --scopes /subscriptions/$subscriptionId --sdk-auth
 echo "Please ensure that the information created here is properly save for future use."
Copy your edited commands into the Azure Shell and run them (Ctrl + Shift + v).
After running these commands, you'll be presented with information related to the service principal. Save this information to a safe location, you'll use it later in the demo to configure GitHub.
Explain
   {
   "clientId": "<service principal client id>",
   "clientSecret": "<service principal client secret>",
   "subscriptionId": "<Azure subscription id>",
   "tenantId": "<Azure tenant id>"
   }
Copy all of this output, braces included. Save this information to a safe location, it will be use later in the demo to configure GitHub Repo.
Close the Cloud Shell once the service principals are created.
Set up GitHub repo
- Fork example repo: https://github.com/shubham081994/LLMOps-Prompt-Flow in your GitHub organization. This repo has reusable LLMOps code that can be used across multiple projects.
Add secret to GitHub Repo
From your GitHub project, select Settings:
Then select Secrets, then Actions:
Select New repository secret. Name this secret AZURE_CREDENTIALS and paste the service principal output as the content of the secret. Select Add secret.
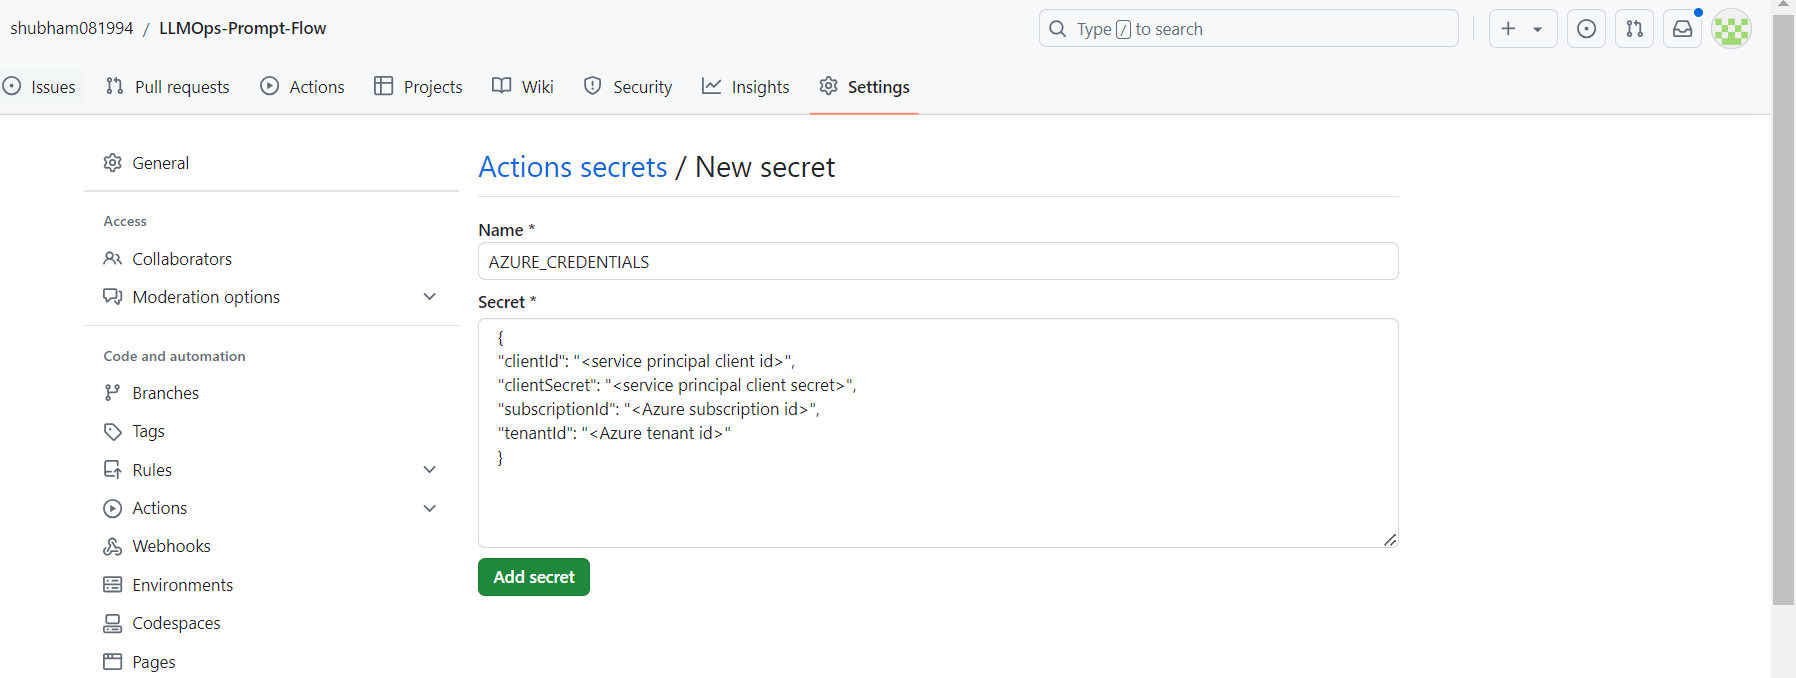
Add each of the following additional GitHub secrets using the corresponding values from the service principal output as the content of the secret:
GROUP: <Resource Group Name>
WORKSPACE: <Azure ML Workspace Name>
SUBSCRIPTION: <Subscription ID>
| Variable | Description |
| GROUP | Name of resource group |
| SUBSCRIPTION | Subscription ID of your workspace |
| WORKSPACE | Name of Azure Machine Learning workspace |
Setting up Connections for Prompt Flow
To set up the connection for the web-classification flow using the AzureOpenAI connection, follow these steps:
Navigate to your workspace portal.
Click on Prompt flow.
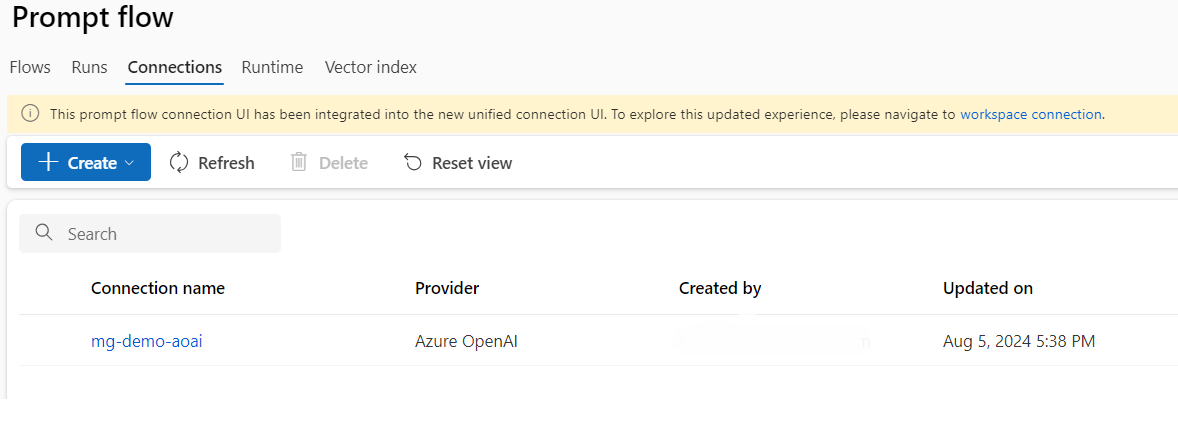
Go to Connections and select Create.
Choose Azure OpenAI from the options available.
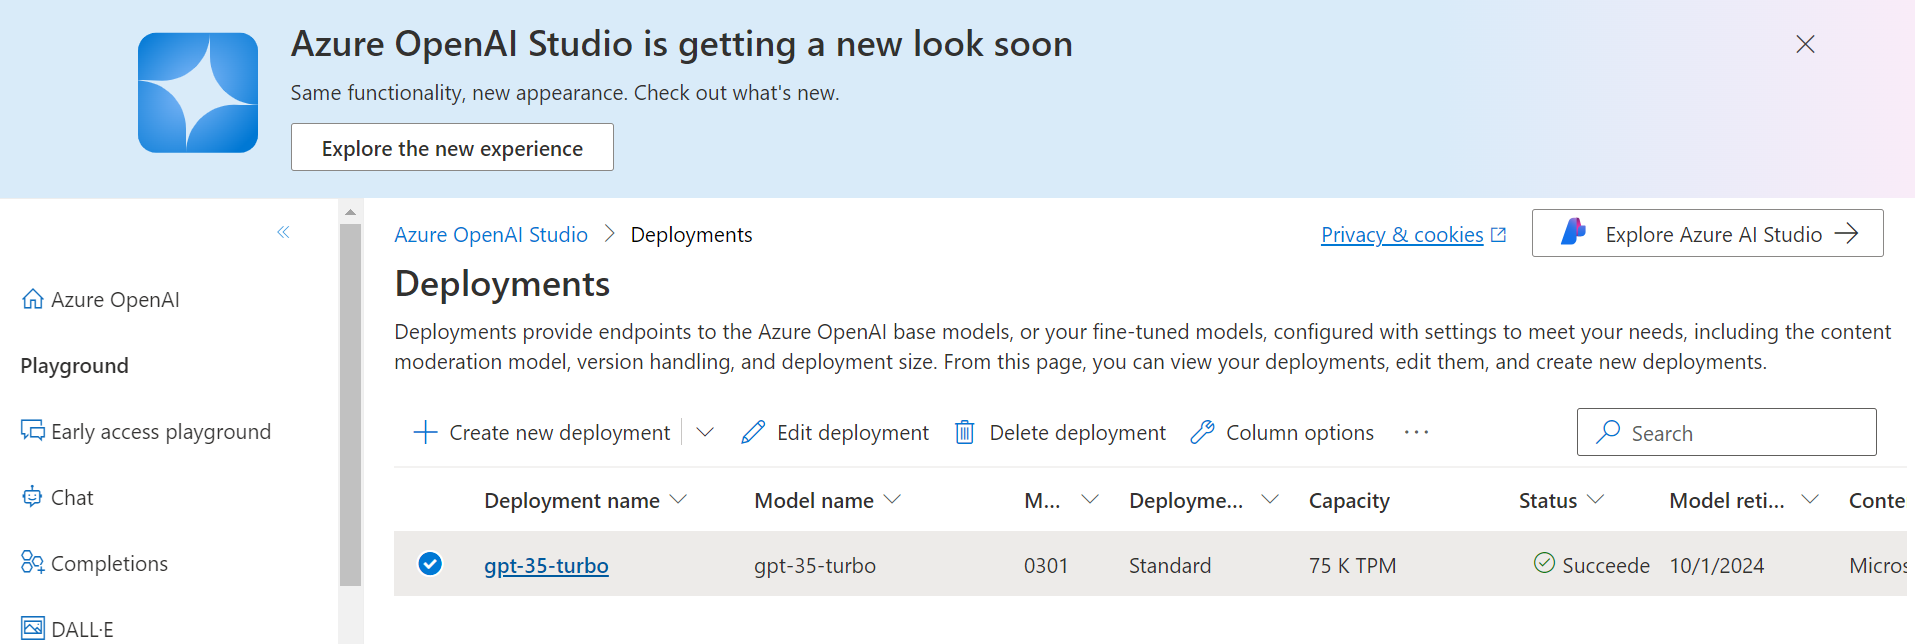
Follow the on-screen instructions to create your own connection named mg-demo-aoai
Setup Variables for Prompt Flow and GitHub Actions:
Clone the repository to your local machine using
git clonehttps://github.com/<user-name>/LLMOps-Prompt-FlowUpdate Workflow to Connect to Azure Machine Learning Workspace:
Navigate to
.github/workflow/in your cloned repository.Update
run-eval-pf-pipeline.ymlanddeploy-pf-online-endpoint-pipeline.ymlto connect to your Azure Machine Learning workspace. Adjust the CLI setup file variables to match your workspace.Verify that the
envsection in these files refers to the workspace secrets you previously added.Update
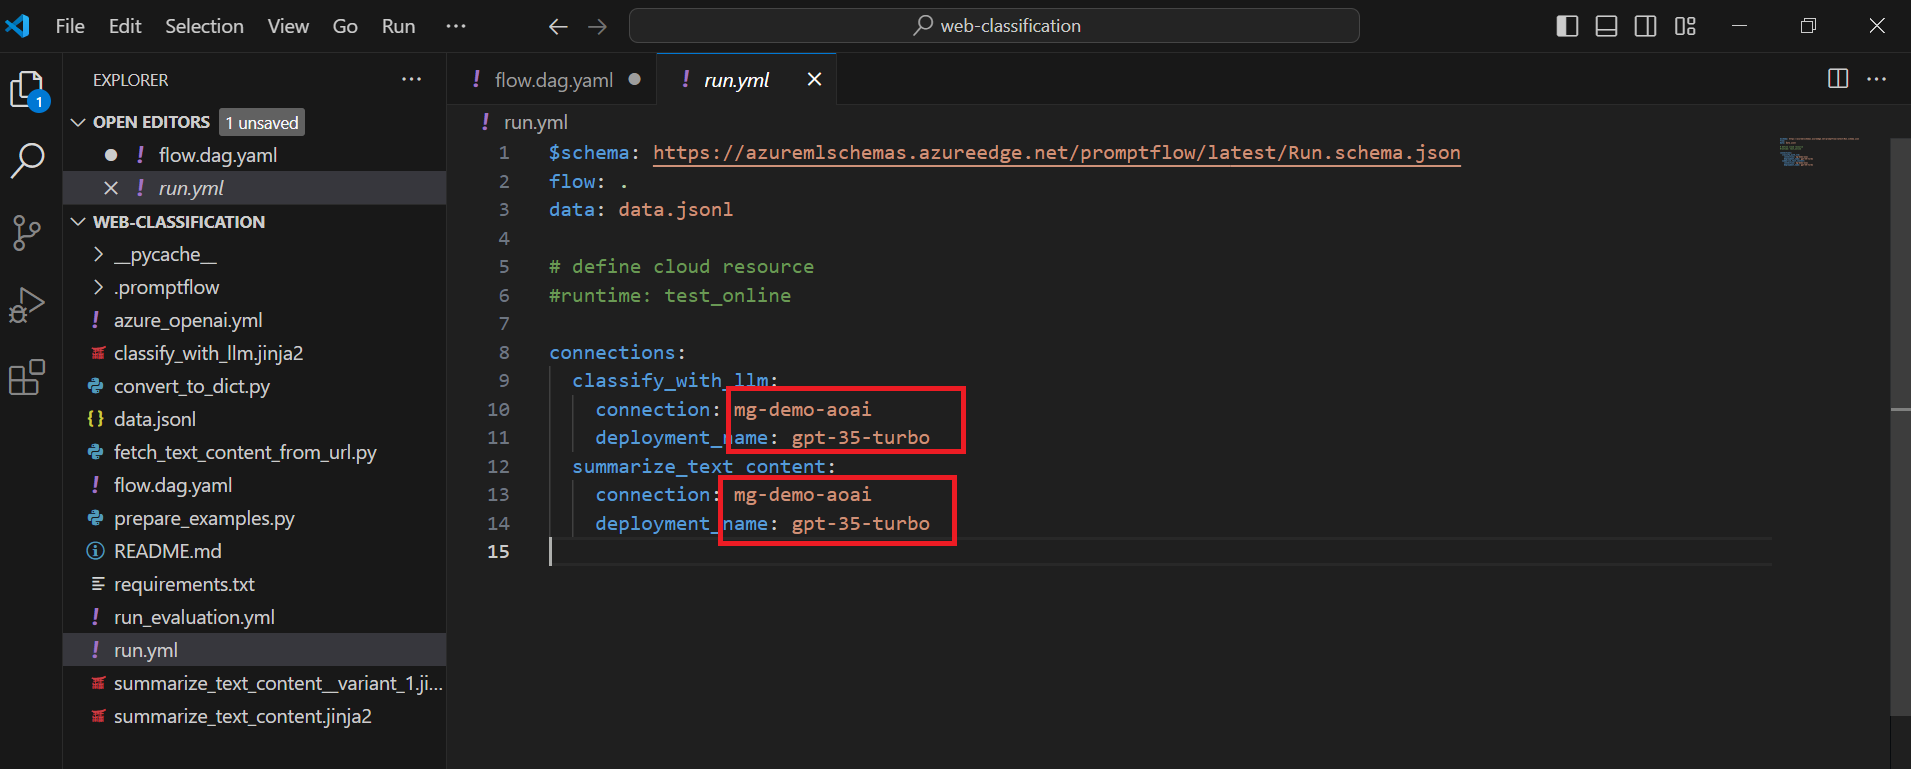
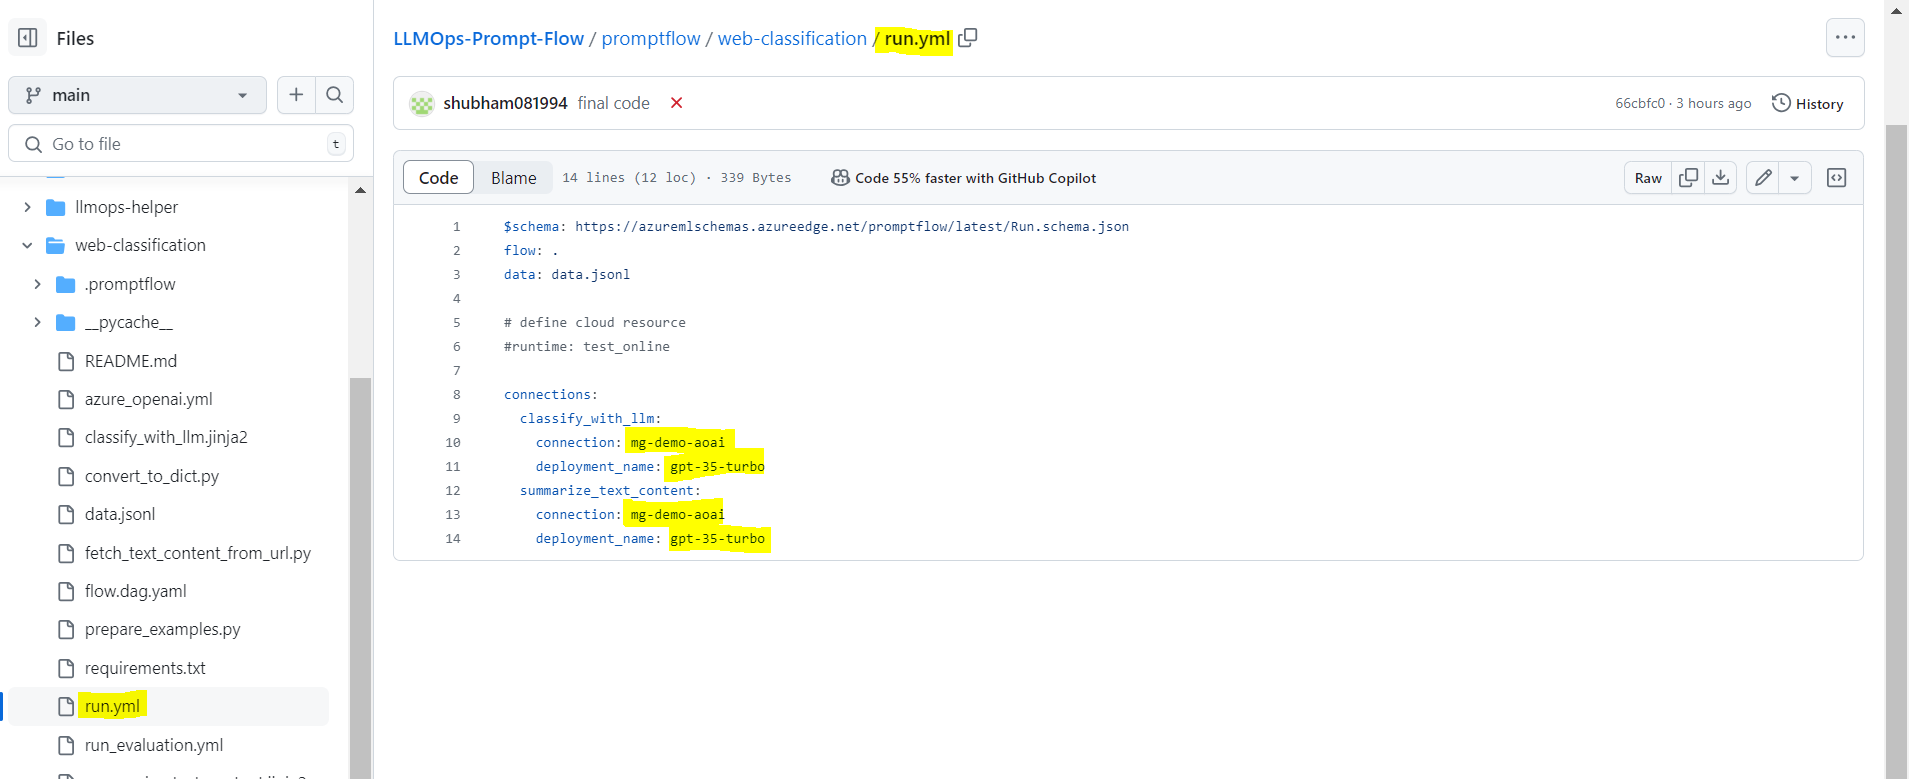
run.ymlwith Connections :Open
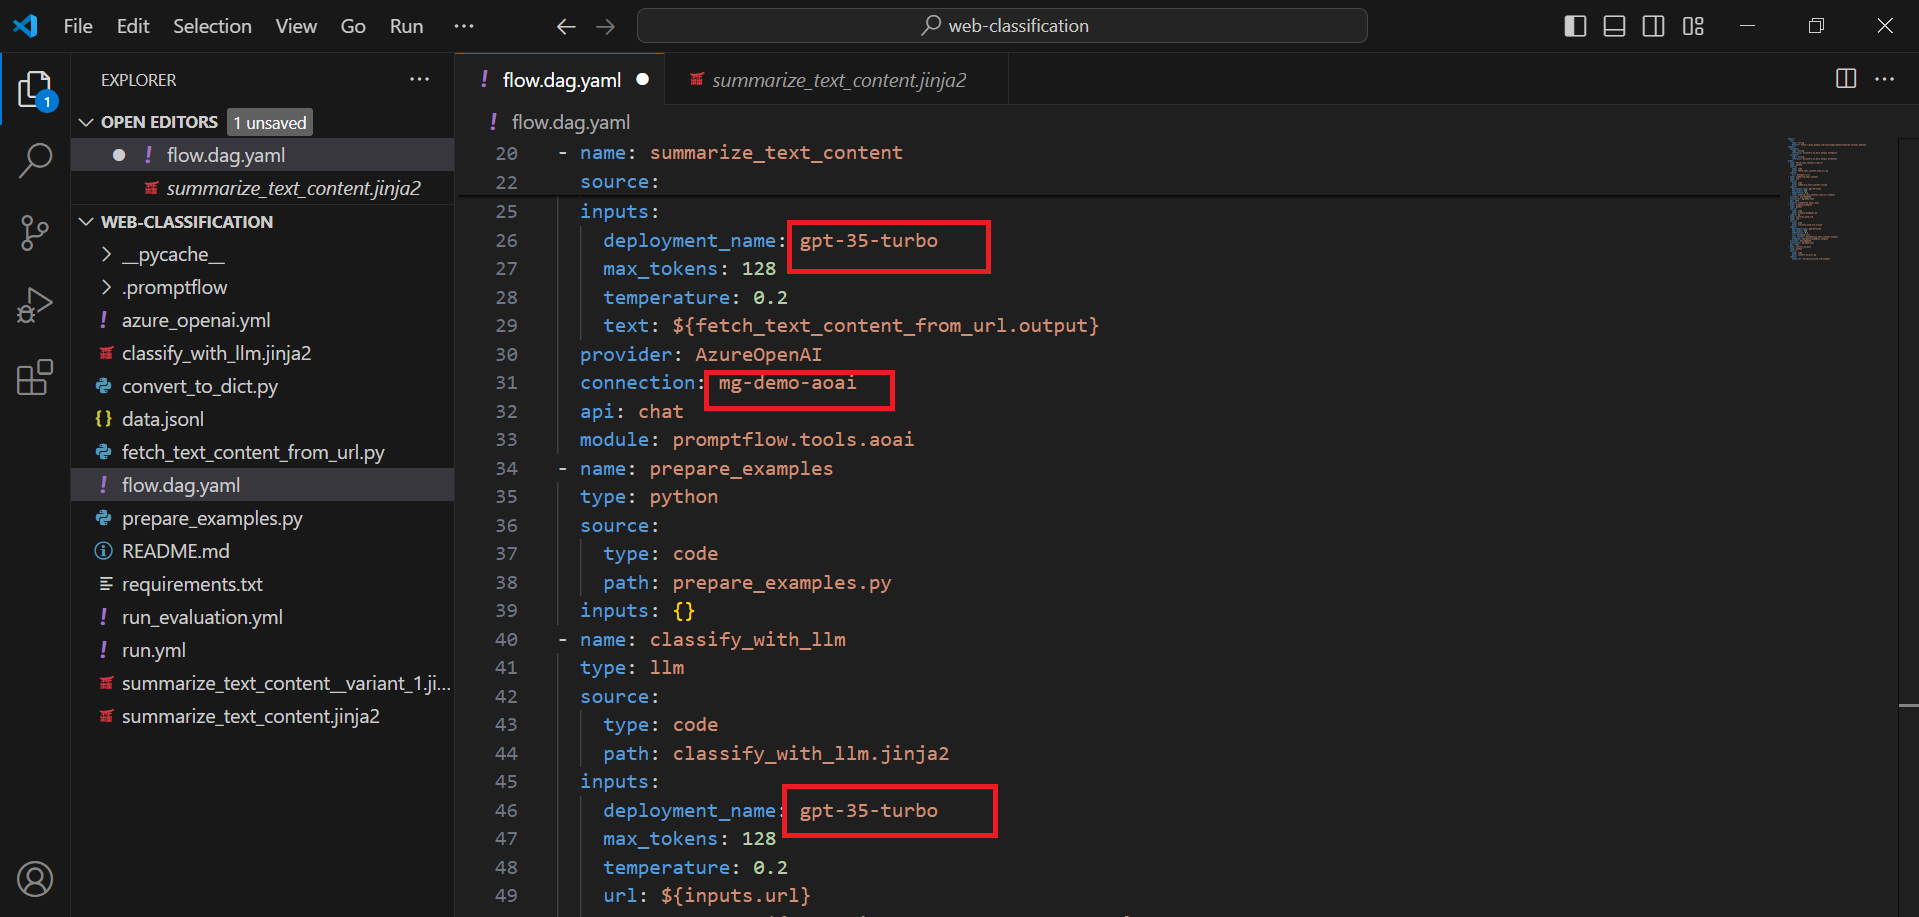
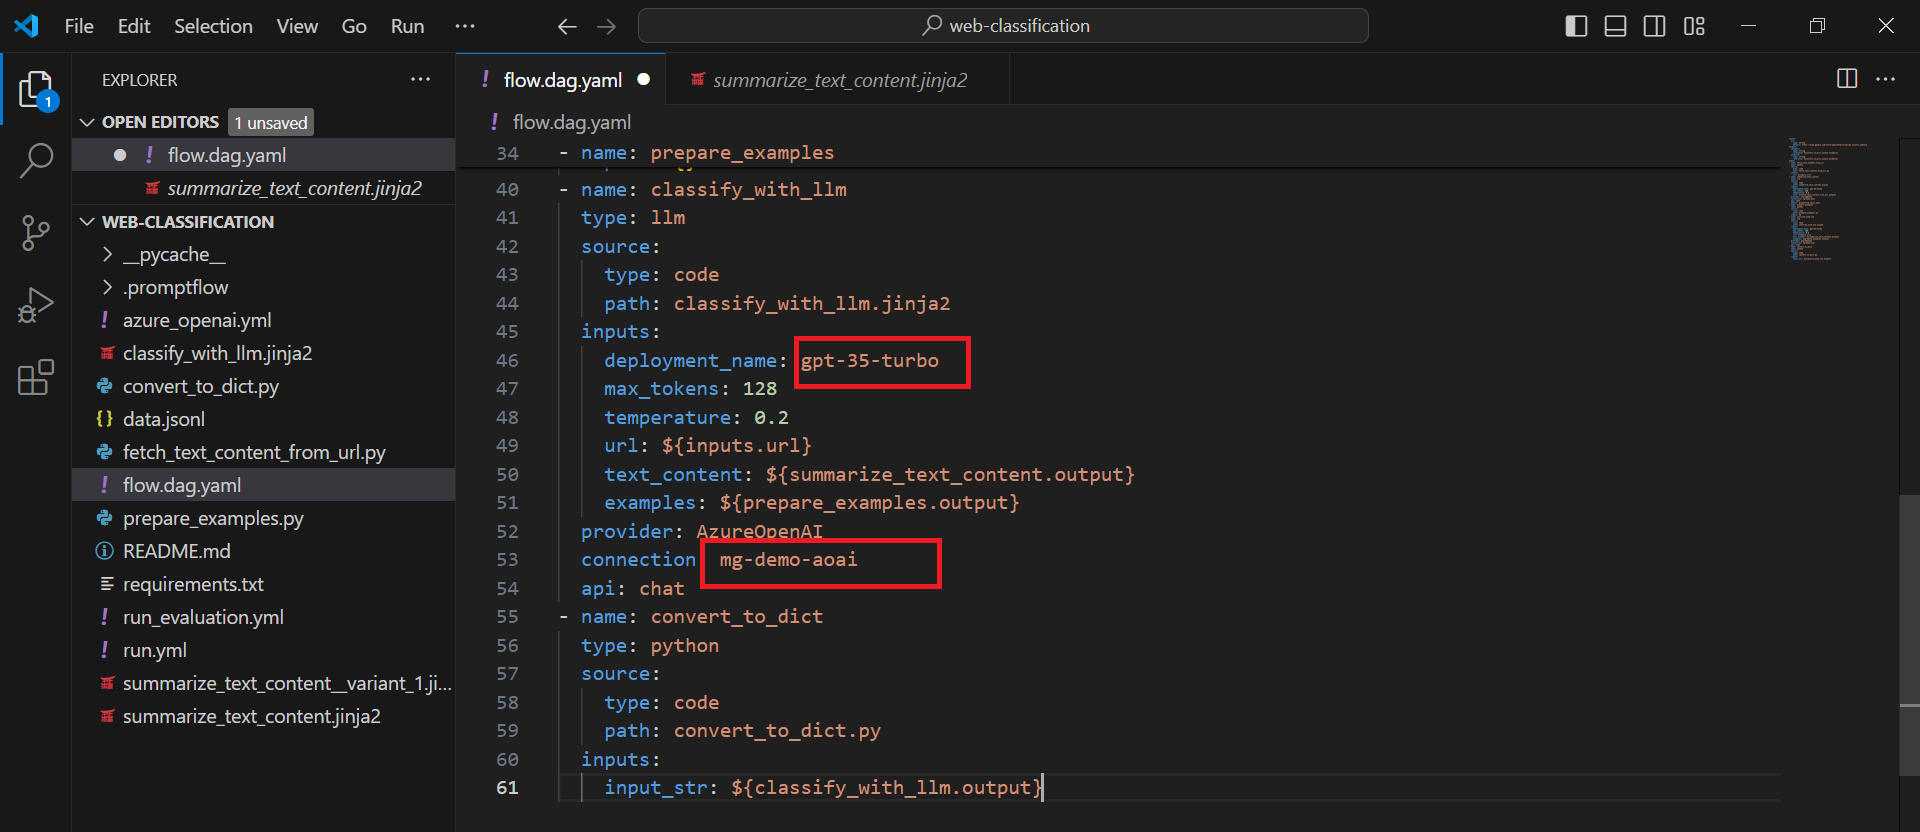
web-classification/run.ymlandweb-classification/run_evaluation.ymlin your cloned repository.Update mg-demo-aoai to match the connection name in your Azure Machine Learning workspace wherever you see
connection:mg-demo-aoai.Adjust
gpt-35-turboto the name of your GPT 3.5 Turbo deployment associated with that connection wherever you seedeployment_name: gpt-35-turboUpdate the flow.dag.yaml file.
Prompt Run, Evaluation, and Deployment
Steps:
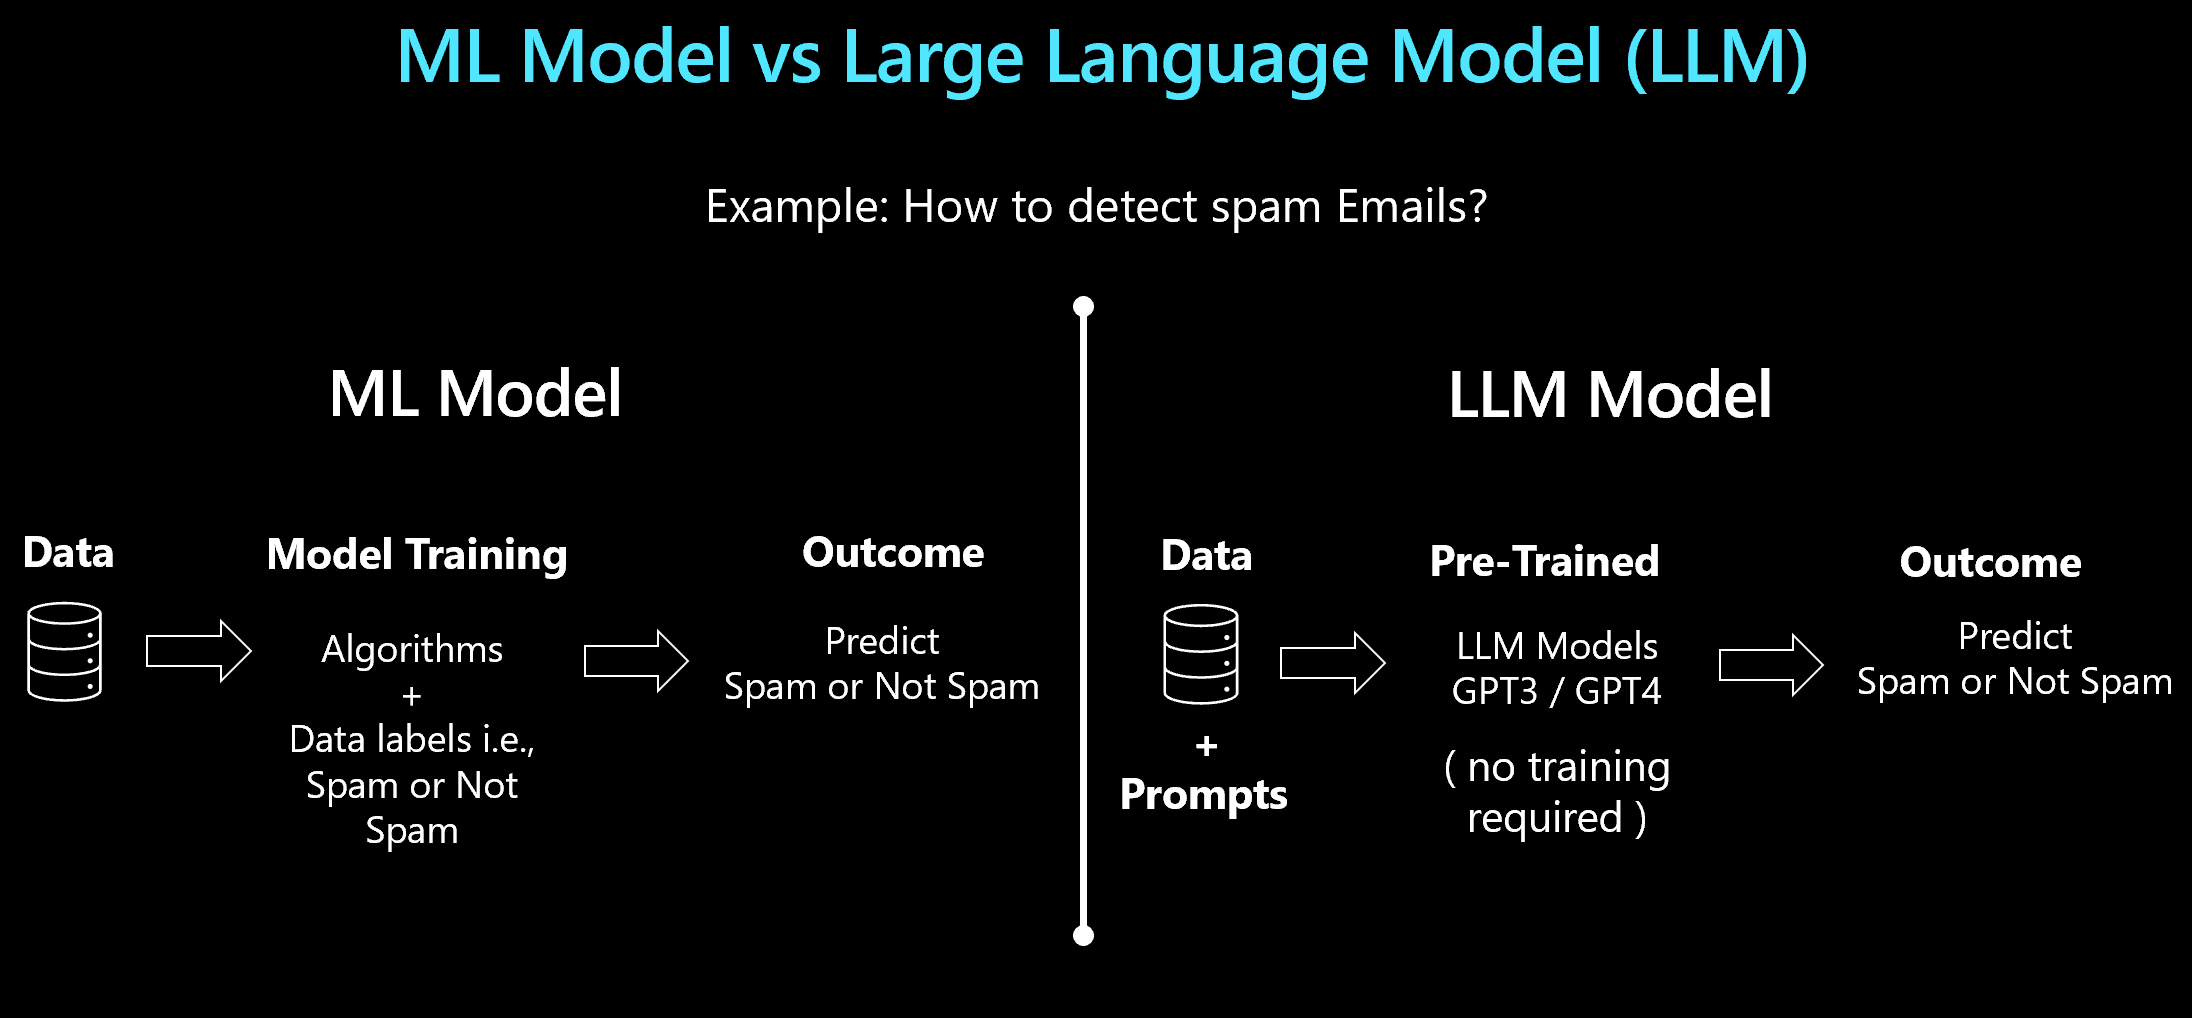
In this flow, you will learn This training pipeline contains the following steps:
Run Prompts in Flow
Compose a classification flow with LLM.
Feed few shots to LLM classifier.
Upload prompt test dataset,
Bulk run prompt flow based on dataset
Evaluate Results
Upload ground test dataset
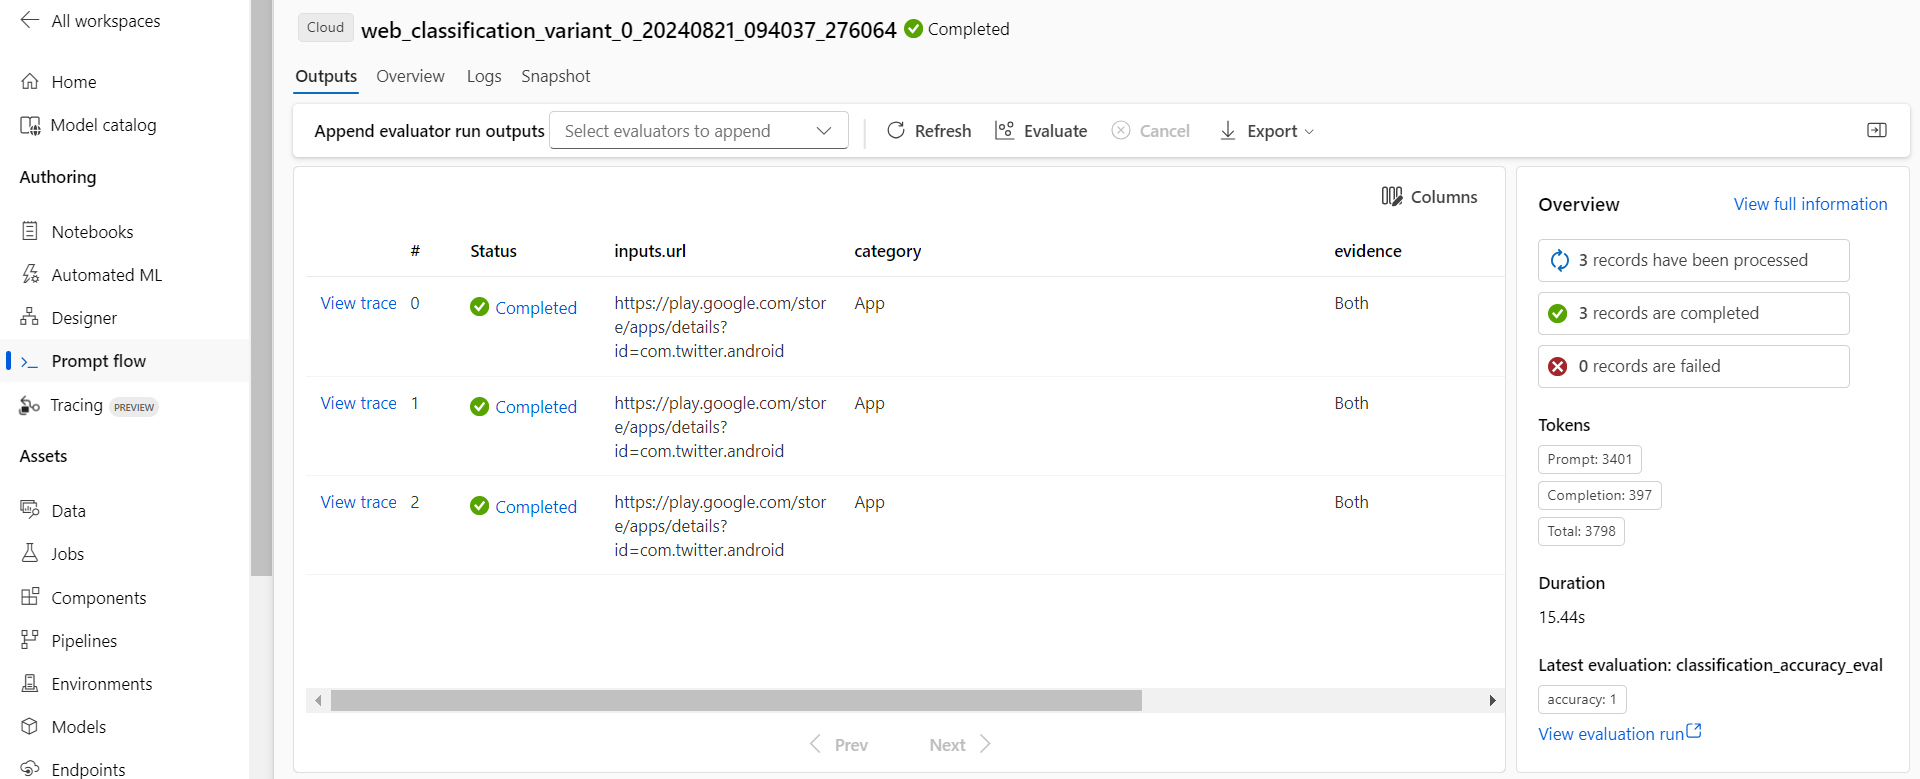
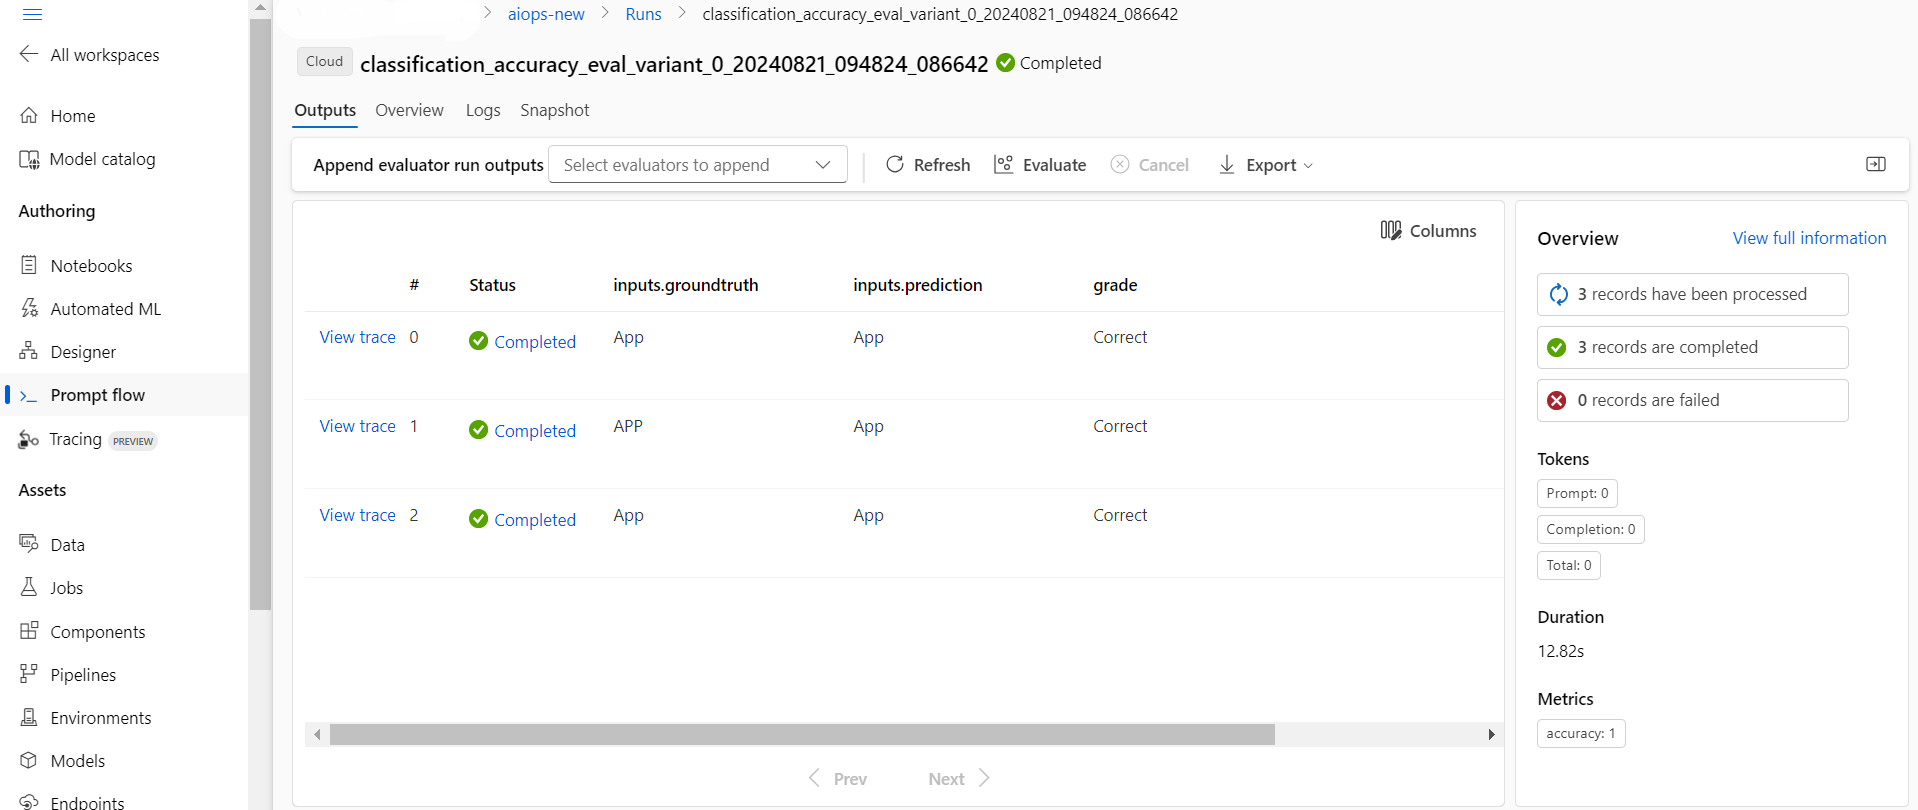
Evaluation of the bulk run result and new uploaded ground test dataset
Register Prompt Flow LLM App
- Check in logic, Customer defined logic (accuracy rate, if >=90% you can deploy)
Deploy and Test LLM App
Deploy the PF as a model to production
Test the model/promptflow realtime endpoint
Run and Evaluate Prompt Flow in AzureML with GitHub Actions
Using a GitHub Action workflow we will trigger actions to run a Prompt Flow job in Azure Machine learning.
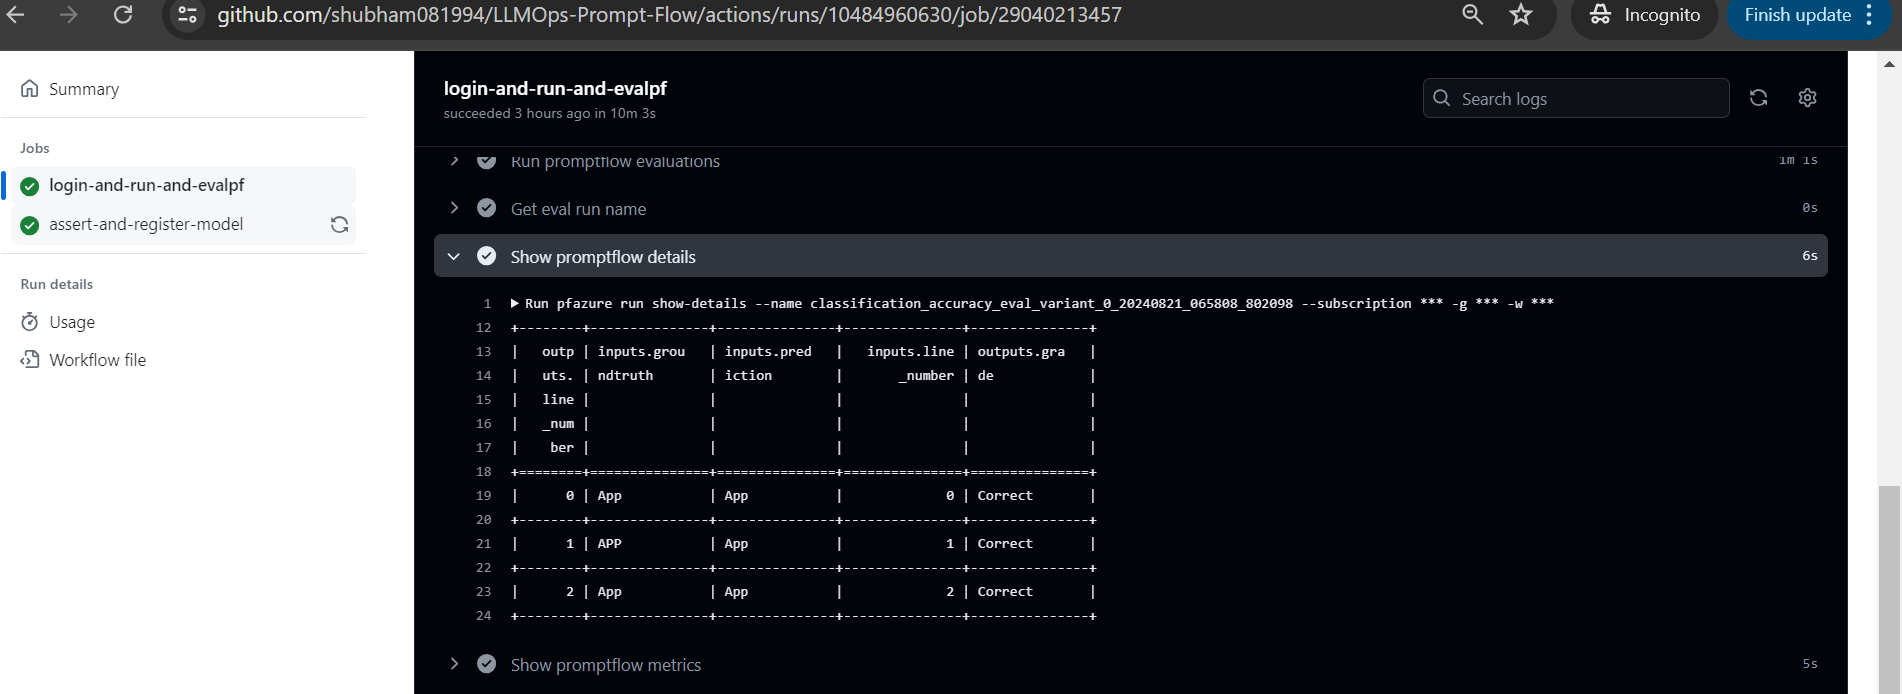
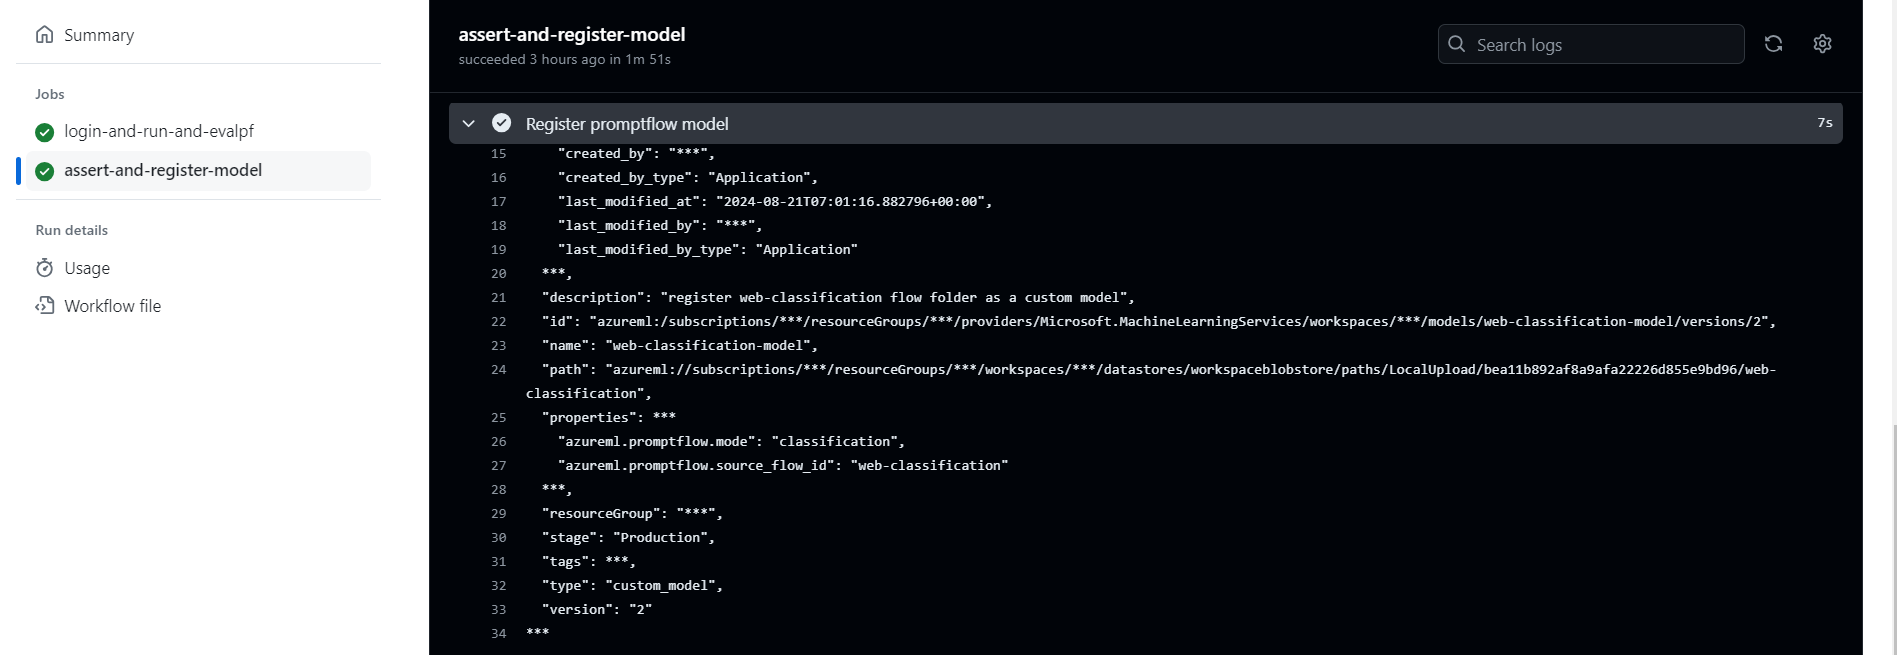
This pipeline will start the prompt flow run and evaluate the results. When the job is complete, the prompt flow model will be registered in the Azure Machine Learning workspace and be available for deployment.
In your GitHub project repository, select Actions
Select the
run-eval-pf-pipeline.ymlfrom the workflows listed on the left and the click Run Workflow to execute the Prompt flow run and evaluate workflow. This will take several minutes to run.The workflow will only register the model for deployment, if the accuracy of the classification is greater than 60%. You can adjust the accuracy thresold in the
run-eval-pf-pipeline.ymlfile in thejobMetricAssertsection of the workflow file. The section should look like:id: jobMetricAssert run: | export ASSERT=$(python promptflow/llmops-helper/assert.py result.json 0.6)You can update the current
0.6number to fit your preferred threshold.Once completed, a successful run and all test were passed, it will register the Prompt Flow model in the Machine Learning workspace.
With the Prompt flow model registered in the Machine learning workspace, you are ready to deploy the model for scoring.
Prompt flow: > Runs


Deploy Prompt Flow in AzureML with GitHub Actions
This scenario includes prebuilt workflows for deploying a model to an endpoint for real-time scoring. You may run the workflow to test the performance of the model in your Azure Machine Learning workspace.
Online Endpoint
In your GitHub project repository , select Actions
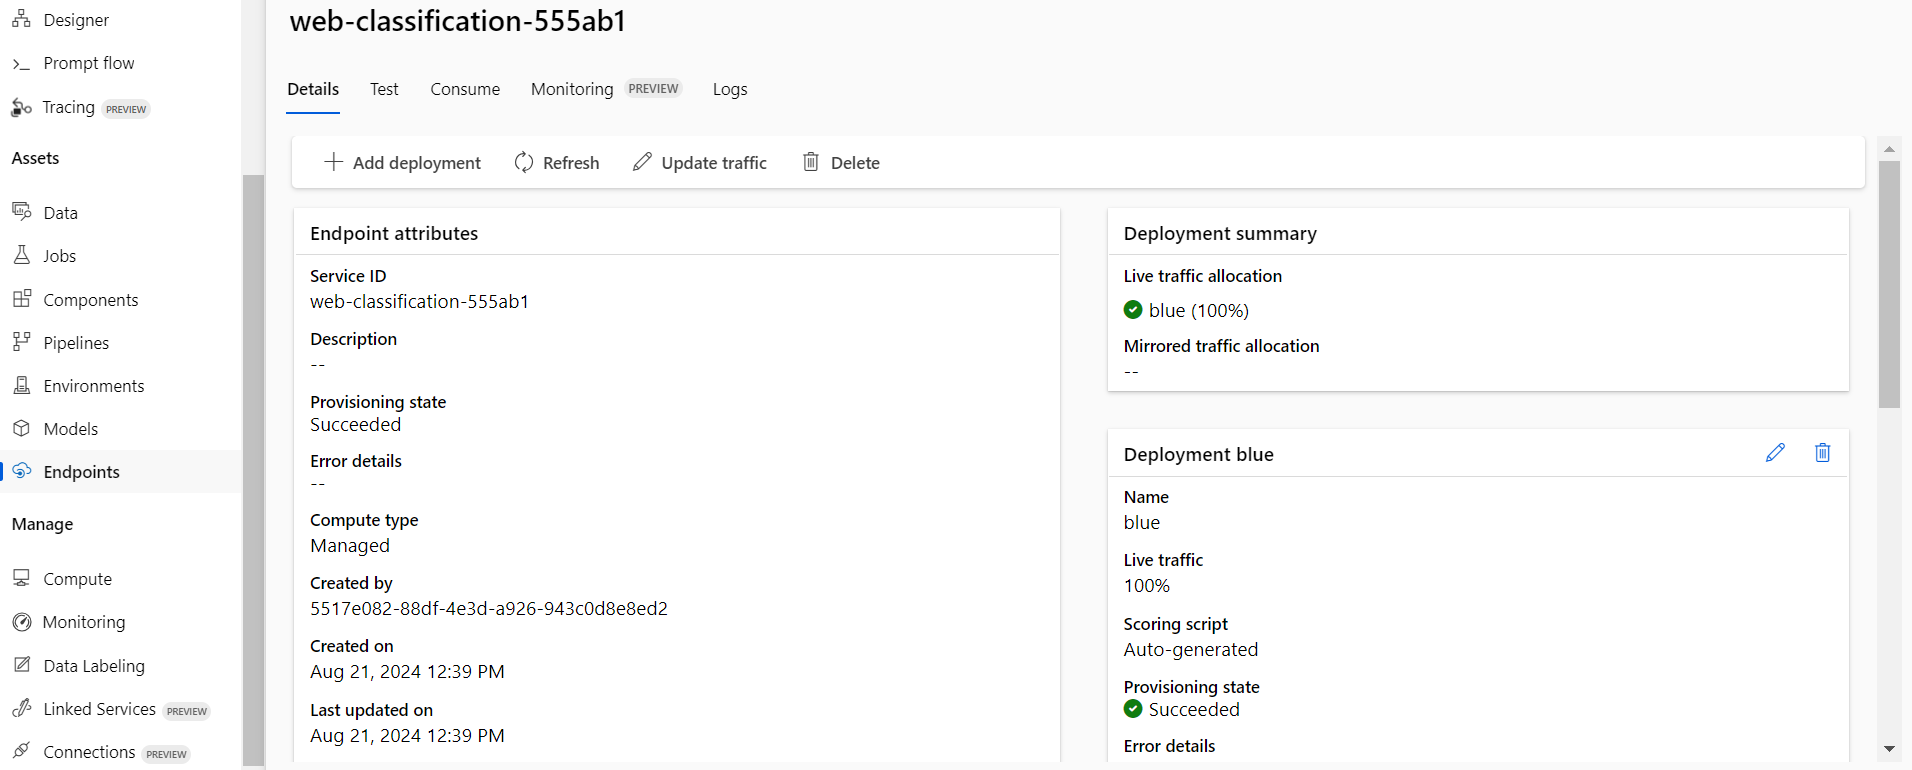
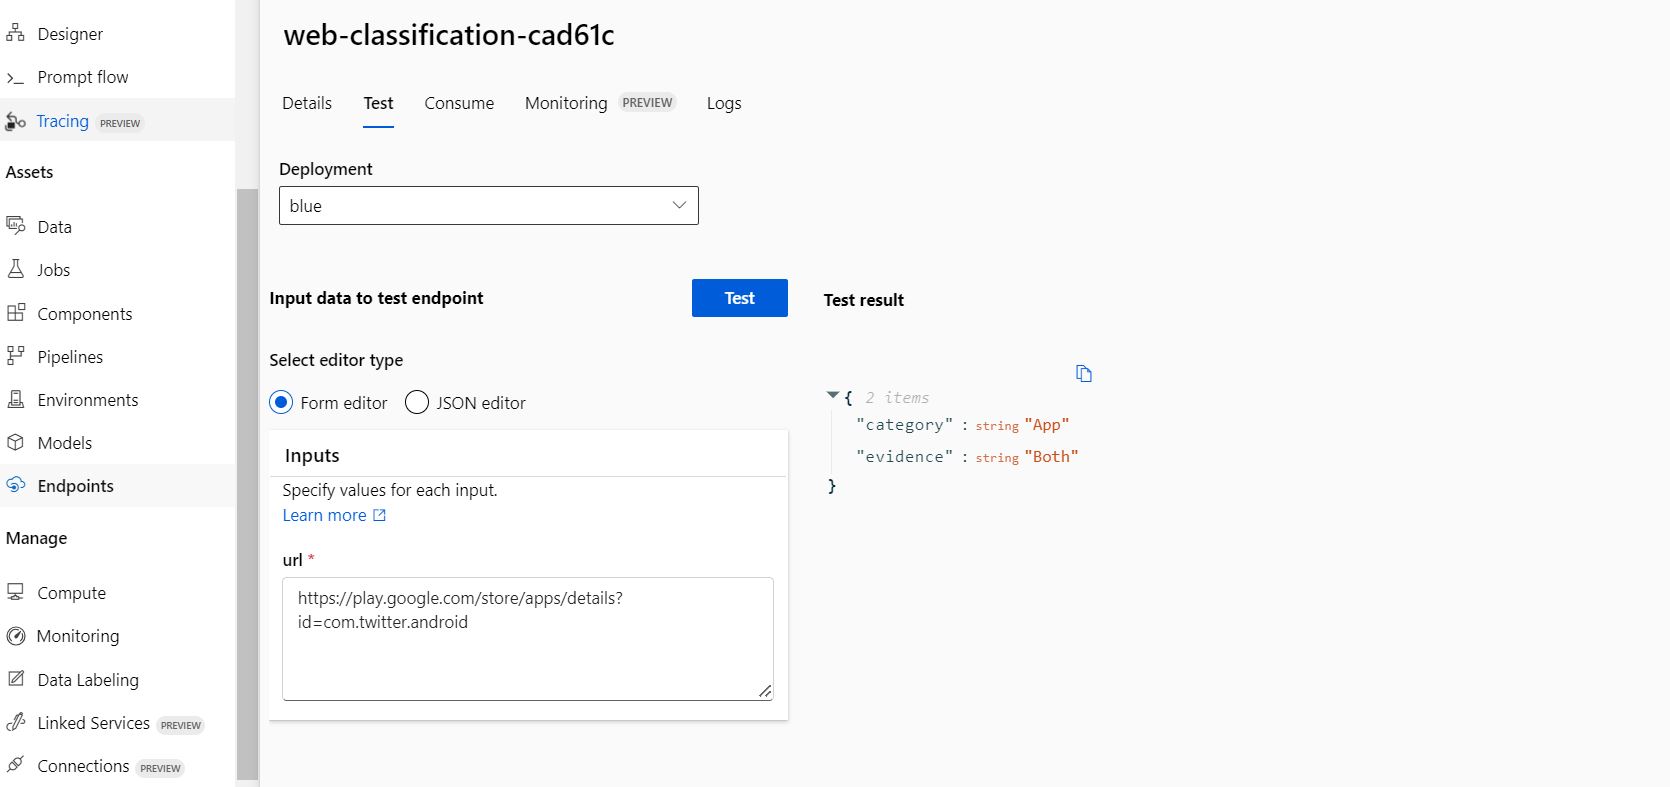
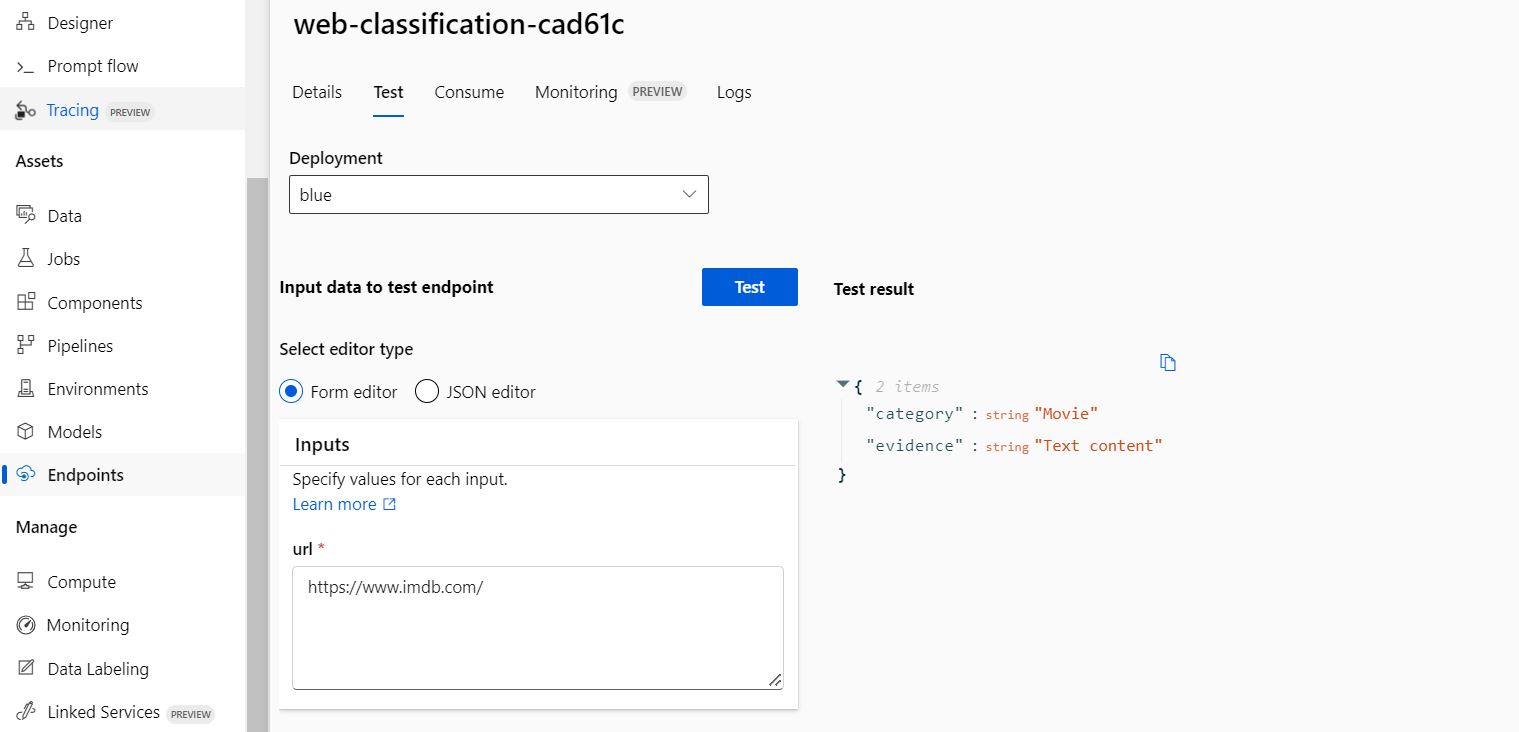
Select the deploy-pf-online-endpoint-pipeline from the workflows listed on the left and click Run workflow to execute the online endpoint deployment pipeline workflow. The steps in this pipeline will create an online endpoint in your Machine Learning workspace, create a deployment of your model to this endpoint, then allocate traffic to the endpoint.
Once completed, you will find the online endpoint deployed in the Azure Machine Learning workspace and available for testing.


Moving to Production Environment :
This example scenario can be run and deployed both for Dev and Prod branches and environments. When you are satisfied with the performance of the prompt evaluation pipeline, Prompt Flow model, and deployment in Testing, Dev pipelines and models can be replicated and deployed in the Production environment.
The provided sample prompt flow run, evaluation, and GitHub workflows serve as a foundation for customizing your prompt engineering code and data for production deployment.
Subscribe to my newsletter
Read articles from Shubham Sahu directly inside your inbox. Subscribe to the newsletter, and don't miss out.
Written by

Shubham Sahu
Shubham Sahu
Proficient in variety of DevOps, DataOps MLOps & AIOps technologies, including Azure, AWS, Linux, Shell Scripting, Python, Docker, Terraform, Kubernetes. I have strong ability to troubleshoot and resolve issues and are consistently motivated to expand their knowledge and skills through expansion of new technologies.


