Cloud Networking - Creating a Private Subnet
 yyounos shaik
Difficulty : easy Time : 60 mins Cost : 0$
What you'll Need :
An AWS account - Create one here!
Part 1 of this series - Build a Virtual Private Cloud
Part 2 of this series - VPC Traffic Flow and Security
AWS Services : Amazon VPC
Overview
In your first two networking projects, we have created:
An Amazon VPC
A public subnet
An internet gateway
A route table
A security group
A Network ACL, aka Network Access Control List (super cool!)
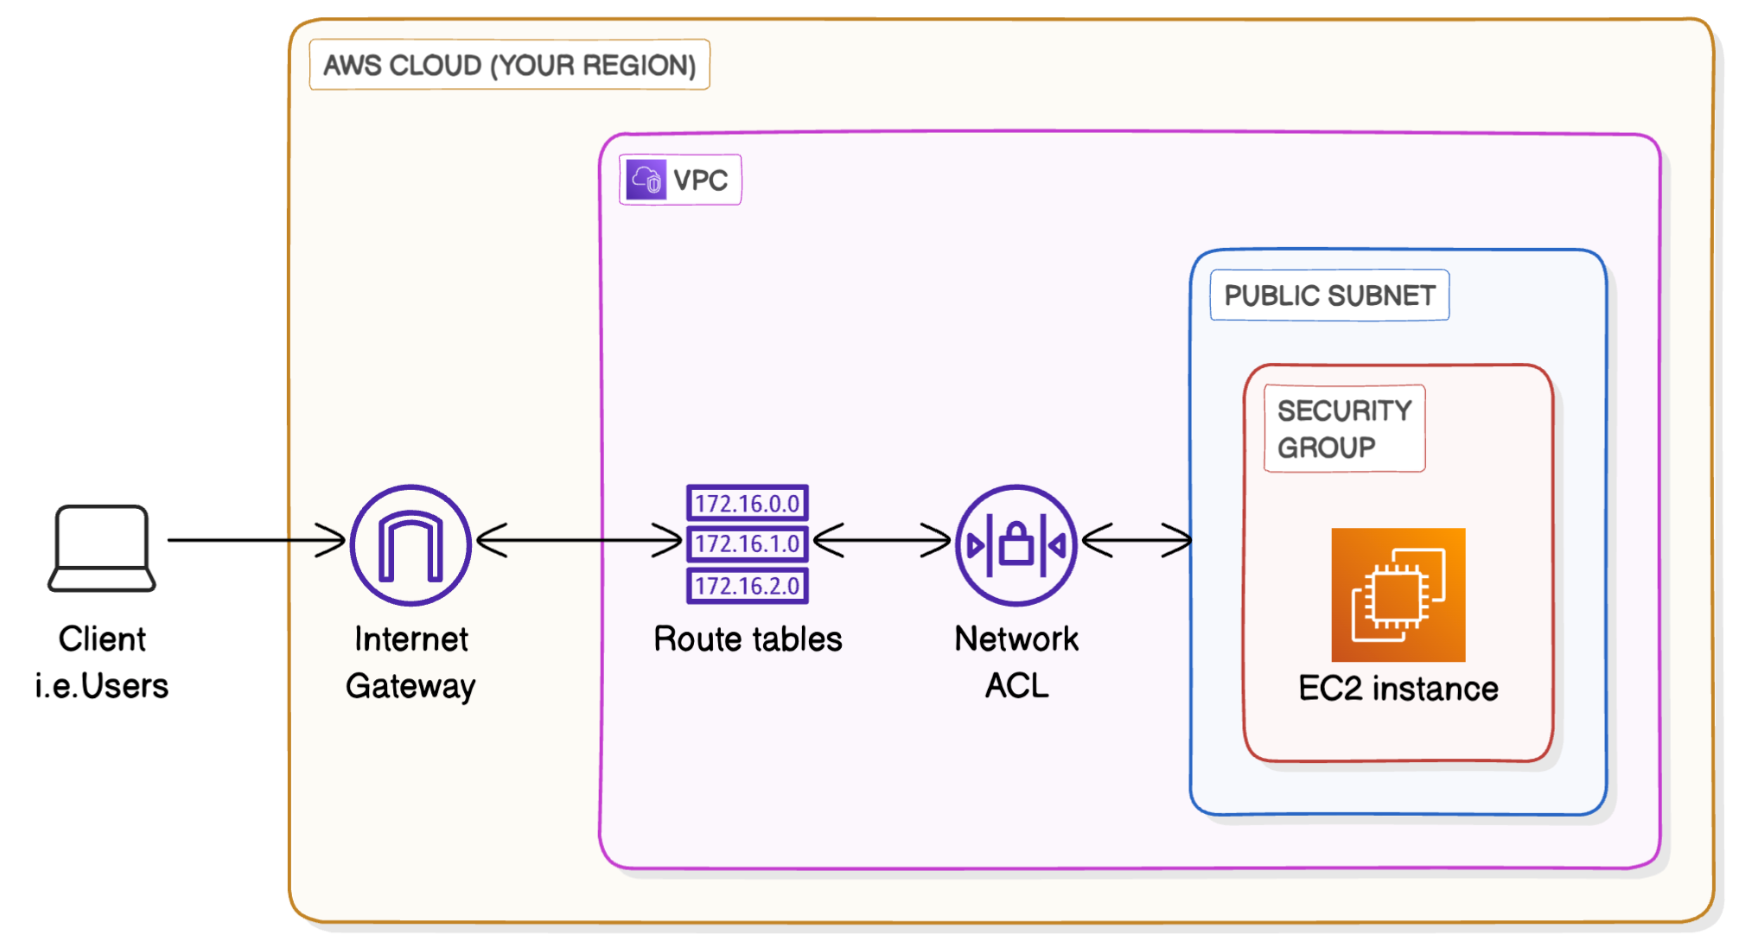
Now we're going to level up by creating a private subnet in your VPC - you'll learn all about this in a minute!
Get ready to:
Create a private subnet.
Create a private route table.
Create a private network ACL.

Let's Get Started...
Step 1: Set up your VPC basics
We're repeating our steps from the first two networking projects to set up our VPC, subnet, internet gateway, route table, security group and network ACLs.
Create VPC:
Off we go! Your VPC is the foundation of this project and represents your corner of the AWS Cloud.

In your AWS Management Console's search bar, search for
VPC.Select VPC from the drop down menu.
In the left navigation pane, choose Your VPCs.
Make sure you're on the Region that's closest to you. Use the dropdown on the top right hand corner to switch Regions.
Choose Create VPC.
Choose VPC Only.
Name tag:
Demo-VPCIPv4 CIDR:
10.0.0.0/16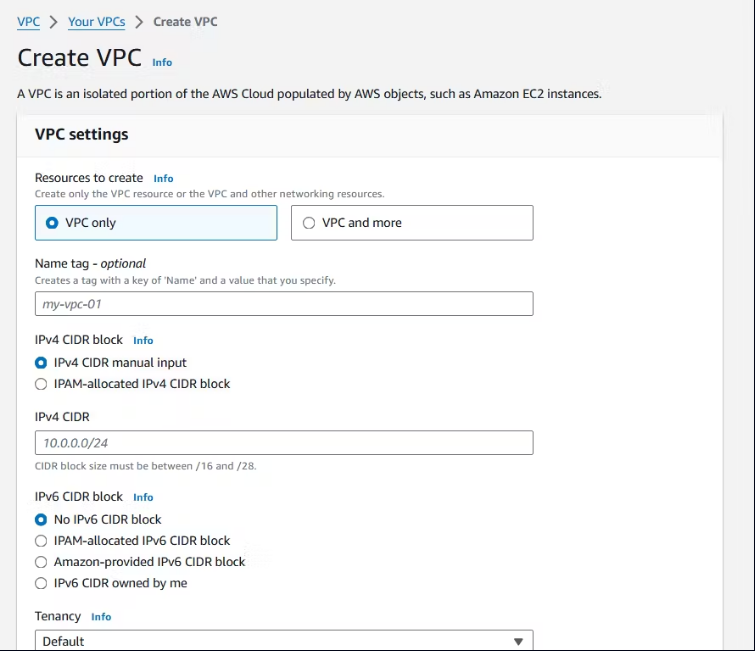
Select Create VPC.
Create Subnets:
Nice! We've created our VPC, so it's time for the next step...creating a public subnet. Subnets are subdivisions within your VPC where you can launch AWS resources, think of them as suburbs/neighbourhoods within your city.
In the VPC Dashboard, under Virtual Private Cloud, choose Subnets.
Choose Create subnet.
Configure your subnet settings:
VPC ID:
Demo VPCSubnet name:
My-Demo-SubnetAvailability Zone: Select the first Availability Zone in the list.
IPv4 VPC CIDR block:
10.0.0.0/16IPv4 subnet CIDR block:
10.0.0.0/24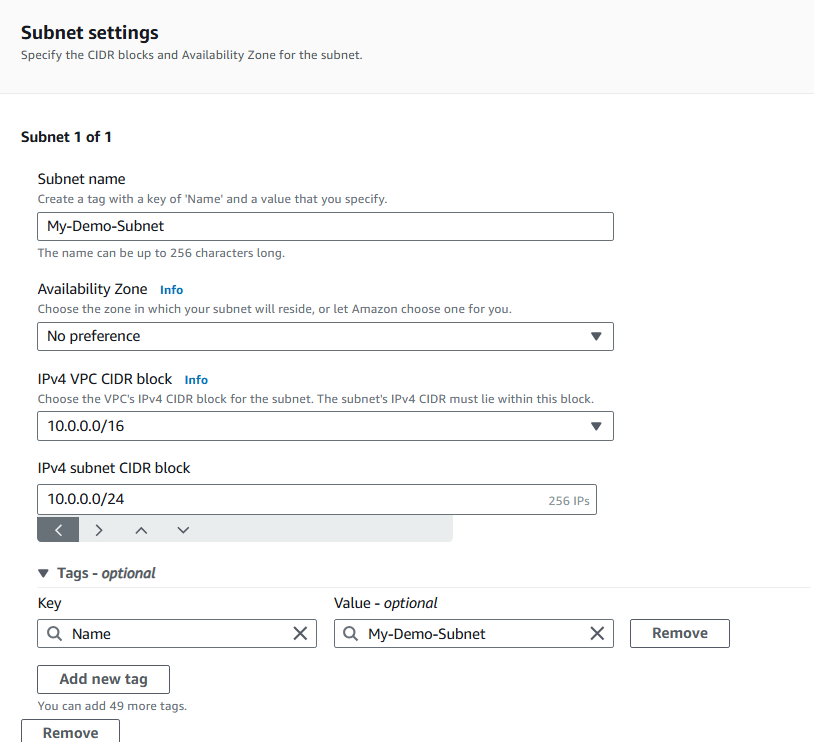
Choose create subnet.
Select the checkbox next to Public 1.
In the Actions menu, select Edit subnet settings.
Check the box next to Enable auto-assign public IPv4 address.

What does it mean to enable auto-assign public IPv4 address?
- Choose Save.
Create an internet gateway:
Time to connect our VPC to the internet! Let's create an internet gateway.
In the left navigation pane, choose Internet gateways.
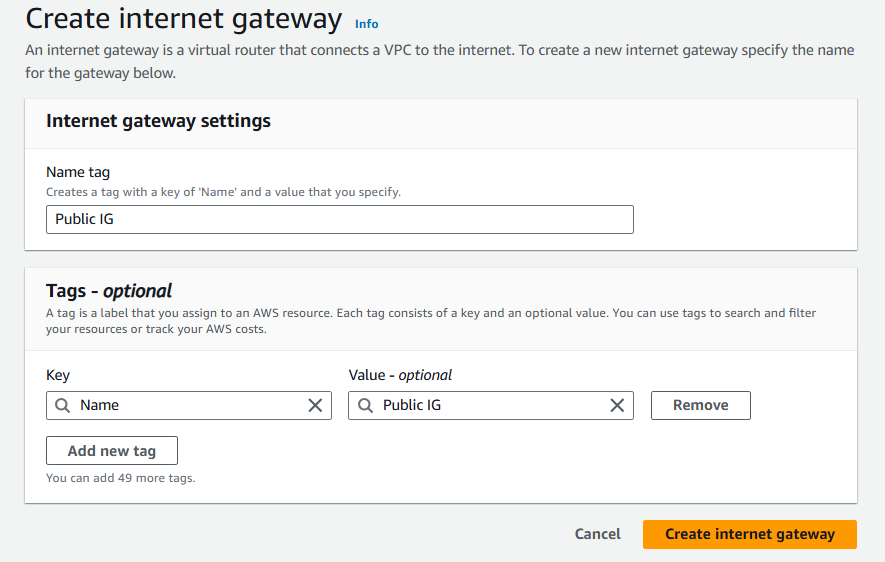
Choose Create internet gateway.
Configure your internet gateway settings:
- Name tag:
Public IG
- Name tag:
Choose Create internet gateway.
Select your newly created internet gateway and choose Actions, then Attach to VPC.
Select Demo-VPC.
Select Attach internet gateway.
What does attaching an internet gateway to a VPC mean?
Attaching an internet gateway means resources in your VPC can now access the internet. The EC2 instances with public IP addresses also become accessible to users, so any application you host on those instances become public too.
Create a route table:
Even though you've created an internet gateway and attached it to your VPC, you still have to tell the resource in your public subnet how to get to the internet.
You'll have to set up route tables to direct traffic from your resource to your internet gateway!
In the left navigation pane, choose Route tables.
Refresh your page.
Ooo, two route tables!
Check out the Routes tab for both, and note that they have different routes.
Select the checkbox next to your NextWork VPC's default route table - this is the route table with a single route to 10.0.0.0/16.
Select the pencil icon in the Name column of your route table.
Enter the name
Demo-Route-Table.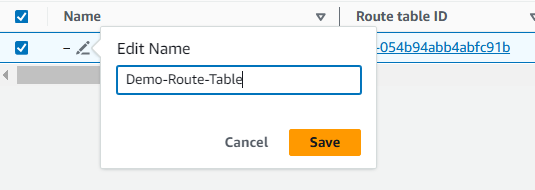
Click on save.
Select the Routes tab.
Choose Edit routes.
Choose Add route near the bottom of the page.
Destination:
0.0.0.0/0Why is the destination 0.0.0.0/0?
0.0.0.0/0 means all IPv4 addresses! When you set 0.0.0.0/0 as the destination in a route table, you are creating a default route that sends any traffic that doesn't match more specific routes on your route table.Select the only Internet Gateway id option.
Choose Save changes.
Choose the Subnet associations tab.

Under the Explicit subnet associations tab, choose Edit subnet associations
Select Public 1.
Choose Save associations.
Create security Group:
let's add a security group so that users can access resources in your VPC.
In the left navigation pane, choose Security groups.
Choose Create security group.
Security group name:
Demo-Security GroupDescription:
A Security Group for the Demo VPCVPC: Demo-VPC
Under the Inbound rules panel, choose Add rule.
Inbound rules control the data that can enter the resources in your security group, while outbound rules control that data that your resources can send out.
Examples of inbound data: Visitors to your website hosted on an EC2 instance in a public subnet, your website receives form submissions.
Examples of outbound data: Your server requests data from another service, sends out an email notification.
Type:
HTTPSource:
Anywhere-IPv4At the bottom of the screen, choose Create security group.
Create a Network ACL:
Nice, that's your traffic flow (route table) and basic security (security groups) sorted for your VPC!
To level up your VPC's security, let's add a network ACL i.e. network access control list.
In the left navigation pane, choose Network ACLs.
Choose the network ACL that's associated with your Public 1 subnet, and check out the tabs for Inbound rules and Outbound rules.
Name:
Network ACLVPC: Demo-VPC.
Select Create network ACL.
Select the checkbox next to your Network ACL.
Select the Inbound rules tab.
Select Edit inbound rules.
Select Add new rule.

Rule number:
100Type: All traffic.
Source:
0.0.0.0/0lick Save changes.
Here are the steps again if you get stuck!
Select the Outbound rules tab.
Select Edit outbound rules.
Select Add new rule.

Rule number:
100Type: All traffic.
Source:
0.0.0.0/0Switch tabs from Outbound rules to the Subnet associations tab.
Select Edit subnet associations.
Select your Public 1 subnet.
Select Save changes.
Step 2: Creating a private subnet
We've learnt about subnets and even created a public subnet that's connected to the internet.
But what about resources that we want to keep private?
For example, it's very common for engineers to set up an EC2 instance hosting their web app in a public subnet, but keep the database of customers and login details in a private subnet.
Let's set up your very first private subnet and learn its differences from a public subnet along the way.
Still in your VPC console, select the Subnets tab again.
Select Create subnet.
For the VPC ID, select Demo-VPC.
Set the Subnet name as
Demo-Private SubnetFor the subnet's Availability Zone, use the second AZ on the dropdown (not the first!)
The IPv4 VPC CIDR block is already pre-set to 10.0.0.0/16
For the IPv4 subnet CIDR block, what do you think will happen if this new subnet has the exact same CIDR block as your Public subnet?
Let's investigate by entering
10.0.0.0/24to start with.Select Create subnet.

Aha! An error message.
What does this error message mean?
The error message says: CIDR Address overlaps with existing Subnet CIDR: 10.0.0.0/24. This error pops up when the CIDR block you're trying to assign to a new subnet is already being used by another subnet in the same VPC.
How would you fix this error?
Let's assign your new subnet a CIDR block that doesn't overlap with Public 1.
Replace the IPv4 subnet CIDR block with
10.0.1.0/24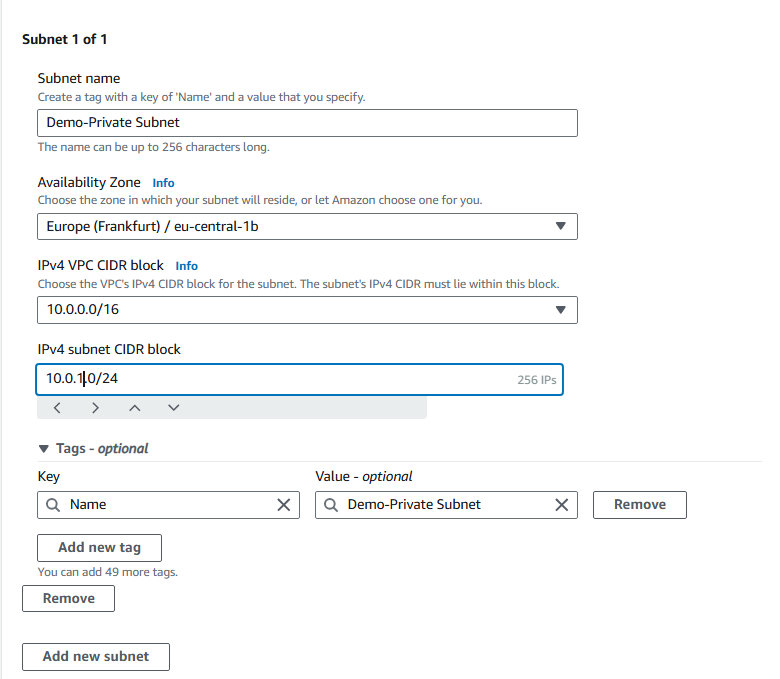
How does this new CIDR block not overlap with Public 1's CIDR block?
10.0.1.0/24, you allocate to a specific range of IP addresses from 10.0.1.0 to 10.0.1.255. The public 1 subnet is defined with the CIDR block 10.0.0/24, which is a different range of IP addresses rom 10.0.0.0 to 10.0.0.255.Select Create subnet.
Success!
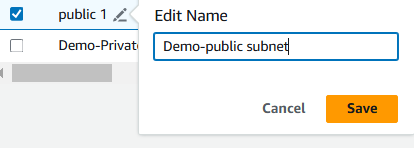
To tidy up your subnets' naming conventions, let's retitle your Public 1 subnet to
Demo-public subnet.
Step 3: Set up a private route table
Like your public subnet,a private subnet also needs to be associated with a route table.
- Head to the Route tables page in your console.
💡 Why are we revisiting the Route tables page?
Back when you set up Demo-route table, you renamed the default route table that AWS automatically created with your VPC.
This means Demo-route table is the default route table for your entire VPC. Subnets that aren't associated with another route table automatically use Demo-route table.
Select Create route table.
Name your new route table
Demo-Private Route TableUnder VPC, select Demo-VPC.
Select Create route table.
Nice! With your private route table set up, let's make sure it can only direct traffic to another internal resource (instead of the public internet).
Select NextWork Private Route Table.
Check the Routes tab - does it only have one default route with a local target?
Switch tabs to Subnet associations.
Select Edit subnet associations under the Explicit subnet associations tab.
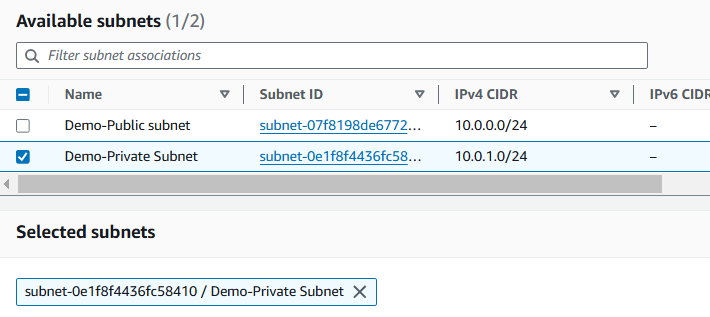
Select the checkbox next to Demo-Private Subnet.
Select Save associations.
To tidy up your Route tables' naming conventions, let's also retitle Demo-route table to
Demo-Public Route Table
Step 4: Set up a private Network ACL
Your private subnet is set up!
A dedicated route table is all done too!
Now to round things off, let's set up a new network ACL.
Select Network ACLs from the left hand navigation panel.
Select the checkbox next to the default ACL for your VPC.
- Note that this is NOT Demo-Network ACL - your default ACL isn't named!
Select the Inbound rules and Outbound rules tabs.
So while the default ACL is very convenient in allowing all traffic types, we'll create a new custom network ACL to keep our private subnet safe.
Select Create network ACL on the top right.
For the name, enter
Demo-Private NACL.Select Demo-VPC.
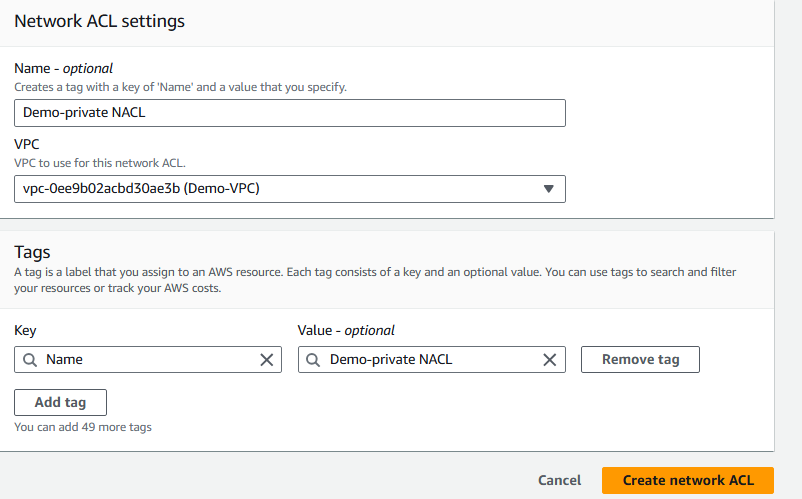
Select Create network ACL.
Done!
Observe the Inbound rules and Outbound rules tabs for your private network ACL


why are they both denying all traffic?
Remember that custom network ACL's start with denying all inbound and outbound traffic! We'll lleave these settings for now - let's customise them later, when we know exactly which traffic source we're wanting to allow.
Switch tabs to Subnet associations.
Select Edit subnet associations.
Select your private subnet.
Select Save changes.
All done! Your subnet is set up and ready to go.
What about security groups?
Remember how security groups are set at the resource level? This means you won't need to create security groups until there is a specific resource e.g. EC2 instance you're launching in your subnet!
Summary
So finally you have set up your very own private sbnet in an Amazon VPC.
Subscribe to my newsletter
Read articles from yyounos shaik directly inside your inbox. Subscribe to the newsletter, and don't miss out.
Written by

yyounos shaik
yyounos shaik
An Aspring Cloud Engineer